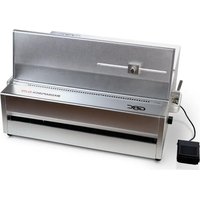
MagnaPunch Elite - Binder GBC - Free user manual and instructions
Find the device manual for free MagnaPunch Elite GBC in PDF.


| Product Type | Professional Binding Machine |
| Brand | GBC |
| Model | MagnaPunch Elite |
| Dimensions (L x H x D) | 45.0 x 30.0 x 42.9 cm (17.7 x 11.8 x 16.9 in) |
| Weight | 34.9 kg (77.0 lb) without packaging |
| Power Supply | 120 V, 60 Hz |
| Max. Punching Frequency | 8 cycles/min |
| Punching Capacity (3:1 Comb Binding) | 30 sheets (max), 27 sheets (recommended) |
| Punching Capacity (3:1 Twin Loop Binding) | 28 sheets (max), 25 sheets (recommended) |
| Punching Capacity (4:1 Spiral Binding) | 23 sheets (max), 20 sheets (recommended) |
| Hole Spacing | From 0.2 to 0.56 in depending on punch set |
| Max. Punching Width | 35.6 cm (14.0 in) |
| Supported Binding Types | Plastic comb, Metal Twin Loop (3:1 and 2:1), Plastic spiral (4:1 and 5:1), Calendar (3:1) |
| Interchangeable Punch Sets | Yes - sets sold separately (GBC MagnaPunch Elite) |
| Activation Mechanism | Pneumatic foot pedal (included) or on/off button |
| Adjustable Stop | Yes - for precise sheet alignment |
| Confetti Bin | Yes - to be emptied regularly (every 200 to 400 cycles) |
| Maintenance | Empty confetti bin, clean with a lint-free cloth and mild detergent |
| Safety | Moving parts, do not open, unplug before maintenance |
| Warranty | 1 year limited (parts and labor) |
| Intended Use | Indoor use, on a stable and level surface |
Frequently Asked Questions - MagnaPunch Elite GBC
User questions about MagnaPunch Elite GBC
0 question about this device. Answer the ones you know or ask your own.
Ask a new question about this device
Download the instructions for your Binder in PDF format for free! Find your manual MagnaPunch Elite - GBC and take your electronic device back in hand. On this page are published all the documents necessary for the use of your device. MagnaPunch Elite by GBC.
USER MANUAL MagnaPunch Elite GBC
natural_image
Exterior view of a metallic industrial machine with a handle and mounting bracket (no visible text or symbols)Instruction Manual
Mode d'emploi
Guia del usuario
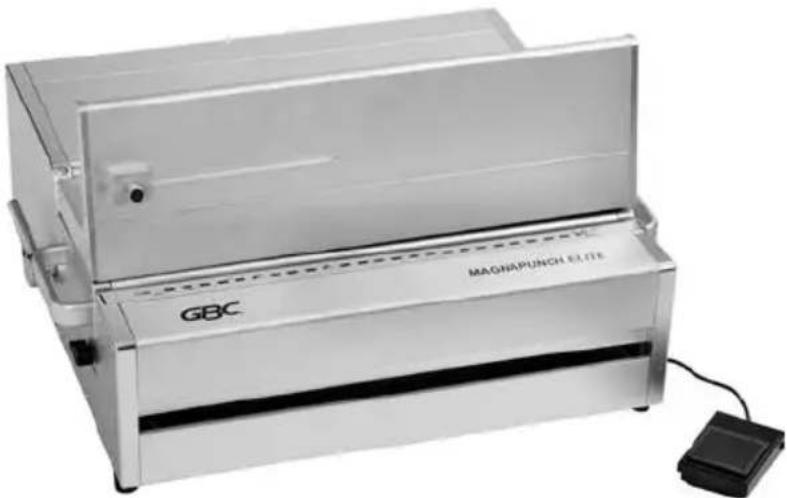
natural_image
Exterior view of a GBC Magnapunch Elite device with a small black foot (no visible text or symbols on the device body)
For service addresses, go to https://www.gbc.com/service-support-center/service-center/
GBC Technical Service
To order replacement accessories, service, parts, or an Equipment Maintenance Agreement, please contact GBC Technical Service and Support at:
United States
ACCO Brands USA LLC
4 Corporate Drive Lake Zurich, IL 60047-8997
1-800-723-4000
www.gbc.com
Canada
Ontario and Quebec - 1-800-268-3310
All other Provinces - 1-800-268-3447 Local 905-595-3100
Callcentre@GBCCanada.com
Mexico
(55) 1500 5778
Lada SIN costo: 01 800 759 6825
ACCO Brands reserves the right to make changes to this publication and to the products described in it without notice. All specifications and information concerning products are subject to change without notice. Reference in this publication to information or products protected by copyright or patent does not convey any license under the rights of ACCO Brands or others. ACCO Brands assumes no liability arising from infringements of patents or any other rights of third parties.
This publication is copyrighted © 2024 by ACCO Brands. All rights reserved
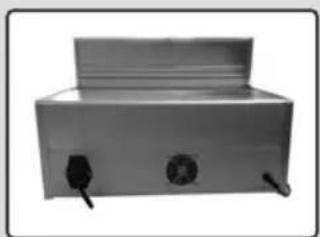
natural_image
Exterior view of a rectangular industrial or laboratory equipment unit with two side outlets and a top lid (no visible text or symbols)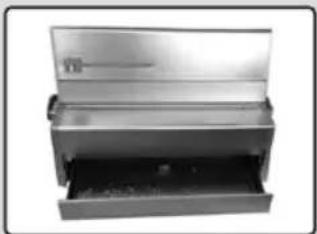
natural_image
Exterior view of a stainless steel industrial machine (no visible text or symbols)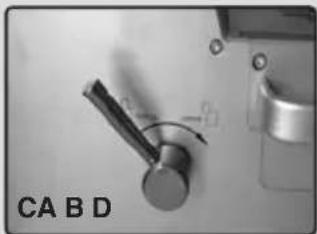
natural_image
Close-up of a mechanical component with a metallic shaft and adjustment knob, labeled 'CA B D' (no other text or symbols visible)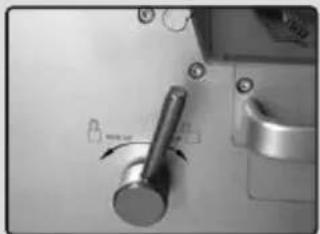
natural_image
Close-up of a mechanical switch or lever mechanism with no visible text or symbols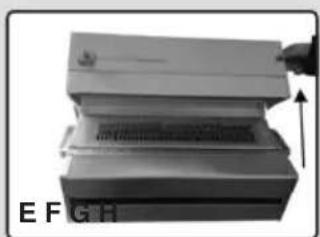
natural_image
Stacked electronic components with a hand pointing to one component (no visible text or symbols)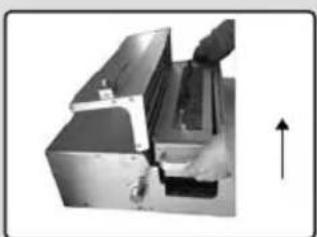
natural_image
Mechanical assembly showing a hand operating a workpiece with an upward arrow indicator (no text or symbols present)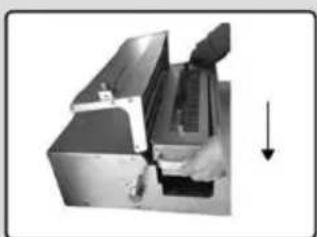
natural_image
Mechanical assembly with a hand operating a component, showing a downward arrow (no text or symbols visible)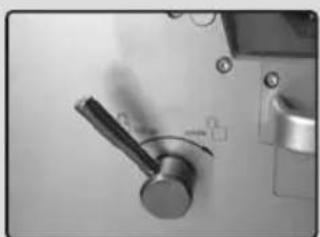
natural_image
Close-up of a metallic door handle and lock mechanism on a white surface (no text or symbols visible)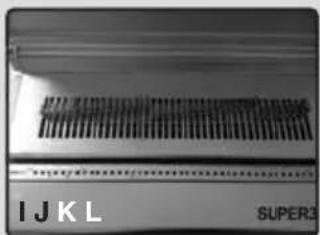
natural_image
Close-up of a metallic component with ribbed texture and labeled 'IJKL' and 'SUPER3' (no other text or symbols visible)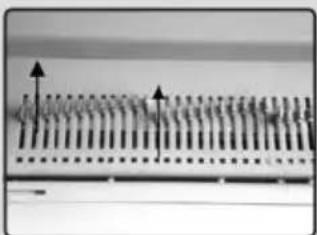
natural_image
Pure diagram of parallel lines with arrows indicating direction, no text or symbols present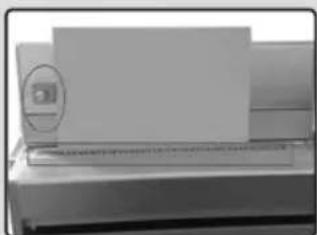
natural_image
Close-up of a printer with a paper sheet and a circular logo on the cover (no visible text or symbols)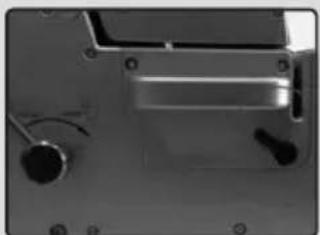
natural_image
Close-up of a mechanical component with no visible text or symbols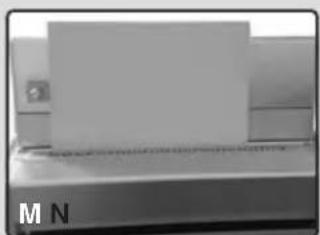
natural_image
Close-up of a mechanical component with a flat plate and a small inset view (no visible text or symbols)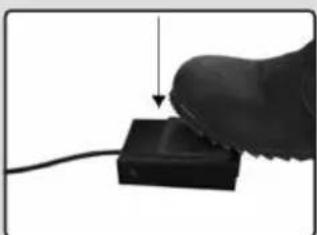
natural_image
Hand pressing a black electronic component with a downward arrow (no text or symbols visible)Specifications
| Punch Die Sets Max. Sheet Capacity (20 lb) | Recommended Sheet Capacity ^+ (20 lb) | Hole Spacing (inch) | Max. Punching Width (inch) |
| Plastic Comb Binding 30 Sheets or 2 Covers 27 Sheets or 2 Covers 0.56 14.0 | |||
| 3:1 Twin loop Wire 28 Sheets or 2 Covers 25 Sheets or 2 Covers 0.33 14.0 | |||
| 2:1 Twin loop Wire 30 Sheets or 2 Covers 27 Sheets or 2 Covers 0.5 14.0 | |||
| 4:1 Plastic Colour Coil 23 Sheets or 2 Covers 20 Sheets or 2 Covers 0.25 14.0 | |||
| 5:1 Spiral Coils 23 Sheets or 2 Covers 20 Sheets or 2 Covers 0.2 14.0 | |||
| 3:1 Calendar/Thumb 28 Sheets or 2 Covers 25 Sheets or 2 Covers 0.33 14.0 |
* Ensures a better quality book with cleaner holes and less welding of the book for better page turning. Also reduces wear on machine to prolong life.
| Dimensions (inch) Machine | Shipping | |
| Width | 17.7 | 23.2 |
| Height | 11.8 | 9.4 |
| Depth | 16.9 | 21.9 |
| Weight (lb) | 77.0 (34.9kg) | 83.8 (38.0kg) |
| Electrical Requirements | European Model |
| Voltage | 120V 60 Hz |
| Receptacle | Detachable - Variable |
| Max. Punching Frequency | 8/min |
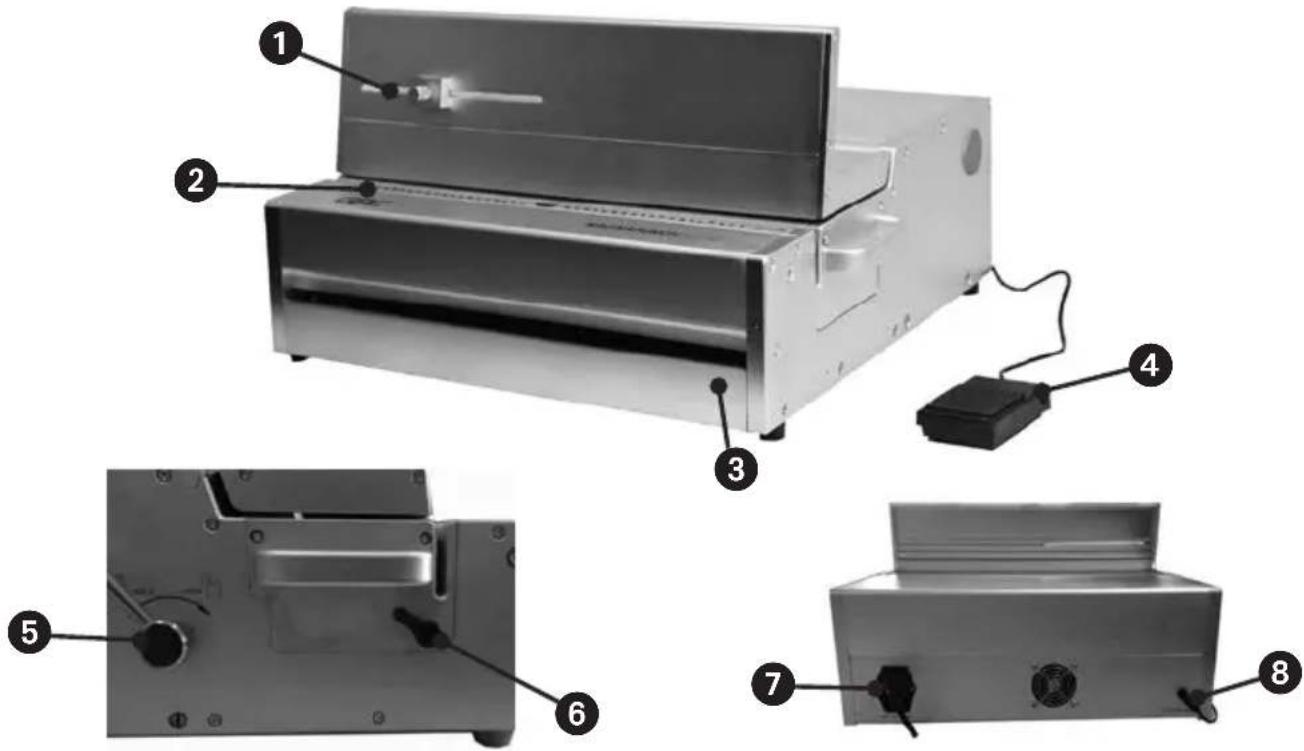
Location of controls
① Paper Holder and Paper Edge guide
② Punch Selector
③ Waste Tray
4 Foot Pedal
⑤ Lock Handle
6 Adjustable Edge Margin
⑦ On/Off Switch
8 Foot Pedal Switch
⚠ Safety instructions
YOUR SAFETY, AS WELL AS THE SAFETY OF OTHERS IS IMPORTANT TO GBC. IN THIS INSTRUCTION MANUAL AND ON THE PRODUCT ARE IMPORTANT SAFETY MESSAGES. BEFORE YOU INSTALL OR USE THE MACHINE, READ AND FOLLOW ALL THE SAFETY NOTICES CAREFULLY IN THIS CHAPTER.
Observe all the safety information provided. Observe all safety warnings.
Never remove safety warnings or other information from the equipment.
Read all of the instructions and save these instructions for further use.

THE SAFETY ALERT SYMBOL PRECEDES EACH SAFETY NOTICE IN THIS MANUAL. THE SYMBOL INDICATES A POTENTIAL PERSONAL SAFETY HAZARD TO YOU OR OTHERS, PRODUCT DAMAGE OR PROPERTY DAMAGE.

THIS SAFETY ALERT SYMBOL INDICATES A POTENTIAL ELECTRICAL SHOCK. IT WARNS YOU NOT TO OPEN THE PUNCH AND EXPOSE YOURSELF TO HAZARDOUS VOLTAGE.

Please read and keep these important safety instructions

Warning: Moving Parts hazard, keep hands away from moving parts.
Do not open. No user serviceable parts insides. Refer servicing to qualified service personal.

WARNING: DO NOT ATTEMPT TO SERVICE OR REPAIR THE PAPER PUNCH.

WARNING: DO NOT CONNECT THE PAPER PUNCH TO AN ELECTRICAL SUPPLY OR ATTEMPT TO OPERATE THE PAPER PUNCH UNTIL YOU HAVE COMPLETELY READ THESE INSTRUCTIONS. MAINTAIN THESE INSTRUCTIONS IN A CONVENIENT LOCATION FOR FUTURE REFERENCE.
General safeguards
- Use this paper punch only for its intended purpose, according to the specifications outlined in the operating instructions.
- Do not place the punch on an unstable cart, stand or table. An unstable surface may cause the punch to fall resulting in serious bodily injury. Avoid quick stops, excessive force and uneven floor surfaces when moving the punch on a cart or stand.
- Do not defeat or remove electrical or mechanical safety equipment such as interlocks, shields and guards.
- Do not insert objects unsuitable for punching.
- Use only GBC Magnapunch Elite interchangeable Die Sets with the Magnapunch Elite.
- Do not expose punch to liquids.
- This equipment is not suitable for use in locations where children are likely to be present.
- Use the device in a suitable, properly installed and easily accessible mains power socket. Locate near the outlet and do not use extension cords. Make sure the device can be disconnected from the mains at all times.

Electrical safeguards
- This punch must be connected to a supply voltage corresponding to the electrical rating as indicated on the rating plate located on the rear of the machine.
- Unplug the punch before moving it, or when it is not in use for an extended period of time.
- Do not operate the punch with a damaged power supply cord or plug.
- Do not overload electrical outlets as this can result in fire or shock.
- Do not alter the attachment plug. This plug is configured for the appropriate supply.
- The unit is intended for indoor use only.

CAUTION: The socket outlet must be located near the equipment and easily accessible. Do not use an extension cord.
- Disconnect the attachment plug from the socket outlet to which it is connected and keep the power supply cord in a safe place while moving the punch.
- Do not operate the paper punch with a damaged power supply cord or attachment plug, upon occurrence of a malfunction, or after the punch has been damaged. Contact an authorized GBC service representative for assistance.
Service

WARNING: Do not attempt to service or repair the punch. Failure to observe this warning could result in severe personal injury or death.
Disconnect the plug from the socket outlet and contact GBC Technical Service when one or more of the following has occurred.
- The power supply cord or attachment plug is damaged.
- Liquid has been spilled into the punch.
- The punch is malfunctioning after being mishandled.
- The punch does not operate as described in these instructions.
Installation
- Shipping damage should be brought to the immediate attention of the delivering carrier.
- Due to the weight of the punch, two people are required for lifting the machine when unpacking or relocating.
- Place the punch on a stable flat surface capable of supporting 150 lb.
- The surface should be at least 30" high to assure comfortable positioning during operation. All four rubber feet should be on the supporting surface.
- Connect power cord to an appropriate power source. Avoid connecting other equipment to the same branch circuit to which the paper punch is connected as this may cause nuisance tripping of the circuit breaker or blown fuses.
- Plug the Foot Pedal air hose to the foot pedal connector on the back of the machine.
Caring for the Magnapunch Elite
The only maintenance required by the operator is to empty the Chip Tray bin to ensure the paper chips do not back up into the punch and periodically clean the surfaces with a lint-free cloth and a mild detergent. Empty the drawer frequently to prevent the buildup of paper chads. Recommended every 200 to 400 cycles depending on binding style.
Set up
natural_image
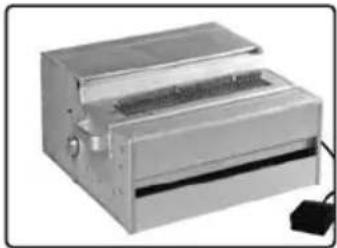
Exterior view of a metallic industrial machine with a clamped lid and mounting base (no visible text or symbols)Ensure the machine is on a stable surface.
natural_image
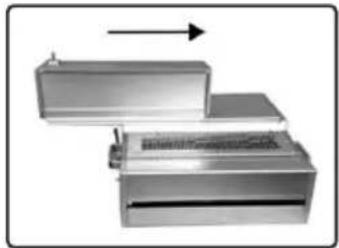
Exterior view of a metallic industrial machine with a side panel and top component (no text or symbols visible)Parallel to the right, push the paper holder.
natural_image
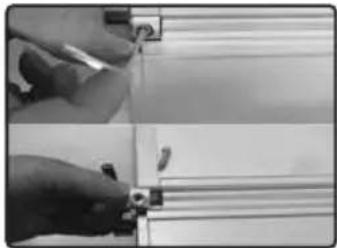
Two-panel image showing hands holding a tool over a panel, with no visible text or symbolsTighten the screws, install the paper holder.
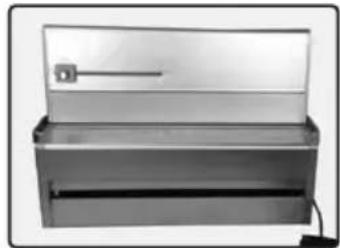
natural_image
Exterior view of a stainless steel industrial machine (no visible text or symbols)Machine is ready.
Features
A. MAIN POWER SWITCH:
Located on the rear of the machine, the switch applies power to the Punch. (fig. A)
B. POWERCORD:
The punch comes with a detachable power cord located in the back. Connect the power cord to the machine before plugging the unit into a wall outlet. (fig. A)
C. EDGE GUIDE:
Used to align the paper for proper punching. Unlock the edge guide by turning the knob counterclockwise, slide the edge guide to the proper position based on your paper size and lock it again by turning the knob clockwise.
D. FOOT PEDAL / FOOT PEDAL CONNECTOR:
The foot pedal can be used to activate the punch. To use the foot pedal, the long black tube needs to be connected to the Foot Pedal Connector (fig. A) on the back of the machine.
E. CHIP TRAY:
The chip tray collects all of the paper chads when punching paper and covers. The chip tray must be emptied on a regular basis. (3) (fig. B)
F. DIE LOCKING HANDLE:
Locks die into position. To remove die, turn handle clockwise to unlock and remove die. After new die is inserted, lock the die into position by turning lock counterclockwise. (fig. C)
G. DIE SLOT:
Where interchangeable die sets are inserted/removed from the punch to modify punch pattern. (fig. F)
H. INTERCHANGABLE DIE SET:
Die sets are sold separately for all of the most common binding styles.
Using Magnapunch Elite
A. EDGE GUIDE ALIGNMENT:
(fig. K) Unlock the edge guide by turning the knob counter clockwise, slide the guide to the proper position based on your paper size and lock the edge guide by turning the knob clockwise.
B. DIE INSERTION/REMOVAL:
(fig. F) If the die for the desired punch pattern is not currently in the machine, you need to replace it. To do this:
- Turn machine off, then rotate the die locking handle to the unlock position (fig. D)
- Remove the die by lifting it out upwards (fig. F)
- Insert the proper die by lowering it into the machine (fig. G)
- Rotate the die locking handle to the locked position (fig. H)
C. DIE PIN DE-SELECT:
(fig. J) With die inserted and edge guide at proper position place media into punch slot against the edge guide. Use die label to determine if any pins should be deselected. To deselect pins:
- Remove die following steps above.
- Lift the corresponding pin leaver upwards.
• Test by punching a sheet.
D. CONFIRM PUNCH ALIGNMENT:
Punch 2 sheets of paper and then fold one of the sheets in half to make sure left and right margins match. If needed make slight adjustment to your edge guide.
Operation
A. TURN ON/OFF:
Power switch is located on the rear of the machine.
B. PAPER INSERTION:
It is best to slide your paper in vertically and then slide to the left to press up against the Edge Guide.
C. PAPER PUNCHING:
Foot Pedal operation will trigger once you have paper aligned and step on the Foot Pedal (fig. N).
Warranty
Limited 1 Year Warranty; USA, Mexico, and Canada
ACCO Brands USA LLC, ACCO Brands, 4 Corporate Drive, Lake Zurich, IL 60047 (in Mexico, ACCO Brands Mexicana, Neptuno 43, Fraccionamiento Nueva Industrial Vallejo México 07700 D.F. México), (in Canada, ACCO Brands Canada Inc., 7381 Bramalea Road, Mississauga ON L5S1C4) (each, respectively, "ACCO Brands") warrants to the original purchaser that this ACCO Brands product is free from defects in workmanship and material under normal use and service for a period of: one (1) year for parts and labor after purchase.
ACCO Brands' obligation under this warranty is limited to replacement or repair, at ACCO Brands' option, of any warranted part found defective by ACCO Brands without charge for material or labor. Any replacement, at ACCO Brands' option, may be the same product or a substantially similar product that may contain remanufactured or refurbished parts. This warranty shall be void in the following circumstances:
(i) if the product has been misused, (ii) if the product has been damaged by negligence or accident, or (iii) if the product has been altered by anyone other than ACCO Brands or ACCO Brands' authorized agents.
For warranty execution, please call: 1-800-541-0094 in the USA 1-800-263-1063 in Canada 01-(55)-1500-5700 / 5778 in Mexico
Or go to www.gbc.com to register your product.
TO THE EXTENT ALLOWED BY APPLICABLE LAW, THIS WARRANTY IS IN LIEU OF ALL OTHER EXPRESSED WARRANTIES. REPRESENTATIONS OR PROMISES INCONSISTENT WITH OR IN ADDITION TO THIS WARRANTY ARE UNAUTHORIZED AND SHALL NOT BE BINDING ON ACCO BRANDS. TO THE EXTENT PERMITTED BY APPLICABLE LAWS, ANY IMPLIED WARRANTIES (IF APPLICABLE) ARE LIMITED IN DURATION TO THE DURATION OF THIS WARRANTY. SOME STATES AND JURISDICTIONS DO NOT ALLOW LIMITATIONS ON HOW LONG AN IMPLIED WARRANTY LASTS, SO THE ABOVE LIMITATION MAY NOT APPLY TO YOU. TO THE EXTENT PERMITTED BY APPLICABLE LAW, IN NO EVENT SHALL ACCO BRANDS BE LIABLE FOR ANY SPECIAL, INCIDENTAL, PUNITIVE, EXEMPLARY, CONSEQUENTIAL OR SIMILAR DAMAGES, WHETHER OR NOT FORSEEABLE. SOME STATES AND JURISDICTIONS DO NOT ALLOW THE EXCLUSION OR LIMITATION OF SPECIAL, INCIDENTAL, PUNITIVE, EXEMPLARY, CONSEQUENTIAL, OR SIMILAR DAMAGES, SO THE ABOVE EXCLUSION OR LIMITATION MAY NOT APPLY TO YOU.
FOR CONSUMERS WHO HAVE THE BENEFIT OF CONSUMER PROTECTION LAWS OR REGULATIONS IN THEIR JURISDICTION OF PURCHASE OR, IF DIFFERENT, IN THEIR JURISDICTION OF RESIDENCE, THE BENEFITS CONFERRED BY THIS WARRANTY ARE IN ADDITION TO ALL RIGHTS AND REMEDIES CONVEYED BY SUCH CONSUMER PROTECTION LAWS AND REGULATIONS.
To the extent permitted by law, this warranty is not transferable and will automatically terminate if the original product purchaser sells or otherwise disposes of the product.
This warranty gives you specific legal rights. Other rights, which vary from jurisdiction to jurisdiction, may exist. In addition some jurisdictions do not allow (i) the exclusion of certain warranties, (ii) limitations on how long an implied warranty lasts and/or (iii) the exclusion or limitation of certain types of costs and/or damages, so the above limitations may not apply.
FCC CLASS B Notice
Note: This equipment has been tested and found to comply with the limits for a Class B digital device, pursuant to part 15 of the FCC Rules. Operation is subject to the following two conditions:
- This device may not cause harmful interference.
- This device must accept any interference received, including interference that may cause undesired operation.
These limits are designed to provide reasonable protection against harmful interference in a residential installation.
This equipment generates, uses and can radiate radio frequency energy and, if not installed and used in accordance with the instructions, may cause harmful interference to radio communications.
However, there is no guarantee that interference will not occur in a particular installation. If this equipment does cause harmful interference to radio or television reception, which can be determined by turning the equipment off and on, the user is encouraged to try to correct the interference by one or more of the following measures:
- Reorient or relocate the receiving antenna.
- Increase the separation between the equipment and receiver.
- Connect the equipment into an outlet on a circuit different from that to which the receiver is connected.
- Consult the dealer or an experienced radio/TV technician for help.
Canada CLASS B Notice
This Class B digital apparatus complies with CAN ICES-003 (B) / NMB-3 (B)
Modifications
Any modifications made to this device, that are not approved by ACCO Brands, may void the authority granted to the user by the FCC and/or by Industry Canada to operate this equipment.
natural_image
Exterior view of a metallic industrial machine with a clamped lid and mounting base (no visible text or symbols)natural_image
Exterior view of a metallic industrial machine with a side panel and top component, showing an arrow indicating direction (no text or symbols visible)natural_image
Two-panel image showing hands holding a tool over a panel, with no visible text or symbolsnatural_image
Exterior view of a stainless steel industrial machine (no visible text or symbols)natural_image
Exterior view of a metallic industrial machine with a clamped lid and mounting base (no visible text or symbols)natural_image
Exterior view of a metallic industrial machine with a side panel and top component, showing an arrow indicating direction (no text or symbols)natural_image
Two-panel image showing hands holding a tool over a panel, with no visible text or symbolsnatural_image
Exterior view of a stainless steel industrial machine (no visible text or symbols)ACCO Brands (Returns Center)
101 Bolton Ave. 9E
Booneville, MS 38829
In USA call 1-800-541-0094
©2024ACCO Brands.
All rights reserved.
ACCO Brands Canada Inc
7381 Bramalea Road
Mississauga L5S 1C4
Ontario, Canada
1-800-268-3447
©2024 ACCO Brands


- GBC Technical Service
- United States
- Canada
- Mexico
- Location of controls
- ⚠ Safety instructions
- Please read and keep these important safety instructions
- General safeguards
- Electrical safeguards
- Service
- Installation
- Caring for the Magnapunch Elite
- Set up
- Features
- Using Magnapunch Elite
- CONFIRM PUNCH ALIGNMENT:
- Operation
- Warranty
- Limited 1 Year Warranty; USA, Mexico, and Canada
- FCC CLASS B Notice
- Canada CLASS B Notice
- Modifications
Brand : GBC
Model : MagnaPunch Elite
Category : Binder