
AromaFresh II - Coffee machine MELITTA - Free user manual and instructions
Find the device manual for free AromaFresh II MELITTA in PDF.

| Product type | Filter coffee machine with integrated bean grinder |
| Brand | Melitta |
| Model | AromaFresh II |
| Category | Coffee machine |
| Capacity | Up to 10 cups (graduated water tank) |
| Coffee type | Beans or ground coffee |
| Grinder | Built-in, adjustable coarseness (from fine to coarse) |
| Functions | Programmable timer, adjustable keep-warm (20/40/60 min), intensity selector (3 levels), anti-drip system, automatic shut-off |
| Display | LED screen with clock and indicators |
| Water hardness | Adjustable to 4 levels (<7, 7-14, 14-21, >21 °dH) |
| Descaling | Automatic with light indicator (dedicated button) |
| Carafe | Glass with lid, dishwasher safe |
| Filter holder | Removable, dishwasher safe |
| Recommended filter | Melitta 1x4® |
| Safety | Automatic shut-off, anti-drip system, protected hot plate |
| Cleaning | Grinder cleanable with brush, accessible bean container |
| Warranty | 3 years manufacturer (France, Belgium, Switzerland) |
| Power supply | 220–240 V ~ 50/60 Hz (check label) |
| Spare parts | Product exchangeable, no spare parts |
Frequently Asked Questions - AromaFresh II MELITTA
User questions about AromaFresh II MELITTA
0 question about this device. Answer the ones you know or ask your own.
Ask a new question about this device
Download the instructions for your Coffee machine in PDF format for free! Find your manual AromaFresh II - MELITTA and take your electronic device back in hand. On this page are published all the documents necessary for the use of your device. AromaFresh II by MELITTA.
USER MANUAL AromaFresh II MELITTA
A. Borking Kalkupicuremskung. Taking for a mg granulollic. Paracrypsone pour le basen to dry rock, in korking were great and the reacceans for bruxal calcium] decompared with cold molids [indust] of malox korking [kurd in agar for malox rock] (slooding for a bruxal calcium). Acanal palmar kohn (crude) [Uranium in wiperium larynx molane].
B CMC-Tate | CMC In set (expel or mnt htrags) | CMC group | Hain CMC | Rata CMC | CMC has | CMC kupper | CMC out | CMC men ex | Prayek odfertan em (CNC)
Chancang Kaikouras: Settings for softes strength | Transderma pour travers de cafs | Insulzer de voorkauf vankerke | Impresen om per il gasto del caft | Auus de la inserides de calfe | Indering | Softes type | Hardener for battery to | Insulzer for capacitance | Auslaser basa strada is | Ummung lang lons
(1) TPRB-Terix | TPRB-hazze | huzan de programación | Sjart delar | TPRB-ang | Hana TPRB | Desón THERONZADOR | TPRB-ans | TPRB-ang | THERONZOR | TPRB-paizc | Frugluc TPRB
E START-Year | START in line | horten, deven van wart en | START-Knup | fonde START | Rutter PHEO | START-Knup | START-trappen | START-knup | START penic | Presch Start.
F
Chameling Taserantrol | Set up for number of pups | Parametres sobre la svire de tunes | Insechtop sputes and bupps | Impacts d'oue sur unenlal coup | Apolus par riforme inotues | Indicing 12 zeta kopper | Enschleger fur and bupps | Enschler fur terri lopper | Anschler copulmentale | Unsensitling bupps
G
H (work) / X (work) / L (work) / H (work) / L (work) / H (work) / L (work)
(work) / 100% / 100% / 100% / 100%
(work) / 100% / 100% / 100% / 100%
(work) / 100% / 100% / 100% / 100%
(work) / 100% / 100% / 100% / 100%
(work) / 100% / 100% / 125% / 125%
(work) / 100% / 100% / 125% / 125%
(work) / 100% / 100% / 125% / 125%
(work) / 100% / 100% / 125% / 125%
(work) / 100% / 100% / 375%
(work) / 100% / 375%
(work) / 100% / 375%
(work) / 100% / 375%
(work) / 100% / 375%
(work) / 100% / 375%
(work) / 100% / 375%
(work) / 100% / 387.
H. (12)(12)(12)
1 Plasentabial (catal, br. flug) | Infecta di una rilee | wateri pfeiffera (o di sartato) | in scale produzta del sartonoio | Indicador del rilei de aga | vanzuanda deia | nietgradergen pl. tamen | shaling pl. crenata | mese in interbendal | Pessita si ineta | vare amenta | sp. Cereb
Malgradogler: Grand love (de) Selezer de mouze | Malgrad aux livres | Selezer de graco de restructeurs | Selezer del vial du molido | Malgradraheau d'ejeerap | Romagnes | Rominiakine |
K. Kieferung [Gesam ring] Ziemannuska/Neubing, Andorid raniakelz [Ziemannuska/Neubing] [Heu-egna] Sambal. Ziemang [Kativinyi margo] Podlaka rachanava myika
L (Nikromocholappe | Forder Chaiz | Trape pour calit mouta | Corviken boffe-linsal | Vara calit in pomerie | Tava de tobo | Nier kauw-dag | Lata for peine lach | Lack di peine lach | Jannien Lana | Far a levey | Peking, Shich king | Peking montaly)
14
Boros de los | Bors de los | Konsara | Grado de la Cale | Konsarve | Conexión del dos |
Ospasiko de granos | Gomexio do | Zorbenilla | Gomexio do | Paspilio | Pojannik na diurni keny
N
Sulverschler (savast) (parle) (davast) (savast) (savast) (davast) (savast) (savast)
bunding till at 30 wettings (the) (bunding till oppa frital blues) (blutals of a spara frital blues) (savast) (savast) (savast)
Tropinopp | drip soap | 100 gm and 200 gm | druginopp | a solvent or antipocibulumeno | Sarcia zirgizona | d'gristazan | drop soaps | cryopentop - spoklato. Zavde rapid eplaje bata a
P. Reis proguerad - Clearing arveh | Evence de remoyen | Lainggeleran | Spasmola si pala: | Caplo de la pala | Lainggeleran | Lainggeleran | Lainggeleran | Lainggeleran | Polkodha | Polkodha (pota)
DE Gebrauchsanierung
GB Operating Instructions
FR Mola d'emploi
NL Gebrikschweing
11. Huaan, 2015
25 Instructions of C95
DK Bruggan-Isring
SE Priloxanwing
NO Bruerwining
FI Kiytobohje
PL: HMI-MK-JE-102412


as satiowks, comes St. de alalte et al. Jahr saiowks kudum, by Sodlka stuk
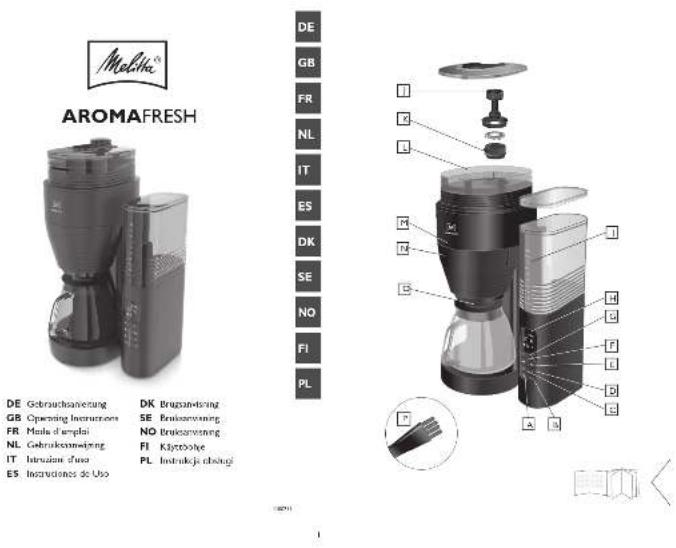
Thank you for buying our AromaFresh filter coffee maker. We hope you will be very happy with it.
If you need further information or if you have any questions please contact Melitta® or visit us on the Internet at www.melitta.co.uk
For your safety

The appliance complies with all valid European guidelines.

The appliance complies with all valid United Kingdom guidelines.
The appliance has been tested and certified by an independent test institute.
Please read the safety notes and the operating manual in full. To avoid danger you must pay attention to the safety and operating instructions. Melitta ^® is not liable for damage caused by ignoring these instructions.
1. Safety notice
This appliance is intended for use in households and similar areas, such as -
- in kitchens for employees in shops, offices and other commercial areas
• in agricultural establishments
• in motels, hotels and other residential facilities and bed and breakfast establishments
Any other use is considered to be improper use and may result in personal injury or damage to property. Melitta® is not liable for damage caused by improper use.
Please observe the following instructions to avoid injuries in case of misuse:
- The appliance must not be placed in a cupboard during operation.
- Connect the appliance only to a properly installed earthed socket.
• The appliance must always be
disconnected from the power supply when unsupervised and before assembly, disassembly or cleaning.
- During operation, parts of the appliance such as the steam outlet at the filter become very hot. Avoid touching these parts and avoid contact with hot steam.
- Do not open the filter holder during brewing.
- The hotplate becomes very hot during use and remains hot for a long time after the brewing process. Contact with the hot plate can cause burns, so avoid touching it.
- Make sure that the power cable does not touch the hot plate.
- Do not use the appliance if the power cable is damaged.
- Do not allow the power cable to come into contact with liquids.
- Never immerse the appliance in water.
- Do not use the jug in the microwave
- Do not clean the parts that come into contact with food with aggressive cleaning agents or scouring cream. Remove detergent residues with clean water. Further information on cleaning can be found under „Cleaning and care“.
- This appliance can be used by children from 8 years of age or older if they are supervised or have been instructed in the safe use of the equipment and have understood the potential hazards.
GB
Cleaning and maintenance must not be carried out by children, unless they are 8 years or older and are supervised. Keep the appliance and the power cable away from children under 8 years of age.
- The appliance may be used by persons with reduced physical, sensory or mental abilities or lack of experience and/or knowledge if they are supervised or have been instructed in the safe use of the appliance and have understood the potential hazards.
• Children must not play with the appliance. - Replacement of the power cable and all other repairs may only be carried out by Melitta® Customer Service or by an authorised repair shop.
2. Before first use
- Ensure that the mains voltage in your home corresponds to that indicated on the identification label on the base of the appliance.
- Connect the appliance to the mains power. Cable which is not required, can be stored in the cable spool ①.
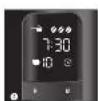
- Set the current time using the buttons 'H' and 'M' ②. It is possible to speed this up by holding in the respective button. The display will switch to standby mode after 15 minutes of no activity. Only the time and possibly the timer symbol will be displayed. Press any button to activate the full display again.
- All appliances are tested for fault free operation when they are produced. Some residual water may be left behind after this test. Rinse the appliance twice with the maximum amount of water without a coffee filter or ground coffee in order to clean it. To do this, fill the water tank ⑥ up to the 8 cup level marker, then press the setting for using ground coffee ⑮ and turn the appliance on ④.
- The appliance has a variety of features for the best coffee enjoyment and ease of use. These features are explained below.
3. Set water hardness
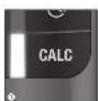
Depending on water hardness lime scale may build up in the appliance. This increases the appliance's energy consumption as lime scale on the heating element can prevent the water heating effectively. To avoid damage the appliance must be descaled regularly. The descaling display helps you in this. If the CALC-button ③ is permanently lit this shows that the appliance needs to be descaled.
The appliance is pre-set for a high level of water hardness (level 4). You can find out the level of water hardness in your area by asking your local water provider or by using water hardness measuring strips available in the shops. For softer water the descaling display can be adjusted to descale less often.
- Hold down the CALC-button ③ and by briefly pressing the m-button ② set the desired level of water hardness. The hardness setting will then show in the display
- Once you have set the desired level of water hardness, let go of the CALC-button.
Your settings are now saved. - The settings and display are shown in the table.
| Hardness setting | I II III | IV | ||
| °dH | <7°dH | 7-14°dH | 14-21°dH | >21°dH |
| Display 2 | 1 | 2 3 4 |
Please note:
• Water hardness cannot be programmed while brewing.
- The last water hardness level chosen remains even after removing the power cable.
4. Setting the hotplate
Keeping coffee warm on the hotplate affects the taste of your coffee. To avoid this you should enjoy your coffee fresh, by drinking it as soon after brewing as possible. Unnecessary warming also uses valuable energy. The factory settings for the appliance are for 40 minutes of warming. After this the hotplate turns off automatically. This time can be changed as needed:
- Hold down the “Start/Stop” button ④ and by briefly pressing the M-button ② set the desired time (20, 40 or 60 minutes). The current warming time will be shown in the display ②.
- Once you have set the desired warming time let go of the button. Your setting is now saved.
- The last setting chosen remains even after removing the power cable.
5. Coffee preparation
For aromatic coffee flavour and the best fit of your coffee filter in the filter holder we recommend using Melitta® coffee filters size 1x4®.
- Ensure that the power cable is plugged in.
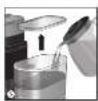
- Open the lid on the water tank ⑤.
- Pour the required amount of cold water into the water tank using the glass jug. With the help of the level markings on the tank ⑥ you can select the required number of cups (2/4/6/8/10).
- Close the water tank lid and place the glass jug with closed lid in the appliance.
- Set the number of cups ⑦ to the amount of water in the water tank ⑥. The number of cups is shown
in the display ②.
Note: Ensure that the selected number of cups corresponds to the amount of water in the water container ⑧. Please note that when making coffee all the water in the water tank is used. If the number of cups and the amount of water do not correspond to each other then this can lead to you not getting the coffee flavour you would like.
5.1 Using coffee beans
- When the bean container is completely full, you can brew enough coffee for 10 cups 2 or 3 times. Roasted coffee beans lose their flavour. Only fill coffee beans in the container which will be used within a few days.
- Open the bean container lid and fill with coffee beans ⑨. Then close the lid.
Note: To ensure the grinder functions perfectly do not use caramelised coffee beans. Do not put ground coffee in the bean container. - Open the swivel filter ⑩ to the left.
- Fold a Melitta ^ 1x4 ^ coffee filter at the embossed seams and place it in the filter holder ⑪ . Use your hand to press the filter in to ensure the best fit.
- Swivel the filter back into the appliance. An audible click indicates that the filter is in place.
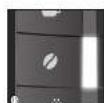
- Set the grinding fineness. Turn the “grinding fineness regulator” clockwise to set a finer grinding fineness. Turn it anti-clockwise to set a coarser grinding fineness (12).
Note: The grinding fineness basically influences the flavour of the coffee. If the grinding fineness is too fine, the coffee will have a bitter taste. If the grinding fineness is too coarse, the coffee will taste acidic.
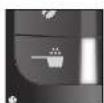
- Press the button to select coffee strength ⑬. The selected coffee strength is shown in the display ②. One coffee bean #is for mild, two beans #for medium and three beans #for strong.
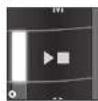
- Turn the appliance on using the start button ON/OFF ④. Coffee preparation begins and the green LED flashes.
- When the coffee is ready the green LED ④ is illuminated but stops flashing. The hot plate keeps your coffee warm and switches off automatically after the time you have set (see point 4). This avoids the unnecessary use of electricity and saves energy. You can of course turn the appliance off manually at any time ④.
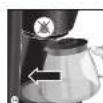
- The drip stop ⑭ prevents coffee dripping when you remove the jug from the appliance.
- The used coffee filter can be disposed of simply and easily using the removable filter insert.
5.2 Using ground coffee
- To use ground coffee select the ground coffee setting ⑮.
- Open the swivel filter to the left ⑩.
- Fold a Melitta ^ 1x4 ^ coffee filter at the embossed seams and place it in the filter holder ^⑪ . Use your hand to press the filter in to ensure the best fit.
- Put the ground coffee in the coffee filter. The amount of coffee you use depends on your personal taste. We recommend using 6-8 g of ground coffee per cup.
- Swivel the filter back into the appliance. An audible click indicates that the filter is in place.
- Turn the appliance on using the "Start/Stop" button
④. Coffee preparation begins and the green LED flashes.
- When the coffee is ready the green LED ④ is illuminated but stops flashing. The hot plate keeps your coffee warm and switches off automatically after the time you have set (see point 4). This avoids the unnecessary use of electricity and saves energy. You can of course turn the appliance off manually at any time ④.
- The drip stop ⑭ prevents coffee dripping when you remove the jug from the appliance.
- The used coffee filter can be disposed of simply and easily using the removable filter insert.
6. Timer Feature
The appliance is equipped with a TIMER. This allows you to start brewing coffee automatically at the time you set.
- Prepare the appliance as described in point 5. 'coffee preparation' but without pressing the "Start/Stop" button ④.
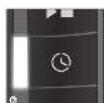
- To set the required start time, hold down the TIMER button ⑯. The first time you set it, the time indicator and the clock symbol will flash in the display ②. Set the required start time by repeatedly pressing the H and M buttons ②. It is possible to speed this up by holding in the respective button.
- Two seconds after you let go of the TIMER button the current time will be displayed again. The start time you selected is saved until a new time is selected or the appliance is removed from the power supply.
- Pressing the TIMER button ⑯ briefly activates the timer feature for automatic coffee preparation. The start time you set appears briefly in the display ②. The clock symbol in the display ② and the white LED are illuminated ⑯.
- The appliance starts preparing coffee automatically at the time you set.
- If you do not remove the appliance from the mains electricity or programme a new start time then the time previously set is saved.
- The TIMER feature can be deactivated at any time by pressing the TIMER button ⑯. The white LED ⑯ and the clock symbol ② are no longer illuminated.
7. Cleaning and care
7.1 Cleaning the exterior
- The housing and the water tank can be cleaned with a soft, damp cloth.
- The glass jug and lid and the filter insert are dishwasher safe.
- The hotplate can be cleaned with a soft, damp cloth when it is cold.
For the best coffee flavour we recommend cleaning the bean container, the grinder and the ground coffee chute regularly. This is easiest when the bean container and the grinder are completely empty.
GB
7.2 Cleaning the grinder
Note: You can call up cleaning and care instructions by using the QR code.

Clean the grinder if you see visible soiling. After each time you clean the grinder, you should also clean the ground coffee chute.
- Empty the bean container. Allow the grinder to grind itself empty. Do this by fitting a filter in the filter insert ⑪ and starting the grinding process with the “Start/Stop” button ④.
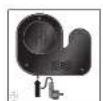
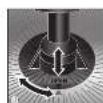
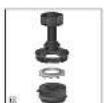
- Turn the grinding fineness regulator until the two triangles point towards each other ⑰. Pull the grinding fineness regulator vertically upwards out of the appliance ⑰.
- Clean all parts of the grinder with the brush.
- Clean the lower grinding disc ⑳, the gap ② and the entrance to the ground coffee chute ②. You can remove loose ground coffee with a vacuum cleaner. Loosen caked-on ground coffee with the brush.
- Pull the silicone ring off the disc carrier ⑱.
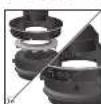
- You can remove the ground coffee from the grinding ring by tapping it lightly. You can also remove the ground coffee with a vacuum cleaner. If it is heavily soiled, you can clean the grinding ring under running water. Allow the grinding ring to dry completely.
- Reassemble the grinding fineness regulator. Make sure you press the silicone gasket evenly and as far as it will go into the grinding ring.
- To lock the grinding ring, turn it to the position shown ⑲.
- Insert the grinding fineness regulator vertically into the appliance. The two triangles must point towards each other ⑰. Turn the grinding fineness regulator clockwise up to the stop to lock it.
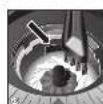
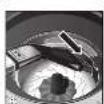
Clean the ground coffee chute:
- Holding the appliance in both hands carefully lay it on its back.
- Now you can firstly clean the area above the swivel filter with the brush and a damp cloth.
- To open the ground coffee chute ^21 hold down the button for ground coffee o for 5 seconds.
- The ground coffee chute flap opens and the chute can be cleaned with the brush..
• To close the flap on the ground coffee chute hold down the button for ground coffee o for 5 seconds. - Put the swivel filter j back in place and stand the appliance up again.
Descaling:
Based on the water hardness you have set (see point 3) the appliance should be descaled soon after the CALC ③ indicator lights up.
- Measure out the descaling fluid according to the manufacturers instructions and pour it into the water tank. We recommend using Melitta® "Anti Calc Liquid for Filter Coffee & Aqua Machines".
- Briefly press the CALC button ③. The red LED starts to flash ③.
- The current time and 'CALC' appear alternately in the display ②.
- The descaling process runs automatically. To remove even heavy calcification the descaling process takes about 25 minutes.
- Attention: Only by running the complete descaling process can all limescale deposits be removed. Only then does the Calc LED ③ go off. Therefore the
descaling process should not be interrupted.
- After the descaling process has been completed the light in the CALC button ③ goes off. The appliance turns off automatically.
- To completely remove any deposits from descaling, the appliance must be rinsed twice with the maximum amount of water without coffee, after the descaling process has ended. Proceed as described in point 2.
8. Note on disposal
- Appliances labelled with this symbol are subject to European guidelines for WEEE (Waste Electrical and Electronic Equipment).
- Electric appliances do not go in the household bin. Dispose of the appliance in an environmentally friendly way using suitable collection systems.
- Packaging materials are raw materials and can be recycled. Please recycle them.
9. Troubleshooting
| Problem/display on Cause Action | ||
| F-01 | The grinding fineness regulator is not locked. | Insert the grinding fineness regulator again and lock it 17, see section 7.2 |
| F-02 The grinder | and/or the ground coffee chute are blocked. | Clean the grinder, see section 7.2 |
| F-03 | There are no coffee beans in the bean container. | Fill the bean container. |
| The coffee beans do not fall into the grinder. | Tap lightly on the bean container. Clean the bean container. | |
| F-04 | The flap in the ground coffee chute is blocked. | Check the ground coffee chute for foreign objects and, if necessary, remove any foreign objects, see section 7.2 |
GB
Cher client, chère cliente,
In addition to the legal guarantee claims, to which the end user is entitled relative to the seller, for this device, if it was purchased from a dealer authorized by Melitta ^® due to his consulting competence, we grant a manufacturer's guarantee under the following conditions:
- The guarantee period begins with the day the product was sold to the end user. The guarantee is 36 months. The purchase date of the device must be verified by a purchase receipt.
The device was designed and built for household use only. It is not dedicated for a commercial use. Guarantee performances lead neither to an extension of the guarantee period nor to a new beginning of the guarantee period for the device or installed spare parts. - Within the guarantee period we will correct all device defects that are based on material or manufacturing errors, through repair or replacement of the device at our discretion. Replace parts become the property of Melitta®.
- Defects that occurred due to improper connection, improper handling, or repair attempts by nonauthorized persons are not covered by the guarantee. The same applies for failure to comply with the use, care, and maintenance instructions as well for the use of consumables (e.g. cleaning and decalcifying agents or waterfilters) that do not correspond to the original specifications. Wear parts (e.g. seals and valves) and fragile parts like glass are excluded from the guarantee.
- Guarantee performances are processed via the Service Hotlines for the respective country (see information below).
- These guarantee conditions apply for devices purchased and used in UK If devices are purchased in foreign countries or brought into foreign countries, then guarantee performances will only be provided as specified in the guarantee conditions applicable for this country.
Melitta UK Ltd.
Hortonwood 45
Telford, Shropshire, TF1 7FA
United Kingdom
Tel: +44(0)800 0288002
www.melitta.co.uk

FR
Garantie Melitta®
Melitta Poland Sp. z o.o.
www.melitta.pl


- For your safety
- Safety notice
- GB
- Before first use
- Set water hardness
- Please note:
- Setting the hotplate
- Coffee preparation
- Using coffee beans
- Using ground coffee
- Timer Feature
- Cleaning and care
- Cleaning the exterior
- Cleaning the grinder
- Clean the ground coffee chute:
- Descaling:
- Note on disposal
- Troubleshooting
- Cher client, chère cliente,
- FR
- Garantie Melitta®
Brand : MELITTA
Model : AromaFresh II
Category : Coffee machine