USER MANUAL DWV015 DEWALT
Dust Extractor Vacuum
English (original instructions) 4
1 Top handle/cord wrap
2 Power cord
3 Vacuum head
4 Canister latch
5 Wheel
6 Canister
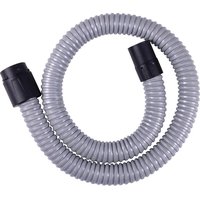
7 Anti-static suction hose (some models)
8 Casters
9 HEPA filters
10 Twist-lock hose inlet
11 Hose clip
12 Front handle
13 Onboard receptacle (outlet)
14 Variable suction dial
15 On/off tool control switch
16 Telescoping handle
17 Telescoping handle release button
18 Bag (some models)
19 Inlet plug
20 Wireless Tool Control™ pairing button
Composants
natural_image
Technical line drawing of a mechanical component with a hand adjusting a circular feature (no text or symbols)
Fig. J Fig. K

natural_image
Technical line drawing of mechanical components with no visible text or symbols
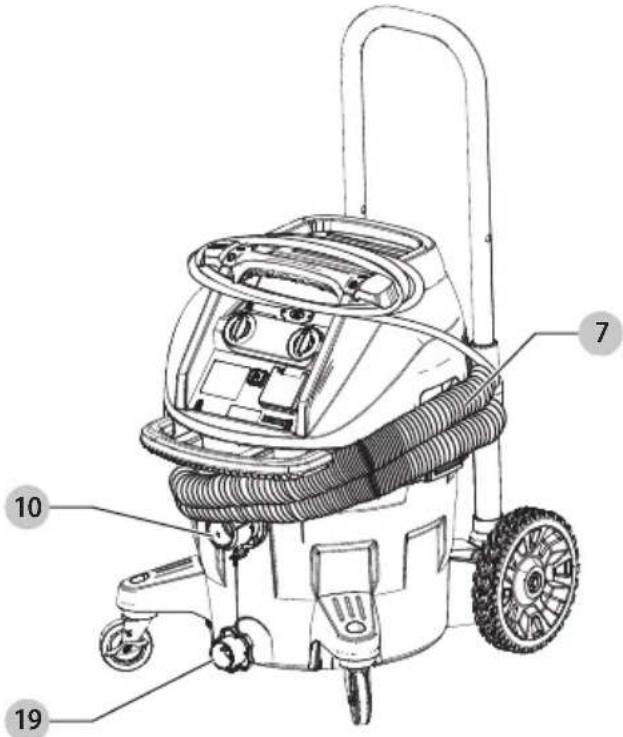
Fig. L Fig. M
English
WARNING: Read all safety warnings and all instructions. Failure to follow the warnings and instructions may result in electric shock, fire and/or serious injury.

WARNING: To reduce the risk of injury, read the instruction manual.
Intended Use
This vacuum is used for fine particulate pick-up, like wallboard, concrete, wood, or surface dust.
This product is NOT to be used for filtering of pathogens, for example Covid-19. Follow all local, state, and federal guidance on general cleaning practices.
DO nOT use under wet conditions or in presence of flammable liquids or gases.
This heavy-duty vacuum is for professional use. DO NOT let children come into contact with the tool. Supervision is required when inexperienced operators use this tool.
nOTE: This vacuum is intended for commercial use.
Definitions: Safety Alert Symbols and Words
This instruction manual uses the following safety alert symbols and words to alert you to hazardous situations and your risk of personal injury or property damage.
DANGER: Indicates an imminently hazardous situation which, if not avoided, will result in death or serious injury.
WARNING: Indicates a potentially hazardous situation which, if not avoided, could result in death or serious injury.
CAUTION: Indicates a potentially hazardous situation which, if not avoided, may result in minor or moderate injury.
NOTICE: Indicates a practice not related to personal injury which, if not avoided, may result in property damage.
(Used without word) Indicates a safety related message.
WARNING! Read all safety warnings and all instructions. Failure to follow the warnings and instructions may result in electric shock, fire and/or serious injury.
SAVE ALL WARNINGS AND INSTRUCTIONS FOR FUTURE REFERENCE
IMPORTANT SAFETY INSTRUCTIONS
WARNING: To reduce the risk of electric shock. Do not expose to rain. Store indoors.
- Do not leave the appliance when it is connected to a power source. Unplug it from outlet when not in use and before servicing.
-
Do not allow the appliance to be used as a toy. Pay close attention when the appliance is used near children.
-
Use this appliance ONLY as described in the manual. Use only DEWALT recommended attachments.
- Do not use this appliance with a damaged cord or plug. If the appliance is not working correctly, or if it has been dropped, damaged, left outdoors, or dropped in water, return it to a service center.
- Do not pull or carry this appliance by the cord, use the cord as a handle, close a door on the cord, or pull the cord around sharp edges or corners. Do not run the appliance over the cord. Keep cord away from heated surfaces.
- Do not unplug this appliance by pulling on the cord. To unplug, grasp the plug, not the cord.
- Do not handle the plug or appliance with wet hands.
- Do not put any objects into the openings of the appliance. Do not use the appliance with any opening blocked; keep free of dust, lint, hair and anything else that may reduce air flow.
- Keep hair, loose clothing, fingers, and all body parts away from the openings and moving parts.
- Turn off all controls before unplugging appliance.
- Use extra care when cleaning on stairs.
- Do not use the appliance to pick up flammable or combustible liquids, such as gasoline, or use in areas where flammable or combustible liquids are present.
- Static shocks are possible in dry areas or when the relative humidity of the air is low. This is only temporary and does not affect the use of the vacuum. To reduce the frequency of static shocks, add moisture to the air with a console, installed humidifier or use DWV9336 anti-static hose (standard on some models).
- To avoid spontaneous combustion, empty canister after each use.
WARNING: Never modify the power tool or any part of its damage or personal injury could result.
WARNING: ALWAYS use safety glasses. Everyday eyeglasses are NOT safety glasses. Also use face or dust mask if cutting operation is dusty. ALWAYS WEAR CERTIFIED SAFETY EQUIPMENT:
• ANSI Z87.1 eye protection (CAN/CSA Z94.3),
• ANSI S12.6 (S3.19) hearing protection,
• NIOSH/OSHA/MSHA respiratory protection.
WARNING Some dust created by power sanding, setting, grinding, drilling, and other construction activities contains chemicals known to the State of California to cause cancer, birth defects or other reproductive harm. Some examples of these chemicals are:
- lead from lead-based paints,
• crystalline silica from bricks and cement and other masonry products, and
• arsenic and chromium from chemically-treated lumber.
Your risk from these exposures varies, depending on how often you do this type of work. To reduce your exposure to these chemicals: work in a well-ventilated area, and work with approved safety equipment, such
as those dust masks that are specially designed to filter out microscopic particles.
- Wear protective clothing and wash exposed areas with soap and water. Allowing dust to get into your mouth, eyes, or lie on the skin may promote absorption of harmful chemicals. Direct particles away from face and body.
- Use the appropriate dust extractor vacuum to remove the vast majority of static and airborne dust. Failure to remove static and airborne dust could contaminate the working environment or pose an increased health risk to the operator and those in close proximity.
• Air vents often cover moving parts and should be avoided. Loose clothes, jewelry or long hair can be caught in moving parts.
- An extension cord must have adequate wire size (AWG or American Wire Gauge) for safety. The smaller the gauge number of the wire, the greater the capacity of the cable, that is, 16 gauge has more capacity than 18 gauge. An undersized cord will cause a drop in line voltage resulting in loss of power and overheating. When using more than one extension to make up the total length, be sure each individual extension contains at least the minimum wire size. The following table shows the correct size to use depending on cord length and nameplate ampere rating. If in doubt, use the next heavier gauge. The lower the gauge number, the heavier the cord.
Minimum Gauge for Cord Sets
| Volts | Total Length of Cord in Feet (meters) |
| 120V 25 (7.6) | 50 (15.2) | 100 (30.5) | 150 (45.7) | |
| 240V 50 (15.2) | 100 (30.5) | 200 (61.0) | 300 (91.4) | |
| Ampere Rating | American Wire Gauge |
| More Than | Not More Than |
| 0618 | 161614 | | | | |
| 6 | 10 | 181614 | 12 | | |
| 10 | 12 | 161614 | 12 | | |
| 12 | 16 | 14 | 12 | Not Recommended |
- Connect to a properly grounded outlet only (Refer to Grounding Instructions).
- This vacuum meets the EPA lead-related Renovations, Repair and Painting (RRP) Rule for HEPA vacuum only when used with the DWV9320 or DWV9330 HEPA Filter (included with DWV015). Contact the United States Environmental Protection Agency (EPA) for more information on their Renovations, Repair and Painting (RRP) Rule.
- This vacuum is approved for use in OSHA Silica 1926.1153 dust collection applications when properly utilized per the OSHA 1926.1153 ruling.
- Do not pick up anything that is burning or smoking, such as cigarettes, matches, or hot ashes.
-
Do not use to vacuum combustible explosive materials, such as coal, grain, or other finely divided combustible material.
-
Do not use to vacuum hazardous, toxic or carcinogenic materials, such as asbestos or pesticides, unless the vacuuming of the material is specifically identified in this instruction manual as an approved use.
- Never pick up explosive liquids (e.g., gasoline, diesel fuel, heating oil, paint thinner, etc.), acids or solvents.
- Do not use vacuum without filters in place, except as described under Wet Pickup Applications.
- Some wood contains preservatives which can be toxic. Take extra care to prevent inhalation and skin contact when working with these materials. Request and follow any safety information available from your material supplier.
- Do not use vacuum as a stepladder.
- Do not place heavy objects on vacuum.
The label on your tool may include the following symbols. The symbols and their definitions are as follows:
V....volts
Hz......hertz
min......minutes
or DC.....direct current
Class I Construction (grounded)
.../min.....per minute
BPM.....beats per minute
\~ or AC......alternating current
or AC/DC.... alternating or direct current
☐ Class II Construction (double insulated)
n_0 ......no load speed
n ......rated speed
PSI.....pounds per square inch
± earthing terminal
⚠️ ...... safety alert symbol
▲......visible radiation—do not stare into the light
E....wearrespiratory protection
...... wear eye protection
○....wearhearing protection
read all documentation
do not expose to rain
NOTE: 15 Amp max Rating refers to the total loading of the vacuum operating with a tool plugged into the onboard receptacle.
ON MOTOR HOUSING (on back of vacuum head):

• TO REDUCE THE RISK OF INJURY, USER MUST READ INSTRUCTION MANUAL. DO NOT RUN UNATTENDED. DO NOT PICK UP FLAMMABLE, COMBUSTIBLE OR HOT MATERIALS. DO NOT USE AROUND EXPLOSIVE DUST, LIQUIDS OR VAPORS. ELECTRICAL DEVICES PRODUCE ARCS OR SPARKS WHICH CAN CAUSE FIRE OR EXPLOSION. DO NOT USE AT FILLING STATIONS OR ANYWHERE GASOLINE IS STORED OR DISPENSED. DO NOT VACUUM TOXIC OR CARCINOGENIC MATERIALS OR OTHER HEALTH ENDANGERING MATERIAL SUCH AS ASBESTOS OR PESTICIDES. ALWAYS USE PROPER EYE AND RESPIRATORY PROTECTION AS REQUIRED BY OSHA OR OTHER GOVERNMENTAL/PROVINCIAL INSTITUTIONS FOR THE
ENGLISH
APPLICATION BEING PERFORMED. TO REDUCE THE RISK OF ELECTRICAL SHOCK, DO NOT EXPOSE TO RAIN. STORE INDOORS. WHEN SERVICING, USE ONLY IDENTICAL REPLACEMENT PARTS. NOT TO BE USED AS A STEP STOOL. (THE USE OF THIS MACHINE IN CONJUNCTION WITH THE PICK UP OF LEAD HAS NOT BEEN INVESTIGATED BY UL.)
CAUTION: RISK OF FIRE AND INJURY. DO NOT EXCEED 120 CMPS. THE RECEPTACLE IS ENERGIZED WHEN THE VACUUM IS ON OR SET TO AUTO MODE. WHEN SET TO AUTO MODE, THE VACUUM WILL TURN ON AUTOMATICALLY WHEN THE APPLIANCE CONNECTED TO THE RECEPTACLE IS TURNED ON.
SAVE THESE INSTRUCTIONS
Grounding Instructions
This appliance must be grounded. If it should malfunction or break down, grounding provides a path of least resistance for electric current to reduce the risk of electric shock. This appliance is equipped with a cord having an equipment-grounding conductor and grounding plug. The plug must be inserted into an appropriate outlet that is properly installed and grounded in accordance with all local codes and ordinances.
WARNING: Improper connection of the equipment-grounding conductor can result in a risk of electric shock. Check with a qualified electrician or service person if you are in doubt as to whether the outlet is properly grounded. Do not modify the plug provided with the appliance – if it will not fit the outlet, have a proper outlet installed by a qualified electrician.
This appliance is for use on a nominal 120-volt circuit and has a grounding attachment plug that looks like the plug illustrated in Figure B. Make sure that the appliance is connected to an outlet having the same configuration as the plug. No adaptor should be used with this appliance.
Motor
Be sure your power supply agrees with the nameplate marking. Voltage decrease of more than 10% will cause loss of power and overheating. These tools are factory tested; if this tool does not operate, check power supply.
NOTICE: Do not use this tool on DC current. Tool damage can occur.
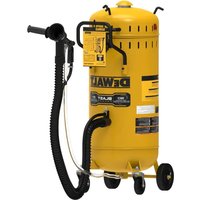
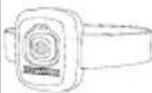
COMPONENTS (FIG. A)
WARNING: Never modify the power tool or any part of its damage or personal injury could result.
Refer to Figure A at the beginning of this manual for a complete list of components.
Anti-Static Hose
The DWV015 is equipped with an anti-static grounding system. Some models have an anti-static hose which will prevent static shocks caused by vacuuming dry debris.
ASSEMBLY AND ADJUSTMENTS
WARNING: To reduce the risk of serious personal injury, turn unit off and disconnect it from power source before making any adjustments or removing/installing attachments or accessories. An accidental start-up can cause injury.
WARNING: When using electric appliances, always follows basic safety precautions to reduce the risk of fire, electric shock and personal injury.
WARNING: The HEPA filters 9 must always be in place while vacuuming, except as described under Wet Pickup Applications under Operation. When vacuuming fine dust, you may also use an additional paper bag or fleece bag to make emptying the canister easier.
- If optional paper or fleece bag 18 is to be used, install as shown in Figure B.
NOTE: Be careful not to tear the bag. Place bag securely onto the backside of the twist-lock hose inlet 10 to provide a tight seal for maximum dust collection performance.
- Place the vacuum head 3 onto the canister and secure it by closing the canister latches 4 as shown in Figure C.
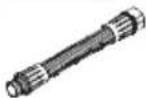
- Insert end of anti-static suction hose 7 into twist-lock hose inlet and rotate counterclockwise to lock in place as shown in Figure D.
OPERATION
WARNING: To reduce the risk of serious personal injury, turn unit off and disconnect it from power source before making any adjustments or removing/installing attachments or accessories.
An accidental start-up can cause injury.
To Operate the Vacuum (Fig. E)
- Plug the power cord into an appropriate outlet.
- Turn the ON/OFF tool control switch 15 to the ON position I).
- Set the variable suction dial 14 to the desired position. This feature allows the user to control the vacuum's power, suction and noise.
NOTE: This setting also controls the level of suction. This is very useful in applications where the vacuum creates unacceptable levels of drag to the workpiece.
- Follow the direction under Connecting to Power Tools to connect to the power tool to be used.
Refer to Pairing the Dust Extractor with a Tool Using Wireless Tool Control™ Mode to use the dust extractor with a Wireless Tool Control™-equipped tool or remote.
NOTE: Some brushless AC tools can start the vacuum in auto mode without turning on the power tool.
- Plug the vacuum power cord into an appropriate outlet.
- Plug the power tool into the outlet 13.
- Turn the on/off tool control switch 15 to the ACTIVATION position This allows the vacuum to be turned on and
off automatically with the power tool.
NOTE: The vacuum cleaner starts automatically within 0.5 seconds and continues to run for 7 seconds after the power tool has been turned off. Afterrun can vary when used with a power generator
- To switch back to manual mode, turn the on/off tool control switch to the ON position (1). In manual mode the tool and the vacuum are turned on and off independent of each other.
- Choose the correct power tool adaptor 21 to fit the power tool connection on the tool to be used. Refer to Accessories under Maintenance. Attach power tool adaptor to the power tool.
- Attach the anti-static suction hose 7 to the power tool adaptor.
Automatic Filter Cleaning System
This vacuum has a highly effective filter cleaning system which minimizes filter clogging. Every 30 seconds, one of the two filters gets automatically cleaned. The cleaning process alternates between the filters and continues through the life of the unit.
NOTE: After starting the vacuum, both filters get cleaned within the first 15 seconds.
NOTE: It is normal to hear a clicking sound during this process.
NOTE: After many hours of operation the automatic filter cleaning system may not be effective. When this happens the filters will need to be cleaned or replaced. Refer to Filter under Maintenance.
Wet Pickup Applications (Fig. G)
WARNING: DO NOT connect power tools to outlet when using the vacuum for wet pickup.
WARNING: Plug vacuum into GFCI protected outlet when using the vacuum for wet pickup.
NOTICE: DO NOT remove ball float 22 as doing so will cause damage to the vacuum. The ball float keeps water from entering the motor.
Before using the vacuum for wet pickup:
- Ensure the canister is empty and free of excessive dust.
- Remove HEPA filters 9.
- Plug vacuum into a GFCI protected outlet.
To Empty Canister (Fig. G)
The ball float valve 22 will block air to the motor when the canister is full and the sound of the motor will change at once. When the motor has a high-pitched sound and air/water flow stops, empty the canister.
- Turn off vacuum and unplug cord from outlet.
- Unlatch canister latches 4 and remove vacuum head 3.
- Empty contents of canister 6 into a suitable container or drain.
To Convert Back to Dry Vacuum Operation
- Empty canister, refer to To Empty Canister instructions.
- Place canister upside-down position until dry. DO NOT use wet canister for dry pickup.
- Place vacuum head 3 on a level surface until dry.
- Reinstall filters when vacuum head is dry. Refer to Filters under Maintenance.
- When canister is dry place the vacuum head onto the canister and secure it by closing the canister latches 4.
Telescoping Handle (Fig. H)
Press telescoping handle release button 17 to raise and lower the telescoping handle 16.
To Shut Down (Fig. A)
- Turn on/off tool control switch 15 to the OFF position (●)
- Unplug the unit.
MAINTENANCE
WARNING: To reduce the risk of serious personal injury, turn unit off and disconnect it from power source before making any adjustments or removing/installing attachments or accessories.
An accidental start-up can cause injury.
Your DEWALT power tool has been designed to operate over a long period of time with a minimum of maintenance. Continuous satisfactory operation depends upon proper tool care and regular cleaning.
Filter
Filter Care
If you experience a loss of suction performance due to a clogged filter, turn the unit off, close the twist-lock hose inlet 10 with the inlet plug 19, start the unit, and wait 15 seconds until you hear the clicking sound of the filter cleaning two times. If the suction performance is still not sufficient the filters must be changed.
The HEPA filters 9 included with this vacuum are long-life filters. To be effective in minimizing dust recirculation, especially in lead paint (EPA RRP Rule) applications, the filters MUST be installed correctly and in good condition. Check the filter conditions before you use the tool.
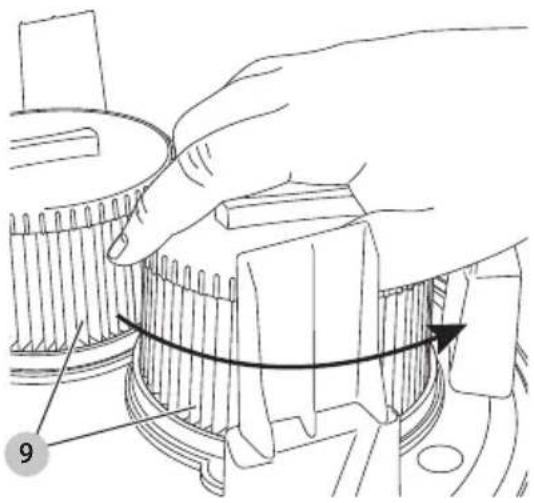
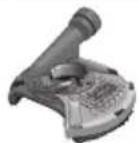
To Remove Filters (Fig. I)
- Turn on/off tool control switch 15 to the OFF position (and unplug cord from outlet.
- Release canister latches 4 and remove vacuum head 3 from canister. Place vacuum head on a level surface upside down.
- Turn each filter counterclockwise by gripping it on the plastic end cover as shown, and carefully remove from head, ensuring debris does not fall into mounting hole.
NOTE: Use care to not damage filter material.
- Inspect filters for wear, tears or other damage.
NOTE: If there is any doubt on the condition of the filters they MUST be replaced. DO NOT continue use if filters are damaged.
English
WARNING: Never use compressed air or a brush to clean filters, otherwise damage to the filter membrane will occur which will allow dust to pass through the filter. If needed, rinse with room temperature water and let air dry. Cleaning of the filters is typically unnecessary. Even if the filter is covered with dust, the automatic filter cleaning system will maintain maximum performance and continue to function. If visual damage to the filter membrane exists, replace filters. Filters typically last between six and twelve months, depending on use and care.
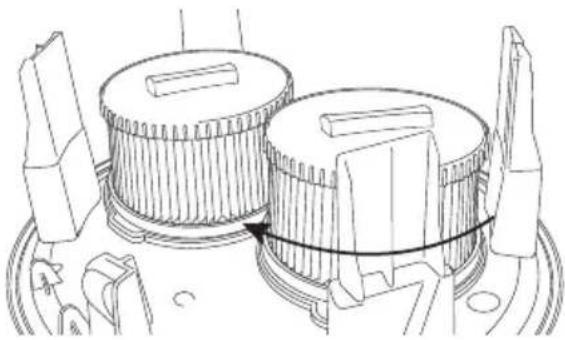
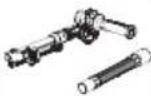
To Install Filters (Fig. J)
-
Ensure filter seal 23 is in place and is secure.
-
Line up filter threads 24 to vacuum head threads and using moderate force, turn filter clockwise until tight.
NOTE: Use care to not damage filter material.
-
Place the vacuum head 3 onto the container and secure it by closing the canister latches 4.
Cleaning
WARNING: Blow dirt and dust out of all air vents with clean, dry air at least once a week. To minimize the risk of eye injury, always wear ANSI Z87.1 approved eye protection when performing this procedure.
WARNING: Never use solvents or other harsh chemicals for cleaning the non-metallic parts of the tool. These chemicals may weaken the plastic materials used in these parts. Use a cloth dampened only with water and mild soap. Never let any liquid get inside the tool; never immerse any part of the tool into a liquid.
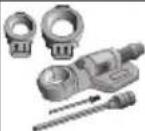
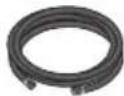
Storage (Fig. K)
- Empty the canister, refer to To Empty Canister under Operation.
- Clean the vacuum inside and outside.
- Clean or replace filters, refer to Filters.
- Remove the anti-static suction hose 7 from the twist-lock hose inlet 10 and close the inlet with the inlet plug 19.
- Put the ends of the suction hose together to prevent dirt particles from escaping.
- Store the suction hose and the power cord as shown in the illustration. Place the unit in a dry room and secure it from unauthorized use.
NOTE: Plug inlet plug into inlet to keep debris inside canister when suction hose is removed. You can also attach the ends of the hose together and lock together with the twist-lock end.
NOTE: After wet applications, the internal parts of the liquid container must be dried before storage.
Accessories
WARNING: Since accessories, other than those offered by DEWALT, have not been tested with this product, use of such accessories with this tool could be hazardous. To reduce the risk of injury, only DEWALT recommended accessories should be used with this product.
Recommended accessories for use with your tool are available at extra cost from your local dealer or authorized service center. If you need assistance in locating any accessory, please contact DEWALT Industrial Tool Co., 701 East Joppa Road, Towson, MD 21286, call 1-800-4-DEWALT (1-800-433-9258) or visit our website: www.dewalt.com.
Optional Accessories
 | DWV9320 (some models) DWV9330 (some models) | HEPA filter: Captures 99.97% of all particles greater than or equal to 0.3 microns. Required when picking up lead paint debris. |
 | DWE46100 | 5"-6" (127-152 mm) Cutting/tuckpointing shroud |
 | D25301D Dust extraction adaptor | |
 | DWE46152 | 5" (127 mm) Surfacing shroud |
 | DWH050K | DWH050 Universal drilling dust extraction system |
 | DWH052K | 1-1/8" Hex hammer dust collection |
 | DWH053K | DWH053 SDS max® and spline chipping dust collection |
 | DWV9316 Anti-static 14' (4.3 m) hose | |
 | DWV9315 | Crush-proof 14' (4.3 m) hose |
 | DWV9336 36 mm anti-static hose | |
 | DWV016TSRK Storage Rack | Accessory |
 | DCV040 | Wireless Tool ControlTM Remote |
The filter bags provide a clean, easy and quick way to dispose of the dust collected.
If you remove the rack DWV016TSRK from the vacuum, use the screws supplied with the rack to close the screw holes on top of the Vac Head.
Paper filter bags: The DWV9401 filter bags are designed to capture many types of dust including drywall, concrete and wood. These bags should be disposed of once the airflow becomes restricted. DO NOT reuse bags.
DWV9401
Disposable paper filter bag 5 gallon (19 L)
Fleece filter bag: The DWV9402 fleece bag is designed to capture many types of dust including drywall, concrete and wood. This bag should be disposed of once the airflow becomes restricted. DO NOT reuse this bag. The fleece bag is ideal for heavier materials such as concrete and drywall dust where a paper filter bag may tear.

DWV9402
Disposable fleece filter bag 3.3 gallon (12 L)
Plastic collection bag: The DWV9400 disposable plastic bag is designed to seal the liner to the tank inlet without being pulled into the filter during use. The plastic disposable bag allows for easy cleanup and disposal of dust and keeps dust from escaping back into the atmosphere during emptying. Because this bag is specially designed not to be pulled into the filter, there will be a small amount of dust remaining in the tank.

DWV9400
Disposable plastic collection bag 5.7 gallon (21.6 L)
CAUTION: When the dust extractor is being controlled with the remote or paired power tool, it may start or stop without warning.
WARNING: Do not attach the remote strap to moving parts.
- Turn the on/off tool control switch 15 to the activation position
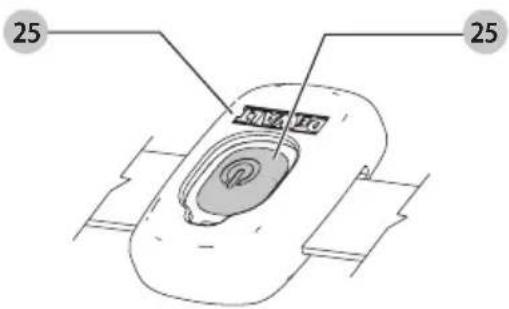
- Press and hold the Wireless Tool Control™ pairing button 20 on the extractor and pull the trigger on the Wireless Tool Control™-equipped tool, or press the remote button 25 on the Wireless Tool Control™ remote 25 at the same time.
- The LED above the Wireless Tool Control™ pairing button will be steadily illuminated to indicate a successful pairing.
CAUTION: Do not activate the Wireless Tool Control™ or the tool if the dust extractor hose is not connected to the dust extraction port of the tool.
NOTE: Only one tool can be paired to the dust extractor at a time. If the unit is already paired, the previous transmitter will be overridden.
- Turn the on/off tool control switch 15 to the activation position and pull the trigger on the Wireless Tool Control™-equipped tool or press the button on the remote at the same time.
- The LED above the Wireless Tool Control™ pairing button 20 will flash slowly to indicate a successful unpairing.
CAUTION: To prevent unintentional switch-on after the work, switch the on/off switch 15 to the OFF position (☐), or unpair the Wireless Tool Control™ of tool or remote.
LED FLASH PATTERN
In pairing mode
No device is paired
Device is successfully paired

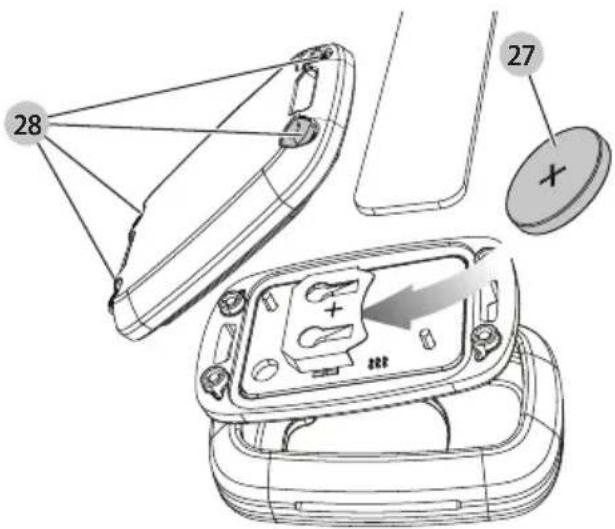
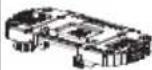
Replacing the Coin Cell Battery in the Remote Control (Fig. M)


DANGER: DO NOT INGEST BATTERY; CHEMICAL BURN HAZARD. This product
contains a coin/button cell battery. If the coin/
button cell battery is swallowed, it can cause severe internal burns in just 2 hours and can lead to death.

NING: KEEP NEW AND USED BATTERIES AWAY
FROM CHILDREN. If the battery compartment does not close securely, stop using the product and keep it away from children. If you think batteries might have been swallowed or placed inside any part of the body, seek immediate medical attention.
WARNING: WHEN REPLACING BATTERY, REPLACE WITH THE SAME OR EQUIVALENT TYPE CR2032.
Observe correct polarity (+ and −) when replacing batteries. Do not store or carry batteries so that metal objects can contact exposed battery terminals.
WARNING: ENSURE THAT COIN CELL REPLACEMENT IS CARRIED OUT PROPERLY. There is a risk of explosion.
- When replacing battery, replace it with the same or equivalent type CR2032. Do not use any other coin cells or other forms of electrical power supply.
- DO NOT attempt to recharge the coin cell battery and do not short circuit the coin cell battery. The coin cell battery may leak, explode, catch fire and cause personal injury.
- DO NOT overheat the coin cell or throw it into fire. The coin cell may leak, explode, catch fire and cause personal injury.
- DO NOT damage the coin cell and do not disassemble the coin cell. The coin cell may leak, explode, catch fire and cause personal injury.
ENGLISH
- DO NOT allow damaged coin cells to come into contact with water. Leaking lithium may mix with water to create hydrogen, which could cause a fire, an explosion, or personal injury.
- DO NOT dispose of the button cell battery with normal household waste. Contact your local waste disposal department to dispose of the device/batteries in accordance with applicable local laws and regulations.
-
Remove and dispose of drained coin cell correctly. Drained coin cell may leak and damage the product or cause personal injury.
-
To open the housing remove the four screws 28 from the rear panel with a T10 torx screwdriver.
- Pull out sideways the discharged coin cell battery from the battery holder.
- Insert sideways the new coin cell battery 27 into the battery holder, and pay attention to the orientation of the battery in terms of polarity.
- Replace the back cover, insert the screws and tighten.
Repairs
WARNING: To assure product SAFETY and RELIABILITY, repairs, maintenance and adjustment (including brush inspection and replacement, when applicable) should be performed by a factory service center or an authorized service center. Always use identical replacement parts.
Register Online
Thank you for your purchase. Register your product now for:
- WARRANTY SERVICE: Registering your product will help you obtain more efficient warranty service in case there is a problem with your product.
- CONFIRMATION OF OWNERSHIP: In case of an insurance loss, such as fire, flood or theft, your registration of ownership will serve as your proof of purchase.
- FOR YOUR SAFETY: Registering your product will allow us to contact you in the unlikely event a safety notification is required under the Federal Consumer Safety Act.
- Register online at www.dewalt.com.
Three Year Limited Warranty
For warranty terms, go to https://www.dewalt.com/support/warranty.
To request a written copy of the warranty terms, contact: Customer Service at DEWALT Industrial Tool Co., 701 East Joppa Road, Towson, MD 21286 or call 1-800-4-DEWALT (1-800-433-9258).
LATIN AMERICA: This warranty does not apply to products sold in Latin America. For products sold in Latin America, see country-specific warranty information contained in the packaging, call the local company or see website for warranty information.
FREE WARNING LABEL REPLACEMENT: If your warning labels become illegible or are missing, call 1-800-4-DEWALT (1-800-433-9258) for a free replacement.

Compliance Certificate
DEWALT Dust Extractor Vacuums (DWV015) are manufactured in compliance with Underwriters Laboratories (UL) 1017 and Canadian Standards Association (CSA) C22.2 No. 243-01 Standards.
These vacuums also meet the requirements of a HEPA vacuum as defined in the United States Environmental Protection Agency's (EPA) Renovation, Repair and Painting (RRP) Rule (40 CFR Part 745) when used with the DWV9320 or DWV9330 HEPA filter.
The DWV9320 and DWV9330 HEPA filters have been evaluated per IEST-RP-C001.5,7.2 by an independent third party to confirm that the filter is capable of capturing particles of 0.3 microns with 99.97% efficiency.
portezdes protections auditives
..... lisez toute la documentation
Underwriters Laboratories (UL) 1017 et Canadian Standards Association (CSA) C22.2 No. 243-01.
Eje Central Lázaro Cárdenas No. 18 - Local (55) 5588 9377 D, Col. Obrera
MERIDA, YUC
Calle 63 #459-A - Col. Centro (999) 928 5038
MONTERREY, N.L.
Av. Francisco I. Madero 831 Poniente - Col. (818) 375 23 13 Centro
PUEBLA, PUE
17 Norte #205 - Col. Centro (222) 246 3714
QUERETARO, QRO
Av. San Roque 274 - Col. San Gregorio (442) 2 17 63 14
SAN LUIS POTOSI, SLP
DEWALT Industrial Tool Co. 701 East Joppa Road, Towson, MD 21286
Copyright © 2022, 2023
The following are trademarks for one or more DEWALT power tools: the yellow and black color scheme, the "D" shaped air intake grill, the array of pyramids on the handgrip, the kit box configuration, and the array of lozenge-shaped humps on the surface of the tool.
NA351779 04/23