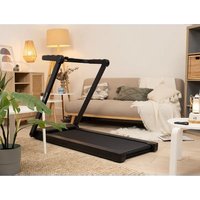
Nordik K12 - Treadmills Skandika - Free user manual and instructions
Find the device manual for free Nordik K12 Skandika in PDF.


| Product type | Treadmill |
| Brand | Skandika |
| Model | Nordik K12 |
| Usage | Domestic |
| Maximum weight capacity | 125 kg |
| Walking speed | 1 - 6 km/h |
| Running speed | 1 - 12 km/h |
| Number of programs | 9 interval programs |
| Display | Speed, calories, pulse, time, steps, distance |
| Pulse sensors | Hand grip manual |
| Connectivity | Bluetooth (Kinomap and audio) |
| Folding | Yes |
| Transport | Built-in transport wheels |
| Safety | Safety clip with emergency stop |
| Power supply | Grounded mains plug |
| Lubrication | Required before first use and periodically |
| Warranty | 24 months |
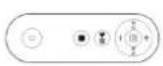
| Included accessories | Remote control, lubricant, keys, safety clip |
| Class | HB (non-therapeutic) |
Frequently Asked Questions - Nordik K12 Skandika
User questions about Nordik K12 Skandika
0 question about this device. Answer the ones you know or ask your own.
Ask a new question about this device
Download the instructions for your Treadmills in PDF format for free! Find your manual Nordik K12 - Skandika and take your electronic device back in hand. On this page are published all the documents necessary for the use of your device. Nordik K12 by Skandika.
USER MANUAL Nordik K12 Skandika
natural_image
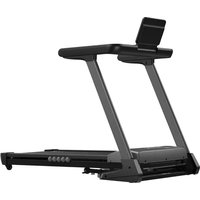
Black treadmill with extended handle and front panel, no visible text or symbols on the device itselfNordik K12
DE GB FR
Inhalt

skandika.com/service
natural_image
Technical line drawing of a mechanical device with labeled parts (1 and 2), no readable text or symbols beyond labelsSCHRITT 3
natural_image
Line drawing of a treadmill with an arrow indicating rotational motion (no text or symbols)
SCHRITT 5
natural_image
Technical line drawing of a treadmill with an inset showing the wheel and arm mechanism (no text or symbols)SCHRITT 6
natural_image
Technical line drawing of a treadmill with an inset showing the internal components (no text or symbols)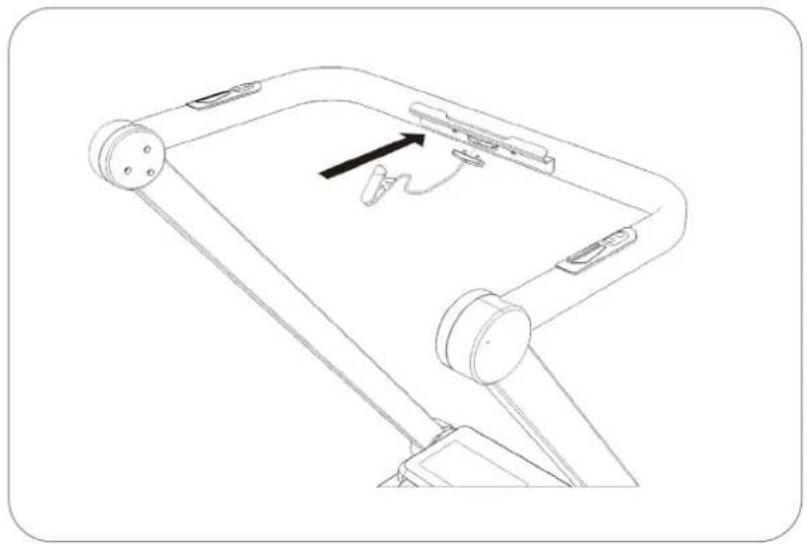
natural_image
Line drawing of a mechanical device with a handle and lever mechanism (no text or symbols)SCHRITT 7
natural_image
Technical line drawing of a mechanical device with articulated joints and a flat plate (no text or symbols)SCHRITT 8 (OPTIONAL)
natural_image
Technical line drawing of a treadmill with an inset showing the wheel mechanism (no text or symbols)
natural_image
Line drawing of a treadmill device with an arrow indicating rotational motion (no text or symbols)natural_image
Line drawing of a treadmill with an arrow indicating motion or force, no text or symbols present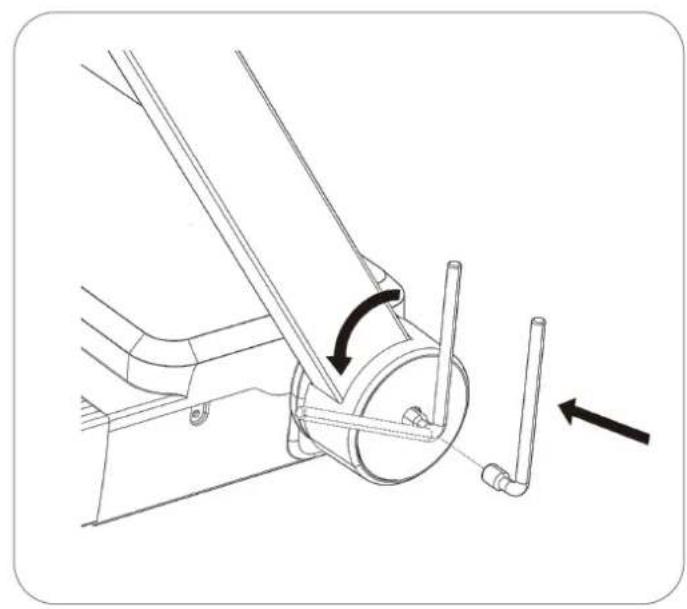
natural_image
Technical line drawing of a mechanical assembly with two arrows indicating motion direction (no text or symbols)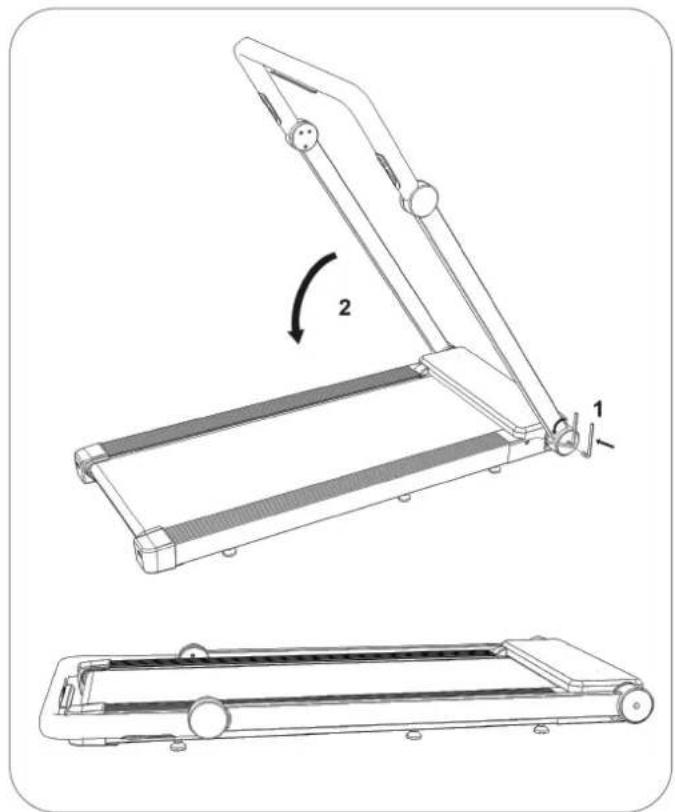
natural_image
Technical line drawing of a treadmill device with two views: top shows open frame, bottom shows side view (no text or symbols)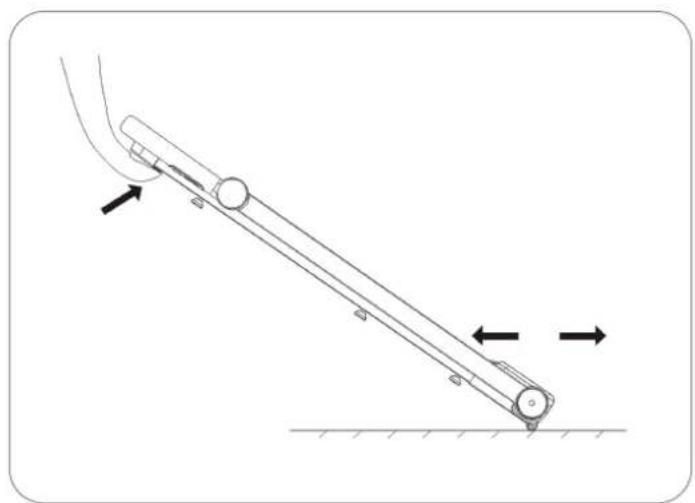
natural_image
Mechanical diagram showing a lever system with two opposing arrows indicating motion direction (no text or symbols present)TRANSPORT: SCHRITT 6
natural_image
Line drawing of a portable treadmill with mesh insulation and wheels (no text or symbols)Laufen
natural_image
Line drawing of a treadmill with adjustable arms and base plate (no text or symbols)BEDIENELEMENTE AM HANDLAUF
| Abschnitt / Programm | 123 | 4567 | 8910 | |||||||
| P1 | 3,0 | 3,0 | 3,0 | 3,0 | 3,0 | 3,0 | 2,0 | 3,0 | 3,0 | 3,0 |
| P2 | 3,0 | 4,0 | 4,0 | 4,0 | 4,0 | 4,0 | 3,0 | 4,0 | 4,0 | 4,0 |
| P3 | 4,0 | 5,0 | 5,0 | 5,0 | 5,0 | 5,0 | 4,0 | 5,0 | 5,0 | 5,0 |
| P4 | 3,0 | 6,0 | 6,0 | 6,0 | 6,0 | 6,0 | 3,0 | 6,0 | 6,0 | 3,0 |
| P5 | 3,0 | 5,0 | 3,0 | 5,0 | 3,0 | 5,0 | 3,0 | 5,0 | 3,0 | 5,0 |
| P6 | 3,5 | 5,5 | 3,5 | 5,5 | 3,5 | 5,5 | 3,5 | 5,5 | 3,5 | 5,5 |
| P7 | 3,0 | 5,0 | 5,0 | 3,0 | 5,0 | 5,0 | 3,0 | 5,0 | 5,0 | 3,0 |
| P8 | 3,5 | 5,5 | 5,5 | 3,5 | 5,5 | 5,5 | 3,5 | 5,5 | 5,5 | 3,5 |
| P9 | 4,0 | 6,0 | 6,0 | 4,0 | 6,0 | 6,0 | 4,0 | 6,0 | 6,0 | 4,0 |
| Abschnitt / Programm | 12345678910 | |||||||||
| P1 | 3,0 | 4,0 | 5,0 | 6,0 | 6,0 | 4,0 | 5,0 | 6,0 | 6,0 | 4,0 |
| P2 | 4,0 | 5,0 | 6,0 | 7,0 | 7,0 | 5,0 | 6,0 | 7,0 | 7,0 | 5,0 |
| P3 | 5,0 | 6,0 | 7,0 | 8,0 | 8,0 | 6,0 | 7,0 | 8,0 | 8,0 | 6,0 |
| P4 | 6,0 | 7,0 | 8,0 | 9,0 | 9,0 | 7,0 | 8,0 | 9,0 | 9,0 | 7,0 |
| P5 | 6,0 | 8,0 | 10,0 | 10,0 | 8,0 | 8,0 | 10,0 | 10,0 | 8,0 | 6,0 |
| P6 | 7,0 | 9,0 | 10,0 | 9,0 | 10,0 | 9,0 | 10,0 | 9,0 | 10,0 | 7,0 |
| P7 | 7,0 | 9,0 | 9,0 | 7,0 | 7,0 | 9,0 | 9,0 | 7,0 | 9,0 | 7,0 |
| P8 | 5,0 | 10,0 | 10,0 | 5,0 | 5,0 | 10,0 | 10,0 | 5,0 | 10,0 | 5,0 |
| P9 | 6,0 | 10,0 | 10,0 | 6,0 | 6,0 | 10,0 | 10,0 | 6,0 | 10,0 | 6,0 |
COMPUTERFUNKTIONEN
natural_image
Three simple line drawings of human, water drop, and heart symbols with upward arrows above each (no text or labels)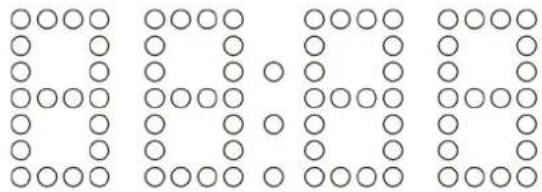
natural_image
Three simple line drawings showing different hand positions: alarm clock, foot, and curved leg (no text or symbols)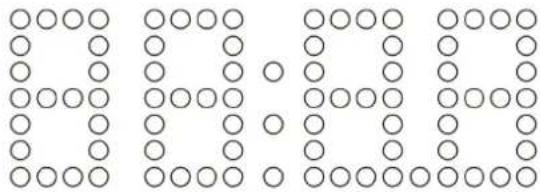
AUTO-STOPP-FUNKTION:
natural_image
Technical line drawing of a mechanical component with a curved arrow indicating rotation (no text or symbols)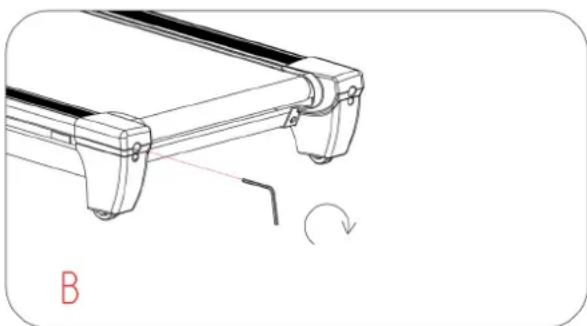
natural_image
Technical line drawing of a mechanical component with a rotation arrow and label B (no text or symbols on the diagram itself)natural_image
Technical line drawing of a mechanical component with curved notches and directional arrows indicating rotation (no text or symbols)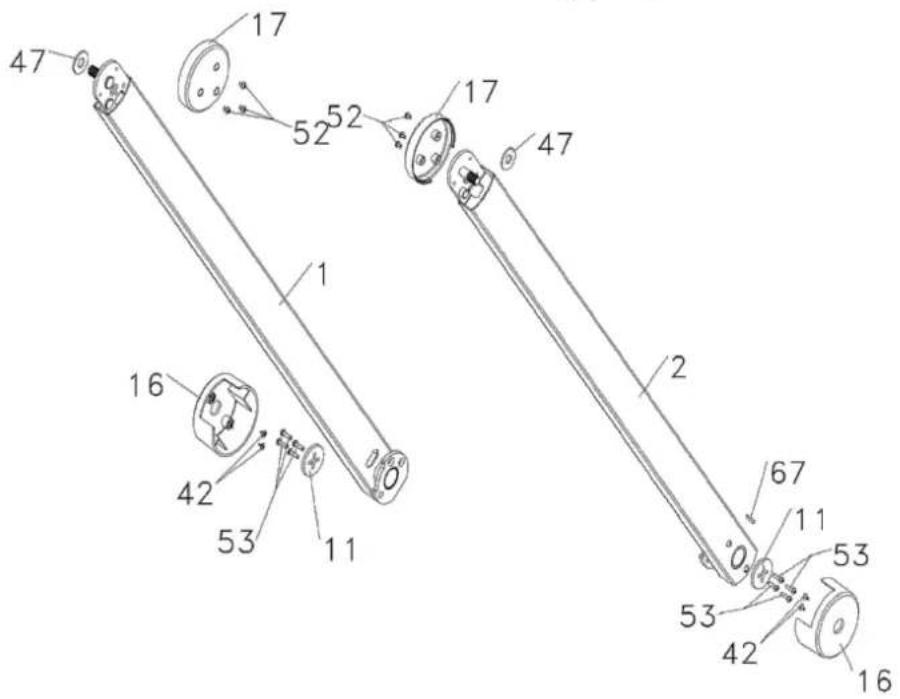
25 Safety precautions
26 Set-up instructions
31 Folding and transportation
33 Walking and running operating modes
34 Control elements
36 Computer functions
37 Troubleshooting
38 Maintenance and care
40 Connecting to KINOMAP app
41 Warm-up and cool-down
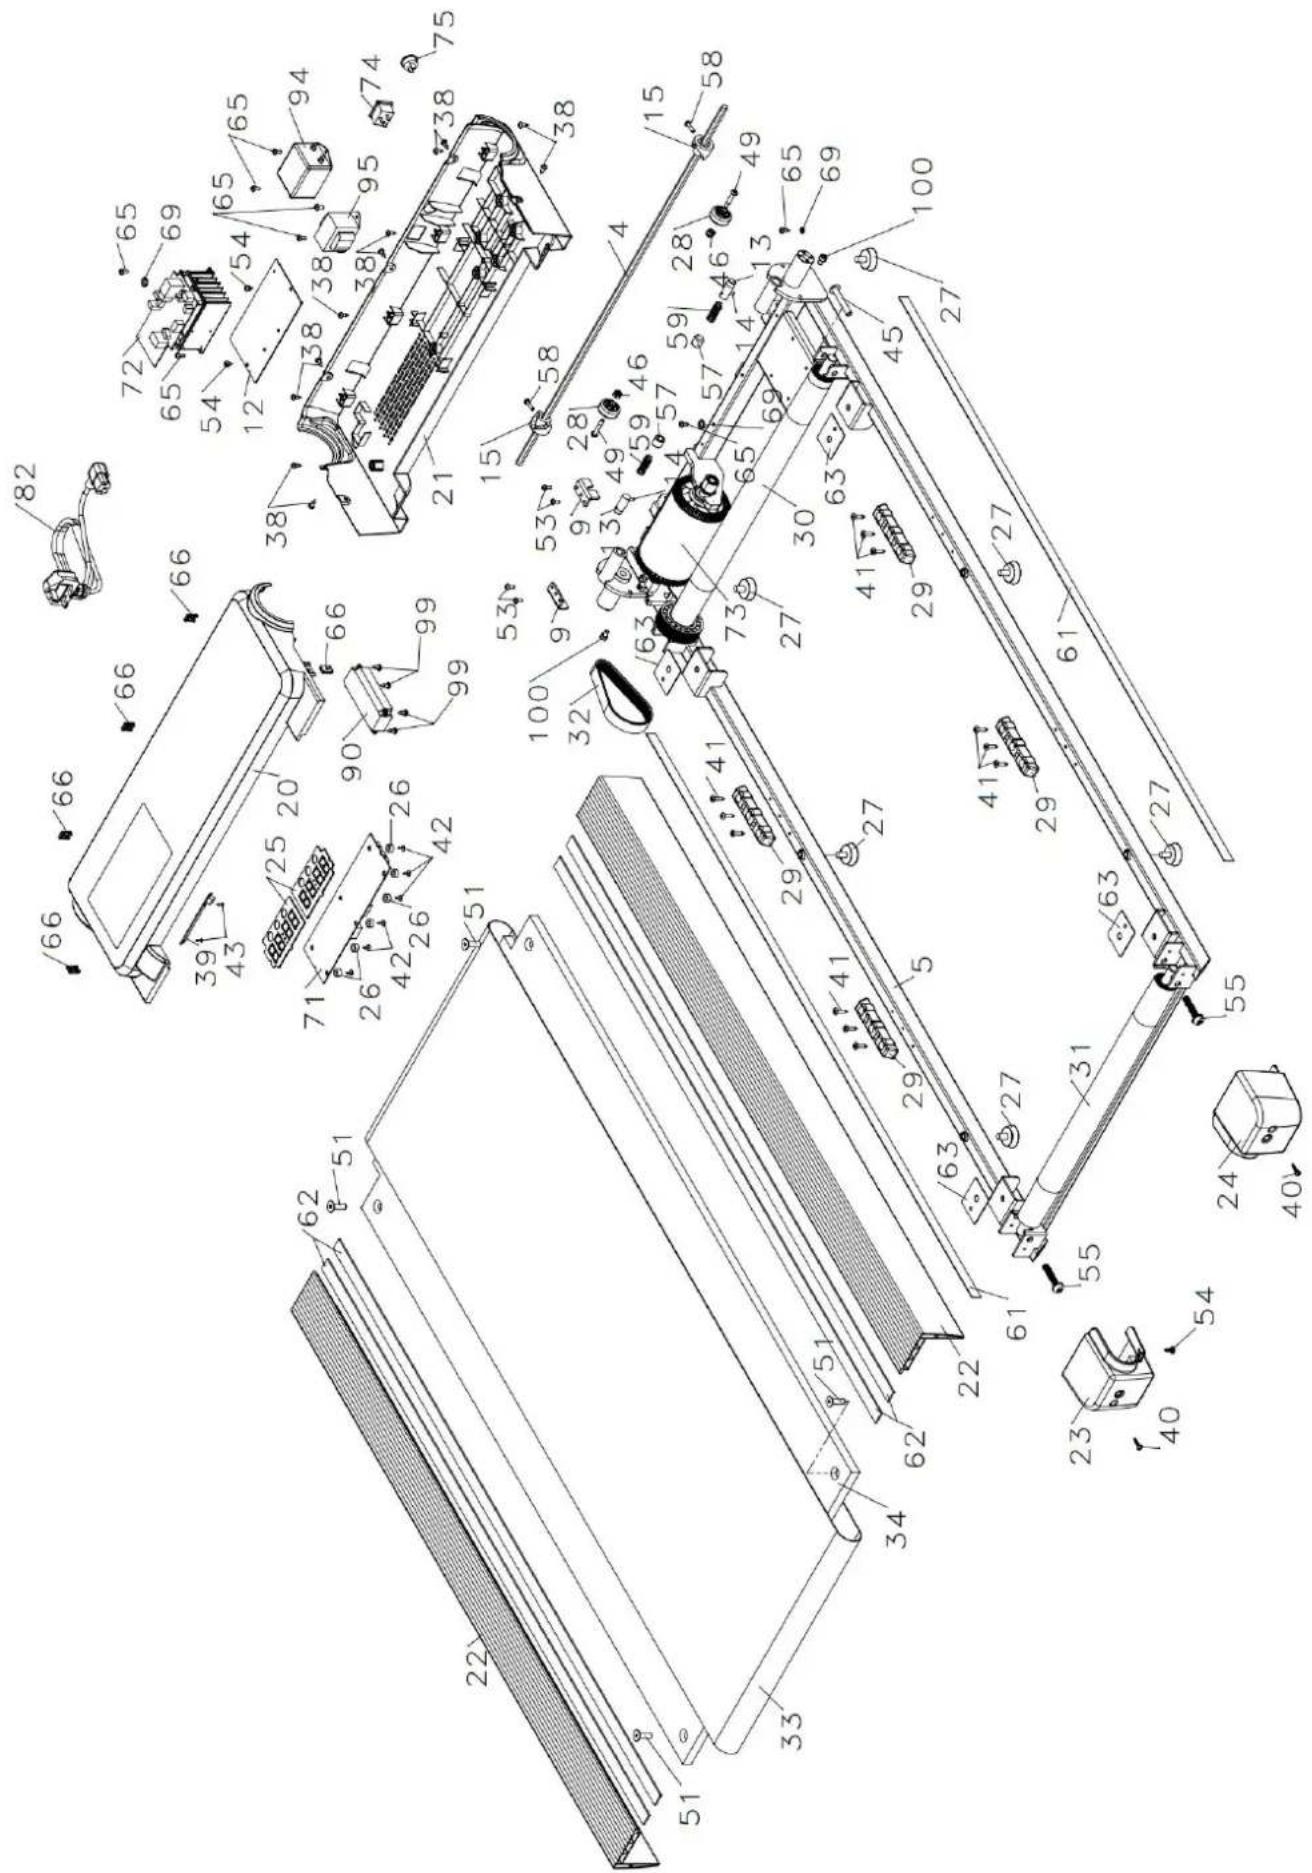
42 Explosion drawing
44 Parts list
45 Guarantee conditions

skandika.com/service
Please visit the Skandika Service portal on our website for setup & help videos, FAQs and downloadable instructions.
For more information about Skandika, simply visit our main page www.skandika.com

WARNING
To reduce risk of injury, read and understand this instruction manual before using the device! This machine is intended for home use only in accordance with the instructions provided in this manual. Read the instruction manual carefully before using this device and keep the instruction manual for future use.
SAFETY PRECAUTIONS
- DANGER! To reduce the risk of electrical shock, always unplug this appliance from the electrical outlet immediately after using and before cleaning.
-
WARNING! To reduce the risk of burns, fire, electric shock, or injury to persons:
-
The treadmill should never be left unattended when plugged in. Unplug from the outlet when not in use and before putting on or removing parts.
- Use this treadmill only for its intended use as described in this manual. Do not use attachments not recommended by the manufacturer.
- Never operate this treadmill if it has a damaged cord or plug, if it is not working properly, if it has been dropped or damaged, or dropped into water. Return this treadmill to a service center for examination or repair.
- Keep the cord away from heated surfaces.
- Never operate the treadmill with the air openings blocked. Keep the air openings free of lint, hair, and alike items.
- Never drop or insert any object into any opening.
- Do not use outdoors or for commercial reasons.
- Do not operate where aerosol (spray) products are being used or where oxygen is being administered.
-
To disconnect, turn the treadmill off, then remove plug from outlet.
-
Connect this treadmill to a properly grounded outlet only. See "important notes on grounding".
CAUTION! To avoid injury, use extreme caution when stepping onto or off of a moving belt.
- It is important to read this entire manual before assembling and using the equipment. Safe and effective use can only be achieved if the equipment is assembled, maintained, and used properly. It is your responsibility to ensure that all users of the equipment are informed of all warnings and precautions.
- Before starting any exercise program, you should consult your physician to determine if you have any medical or physical conditions that could put your health and safety at risk or prevent you from using the equipment properly. Your physician's advice is essential if you are taking medication that affects your heart rate, blood pressure or cholesterol level.
- Be aware of your body's signals. Incorrect or excessive exercise can damage your health. Stop exercising if you experience any of the following symptoms: pain, tightness in your chest, irregular heartbeat, shortness of breath, dizziness, or feelings of nausea. If you do experience any of these conditions, you should consult your physician before continuing with your exercise program.
-
Only one person should use the device at a time. The maximum load of this device is 125 kg. Class: HB - not suitable for therapeutically use!
-
Keep children and pets away from the equipment. This equipment is designed for adult use only! Children should not be allowed to use or play near this equipment. When present, children should always be supervised by an adult.
- Cleaning and user maintenance shall not be made by children without supervision.
- Use the equipment on a solid, flat level surface with a protective cover for your floor or carpet. Do not place the treadmill on any surface that blocks air openings.
- Ensure that all nuts and bolts are securely tightened before using the equipment. The safety of the equipment can only be maintained if it is regularly examined for damage and/or wear and tear.
- Always use the equipment as indicated. If you find any defective components while assembling or checking the equipment, or if you hear any unusual noises coming from the equipment during exercise, discontinue use of the equipment immediately and do not use until the problem has been rectified.
- Wear suitable clothing while using the equipment. Avoid wearing loose clothing that may become entangled in the equipment.
- Do not place fingers or objects into the moving parts of the equipment.
- To avoid bodily injury and/or damage to the product or property, proper lifting and moving is required.
- Your product is intended for use in cool, dry conditions. You should avoid storage in extreme cold, hot or damp areas as this may lead to corrosion and other related problems.
- While on the treadmill, move with caution as distractions may cause you to lose balance and stray from walking in the center of the belt. This may result in serious injury.
- This unit starts at a low speed. To begin use, stand on the side rails while it starts up, then step onto the belt once it's in motion.
- A safety key is provided for emergency use. The treadmill will function only if the safety key is inserted into the computer console. In case of emergency, remove the safety key to immediately stop the belt and shut off the treadmill. The display screen will reset once the safety key is reinserted.
- Women who are pregnant or nursing should consult a
physician before beginning any exercise program.
- The belt must be lubricated before the first use.
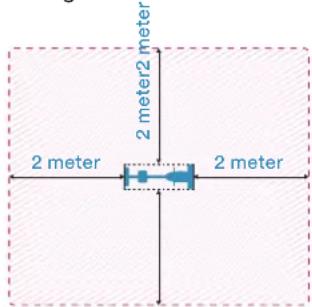
- Please only exercise with a minimum clearance area of 2 meters around the device.
IMPORTANT NOTES ON GROUNDING
WARNING! This treadmill requires a right power source in order to properly operate. For your safety, as well as the safety of others, please verify that the power source is correct before plugging the equipment. Any incorrect power source could cause significant damage to the equipment and or user. GROUNDING METHODS: This product must be grounded. Grounding provides the least resistance for electrical current and will reduce the risk of electric shock. The plug must be plugged into an appropriate outlet that is properly installed and grounded in accordance with all local codes and ordinances. Ensure that the product is connected to an outlet which contains the same configuration as the plug. Do not use an adaptor for this product. This product is for use on a nominal circuit and has a grounding plug that looks like the plug illustrated in the sketch below. Make sure that the product is connected to an outlet having the same configuration as the plug. No adapter should be used with this product.
GROUNDING METHODS
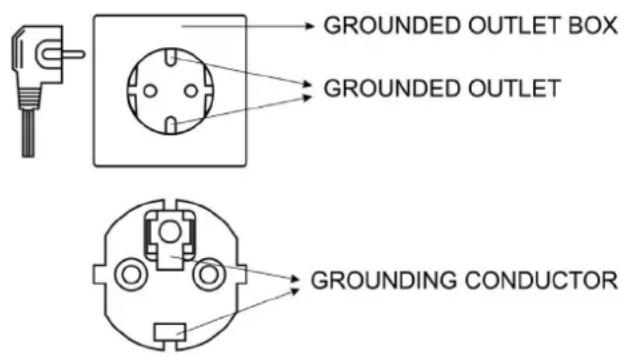
DANGER! Improper connection of the equipment-grounding conductor can result in risk of electric shock. Check with a certified electrician if you are in doubt as to whether the product is properly grounded. Do not modify the plug provided with the product. If it will not fit the outlet, have a proper outlet installed by an electrician.
WARNING!
- NEVER use a ground fault circuit interrupt (GFCI) wall outlet with this treadmill. Route the power cord away from any moving part of the treadmill including the elevation mechanism and transport wheels.
- NEVER operate the treadmill using a generator or UPS power supply.
- NEVER remove any cover without first disconnecting power.
- NEVER expose the treadmill to rain or moisture. This treadmill is not designed for use outdoors, near pools or in any other high humidity environment.
SET-UP INSTRUCTIONS
Before you start assembling, we recommend that you find a place with sufficient free space and a flat surface for assembly.
Please check with the checklist whether all the necessary parts for assembly are present. Some parts may already be pre-assembled to make assembly easier.
We recommend using the enclosed tools to assemble the unit.
CHECKLIST
| Part No. | Description Quantity | ||
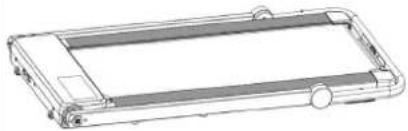 | Treadmill frame 1 | ||
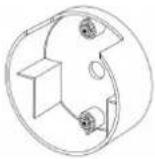 | 16 Upright side cover 2 | ||
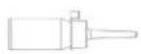
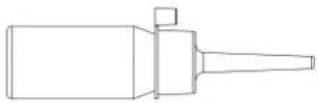 | 87 Lubrication oil 1 | ||
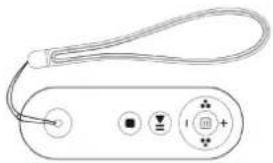 | 70+78 Remote control with rope | 1 | |
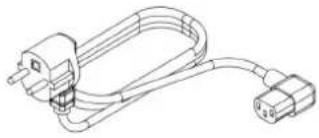 | 82 | Power wire | 1 |
 | 67 | Magnet | 1 |
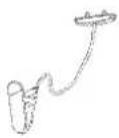 | 81 | Safety key | 1 |
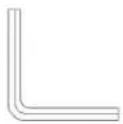 | 86 | Allen wrench | 1 |
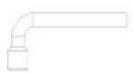
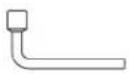 | 85 | L-shaped wrench | 1 |
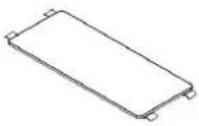 | 64 | Optional storage table, available as Art. No. SF-3160 | 1 |
STEP 1
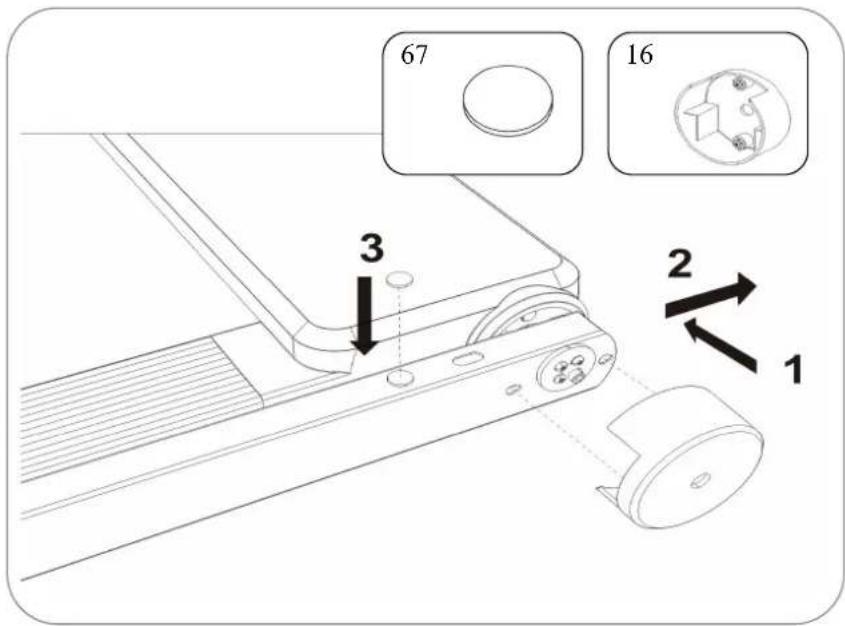
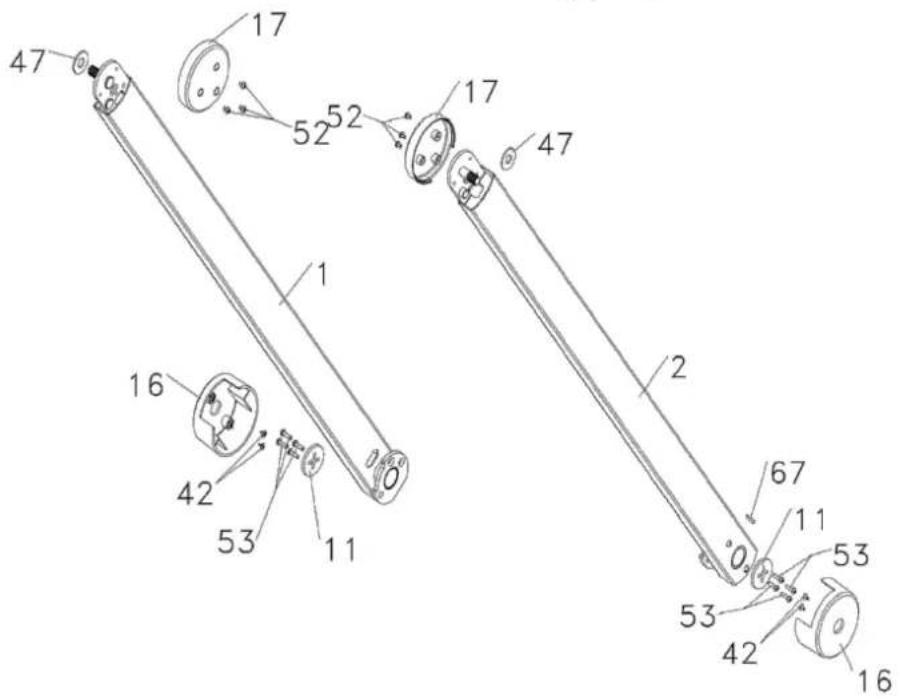
Attach the round magnet (67) to the support strut as shown and press the two side covers (16) onto the support struts on the left and right.
STEP 2
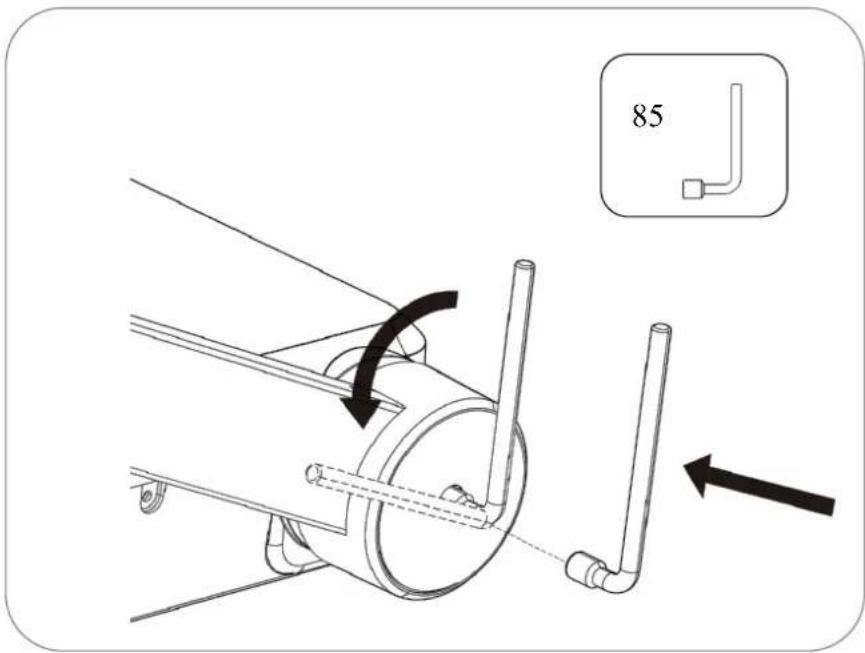
Use the L-shaped wrench (85) to turn the screw on the right-hand support strut anti-clockwise in order to be able to move the struts.
natural_image
Technical line drawing of a mechanical device with two labeled parts (1 and 2), showing no text or symbols beyond labels.STEP 3
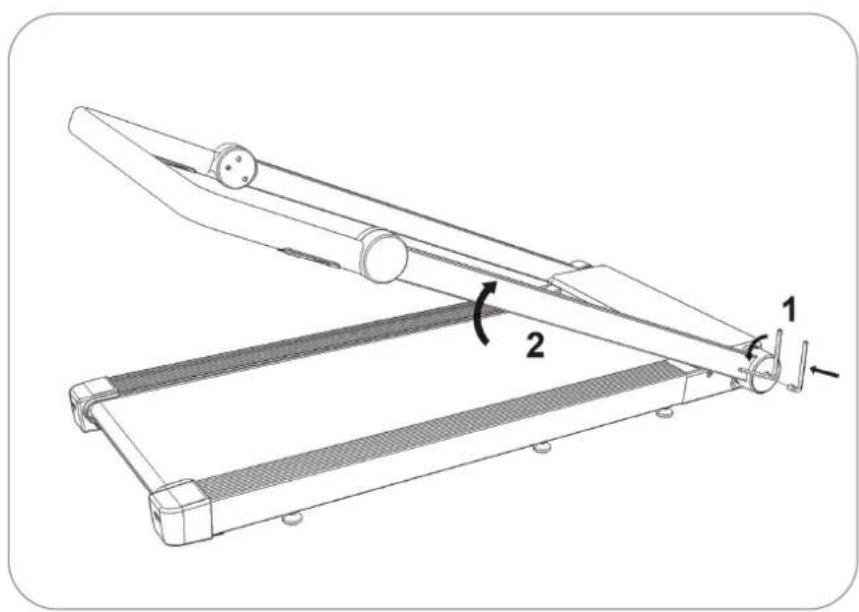
Lift up the upright tubes.
STEP 4
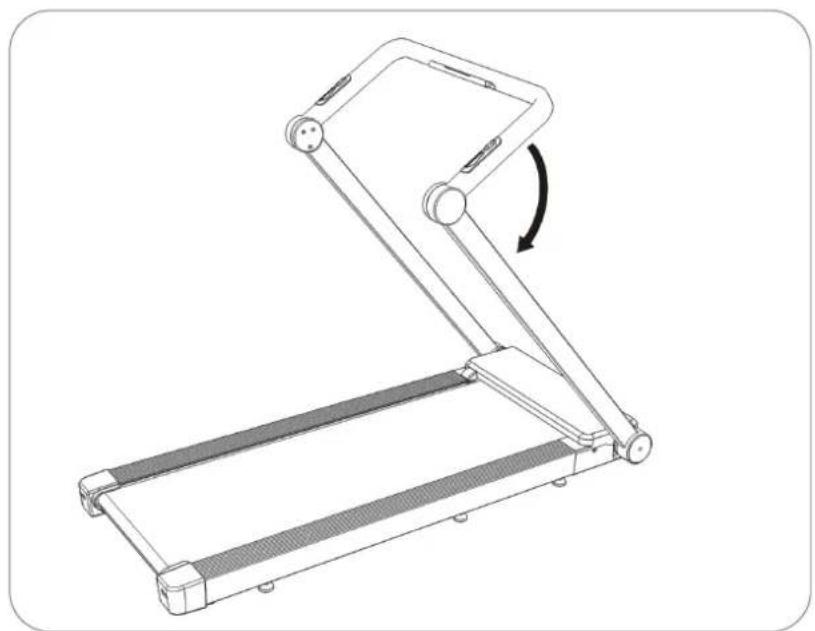
Press down the handle bars.
natural_image
Line drawing of a treadmill with an arrow indicating rotational motion (no text or symbols)STEP 5
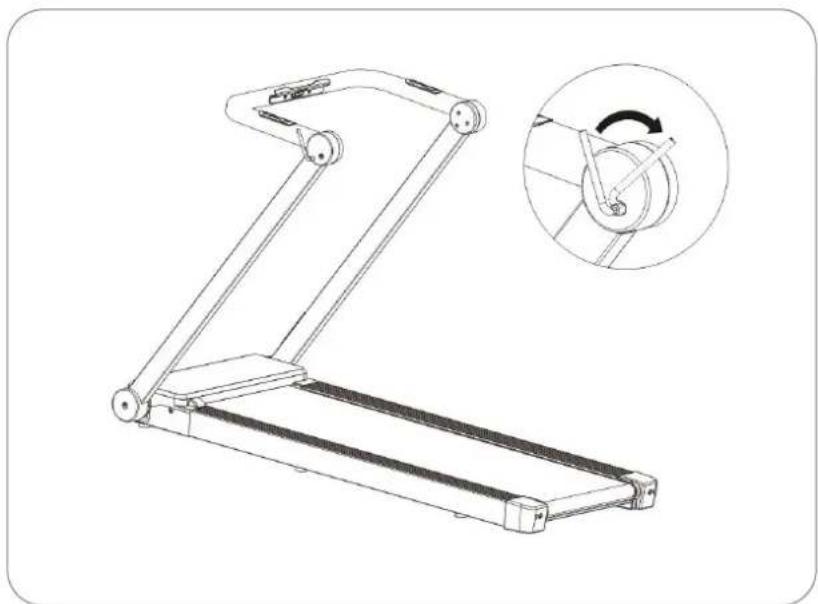
Lock the console. Using L-shaped wrench (85), turn the bolt on the left handle bar cover in clockwise direction to lock the console.
natural_image
Technical line drawing of a treadmill with an inset showing the wheel and arm mechanism (no text or symbols)STEP 6
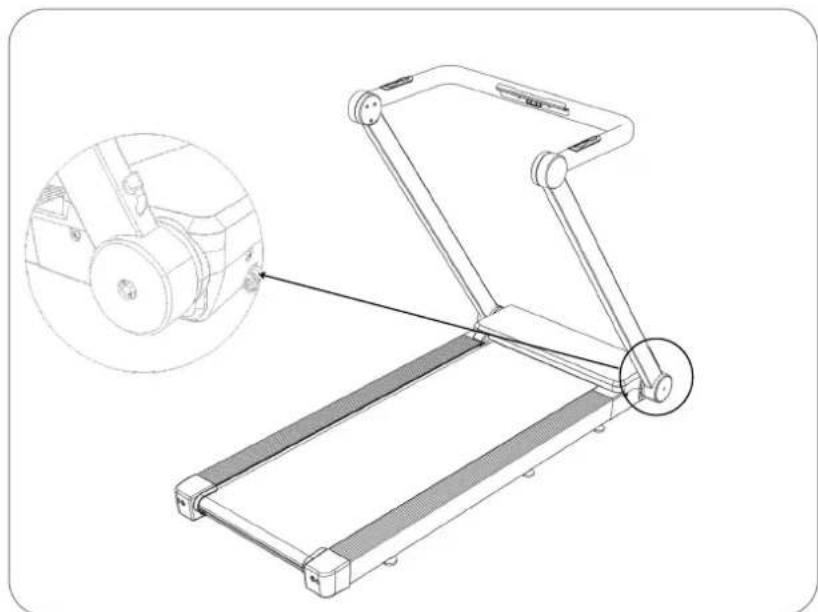
Attach the L-shaped wrench (85) to the round magnet (67) as shown.
natural_image
Technical line drawing of a treadmill with an inset showing the engine component (no text or symbols present)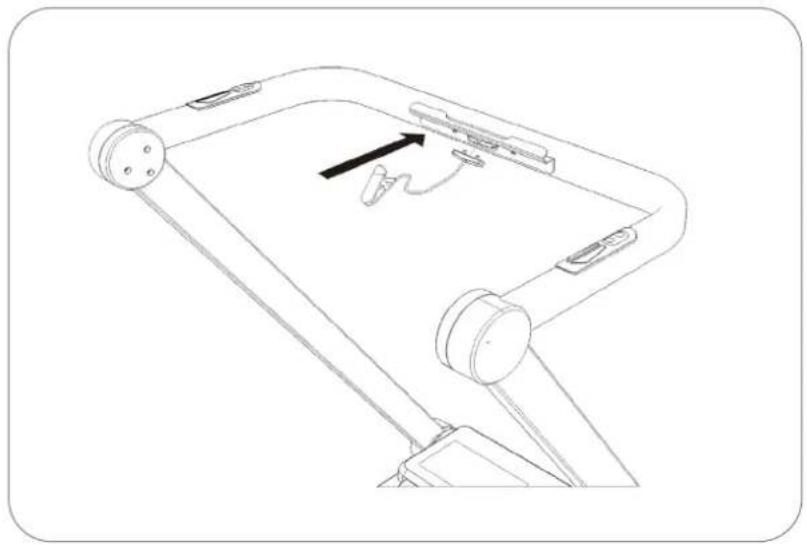
natural_image
Line drawing of a mechanical device with a handle and lever mechanism (no text or symbols)STEP 7
Insert the safety key.

natural_image
Technical line drawing of a mechanical device with articulated joints and a flat plate (no text or symbols)STEP 8 (OPTIONAL)
If you have purchased the optional storage table (SF-3160), place it on the handrail as shown.
FOLDING: STEP 1
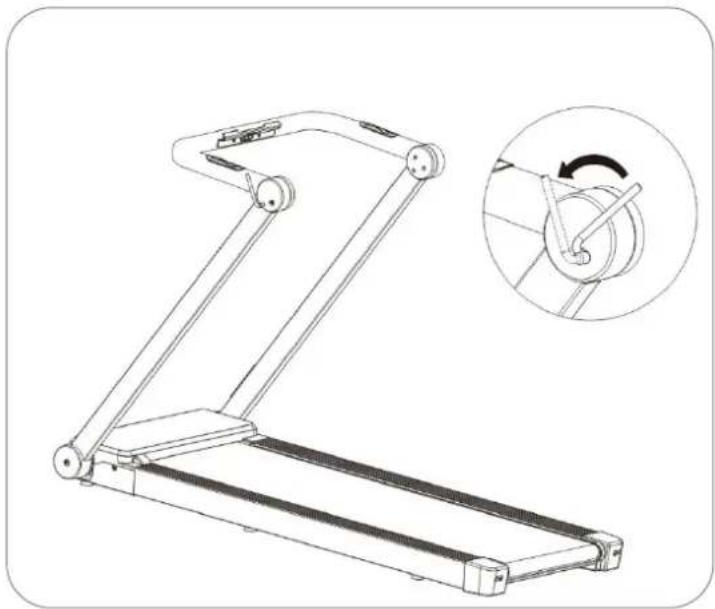
Unlock the console. Using L-shaped wrench (No.85), turn the bolt on the left handle bar cover in an anti-clockwise direction to unlock the console.
natural_image
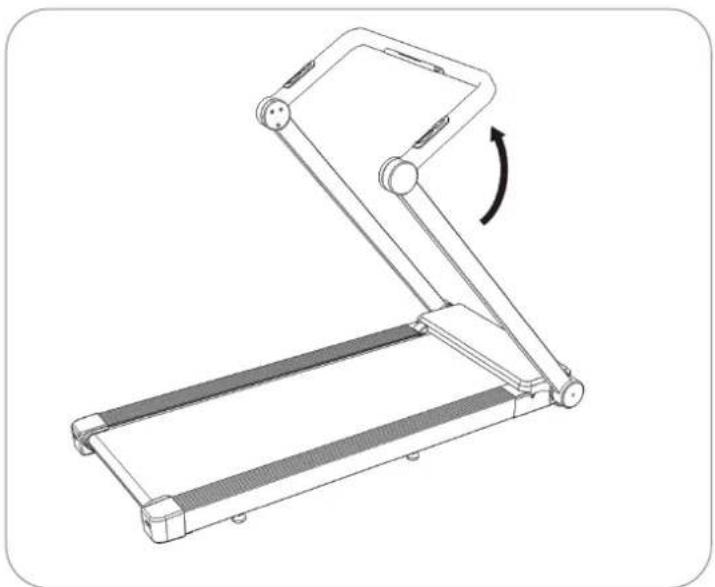
Technical line drawing of a treadmill with an inset showing the wheel mechanism (no text or symbols)FOLDING: STEP 2
Lift up the handle bars.
natural_image
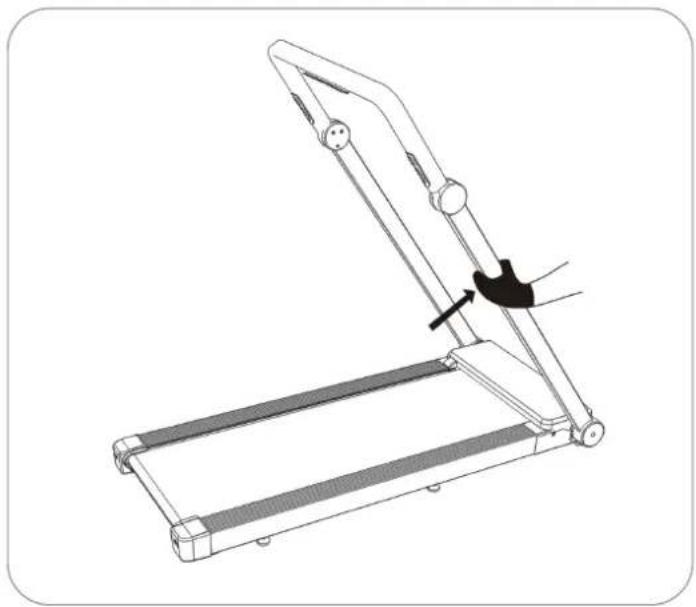
Line drawing of a treadmill device with an arrow indicating rotational motion (no text or symbols)FOLDING: STEP 3
Hold the right upright tube.
natural_image
Line drawing of a treadmill with an arrow indicating motion or force, no text or symbols present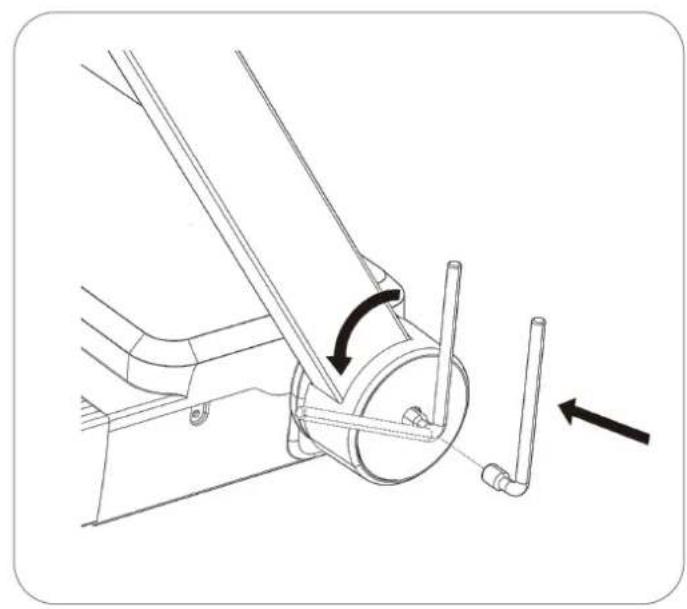
natural_image
Technical line drawing of a mechanical assembly with two arrows indicating motion direction (no text or symbols)
natural_image
Technical line drawing of a treadmill device with two views: top shows open lid, bottom shows side view with flat base (no text or symbols)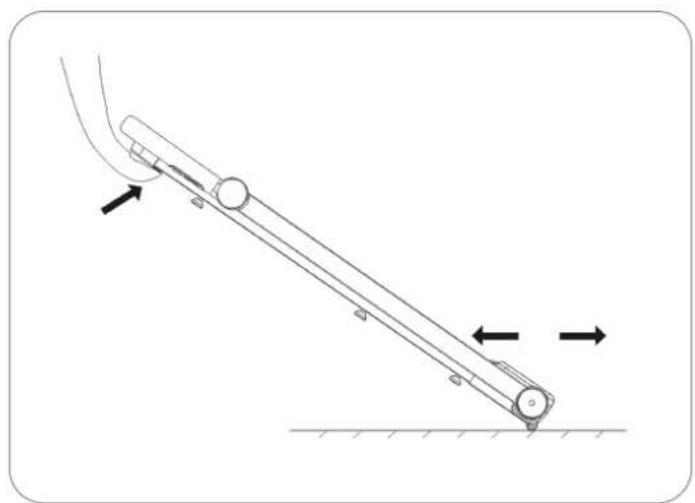
natural_image
Mechanical diagram showing a lever system with two opposing arrows indicating motion direction (no text or symbols present)FOLDING: STEP 4
Using L-shaped wrench (85), turn the bolt on the right upright tube in an anti-clock-wise direction to unlock.
FOLDING: STEP 5
Fold the upright tubes down with hand to avoid sudden falling.
TRANSPORTATION: STEP 6
Lift the appliance from the rear to be able to move it easily using the transport rollers at the front.
Operating modes: walking and running
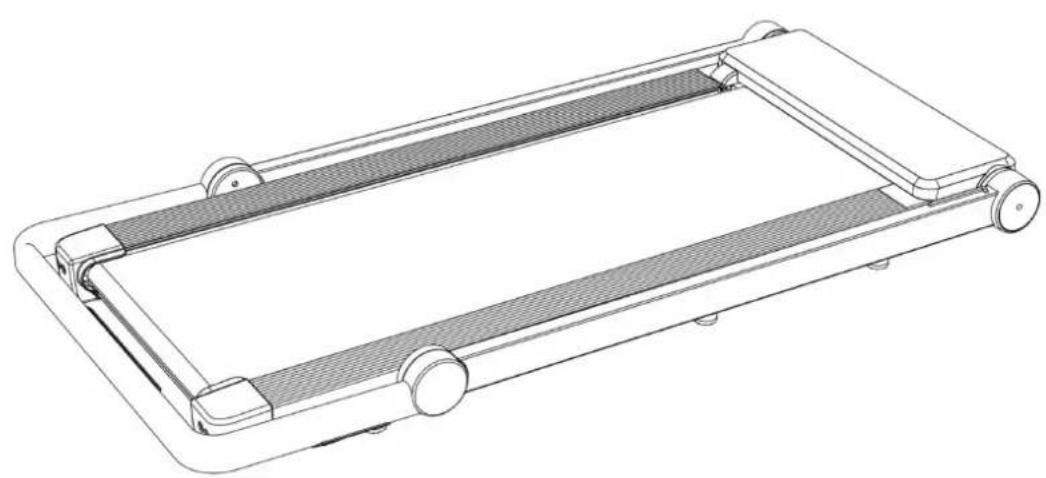
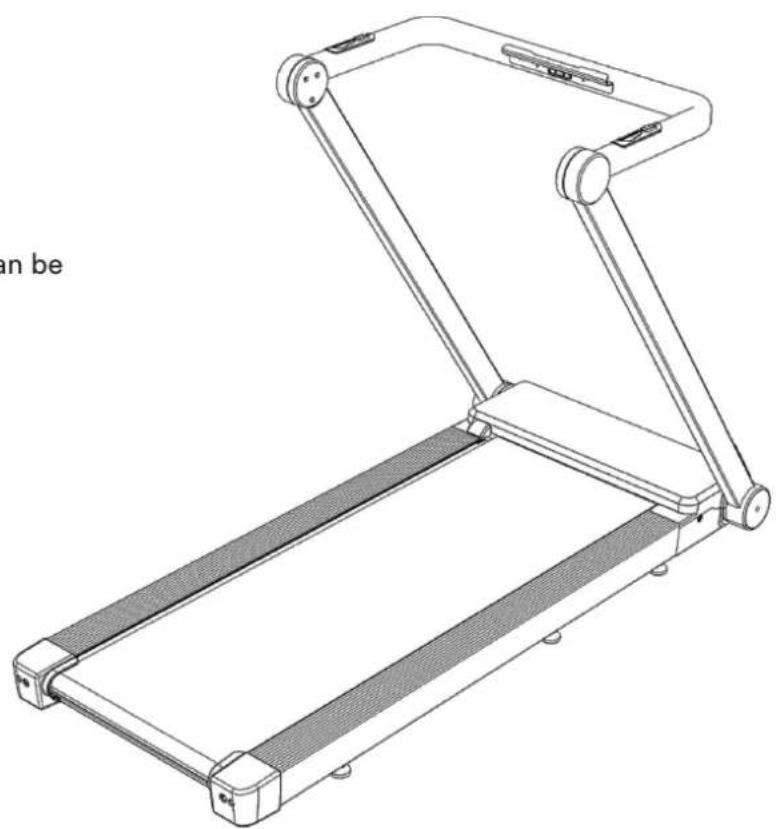
This treadmill can be used as a walking training device when folded and as a running trainer when set up.
Walking
When flat, the device can be used as a walking training device - the speed can be set from 1 to 6 km/h.
natural_image
Line drawing of a portable treadmill with mesh insulation and wheels (no text or symbols)Running
When fully set up, the running speed can be adjusted from 1 to 12 km/h.
natural_image
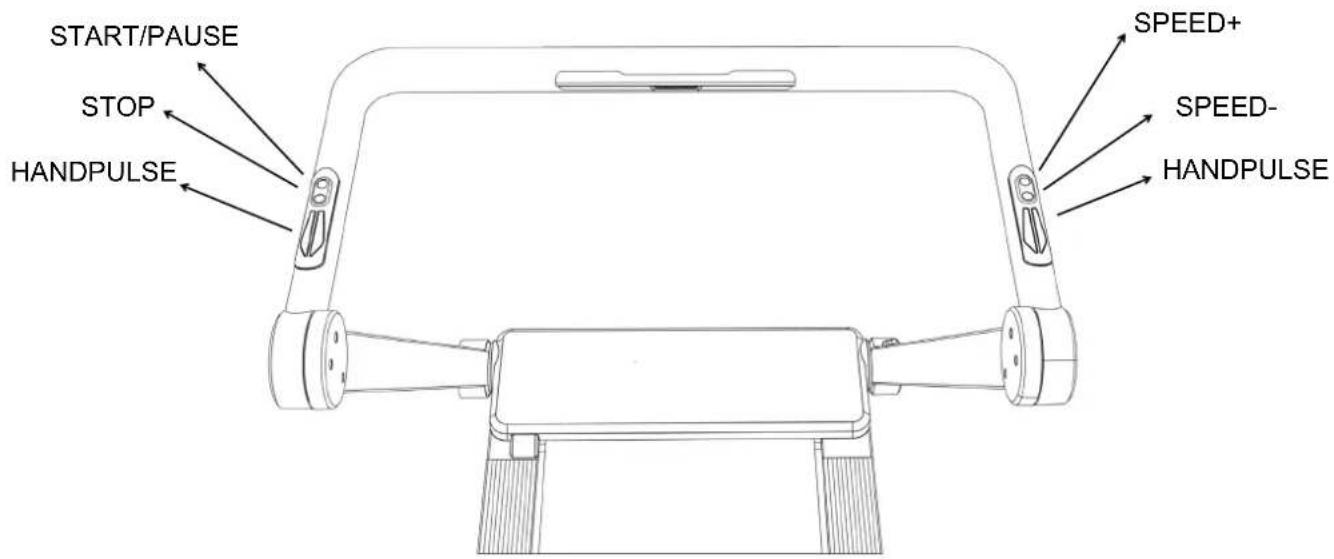
Line drawing of a treadmill with adjustable arms and seat (no text or symbols)CONTROL ELEMENTS ON THE HANDLEBARS
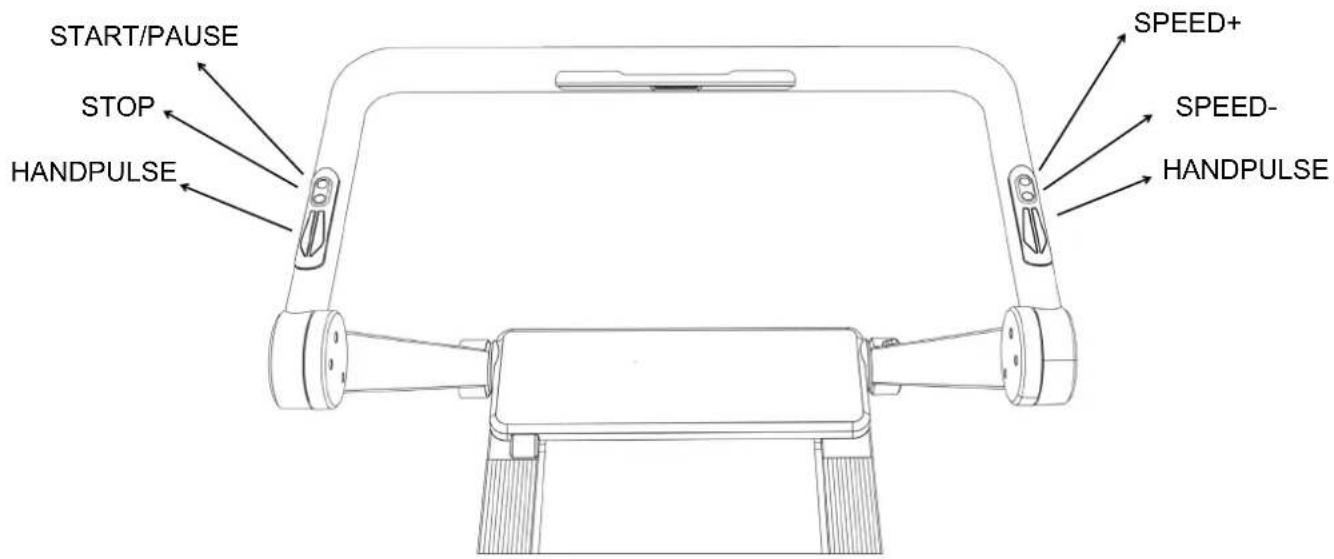
- START/PAUSE: Press this button to start or pause a training session.
- STOP: End a workout.
- SPEED+: Increase running speed.
- SPEED-: Decrease running speed.
- HANDPULSE: The hand pulse sensors enable pulse measurement. Grasp them as completely as possible on both sides. Your pulse rate will be displayed after a few seconds.
CONTROL ELEMENTS ON THE REMOTE CONTROL
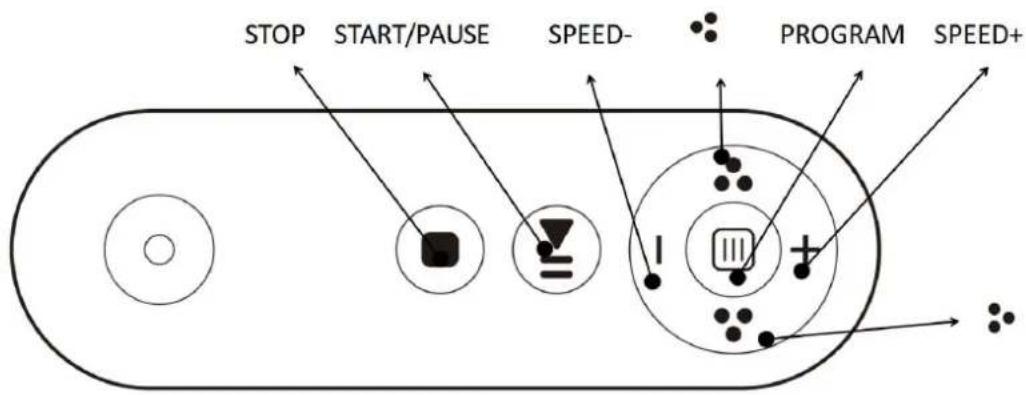
STOP: End a workout. All values will be set to 0.
START/PAUSE: Press this button to start or pause a training session.
SPEED-: Decrease the running speed or (in standby mode) to enter the target time (decrease).
SPEED+: Increase the running speed or (in standby mode) to enter the target time (increase).
Speed quick button&Time count down :
a) In „Walking“ operating mode, the speed is set to 3 km/h
b) In „Running“ operating mode, the speed is set to 5 km/h
c) In standby mode (programme selection); to select P1 to P9
d) In standby mode (pressed directly) to set a target time. Then press +/- or Start.
Speed quick button&Distance count down :
a) In „Walking“ operating mode, the speed is set to 6 km/h
b) In „Running“ operating mode, the speed is set to 8 km/h
c) In standby mode (programme selection); to select P1 to P9
d) In standby mode to set a target distance. Then press +/- or Start.
PROGRAM: Press this button in standby mode to call up the programmes. You can press the quick selection buttons to select a programme and the „+“ and „-“ buttons to set the time for each programme. Then press the START/PAUSE button to start the programme. Taste zum Starten.
The interval programme is divided into 10 sections. When the next interval starts, the treadmill beeps and the speed is changed according to the system setting. During each section, you can change the speed using the SPEED +/- buttons, but the system will return to the default speed when you start the next section. At the end of a programme, the tape will gradually come to a standstill.
Interval programme speeds (km/h) during the „Walk“ operating mode:
Time = Preset time divided by 10.
| Interval / Program | 123 | 4567 | 8910 | |||||||
| P1 | 3.0 | 3.0 | 3.0 | 3.0 | 3.0 | 3.0 | 2.0 | 3.0 | 3.0 | 3.0 |
| P2 | 3.0 | 4.0 | 4.0 | 4.0 | 4.0 | 4.0 | 3.0 | 4.0 | 4.0 | 4.0 |
| P3 | 4.0 | 5.0 | 5.0 | 5.0 | 5.0 | 5.0 | 4.0 | 5.0 | 5.0 | 5.0 |
| P4 | 3.0 | 6.0 | 6.0 | 6.0 | 6.0 | 6.0 | 3.0 | 6.0 | 6.0 | 3.0 |
| P5 | 3.0 | 5.0 | 3.0 | 5.0 | 3.0 | 5.0 | 3.0 | 5.0 | 3.0 | 5.0 |
| P6 | 3.5 | 5.5 | 3.5 | 5.5 | 3.5 | 5.5 | 3.5 | 5.5 | 3.5 | 5.5 |
| P7 | 3.0 | 5.0 | 5.0 | 3.0 | 5.0 | 5.0 | 3.0 | 5.0 | 5.0 | 3.0 |
| P8 | 3.5 | 5.5 | 5.5 | 3.5 | 5.5 | 5.5 | 3.5 | 5.5 | 5.5 | 3.5 |
| P9 | 4.0 | 6.0 | 6.0 | 4.0 | 6.0 | 6.0 | 4.0 | 6.0 | 6.0 | 4.0 |
Interval programme speeds (km/h) during the „Running“ operating mode:
| Interval / Program | 123 | 4567 | 8910 | |||||||
| P1 | 3.0 | 4.0 | 5.0 | 6.0 | 6.0 | 4.0 | 5.0 | 6.0 | 6.0 | 4.0 |
| P2 | 4.0 | 5.0 | 6.0 | 7.0 | 7.0 | 5.0 | 6.0 | 7.0 | 7.0 | 5.0 |
| P3 | 5.0 | 6.0 | 7.0 | 8.0 | 8.0 | 6.0 | 7.0 | 8.0 | 8.0 | 6.0 |
| P4 | 6.0 | 7.0 | 8.0 | 9.0 | 9.0 | 7.0 | 8.0 | 9.0 | 9.0 | 7.0 |
| P5 | 6.0 | 8.0 | 10.0 | 10.0 | 8.0 | 8.0 | 10.0 | 10.0 | 8.0 | 6.0 |
| P6 | 7.0 | 9.0 | 10.0 | 9.0 | 10.0 | 9.0 | 10.0 | 9.0 | 10.0 | 7.0 |
| P7 | 7.0 | 9.0 | 9.0 | 7.0 | 7.0 | 9.0 | 9.0 | 7.0 | 9.0 | 7.0 |
| P8 | 5.0 | 10.0 | 10.0 | 5.0 | 5.0 | 10.0 | 10.0 | 5.0 | 10.0 | 5.0 |
| P9 | 6.0 | 10.0 | 10.0 | 6.0 | 6.0 | 10.0 | 10.0 | 6.0 | 10.0 | 6.0 |
COMPUTER FUNCTIONS
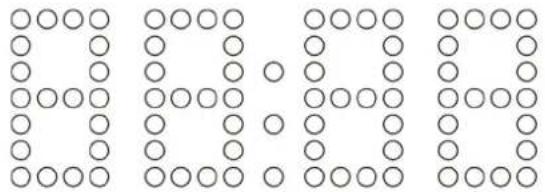
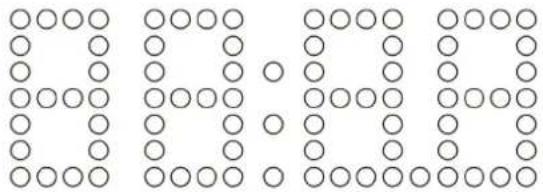
The display on the motor cover:
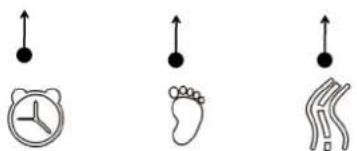
SPEED CALORIES PULSE TIME STEPS DISTANCE

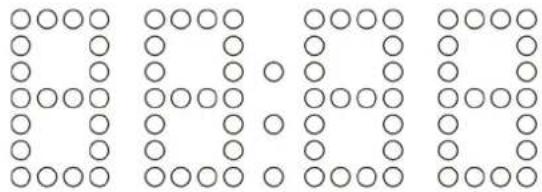
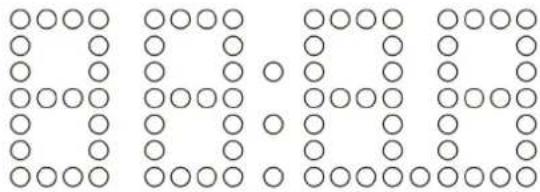
- SPEED: Speed display. Maximum speed in „Walking“ mode = 6 km/h and in „Running“ mode = 12 km/h.
• CALORIES: Display of the calorie consumption (kcal). - PULSE: Display of the heart rate. You must include the pulse sensors for this. This value is not suitable for medical assessment of the heart rate.
• TIME: Display of the training time.
• STEPS: Displays steps that the user has walked.
• DISTANCE: Display of the current distance.
Remark: The functions TIME/STEPS/DISTANCE share the same window. The display changes automatically (every approx. 3 seconds).
Bluetooth connection: The device can be connected via Bluetooth to the „Kinomap“ app (see corresponding chapter) or to a Bluetooth-enabled music source (e.g. smartphone). Bluetooth name: „Nordik K12“.
LUBRICATION REMINDER FUNCTION:
This device has a lubrication reminder function. Your treadmill must be serviced with lubricant after every 300 kilometres of running. The system emits a sound reminder every 10 seconds and „OIL“ is displayed in the window. This means that your treadmill needs to be lubricated. Please read the operating instructions first and add the lubricant to the centre part of the running board. After you have finished the lubrication, please press and hold the „STOP“ button for 3 seconds and the warning sound of the system will disappear.
Changing the unit of measure (km / miles):
If you press and hold the „STOP“ button for 5 seconds in standby mode, you can switch between „mile“ and „kilometre“. The display shows „n“ or „k“, „n“ means „mile“, „k“ means „kilometre“.
SAFETY LOCK FUNCTION:
If you remove the safety clip in any mode, the device switches off. „---“ is displayed in the window and a warning tone sounds. The device cannot operate until the safety clip is reinserted.
POWER SAVING FUNCTION:
The device is equipped with an energy-saving function. If the device is not used for 10 minutes in standby mode, the system switches to energy-saving mode and the display goes out. You can press any button to switch the display back on.
AUTO STOP FUNCTION:
If the appliance is not in operation for 2 minutes, it automatically switches to the PAUSE function. If the appliance is not in operation for 10 minutes, it switches to energy-saving mode and the display goes out. You can press any button to switch the display back on.
ATTENTION!
1 We recommend that you set a slow speed at the start of a training session and hold on to the handrails until you have familiarised yourself with the treadmill.
2. attach the magnetic end of the safety clip to the computer and attach the clip on the other side to your clothing.
3. to end your training safely, press the STOP button or pull out the safety clip and the treadmill will stop immediately.
TROUBLESHOOTING
Error: Treadmill will not start
Possible cause: Safety clip not plugged in or no power connection.
Error: Running belt not centered
Possible cause: Belt tension not set correctly. See chapter „Maintenance and care“.
Error: Display does not show any values
Possible cause: Cables are not correctly connected.
Error E01 / E02 / E03 / E05 / E10:
Overvoltage is present. Disconnect the power supply and restart the treadmill.
Error E04:
Too low voltage. Disconnect the power supply and restart the treadmill.
Error E06 to E09 or E11:
Motor fault. Ensure that the running surface is sufficiently lubricated. Check all cable connections for integrity and correct contact. Disconnect the power supply and restart the treadmill.
Error E12:
Communication error. Disconnect the power supply, check all cable connections and restart the treadmill.
If you are unable to rectify the fault using the suggestions given here, please contact customer service.
MAINTENANCE AND CARE
General cleaning helps to extend the service life and performance of your treadmill. Keep the device clean and maintain it by regularly dusting the components. Clean both sides of the treadmill so that dust does not accumulate under the belt. Keep your running shoes clean so that dirt from your shoes does not wear down the running board and belt unnecessarily. Clean the surface of the treadmill with a clean, damp cloth.
To take better care of the treadmill and extend its service life, it is recommended that you switch off the device for 10 minutes every 2 hours and switch it off completely when not in use.
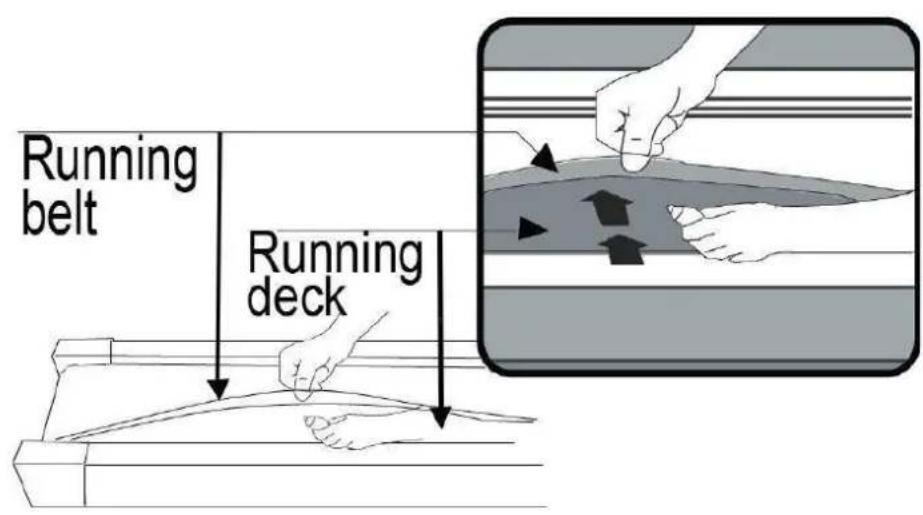
A treadmill that is too loose will cause the runner to slip while running, while a treadmill that is too tight will affect the performance of the motor and also create more friction between the roller and the running belts. The most suitable tension for the belts is 50-75 mm pulled out from the running board.
CENTRING OF THE RUNNING BELT:
Place the device on a level surface and let the belt run at 6-9 km/h to check whether the treadmill drifts to the right or left. If the belt moves to the right, turn the adjusting screw on the right-hand side 14 turn clockwise, then turn the left-hand adjusting screw 14 turn anti-clockwise. If the belt does not move, repeat this step until it is centred. See figure A.
If the belt moves to the left, turn the adjustment screws on the left side 14 turn clockwise, then turn the right adjustment screw 14 turn anti-clockwise. If the belt does not move, repeat this step until it is centred. See figure B.

natural_image
Technical line drawing of a mechanical component with a curved arrow indicating rotation (no text or symbols)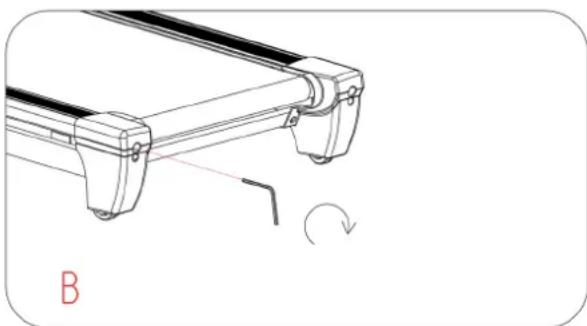
natural_image
Technical line drawing of a mechanical component with a rotation arrow and label B (no text or symbols on the diagram itself)ADJUSTING THE BELT TENSION:
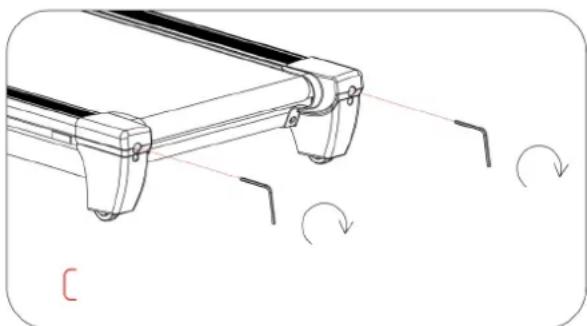
The running belt will become looser over time. To tighten the belt, turn the adjusting screws on the left and right-hand side a full turn clockwise and check the tension of the belt. Continue this process until the belt has the correct tension. Be sure to adjust both sides equally to ensure proper belt alignment. See figure C.
natural_image
Technical line drawing of a mechanical component with curved notches and motion arrows indicating rotation (no text or symbols)LUBRICATION OF THE RUNNING SURFACE:
ATTENTION! You must lubricate the running surface BEFORE FIRST USE and later depending on the frequency of use. Lubrication is recommended every 2 months if used for more than 5 hours a week, every 3 months if used for 3-5 hours a week and every 6 months if used for less than 3 hours a week.
TREADMILLS & TREADMILL LUBRICANTS:
Lubricating the running board and belt is essential, as the friction between the two affects the service life and function of the running belt. It is therefore recommended that the running board and belt are checked regularly.
WARNING: Always unplug the treadmill before cleaning, lubricating or repairing the appliance.
LUBRICATION:
- Lift the belt on one side and apply lubricant to the running deck. Use a cloth to spread the lubricant thoroughly over the running deck. Repeat this process on the other side.
2 The moving parts must rotate freely and quietly. Irregularities in moving parts affect the safety of the appliance. Check the screws regularly and tighten them.
- To take better care of the treadmill and extend its service life, it is recommended that it is serviced regularly.
KINOMAP
The device computer can be connected to the „KinoMap“ app via Bluetooth (frequency: 2.4 GHz). The free KinoMap app turns your device into a powerful and fun fitness product! Choose from the geotagged video on Kinomap and go! Your position is shown in the video and as icon on the map. Download the Kinomap Fitness app in the app or play store by searching for ‘Kinomap Fitness’ or follow one of the links below.
Install and open the app and register resp. log in. Activate Bluetooth. Now add the training device as follows:


-
- Tap „+“ 3. Treadmill →
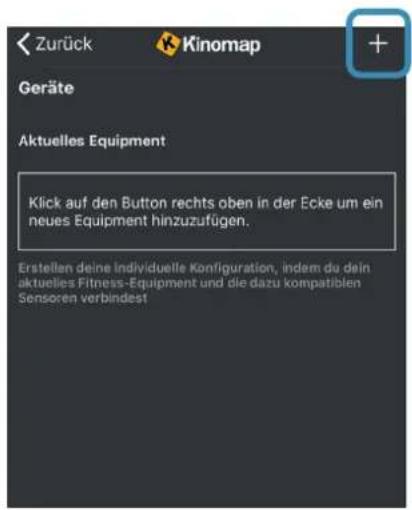
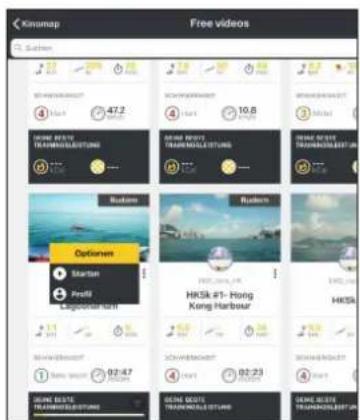
Now tap on OK and return to main menu. You can now choose a course for your exercise (depending on your type of KinoMap account maybe only some free courses). Press Start and begin to exercise!
WARM-UP and COOL-DOWN
A successful exercise program consists of a warm-up, aerobic exercise and a cool-down. Exercise for at least two or preferably three times a week, resting for a day between workouts. After several months, you may increase the frequency to four or five times per week.
Warm-Up
This stage helps to improve the blood circulation and prepares the muscles for your workout. It additionally helps to reduce the risk of injury or cramps. It is recommended to do some stretching exercises as shown here below. Hold each stretching position for approximately 30 seconds. Never force or jerk yourself into a stretching position – if you feel pain, STOP immediately. Warm-up exercises may also include brisk walking, jogging, jumping jacks, jump rope exercises or running in place.
Stretching
Muscles can be stretched more easily when these are warm. This reduces the risk of injury. DO NOT BOUNCE.
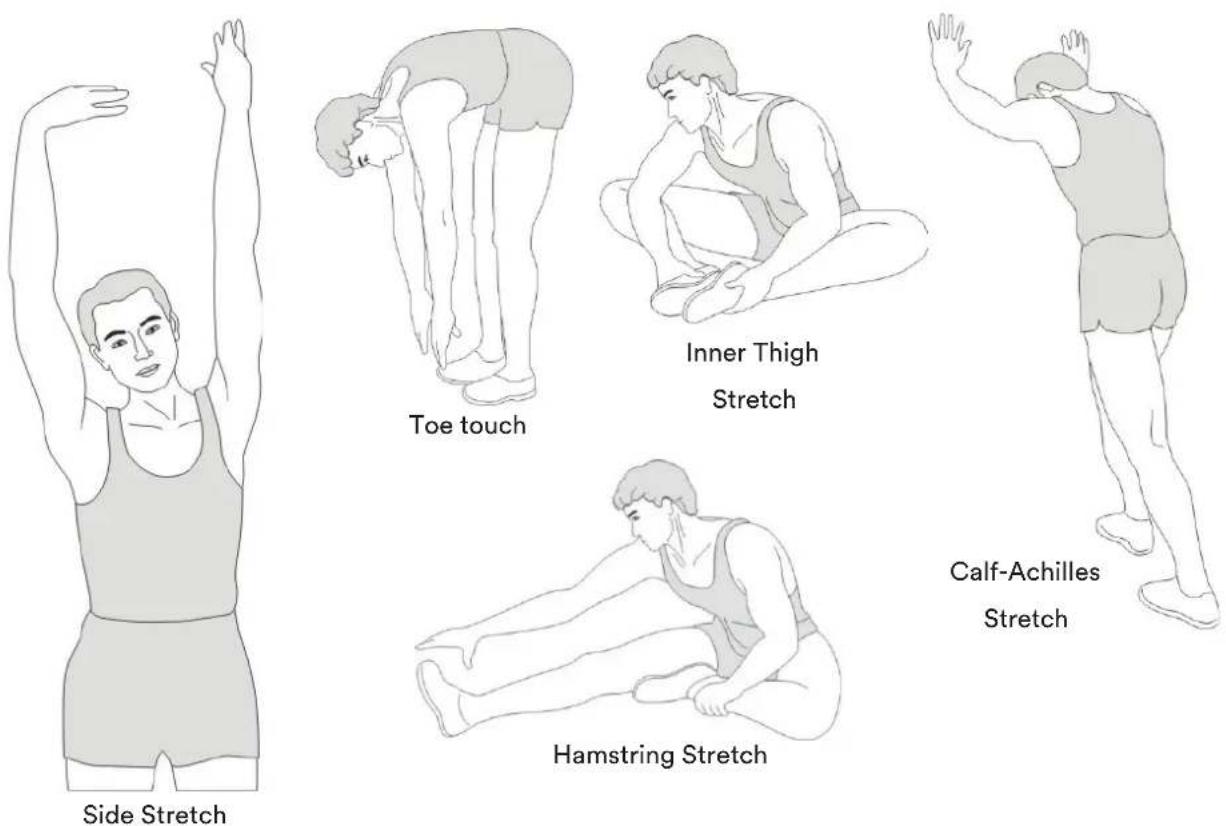
Remember always to check with your physician before starting any exercise program.
Cool-Down
This stage helps to soothe your muscles and your cardiovascular system after your workout.
At the end of your workout, reduce the speed and exercise for approximately 5 minutes at this lower speed level. Afterwards, repeat the warm-up exercises as described above.
 | 78 |
 | 85 |
 | 86 |
 | 87 |
 | 88 |
 | 89 |
 | 96 |
 | 91 |
 | 92 |
 | 93 |
 | 79 |
 | 70 |
 | 97 |
 | 98 |
 | 101 |
 | 102 |
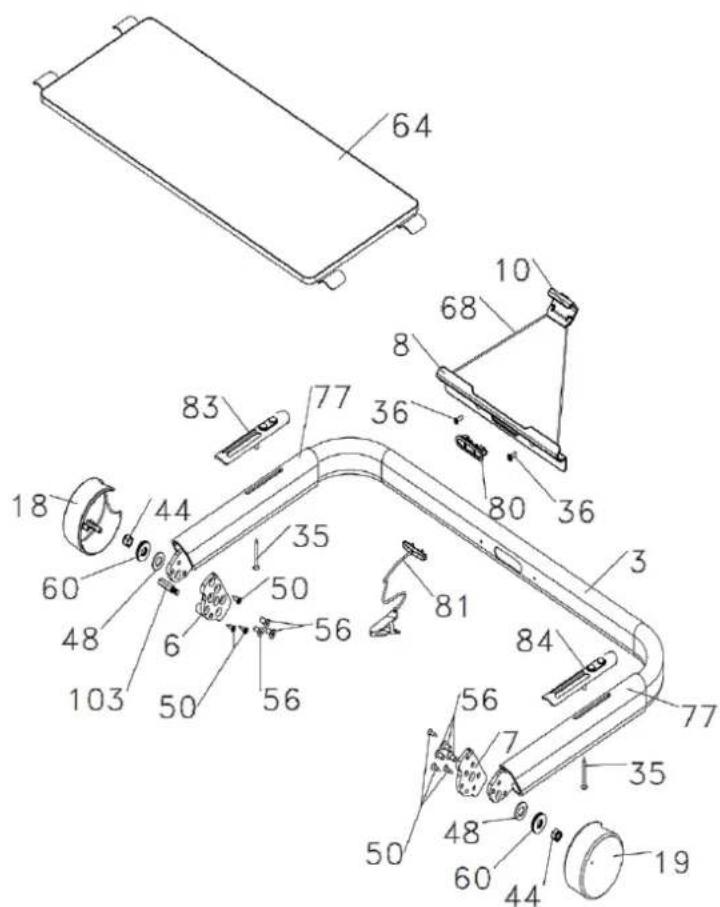
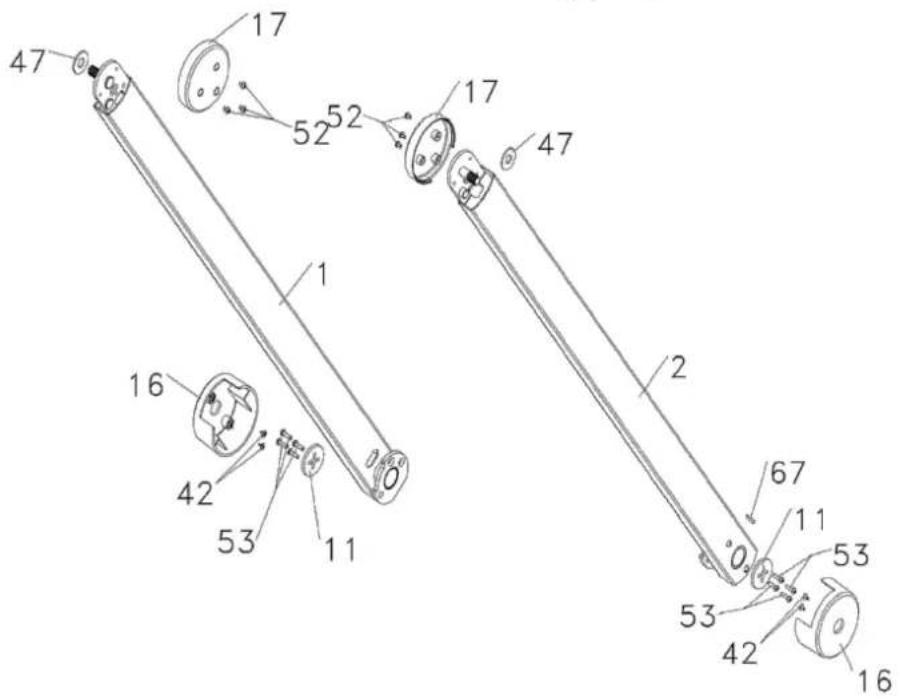
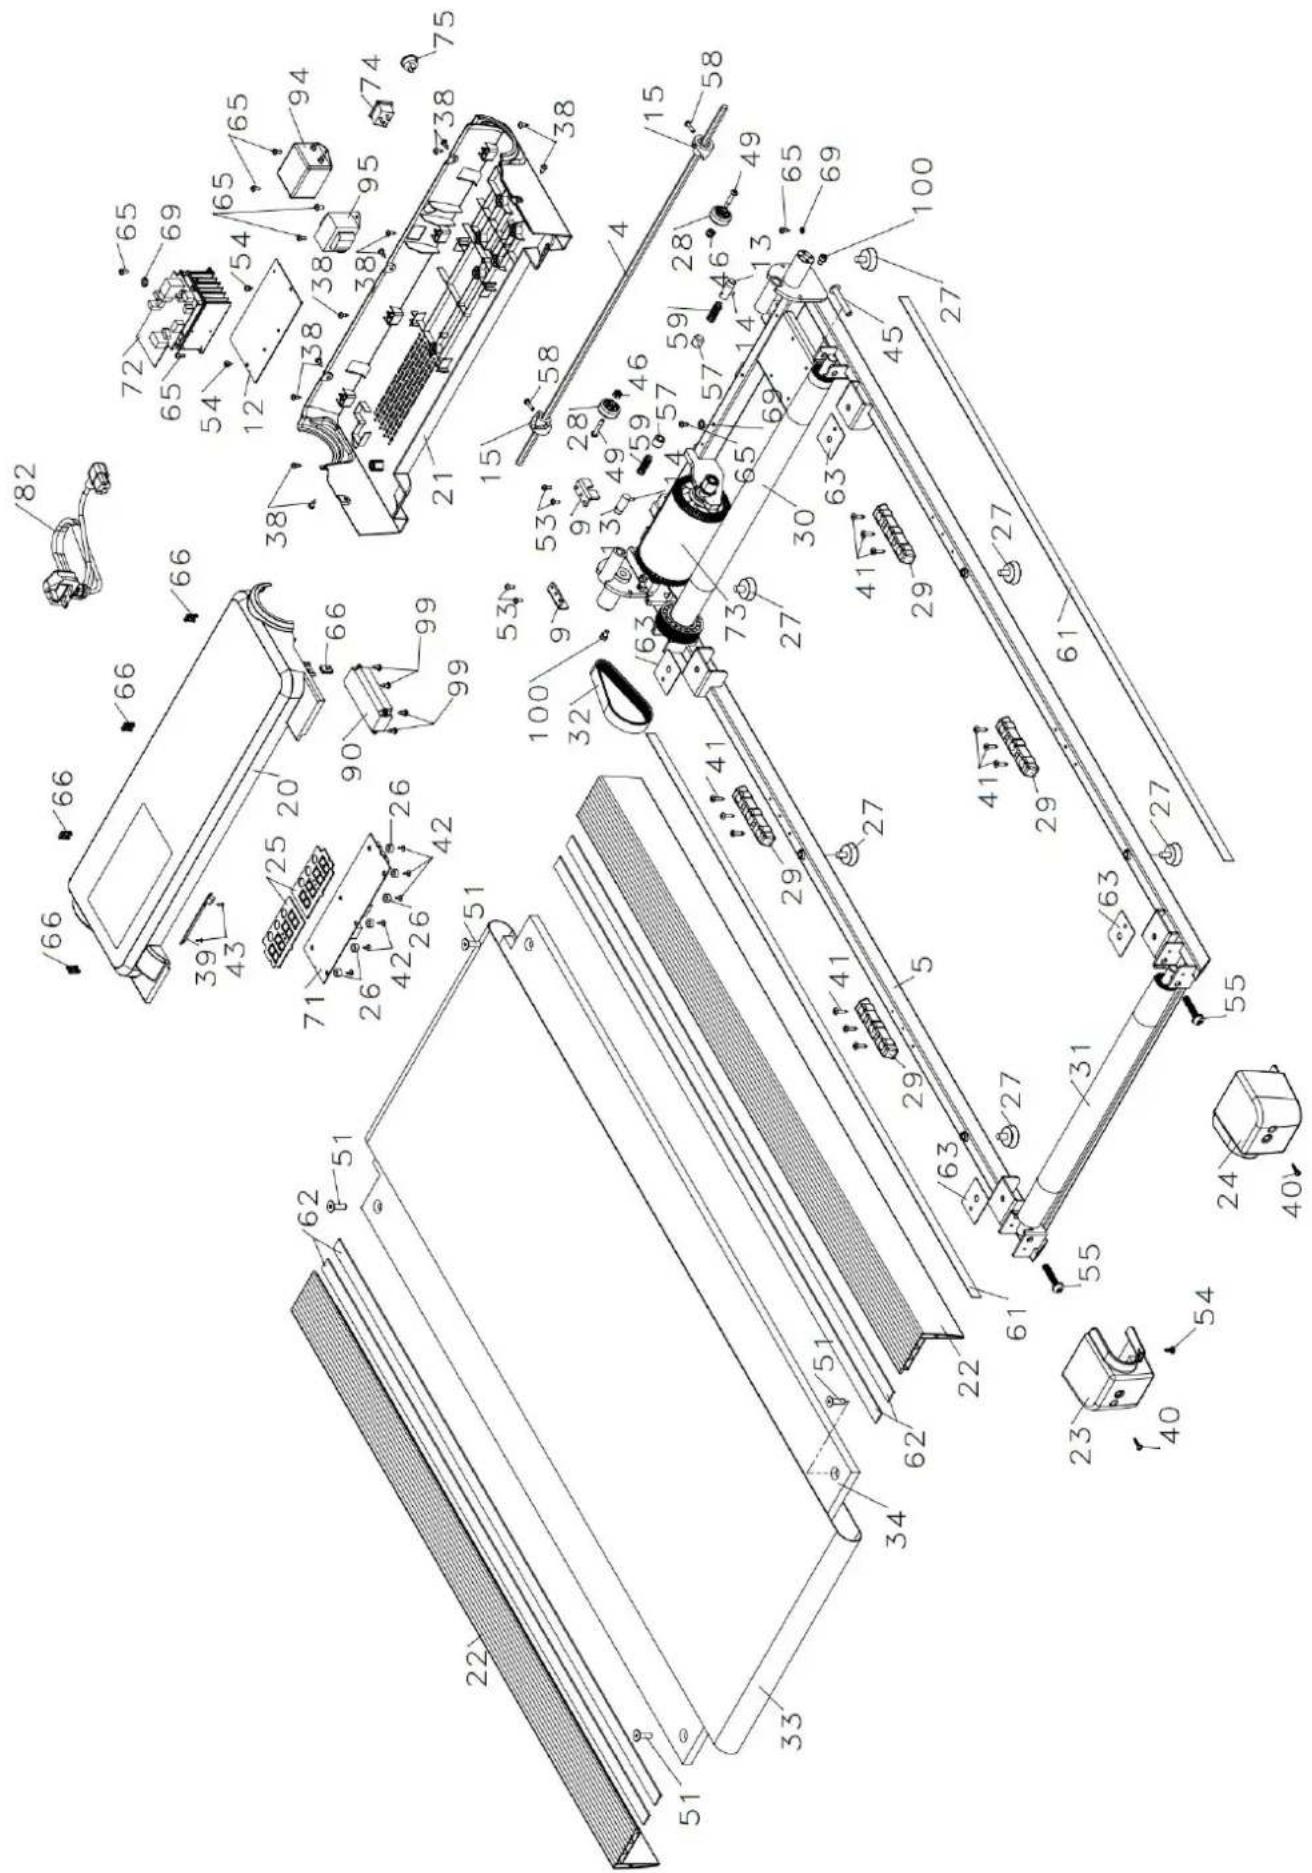
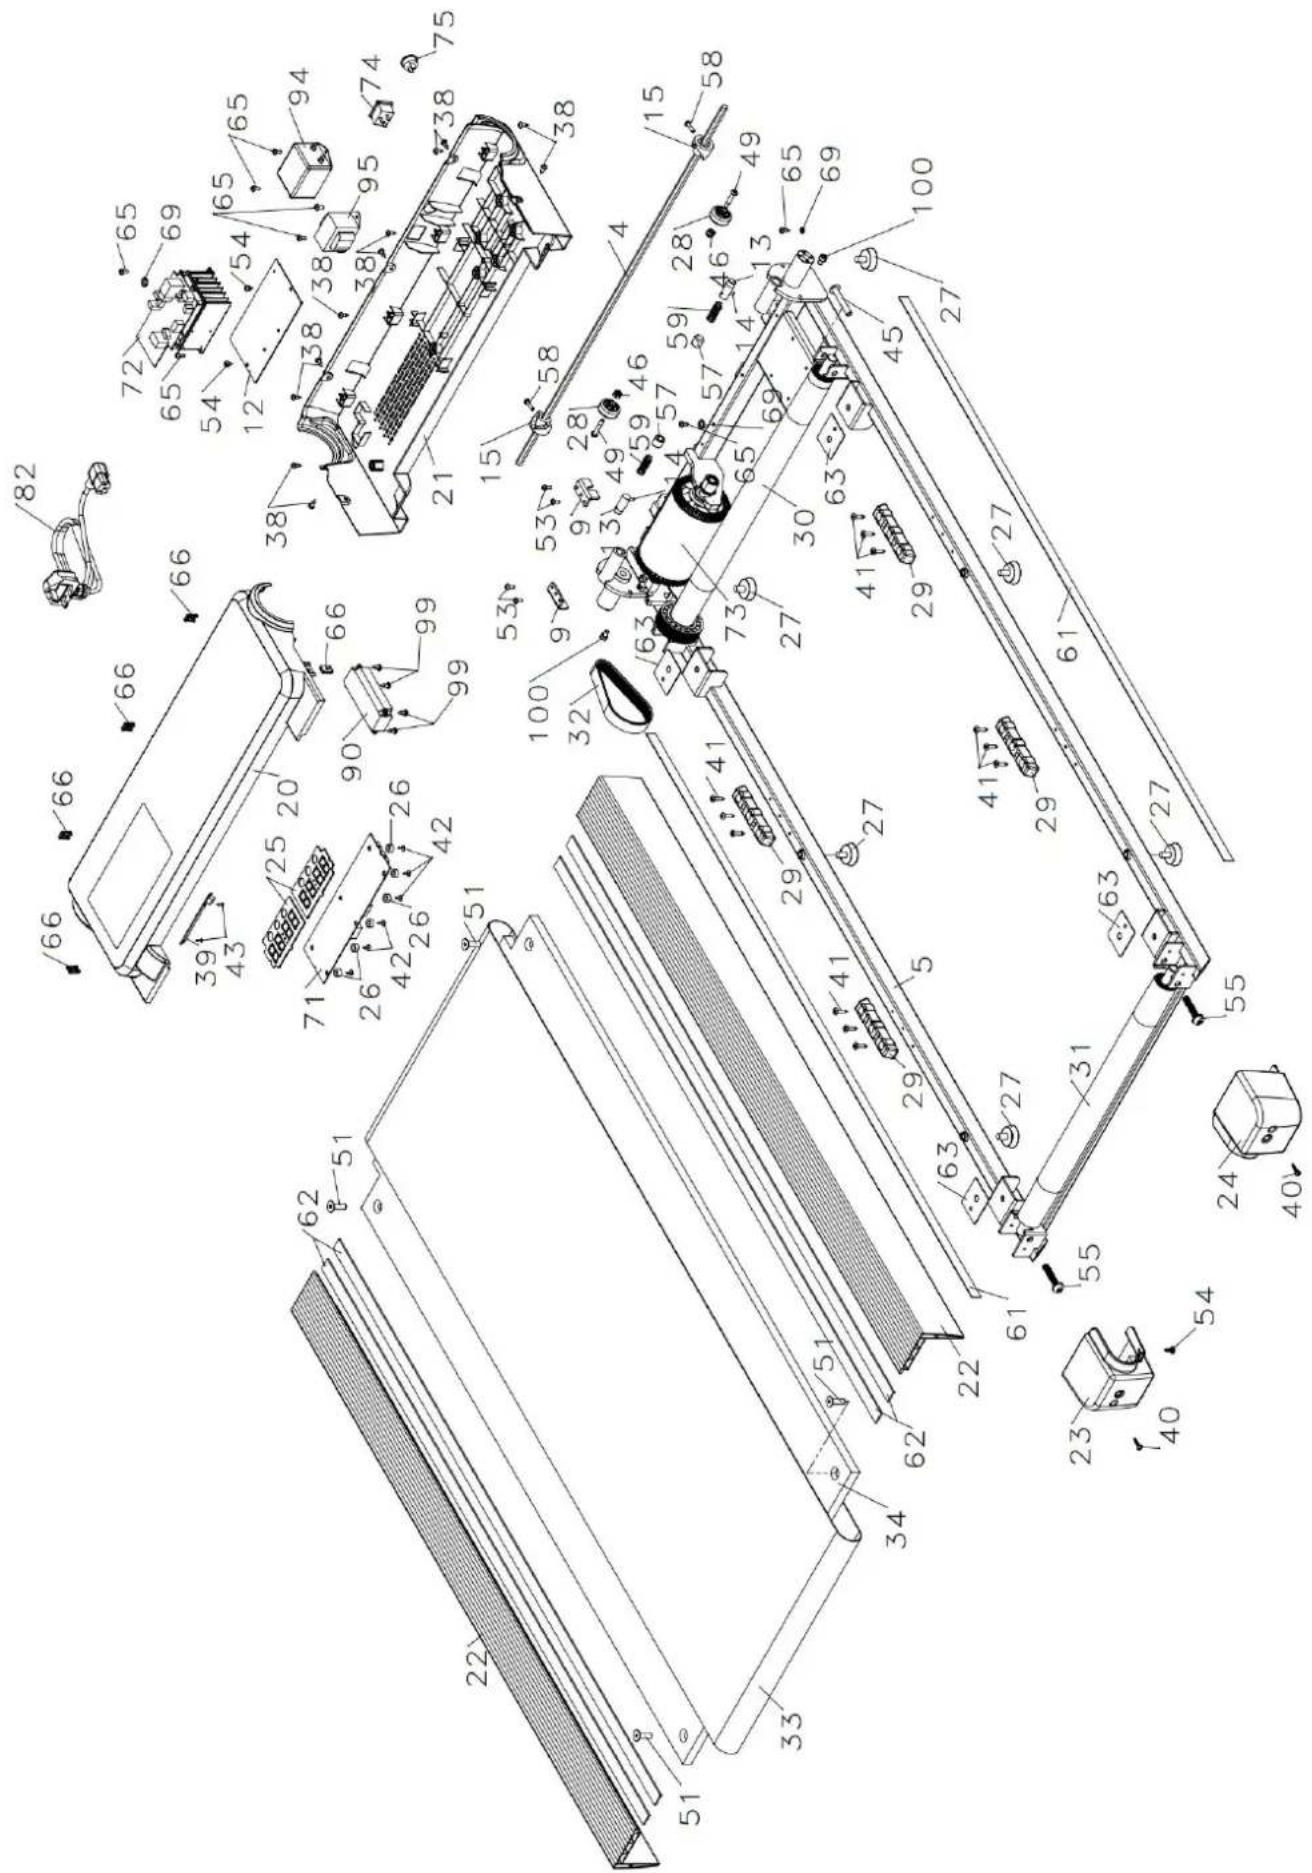
| Part no. | Description Qty | |
| 1 | Left upright tube 1 | |
| 2 | Right upright tube 1 | |
| 3 | Handle bar 1 | |
| 4 | Adjustable tube 1 | |
| 5 | Main frame 1 | |
| 6 | Handle bar spacing(L) 1 | |
| 7 | Handle bar spacing(R) 1 | |
| 8 | Device bottom holder 1 | |
| 9 | Motor press piece 2 | |
| 10 | Device top holder 1 | |
| 11 | Upright tube axis plate | 2 |
| 12 | Control board holder | 1 |
| 13 | Sprint latch | 2 |
| 14 | Axis latch | 2 |
| 15 | Adjustable block 2 | |
| 16 | Upright side cover | 2 |
| 17 | Handle bar inner cover | 2 |
| 18 | Handle bar cover(L) | 1 |
| 19 | Handle bar cover(R) | 1 |
| 20 | Motor top cover | 1 |
| 21 | Motor bottom cover | 1 |
| 22 | Side rail | 2 |
| 23 | Back end cover(L) 1 | |
| 24 | Back end cover(R) | 1 |
| 25 | Silica gel plate | 2 |
| 26 | Spacer | 6 |
| 27 | Foot pad | 6 |
| 28 | Transport wheel | 2 |
| 29 | Cushion | 4 |
| 30 | Front roller 1 | |
| 31 | Back roller | 1 |
| 32 | Motor belt | 1 |
| 33 | Running belt | 1 |
| 34 | Running board | 1 |
| 35 | Screw ST4.2*45mm | 2 |
| 36 | Bolt M4*12mm | 2 |
| 38 | Screw ST4.2*16mm | 11 |
| 39 | Light board 1 | |
| 40 | Screw ST4.2*19mm | 2 |
| 41 | Screw ST4.2*15mm | 12 |
| 42 | Screw ST2.9*9.5mm | 10 |
| 43 | Screw ST2.9*10mm | 2 |
| 44 | Nut M12 | 2 |
| 45 | Bolt M8*45mm | 1 |
| 46 | Nut M5 | 2 |
| 47 | Flat washer ∅12.5*∅30 | 2 |
| 48 | Flat washer ∅12.5*∅24 | 2 |
| 49 | Bolt M5*25mm | 2 |
| 50 | Screw ST4.2*15 | 6 |
| 51 | Bolt M8*30mm | 4 |
| 52 | Bolt M4*6mm | 6 |
| 53 | Bolt M4*12mm | 12 |
| Part no. | Description Qty | |
| 54 | Screw ST4.2*13mm | 3 |
| 55 | Bolt M8*55mm | 2 |
| 56 | Bolt M6*10mm | 6 |
| 57 | Bolt M14*14mm | 2 |
| 58 | Bolt M4*16mm | 2 |
| 59 | Spring | 2 |
| 60 | Bearing | 2 |
| 61 | Side rail side foam | 2 |
| 62 | Side rail top foam | 4 |
| 63 | Running board foam | 4 |
| 64 | Desktop | 1 |
| 65 | Bolt M4*10mm | 8 |
| 66 | Clip buckle | 5 |
| 67 | Magnet | 1 |
| 68 | Sprint rope | 1 |
| 69 | Spring washer | 3 |
| 70 | Rope of remote control | 1 |
| 71 | PCB board | 1 |
| 72 | Control board | 1 |
| 73 | DC motor | 1 |
| 74 | Power socket | 1 |
| 75 | Power switch | 1 |
| 77 | Handle bar foam | 2 |
| 78 | Remote control | 1 |
| 79 | Speed switcher | 1 |
| 80 | Switch fixing seat | 1 |
| 81 | Switch set | 1 |
| 82 | Power wire | 1 |
| 83 | Hand pulse with start/stop | 1 |
| 84 | Hand pulse with speed | 1 |
| 85 | L-shaped wrench | 1 |
| 86 | Allen wrench | 1 |
| 87 | Lubrication oil | 1 |
| 88 | PCB&Control board connection wire | 1 |
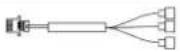
| 89 | Pulse wire | 2 |
| 90 | Speaker | 1 |
| 91 | Switch wire | 1 |
| 92 | Light connection wire 1 | |
| 93 | Power socket grounding wire | 1 |
| 94 | Filter | 1 |
| 95 | Inductance | 1 |
| 96/97 | Filter wire(R)/(B) | 1/1 |
| 98 | Filter grounding wire | 1 |
| 99 | Screw ST4.2*10mm | 4 |
| 100 | Bolt M6×8 | 2 |
| 101 | Control board grounding wire | 1 |
| 102 | Magnet ring | 1 |
| 103 | Spacer | 1 |
In the course of continuous product improvement, we reserve the right to make technical and design changes.
GUARANTEE CONDITIONS
For our devices we provide a warranty as defined below.
- In accordance with the following conditions (numbers 2-5) we repair defect or damage to the device free of charge, if the cause is a manufacturing defect. Therefore, these defects / damages need to be reported to us without delay after appearance and within the warranty period of 24 months after delivery to the end user. The warranty does not cover parts, which easily break (e.g. glass or plastic). The warranty does not cover slight deviations of the product, which are insignificant for usability and value of the device and damage caused by chemical or electrochemical effects and damages caused by penetration of water or generally force majeure damage.
- The warranty achievement is the replacement or repair of defective parts, depending on our decision. The cost of material and labor will be borne by us. Repairs at customer site cannot be demanded. The proof of purchase along with the date of purchase and / or delivery is required. Replaced parts become our property.
- The warranty is void if repairs or adjustments are made, which are not authorized by us or if our devices are equipped with additional parts or accessories that are
not adapted to our devices. Furthermore, the warranty is void if the device is damaged or destroyed by force majeure or due to environmental influences and in case of improper handling / maintenance (e.g. due to non-observance of the instruction manual) or mechanical damages. The customer service may authorize you to replace or repair defective parts after telephone consultation. In this case, the warranty is not void.
- Warranty services do not extend the warranty period nor do they initiate a new warranty period.
- Further demands, especially claims for damages which occurred outside the device, are excluded as long as a liability is not obligatory legal.
- Our warranty terms - which cover the requirements and scope of our warranty conditions - do not affect the contractual warranty obligations of the seller.
- Parts of wear and tear are not included in the warranty.
- The warranty is void if not used properly or if used in gyms, rehabilitation centers and hotels. Even if most of our units are suitable for a professional use, this requires a separate agreement.
ENVIRONMENTAL PROTECTION
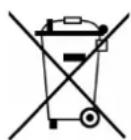
At the end of its life cycle, this product must not be disposed of with household waste but must be taken to a collection unit for the recycling of electric and electronic equipment. The symbol on the product, the instructions for use or the packaging express mention of this. The basic materials can be recycled as specified on the labelling.
When recycling the materials and finding other utilisation for used equipment, you are making a significant contribution towards protecting our environment. Ask at your council about the respective local disposal sites.
In accordance with our policy of continual product improvement, we reserve the right to make technical and visual changes without notice.
For spare parts please contact: service@skandika.de
Service centre:

skandika.com/service
natural_image
Technical line drawing of a mechanical device with labeled parts (1 and 2), no readable text or symbols beyond labelsÉTAPE 3
natural_image
Line drawing of a treadmill with an arrow indicating rotational motion (no text or symbols)ÉTAPE 5
natural_image
Technical line drawing of a treadmill with an inset showing the wheel mechanism (no text or symbols)ÉTAPE 6
natural_image
Technical line drawing of a treadmill with an inset showing the engine component (no text or symbols present)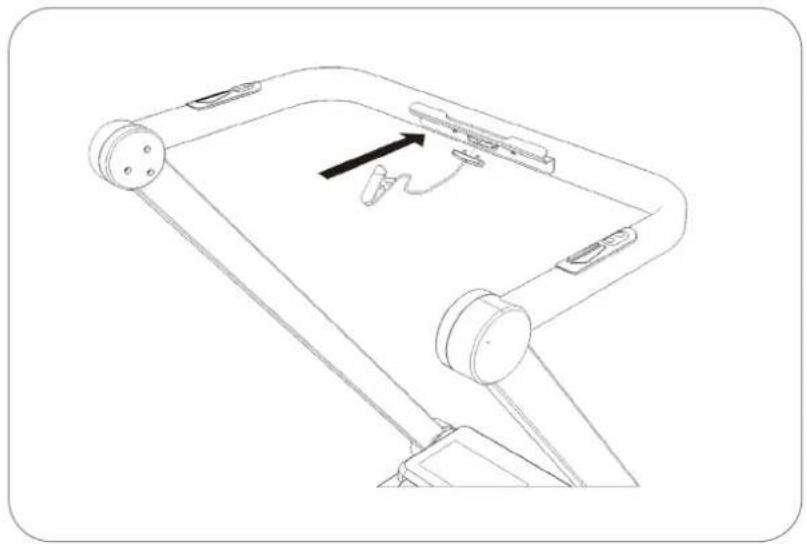
natural_image
Line drawing of a mechanical device with a handle and lever mechanism (no text or symbols)ÉTAPE 7
natural_image
Technical line drawing of a mechanical device with articulated joints and a flat plate (no text or symbols)ÉTAPE 8 (EN OPTION)
natural_image
Technical line drawing of a treadmill with an inset showing the wheel mechanism (no text or symbols)PLIAGE : ÉTAPE 2
natural_image
Line drawing of a treadmill with an arrow indicating rotational motion (no text or symbols)PLIAGE : ÉTAPE 3
natural_image
Line drawing of a treadmill with an arrow indicating motion or force, no text or symbols present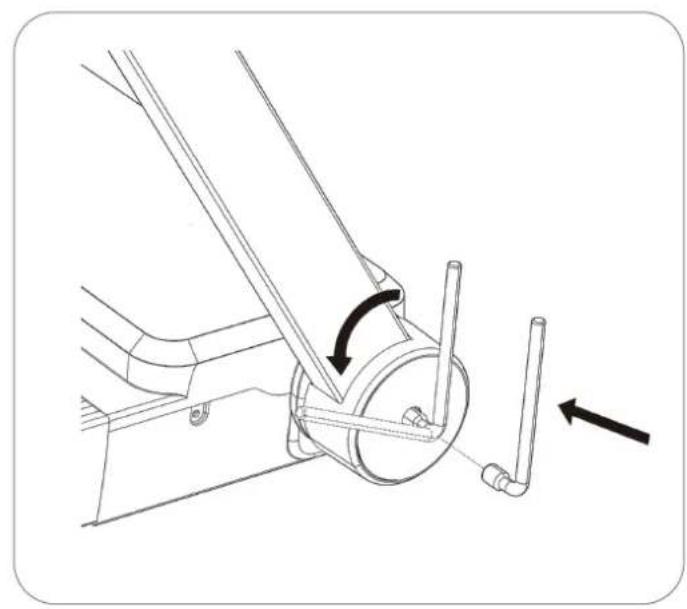
natural_image
Mechanical diagram showing a lever mechanism with arrows indicating motion direction (no text or symbols)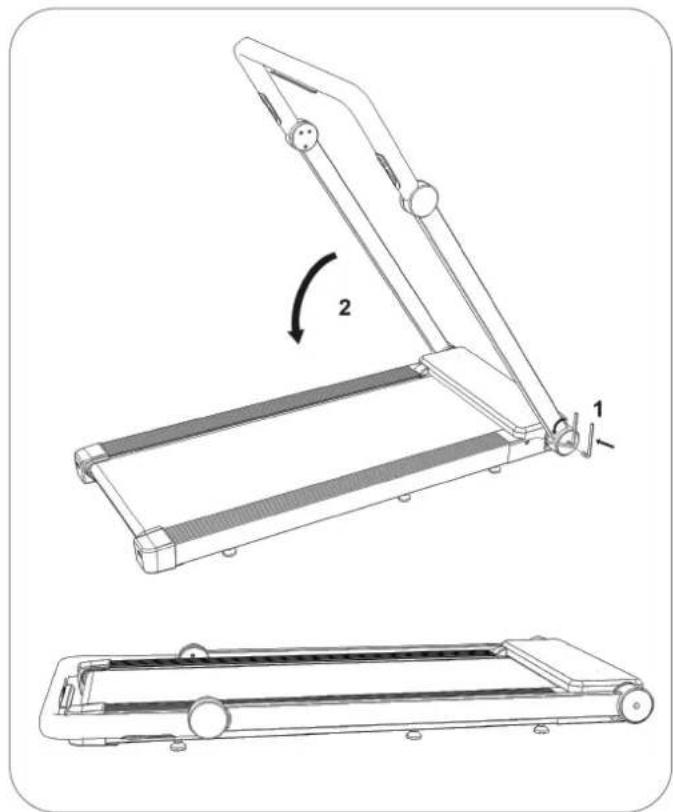
natural_image
Technical line drawing of a treadmill device with two views: top shows open lid, bottom shows side view with flat base (no text or symbols)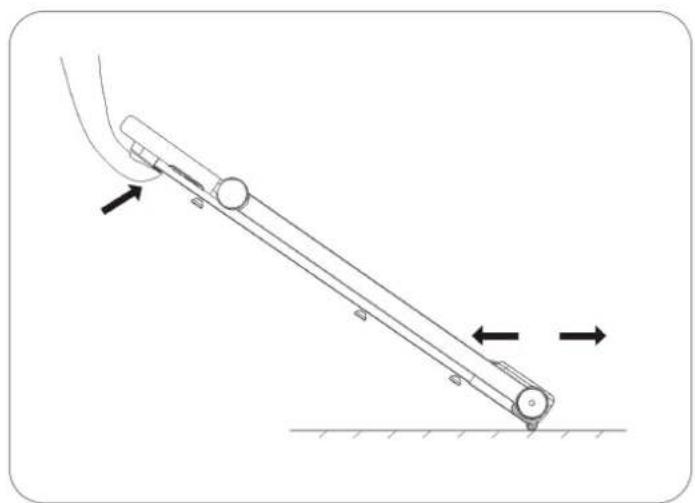
natural_image
Mechanical diagram showing a lever system with two opposing arrows indicating motion direction (no text or symbols present)PLIAGE : ÉTAPE 4
natural_image
Line drawing of a portable treadmill with mesh insulation and wheels (no text or symbols)Course
| Section / Programme | 12345678910 | |||||||||
| P1 | 3,0 | 3,0 | 3,0 | 3,0 | 3,0 | 3,0 | 2,0 | 3,0 | 3,0 | 3,0 |
| P2 | 3,0 | 4,0 | 4,0 | 4,0 | 4,0 | 4,0 | 3,0 | 4,0 | 4,0 | 4,0 |
| P3 | 4,0 | 5,0 | 5,0 | 5,0 | 5,0 | 5,0 | 4,0 | 5,0 | 5,0 | 5,0 |
| P4 | 3,0 | 6,0 | 6,0 | 6,0 | 6,0 | 6,0 | 3,0 | 6,0 | 6,0 | 3,0 |
| P5 | 3,0 | 5,0 | 3,0 | 5,0 | 3,0 | 5,0 | 3,0 | 5,0 | 3,0 | 5,0 |
| P6 | 3,5 | 5,5 | 3,5 | 5,5 | 3,5 | 5,5 | 3,5 | 5,5 | 3,5 | 5,5 |
| P7 | 3,0 | 5,0 | 5,0 | 3,0 | 5,0 | 5,0 | 3,0 | 5,0 | 5,0 | 3,0 |
| P8 | 3,5 | 5,5 | 5,5 | 3,5 | 5,5 | 5,5 | 3,5 | 5,5 | 5,5 | 3,5 |
| P9 | 4,0 | 6,0 | 6,0 | 4,0 | 6,0 | 6,0 | 4,0 | 6,0 | 6,0 | 4,0 |
| Section / Programme | 12345678910 | |||||||||
| P1 | 3,0 | 4,0 | 5,0 | 6,0 | 6,0 | 4,0 | 5,0 | 6,0 | 6,0 | 4,0 |
| P2 | 4,0 | 5,0 | 6,0 | 7,0 | 7,0 | 5,0 | 6,0 | 7,0 | 7,0 | 5,0 |
| P3 | 5,0 | 6,0 | 7,0 | 8,0 | 8,0 | 6,0 | 7,0 | 8,0 | 8,0 | 6,0 |
| P4 | 6,0 | 7,0 | 8,0 | 9,0 | 9,0 | 7,0 | 8,0 | 9,0 | 9,0 | 7,0 |
| P5 | 6,0 | 8,0 | 10,0 | 10,0 | 8,0 | 8,0 | 10,0 | 10,0 | 8,0 | 6,0 |
| P6 | 7,0 | 9,0 | 10,0 | 9,0 | 10,0 | 9,0 | 10,0 | 9,0 | 10,0 | 7,0 |
| P7 | 7,0 | 9,0 | 9,0 | 7,0 | 7,0 | 9,0 | 9,0 | 7,0 | 9,0 | 7,0 |
| P8 | 5,0 | 10,0 | 10,0 | 5,0 | 5,0 | 10,0 | 10,0 | 5,0 | 10,0 | 5,0 |
| P9 | 6,0 | 10,0 | 10,0 | 6,0 | 6,0 | 10,0 | 10,0 | 6,0 | 10,0 | 6,0 |
FONCTIONS DE L'ORDINATEUR
natural_image
Technical line drawing of a mechanical component with a curved arrow indicating rotation (no text or symbols)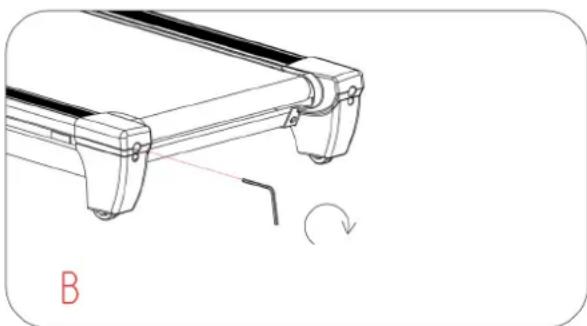
natural_image
Technical line drawing of a mechanical component with a rotation arrow and label B (no text or symbols on the diagram itself)AJUSTEMENT DE LA TENSION DE LA BANDE :
natural_image
Technical line drawing of a mechanical component with curved notches and motion arrows indicating rotation (no text or symbols)LUBRIFICATION DE LA BANDE DE ROULEMENT :
- Inhalt
- SCHRITT 3
- SCHRITT 5
- SCHRITT 6
- SCHRITT 7
- SCHRITT 8 (OPTIONAL)
- TRANSPORT: SCHRITT 6
- Laufen
- COMPUTERFUNKTIONEN
- AUTO-STOPP-FUNKTION:
- WARNING
- SAFETY PRECAUTIONS
- IMPORTANT NOTES ON GROUNDING
- WARNING!
- SET-UP INSTRUCTIONS
- STEP 1
- STEP 2
- STEP 3
- STEP 4
- STEP 5
- STEP 6
- STEP 7
- STEP 8 (OPTIONAL)
- FOLDING: STEP 1
- FOLDING: STEP 2
- FOLDING: STEP 3
- FOLDING: STEP 4
- FOLDING: STEP 5
- TRANSPORTATION: STEP 6
- Operating modes: walking and running
- Walking
- Running
- CONTROL ELEMENTS ON THE HANDLEBARS
- CONTROL ELEMENTS ON THE REMOTE CONTROL
- Speed quick button&Distance count down :
- COMPUTER FUNCTIONS
- LUBRICATION REMINDER FUNCTION:
- Changing the unit of measure (km / miles):
- SAFETY LOCK FUNCTION:
- POWER SAVING FUNCTION:
- AUTO STOP FUNCTION:
- ATTENTION!
- TROUBLESHOOTING
- MAINTENANCE AND CARE
- CENTRING OF THE RUNNING BELT:
- ADJUSTING THE BELT TENSION:
- LUBRICATION OF THE RUNNING SURFACE:
- TREADMILLS & TREADMILL LUBRICANTS:
- LUBRICATION:
- KINOMAP
- WARM-UP and COOL-DOWN
- Warm-Up
- Stretching
- Cool-Down
- GUARANTEE CONDITIONS
- ENVIRONMENTAL PROTECTION
- ÉTAPE 3
- ÉTAPE 5
- ÉTAPE 6
- ÉTAPE 7
- ÉTAPE 8 (EN OPTION)
- PLIAGE : ÉTAPE 2
- PLIAGE : ÉTAPE 3
- PLIAGE : ÉTAPE 4
- Course
- FONCTIONS DE L'ORDINATEUR
- AJUSTEMENT DE LA TENSION DE LA BANDE :
- LUBRIFICATION DE LA BANDE DE ROULEMENT :
Brand : Skandika
Model : Nordik K12
Category : Treadmills