Floodlight Camera 2 Pro - Surveillance Camera eufy - Free user manual and instructions
Find the device manual for free Floodlight Camera 2 Pro eufy in PDF.

User questions about Floodlight Camera 2 Pro eufy
0 question about this device. Answer the ones you know or ask your own.
Ask a new question about this device
Download the instructions for your Surveillance Camera in PDF format for free! Find your manual Floodlight Camera 2 Pro - eufy and take your electronic device back in hand. On this page are published all the documents necessary for the use of your device. Floodlight Camera 2 Pro by eufy.
USER MANUAL Floodlight Camera 2 Pro eufy
Anker Innovations Limited. All rights reserved. eufy Security and eufy Security Logo are trademarks of Anker Innovations Limited, registered in the United States and other countries. All other trademarks are the property of their respective owners.
51005002819
QUICK START GUIDE
EUFY FLOODLIGHT CAM 2 PRO
natural_image
Line drawing of a surveillance camera with three rectangular panels mounted on a circular base (no text or symbols)English
Deutsch
Español
Français
Italiano
Nederlands 1
Portuguese 5
لعرّية
169
Table of Contents
SAFETY INSTRUCTIONS 02
WHAT'S IN THE BOX 02
PRODUCT OVERVIEW 03
DECLARATIONS 04
POWERING ON YOUR FLOODLIGHT CAMERA 06
SETTING UP THE FLOODLIGHT CAMERA 07
PREPARING FLOODLIGHT CAMERA FOR INSTALLATION 08
INSTALLING THE JUNCTION BOX 09
MOUNTING YOUR FLOODLIGHT CAMERA 12
ADJUSTING THE LIGHTING ANGLE 21
NOTICE 24
SAFETY INSTRUCTIONS
- Disconnect power at the fuse or circuit breaker before installing.
- Do not install the product near flammable surfaces.
- To avoid risk of shock, injury or death, always be cautious when working with electricity.
- Consult a licensed electrician if you are uncomfortable working with electrical wiring.
■ Make sure the Floodlight Camera is properly grounded. - Floodlight Camera must be installed on a wall and on a UL-listed junction box.
WHAT'S IN THE BOX
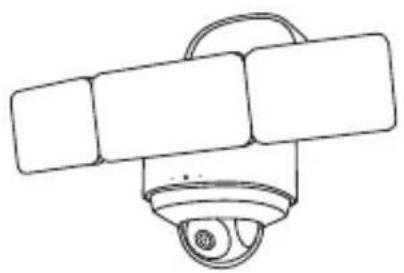
natural_image
Simple line drawing of a surveillance camera with lens and screen (no text or symbols)eufy Floodlight Cam 2 Pro (T8423)
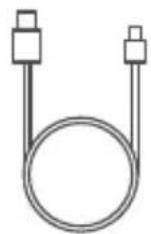
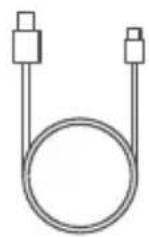
Charging Cable
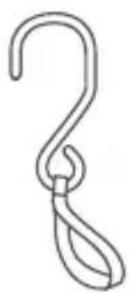
Installation Hook & String
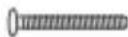
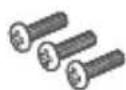
Central Screw

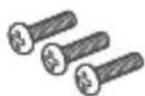
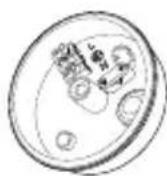
Central Screw Cap Plate Screws Junction box
002 EN
Required (not included):
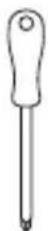
Crosshead
Screwdriver
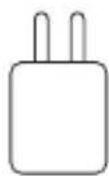
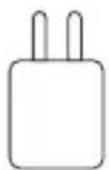
USB Power Adapter (5V/1A)
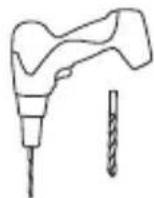
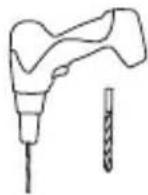
Power Drill (15/64 mm)
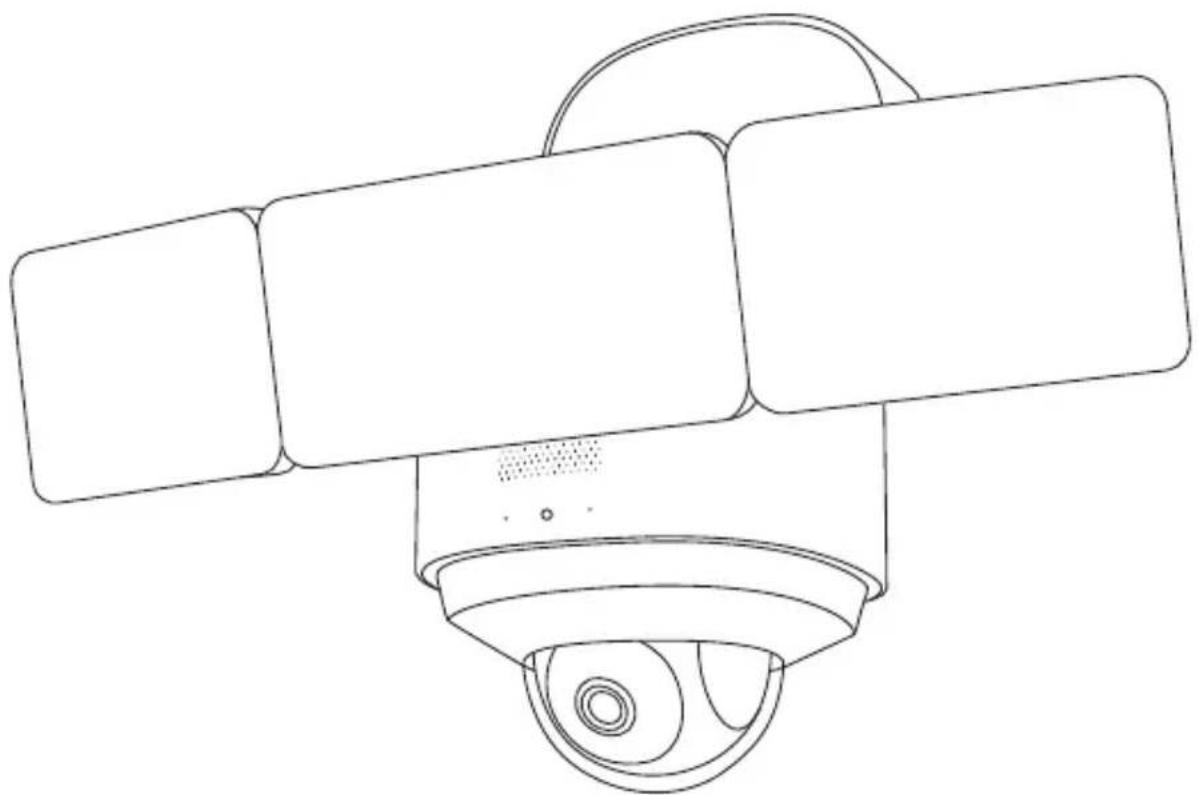
PRODUCT OVERVIEW
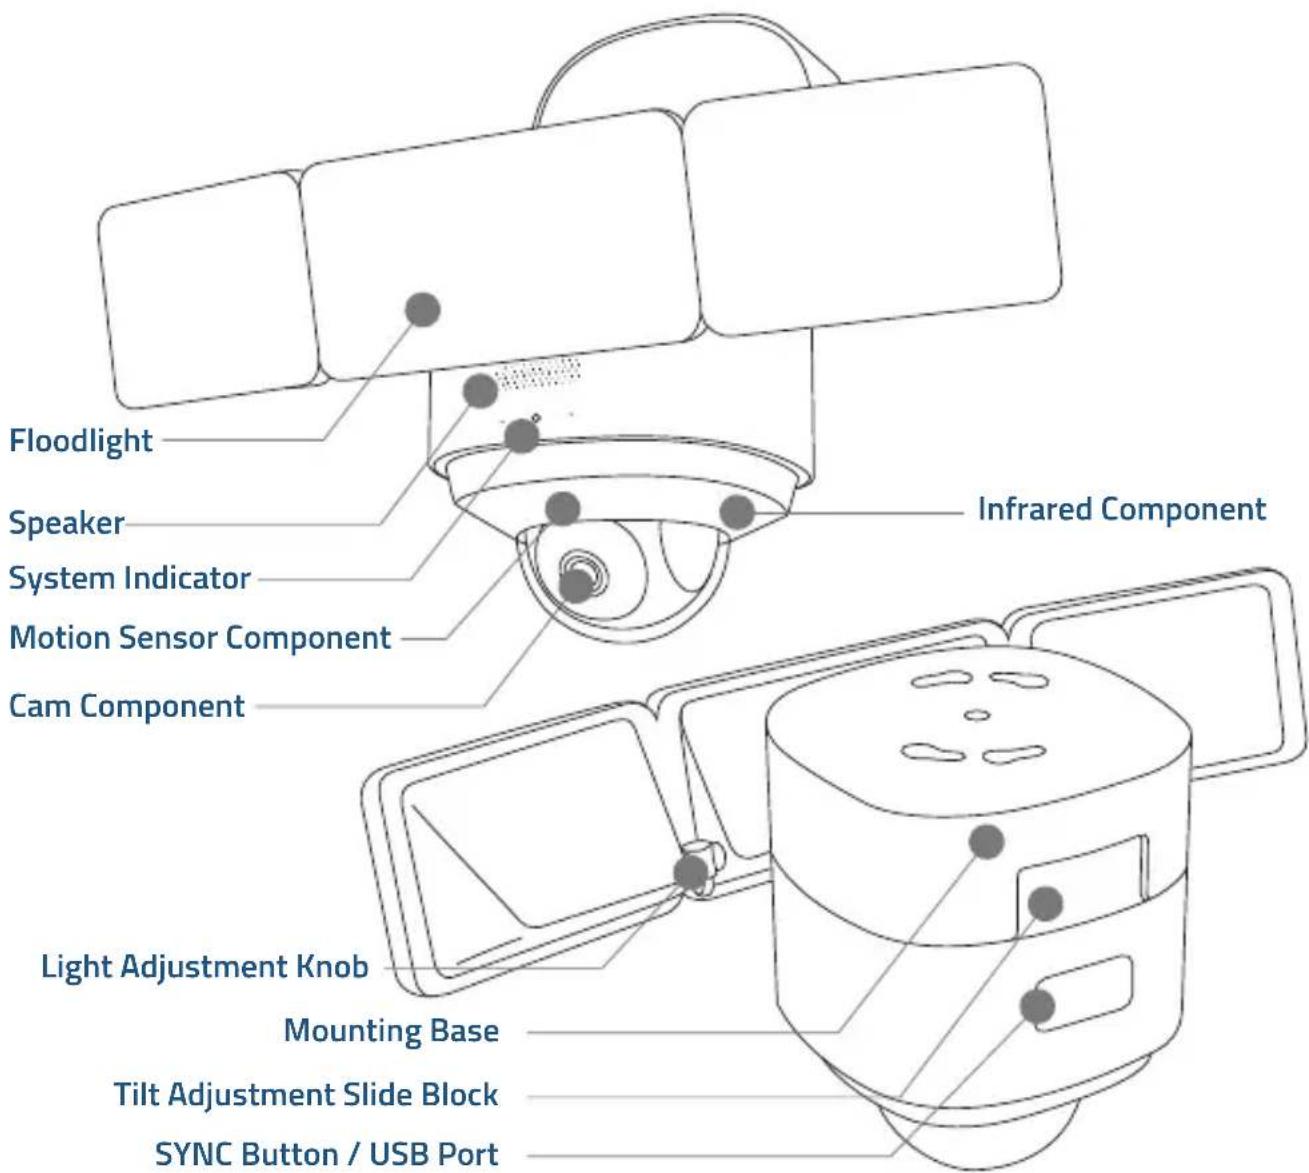
EN 003
DECLARATIONS
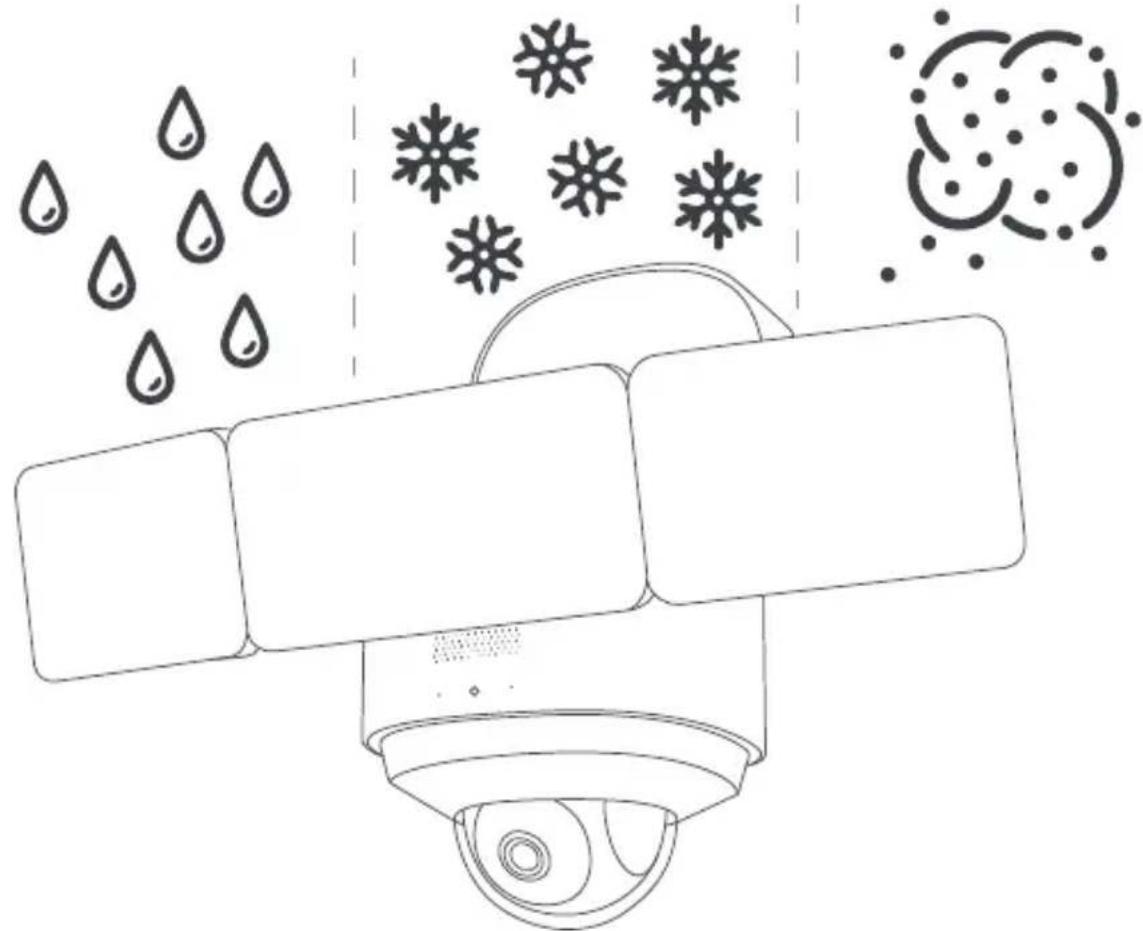
IP65-rated dustproof and waterproof
This product meets IP65 (dustproof and waterproof) requirements.
For dustproof testing, the product was vacuumed and placed in a dust box. After 8 hours of testing, no dust was found in the product.
For waterproof testing, the product was sprayed by a nozzle with an inner diameter of 6.3mm, and water flow of 12.5 L/min. After the test, the product operated normally with no water found inside.
natural_image
Diagram of a surveillance camera with raindrops and snowflakes, no text or symbols presentAnti-corrosion
The metal surface of the product is galvanized, and can survive continuous exposure to salt spray at 35^ + / - 2^ (relative humidity: 90% -95% ) with a salt concentration of 5% NaCl for 48 hours in the salt spray test.
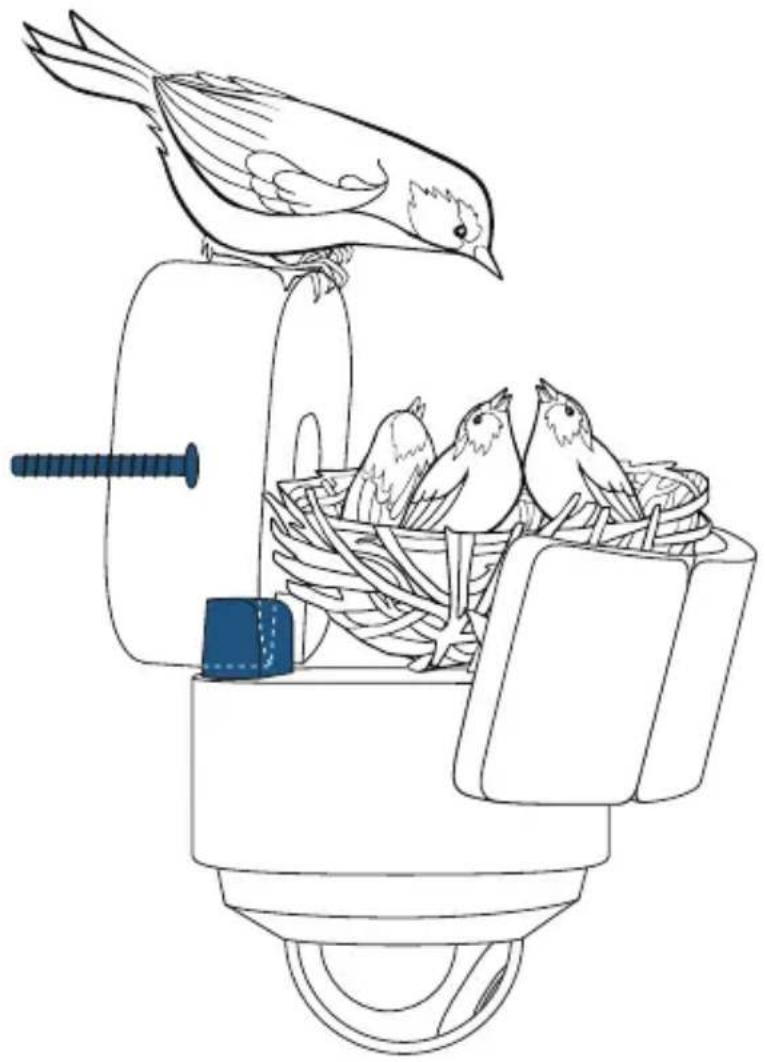
Load-bearing tests
The L-shaped bracket and center screw of the product are made of SUS304 steel and have passed industrial-grade outdoor reliability and durability tests.
NOTE: The total weight of the product is 2.2kg (4.9lbs), and the L-shaped bracket and center screw is strong enough to carry a load of 10kg (22lbs).
natural_image
Line drawing of a bird feeding into a nest with three chicks, mounted on a cylindrical platform (no text or symbols)10kg
POWERING ON YOUR FLOODLIGHT CAMERA

To avoid scratching the Floodlight Camera, do not peel off the protective film for the time being.
Put your Floodlight Camera in the direction as illustrated on a table, and open the USB port cover. Connect the device to a power source inside your home using the micro USB charging cable and a power adapter (5V/1A, not provided). Wait 1 minute or until the LED indicator blinks red.
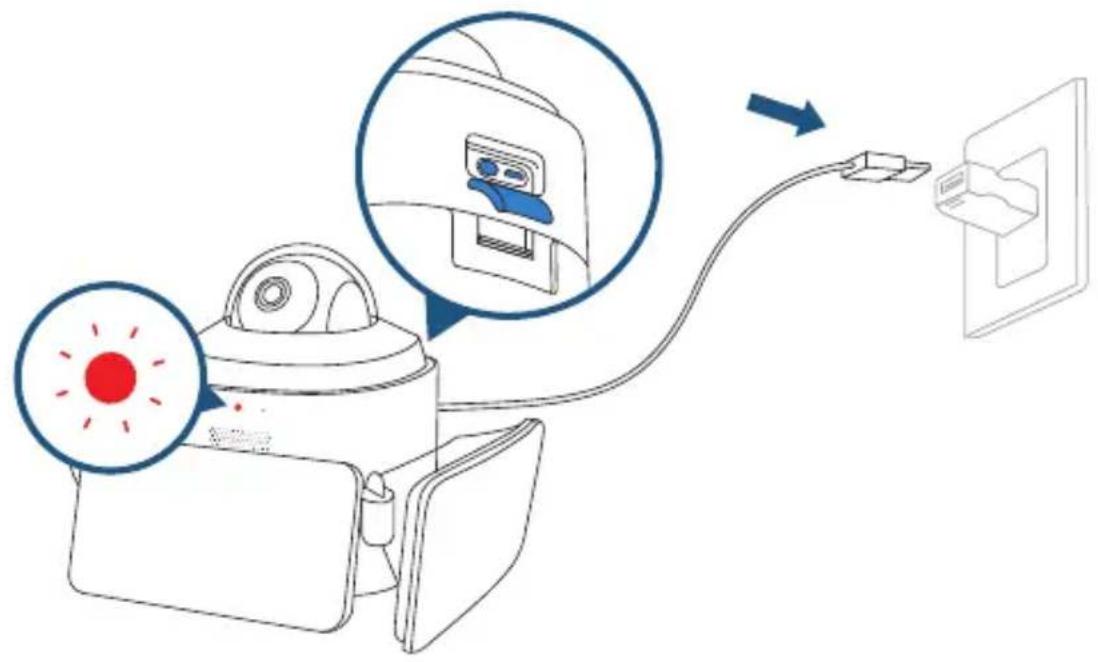

The Floodlights will only light up when in wired power mode. The USB-powered connection is used for setting up the camera safely inside your home.
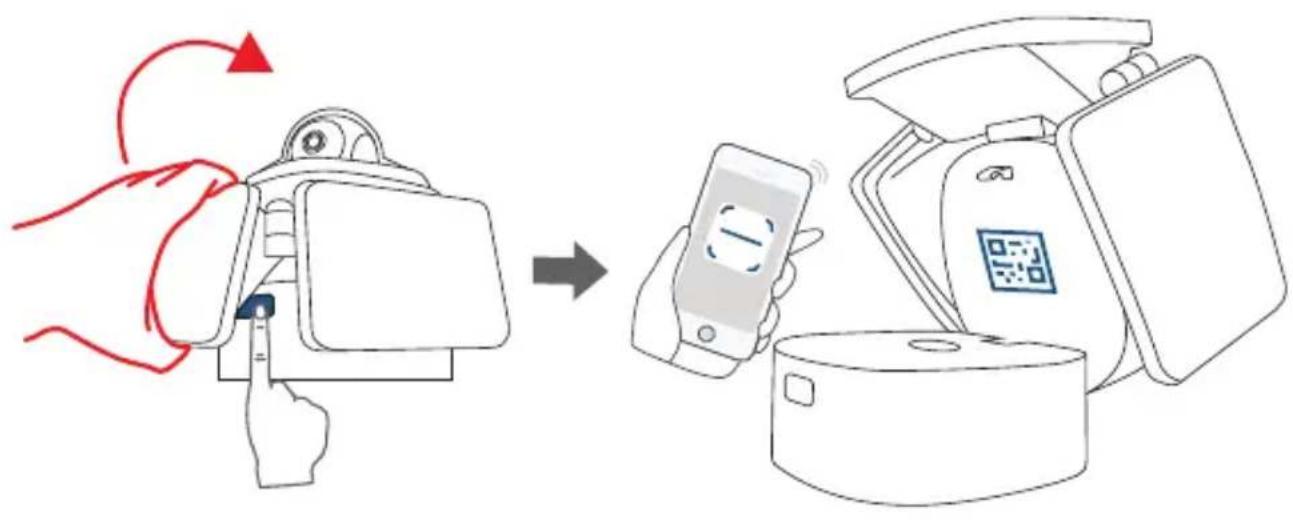
SETTING UP THE FLOODLIGHT CAMERA
Push and hold the button to open the mounting base and find a QR Code.
flowchart
graph LR
    A["Hand interacting with device"] --> B["Mobile payment via QR code"]
    B --> C["Payment box with QR code"]
Download the eufy Security app from the App Store (iOS devices) or Google Play (Android devices).

natural_image
Gray shield icon with a circular refresh symbol in the center, no text or numbers present.

Log in or sign up for a eufy Security account, then follow the on-screen instructions to complete the setup.

Make sure you can livestream video from Floodlight Camera before mounting.
If the Floodlight Camera LED keeps blinking red, it means the floodlight is not connected to the Internet. Please make sure the Wi-Fi signal is strong at the desired location. You may consider moving the wireless router closer to Floodlight Camera or using a Wi-Fi range extender.
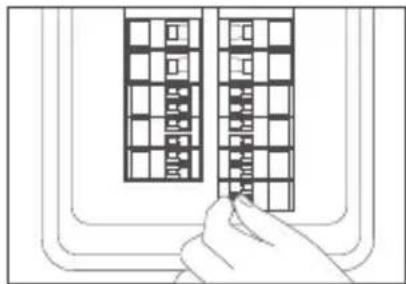
PREPARING FLOODLIGHT CAMERA FOR INSTALLATION
- Unplug the power adapter. Close the mounting base and USB port cover.

- Shut down the circuit breaker in your house. Switch on/off the lights to make sure the electricity in your house is properly shut off.
natural_image
Line drawing of a hand inserting a grid into a rectangular panel (no text or symbols)
To avoid risk of shock, injury or death, always be cautious when working with electricity.
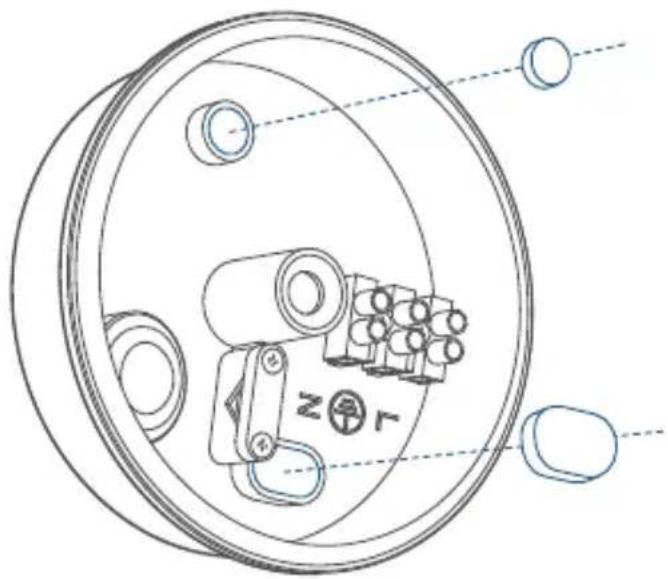
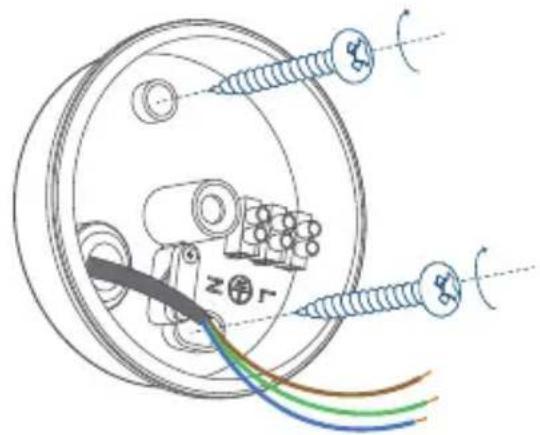
INSTALLING THE JUNCTION BOX
- Remove the rubber plugs indicated in the illustration below.
natural_image
Technical line drawing of a mechanical component with no visible text or symbols- Run the existing wire through the hole.
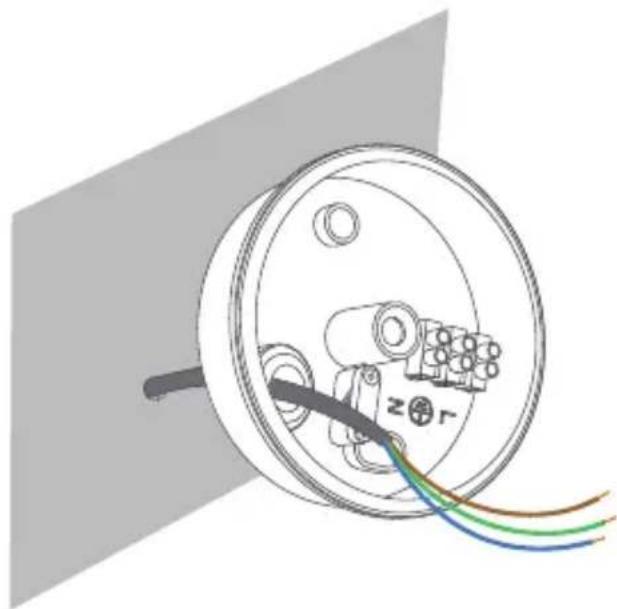
natural_image
Diagram of a circular electrical component with wires and connectors, no text or symbols present
If you don't have existing wires outdoors, contact a licensed electrician to run the wires.
-
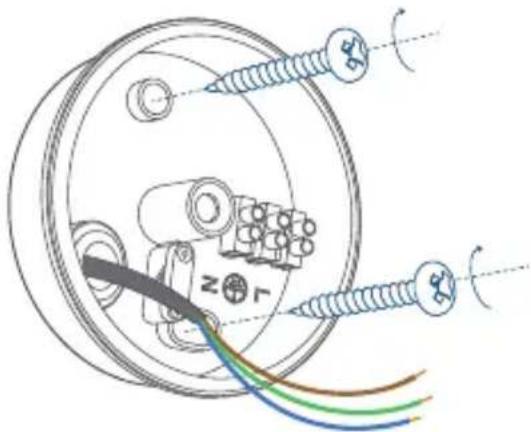
Install the junction box:
-
Orient the two mounting holes vertically to ensure stable mounting.
- On wooden walls, DO NOT pre-drill holes. Use the screws provided to fix the junction box onto the wall.
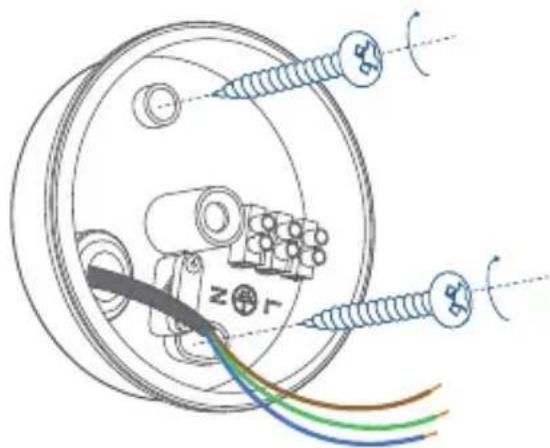
- On walls that are made out of hard materials, such as stucco, brick, or concrete, drill holes with a 15/64 inch (6 mm) drill bit, and then insert the anchors provided into the holes. Use the screws provided to fix the junction box on the wall.

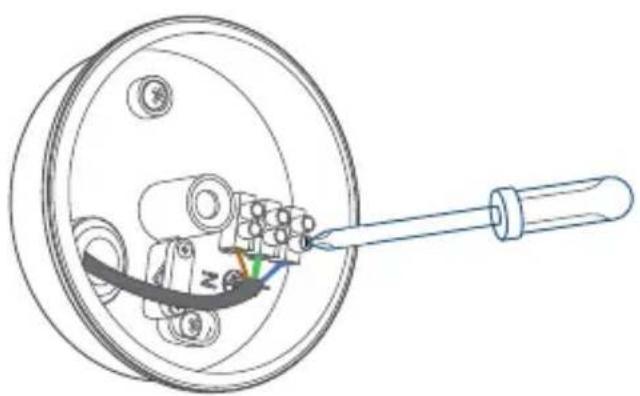
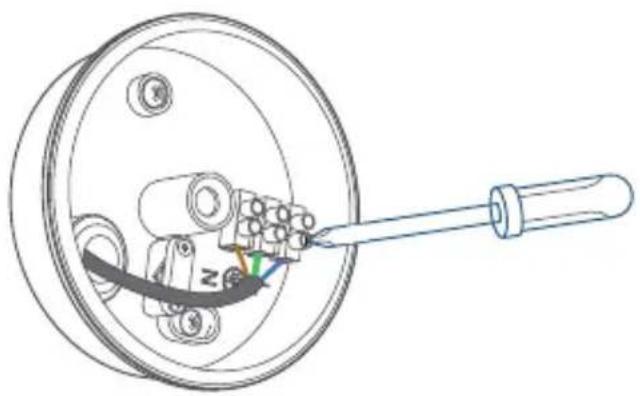
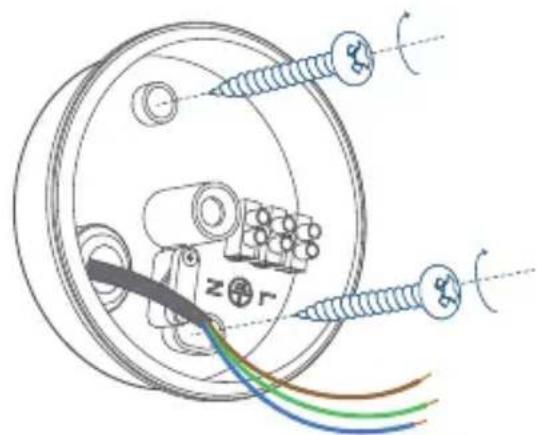
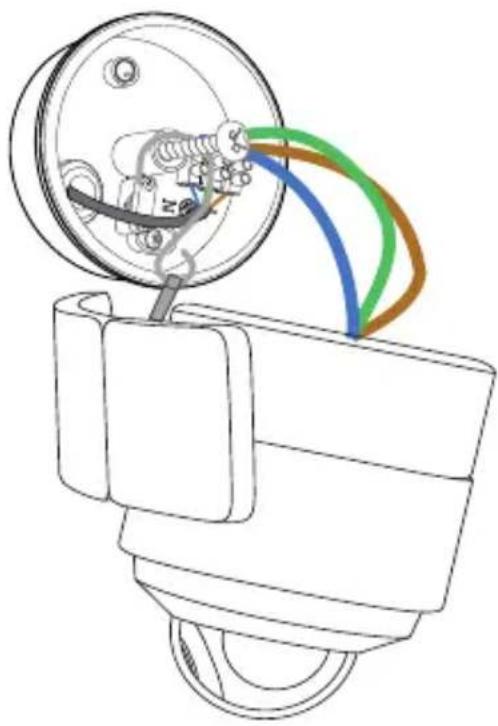
- Unscrew the bolt with a flat-head screwdriver. Connect the Neutral (blue) / Ground (green / green and yellow) / Live (brown) wire to the Neutral / Ground / Live wire connector in the junction box respectively. Secure the wires tightly to prevent wires from falling.

1

natural_image
Technical line drawing of a mechanical component with a rod inserted into a circular housing (no text or symbols)2
MOUNTING YOUR FLOODLIGHT CAMERA

To ensure the best motion detection range, we recommend installing the Floodlight Camera within 2-3 meters of the ground.
You can hang Floodlight Camera upside down or install it vertically on the wall. Select the installation method that best suits the position of your junction box.
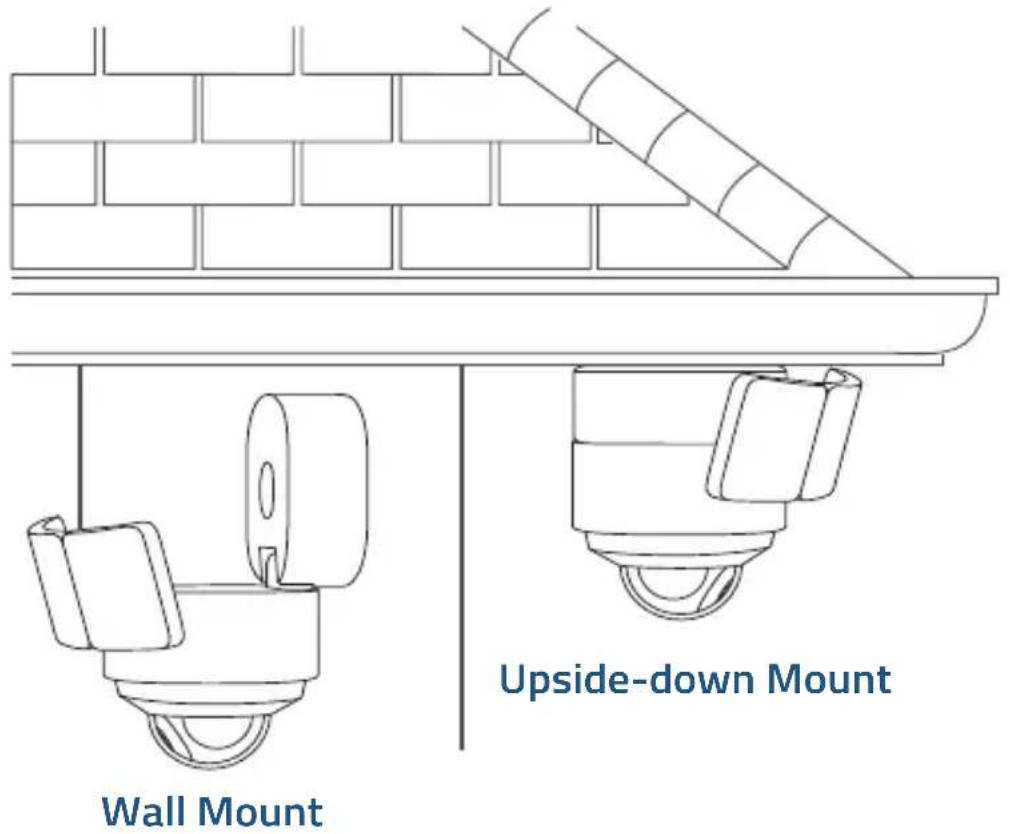
Mount Floodlight Camera onto a Wall
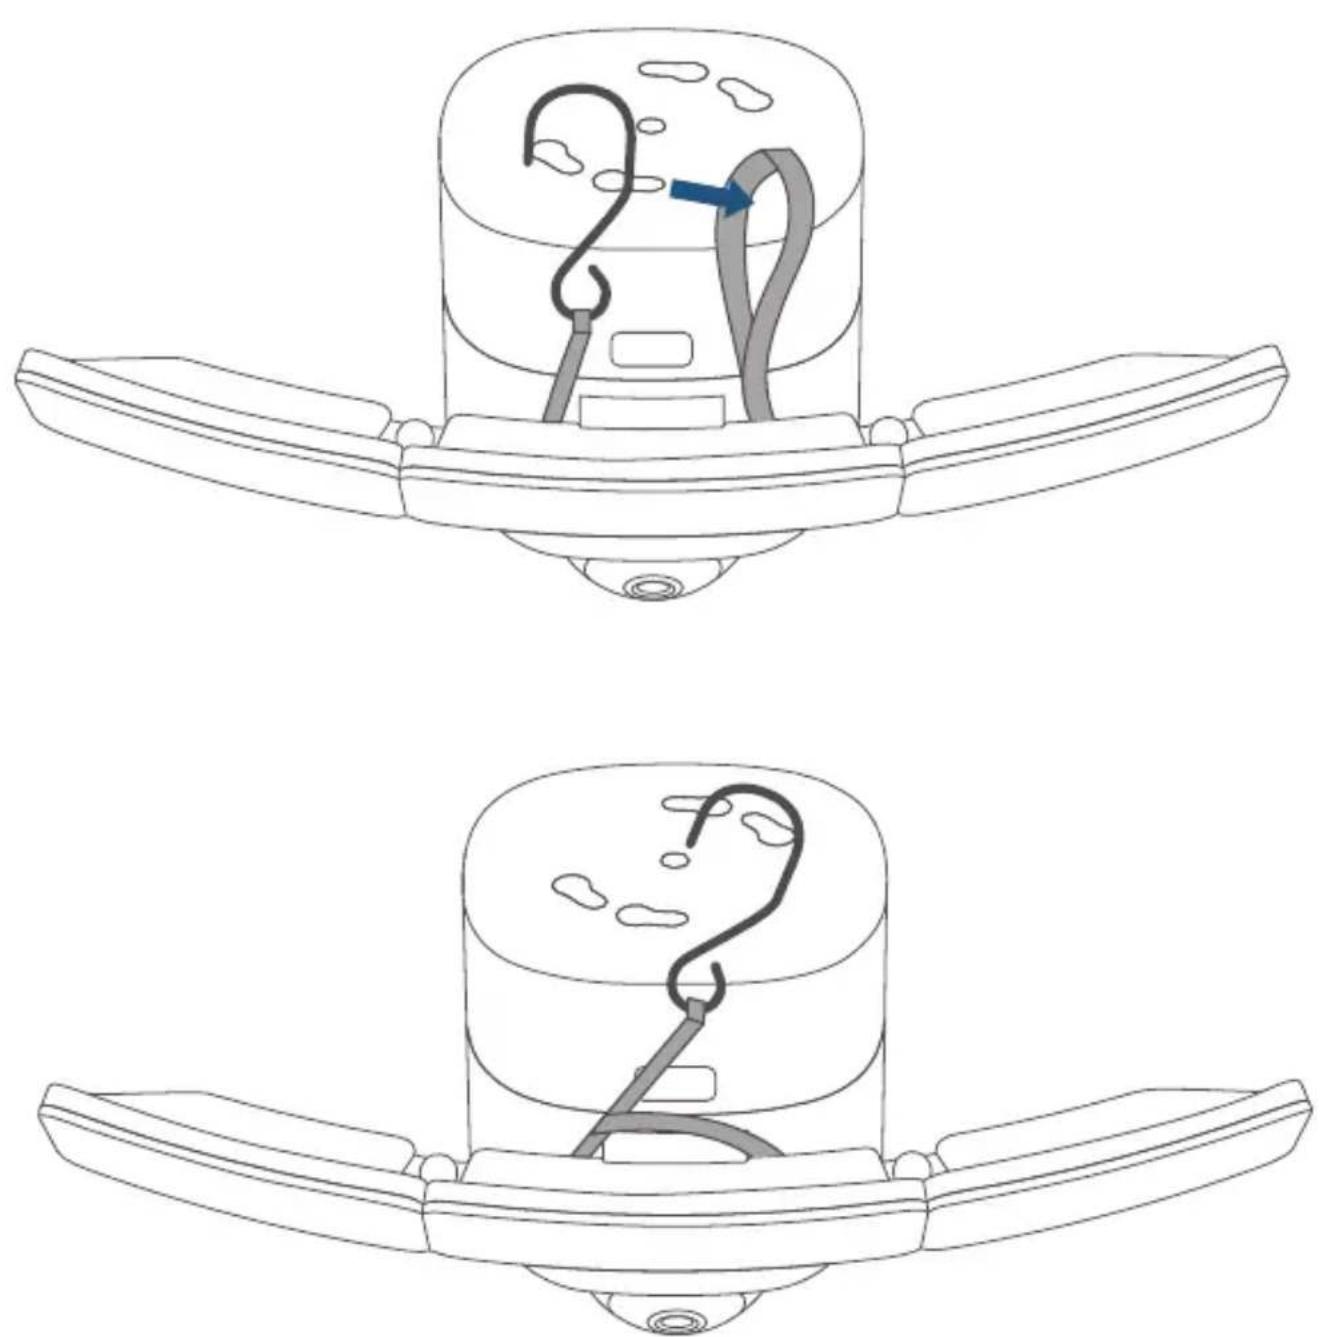
STEP 1. Before Mounting
- Pass the hook through the other end of the string as illustrated.
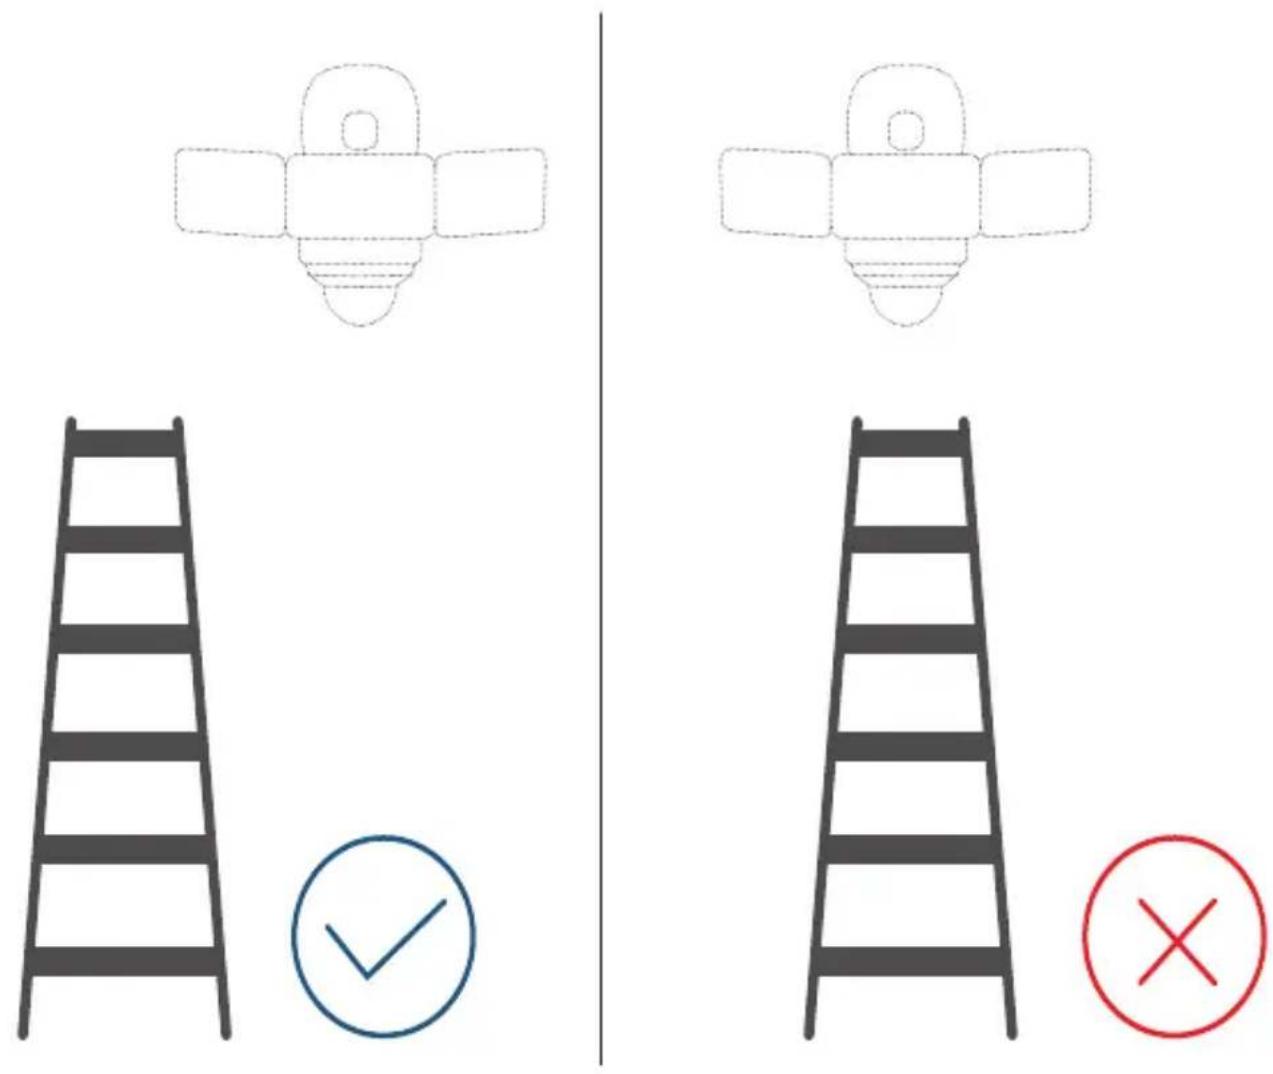
- You need a ladder to mount your Floodlight Camera on the wall. Make sure you do not place your ladder right under the Floodlight Camera. Place it to the lower left or right of the Floodlight Camera as illustrated below to avoid obstructing your view while mounting.
- Screw part of the central screw through the center of the Junction box and leave the screw long enough to hang the Floodlight Camera using the provided hook.
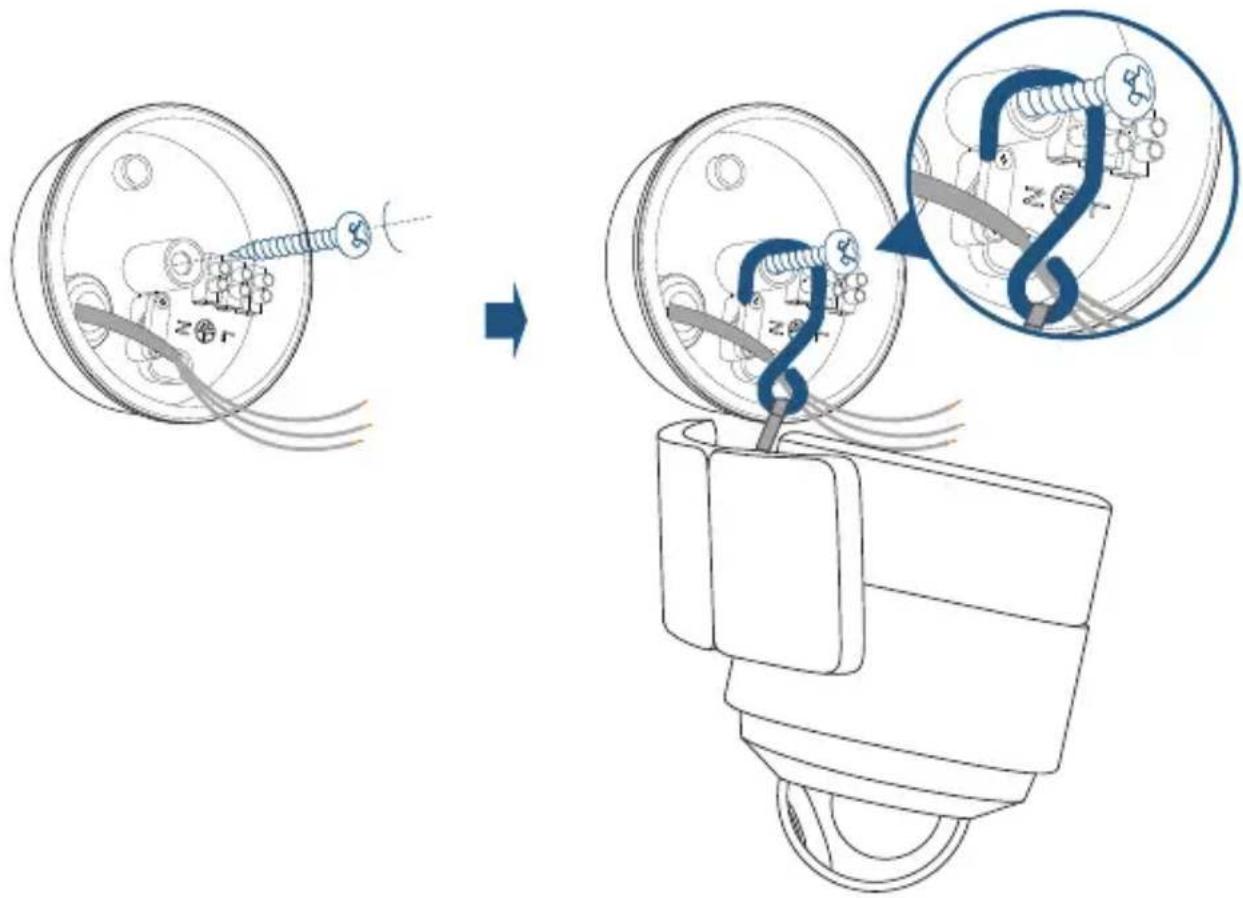
STEP 2. Connect Wires
-
Connect the ground wire from the Floodlight Camera to the ground wire from the wire connector in the junction box.
-
Connect the live / neutral wire from the Floodlight Camera to the live / neutral wire from the wire connector in the junction box respectively.
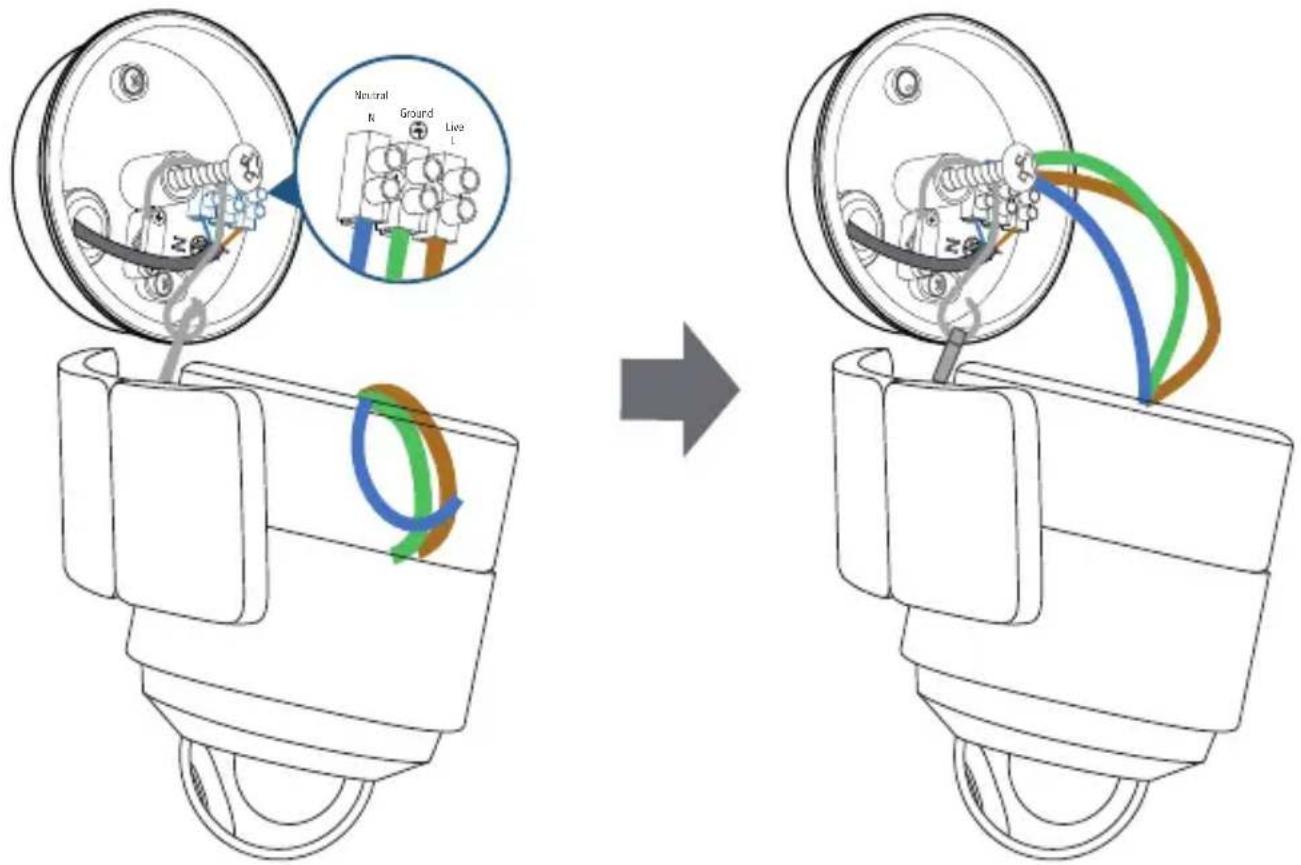
- Secure the wires with a screwdriver.
- Hold the Floodlight Camera, and remove the hook, strings, and central screw from the junction box.

- If you have problems with the proper operation of Flood-light Camera, consult a licensed technician.
- Green / green and yellow, brown and blue wires must connect to the matching colors. Never cross connect.
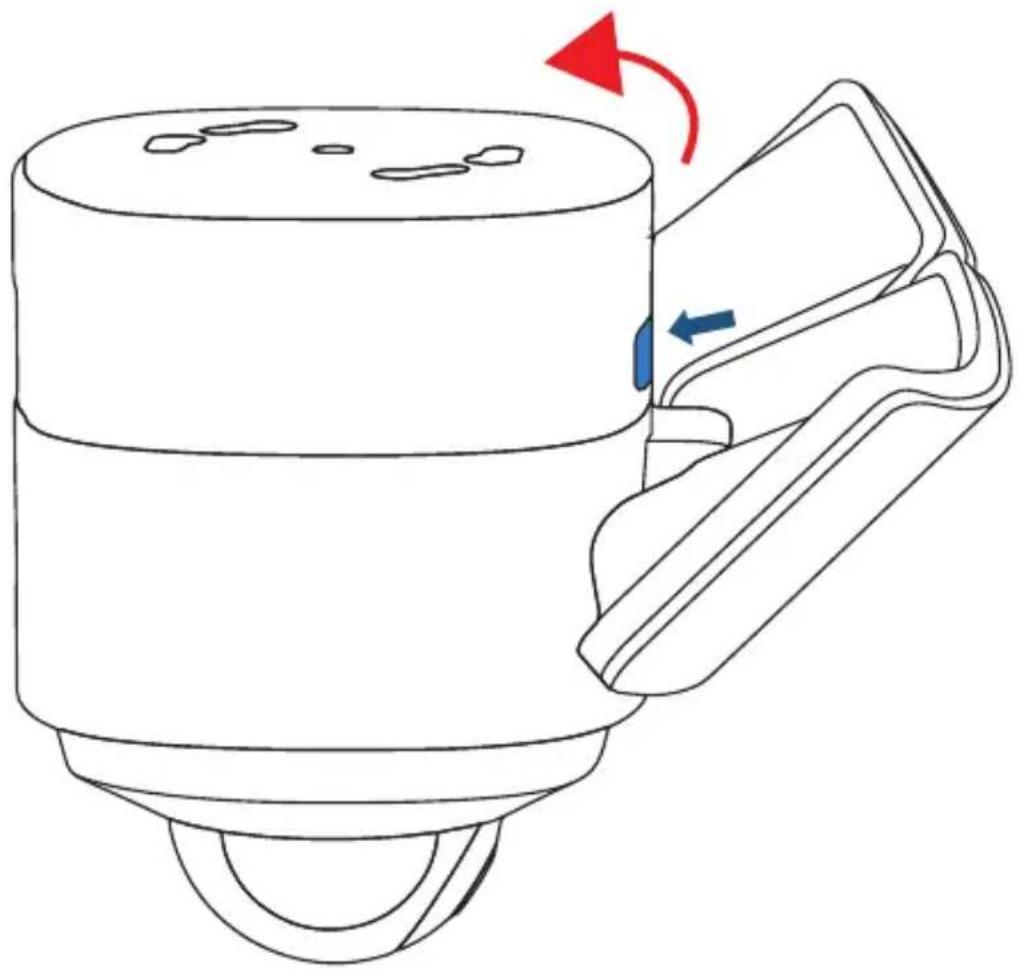
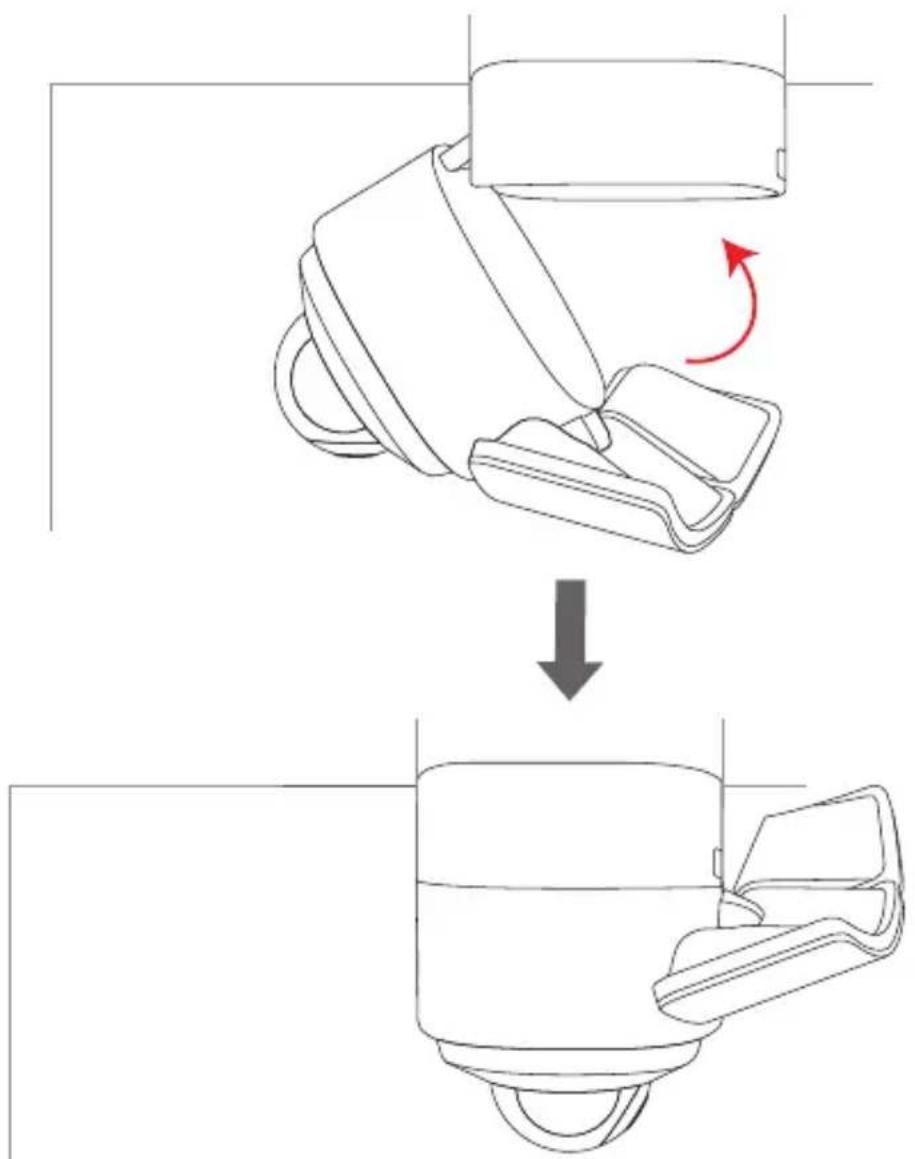
STEP 3. Mount the Floodlight Camera
- Press the button to open the mounting base.
natural_image
Line drawing of a mechanical device with a blue arrow indicating rotation and red arrow indicating clockwise motion (no text or symbols)-
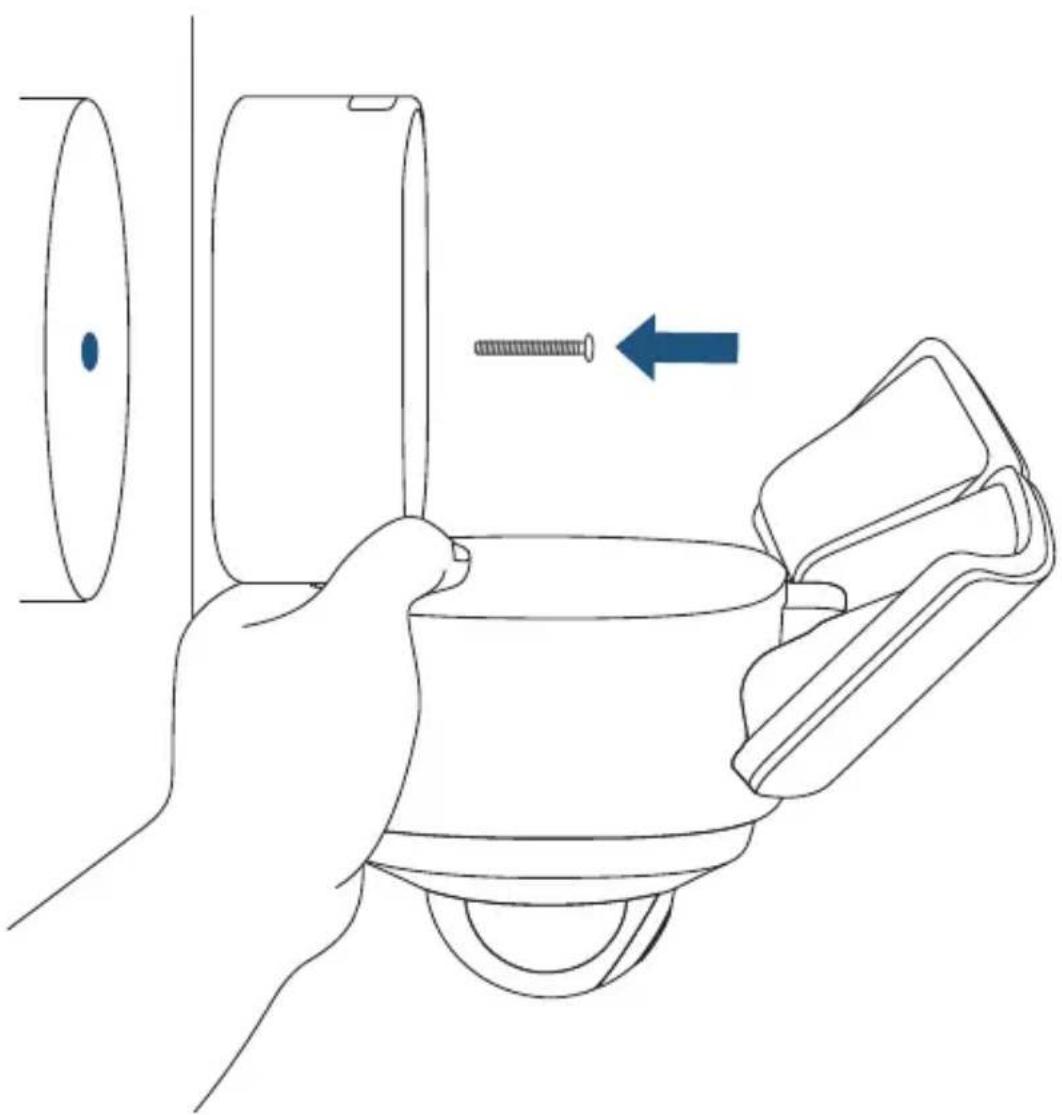
Hold the mounting base, and insert the central screw through the center of the mounting base and screw it tightly. Use the central screw cap to cover the central screw to prevent it from rusting.
-
Cover the central screw with the provided cap.
natural_image
Line drawing of a hand holding a cup with a screw being inserted, showing a blue arrow indicating direction (no text or symbols)Side view makes it easier for you to align the screws.
- Adjust the angle as mentioned in the section "Adjusting the Lighting Angle" to get the best view.
- Remove the label and protective film on the Floodlight.
- Switch on the main circuit breaker in the house.
Mount Floodlight Camera on the Ceiling
- Follow steps mentioned in the section "Mount Floodlight Camera onto a Wall" to choose the place for mounting and connecting wires.
- Insert the central screw through the center of the mounting base and screw it tightly.
- Cover the central screw with the provided cap.
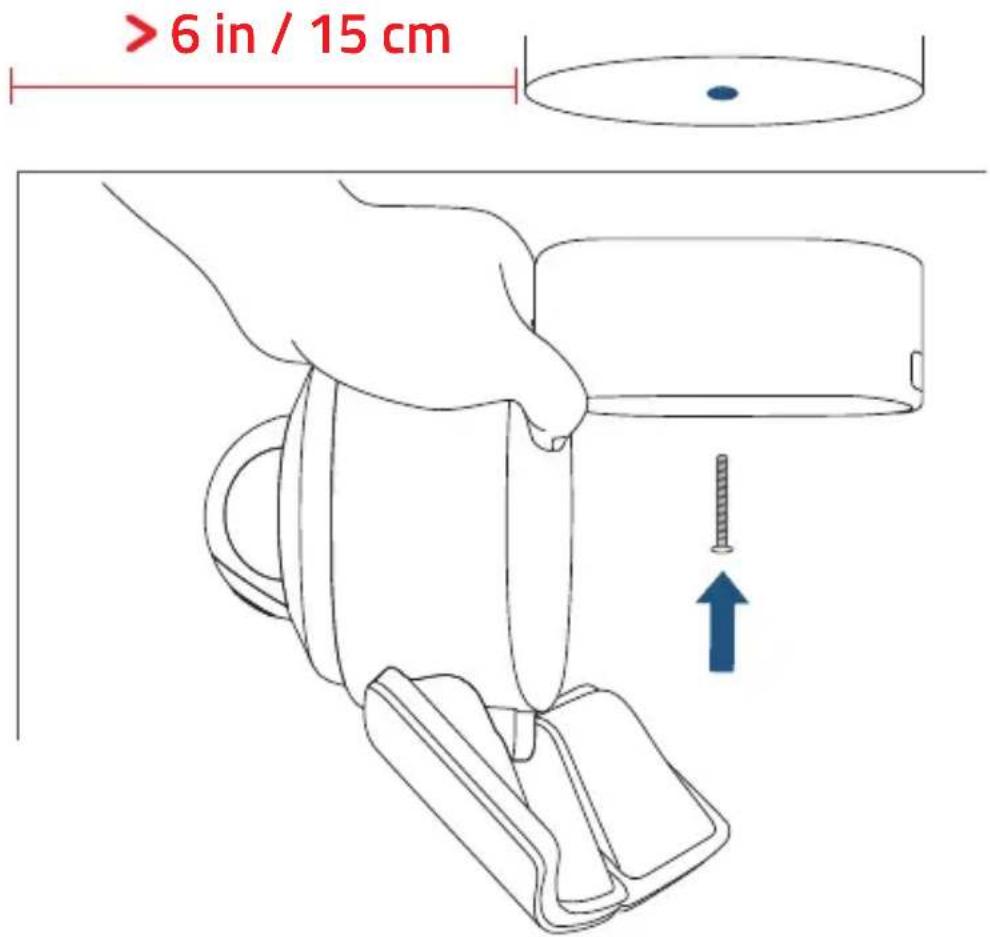

Make sure you place the Floodlight Camera more than 6 in / 15 cm away from a side wall.
- Snap the camera onto its base.
- Adjust the angle as mentioned in the section "Adjusting the Lighting Angle" to get the best view.
- Remove the label and protective film on the Floodlight.
- Switch on the main circuit breaker in the house.

In case Floodlight Camera is not powered on, switch off the circuit breaker before checking the wiring of Floodlight Camera. To avoid risk of shock, injury or death, always be cautious when working with electricity. Remember, do hire a professional electrician if you're uncomfortable working with electrical wiring.
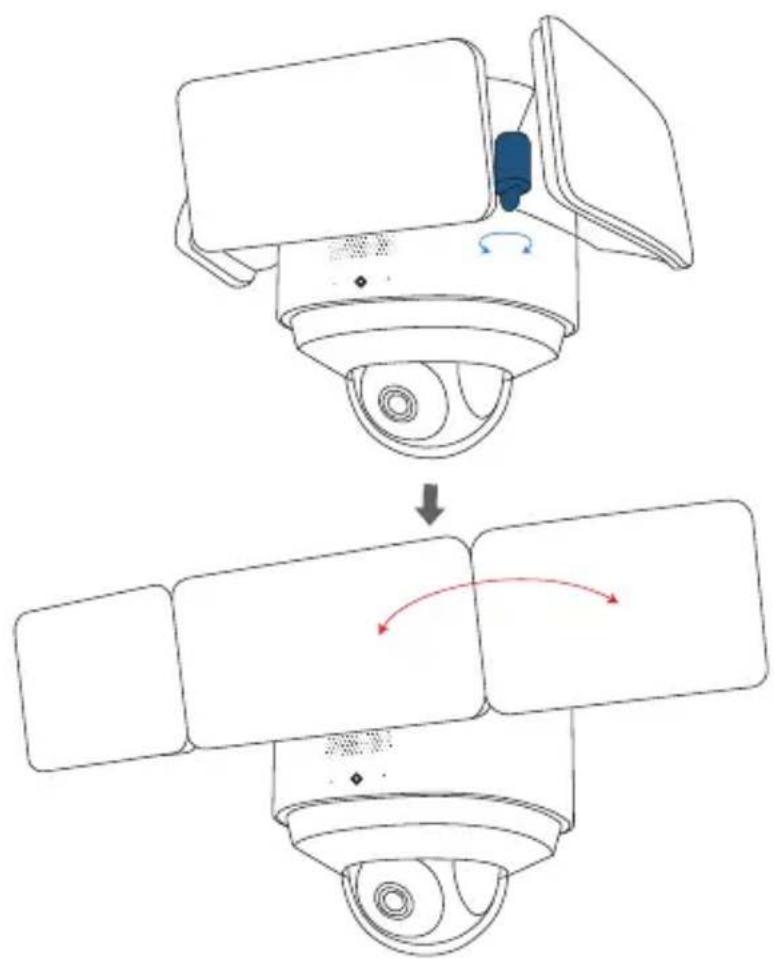
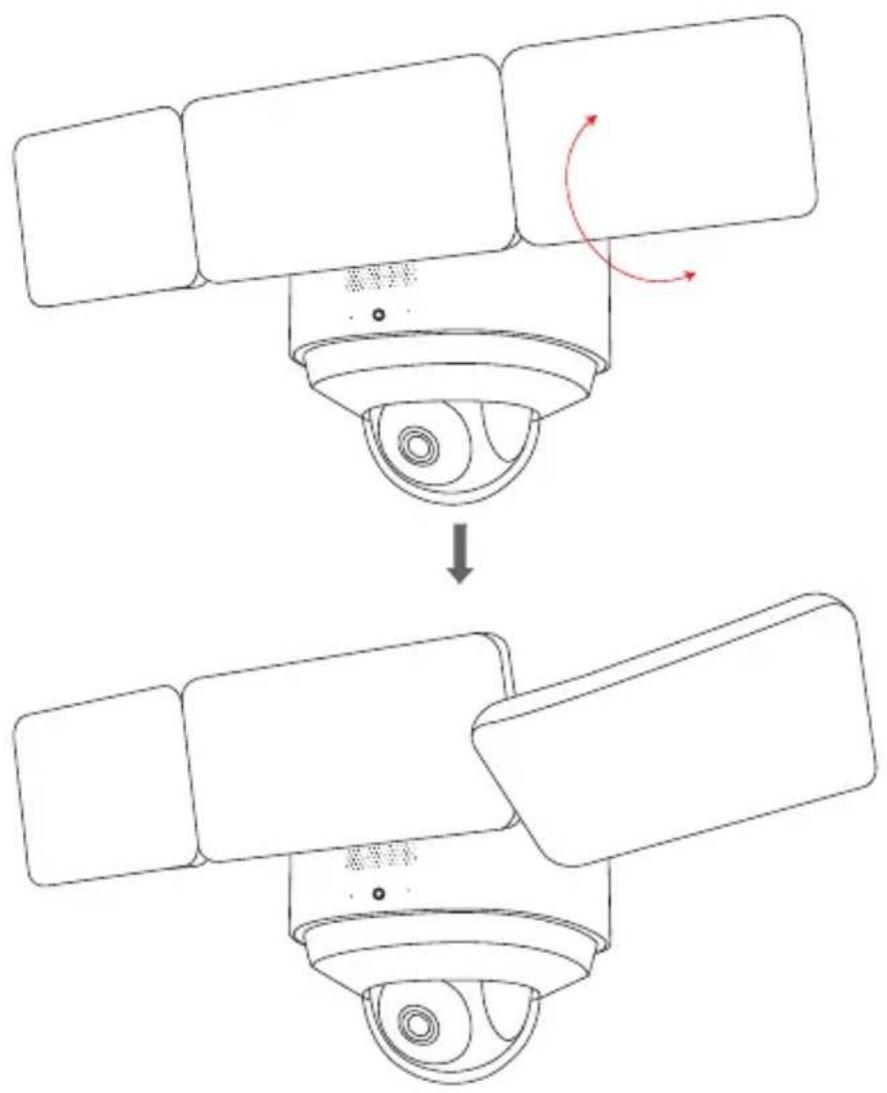
- Turn the knobs counter-clockwise to extend the Floodlight. Adjust the Floodlight horizontally and then tighten the knobs by turning them clockwise.
flowchart
graph TD
    A["Top: Camera with scroll, turn"] --> B["Downward adjustment"]
    B --> C["Left: Display screen, sensor input"]
    C --> D["Right: Display screen, sensor output"]
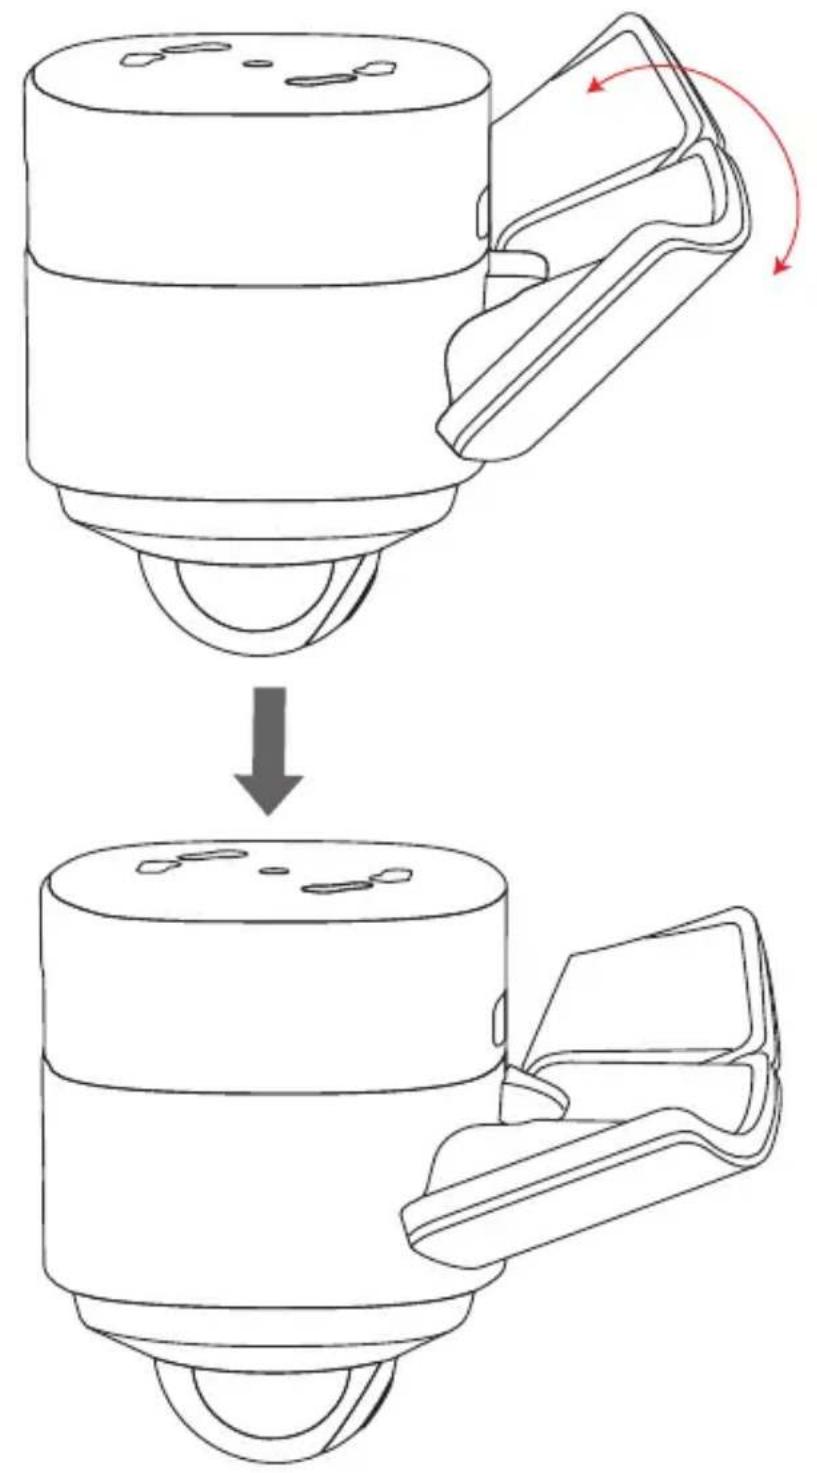
- Manually pull down the Floodlight in the middle.
flowchart
graph TD
    A["Top-Component"] --> B["Step 1: Processed"]
    B --> C["Step 2: Processed"]
    C --> D["Final Component"]
- Manually pull down the Floodlight on the side.

flowchart
graph TD
    A["Sensor with 3 cameras"] --> B["Arrow indicating rotation"]
    B --> C["Sensor with 2 cameras"]
    style A fill:#f9f,stroke:#333
    style C fill:#bbf,stroke:#333
To check whether Floodlight Camera is operating, confirm the LED indicator has turned solid white.
For troubleshooting, check the Help section in the eufy Security app. Refer to the app page for what the LED indicator status lights mean.
NOTICE

This product complies with the radio interference requirements of the European Community.
Declaration of Conformity
Hereby, Anker Innovations Limited declares that this device is in compliance with the essential requirements and other relevant provisions of Directive 2014/53/EU. For the declaration of conformity, visit the Web site https://uk.eufylife.com/
Due to the used enclosure material, the product shall only be connected to a USB Interface of version 2.0 or higher. The connection to so called power USB is prohibited.
Do not use the Device in the environment at too high or too low temperature, never expose the Device under strong sunshine or too wet environment.
The suitable temperature for the product and accessories is -20^-60^ .
Please place the device in an environment that has a normal room temperature and good ventilation. It is recommended to charge the device in an environment with a temperature that ranges from 5^ C\~ 25^ C.
RF exposure information: The Maximum Permissible Exposure (MPE) level has been calculated based on a distance of d=20 cm between the device and the human body. To maintain compliance with RF exposure requirement, use product that maintain a 20cm distance between the device and human body.
CAUTION RISK OF EXPLOSION IF BATTERY IS REPLACED BY AN INCORRECT TYPE. DISPOSE OF USED BATTERIES ACCORDING TO THE INSTRUCTIONS
Wi-Fi Operating Frequency Range: 2412\~2472MHz for EU;
Wi-Fi Max Output Power: 19.85 dBm(EIRP for 2.4G).
Bluetooth Operating Frequency Range: 2402\~2480 MHz;
Bluetooth Max Output Power: 4.81 dBm(EIRP).
This product is designed and manufactured with high quality materials and components, which can be recycled and reused.

This symbol means the product must not be discarded as household waste, and should be delivered to an appropriate collection facility for recycling. Proper disposal and recycling helps protect natural resources, human health and the environment. For more information on disposal and recycling of this product, contact your local municipality, disposal service, or the shop where you bought this product.
Declaration of Conformity
Hereby, Anker Innovations Limited declares that the product type T8423 is in compliance with Radio Equipment Regulations 2017. The full text of the UK declaration of conformity is available at the following internet address: https://uk.eufylife.com
Anker Technology (UK) Ltd I Suite B, Fairgate House, 205 Kings Road, Tyseley, Birmingham, B11 2AA, United Kingdom
Inhaltsverzeichnis
natural_image
Diagram of a surveillance camera with snowflake patterns and water droplets (no text or symbols)Korrosionsschutz
natural_image
Line drawing of a bird feeding into a bird's nest inside a surveillance camera (no text or symbols)10kg

flowchart
graph LR
    A["Hand gestures"] --> B["Payment via smartphone"]
    B --> C["Phone scanning with QR code"]
natural_image
Gray shield icon with a white circular symbol inside, resembling a stylized refresh or power button (no text or numbers)
natural_image
Diagram of a medical device connected to a device via cable, showing internal components and a magnified inset (no text or symbols)natural_image
Line drawing of a hand inserting a grid into an electronic device (no text or symbols)
natural_image
Technical line drawing of a mechanical component with no visible text or symbolsnatural_image
Diagram of a circular electrical connector with wires and connectors, no text or symbols present
natural_image
Technical diagram of a mechanical assembly with screws and colored wires, no visible text or symbols1
natural_image
Technical line drawing of a mechanical component with a tool inserted, showing internal parts and a blue-green symbol (no text or labels)2
natural_image
Line drawing of a mechanical device with a blue arrow indicating rotation and red arrow indicating clockwise motion (no text or symbols)natural_image
Line drawing of a hand holding a cup and a wall-mounted device, with a blue arrow pointing to the screw (no text or symbols)
natural_image
Diagram showing a mechanical device being processed from top to bottom, with red arrows indicating motion direction (no text or symbols)natural_image
Simple line drawing of a surveillance camera with four rectangular panels mounted on a circular base (no text or symbols)eufy Floodlight Cam 2 Pro (T8423)
Cable de carga
DECLARACIONES
natural_image
Diagram of a surveillance camera with snowflake icons and water droplets (no text or labels)Anticorrosión
natural_image
Line drawing of a bird feeding into a bird's nest with a screwdriver inserted (no text or symbols)10kg
ES 053
ENCENDIDO DE LA CÁMARA CON FOCOS


flowchart
graph LR
    A["Hand gestures"] --> B["Payment with smartphone"]
    B --> C["Phone payment"]
    C --> D["Car payment with QR code"]
natural_image
Gray shield icon with a circular refresh symbol in the center, no text or numbers present.

natural_image
Line drawing of a device connected to a screen, showing internal components and a magnified inset (no text or symbols)natural_image
Line drawing of a hand inserting a grid into an electrical panel (no text or symbols)
natural_image
Technical line drawing of a mechanical assembly with circular components and mounting holes (no text or symbols)natural_image
Technical diagram of a circular electrical connector with wires and connectors, no text or symbols present
1
natural_image
Technical line drawing of a mechanical component with a rod inserted into a circular housing (no text or symbols)2
MONTAJE DE LA CÁMARA CON FOCOS

Wall Mount
natural_image
Line drawing of a mechanical device with a blue arrow indicating rotation and red arrow indicating clockwise motion (no text or symbols)natural_image
Line drawing of a hand holding a cup with a screw being inserted, showing a blue arrow indicating direction (no text or symbols)
natural_image
Line drawing of a mechanical device with a downward arrow indicating process (no text or symbols)natural_image
Simple line drawing of a surveillance camera with lens and frame (no text or symbols)Eufy Floodlight Cam 2 Pro (T8423)
DÉCLARATIONS
natural_image
Diagram of a surveillance camera with snowflake icons and water droplets (no text or labels)Anti-corrosion
natural_image
Line drawing of a bird feeding into a bird's nest with a screwdriver inserted, no text or symbols present10kg
MISE SOUS TENSION DE VOTRE CAMÉRA FLOODLIGHT


flowchart
graph LR
    A["Hand gestures"] --> B["Payment icon"]
    B --> C["Smartphone with QR code payment"]
    C --> D["Device with battery icon"]
natural_image
Gray shield icon with a circular refresh symbol in the center (no text or numbers)


natural_image
Technical line drawing of a mechanical component with no visible text or symbolsnatural_image
Diagram of a circular electrical component with wires and connectors, no text or symbols present
natural_image
Pure mechanical diagram showing a cylindrical component inserted into a vertical surface with a blue arrow indicating direction (no text or symbols)1
2
natural_image
Technical line drawing of a mechanical component with a tool inserted into a circular housing (no text or symbols)2
MONTAGE DE VOTRE CAMÉRA FLOODLIGHT

natural_image
Line drawing of a mechanical device with a blue arrow indicating rotation and red arrow indicating clockwise motion (no text or symbols)natural_image
Line drawing of a hand holding a cup with a screw being inserted, showing a blue arrow indicating direction (no text or symbols)
flowchart
graph TD
    A["Top: Camera with lens and sensor"] --> B["Downward adjustment"]
    B --> C["Left: Sensor output"]
    C --> D["Right: Sensor output with red curved arrows indicating rotation"]
natural_image
Diagram showing a mechanical device before and after assembly, with no visible text or symbolsnatural_image
Simple line drawing of a surveillance camera with lens and four rectangular panels (no text or symbols)eufy Floodlight Cam 2 Pro (T8423)
Cavo di ricarica
DICHIARAZIONI
natural_image
Diagram of a surveillance camera with snowflake icons and water droplets (no text or labels)Anti corrosione
natural_image
Line drawing of a bird feeding into a bird's nest with a screwdriver inserted, no text or symbols present10kg
IT 101
ACCENSIONE DELLA TELECAMERA A FARO


flowchart
graph LR
    A["Hand gestures"] --> B["Payment with smartphone"]
    B --> C["Payment device with QR code"]
natural_image
Gray shield icon with a circular symbol inside, representing refresh or download (no text or numbers)
natural_image
Line drawing of a hand inserting a grid into an electronic device panel (no text or symbols)
natural_image
Technical line drawing of a mechanical assembly with rollers and clamps (no text or symbols)natural_image
Diagram of a circular electrical component with wires and connectors, no text or symbols present
natural_image
Technical diagram of a mechanical assembly with screws and wires, no visible text or symbolsnatural_image
Pure mechanical diagram showing a shaft inserted into a vertical groove with an arrow indicating direction (no text or symbols)1
natural_image
Technical diagram of a mechanical assembly with threaded fasteners and colored wires (no text or symbols)2
natural_image
Technical line drawing of a mechanical component with a tool inserted, showing internal parts and a 3D coordinate axis (no text or symbols)2
MONTAGGIO DELLA TELECAMERA A FARO

Wall Mount
natural_image
Line drawing of a mechanical device with a blue arrow indicating rotation and red arrow indicating clockwise motion (no text or symbols)natural_image
Line drawing of a hand holding a cup with a screw being inserted, showing a blue arrow indicating direction (no text or symbols)
natural_image
Line drawing of a mechanical device with a downward arrow indicating process (no text or symbols)natural_image
Simple line drawing of a surveillance camera with four rectangular panels mounted on a circular base (no text or symbols)eufy Floodlight Cam 2 Pro (T8423)

Oplaadkabel
Voedingsadapter (5V/1A)
Boormachine (15/64 mm)
PRODUCTOVERZICHT

VERKLARINGEN
natural_image
Diagram of a surveillance camera with snowflake icons and water droplets (no text or labels)Corrosiebestendigheid
natural_image
Line drawing of a bird feeding into a nest with two chicks, mounted on a platform (no text or symbols)10kg
NL 125
UW CAMERA MET SCHIJNWERPERS INSCHAKELEN


flowchart
graph LR
    A["Hand gestures"] --> B["Payment via smartphone"]
    B --> C["Payment card with QR code"]
natural_image
Gray shield icon with a circular symbol inside, representing security or refresh (no text or numbers)

natural_image
Line drawing of a hand inserting a grid into an electrical panel (no text or symbols)
natural_image
Technical line drawing of a mechanical assembly inside a circular housing, showing components like gears and linkages (no text or symbols)natural_image
Diagram of a circular electrical component with wires and connectors, no text or symbols present
1

natural_image
Technical line drawing of a mechanical component with a rod inserted into a circular housing (no text or symbols)2
CAMERA MET SCHIJNWERPERS MONTEREN

natural_image
Technical line drawings of a mechanical component with no visible text or symbolsNL 133
STAP 2. Verbind de draden
natural_image
Line drawing of a mechanical device with a blue arrow indicating rotation and red arrow indicating clockwise motion (no text or symbols)natural_image
Line drawing of a hand holding a cup with a screw being inserted, showing a blue arrow indicating direction (no text or symbols)
flowchart
graph TD
    A["Top Device"] -->|Rotation Arrow| B["Bottom Device"]
flowchart
graph TD
    A["Top: Top part of device"] --> B["Downward arrow"]
    B --> C["Bottom: Bottom part of device"]
    style A fill:#f9f,stroke:#333
    style C fill:#bbf,stroke:#333
flowchart
graph TD
    A["Sensor with four panels"] --> B["Arrow indicating rotation"]
    B --> C["Final sensor with three panels"]
natural_image
Simple line drawing of a surveillance camera with no text or symbolseufy Floodlight Cam 2 Pro (T8423)

Tampa do
parafuso central
Parafusos de
placa
Caixa de
ligação
DECLARAÇÕES
natural_image
Diagram of a surveillance camera with snowflake and droplet patterns, no text or symbols presentAnticorrosão
natural_image
Line drawing of a bird feeding into a bird's nest with a screwdriver inserted, no text or symbols present10kg
LIGAR A CÂMARA DE HOLOFOTE


flowchart
graph LR
    A["Hand gestures"] --> B["Payment icon"]
    B --> C["Smartphone with 'i' icon"]
    C --> D["Payment device with QR code"]
natural_image
Gray shield icon with a circular refresh symbol in the center (no text or numbers)

natural_image
Illustration of a hand inserting a grid into an abacus (no text or symbols)
natural_image
Technical line drawing of a mechanical component with no visible text or symbolsnatural_image
Technical diagram of a circular electrical component with wires and connectors, no visible text or symbols
natural_image
Technical diagram of a mechanical assembly with threaded fasteners and colored wires (no text or labels)1

natural_image
Technical line drawing of a mechanical component with a rod inserted into a circular housing (no text or symbols)2
INSTALAR A CÂMARA DE HOLOFOTE

Wall Mount
PASSO 2. Ligar fios
natural_image
Line drawing of a mechanical device with a blue arrow indicating rotation and red arrow indicating clockwise motion (no text or symbols)-
Segure a base de instalação e insira o parafuso central através do centro da base de instalação e aparafuse-o firmemente. Cubra o parafuso central com a tampa do parafuso central para evitar que enferruje.
-
Bedek de centrale schroef met de centrale schroefdop om roestvorming te voorkomen.

natural_image
Line drawing of a hand holding a cup with a screw being inserted, showing a magnified view (no text or symbols)
flowchart
graph TD
    A["Top Valve"] -->|Rotation Arrow| B["Side-view Component"]
flowchart
graph TD
    A["Top: Camera with Shift"] --> B["Downward Rotation"]
    B --> C["Left: Camera with Shift"]
    C --> D["Right: Camera with Rotation"]
    D --> E["Bottom: Camera with Shift"]
natural_image
Line drawing of a mechanical device with a downward arrow indicating process (no text or symbols)- Puxe manualmente o Holofote na parte lateral.
flowchart
graph TD
    A["Sensor Input"] --> B["Sensor Rotation"]
    B --> C["Security Camera Output"]
natural_image
Simple line drawing of a surveillance camera with lens and screen (no text or symbols)eufy Floodlight Cam 2 Pro (T8423)
كبل الشحن
AR 171
تاحيرصتلا
natural_image
Diagram of a surveillance camera with snowflake icons and falling water droplets (no text or labels)Anticorrosão
مضاد للتأكل
natural_image
Line drawing of a bird feeding into a nest with two chicks, no text or symbols present10kg

flowchart
graph LR
    A["Hand interacting with device"] --> B["Mobile payment"]
    B --> C["Mobile payment with QR code"]
natural_image
Gray shield icon with a circular symbol inside, representing security or power protection (no text or numbers)

natural_image
Line drawing of a hand pressing down on a grid panel with no text or symbols
natural_image
Diagram of a circular electronic component with wires and connectors, no text or symbols present
natural_image
Pure mechanical diagram showing a shaft and pipe connection without any text or symbols1
2
natural_image
Technical line drawing of a mechanical component with a handle and internal parts (no text or symbols)2
Wall Mount
natural_image
Technical line drawings of a mechanical component with no visible text or symbols
natural_image
Technical line drawing of a mechanical device with colored wires and components (no text or symbols)natural_image
Line drawing of a mechanical device with a blue arrow indicating rotation and red arrow indicating clockwise motion (no text or symbols)natural_image
Line drawing of a hand holding a cup with a screw being inserted, showing a magnified view (no text or symbols)
flowchart
graph TD
    A["Top: Camera with scroll, turn"] --> B["Downward Arrow"]
    B --> C["Left: Screen with sensor, downward arrow"]
    C --> D["Right: Sensor with red curved arrow"]
AR 189
natural_image
Diagram showing a mechanical device before and after assembly, with no visible text or symbols12-month limited warranty
support@eufylife.com

@EufyOfficial

@EufyOfficial

@EufyOfficial