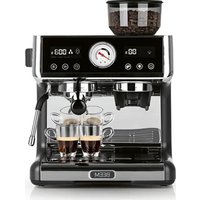
Espresso Grind-Expert - Coffee machine BEEM - Free user manual and instructions
Find the device manual for free Espresso Grind-Expert BEEM in PDF.


| Brand | BEEM |
| Model | Espresso Grind-Expert |
| Product type | Espresso machine with built-in grinder |
| Supply voltage | 220 - 240 V ~ 50 - 60 Hz |
| Power | 3000 W |
| Pressure | 15 bar |
| Water tank | Removable, capacity between MIN and MAX marks (approx. 1.5 L) |
| Bean hopper | Removable, unspecified capacity (approx. 200 g) |
| Grind settings | 30 fineness levels |
| Water temperature | 4 settings: 90, 92, 94, 96 °C |
| Main functions | Single/double espresso, milk froth, hot water, cup warmer |
| Programming | Water quantity, ground coffee quantity, grinding duration |
| Display | Screen with pressure, grinding duration, preparation time, indicator lights |
| Included accessories | Portafilter, single and double filters, tamper, milk jug, brush, cleaning needle |
| Cleaning | Self-cleaning steam wand, removable grinder, descaling with indicator light |
| Safety | Automatic shut-off after 30 min, overheating protection, child safety (supervision required) |
| Materials | Plastic body, stainless steel parts (not specified) |
| Warranty | Manufacturer warranty under conditions (duration not specified) |
Frequently Asked Questions - Espresso Grind-Expert BEEM
User questions about Espresso Grind-Expert BEEM
0 question about this device. Answer the ones you know or ask your own.
Ask a new question about this device
Download the instructions for your Coffee machine in PDF format for free! Find your manual Espresso Grind-Expert - BEEM and take your electronic device back in hand. On this page are published all the documents necessary for the use of your device. Espresso Grind-Expert by BEEM.
USER MANUAL Espresso Grind-Expert BEEM
natural_image
Exterior view of a modern BEEM coffee maker with digital display and pressure gauge (no text or symbols on main body)ESPRESSO-GRIND-EXPERT
02362
Gebrauchsanleitung
Operating instructions
Mode d'emploi
Enjoy intense coffee and tea moments – Discover a variety of preparation methods and experience a special array of flavours with BEEM.
natural_image
Close-up of a coffee cup with orange sauce, placed on a saucer (no text or symbols visible)
natural_image
Close-up of hands pouring light from a cup into a white bowl containing a soft, pear-shaped coffee (no text or symbols visible)
natural_image
Three glasses of light-colored beverage on a wooden surface (no text or symbols visible)DEUTSCH 4
ENGLISH 35
FRANÇAIS 66
ESPAÑOL 97
ITALIANO 128
KUNDENSERVICE / IMPORTEUR
CUSTOMER SERVICE / IMPORTER
SERVICE APRÈS-VENTE / IMPORTATEUR
natural_image
Close-up of a hand pouring liquid into a glass container on an electric stove (no visible text or symbols)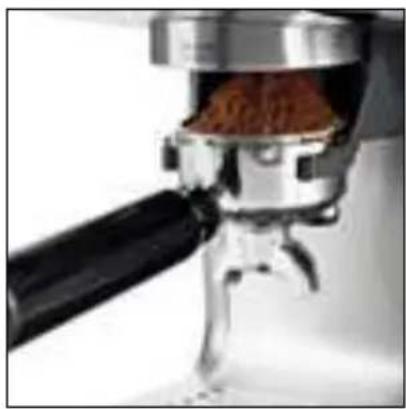
natural_image
Close-up of a coffee maker's presser feeding a brown coffee kernel (no text or symbols visible)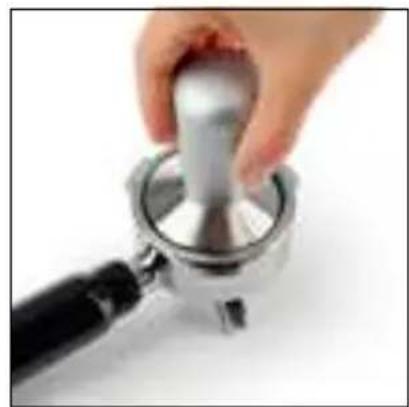
natural_image
Hand holding a metallic mechanical component, possibly a valve or clamp, against a plain white background (no text or symbols visible)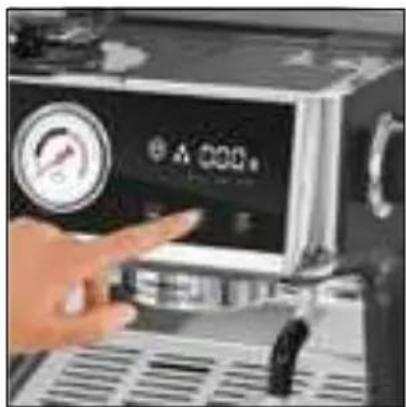
natural_image
Close-up of a hand pressing down on a coffee machine control panel (no visible text or symbols)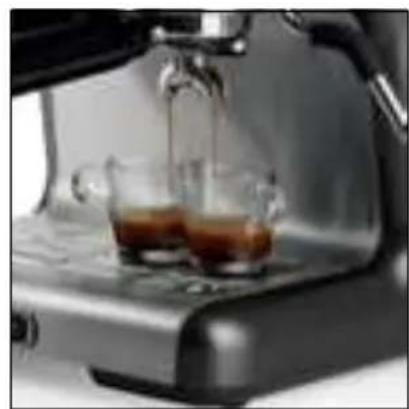
natural_image
Close-up of a espresso machine with two glass cups pouring liquid into it (no visible text or symbols)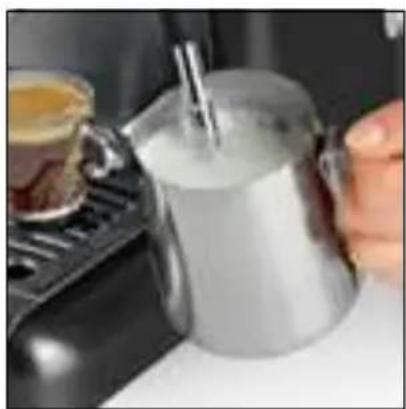
natural_image
Close-up of a hand holding a metallic kettle with a glass lid, next to a small cup on a stovetop (no visible text or symbols)8 Lieferumfang
8 Geräteübersicht
natural_image
Three circular mechanical components with internal structural lines and mounting holes, shown from different angles (no text or symbols)D

natural_image
Close-up of a glass beaker containing a container with brown granular substance, placed on a metal stand (no visible text or symbols)E
natural_image
Close-up of a mechanical presser or mixer device with a black handle and metallic components (no visible text or symbols)F
natural_image
Close-up of a glass container with brown granular substance inside, mounted on a metal base (no visible text or symbols)G
natural_image
Close-up of two black plastic mechanical components with a red 'X' and green checkmark indicators (no text or symbols on the main subject)Lieferumfang
natural_image
Bottle of clear liquid with red cap and label (no visible text or symbols)natural_image
White rectangular product packaging with printed text and a small logo (no visible text or symbols on the packaging itself)BEEM Premium Reinigungstabletten
Cleaning tablets Pastilles de nettoyage Tabletas de limpieza Pastiglie per la pulizia Art. Nr. 07292 (50x) / 00426 (20x)
natural_image
Close-up of a hand holding a glass container over a kitchen appliance with a digital scale (no visible text or symbols)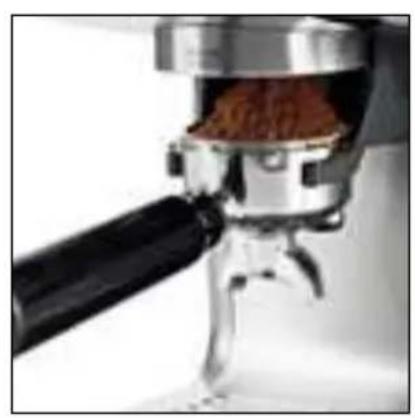
natural_image
Close-up of a coffee maker's presser feeding a brown coffee kernel (no text or symbols visible)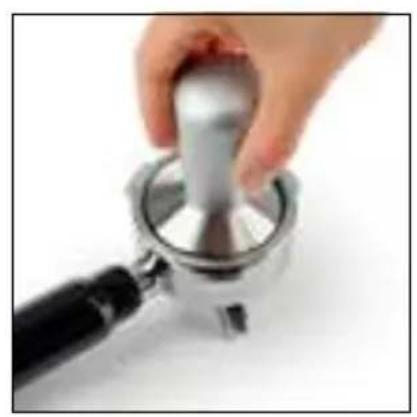
natural_image
Hand holding a metallic mechanical clamp or knob, no visible text or symbols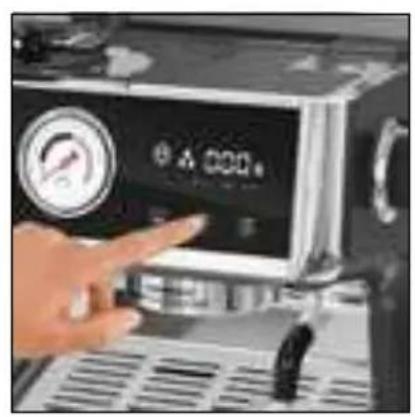
natural_image
Close-up of a hand pressing a pressure gauge on a coffee machine (no visible text or symbols)
natural_image
Close-up of a espresso machine with two cups pouring liquid into it (no visible text or symbols)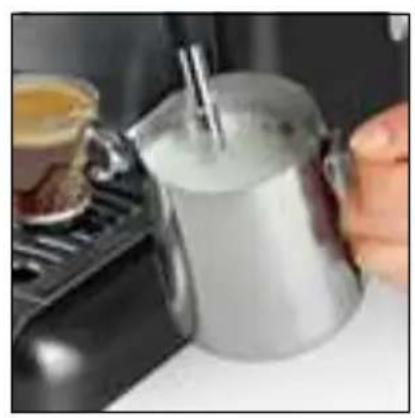
natural_image
Close-up of a hand pouring liquid from a metallic kettle into a stainless steel stove (no visible text or symbols)39 Items Supplied
39 Device Overview
40 Information About Your Operating Instructions
40 Intended Use
41 Safety Notices
44 Before Initial Use
44 Setting Up and Connecting the Device
45 Operation and Functions
45 Display
45 Operating Fields
46 Pressure Display
46 Steam Power Control
46 Hotplate
46 Programming Your Own Settings
47 Setting the Grinding Fineness
47 Setting the Quantity of Espresso Powder
48 Setting the Water Quantity
48 Setting the Water Temperature
49 Preparation
49 Inserting / Removing the Drip Tray
49 Filling the Water Tank
49 Adding Espresso Beans
50 Inserting / Removing the Sieve Insert
50 Filling the Portafilter
50 Inserting the Portafilter into the Device
50 Removing the Portafilter from the Device
51 Emptying the Sieve Insert
51 Tips
52 Finding Suitable Settings for Your Espresso
53 Preparation
53 Making Espresso
54 Preparing Milk Froth
55 Dispensing Hot Water
55 Recipes for Speciality Coffees
55 Cappuccino
56 Latte Macchiato
56 Caffè Americano
56 Cleaning and Care
57 Cleaning the Steam Nozzle
57 Cleaning the Grinder
58 Descaling
59 Storage
60 Troubleshooting
63 Warranty and Limitations of Liability
63 Technical Data
64 Disposal
natural_image
Three circular mechanical components with internal vertical and horizontal features, shown from different angles (no text or symbols)D
natural_image
Close-up of a glass beaker containing a container filled with brown granular substance, placed on a stand (no visible text or symbols)F
natural_image
Close-up of a glass container with dark granular substance inside, placed on a metal base (no visible text or symbols)E
natural_image
Close-up of a mechanical presser's lever mechanism (no visible text or symbols)G
natural_image
Close-up of two black plastic components with circular cutouts, one marked with a red X and green checkmark (no text or symbols on the main subject)Items Supplied
- Main device
• Water tank with lid - Bean container with lid
- Drip tray
- Storage plate
- Portafilter
-
Large sieve insert for coffee powder for preparing 2 cups of espresso or 1 cup of double espresso
-
Small sieve insert for coffee powder for preparing 1 cup of espresso or 1 small cup of coffee
- Cleaning brush, 2 x
- Cleaning needle
- Small milk jug
- Tamper
- Operating instructions
Check the items supplied for completeness and the components for transport damage. If you find any damage, do not use the device but contact our customer service department.
Remove all packaging materials and any possible protective films and transport protection. Never remove the rating plate and any possible warnings.
Device Overview
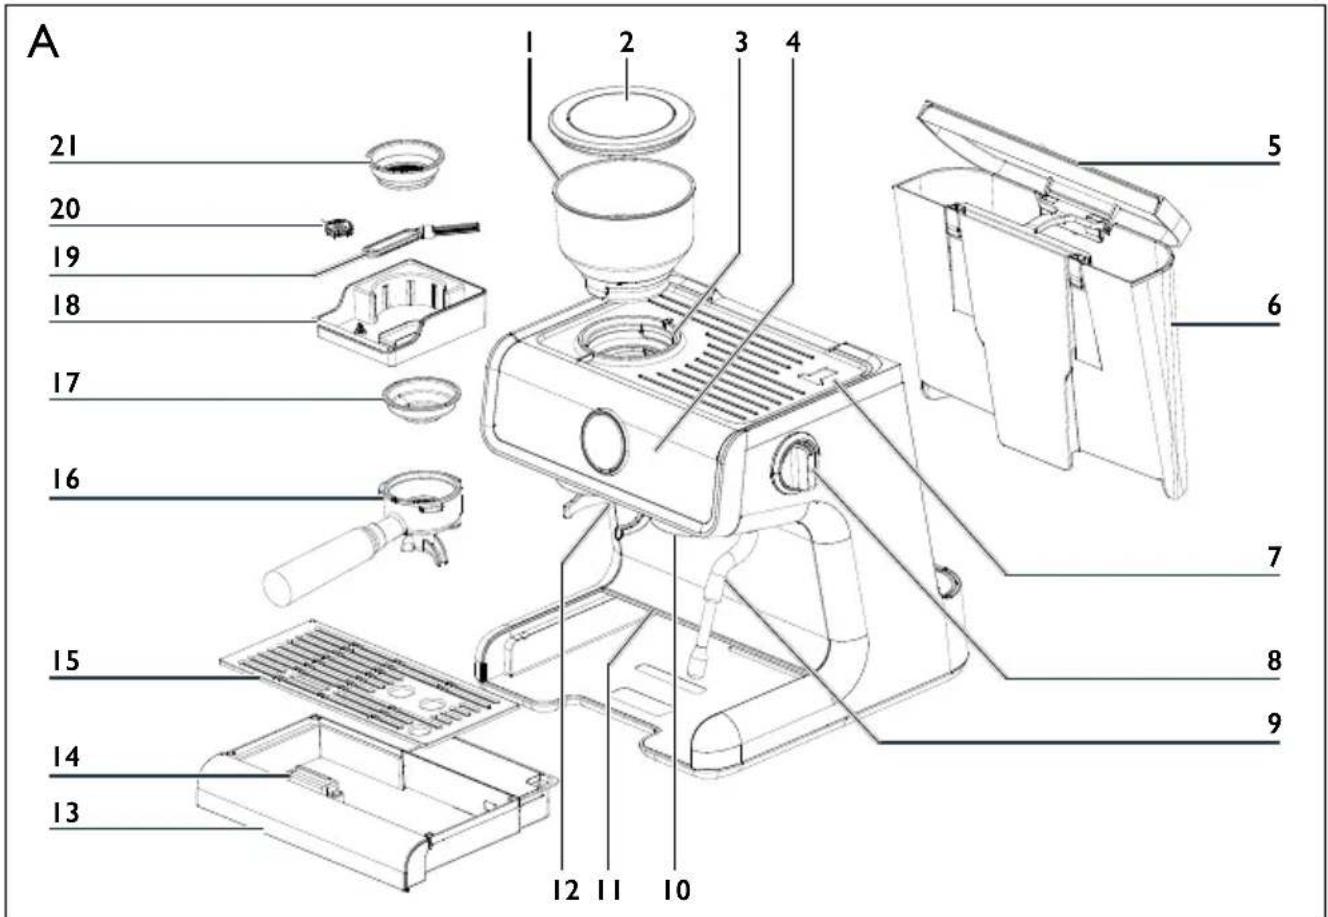
(See first pages for illustrations)
Picture A – Device and Accessories
I Bean container
2 Lid of bean container
3 Grinder
4 Control panel with display and pressure display
5 Water tank lid
6 Water tank
7 Hotplate with tamper store
8 Steam power control (steam / hot water)
9 Steam nozzle
10 Portafilter mount
II Compartment for drawer for cleaning utensils
12 Coffee powder outlet
13 Drip tray
14 Float gauge
15 Storage plate
16 Portafilter
17 Single sieve insert
18 Drawer for cleaning utensils
19 Cleaning brush
20 Cleaning needle
21 Double sieve insert
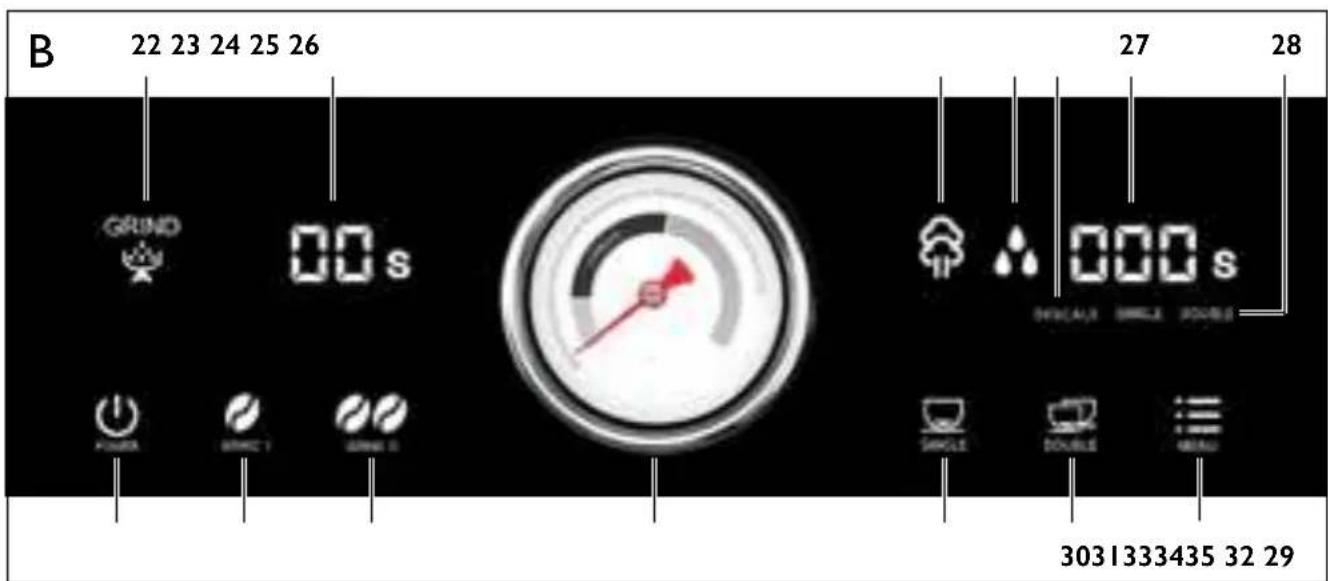
Picture B – Control Panel
22 GRIND /
Bean container control lamp
23 Grinding time display
24 - Steam control lamp
25 - Hot water control lamp
26 DESCALE – Descale control lamp
27 Preparation time display / Number of cups prepared / Water temperature /
28 SINGLE / DOUBLE – Brewing mode control lamp
29 Field : / MENU – Settings
30 Field / DOUBLE – Double espresso brewing mode
31 Field / SINGLE — Single espresso brewing mode
32 Pressure display
33 Field / GRIND II – Double espresso grinding mode
34 Field / GRIND I – Single espresso grinding mode
35 Field ⏻ / POWER – On / Off switch
Congratulations!
Dear Customer,
We are delighted that you have chosen this espresso portafilter machine with grinder.
If you have any questions about the device and about spare parts/accessories, contact the customer service department via our website: www.beem.de
Information About Your Operating Instructions
Before using the device for the first time, please read through the operating instructions carefully and keep them for future reference. If the device is given to someone else, it should always be accompanied by these operating instructions. The operating instructions are an integral part of the device. The manufacturer and importer do not accept any liability if the information in these operating instructions is not complied with.
Symbols

Danger symbols: These symbols indicate risks of injury (e.g. from electricity or fire). Read through the associated safety notices carefully and follow them.

Supplementary information




Suitable for use with food.

Read the operating instructions before use!
Signal Words
Signal words indicate hazards if the associated notices are not followed.
DANGER – high risk, results in serious injury or death
WARNING – medium risk, may result in serious injury or death
CAUTION – low risk, may result in minor or moderate injury
NOTICE – may result in risk of damage to material
Intended Use
- This device is intended to be used to make espresso using espresso beans. It can also be used to make milk froth.
- The device is for personal use only and is not intended for commercial or domestic-like applications, e.g. in hotels, bed and breakfasts, offices, staff kitchens or similar places.
- The device should only be used as described in the operating instructions. Any other use is deemed to be improper.
Safety Notices

WARNING: Note all safety notices, instructions, illustrations and technical data provided with this device.
Failure to follow the safety notices and instructions may result in electric shock, fire and / or injuries.
- This device may be used by children aged 8 and over and by people with reduced physical, sensory or mental abilities or a lack of experience and/or knowledge if they are supervised or have received instruction on how to use the device safely and have understood the dangers resulting from failure to comply with the relevant safety precautions.
• Children must not play with the device. - Cleaning and user maintenance must not be carried out by children, unless they are older than 8 years of age and are supervised.
• Children younger than 8 years of age and animals must be kept away from the device and the connecting cable.

CAUTION: hot surfaces!
The device and the accessories are very hot during and shortly after use. Only the handles, controls and operating fields may be touched while the device is in operation or immediately after it is switched off. Allow the device to cool down completely before it is cleaned.
- Never exceed the maximum fill level (note the MAX marking). If the water tank is overfilled, it could overflow.
- The device is not designed to be operated with an external timer or a separate remote control system.
- Never immerse the device and the connecting cable in water or other liquids and ensure that these components cannot fall into water or become wet.
- The device must always be disconnected from the mains power when it is left unattended and before assembling, disassembling or cleaning the device.
- Do not make any modifications to the device. Do not replace the connecting cable yourself. If the device or the connecting cable of the device are damaged, they must be replaced by the manufacturer, customer service department or authorised distributors in order to avoid any hazards.
- It is essential to follow the instructions in the “Cleaning and Care” chapter.

DANGER – Danger of Electric Shock
- Use the device only in closed rooms.
- Do not use the device in rooms with high humidity.
- If the device falls into water while it is connected to the mains power; switch off the power supply immediately! Only after this should you pull the device out of the water.
- Never touch the device and the connecting cable with wet hands when these components are connected to the mains power.
- Make sure that the steam which emerges does not come into contact with electrical devices and equipment containing electrical components.

WARNING – Danger of Injury
- Keep the packaging material away from children and animals.There is a danger of suffocation!
Danger of scalding from heat, hot steam or condensation!
- Avoid coming into contact with the rising steam. Do not open the water tank lid during the brewing process.
- Do not take out the portafilter during the brewing process. The portafilter will become hot during use.
- Do not touch the steam nozzle after use. It gets hot when steam or hot water is emitted.
- Be careful when removing the portafilter after operating the device. There may still be hot water remaining in / on the portafilter!
-
Allow the portafilter to cool down before it is emptied.
-
Never pour water into the water tank when the device is switched on or during the brewing process. Allow the device to cool down before filling it again.
-
Do not move the device during the brewing process.
-
Keep items of clothing such as scarves, shawls, jewellery, ties and long hair away from the bean container and the grinder shaft.
- Do not reach into the bean compartment and the grinder shaft and do not insert any objects when the device is in operation!
- In the interest of your own safety, inspect the device and the connecting cable for damage each time before you use it. Use the device only if it is in working order.
- Make sure that the connecting cable does not present a trip hazard. The connecting cable should not hang down from the surface on which the device is placed in order to prevent the device from being pulled down.

WARNING – Danger of Fire
- Do not connect the device along with other consumers (with a high wattage) to a multiple socket in order to prevent overloading and a possible short circuit (fire).
- Do not operate the device in the vicinity of combustible materials. Do not place any combustible materials (e.g. cardboard, paper, wood or plastic) in or on the device.
- Do not cover the device during operation.
NOTICE – Risk of Damage to Material and Property
- The device should only be used if it has been correctly assembled! Before each use, check whether the bean container, portafilter and water tank are inserted correctly!
- Switch off the device and pull the mains plug out of the plug socket if an error occurs during operation, when there is a power cut or before a thunderstorm.
- When you pull it out of the plug socket, always pull on the mains plug and never the mains cable!
- Never pull or carry the device by the connecting cable.
- Protect the device from other heat sources, fire, sub-zero temperatures, persistent moisture and impacts.
- Use only original accessories from the manufacturer in order to guarantee that there is no interference that may prevent the device from working and to avoid possible damage.
Before Initial Use
I. Wipe the device with a clean, damp cloth. Clean all accessories with a little detergent and clear water.
2. When the device is delivered, the water pipe is fitted with transport protection that needs to be removed. Pull the water tank (6) vertically up out of the device. On the water feed on the device there is an orange plug – pull it out. The water tank can now be filled and inserted into the device.
3. Set up the device and connect it (see the "Setting Up and Connecting the Device" chapter).
4. Before you enjoy your first espresso or coffee, we recommend that you carry out a trial run with espresso beans to remove any possible production residues in the grinder and in the water system. To do this, follow the instructions in the “Operation and Functions” and “Preparation” chapters.

When the device is first used, production-related additives may cause a small amount of smoke and / or an odour to be produced. This is normal and not a device defect.
- Repeat this process twice. Do not drink this espresso!
- Clean the device and accessories (see the "Cleaning and Care" chapter).
Setting Up and Connecting the Device
PLEASE NOTE!
- Only connect the device to a plug socket that is properly installed. The plug socket must also be readily accessible after connection so that the connection to the mains can quickly be isolated. The mains voltage must match the technical data of the device.
- Lay the connecting cable in such a way that it does not become squashed or bent and does not come into contact with hot surfaces (also applies to the hot surfaces of the device!).
- Do not use the device in conjunction with extension cables.
- Always set up the device with a clear space at the sides (at least 20 cm) and clear space above it (at least 29 cm) on a flat, solid and heat-resistant surface that is resistant to splashing.
- Do not place the device below kitchen wall units or similar cupboards. The rising steam could cause damage to them!
I. Place the device on the kitchen unit or another dry, clean work surface, following the safety notices and the notices provided at the beginning of this chapter.
2. Plug the mains plug into a plug socket. The field ⏻ (35) lights up and a beep is heard. The device is in standby mode.
Operation and Functions
Display
The display of the device features the following display indicators and control lamps:

These control lamps (22) light up red when the bean container (1) is not / not fully inserted in the grinder (3). As soon as the bean container has been inserted correctly, the 🎨 symbol goes out and the GRIND control lamp lights up white.
During the grinding process, the GRIND control lamp and the symbol light up white.
Grinding time [s]
This display indicator (23) shows the number of seconds that have elapsed since the start of the grinding process. The display indicator goes out as soon as the grinding process has finished.

This control lamp (24) flashes when the steam power control (8) is in the position.

This control lamp (25) flashes when the steam power control (8) is in the 🔒 position.
The dual-circuit thermoblock heating system makes it possible to brew espresso at any time and froth milk with steam without having to wait for the temperature to adjust.
DESCALE
This control lamp (26) lights up when the device needs to be descaled and during the descaling process.
Preparation time [s]
This display indicator (27) shows the number of seconds that have elapsed since the start of preparation.
SINGLE / DOUBLE
While a single espresso or double espresso is being prepared, the corresponding control lamp (28) lights up.
Operating Fields
The device has six operating fields:

Touch the field (35) to switch the device on and off.

Touch this field (34) to start / stop the grinding process for a single espresso or adjust the quantity of espresso powder.

Touch this field (33) to start / stop the grinding process for a double espresso or adjust the quantity of espresso powder.

Touch this field (31) to start / stop the brewing process for a single espresso or adjust the quantity of water.

Touch this field (30) to start / stop the brewing process for a double espresso or adjust the quantity of water.
Touch this field (29) to adjust the temperature.
The the
operating respective

The detail
operatin; in
Pressure Display
The needle on the pressure display (32) indicates the brewing pressure while preparing espresso. Ideally, the needle should be in the “Espresso” section. If the needle is outside this section during preparation, you should adjust the settings for your espresso (see the “Programming Your Own Settings” chapter and “Tips” chapter).
Steam Power Control
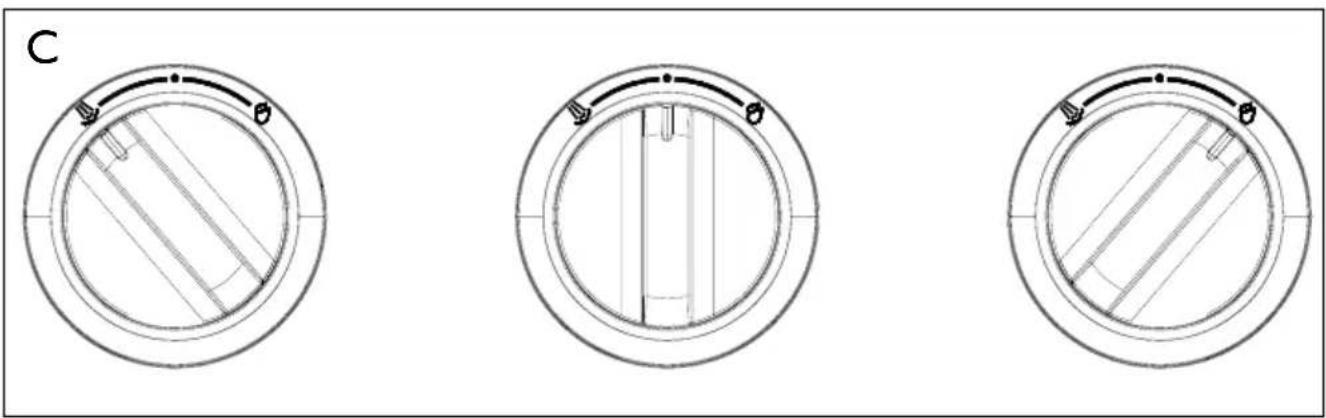
The steam power control (8) is used to regulate the emission of steam and hot water (Picture C):
- In this position no steam is emitted.

In this position steam is emitted.
In this position hot water is emitted.

When you switch on the device, always make sure that the steam power control is in the
- position!
Hotplate
On the hotplate (7) you can preheat your cups or keep espresso that you have made warm. As soon as the device heats up, the hotplate is automatically heated at the same time.
Programming Your Own Settings
The grinding fineness and the amount of coffee powder which is ground in each grinding process can be set individually. The amount of water for the single or double espresso can likewise be individually programmed separately.

New settings cancel the factory default settings and are retained even if there is a power cut or when the device is disconnected from the mains power.
To restore the device to the factory settings, touch the fields (35) and (29) simultaneously until a beep is heard.
Setting the Grinding Fineness
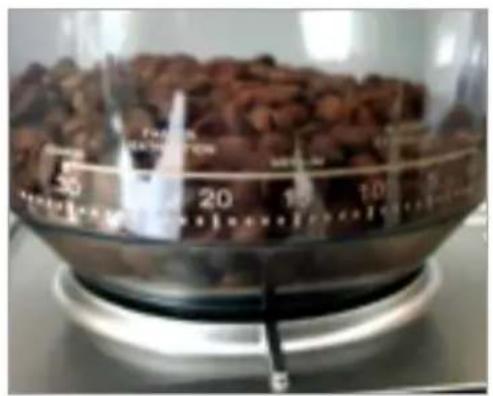
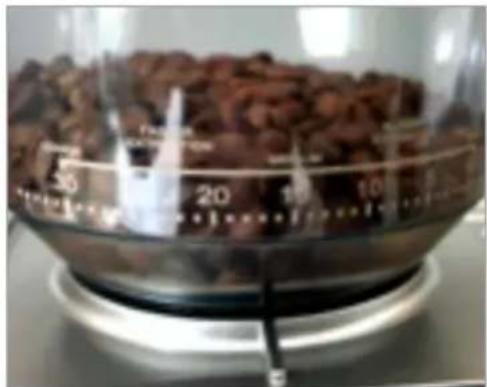
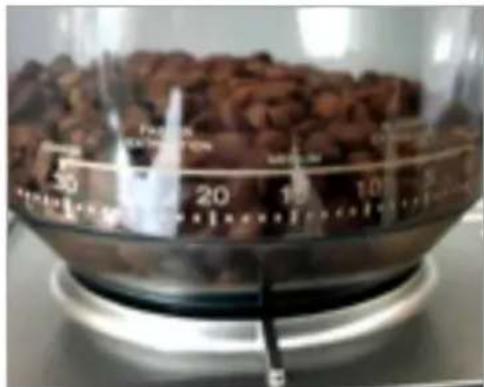
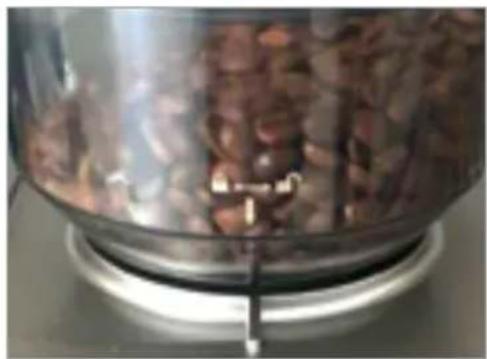
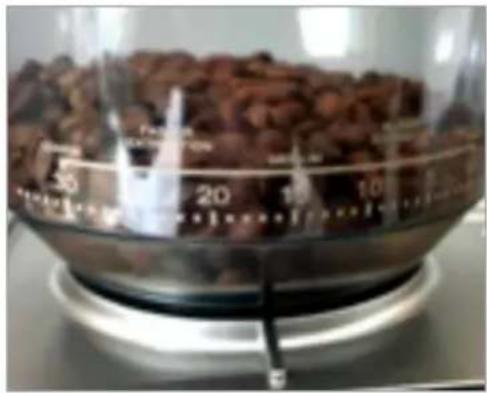
Twist the bean container (I) to the right or left so that the scale mark on the device points to the position with the grinding fineness you want (Picture D).
PLEASE NOTE: During operation, only twist the bean container from a coarse to a fine setting. Otherwise the grinder (3) could be damaged or blocked.
30 different levels can be chosen:
– all the way to the left: coarsest grinding level
– all the way to the right: finest grinding level
We recommend starting with grinding fineness level 15 and gradually working your way up to the perfect setting for your own personal taste.
When you do this, note that grinding fineness levels 20 – 30 are for coarse espresso powder. A coarse grinding fineness affects the flavour of your espresso because coarsely ground espresso powder shortens the extraction time, which makes the espresso weaker.

When you switch to another grinding strength, there will still be espresso powder with the previous grinding strength in the grinder.
Setting the Quantity of Espresso Powder
In the factory, 12 g are preset for a single espresso and approx. 16 g for a double espresso.
The preset quantity is dependent on the respective grinding fineness. The quantity of espresso powder can be set by adjusting the grinding time.

The device only saves the grinding time when it reaches at least 5 seconds (5–6 g). Shorter figures are ignored. This prevents the programming from being changed accidentally.
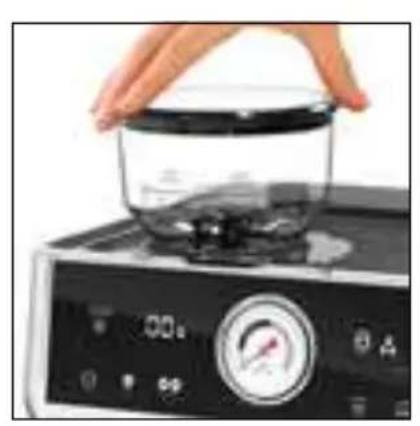
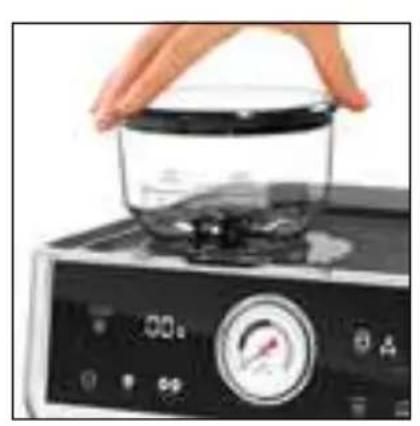
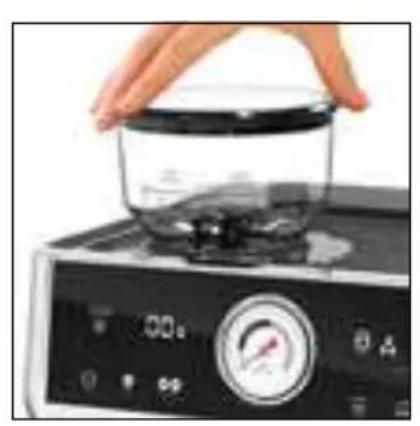
I. Make sure that the bean container (I) is filled with enough espresso beans and is inserted correctly (see the “Preparation of the Device” chapter – “Adding Espresso Beans”).
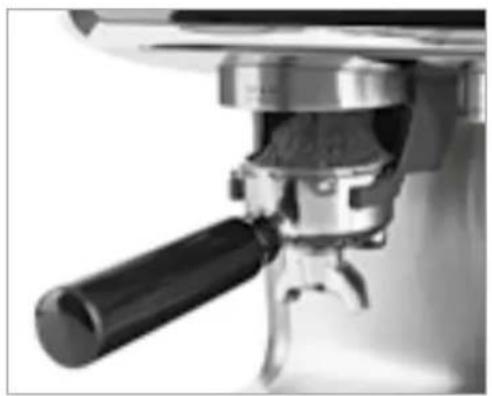
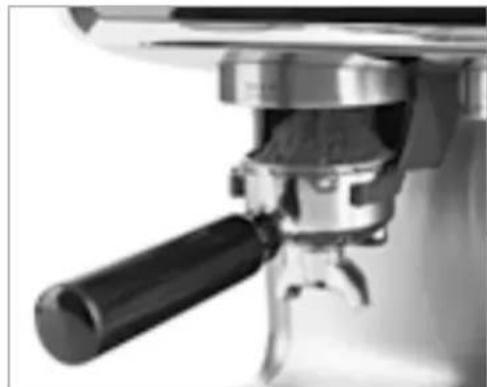
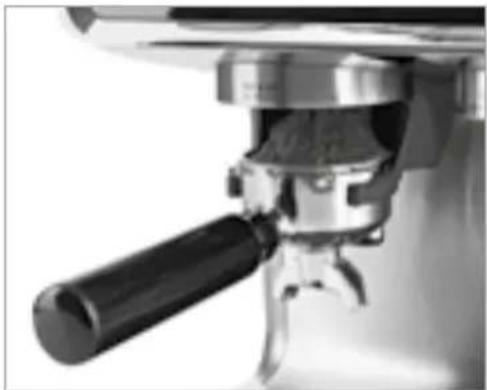
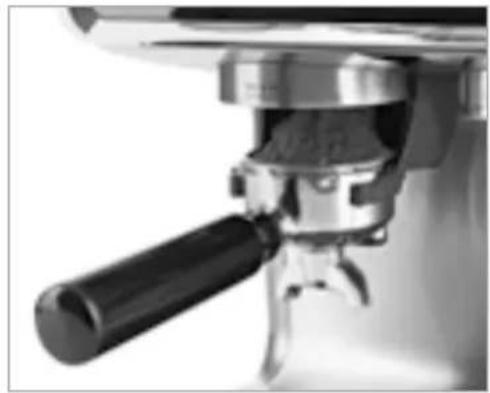
2. Place the portafilter (16) with the corresponding sieve insert (17, 21) into the coffee powder outlet (12) (Picture E).
3. Keep touching and holding the field 🎨 (single espresso, 34) or 🎨 (double espresso, 33) until the desired quantity of espresso powder has been dispensed. The corresponding field and the field ≡ (29) flash. The grinding time is shown on the display (23).
- Let go of the field. This grinding time is saved. A beep is heard.

To reset the grinding time to the factory setting, keep touching and holding the field: and the field for until you hear a beep.
Note that the quantity of espresso powder may need to be reset when the grinding fineness is changed.
Setting the Water Quantity
In the factory, 60 ml are preset for a single espresso and 90 ml for a double espresso. Note that during extraction some of the water remains in the espresso powder, so a full 60 or 90 ml does not end up in the espresso cup.

The device only saves the water quantity if it is between 20 – 125 ml for a single espresso or 20 – 250 ml for a double espresso.
I. Make sure that the water tank (6) is filled with enough water (see the “Preparation of the Device” chapter – “Filling the Water Tank”).
2. Fill the portafilter (16) with espresso powder (see the "Preparation of the Device" chapter – "Filling the Portafilter"). When you do this, note which water setting you want to adjust – single or double espresso!
3. Insert the portafilter into the device (see the “Preparation of the Device” chapter – “Inserting the Portafilter into the Device”).
4. Place a cup under the portafilter.
5. Keep touching and holding the field 📄 (single espresso, 31) or 🌐 (double espresso, 30) until the desired quantity of water has been dispensed. The corresponding field and the field ≡ (29) flash. The preparation time is shown on the display (27).
6. Let go of the field. This quantity of water is saved. A beep is heard.

To reset the quantity of water to the factory setting, keep touching and holding the field (29) and the field or until you hear a beep.
Setting the Water Temperature
Four different brewing temperatures can be chosen: 90 / 92 / 94 / 96°C. A brewing temperature of 92°C is preset in the factory.
To change this setting, proceed as follows:
I. Touch the field: (29) for approx. 3 - 4 seconds. A beep is heard and the field flashes. The temperature which is currently set is shown on the display (27).

If no setting is made within the next 60 seconds, the process is cancelled and the previous setting is retained.
- The temperatures are saved behind the operating fields. Touch the field you want:
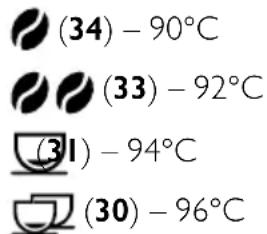
The field: ■ flashes and the corresponding chosen temperature field also lights up.
- Touch the field again. A beep is heard and the setting is saved.
Preparation
Inserting / Removing the Drip Tray
The device is supplied with a drip tray (13) because espresso may drip from the portafilter (16) after the cup has been removed.
I. Insert the drip tray into the bottom of the device. Insert it at a slight angle so that the drip tray can lock in place. Make sure that it fits correctly in the device.
2. Place the storage plate (15) on the drip tray.
3. To remove the drip tray, tilt it forwards slightly and carefully pull it out of the device.

Behind the drip tray there is a small drawer for the cleaning utensils (18). Insert this into the designated compartment (11) before you insert the drip tray.
Filling the Water Tank
PLEASE NOTE!
- Do not pour milk or other liquids into the water tank. Only ever use water!
I. Take the water tank (6) off the device by pulling it upwards.
2. Open the water tank lid (5).
3. Pour water into the water tank. Make sure that you fill it at least up to the MIN marking and no higher than the MAX marking.
4. Close the water tank lid.
5. Insert the water tank into the device by sliding it into the device from above. Make sure that the locking lugs of the water tank sit in the recesses which are provided for them on the device. You must feel it engage.

If the device notices that the water tank does not have enough water in it, all operating fields flash and a beep is heard.
Adding Espresso Beans
I. Make sure that the bean container (1) is inserted correctly (see the "Cleaning and Care" chapter – "Cleaning the Grinder").
2. Remove the lid (2) from the bean container.
3. Fill the bean container with espresso beans. Do not overfill it!
4. Place the lid back on the bean container.

When you switch to another type of espresso, there will still be coffee powder from the previous type in the grinder (3). The grinder may need to be cleaned beforehand (see the “Cleaning and Care” chapter – “Cleaning the Grinder”).
Inserting / Removing the Sieve Insert
I. Insert the appropriate sieve insert (17, 21) into the portafilter (16).
2. To remove the sieve insert from the portafilter, use the cleaning needle (20) if necessary. This can be slid between the portafilter and sieve insert to lever out the sieve insert.
Filling the Portafilter
I. Touch the field ⏻ (35) to switch on the device.
2. Make sure that the bean container is inserted correctly (see the “Cleaning and Care” chapter – “Cleaning the Grinder”) and is filled with sufficient espresso beans (see the “Preparation of the Device” chapter – “Adding Espresso Beans”).
3. If the control lamps in the fields (34) and (33) are lit white, the grinder (3) is ready to operate.
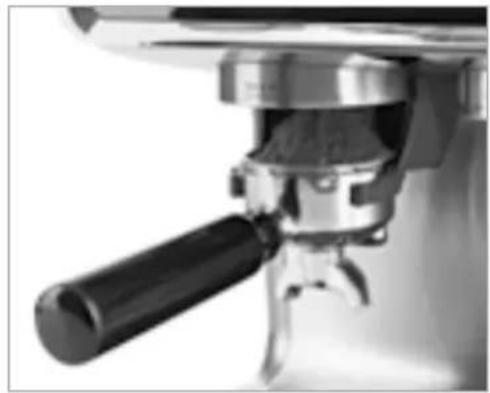
4. Place the portafilter (16) with sieve insert into the coffee powder outlet (12) (Picture E).
5. Touch the field 🎨 (single espresso, 34) or 🎨 (double espresso, 33). The field flashes during the grinding process; the symbol 🎨 (22) also lights up white. Freshly ground espresso powder drops into the portafilter. Once the set quantity of espresso powder has been ground, the grinding process stops automatically. The field 🎨 or 🎨 up constantly and the symbol 🎨 goes out.
6. Press the espresso powder down with roughly 10 - 12 kg in the portafilter with the tamper.
7. Remove excess espresso powder from the rim of the portafilter.

You can also add espresso powder that has already been ground to the portafilter. Bear in mind that this can also be pressed down well with the tamper.
PLEASE NOTE: If the espresso powder is pressed down too firmly, the water cannot flow through it. The brewing process is then aborted, a warning signal is heard and all fields light up.
Inserting the Portafilter into the Device
I. Hold the filled portafilter (16) firmly by the handle and insert it at a 45^ angle into the portafilter mount (10).
2. Twist the portafilter to the right, as far as it will go. The handle points straight forwards.
Removing the Portafilter from the Device
I. Hold the portafilter (16) by the handle and turn it approx. 45^ to the left.
2. It is released and can be pulled down and out of the device.
Emptying the Sieve Insert
I. Tap out the portafilter over a dustbin or knock box. When you do this, make sure that the sieve insert does not fall out at the same time.
2. Remove the sieve insert (see the “Preparation of the Device” chapter – “Inserting / Removing the Sieve Insert”).
3. Clean the sieve insert (see the “Cleaning and Care” chapter).
Do you not have a suitable knock box available? But is opening the dustbin each time too much hassle for you? Not a problem! This is no longer a problem with our BEEM Knock Box (article number 03994). This attractive knock box has a silicone-covered knocking bar – this protects the portafilter and makes it easier to clean later on. And with a capacity of 650 ml, the BEEM Knock Box offers plenty of space for several rounds of making coffee.
Tips
To enjoy an aromatic espresso or coffee, please note the following tips:
• Always preheat the cups on the hotplate (7).
- Rinse out the cups with hot water immediately before using them.
- Always fill the water tank (6) with fresh water. Do not use any water that has been in the water tank for longer than 12 hours.
- After the device has heated up, first allow hot water for 1 – 2 double espressos to run through the sieve insert (17, 21) and the portafilter (16) before you fill them with espresso powder to preheat the portafilter.
- If you want to make milk froth, once the device has heated up first allow hot steam to run through the steam nozzle (9).
- If possible, always use freshly ground espresso powder to achieve an optimum flavour.
- Do not press down the espresso powder in the portafilter too firmly. If the espresso powder is pressed too much, the process may be aborted or the preparation time may be increased, thus producing increased levels of bitter compounds. You can use a scale to measure the contact pressure. The ideal contact pressure is approx. 10–12 kg. After pressing, there must still be a clear gap of approx. 6 mm below the edge of the sieve.
- We recommend starting with a processing time of between 25 and 30 seconds and gradually working your way up to the perfect setting for your own personal taste. Brewing times of more than 35 seconds will produce a very bitter drink.
• Empty and clean the sieve insert after each use.
- Regularly clean and descale the device (see the “Cleaning and Care” chapter – “Descaling”). A dirty and / or furred-up device compromises the flavour.
Finding Suitable Settings for Your Espresso
You will only get a barista-grade espresso if the following three parameters are perfectly matched:
- Grinding Fineness of the Espresso Powder
- The finer the powder, the more slowly the water will run through.
- The coarser the espresso powder, the faster the water will run through the powder.
• Quantity of the Espresso Powder in the Portafilter
- The more powder is contained in the portafilter, the more slowly the water will run through.
- The less powder, the faster the water will run through the powder in the portafilter.
- Contact Pressure with the Tamper
- The lower the pressure when the powder is pressed down and the looser the espresso powder remains in the portafilter, the faster the water can run through.
We recommend adopting the following procedure to find the perfect settings for your espresso. To do this, you will also require kitchen scales and a small glass that can hold at least 60 ml.

Always change the grinding fineness in small increments of no more than one grinding fineness level at a time.
I. Make sure that the device is switched on and the portafilter is nicely preheated.
2. Set the grinder to grinding fineness level 15 (see the “Programming Your Own Settings” chapter - “Setting the Grinding Fineness”).
PLEASE NOTE: During operation, only twist the bean container (1) from a coarse to a fine setting. Otherwise the grinder (3) could be damaged or blocked.
- Pour approx. 16 g of espresso beans into the bean container (see the “Preparation of the Device” chapter - “Adding Espresso Beans”), grind them into the double sieve insert (21) (see the “Preparation of the Device” chapter - “Filling the Portafilter”) and press the powder down well with the tamper.
- Insert the portafilter with the sieve insert into the portafilter mount (10).
- On the glass, mark the fill level of approx. 60 ml for a double espresso and place the glass on the storage plate (15) below the portafilter.
- Fill the glass up to the mark (see the "Programming Your Own Settings" chapter - "Setting the Water Quantity") and at the same time watch the pressure display (32) – the needle should be in the section labelled "Espresso".
- If the pressure is too low, reduce the grinding fineness; increase the grinding fineness if the pressure is too high; repeat steps 3 to 7 until the needle is in the “Espresso” section.
-
Fill the glass up to the mark again (see the "Setting the Water Quantity" chapter) and note the time shown on the display (27). This should not exceed 35 seconds and ideally should be between 25 and 30 seconds.
-
If the mark is reached in less than 25 seconds, reduce the grinding fineness; if the mark takes more than 30 seconds to be reached, increase the grinding fineness; repeat steps 3 to 9 until the preparation time is between 25 and 30 seconds.
-
Repeat steps 3 to 9 with the single sieve insert (17), but start by filling it with approx. 10–12 g of espresso powder and filling the glass with approx. 30 ml of espresso. The values for the ideal preparation time also apply to the single espresso.
II. If the perfect grinding fineness is between two grinding fineness levels, vary the contact pressure with the tamper a little: -
If there is too little espresso or the preparation time is too long, reduce the contact pressure.
-
If there is too much espresso or the preparation time is too short, increase the contact pressure.
-
Then fill the bean container and save the corresponding powder quantity (see the "Programming Your Own Settings" chapter - "Setting the Quantity of Espresso Powder"). During the previous grinding tests, you can read off the required time from the grinding time which is shown on the display (23).

Each time that the grinding fineness is changed, with the same grinding time the quantity of espresso powder is changed. You should therefore occasionally adjust the settings for your espresso if necessary.
- Set the appropriate brewing temperature for the type of bean you are using (see the “Programming Your Own Settings” chapter - “Setting the Water Temperature”).
Preparation
PLEASE NOTE!
- Do not operate the device without water or with less water than is required to reach the MIN marking.
- Never use the device without a suitable cup below the portafilter.
Making Espresso
I. Fill the water tank (6) (see the "Preparation of the Device" chapter – "Filling the Water Tank").
2. Make sure that the steam power control (8) is in the ● (Off) position.
3. Switch on the device by touching the field ⏻(35). The device switches to preheating mode. The field ⏻ flashes slowly and the fields ⏻ (34) and ⏻ (33) light up. When preheating finishes, all operating fields and displays (apart from DESCALE (26) and SINGLE/DOUBLE (28)) will be lit. The device is ready to operate.
4. Prepare the portafilter (16) for the espresso you want in the manner described in the "Preparation of the Device" chapter and insert it into the device.
- Place one or two suitable cup(s) on the storage plate (15) under the portafilter.

With
under
- Touch the field 📋 (single espresso, 31) or 🌐 (double espresso, 30) to start the brewing process. The corresponding field flashes and the corresponding control lamp (28) lights up. The set quantity of water runs through the portafilter into the cup(s) and the processing time is shown on the display (27).
- Switch the device to standby mode by touching the field ⏻. All fields go out, apart from the field ⏻

If there is no more action, the device automatically switches to standby mode after approx. 30 minutes. All fields go out, apart from the field ⏻To switch the device on again, touch the field ⏻
Preparing Milk Froth
I. Fill the water tank (6) (see the "Preparation of the Device" chapter – "Filling the Water Tank").
2. Direct the steam nozzle (9) towards the drip tray (13) or into an empty vessel.
3. Make sure that the steam power control (8) is in the ● (Off) position.
4. Switch on the device by touching the field ⏻(35). The device switches to preheating mode. The field ⏻ flashes slowly and the fields ⏻ (34) and ⏻ (33) light up. When preheating finishes, all operating fields and displays (apart from DESCALE (26) and SINGLE/DOUBLE (28)) will be lit. The device is ready to operate.
5. Move the steam power control (8) for a few seconds to the ⏻ (Steam) position to drain away any existing condensation. The control lamp ⚙ (24) flashes.
6. Pour milk at fridge temperature with a fat content of at least 2% to a level of roughly two-thirds into the small milk jug for frothing.
7. Direct the steam nozzle into the small milk jug and immerse it in the milk.
8. Start the frothing process by turning the steam power control to the lamp 🔗 flashes.
9. First hold the steam nozzle just below the surface of the milk to warm it up and draw air under the milk. Once the milk is warm to the touch and a fine milk froth resembling a cream is produced, hold the steam nozzle in the middle of the frothing container so that the milk is swirled around.
10. Once the milk froth is of the desired consistency, turn the steam power control to the position and pull the frothing container down and outwards.
I I. Tap the frothing container one to two times on a solid surface to compress the milk froth.
12. Pour the milk froth into the drinking vessel or scoop it with a spoon.
13. Clean the steam nozzle after each use to prevent a blockage (see the “Cleaning and Care” chapter – “Cleaning the Steam Nozzle”).

Empty drink.
14.
field

Switch

If there is no more action, the device automatically switches to standby mode after approx. 30 minutes. All fields go out, apart from the field ⏻To switch the device on again, touch the field ⏻
Dispensing Hot Water
I. Fill the water tank (6) (see the "Preparation of the Device" chapter – "Filling the Water Tank").
-
Direct the steam nozzle (9) towards the drip tray (13) or into an empty vessel.
-
Make sure that the steam power control (8) is in the ● (Off) position.
-
Switch on the device by touching the field ⏻(35). The device switches to preheating mode. The field ⏻ flashes slowly and the fields ⏱ (34) and ⚡ (33) light up.
When preheating finishes, all operating fields and displays (apart from DESCALE (26) and SINGLE/DOUBLE (28)) will be lit. The device is ready to operate.

Approx. 190 – 240 ml of hot water are dispensed. Make sure that the vessel is large enough!
-
Move the steam power control (8) to position 🔒 (Hot water). The control lamp 🔊 (25) flashes.
-
Turn the steam power control to the ● position once the desired quantity of hot water has been dispensed.
-
Switch the device to standby mode by touching the field. All fields go out, apart from the field 🔒.

If there is no more action, the device automatically switches to standby mode after approx. 30 minutes. All fields go out, apart from the field ⏻To switch the device on again, touch the field ⏻
Recipes for Speciality Coffees
Cappuccino
Cappuccino is normally made from one third espresso, one third hot milk and one third milk froth.

The cup should be thoroughly preheated as the drink is prepared in several steps.
I. First prepare the espresso (see the "Preparation" chapter – "Making Espresso").
-
Then place the cup down on the hotplate (7) so that the espresso remains as hot as possible.
-
In comparison to the espresso, pour twice the amount of milk into the small milk jug and froth up half of the milk (see the “Preparation” chapter – “Preparing Milk Froth”).
The other half of the milk remains liquid. - Hold back the milk froth with a spoon or plastic spatula and pour the hot milk over the espresso.
- Scoop the milk froth out of the frothing container with a spoon and spread it as a crest on the cappuccino.
Latte Macchiato
Latte macchiato traditionally comprises three layers: a bottom layer of hot milk (2/3), a top layer of frothed milk (1/3) and an espresso which is poured through the milk froth. As milk containing fat has a higher density than espresso, the coffee floats on the milk.

The espresso cup and the latte macchiato glass should be thoroughly preheated as the drink is prepared in several steps.
I. Pour the milk into the small milk jug and froth up a third of the milk (see the “Preparation” chapter – “Preparing Milk Froth”). The rest of the milk is just heated and remains liquid.
2. Pour the hot milk and the milk froth into the latte macchiato glass.
3. Then place the latte macchiato glass down on the hotplate (7) so that the milk remains as hot as possible.
4. Prepare the espresso (see the "Preparation" chapter – "Making Espresso").
5. Pour the hot espresso through the milk froth at the edge of the glass.
Caffè Americano
Caffè Americano is a type of coffee beverage which is prepared by diluting an espresso with hot water. As it contains the same amount of acid and caffeine as a normal espresso, it has a less strong flavour and is a popular alternative to a traditional coffee at the end of a meal.
An original Caffè Americano is mixed 1:1.
I. First prepare hot water (see the “Preparation” chapter – “Dispensing Hot Water”). Allow this to run into a coffee cup.
2. Place the coffee cup under the portafilter and prepare an espresso (see the “Preparation” chapter – “Making Espresso”).
Cleaning and Care
PLEASE NOTE!
- Do not use any toxic, corrosive or abrasive cleaning agents or scouring sponges to clean the device. These may damage the surface.
I. Take the portafilter (16) out of the device and empty it (see the "Preparation of the Device" chapter
2. Remove the used sieve insert (17, 21) (see the "Preparation of the Device" chapter—"Inserting / Removing the Sieve Insert").
3. Empty the drip tray (13) after each use (see the "Preparation of the Device" chapter – "Inserting / Removing the Drip Tray").
4. Clean all used accessories with detergent and warm water.
5. Wipe the housing with a damp cloth. If necessary, use a little detergent to remove more intense soiling.
6. Check the connecting cable regularly for any damage.
Cleaning the Steam Nozzle
To prevent any blockage, the steam nozzle (9) must be cleaned after each use.
I. Turn the steam nozzle over the drip tray (13).
2. Switch on the device by touching the field ⏻(35). The device switches to preheating mode. The field ⏻ flashes slowly and the fields ⏻ (34) and ⏻ (33) light up. When preheating finishes, all operating fields and displays (apart from DESCALE (26) and SINGLE/DOUBLE (28)) will be lit. The device is ready to operate.
-
Move the steam power control (8) to position 🔒 (Hot water). The device starts to emit water and milk residues are rinsed out of the steam nozzle. The control lamp 🔒 (25) flashes.
-
Wipe down the steam nozzle with a damp cloth.

If the steam nozzle has become clogged, you can release the blockage with the cleaning needle.
Cleaning the Grinder
I. Make sure that the device has been disconnected from the mains power.
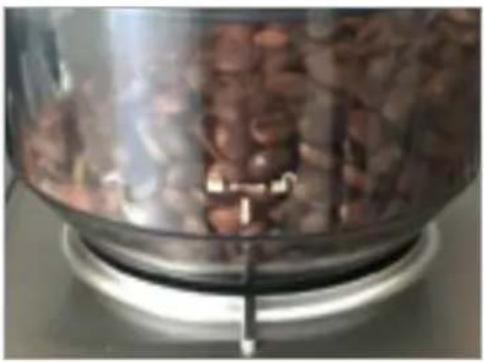
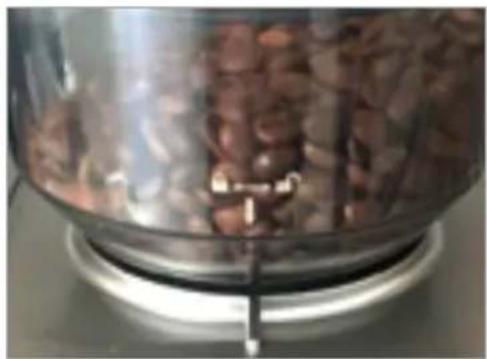
2. Turn the bean container (I) anticlockwise until the scale mark on the device and the scale arrow with the lock symbol on the bean container are aligned (Picture F).
3. Pull the bean container up and off.
4. Empty the bean container and carefully remove the rest of the beans from the grinder (3).
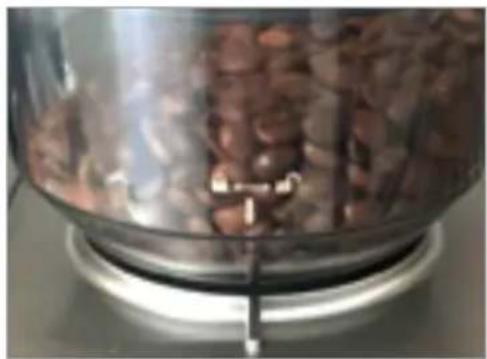
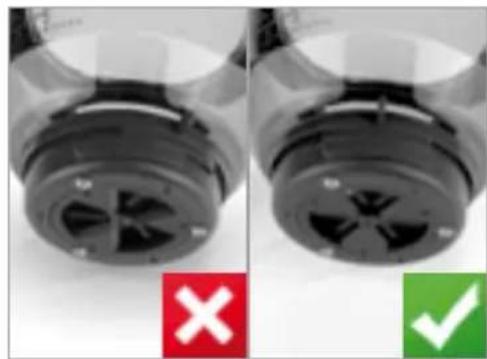
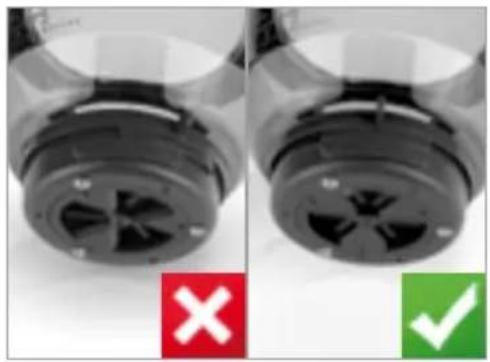
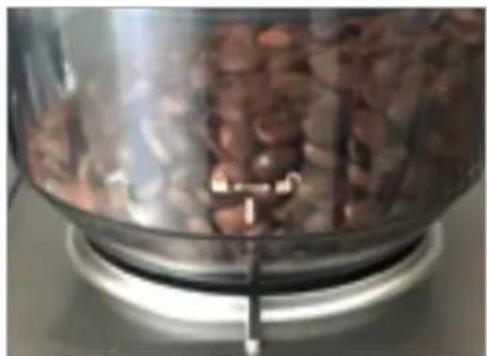
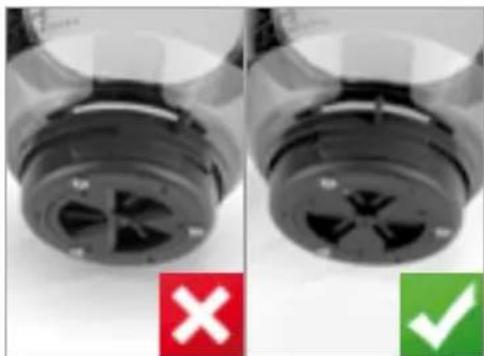
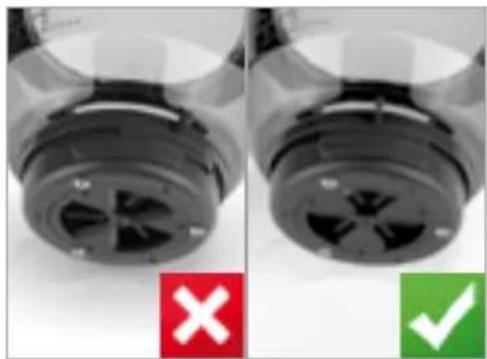
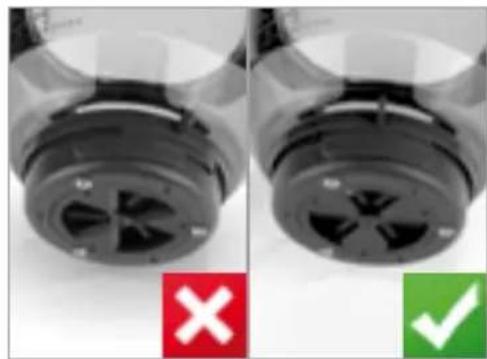
Make sure that the catch at the bottom of the bean container is fully closed (Picture G).
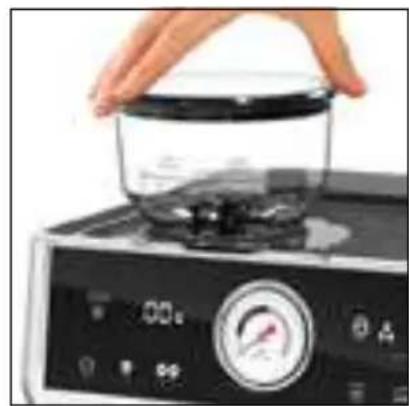
5. Place the bean container back on the grinder: The scale arrow with the lock symbol on the bean container and the scale mark on the device must be aligned. Twist the bean container clockwise until the grinding fineness scale is at the front.
6. Plug the mains plug into the plug socket.


If the bean container does not fit correctly, after switch-on the control lamp
GRIND 🎨 (22) and the fields 🔒 (34) and 🔒 (33) light up red.
- Switch on the device by touching the field ⏻(35). The device switches to preheating mode.
The field ⏻ flashes slowly and the fields ⏱ (34) and ⚡ (33) light up.
When preheating finishes, all operating fields and displays (apart from DESCALE (26) and SINGLE/DOUBLE (28)) will be lit. The device is ready to operate. - Touch the field (34) or (33), possibly several times, to grind the rest of the beans in the grinder.
Once the rest of the coffee beans have been ground, you can tell this from the change in the grinding noise. - Pull the plug out of the plug socket again.
- Take off the bean container.
II. Grab the small clip on the grinding collar and twist the grinding collar anticlockwise. It is released from its locking mechanism and can be removed. - Clean the grinding collar with the cleaning brush. If necessary, you can also use a little water and cleaning agent.
- Clean the grinder on the inside with the cleaning brush.
- Place the grinding collar back on the grinder and twist it clockwise until it slides down on the grinder and you feel it engage.
- Place the bean container back on and fill it again (see the "Preparation of the Device" chapter – "Adding Espresso Beans").
Descaling
Limescale deposits have an adverse effect not only on the quality of the coffee and the water, but they also cause power losses and shorten the lifespan of the device. The thicker a limescale layer is, the more difficult it is to remove.
The device indicates via the control lamp DESCALE (26) when the device needs to be descaled. If on average you prepare 1–2 double espressos, we recommend the following regular descaling regime:
• Very hard water (over 26 °dH): roughly every 3 months
• Medium-hard water (15–21 °dH): roughly every 4 months
- Very soft water (0–3 °dH): roughly every 8 months
For descaling we recommend the BEEM Premium Descaler Concentrate. The efficient, food-safe and environmentally friendly BEEM Premium Descaler Concentrate is available from selected specialist stockists, via our website www.beem.de or from our customer service department on request.
Descaling with the BEEM Premium Descaler Concentrate
I. Fill the water tank (6) up to the MAX marking with a concentrate/water solution of no more than 1:20 (one part concentrate to 20 parts water). There should be at least 1 litre in the water tank.
2. Make sure that the drip tray (13) is empty and is fitted in the device correctly and the portafilter (16) with the double sieve insert (21) has been inserted in the portafilter mount (10) (see the “Preparation of the Device” chapter).
3. Place a suitable vessel under the portafilter and under the steam nozzle (9).
- Touch and hold the fields (31), (30) and: (29). The device starts the descaling process. The control lamp DESCALE (26) flashes and the display (27) indicates the number of cups already prepared.
As soon as the control lamp DESCALE (26) flashes, perform the following steps within the next 60 seconds:
5. Move the steam power control (8) to position ⬆ (Steam).
The control lamp ⚙ (24) flashes, the control lamp DESCALE lights up and the display (27) indicates the time that has elapsed.
The water pump operates, hot water emerges from the portafilter mount and the steam nozzle for approx. 2 minutes.
- Once water stops coming out, turn the steam power control to position .
IMPORTANT: The following two steps must be performed within the next 5 minutes for the descaling process to be continued.
-
Empty the water tank and refill it with clear water.
-
Empty the two vessels.
The whole system is then cleaned:
- Move the steam power control to position 🔒 (Hot water).
The control lamp ⬆ (25) flashes, the control lamp DESCALE lights up and the display (27) indicates the time that has elapsed.
The water pump operates, hot water emerges from the portafilter mount and the steam nozzle for approx. 2 minutes.
- Once water stops coming out, turn the steam power control to position●. The control lamp DESCALE goes out. The other fields light up, a beep is heard and the field ⏻ is lit constantly. The descaling process has been completed.
Storage
Disconnect the device from the mains power when you are not going to use it for a prolonged period. Clean the device again if necessary (see the “Cleaning and Care” chapter) and let it dry completely.
Store the device and all accessories in a dry, clean, frost-free place that is protected from direct sunlight and cannot be accessed by children or animals.
Troubleshooting
If
yourself.
service
the
If
departmenten

Do not attempt to repair an electrical device yourself!
| Problem Possible cause Fix | ||
| The device cannot be switched on. | The mains plug is not inserted correctly in the plug socket. | Correct the fit of the mains plug. |
| The plug socket is defective. | Try another plug socket. | |
| There is no mains voltage. | Check the fuse of the mains connection. | |
| The fuse in the fuse box is triggered. | Too many devices connected to the same circuit. | Reduce the number of devices in the circuit. |
| The brewing process cannot be started. | The device has not yet reached the correct brewing temperature. | Wait until the device has heated up or cooled down sufficiently. |
| Water runs out of the device. | There is too much water in the water tank (6). | Do not overfill the water tank! |
| The steam power control (8) is not in the ● position. | Always move the selector switch to the ● position when there is no vessel under the portafilter outlet or the steam nozzle (9). | |
| The drip tray (13) is full. | Empty the drip tray. | |
| The portafilter (16) cannot be inserted. | There is too much espresso powder in the portafilter. | Add less espresso powder. |
| The espresso runs along the outside of the portafilter (16). | The portafilter is not inserted correctly. | Make sure that it fits correctly. |
| The rim of the portafilter is contaminated with espresso powder. | Clean the portafilter and the sieve insert (17, 21). | |
| Despite a pumping noise, no water comes out of the device. | There is no water in the water tank (6). | Fill the water tank. |
| The water tank is inserted incorrectly. | Take out the water tank and reinsert it. Make sure that it fits correctly. | |
| The espresso does not run or only runs very slowly into the cup. | The espresso powder is pressed too firmly. | Only press down the espresso powder lightly. |
| The espresso powder is too finely ground. | Use espresso powder with a coarser grind. | |
| There is too much espresso powder in the portafilter (16). | Add less espresso powder. | |
| The transport protection is still attached to the water feed below the water tank (6). | Pull out the orange / red plug before you start operating the device. | |
| The sieve insert (17, 21) is blocked. | Clean the sieve insert, using the cleaning needle (20) if necessary. | |
| The device is furred up. Descale the device. | ||
| The espresso runs too quickly into the cup. | The espresso powder is not pressed enough. | Press down the espresso powder slightly harder. |
| The espresso powder is too coarsely ground. | Use espresso powder with a finer grind. | |
| There is not enough espresso powder in the portafilter (16). | Add more espresso powder. | |
| The grinder (3) does not work. No espresso is ground. | If the grinder operates for longer than 3 minutes without interruption, it is temporarily switched off as a safety measure. | Wait approx. 6 minutes and try again. A break between multiple grinding operations protects the grinder. |
| The grinding collar is not inserted in the grinder (3) correctly. | When the grinding collar is locked in place, you must be able to feel obvious resistance. Then flip down the metal clip. | |
| The grinder (3) is blocked. | Clean the grinder (see the “Cleaning and Care” chapter – “Cleaning the Grinder”). | |
| The bean container (1) is not inserted correctly. | Follow the tips in the following lines. | |
| The bean container (1) cannot be placed on. | Coffee beans are blocking the opening of the grinder (3). | Remove from the grinder all coffee beans that are sticking up above the grinding collar. |
| The bean container is in the wrong position. | When you insert the bean container, hold it so that the grinding fineness scale at the back and the scale arrow with the lock symbol on the bean container and the scale mark on the device are aligned (Picture F). | |
| The catch at the bottom of the bean container is not in the correct position. | Twist the catch on the bean container so that it is fully closed (Picture G). | |
| The grinding collar is not inserted in the grinder (3) correctly. | When the grinding collar is locked in place, you must be able to feel obvious resistance. Then flip down the metal clip. | |
| Espresso or milk has an unpleasant taste. | The espresso beans are too old. | Empty the bean container (1), clean the grinder (3) and add new espresso beans. |
| The water in the water tank (6) is no longer fresh. | Clean the water tank and add fresh water. Do not leave water residues standing for a long time. | |
| A large amount of steam is produced in the brewing process. | The device is furred up. Descale the device. | |
| During use, an unpleasant smell is detected. | The device is being used for the first time. | A smell often develops when new devices are first used. The smell should disappear once the device has been used several times. |
| The device has previously been descaled. | Rinse out the device with fresh water. | |
Warranty and Limitations of Liability
The warranty does not cover faults caused by incorrect handling, calcification, damage or attempted repairs. The same applies to normal wear and tear.
We do not accept any liability for damage or consequential damage resulting from:
- failure to follow the operating instructions
• non-designated use - improper or unsuitable handling
• repairs which are not carried out properly - unauthorised modifications
• use of outside parts or spare parts - use of unsuitable additional parts or accessories

Keep the original packaging during the warranty period of the device so that the device can be properly packaged up if it needs to be returned. The warranty claim will lapse if any damage is caused during transport.
Technical Data
Article number: 02362
Model number: CM5020DI-GS
Voltage supply: 220 – 240 V \~ 50 – 60 Hz
Power: 3000 W
Brewing pressure: 15 bar
Protection class: I
ID of operating instructions: Z 02362 M BE V2 0323 as

Disposal
Dispose of the packaging material in an environmentally friendly manner so that it can be recycled.
The adjacent symbol (crossed-out bin underlined) means that used devices should not be disposed of in the domestic waste, but should instead be taken to special collection and return systems.

Owners of used devices from private households can take them free of charge to the collection points of the public waste disposal authorities or the disposal points which are set up by manufacturers and distributors under the Electrical Equipment Act so that they can be disposed of in an environmentally friendly way and valuable raw materials can be recovered. If they are not disposed of properly, toxic ingredients may escape into the environment and cause harm to the health of humans, animals and plants. Businesses which market electrical and electronic devices are also obliged to take back used devices.
Waste prevention makes an even more valuable contribution to protecting the environment. This means if possible, as well as continuing to use or repair a device yourself, passing it on to another user also represents an ecologically beneficial alternative to disposal.
All rights reserved.
Optionally available

natural_image
Bottle of water with red cap and black logo (no visible text or symbols)natural_image
White rectangular product packaging with printed text and a small logo (no visible signage or symbols)BEEM Premium Reinigungstabletten
Cleaning tablets Pastilles de nettoyage Tabletas de limpieza Pastiglie per la pulizia Art. Nr. 07292 (50x) / 00426 (20x)
natural_image
Close-up of a hand holding a glass container over a kitchen appliance with a digital scale (no visible text or symbols)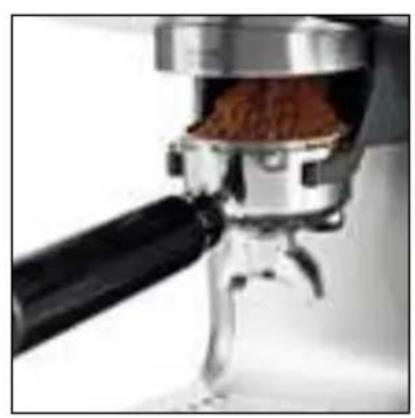
natural_image
Close-up of a coffee maker's presser feeding a brown coffee kernel (no text or symbols visible)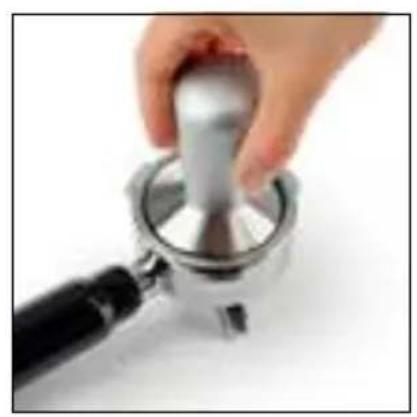
natural_image
Hand holding a metallic mechanical clamp or tool against a white background (no text or symbols visible)
natural_image
Close-up of a hand pressing down on a coffee machine control panel (no visible text or symbols)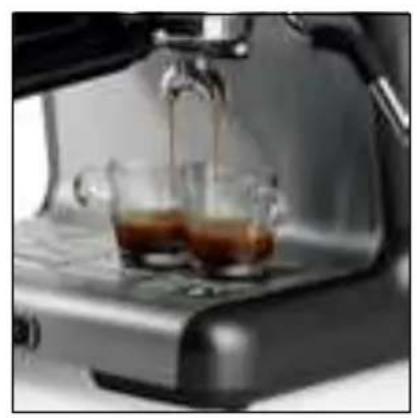
natural_image
Close-up of a espresso machine with two cups pouring liquid into it (no visible text or symbols)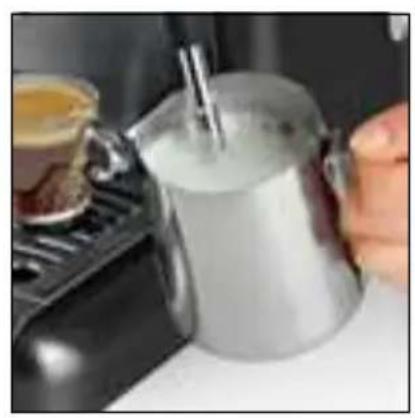
natural_image
Close-up of a hand pouring liquid from a metallic kettle into a stainless steel stove (no visible text or symbols)natural_image
Three circular mechanical components with internal structural lines and mounting holes, shown from different angles (no text or symbols)D
natural_image
Close-up of a glass beaker containing a container filled with brown granular substance, placed on a metal stand (no visible text or symbols)E
natural_image
Close-up of a mechanical presser or mixer device with handle and lever mechanism (no visible text or symbols)F
natural_image
Close-up of a glass container with brown granular substance inside, mounted on a metal base (no visible text or symbols)G
natural_image
Close-up of a black plastic bottle with internal components, showing a red 'X' and green checkmark (no text or symbols on the bottle itself)Composition
natural_image
Clear glass bottle with red cap and black label, no visible text or symbolsnatural_image
White rectangular product packaging with printed text and a small logo (no visible text or symbols on the packaging itself)BEEM Premium Reinigungstabletten
Cleaning tablets Pastilles de nettoyage Tabletas de limpieza Pastiglie per la pulizia Art. Nr. 07292 (50x) / 00426 (20x)
natural_image
Close-up of a hand holding a glass container over a kitchen appliance with a digital scale (no visible text or symbols)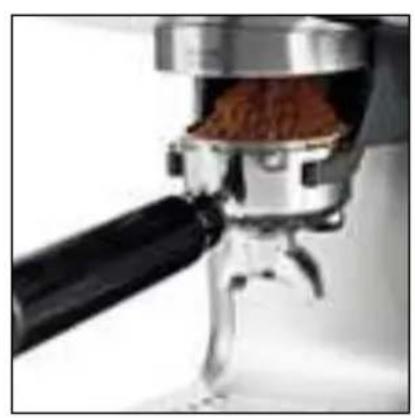
natural_image
Close-up of a coffee maker's presser feeding a brown coffee kernel (no text or symbols visible)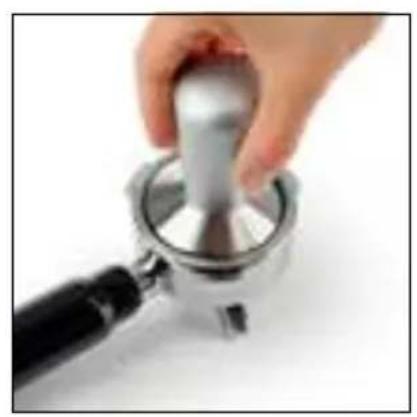
natural_image
Hand holding a metallic mechanical clamp or knob, no visible text or symbols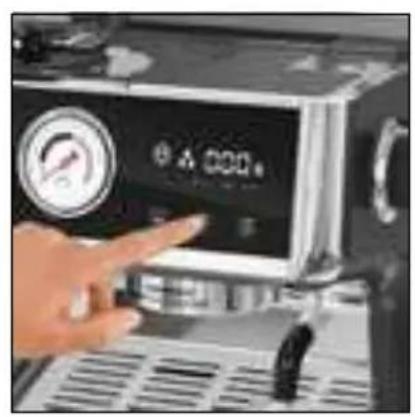
natural_image
Close-up of a hand pressing down on a coffee machine control panel (no visible text or symbols)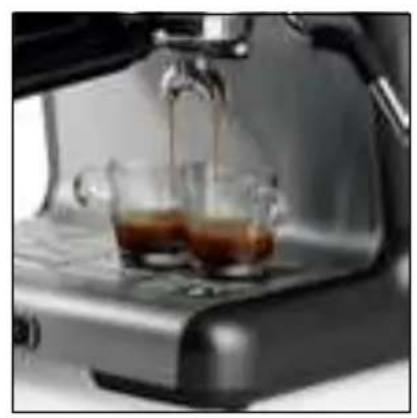
natural_image
Close-up of a espresso machine with two cups pouring liquid into it (no visible text or symbols)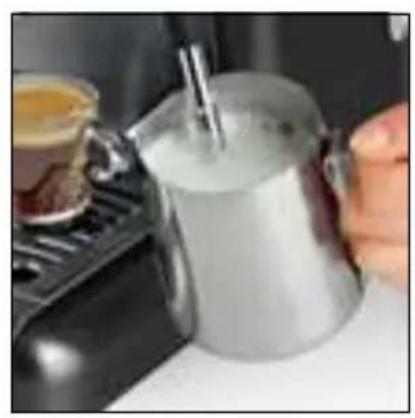
natural_image
Close-up of a hand pouring liquid from a metallic kettle into a stainless steel stove (no visible text or symbols)natural_image
Three circular mechanical components with internal structural lines and mounting holes, shown from different angles (no text or symbols)D
natural_image
Close-up of a glass beaker containing a bowl of brown granular substance, placed on a metal stand (no visible text or symbols)F
natural_image
Close-up of a glass container with scattered brown objects and a small metallic object inserted into the lid (no visible text or symbols)E
natural_image
Close-up of a mechanical device with a black handle and metallic components (no visible text or symbols)G
natural_image
Close-up of a black plastic bottle with internal compartments and a red 'X' symbol, alongside a green checkmark (no text or symbols on the bottle itself)SINGLE / DOUBLE (INDIVIDUAL / DOBLE)
natural_image
Bottle with red cap and black label, no visible text or symbols on the bottle itselfnatural_image
White rectangular product with a small screen and printed label (no visible text or symbols)BEEM Premium Reinigungstabletten
Cleaning tablets Pastilles de nettoyage Tabletas de limpieza Pastiglie per la pulizia Art. Nr. 07292 (50x) / 00426 (20x)
natural_image
Close-up of a hand pouring liquid into a glass container on an electric stove (no visible text or symbols)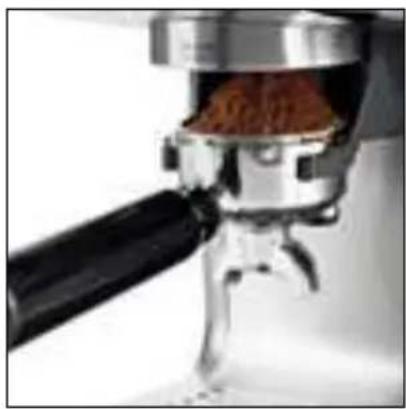
natural_image
Close-up of a coffee maker's presser with a wooden scoop and brown powder being inserted (no visible text or symbols)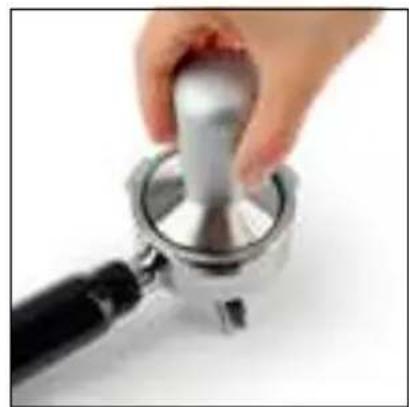
natural_image
Hand holding a metallic mechanical component, possibly a valve or clamp, against a plain white background (no text or symbols visible)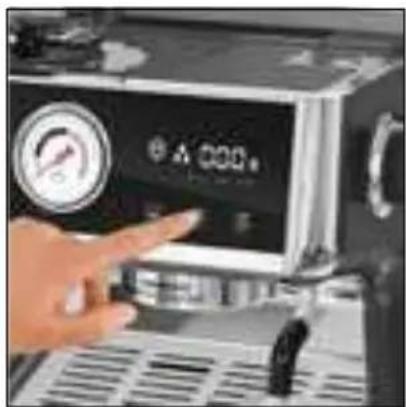
natural_image
Close-up of a hand pressing down on a coffee machine control panel (no visible text or symbols)
natural_image
Close-up of a espresso machine with two glass cups pouring liquid into it (no visible text or symbols)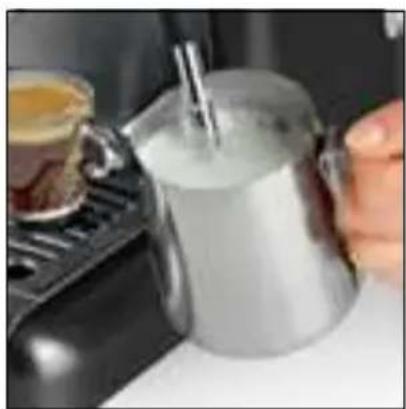
natural_image
Close-up of a hand holding a metallic kettle with a glass lid, placed on a stovetop with a coffee cup nearby (no visible text or symbols)natural_image
Three circular mechanical components with internal structural lines and mounting holes, shown from different angles (no text or symbols)D
natural_image
Close-up of a glass beaker containing a bowl of brown granular substance, placed on a metal stand (no visible text or symbols)E
natural_image
Close-up of a mechanical press or mixer device with a black handle and metallic components (no visible text or symbols)F
natural_image
Close-up of a glass container filled with brown granular material, placed on a metal base (no visible text or symbols)G
natural_image
Close-up of two black plastic bottles with internal compartments, one marked with a red X and green checkmark (no text or symbols on the bottle itself)natural_image
Bottle of clear liquid with red cap and small object inside (no visible text or symbols)BEEM Premium Entkalker
Konzentrat
Descaler Concentrate
natural_image
White rectangular product with a small screen and printed label (no visible text or symbols)BEEM Premium Reinigungstabletten
Cleaning tablets
Calls to German landlines are subject to your provider's charges.
- ESPRESSO-GRIND-EXPERT
- Lieferumfang
- BEEM Premium Reinigungstabletten
- Items Supplied
- Device Overview
- Picture A – Device and Accessories
- Picture B – Control Panel
- Congratulations!
- Information About Your Operating Instructions
- Symbols
- Signal Words
- Intended Use
- Safety Notices
- WARNING: Note all safety notices, instructions, illustrations and technical data provided with this device.
- CAUTION: hot surfaces!
- DANGER – Danger of Electric Shock
- WARNING – Danger of Injury
- Danger of scalding from heat, hot steam or condensation!
- WARNING – Danger of Fire
- NOTICE – Risk of Damage to Material and Property
- Before Initial Use
- Setting Up and Connecting the Device
- PLEASE NOTE!
- Operation and Functions
- Display
- DESCALE
- SINGLE / DOUBLE
- Operating Fields
- Pressure Display
- Steam Power Control
- Hotplate
- Programming Your Own Settings
- Setting the Grinding Fineness
- Setting the Quantity of Espresso Powder
- Setting the Water Quantity
- Setting the Water Temperature
- Preparation
- Inserting / Removing the Drip Tray
- Filling the Water Tank
- Adding Espresso Beans
- Inserting / Removing the Sieve Insert
- Filling the Portafilter
- Inserting the Portafilter into the Device
- Removing the Portafilter from the Device
- Emptying the Sieve Insert
- Tips
- Finding Suitable Settings for Your Espresso
- - Grinding Fineness of the Espresso Powder
- • Quantity of the Espresso Powder in the Portafilter
- - Contact Pressure with the Tamper
- Making Espresso
- Preparing Milk Froth
- Dispensing Hot Water
- Recipes for Speciality Coffees
- Cappuccino
- Latte Macchiato
- Caffè Americano
- Cleaning and Care
- Cleaning the Steam Nozzle
- Cleaning the Grinder
- Descaling
- Descaling with the BEEM Premium Descaler Concentrate
- Storage
- Troubleshooting
- Warranty and Limitations of Liability
- Technical Data
- Disposal
- Optionally available
- Composition
- SINGLE / DOUBLE (INDIVIDUAL / DOBLE)
- BEEM Premium Entkalker
- Konzentrat
Brand : BEEM
Model : Espresso Grind-Expert
Category : Coffee machine