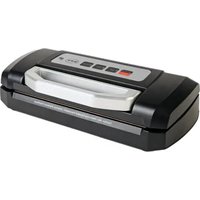
Fresh Quality Home - Vacuum packaging machines RGV - Free user manual and instructions
Find the device manual for free Fresh Quality Home RGV in PDF.


| Product type | Vacuum sealer |
| Brand | RGV |
| Model | Fresh Quality Home |
| Dimensions | 402 x 180 x 101 mm |
| Power supply | 220-240 V ~ 50 Hz, 110 W |
| Suction capacity | 12 L/min |
| Maximum vacuum level | -800 mbar |
| Sealing width | 30 cm |
| Main functions | Automatic vacuum and sealing, manual sealing, pulse vacuum, container suction |
| Included accessories | Container accessory, removable drip tray |
| Material | Plastic, sealing bar with Teflon coating |
| Noise level | Less than 60 dBA |
| Automatic cycle | 1 cycle per minute |
| Usage | Household use only |
| Maintenance and cleaning | Clean with a soft cloth and mild detergent; removable seals washable with water |
| Safety | Unlock the lid before plugging/unplugging; do not immerse; hot sealing bar |
| Spare parts | Chamber seals, sealing bar, Teflon tape, container accessory |
| Warranty | 24 months (12 months legal + 12 months voluntary) |
Frequently Asked Questions - Fresh Quality Home RGV
User questions about Fresh Quality Home RGV
0 question about this device. Answer the ones you know or ask your own.
Ask a new question about this device
Download the instructions for your Vacuum packaging machines in PDF format for free! Find your manual Fresh Quality Home - RGV and take your electronic device back in hand. On this page are published all the documents necessary for the use of your device. Fresh Quality Home by RGV.
USER MANUAL Fresh Quality Home RGV
Automatic vacuum machine
EN
Machine sous vide
FR
FRESH QUALITY Home
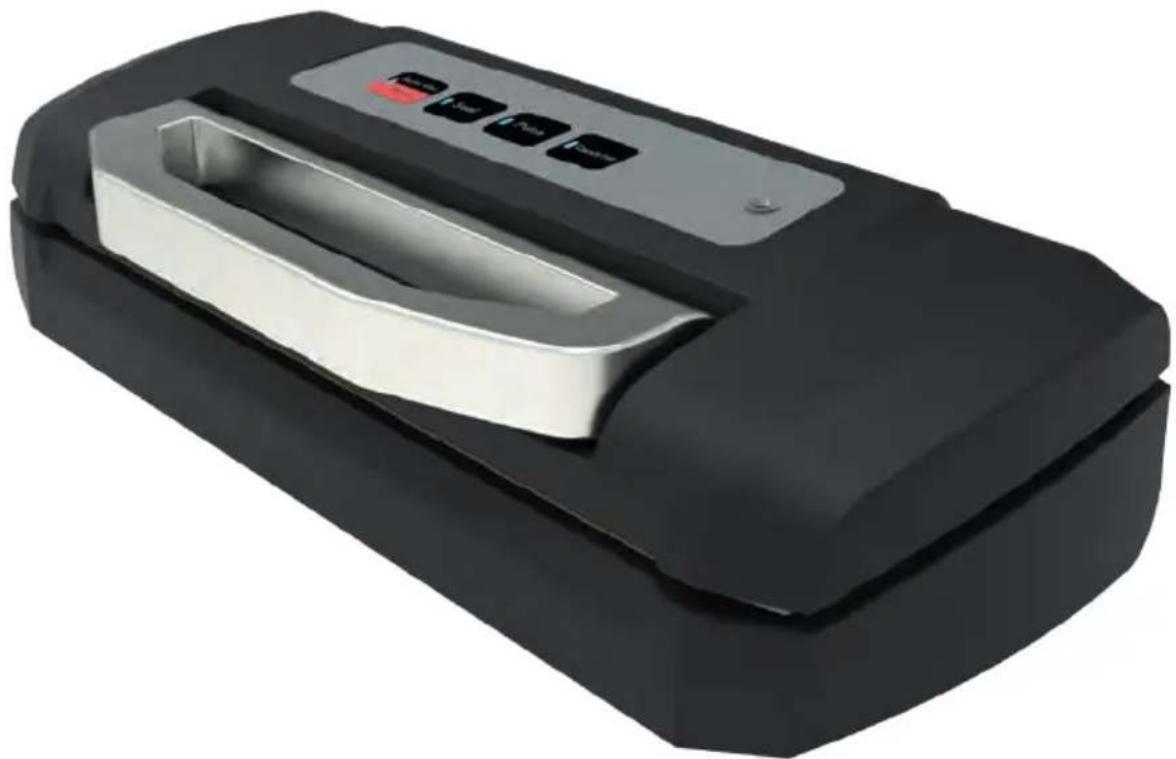
natural_image
Black and silver electronic device with control buttons and a central tray (no visible text or symbols)(Translation of original instructions)
A. General informations...... Page 14
B. Parts and Functions...... Page 16
C. Operating instructions...... Page 18
D. Cord storage...... Page 20
E. Cleaning and Maintenance...... Page 20
F. Specifications...... Page 20
G. Troubleshooting...... Page 21
H. Disposal of device...... Page 22
I. Conventional warranty conditions...... Page 23
A. GENERAL INFORMATIONS
When using this electrical appliance, safety precautions should always be observed, including the following:
CAREFULLY READ
-
Carefully read all of the instructions before using this appliance and save for future reference.
-
Before plugging cord into wall outlet, or disconnecting, make sure that the cover of the machine is in unlocked condition, and unplug from outlet when not in use or before cleaning.
-
- This appliance is not intended for use by persons (including children) with reduced physical, sensory or mental capabilities, or lack of experience and knowledge, unless they have been given supervision or instruction concerning use of the appliance by a person responsible for their safety. Children should be supervised to ensure that they do not play with the appliance. Cleaning and maintenance operations should not be made by childreni. Always unplug the machine after using or leaving without surveillance. Use only bags suggested by the manufacturer.
-
Stop using the machine immediately if the cord is damaged and have it replaced by a professional.
-
Keep away from moving parts.
-
Be careful not to touch the welding bar to avoid burning, it is a heating part of the machine.
-
Maintenance and reparation should be made by manufacturer, its service agent or authorized service center in order to avoid a hazard.
-
Don't use this device in case the cord or the body is damaged.
-
Don't pull or carry the device using the cord, and be careful not to damage the cord. Don't use the device if it is wet, or the cord or the plug are wet.
-
Keep away from hot gas, heated oven, electric burner or any other hot surfaces. Do not use this appliance on wet or hot surface or near a heat source.
-
It's better not to use an extension cord with this unit. However, if one is used, it must have a rating equal to or exceeding the fating of this appliance.
-
When disconnect, to avoid any injury, please unplug by grasp the plug, not the cord.
-
Before plugging the appliance in or operating, make sure your hands are dry and safe to do the actions.
-
Use the device only on a stable, dry and safe surface.
- There's no need to use any lubricant, such as lubricating or cooling oil or water, on this appliance.
- Do not immerse any part of this appliance, power cord or plug in water or any other liquid.
- Do not use this appliance outdoors or on a wet surface, it's recommended for household indoor use only.
- Children should be supervised to ensure that they do not play with the appliance.
ATTENTION:
THIS DEVICE IS ONLY INTENDED FOR HOUSEHOLD USE. RECOMMENDED FUNCTION IS ONE AUTOMATIC CYCLE (VACUUM/WELDING) IN 1 MINUTE
B. PARTS AND FUNCTIONS
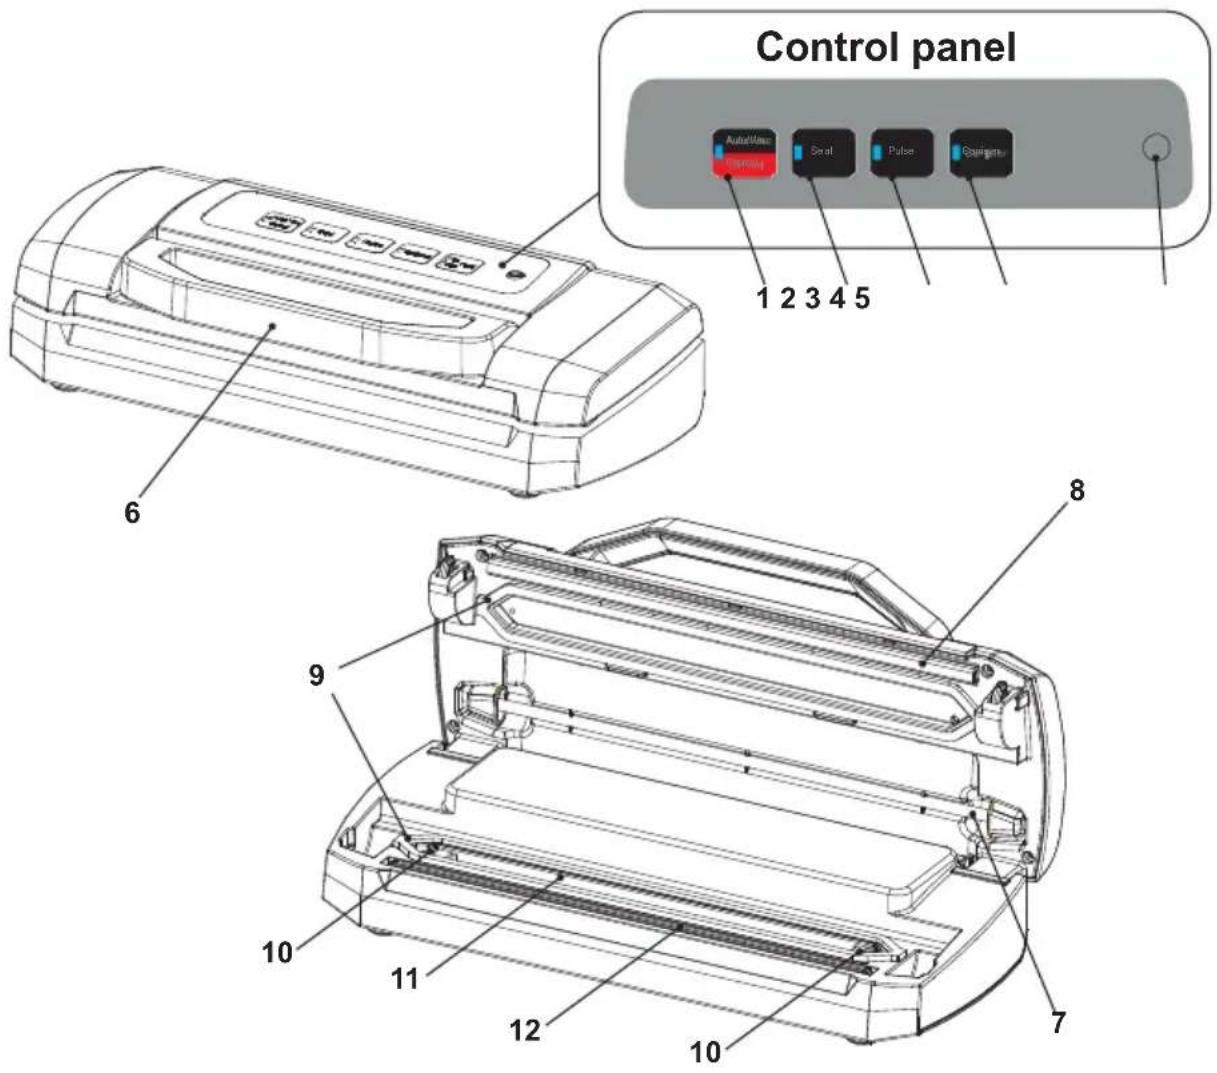
1. Auto/Vac - Cancel:
This button has two functions depending on the machine status:
At stand-by condition, it starts the automatic operation of vacuuming the bag and then automatically seals the bag when vacuum is complete; At working (vacuuming or sealing operations) condition, it stops the machine.
2. Seal:
Immediate start of welding operation.
3. Pulse:
Pulse vacuum function. Use this fuction to obtain customized vacuum, in case of fragile products that could be crushed by automatic function. When desired vacuum is reached, manual welding can be operated with "2. Seal" switch.
BE CAREFUL: VACUUM LEVEL COULD BE LOWER THAN NECESSARY TO GUARANTEE CORRECT FOOD PRESERVATION. PRESERVATION TIME COULD BE LOWER THAN EXPECTED.
4. Canister:
To start vacuuming for canisters, jar lids, wine stoppers or other accessories through a hose.
5. Hose Port:
To insert the hose for canister and wine stopper.
6. Handle:
Press the handle to lock the cover into the base very easily. When handle is unlocked, functions of switches are inactivated.
7. Canisters hose:
Use this hose adaptor to connect with vacuum canister and machine for vacuuming purpose. Canisters are not included in the packaging.
8. Welding bar gasket:
Place the bag to be sealed below this strip. Clean and dry or replace it when distorted or broken.
9. Vacuum chamber gaskets:
Keep air away by forming vacuum chamber. Clean and dry or replace it when it is distorted or broken.
10. Air intake:
Air intake connects with vacuum chamber and pump. Do not cover this intake when placing bag for vacuum & Seal operations.
11. Liquid tank:
Position the open end of the bag inside the chamber, draws air out of bag and catches any liquid overflow from the bag. Can be take out for cleaning after use.
BE CAREFUL: PROTECTION IS GUARANTEED ONLY FOR SMALL LIQUID QUANTITY OR HUMIDITY. BIG QUANTITIY COULD ANYWAY DAMAGE THE DEVICE.
12. Sealing bar:
Teflon-coated heating element which gets hot to seal the bag. BE CAREFUL: THIS ITEM COULD BE VERY HOT AND BURNING DURING FUNCTION.
C. OPERATING INSTRUCTIONS
I. Making a bag with bag roll
- Pull out the bag material and cut the suitable length.
- Put one end of the bag on top of the sealing element.
- Close the cover and press handle to lock the cover.
- Press "Seal" to start welding. The indicator lights on to indicate sealing operate.
- When the indicator turns off, the sealing is done; unlock the handle to open the cover and take the bag; it is ready for vacuum/sealing.
N.B.: to improve welding operation, it is possible to operate "Pulse" function before starting welding operation.
II. Vacuum packaging with a bag
-
- Put the items inside the bag. For best result leave 4 / 5 ~cm . free space on top of the bag.
- Clean and straighten the open end of the bag, make sure no dust, wrinkle or ripples.
- Place the open end of the bag within the vacuum chamber area. Make sure the air intake is not covered by the bag.
- Put the cover down and press handle to lock the cover.
- Press switch (1.) "Auto/Vac - Cancel" to start automatic vac/welding operation.
- Wait until RED light (2.) turns off to cpmplete operation. Then operate the handle to unlocj the cover and remove bag.
N.B.: You can operate at any time, during vac/welding operation:
- Stop any operation by switching (1.) "Auto/Vac - Cancel".
- Start welding by switching (2.) "Seal"
ATTENTION:
- Wipe out any excess liquid or food residue in the vacuum chamber or bag before each vacuum operation.
- Clean liquid container (11.) after each vacuum operation.
- This device will not provide vacuum with smooth bags. Embossed bags must be used.
III. Pulse/Vacuum function
- This function is preferred for vacuum packing, when you want a slight vacuum effect such as e.g. tomatoes, chips or similar. Or, if you have moist raw materials or a sauce, where you just want to drain air from the bag and then stop the appliance before the liquid is compressed.
- Press the "Pulse Vacuum button" (3.) several times until you get the wanted result.
- As desired vacuum level is reached proceed with bag sealing by pressing (2.) "Seal".
ATTENTION:
• Take maximum care to avoid liquid suction, that could damage the device.
IV. Vacuum package in a Canister & Vacuum Bowl
- Be careful to use proper canisters and covers suitable for vacuum packaging, strong and resistant, in steel, plastic or tempered glass.
- Be sure to have a proper canister attachment, for the covers and valves used.
- Fill canister leaving 4/5 cm. free space from top.
- Insert one end of the hose (7.) into the air intake (5.). Insert the other end in the canister valve or specific canister attachment; this attachment is specific for every kind of cover/canister, so it may be bought as spare part.
- Press switch (4.) "Canister" to start vacuum operation. Device will automatically stop as the maximum vacuum level is obtained.
- Immediately remove hose end (7.) and canister attachment; lock canister valve (if necessary, depending on the kind of cover/canister used). Don't delay this operation, to prevent air leakage inside the canister.
D. CORD STORAGE
Put the power cord into the storage area in the bottom of the machine when not in use. Do not wrap the cord around the appliance in order to avoid damages.
E. CLEANING AND MAINTENANCE
- Always unplug the unit before cleaning.
- Do not immerse in water or any other liquid.
- Avoid using abrasive products or material to clean the unit, for they will scratch the surface.
- Use a mild dishwashing soap and a warm, damp cloth to wipe away food residue or around components.
- Dry thoroughly before using again.
N.B.: Gaskets can be removed for cleaning; just use water for cleaning and dry carefully before reassembling, to avoid air leakage during vacuum operation.
- Store the device in a dry place, not expsed to light, out of children's reach.
N.B.: When the device is not in use, DON'T LOCK THE COVER WITH THE HANDLE, to avoid gaskets damaging.
F. SPECIFICATIONS
• 220-240V / 50Hz - 110W
• Suction capacity: 12 lt/min
• Vacuum level: -800 mbar max
- Seal: 2.5 ~mm × 30 ~cm .
- Dimensions : 402x180x h101 mm.
G. TROUBLESHOOTING
| Trouble Solutions | |
| Vacuuming but seal function is not good | Check if the edge of the bags has liquid, oil stain or any chippings. |
| Check if heating element is damaged.In case of damages it must be replaced by technical service. | |
| Check teflon sealing strip.In case of damages it must be replaced or covered. | |
| Check if the bag has enough free space from the top.4/5 cm of free space arre required for best result of vac/seal operation. | |
| Seal function is good but can not vacuuming | Check gaskets are not damaged and well applied.This could cause air leakage; change or replace gaskets. |
| Check open side of the bag lays between the gaskets. | |
| Check products inside the bag has no edges or sharp sides.Edges or sharp side must be protected with paper or plastic. | |
| Check air intakes (10.) are free. | |
| Bag inflation after vacuuming | Check if the good is belong to easy corrosion foods?All the easy corrosion goods are need to be frozen or refrigerated after vacuuming so that it can prolong it's shelf life. But vacuuming doesn't guarantee the foods will never spoil.Check if you packed the fresh vegetables or fruit and seed food?All fresh vegetables or fruit and seed are not suitable to storage under room temperature after vacuumed, they have photosynthesis and respiration. Suggest to storage them in refrigerated. |
| Bags can't hold vacuum | Check sealed are is clean, without wrinkles.In case of wrinkles vac/welding operation is to be made again. |
H. DISPOSAL OF DEVICE
PROTECTION OF THE ENVIRONMENT
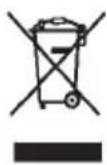
The crossed-out wheeled bin symbol placed on the product and on the accompanying documentation indicates that the product itself is subject to Directive 2012/19/EU which regulates the collection, the management, he processing and the disposal of electrical and electronic equipment waste (WEEE).
When the product reaches the end of its lifetime must therefore not be disposed of as a common mixed urban waste but it must be subject to sorted collection at authorized collection centers.
Responsible disposal of electrical and electronic equipment waste helps to ease the material resources sustainable recycling and reuse, as well as to avoid possible damages to the environment and to human health caused by uncontrolled waste disposal.
The municipalities organize sorted collection centers specialized for WEEE. For more detailed information regarding the WEEE collection and pick-up systems, it is possible to refer to your own municipality or to the local household waste disposal service.
Moreover, at the time of purchase of a new equivalent equipment intended to be used in a household environment, the customer has the right to freely lend, at the rate of one on one, the used equipment to the distributor which will provide for its disposal as required by law.
Professional purchasers are exhorted to contact their own supplier to check the terms and conditions of the purchase contract.
I. CONVENTIONAL WARRANTY CONDITIONS
This Warranty does not affect your statutory rights under D. Lgs. 02/022002, n. 24. With this guarantee, the manufacturer suggests the Purchaser to address directly a Point of Sale which to comply with the restoration in a fast, safe and unquestionable quality.
This Warranty is effective regardless of the evidence that the defect - resulting from manufacturing defects present at the time of purchase of the device, except as provided in paragraph "d" of this text.
a) Warranty duration: 24 months from date of purchase.
After the first 12 months of warranty, the warranty on the unit will be managed by the Stores within 12 months of legal guarantee in strict application of the provisions of Legislative Decree 02/022002, n. 24.
b) The warranty is effective: In case of a request for assistance, the warranty is valid only if you show the warranty certificate together with a document, valid receipt, showing the identification details of the seller, the product and the date on which the purchase was made.
c) Warranty extension: Repair DOES NOT stop nor change the duration of the warranty which will expire on its legal deadline.
d) Limitations of Warranty:
The warranty does not cover any damage resulting from:
- negligence, incompetence, recklessness and carelessness in use (failure to comply with the rules in this manual);
- maintenance not covered in this booklet or performed by unauthorized personnel;
- tampering or interventions to increase the power or efficacy of the product;
- incorrect installation (power supply with a voltage other than that listed on the nameplate and in this booklet);
- improper use of the appliance;
- damage due to normal wear and tear of the components, impacts, falls, transport damage.
- the guarantee does not cover the repair / replacement of parts subject to wear during normal use of the product (hooks, kneading, blades, belts, connectors ...).
e) Costs: In cases not covered by the warranty, the manufacturer reserves the right to charge
the customer the cost of repair or replacement of the appliance.
f) Manufacturer's responsibility: The manufacturer is not liable for any damage that may directly
or indirectly affect persons, property or pets as a consequence of failure to comply with all the requirements set out in this “Instructions for Use” booklet and concerning especially the warnings regarding installation, use and maintenance.
How to contact technical support
• Tel. +39 031 722819
• Fax +39 031 722825
info@rgv.it
www.rgv.it
A. INFORMATIONS GÉNÉRALES
4. Conteneur (Canister):
Complete the fields below for the validity of the Warranty
Modello Model
SH 300 - Art. Code: 111226
Cognome Surname
Nome Name
Via n° Street n°
Città City
Nazione Country

Fabbricato da / Manufactured by:
R.G.V. srl
Via Giovanni XXIII, 11
22072 Cermenate (CO) - Italia
Tel. +39 031 722819
fax +39 031 722825
e-mail: info@rgv.it
www.rgv.it
Ed.: 12/2020
Made in P.R.C.

- FRESH QUALITY Home
- GENERAL INFORMATIONS
- CAREFULLY READ
- ATTENTION:
- PARTS AND FUNCTIONS
- Auto/Vac - Cancel:
- Seal:
- Pulse:
- Canister:
- Hose Port:
- Handle:
- Canisters hose:
- Welding bar gasket:
- Vacuum chamber gaskets:
- Air intake:
- Liquid tank:
- Sealing bar:
- OPERATING INSTRUCTIONS
- Making a bag with bag roll
- Vacuum packaging with a bag
- Pulse/Vacuum function
- Vacuum package in a Canister & Vacuum Bowl
- CORD STORAGE
- CLEANING AND MAINTENANCE
- SPECIFICATIONS
- TROUBLESHOOTING
- DISPOSAL OF DEVICE
- PROTECTION OF THE ENVIRONMENT
- CONVENTIONAL WARRANTY CONDITIONS
- How to contact technical support
- INFORMATIONS GÉNÉRALES
- Conteneur (Canister):
- Complete the fields below for the validity of the Warranty
Brand : RGV
Model : Fresh Quality Home
Category : Vacuum packaging machines