
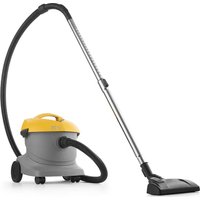
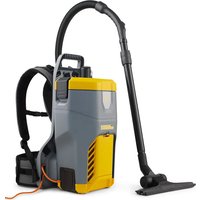
AS 10 P - Vacuum Cleaner Ghibli & Wirbel - Free user manual and instructions
Find the device manual for free AS 10 P Ghibli & Wirbel in PDF.

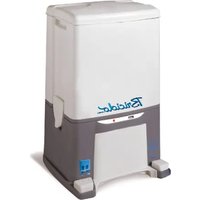
| Product type | Wet and dry vacuum cleaner |
| Brand | Ghibli & Wirbel |
| Model | AS 10 P |
| Power supply | Mains, 220-240 V |
| Power | Not specified |
| Motor type | Single or dual depending on version |
| Tank capacity | Approximately 20-30 liters (estimate) |
| Main functions | Suction of liquids and solids; suction power adjustment |
| Included accessories | Flexible hose, rigid extensions, ergonomic handle, nozzles, possible electric brush |
| Filter | Washable polyester filter |
| Collection bag | Disposable paper bag (depending on version) |
| Noise level | Increases when the tank is full |
| Maintenance and cleaning | Regular filter cleaning; emptying the tank; cleaning the body with a damp cloth |
| Safety | Unplug before maintenance; do not vacuum flammable, explosive or corrosive substances |
| Weight | Not specified |
| Dimensions | Not specified |
| Spare parts and repairability | Dust bag, polyester filter, accessories, seals |
| General information | Manual in several languages; optional trolley; professional use |
Frequently Asked Questions - AS 10 P Ghibli & Wirbel
User questions about AS 10 P Ghibli & Wirbel
0 question about this device. Answer the ones you know or ask your own.
Ask a new question about this device
Download the instructions for your Vacuum Cleaner in PDF format for free! Find your manual AS 10 P - Ghibli & Wirbel and take your electronic device back in hand. On this page are published all the documents necessary for the use of your device. AS 10 P by Ghibli & Wirbel.
USER MANUAL AS 10 P Ghibli & Wirbel
natural_image
Illustration of a small industrial vacuum cleaner with handle and wheels (no text or symbols)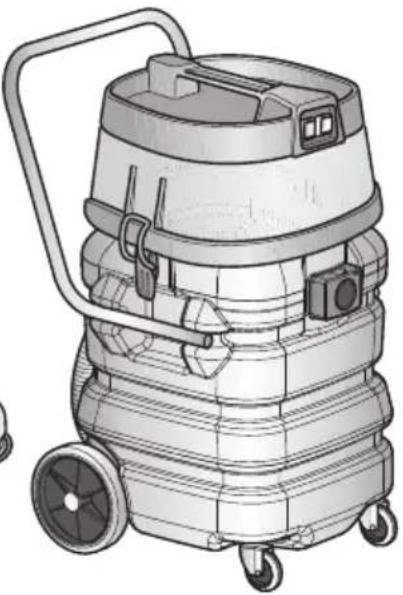
natural_image
Line drawing of a four-wheeled industrial vacuum cleaner with handle and wheels (no text or symbols)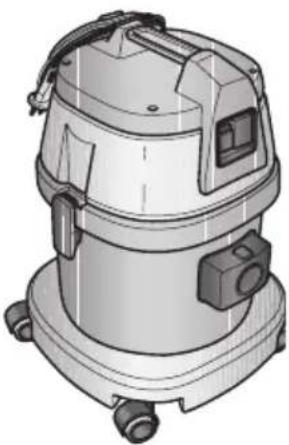
natural_image
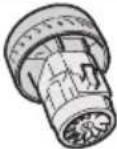
Illustration of a vacuum cleaner with attached control panel and wheels (no text or symbols)EN Use and Maintenance
natural_image
Illustration of a vacuum cleaner with labeled component 6, shown in technical line drawing (no text or symbols beyond label)
natural_image
Illustration of a hand using a tool to adjust or install a mechanical component, labeled with number 21 (no text or symbols on the diagram itself)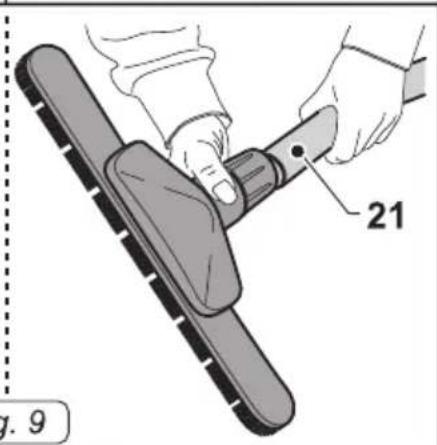
 |  |  |  |  |  |  |  |  |  | |
| AS10P/I | ■ | 190 mpar 10 l | 800 W 60 dbA 160 | mbar 10 l | 410 x 410x 560 | 8,8 kg (P)9,4 kg (l) | ∅ 36 mm | |||
| ASL10P/I / I Auto | ■ ■ 1000 W 62 dbA | 190 mpar 10 l | 410 x 410x 560 | 9,2 kg (P)9,8 kg (l) | ∅ 36 mm (P)∅ 40 mm (Auto) | |||||
| AS27P/IK / IK Auto | ■ ■ 1000 W 62 dbA | 190 mpar 25 l | 410 x 410x 760 | 9,7 kg (P)10,4 kg (IK) | ∅ 36 mm∅ 40 mm | |||||
| AS400P/PD / IK / IK Auto | ■ ■ 1200 W 63 dbA | 210 mpar 35 l | 500 x 500x 840 | 13 kg (P/PD)14 kg (IK) | ∅ 40 mm | |||||
| AS59P/IK / IK Auto | ■ ■ 1900 W 65 dbA | 190 mpar 56 l | 610 x 520x 920 | 20 kg (P)21,3 kg (IK) | ∅ 40 mm | |||||
| AS59PD SP | ■ ■ 1900 W 65 dbA | 190 mpar 56 l | 620 x 480x 930 | 23,1 kg | ∅ 40 mm | |||||
| AS590PIK CBN | ■ ■ 1900 W 65 dbA | 190 mpar 56 l | 610 x 520x 920 | 20,4 kg (P)21,3 kg (IK) | ∅ 40 mm | |||||
| AS590IK CBM | ■ ■ 1900 W 65 dbA | 190 mpar 56 l | 610 x 520x 920 | 21,3 kg | ∅ 40 mm | |||||
| AS60P/IK / IK Auto | ■ ■ 2900 W | 66,5 dbA | 205 mbar 56 l | 610 x 520x 920 | 24 kg (P)25,2 kg (IK) | ∅ 40 mm | ||||
| AS60PD SP | ■ ■ 2900 W | 66,5 dbA | 205 mbar 56 l | 620 x 480x 930 | 25,6 kg | ∅ 40 mm | ||||
| AS600PCBN | ■ ■ 2900 W | 66,5 dbA | 205 mbar 56 l | 610 x 520x 920 | 24,7 kg | ∅ 40 mm | ||||
| AS600IK CBN / IK CBM | ■ ■ 2900 W | 66,5 dbA | 205 mbar 56 l | 610 x 520x 920 | 26 kg | ∅ 50 mm |
EN English ...... ENGLISH -1
(Translation of original instructions)
FR Français ...... FRANÇAIS -1
These devices were designed to vacuum liquids or solids or both, according to the technical data table from the introduction to this manual. They were designed only for this use.

DANGER:
The manufacturer can not be held responsible for any damage due to improper or incorrect use.
Any other use releases the manufacturer from liability for harm to persons and/or property and invalidates any warranty condition.
IMPROPER USE
Do not use the appliance to:
- Aspirate flammable, explosive, corrosive and toxic substances.
- Aspirate hot substances.
- Do not use the appliance in liquid suction mode to suction powder and vice versa.
Do not use the appliance in areas at risk of explosion.
PREPARING THE APPLIANCE
Trolley installation (for models equipped with cart)
- Place the trolley on the ground (1 Fig. 1)
- Place the cover (2 Fig. 1) on the trolley, setting the support In the plastic (3 Fig. 1) on the trolley's rod (4 Fig. 1).
Vacuum cleaner
For appliances equipped with suitable accessories.
- Release the levers (5 Fig. 2) and remove the cover (6 Fig. 3) complete with the motor unit.
- Remove the polyester filter (8 Fig. 4).
-
Check, if applicable, that inside the device to be set the paper bag (7 Fig. 4).
-
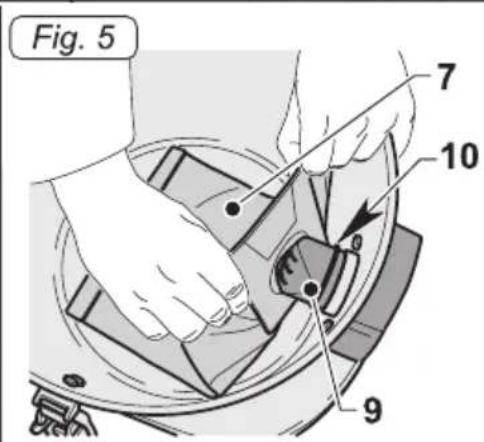
If the paper bag (7 Fig. 4) is not there, install it, if necessary, acting as follows:
Install the paper bag (7 Fig.5) in the nozzle (9 Fig. 5) until it passes the banding (10 Fig. 5) - Reassemble the polyester filter (8 Fig. 4).
- Place the cover back on (5 Fig. 2) and lock it using the levers.
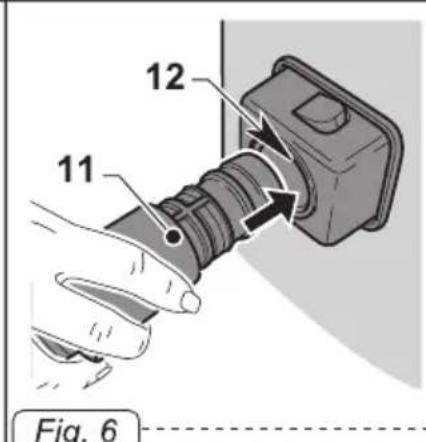
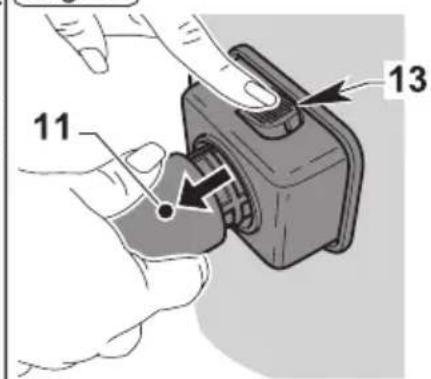
- Insert, as far as possible, the sleeve (11 Fig. 6) of the suction hose into the nozzle (12 Fig. 6) on the drum.
- To release the sleeve (11 Fig. 6) press and hold the button (13 Fig. 6) and then pull out the sleeve (11 Fig. 6).
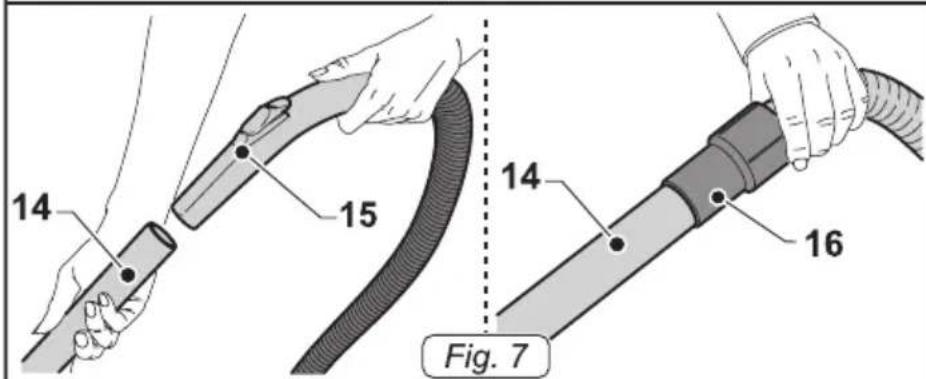
- Connect the ergonomic handle (15 Fig. 7) or the hose (16 Fig. 7) depending on the model, with the extension (14 Fig. 7).
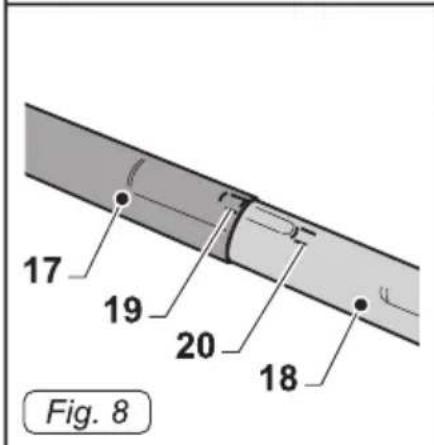
- Join the two rigid extensions (17-18 Fig. 8), alining the reference points (19-20 Fig. 8), if applicable.
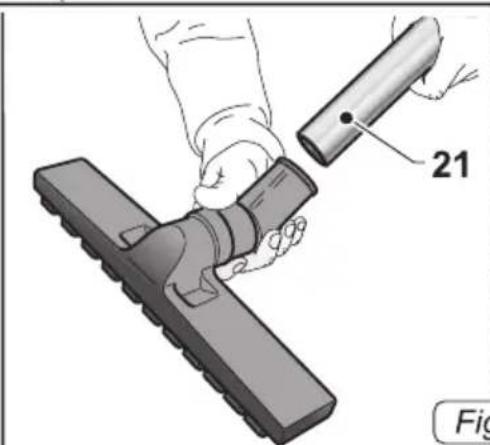
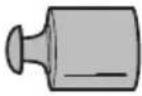
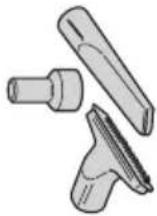
- Attach to the rigid extension (21 Fig. 9) the desired accessory (the vacuum nozzle, the dust brush, the accessory for tight spaces, the floor nozzle etc..

NOTES:
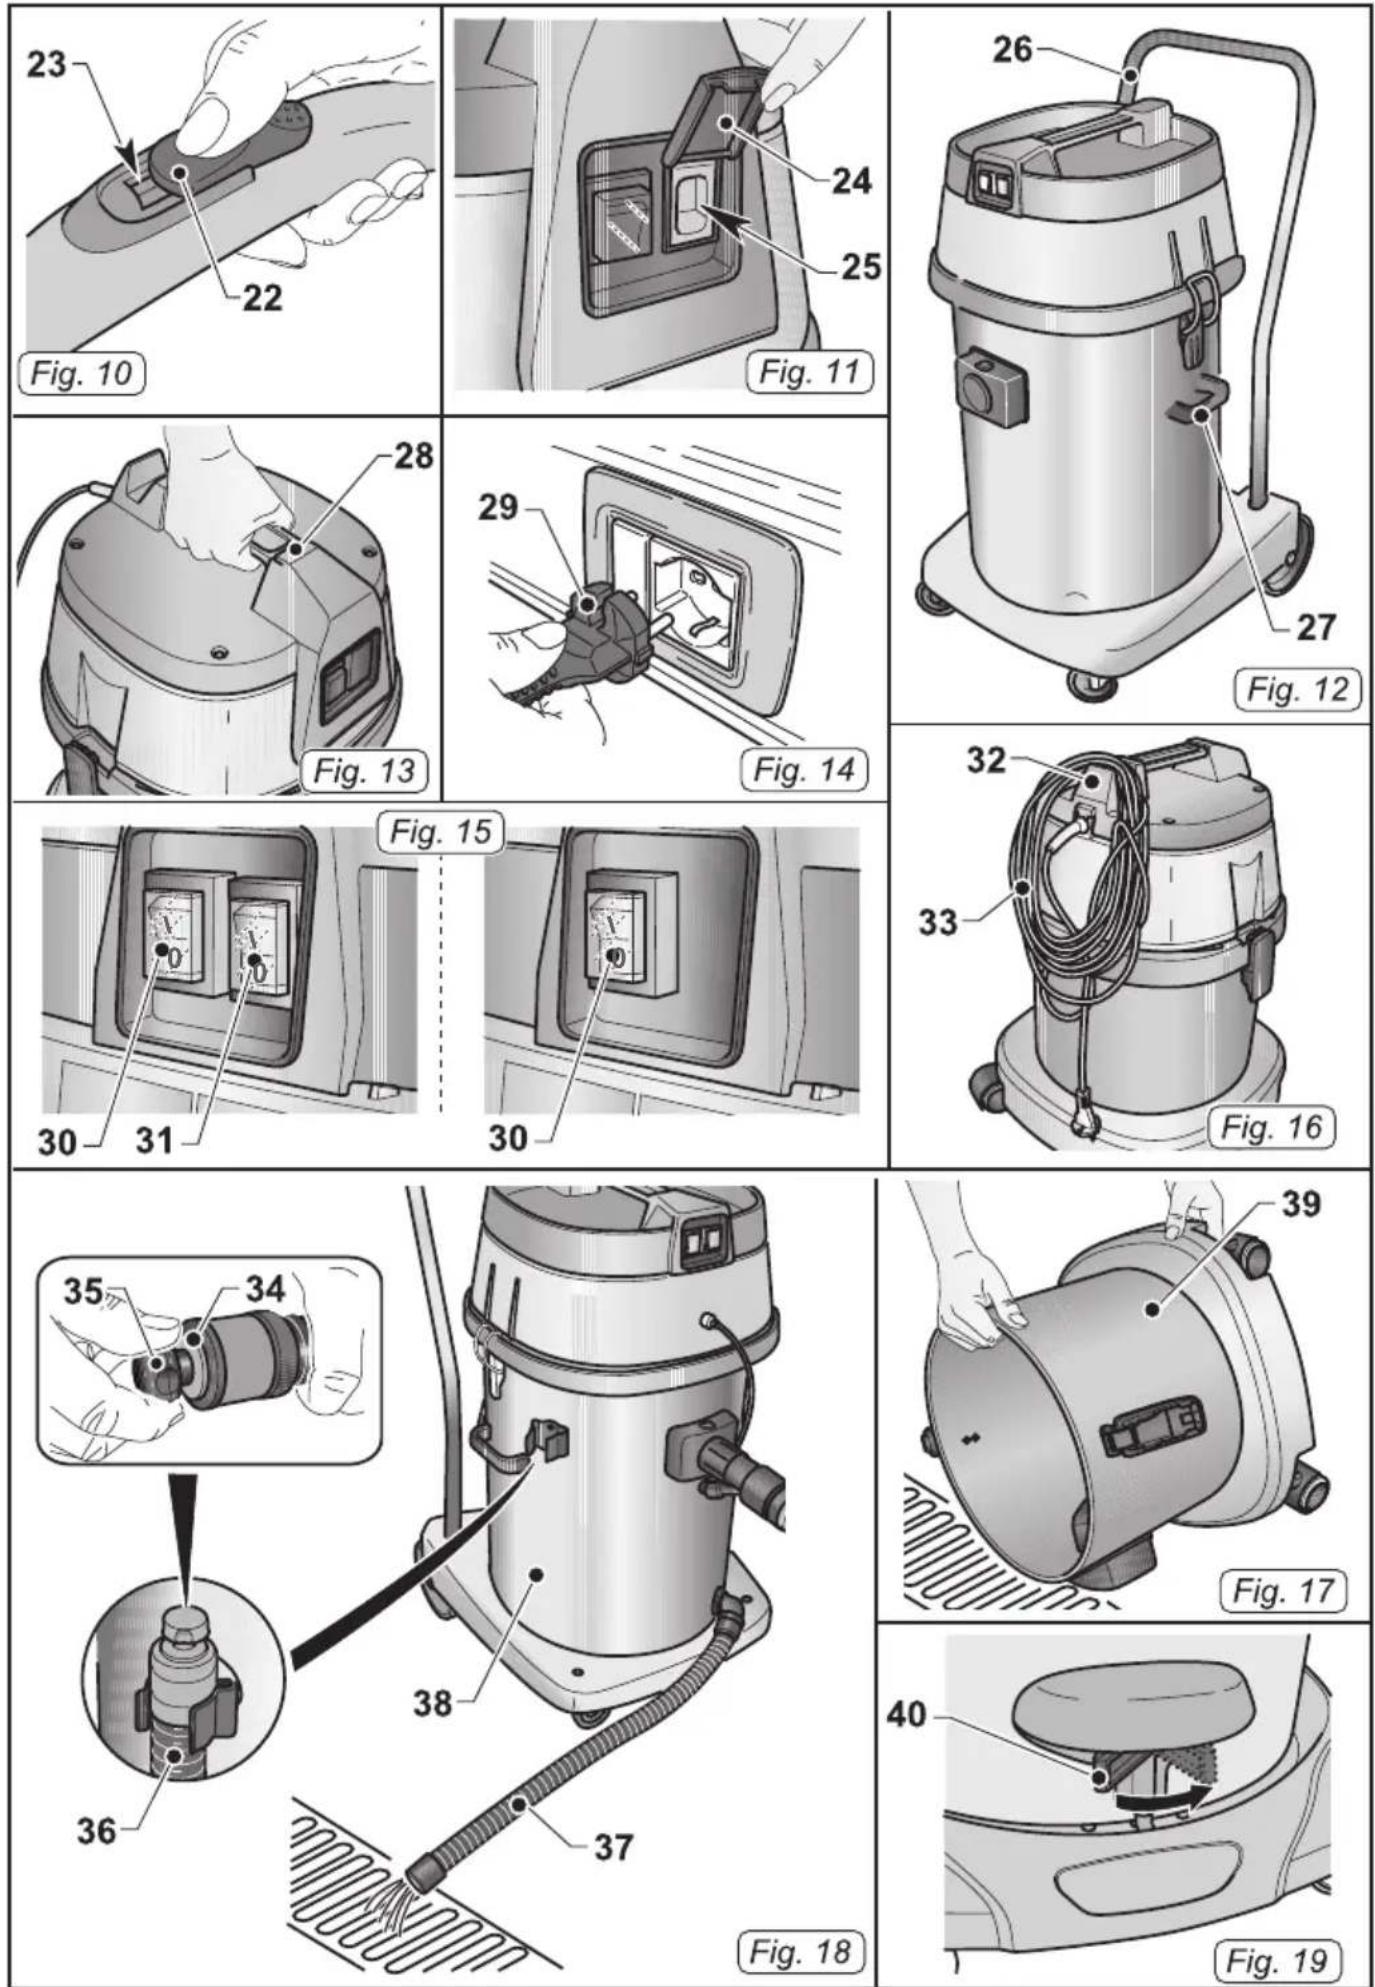
For models equipped with ergonomic handle is possible to adjust the suction force, by acting the selector (22 Fig. 10).
By opening the window (23 Fig. 10) you get a lower suction force.
Connecting the electrical brush
For devices with socket:
- Lift the shutter (24 Fig. 11).
- Connect the electrical brush's plug to the socket (25 Fig. 11) located on the top of the vacuum (maximum output 200 W).
Liquid suction
For appliances equipped with suitable accessories.
- Release the levers (5 Fig. 2) and remove the cover (6 Fig. 3) complete with the motor unit.
- Remove the polyester filter (8 Fig. 4) if present.
- Remove the paper bag (7 Fig. 4) if present.
- Place the cover back on and lock it using the levers (5 Fig. 2).
- Insert, as far as possible, the sleeve (11 Fig. 6) of the suction hose into the nozzle (12 Fig. 6) on the drum.
- To release the sleeve (11 Fig. 6) press and hold the button (13 Fig. 6) and then pull out the sleeve (11 Fig. 6).
- Merge the ergonomic handle (15 Fig. 7) or hose (16 Fig. 7) depending on the model, with the extension (14 Fig. 7).
- Connect the two rigid extensions (17-18 Fig. 8) by aligning the two reference points (19-20 Fig. 8).
- Mount on the rigid extension (21 Fig. 9) the desired accessory,( vacuum nozzle, floor nozzle etc..)

NOTES:
For models equipped with ergonomic handle it is possible to adjust the suction force acting the nut (22 Fig. 10).
By opening the little window (23 Fig. 10) you get a lower suction force.
USING THE APPLICANCE
- The device is equipped with wheels and thus can be moved with the proper handles, or it can be pushed with the help of the handle (26 Fig. 12)
- To lift it up insert your fingers under the dedicated handle (28 Fig. 13) on the top of the cover of the single version motor or lift with the help of two people using the handles (27 Fig. 12).
Starting up the appliance
- Insert the plug (29 Fig. 14) into the socket.
Single motor
- Press the switch (30 Fig.15) to position "I" to start the vacuum engine; lights, if located on the switch will turn on.
Double motor
- Depending on the power required it is possible to start only one motor by pressing the switch (30 Fig. 15) on "I" or both switches (30 e 31 Fig. 15) if a greater suction force is required.
Lights, if located on the switch will turn on.

NOTES:
When the recovery tank is full, the noise intensity increases and the device can no longer aspire. Then you must switch off the device and empty the tank as described in the relevant paragraphs.
Switching off the appliance
- Push the switches (30, 31 Fig. 15) to the "0" position to stop the device; the lights, if any on the switches, will go off.
- Remove the plug (29 Fig. 14) from the electrical socket.
- Wind up the cable (33 Fig. 16) and hook it onto its housing (32 Fig. 16).
CLEANING AND MAINTENANCE

DANGER:
Before performing any maintenance operation, unplug the appliance from the electrical socket.
Removing and replacing the paper dust collection bag (if present)
- Release the levers (5 Fig. 2) and remove the cover (6 Fig. 3) complete with motor.
- Remove the polyester filter (8 Fig. 4).
- Remove the paper bag for collecting dust (7 Fig. 4), and replace it as described above.
- Reassemble all the parts by following the dismantling process steps in the reverse order.
Emptying the recovery tank
- Release the lever (5 Fig. 2) and remove the top (6 Fig. 3) along with the engine.
- Place it on the top of a drain and empty the liquid in the recovery tank (38 Fig. 18).
- Clean the inside of the tank with running water and then re-install everything doing the opposite of the disassembly.
For machines equipped with drain hose
- Release the exhaust tube (36 Fig. 18) from its base.
- Unscrew the button (35 Fig. 18), remove the cap (34 Fig. 18) of the exhaust hose (37 Fig. 18) and drain the liquid in the recovery tank (37 Fig. 18).
For devices with rocking tank
- Release the lever (5 Fig. 2) and remove the top (6 Fig. 3) along with the engine.
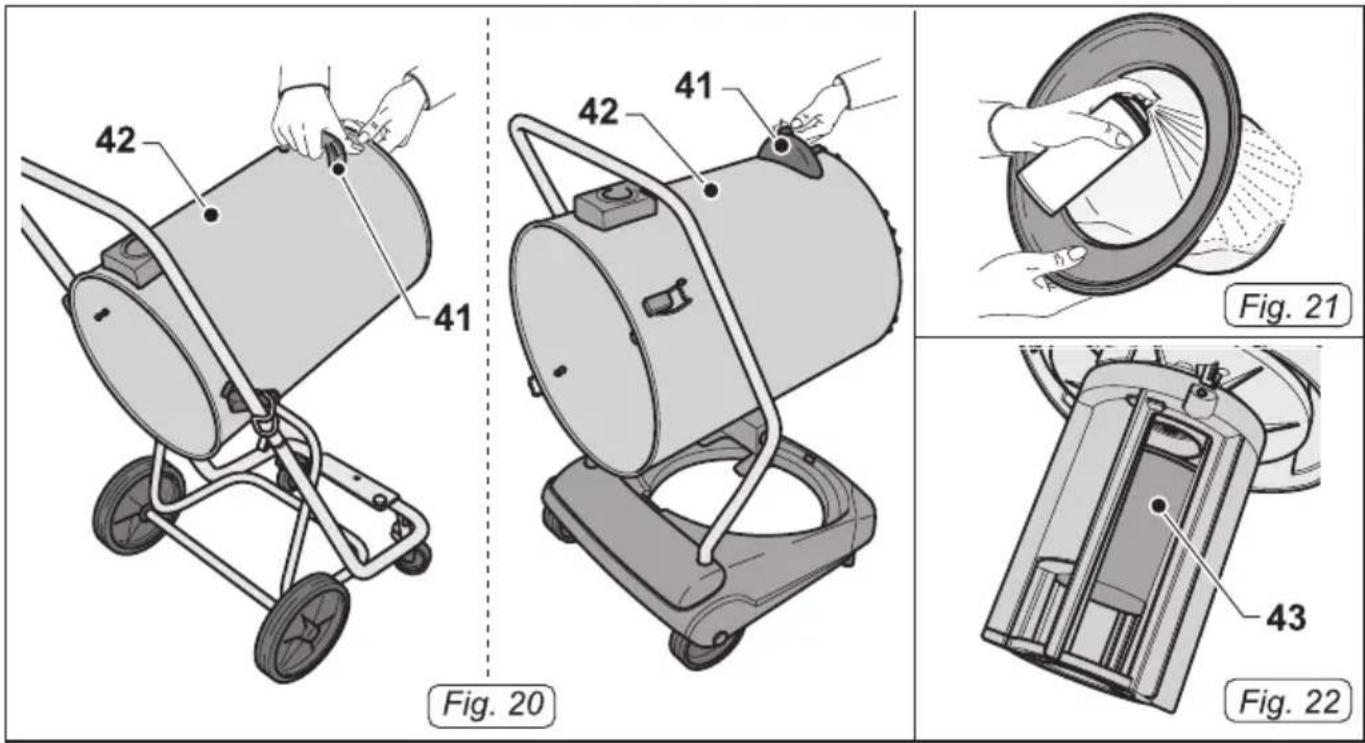
- Remove the tank locking device by acting the lever (40 Fig. 19) if any.
- Lift the tank (39 Fig. 17) with the appropriate lever (41 Fig. 20) until completely emptied.
- Replace everything doing the opposite of the disassembly.
Daily cleaning
Checking and cleaning the polyester filter (if present)
- Release the levers (5 Fig. 2) and remove the cover (6 Fig. 3) complete with motor.
- Remove the polyester (8 Fig. 4) filter.
- Clean the filter (Fig. 21) from the inside out with a blast of air; the filter can be washed (Fig. 21) in warm water and must only be replaced once it is completely dry. If it is too dirty, replace it.
- Reassemble all the parts by following the dismantling process steps in the reverse order.
Cleaning the appliance
- Clean the unit body with a cloth dampened with water or a mild detergent.
- Remove the top, as described above and clean the inside with running water and then empty it, as indicated above.
Replace everything doing the opposite of the disassembly.

DANGER:
Do not wash the appliance using jets of water.
Periodic checks
Checking the floater
- Remove the top as shown above
- Check If the floater (43 Fig. 22) is In good condition and if it moves freely in its space.
| PROBLEM CAUSE SOLUTION | ||
| The vacuum cleaner does not work. | Switch not pressed.Plug not inserted.No current. | Press the switch.Insert the plug into the socket.Check the power supply line. |
| Suction is not satisfactory. Paper bag full.Filter elements clogged.Accessories or tubes clogged.Suction nozzle squeegee worn or damaged. | Replace the dust bag.Clean the filter elements.Check and clean the flexible hose and the suction nozzle.Check and replace the squeegee. | |
TYPE D'UTILISATION
Professional Cleaning Machines Since 1968
DEALER
GHIBLI & WIRBEL S.p.A.
Registered office:
Via Enrico Fermi, 43 - 37136 Verona (VR) - Italy
Headquarters:
- DANGER:
- IMPROPER USE
- PREPARING THE APPLIANCE
- Trolley installation (for models equipped with cart)
- Vacuum cleaner
- NOTES:
- Connecting the electrical brush
- Liquid suction
- USING THE APPLICANCE
- Starting up the appliance
- Single motor
- Double motor
- Switching off the appliance
- CLEANING AND MAINTENANCE
- Removing and replacing the paper dust collection bag (if present)
- Emptying the recovery tank
- For machines equipped with drain hose
- For devices with rocking tank
- Daily cleaning
- Checking and cleaning the polyester filter (if present)
- Cleaning the appliance
- Periodic checks
- Checking the floater
- TYPE D'UTILISATION
- GHIBLI & WIRBEL S.p.A.
Brand : Ghibli & Wirbel
Model : AS 10 P
Category : Vacuum Cleaner