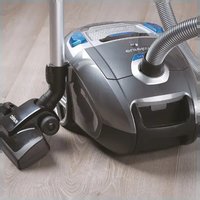
Optima NEN200C - Vacuum Cleaner EUREKA - Free user manual and instructions
Find the device manual for free Optima NEN200C EUREKA in PDF.


| Brand | Eureka |
| Model | Optima NEN200C |
| Type | Vacuum cleaner with bag |
| Power supply | Mains (120 V, 60 Hz) |
| Suction power | Electronically adjustable (+ and - buttons) |
| Bag capacity | Disposable bag (model NEN200C01) |
| Filter type | HEPA exhaust filter + washable foam filter |
| Full bag indicator | Yes, red light |
| Brush adjustment | Floor nozzle with carpet/hard floor selector |
| Turbo nozzle | Yes, for carpets |
| Thermal protection | Thermal cutout with automatic shut-off |
| Included accessories | Floor nozzle, crevice tool, upholstery brush, metal extension tube, hose and handle |
| Cord length | Automatic cord rewinder |
| Filter maintenance | Rinse foam filter with warm water, replace HEPA periodically |
| Bag maintenance | Replace when indicator is red |
| Replacement parts | Bag (NEN200C01), Brush (NEN200C02), Crevice tool (NEN200C03), HEPA filter (NEN200C04), Nozzle (NEN200C05), Turbo tool (NEN200C06), Tube (NEN200C07), Hose (NEN200C08) |
| Warranty | 2-year limited warranty |
| Customer service | 1 800 282-2886, www.eureka.com |
| Country of origin | Not specified |
Frequently Asked Questions - Optima NEN200C EUREKA
User questions about Optima NEN200C EUREKA
0 question about this device. Answer the ones you know or ask your own.
Ask a new question about this device
Download the instructions for your Vacuum Cleaner in PDF format for free! Find your manual Optima NEN200C - EUREKA and take your electronic device back in hand. On this page are published all the documents necessary for the use of your device. Optima NEN200C by EUREKA.
USER MANUAL Optima NEN200C EUREKA
Thank you for purchasing your new Eureka vacuum!
Important instructions
For easy assembly, please take a few moments to read this owner's guide.
If you have questions about your new vacuum, please contact our customer service HELPLINE at 1-800-282-2886.
We're here to help!

text_image
THE eureka CLEAN PROMISE PERFORMANCE QUALITY · VALUEEureka stands by our Clean Promise seal. Learn more at www.eureka.com/cleanpromise
www.eureka.com
natural_image
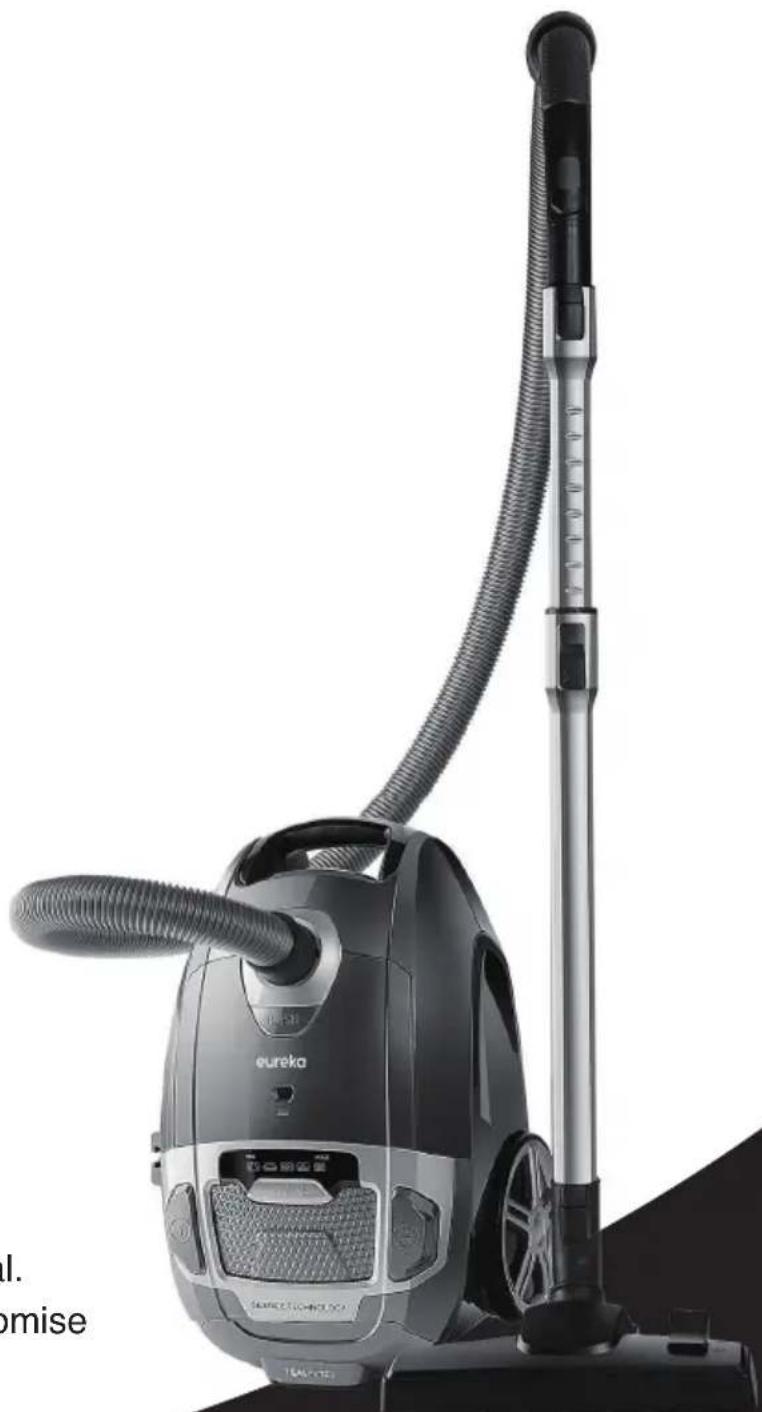
Black and white photo of a Eureka vacuum cleaner with coiled hose and control panel (no visible text or symbols)eureka
Where to find important vacuum information
Please Retain
We suggest you record the model, type and serial numbers below. They are located on the back of your cleaner. For prompt and complete service information, always refer to these numbers when inquiring about service.
Model & Type ____
Serial No. ____
It is also important to keep your receipt as proof of date of purchase.
natural_image
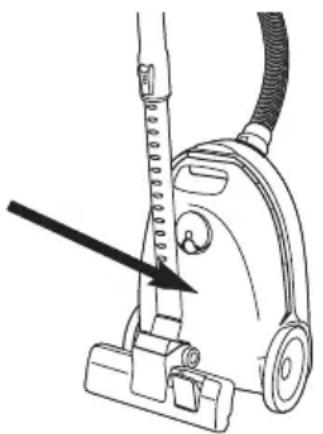
Line drawing of a vacuum cleaner with a tool inserted, showing no text or symbolsThis Owner's Guide provides important instructions to prolong the life of your Eureka vacuum cleaner.
Registration: To register your product visit www.eureka.com and click on the 'Register Your Product' link in the top right corner.
Inspection: Carefully unpack and inspect your new Eureka vacuum cleaner for shipping damage. Each unit is tested and thoroughly inspected before shipping. For instructions regarding any shipping damage, call Eureka Customer Service HELPLINE 1-800-282-2886 immediately.
Contents
Important Safeguards .... 3
What comes in the carton 4
How to use your vacuum cleaner .... 5
About your vacuum cleaner's settings....6
How to maintain your vacuum cleaner .... 7
Troubleshooting....8
The Eureka limited warranty ..... 9

Follow caution information wherever you see this symbol.
IMPORTANT SAFEGUARDS
When using an electrical appliance, basic precautions should always be followed, including the following:
READ ALL INSTRUCTIONS BEFORE USING THIS VACUUM CLEANER
WARNING

To reduce the risk of fire, electric shock, or injury:
- Do not use outdoors or on wet surfaces.
- Do not leave vacuum cleaner when plugged in. Turn off the switch and unplug the electrical cord when not in use and before servicing.
- Do not allow to be used as a toy. Close attention is necessary when used by or near children.
- Use only as described in this manual. Use only manufacturer's recommended attachments.
- Do not use with damaged cord or plug. If cleaner is not working as it should, has been dropped, damaged, left outdoors, or dropped into water, call the Eureka Customer Service HELPLINE at 1-800-282-2886.
- Do not pull or carry by the cord, use cord as a handle, close door on cord, or pull cord around sharp edges or corners. Do not run vacuum cleaner over cord. Keep cord away from heated surfaces.
- Do not use extension cords or outlets with inadequate current carrying capacity.
- Turn off all controls before unplugging.
- Do not unplug by pulling on cord. To unplug, grasp the plug, not the cord.
- Do not handle the vacuum cleaner with wet hands or operate without shoes.
- Do not put any objects into openings. Do not use with any opening blocked; keep free of dust, lint, hair and anything that may reduce airflow.
- This vacuum cleaner creates suction. Keep hair, loose clothing, fingers, and all parts of body away from openings and moving parts.
- Do not pick up anything that is burning or smoking, such as cigarettes, matches, or hot ashes.
- Do not use without dust bag or filter(s) in place.
- Use extra care when cleaning on stairs.
- Do not use to pick up flammable or combustible liquids such as gasoline, or use on areas where they may be present.
- Store you cleaner indoors in a cool, dry area.
- Keep your work area well lit.
- Unplug electrical appliances before vacuuming them.
- Belt pulleys can become hot during normal use. To prevent burns, avoid touching the belt pulley when servicing the drive belt.
- Turn off the power switch and unplug cleaner before rotating the nozzle.
SAVE THESE INSTRUCTIONS
To reduce the risk of electric shock, this appliance has a polarized plug (one blade is wider then the other).
This plug will fit in a polarized outlet only one way. If the plug does not fully fit into the outlet, reverse the plug.
If it still does not fit, contact a qualified electrician to install the proper outlet. Do NOT change the plug in any way.
Thermal Cut Off
This vacuum cleaner has a special thermostat that protects the cleaner in case of motor overheating. If the cleaner suddenly shuts off, push the on/off switch off (0) and unplug the cleaner. Check the cleaner for a possible source of overheating such as a full dust bag, a blocked hose or clogged filter. If these conditions are found, fix them and wait at least 30 minutes before attempting to use the cleaner. After the 30 minute period, plug the cleaner back in and push the on/off switch on (1).

Do Not Oil the motor or the brushroll at any time. The bearings are permanently lubricated and sealed.
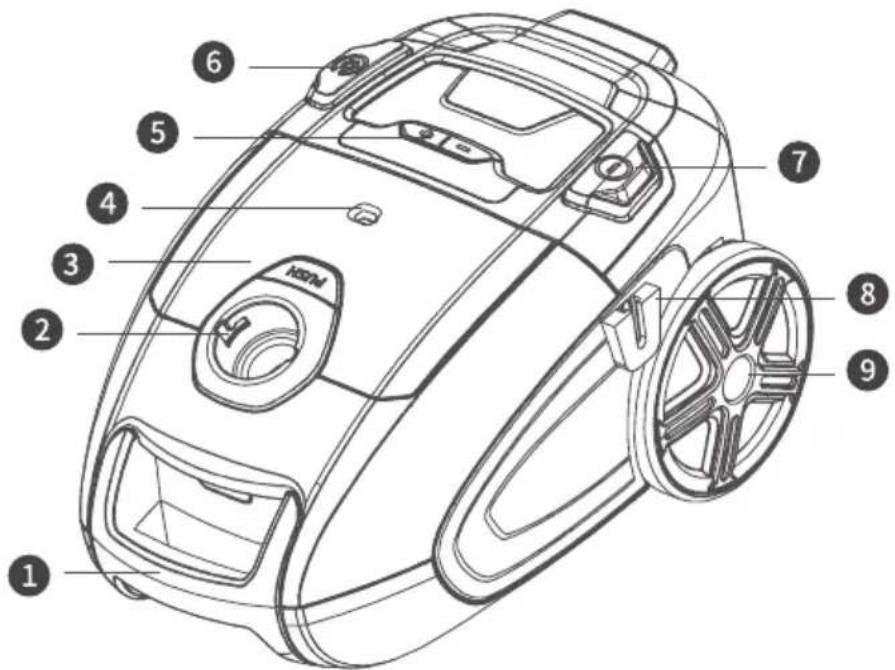
What comes in the carton
1 Handle
② Vacuum port
③ Tool storage door
4 Full dust bag indicator
5 Power Adjust Button
6 Cord rewind button
7 On/off button
8 Vertical parking clip
9 Wheel
10 Metal wand
11 Floor nozzle
⑫ Accessory compartment
13 Hose and handle
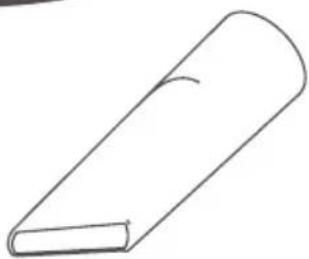
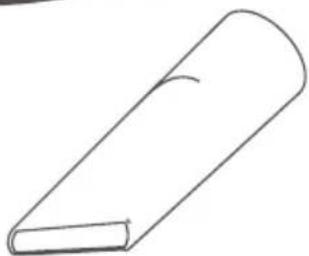
14 Crevice tool
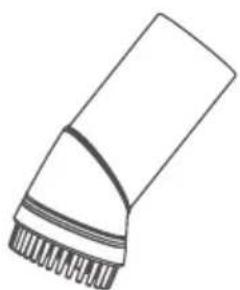
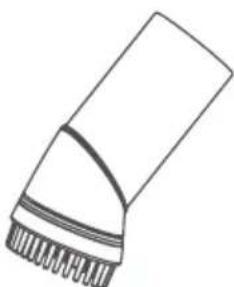
15 Upholstery tool
text_image
Technical diagram of a vacuum cleaner with numbered parts for identification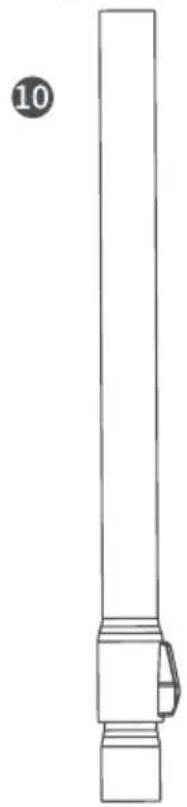
natural_image
Line drawing of a vertical cylindrical object with a handle and base, labeled with number 10 (no text or symbols on the object itself)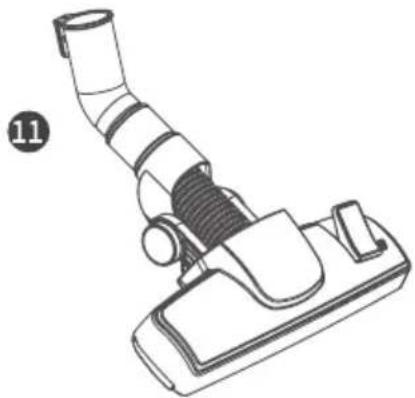
natural_image
Line drawing of a vacuum cleaner device with handle and base (no text or symbols)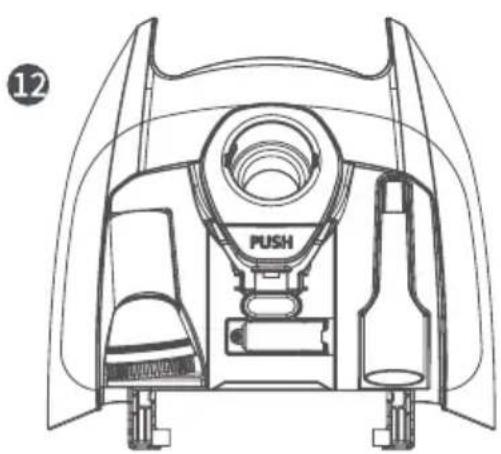
natural_image
Technical line drawing of a mechanical device with labeled parts (no readable text or symbols)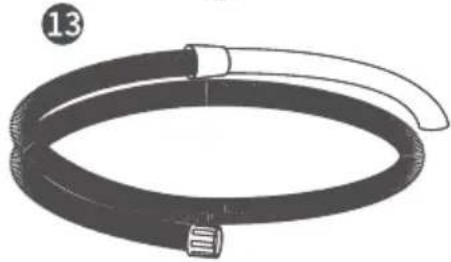
natural_image
Illustration of a coiled hose with a bulb and hose connector (no text or symbols)14
natural_image
Simple line drawing of a rolled-up book or document (no text or symbols)15
natural_image
Simple line drawing of a brush tip with bristles and a curved handle (no text or symbols)How to use your vacuum cleaner
natural_image
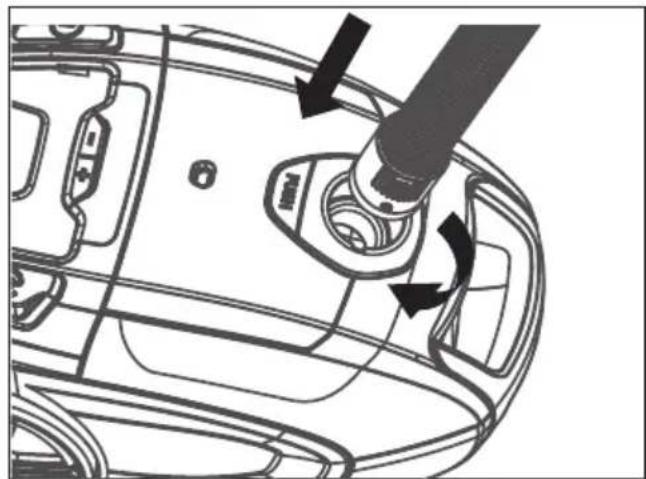
Technical line drawing of a car interior showing a valve and adjustment mechanism (no text or symbols)Step 1: Attach the hose by pressing the end down into the suction port and twisting it clockwise
natural_image
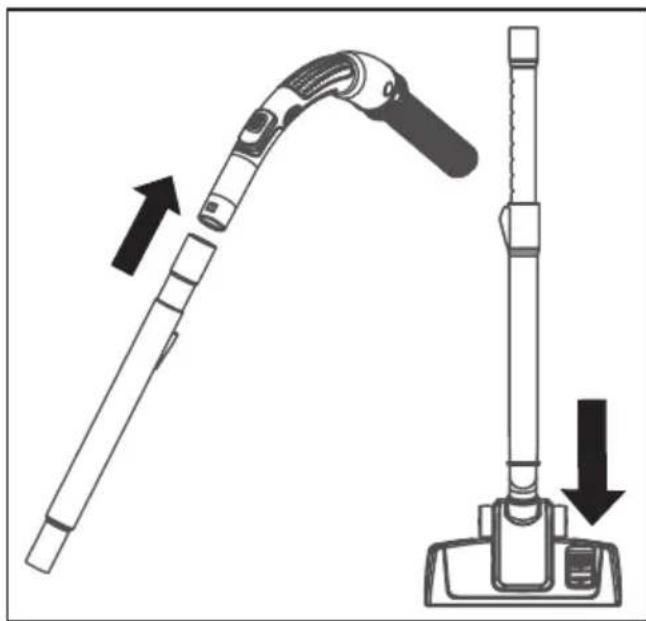
Diagram of a vacuum cleaner with a curved arm and base, showing mechanical components and directional arrows (no text or symbols)Step 2: Connect the metal wand to the hose.
Attach the floor nozzle to the metal wand and set the switch to either the carpet or hard floor setting
text_image
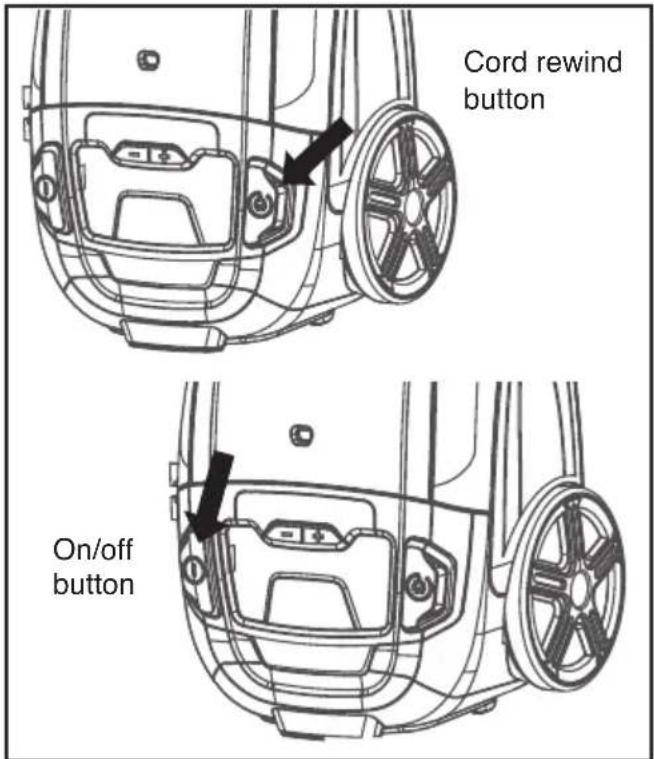
Cord rewind button On/off buttonStep 3: Extend the cord.
Note: Do not extend the cord lead further than to the red mark. To rewind the cord, press the rewind button and guide the cord with the other hand to ensure that it does not whip and cause damage.
Step 4: Switch the vacuum cleaner on and off using the on/off button
About your vacuum cleaner's settings
text_image
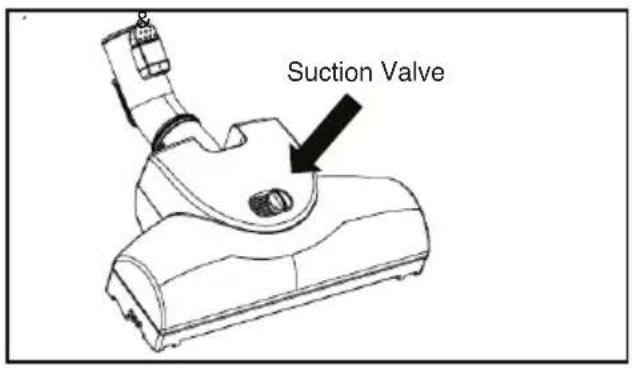
Suction ValveTurbo Floor Nozzle
This nozzle is best suited for carpeted floors. Suction can be adjusted for ease of use by sliding the valve on the top of the nozzle.
text_image
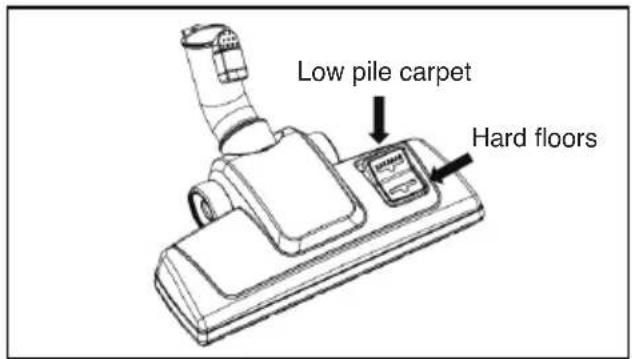
Low pile carpet Hard floorsHard Floor Nozzle
This nozzle is best suited for hard floors or low pile carpets. The switch can be pressed to set to hard floor or to low pile carpet.
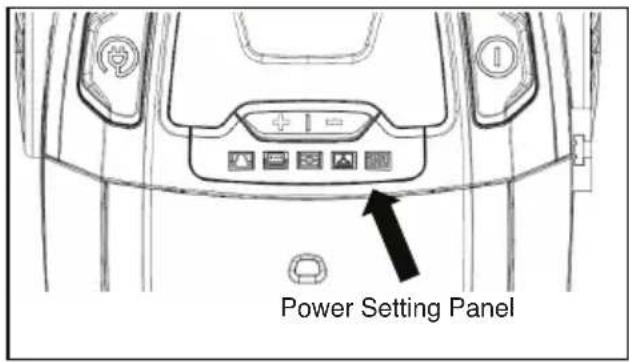
text_image
Power Setting PanelSuction Control Panel
The main body of the vacuum cleaner contains + and – sign buttons which will adjust power depending on the type of surface you are cleaning. Pressing these buttons will increase or decrease suction.
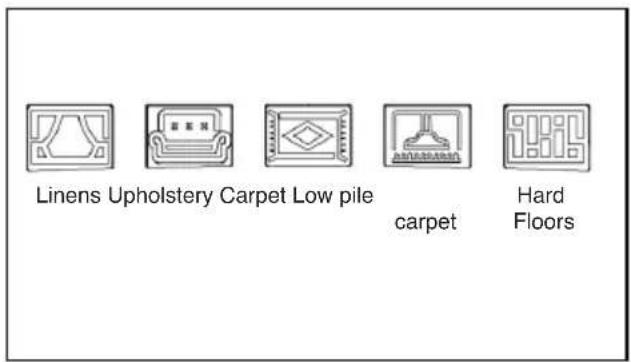
text_image
Linens Upholstery Carpet Low pile carpet Hard FloorsHow to maintain your vacuum cleaner
text_image
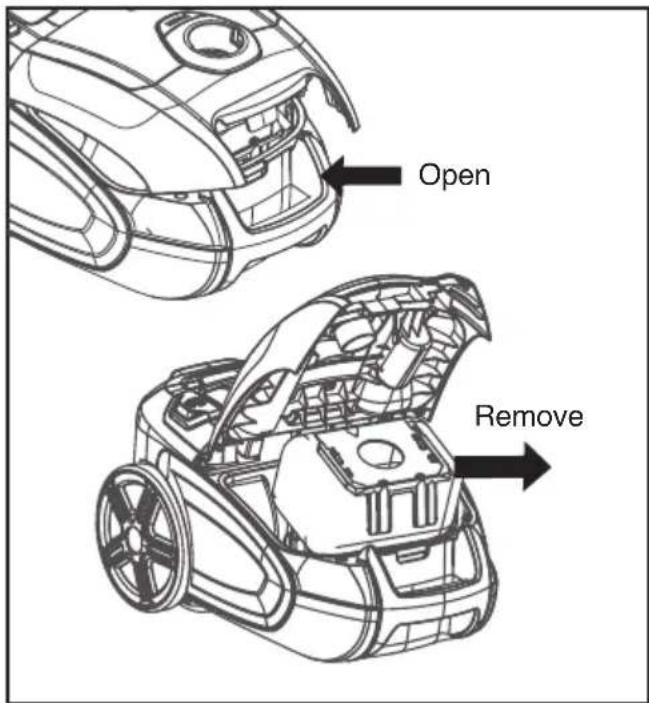
Open Remove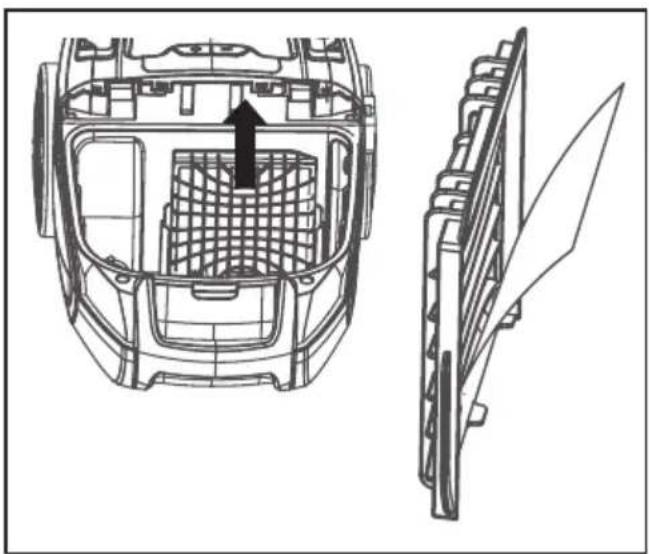
natural_image
Technical line drawing of a vehicle chassis with internal components and a separate view showing a blade assembly (no text or symbols)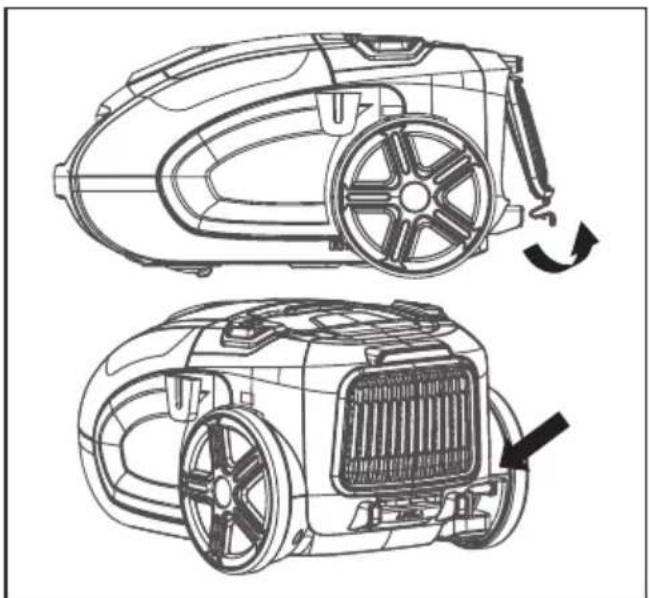
natural_image
Technical line drawing of a car's front and side views showing engine, fan, and exhaust components (no text or symbols)Step 1: Changing the dust bag:
When the dust bag full indicator turns red, it is time to replace the existing bag with a new one. Open the dust bag compartment by lifting the cover and remove the old dust bag, insert the new dust bag and snap it in place.
Step 2: Replacing the filter:
- Open the dust bag compartment by lifting the cover.
- Pull out the filter bracket assembly.
- Separate the filter from the bracket assembly

CAUTION: Unplug from electrical outlet before maintenance.
- Rinse the filter in lukewarm water and allow it to dry. Never wash the filter in a washing machine. Do not use a hair dryer or similar device to dry it.
- Reinsert the clean filter when it is completely dry. You may also replace the filter with a new one.
Step 3: Replacing the (HEPA) exhaust filter:
- Remove the exhaust filter door.
- Remove the current filter from the holder and insert a new one.
- Close the filter door.
NOTICE: Thermal cut-off
| This vacuum cleaner has a special thermostat that protects the vacuum in case of motor overheating. If the vacuum suddenly shuts off, proceed as follows: 1) Push the power switch to off and unplug the vacuum. 2) Check the vacuum for a possible source of overheating such as a full dust cup, blocked hose or clogged filter. If these conditions are found, fix them and wait at least 30 minutes before attempting to use the vacuum. 3) After the 30 minute period, plug the vacuum back in and turn on the switch. If the vacuum still does not work, call the Eureka Customer Service HELPLINE at 1-800-282-2886. | ||
| Problem Possible cause Solution | ||
| The vacuum cleaner does not turn on | Too much dust in the bagFilter is blockedHose is blocked | Empty the dust bagRinse the filterClear the blockage |
| The vacuum cleaner does not work | Electrical outlet is not connected or not workingPower switch was not turned on | Ensure the plug is properly connected in the socket and the socket is activePress the power button |
| The vacuum cleaner suddenly stops | The dust bag is filledThe filter is blockedSuction inlet of brush or accessories is blocked | Empty the dust bagClean the filterClear the blockage |
Eureka Customer Service HELPLINE 1-800-282-2886
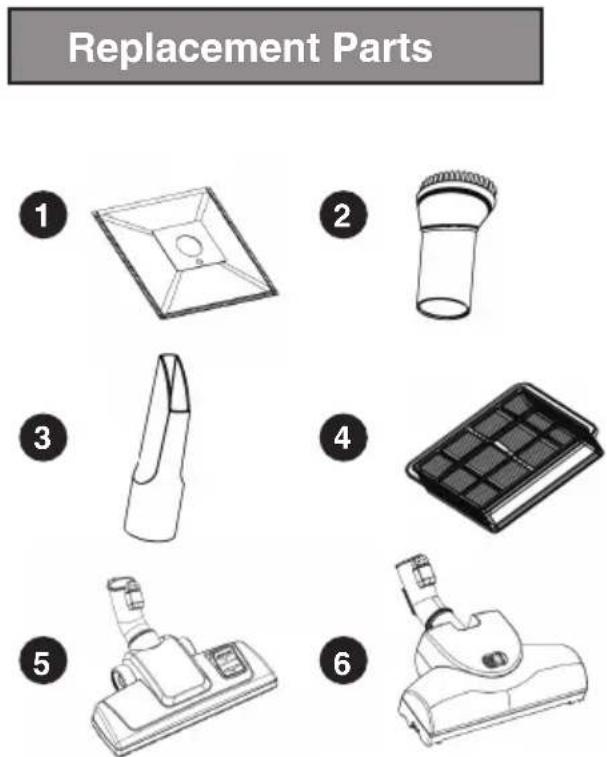
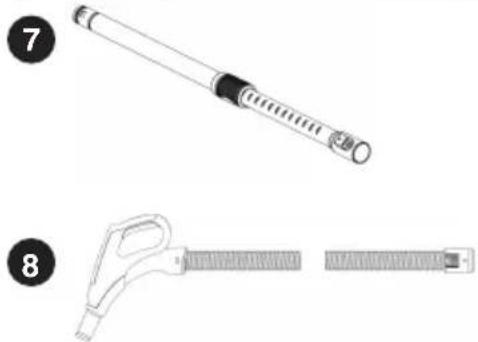
| Part No. Part Name | ||
| 1 | NEN200C01 | Dust bag |
| 2 | NEN200C02 | Dust brush |
| 3 | NEN200C03 | Crevice tool |
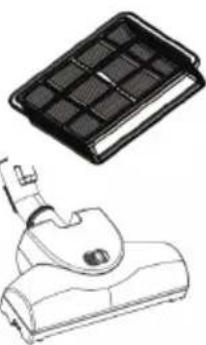
| 4 | NEN200C04 | HEPA filter |
| 5 | NEN200C05 | Normal Nozzle |
| 6 | NEN200C06 | Turbo Nozzle |
| 7 | NEN200C07 | Wand |
| 8 | NEN200C08 | Hose Assembly |
The Eureka five-year limited warranty
Midea America Corp. ("Eureka"), subject to the terms and conditions herein, warrants this vacuum cleaner to be free from defects in material and workmanship for a term of five years from the date of original purchase when used in accordance with the Eureka operating and maintenance instructions and under normal household usage. This warranty is granted only to the original purchaser and members of immediate household, and is applicable only to original purchases from Eureka authorized resellers.
What Eureka will do:
Eureka will, at its option, repair or replace a defective vacuum or vacuum part that is covered by this warranty. Repairs may be performed using new or refurbished parts that meet or exceed Eureka specifications for new parts. If Eureka elects to replace the vacuum, the replacement may be a reconditioned unit. Depending on availability of products, Eureka reserves the right to provide you with a replacement product that is the same or similar, or substitute equivalent of the original product. As a matter of warranty policy, Eureka will not refund the consumer's purchase price.
This warranty does not cover:
- Normal wear and tear of the vacuum and vacuum parts that require replacement under normal use such as disposable dust bags, filters, drive belts, light bulbs, brush-roll, bristles, impellers and cleaning.
- Damages or malfunctions resulting from: improper or unreasonable use or maintenance, abuse, negligence, failure to follow instructions contained in any written materials that accompany the product, deterioration by reason of excess moisture, corrosive atmosphere, lightning, power surges, connections to improper voltage supply, unauthorized alteration, or other external causes such as extremes in temperature or humidity, modifications, scratches or discoloration, accidents, misuse, or acts of God. This warranty also does not cover damage resulting from repair or attempted repair by anyone other than Eureka. This warranty is not applicable to any product that has been altered or on which the serial number has been defaced, modified or removed. Altering, erasing, or forging any proof-of-purchase documents voids any applicable product warranty.
Obtaining warranty service:
To obtain warranty service you must contact the Eureka Service Team, toll free, at 1-800-282-2886 or email customerserviceusa@midea.com, to discuss the warranty claim and procedures to be followed. All warranty claims must include submission of proof-of-purchase documentation. For additional information, you may also visit www.eureka.com.
Shipping charges:
You will be responsible for any initial shipping and insurance charges if the defective product(s) must be shipped for warranty service or warranty evaluation; however, Eureka will pay the return shipping charges if repairs are covered by the warranty. When returning parts for repair, you must include the model, type and serial number. If any product submitted for warranty service is found to be ineligible, an estimate of repair cost will be furnished and the repair performed only if requested by the owner and upon receipt of payment or acceptable arrangements for payment.
Further limitations and exclusions:
Any warranty that may be implied in connection with your purchase or use of the vacuum, including any warranty of Merchantability or any warranty of Fitness For A Particular Purpose is limited to the duration of this limited warranty. Some states do not allow limitations on how long an implied warranty lasts, so the above limitations may not apply to you.
Your relief for the breach of this warranty is limited to the relief expressly provided above. In no event shall the manufacturer be liable for any consequential or incidental damages you may incur in connection with your purchase or use of the vacuum. Some states do not allow the exclusion or limitation of incidental or consequential damages, so the above limitation or exclusion may not apply to you.
This warranty gives you specific legal rights. You may also have other rights, which may vary by state.
Midea America Corp. 200 Rivers Edge Drive Medford, MA. 02155 USA
Owner's Guide
Do not return to the store, call
Eureka Customer Service
HELPLINE 1-800-282-2886
www.eureka.com

text_image
THE eureka CLEAN PROMISE PERFORMANCE QUALITY·VALUE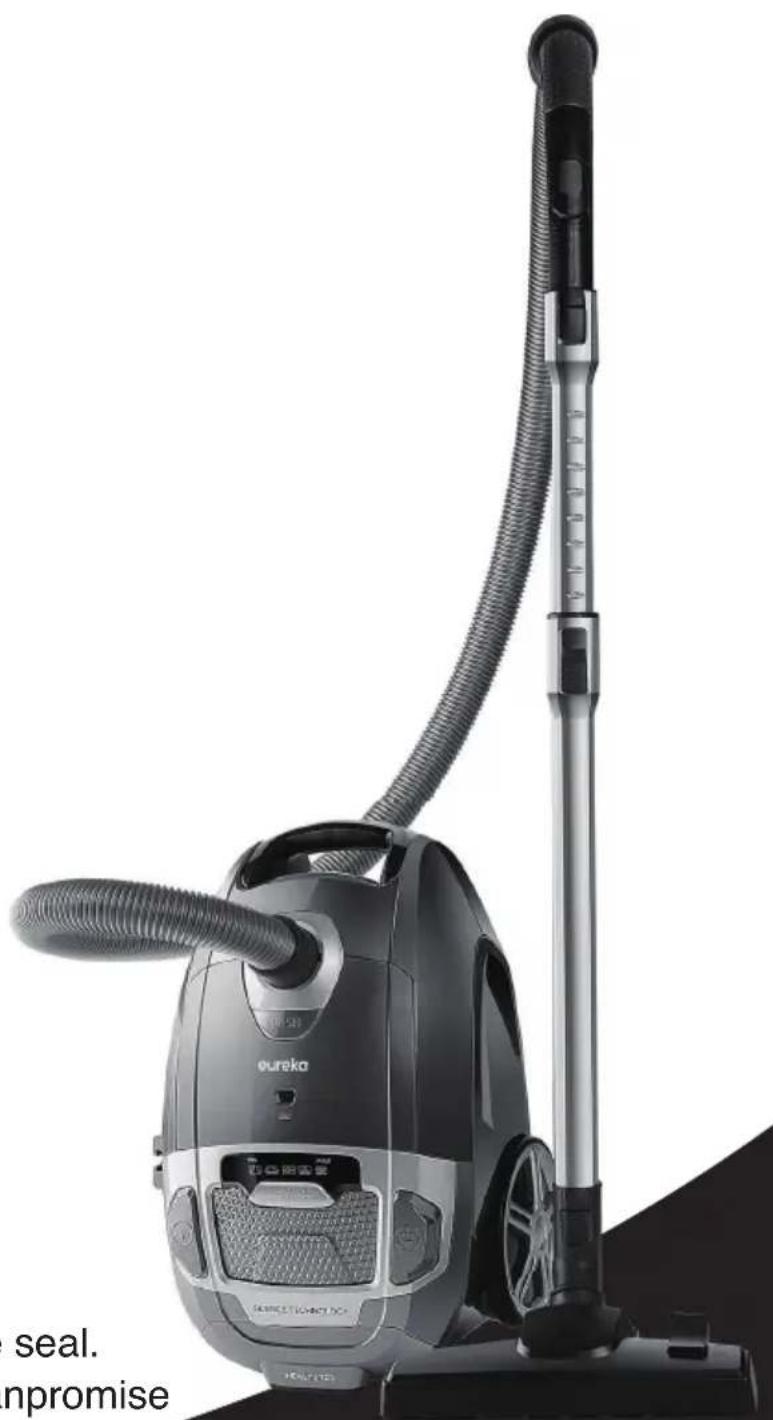
text_image
seal. npromiseEureka stands by our Clean Promise seal.
Learn more at www.eureka.com/cleanpromise
© 2018 Midea Corp. Printed in China 02155180_WMT_rev4
eureka
text_image
z t cter a er! eureka TARTELA esse a pageeureka
natural_image
Line drawing of a vacuum cleaner with a tool inserted, showing no text or symbolsnatural_image
Line drawing of a vertical cylindrical object with a handle and base, labeled with number 10 (no text or symbols on the object itself)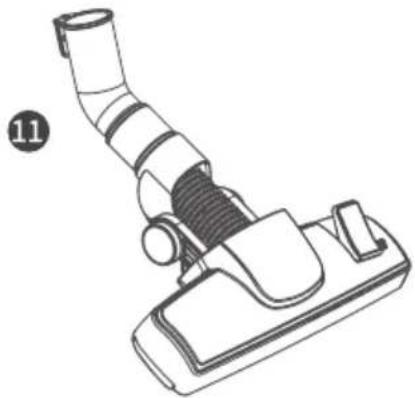
natural_image
Line drawing of a vacuum cleaner with handle and lever (no text or symbols)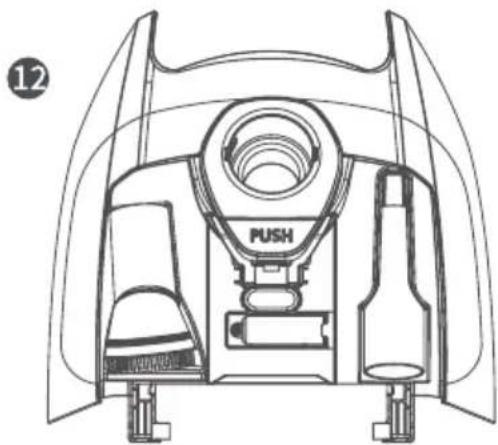
natural_image
Technical line drawing of a mechanical device with labeled parts (no readable text or symbols)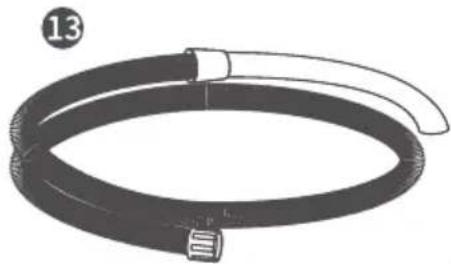
natural_image
Illustration of a coiled hose with a handle and bulb, no text or symbols present14
natural_image
Simple line drawing of a rolled-up book or document (no text or symbols)15
natural_image
Simple line drawing of a brush tip with bristles and a curved handle (no text or symbols)natural_image
Technical line drawing of a car interior showing a valve and adjustment mechanism (no text or symbols)natural_image
Diagram of a vacuum cleaner with a lever mechanism and base mount, showing no text or symbolsnatural_image
Technical line drawing of a vehicle chassis with internal components and a separate view showing a blade assembly (no text or symbols)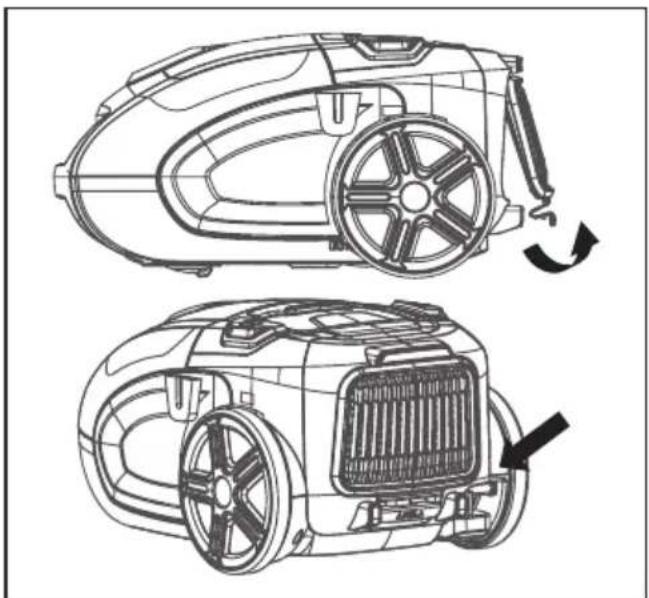
natural_image
Technical line drawing of a car's front and side views showing engine, fan, and exhaust components (no text or symbols)natural_image
Line drawing of a vacuum cleaner with labeled parts (no text or symbols present)4
natural_image
Technical line drawing of a vacuum cleaner with a grid cover and mechanical component (no text or symbols)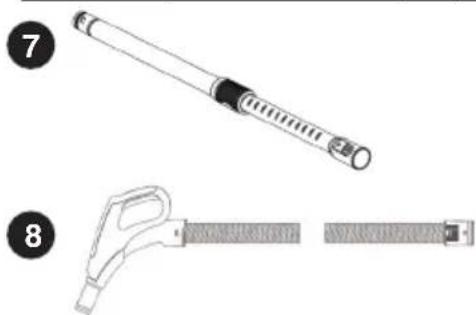
natural_image
Illustration of two different types of medical or laboratory tools: a cylindrical device and a handheld tool, both without any text or symbols.text_image
e ez rvice eureka E R R R R R R R R R R R R R R R R R R R R R R R R R R R R R R R R R R R R R R R R R R R R R R R R R R Bomesse ez la© Midea Corp., 2018. Imprimé en Chine 02155180_WMT_rev4
eureka