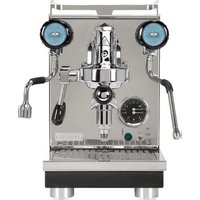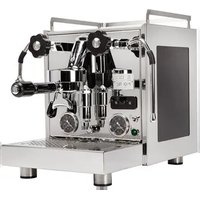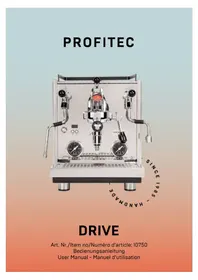
DRIVE - Coffee machine Profitec - Free user manual and instructions
Find the device manual for free DRIVE Profitec in PDF.


User questions about DRIVE Profitec
0 question about this device. Answer the ones you know or ask your own.
Ask a new question about this device
Download the instructions for your Coffee machine in PDF format for free! Find your manual DRIVE - Profitec and take your electronic device back in hand. On this page are published all the documents necessary for the use of your device. DRIVE by Profitec.
USER MANUAL DRIVE Profitec
Dear coffee enthusiasts,
With the DRIVE you have purchased an espresso machine of the highest quality. We thank you for your choice and wish you a lot of pleasure preparing perfect espresso and cappuccino with your espresso coffee machine.
Please read the instruction manual carefully before using your new machine. If you have any further questions or require any further information, please contact your local specialised dealer before starting up the espresso machine. Please keep the instruction manual within reach for future reference.
The English instructions for use start with chapter 1 „About these operating instructions“ on page 95.
7 Installation....35
10.3.1 Brew Temperature....62
10.3.2 Steam Enable....62
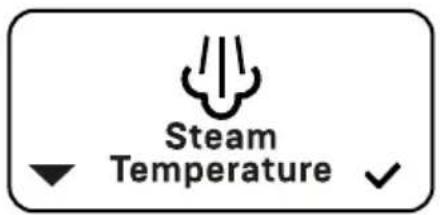
10.3.3 Steam Temp....62
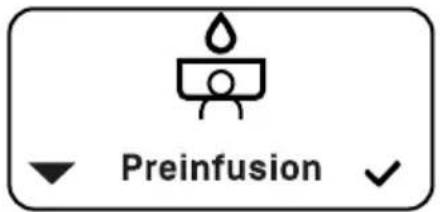
10.3.4 Preinfusion....63
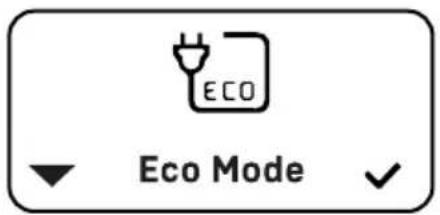
10.3.5 Eco Mode....64
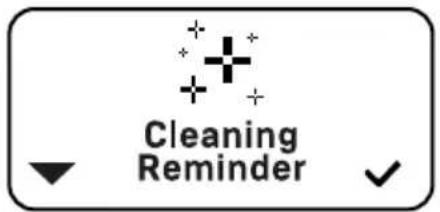
10.3.6 Cleaning Reminder 65
10.3.7 Reset Reminder 66
10.4.6 Temperature Unit 72
10.4.7 Coffee Offset Correction....72
10.4.8 Enable Fast Heating 73
11 Reinigung ....74
1 About these operating instructions....95
1.1 Design of safety and warning notices....95
1.2 Stylistic conventions....96
2 Safety....97
2.1 General safety instructions .....97
2.2 Hazard due to high temperatures 98
2.2.1 Hazard due to hot media 98
2.2.2 Hazard due to hot surfaces....98
3 Quick guide to your first espresso....99
4 Intended use ....101
5 Description of the machine....102
5.1 Machine structure....102
5.2 Control elements....103
5.2.1 On/off button 104
5.2.2 Navigation buttons....104
5.2.3 Operating levers....105
5.2.4 Flow control 108
6 Transport....110
6.1 Markings on the packaging....110
6.2 Scope of delivery ....111
6.3 Removing the transport packaging ....111
6.4 Checking the scope of delivery....112
6.5 Transportation....112
7 Installation....114
7.1 Requirements at the installation site....114
7.2 Connecting to the power supply....114
7.3 Installation in water tank mode....115
7.4 Installation with mains water connection....115
7.4.1 Additional requirements at the installation site....115
7.4.2 Additionally required accessories....116
7.4.3 Connecting the machine to the water supply 116
7.4.4 Installing the drain pan....117
7.5 Installing the accessories....117
7.5.1 Installing the blind filter and drip tray....118
7.5.2 Installing the cup raiser....119
7.5.3 Installing the water filter 119
8 Initial start-up....120
8.1 Initial start-up in water tank mode....120
8.1.1 Connecting and switching on the machine ....120
8.1.2 Filling the boiler with water (fill mode) 121
8.1.3 Rinsing the machine....121
8.2 Initial start-up with mains water connection....122
8.2.1 Connecting and switching on the machine .....122
8.2.2 Filling the boiler with water (fill mode)....122
8.2.3 Rinsing the machine....122
8.3 After initial start-up....123
9 Operation....124
9.1 Operating modes....124
9.1.1 Operational readiness....124
9.1.2 Continuous operation....124
9.1.3 Standby mode of the display....124
9.1.4 ECO mode....124
9.2 Putting the machine into operation....125
9.2.1 Switching the machine on and off 125
9.2.2 Machine in tank mode....125
9.2.3 Machine in mains water mode 126
9.3 Opening and closing the shut-off valve....126
9.4 Shortcut functions....126
9.4.1 Switching on ECO mode 126
9.4.2 Activating or deactivating pre-infusion....126
9.4.3 Switching the steam boiler on or off....127
9.5 Filling the water tank with water....127
9.6 Pouring ground coffee into the portafilter and pressing (tamping)....128
9.7 Inserting the filters in the portafilter 128
9.8 Inserting the portafilter in the brew group....129
9.9 Perform a flush ....130
9.9.1 Flush after heating up....131
9.9.2 Flush for rinsing the lines 132
9.10 Preparing espressos....132
9.11 Removing the portafilter from the brew group....133
9.12 Drawing hot water 133
9.13 Drawing hot steam....134
10 Navigation and settings in the menu ....136
10.1 Icons on the display....136
10.1.1 Menus for basic settings....136
10.1.2 Menus for advanced user settings....137
10.1.3 Further icons on the display....138
10.2 Navigation in the menu....140
10.2.1 Opening the main menu....140
10.2.2 Selecting and opening submenus....140
10.2.3 Changing settings ....140
10.3 Basic menu settings....141
10.3.1 Brew Temperature....141
10.3.2 Steam Enable....141
10.3.3 Steam Temp....141
10.3.4 Pre-infusion....142
10.3.5 Eco Mode....143
10.3.6 Cleaning Reminder 144
10.3.7 Reset Reminder....144
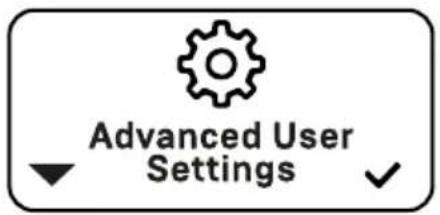
10.4 Advanced menu [user] settings....145
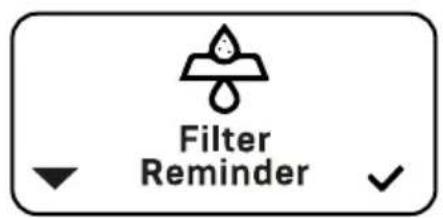
10.4.1 Filter Reminder 146
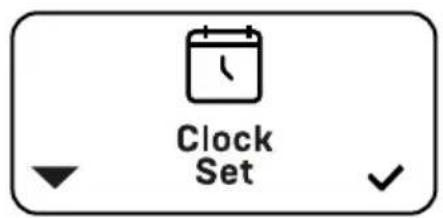
10.4.2 Clock Set 146
10.4.3 Schedule Set....147
10.4.4 Timer Enable....148
10.4.5 Tank Mode....149
10.4.6 Temperature Unit 150
10.4.7 Coffee Offset Correction....151
10.4.8 Enable Fast Heating 151
11 Cleaning....153
11.1 Cleaning the portafilters and filters....153
11.2 Cleaning the drip tray, grid, and cup raiser 154
11.3 Cleaning the steam and hot water nozzles....154
11.3.1 Cleaning the steam and hot water nozzles after use....154
11.3.2 Cleaning a blocked steam nozzle....155
11.4 Cleaning the machine housing....155
11.5 Cleaning the water tank....156
11.5.1 Orientation of the water tank .....156
11.5.2 Cleaning the water tank....156
11.6 Emptying the boiler....156
11.7 Cleaning the brew group....157
11.7.1 Cleaning the brew group gasket and shower screen....157
11.7.2 Cleaning the rest of the brew group....158
12 Servicing....159
12.1 Spare parts and accessories....159
12.2 Replacing the water filter....160
12.3 Replacing the brew group gasket....160
12.3.1 Required tools and accessories....160
12.3.2 Before replacement....160
12.3.3 Replacing the gasket....161
13 Troubleshooting....163
13.1 Machine faults....163
13.1.1 Resetting the machine ....165
14 Technical data....166
15 Shutdown, dismantling, and storage.... 167
15.1 Shutting down the machine....167
15.2 Dismantling the machine with a mains water connection....167
15.3 Dismantling the machine in tank mode....167
15.4 Storage....168
16 Disposal....169
17 Recommendations for preparing the perfect espresso ....170
18 Notes 172
Table des matières
7 Installation....194
10.3.5 Mode ECO....223
10.3.6 Cleaning Reminder (Rappel de nettoyage)....224
10.4.8 Enable Fast Heating (Chauffe rapide) 232
11 Nettoyage 233
natural_image
Concentric circles diagram with no text or symbolsnatural_image
Technical line drawing of a mechanical device with a numbered component (no text or symbols)natural_image
Technical line drawing of a mechanical component with no visible text or symbolsnatural_image
Simple line drawing of a mechanical device with two protruding components (no text or symbols)natural_image
Silhouette of a hand holding a device with three dashed outline shapes extending outward (no text or symbols)natural_image
Simple concentric circle diagram with no text or symbolsAus
natural_image
Concentric circles diagram with no text or symbolsEin
natural_image
Simple diagram of a beam or optical component with dashed lines indicating projection or alignment (no text or symbols)Obere Stellung
natural_image
Simple black-and-white diagram of a conical object with two dashed outline arms (no text or symbols)Mittelstellung
natural_image
Abstract black-and-white diagram of a stylized object with dashed and solid lines, no text or symbols present.Untere Stellung
natural_image
Simple diagram of a beam or optical component with dashed lines indicating projection or alignment (no text or symbols)Obere Stellung
natural_image
Simple black-and-white diagram of a conical object with dashed lines indicating internal or external components (no text or symbols)Mittelstellung
natural_image
Abstract black-and-white diagram of a stylized object with dashed and solid lines, no text or symbols present.Untere Stellung
natural_image
Simple line drawing of a device with two connected components (no text or symbols)Bezugsstellung
natural_image
Simple line drawing of a rocket with two propellers and a central body (no text or symbols)Halbstellung
natural_image
Silhouette of a hand holding a megaphone with dashed lines indicating motion or spray (no text or symbols)Ausgangsstellung
natural_image
Close-up of a metallic mechanical device with a dial and top mount (no visible text or symbols)Flow Control öffnen
natural_image
Close-up of a metallic mechanical device with orange dial and black top mount (no visible text or symbols)natural_image
Black upward-pointing arrow symbol on white background (no text or labels)natural_image
Silhouette of a wine glass against a white background (no text or symbols)Zerbrechlich
natural_image
Silhouette of an open umbrella with a curved handle (no text or symbols)Vor Nässe schützen
natural_image
Diagram of a mechanical device with two ports and a directional arrow, labeled 1 and 2 (no text or symbols beyond labels)natural_image
Simple line drawing of a mechanical component or bracket (no text or symbols)Tipp
natural_image
Simple geometric shape with a black dot centered inside a gray rectangle (no text or symbols)natural_image
Simple diagram of a rectangular object with a central dot and an arrow pointing to it, labeled '1' (no text or symbols on the object itself)natural_image
Simple line drawing of a crescent moon with 'z' and 'z' symbols inside a rounded rectangle (no text or labels)Sleep-Icon
natural_image
Simple icon of a water drop with a person inside a speech bubble, enclosed in a rounded rectangle (no text or symbols)natural_image
Simple icon of a water drop with a cross symbol inside a rounded rectangle (no text or labels)natural_image
Simple rectangular outline with a small water droplet icon in the bottom right corner (no text or symbols)Tank läuft leer
text_image
Warning symbol with a checkmark inside a U-shaped box and an exclamation mark below itTank leer
natural_image
Industrial machine with mechanical components and gauges (no visible text or labels)natural_image
Technical line drawing of a mechanical device with no visible text or symbolsnatural_image
Technical line drawing of a mechanical device with a numbered component (no text or symbols)natural_image
Technical line drawing of a mechanical component with no visible text or symbolsnatural_image
Simple line drawing of a person standing at a desk with a monitor (no text or symbols)Bezugsanzeige
text_image
Brew Temperature ✓text_image
Steam Enabletext_image
Steam Temperaturetext_image
Cleaning Remindertext_image
Advanced User Settingstext_image
Clock Settext_image
Schedule Settext_image
Tank Modetext_image
F °C Temperature Unittext_image
Coffee Offset Correctiontext_image
Enable Fast Heating ✓text_image
Heating Upnatural_image
Simple icon of a person with a droplet and speech bubble inside a rounded rectangle (no text or symbols)natural_image
Simple icon of a water droplet with a cross symbol inside a rectangular frame (no text or labels)natural_image
Simple icon of a person standing at a desk with a monitor, enclosed in a rounded rectangle (no text or symbols)natural_image
Simple line drawing of a person viewing through a screen with sound waves (no text or symbols)natural_image
Simple line drawing of a person standing at a desk with a monitor (no text or symbols)natural_image
Simple geometric pattern with a plus sign inside a rounded rectangle (no text or symbols)natural_image
Simple line drawing of a water droplet with a leaf on a surface, enclosed in a rounded rectangle (no text or symbols)natural_image
Simple line drawing of a crescent moon with 'z' and 'z' symbols inside a rounded rectangle (no text or labels)text_image
Warning symbol with a checkmark and exclamation mark inside a rounded rectanglenatural_image
Empty rectangular frame with a small water droplet icon in the bottom right corner (no text or symbols)natural_image
Simple icon of a person standing at a desk with a monitor, enclosed in a rounded rectangle (no text or symbols)Passive Preinfusion
natural_image
Simple line drawing of a person standing under a screen with sound waves above (no text or symbols)Aktive Preinfusion
text_image
Brew Temperature ✓- Hauptmenü öffnen.
text_image
Preinfusiontext_image
OFF 4" 5" - +text_image
ON 4" 5" - +text_image
Brew Temperature ✓- Hauptmenü öffnen.
text_image
Eco Mode10.3.6 Cleaning Reminder
text_image
Brew Temperature ✓- Hauptmenü öffnen.
text_image
Cleaning Remindertext_image
Brew Temperature ✓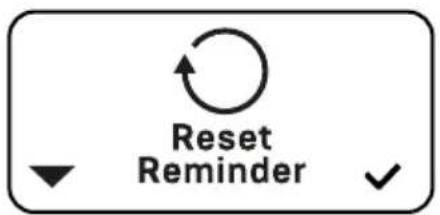
text_image
Reset Reminder
text_image
+/- + - - -text_image
Brew Temperature- Hauptmenü öffnen.
text_image
Advanced User Settingstext_image
Brew Temperature ✓- Hauptmenü öffnen.
text_image
Filter Remindertext_image
Brew Temperature ✓- Hauptmenü öffnen.
text_image
Clock Settext_image
Brew Temperature ✓- Hauptmenü öffnen.
text_image
Schedule Settext_image
Brew Temperature- Hauptmenü öffnen.
text_image
Timer Enabletext_image
Brew Temperature ✓- Hauptmenü öffnen.
text_image
Tank Mode10.4.6 Temperature Unit
text_image
Brew Temperature ✓- Hauptmenü öffnen.
text_image
F C Temperature Unittext_image
Brew Temperature ✓- Hauptmenü öffnen.
text_image
Coffee Offset Correction10.4.8 Enable Fast Heating
text_image
Brew Temperature ✓- Hauptmenü öffnen.
text_image
Enable Fast Heating ✓4x Pro Cups Cappuccino Pr5128
natural_image
Simple line drawing of a water droplet with a drop, enclosed in a rounded rectangle (no text or symbols)natural_image
Technical line drawing of a mechanical component with no visible text or symbolsnatural_image
Technical line drawing of a mechanical device with concentric circular components and a central shaft (no text or symbols)natural_image
Technical line drawing of a mechanical pump assembly with no visible text or symbolsnatural_image
Diagram of concentric circular layers with radial dots, no text or symbols presentnatural_image
Technical line drawing of a mechanical device with two circular components and a shaft (no text or symbols)natural_image
Technical line drawing of a mechanical device with rotating shaft and housing (no text or symbols)natural_image
Technical line drawing of a mechanical component with no visible text or symbolsEU, UK, NZ, AU 1600 W
US, JP 1600 W
natural_image
Symbol of a trash bin with crossed lines indicating no waste, and a solid black rectangle below (no text or labels)1 About these operating instructions
These operating instructions contain information and instructions which are required for safe and efficient handling of the product.
- Before using the product, make sure that you have carefully read and understood the operating instructions.
- Adhering to all safety-related information and handling instructions in this manual is essential for safe handling and use.
- Keep these operating instructions in an easily accessible location so that you can refer to them at any time.
- In case of questions or problems with handling the product, please contact the manufacturer or dealer.
1.1 Design of safety and warning notices
In order to warn you of specific hazards in the context of an action or phase of life, warnings are used in the text and are denoted by a warning symbol in conjunction with a signal word. The signal words indicate the extent of the hazard.
The following warnings are used in these operating instructions.

DANGER
DANGER indicates an impending hazard that will result in death or serious injuries if the safety measures are not followed.

WARNING
WARNING indicates a possible hazard that could result in death or serious injuries if the safety measures are not followed.

CAUTION
CAUTION indicates a possible hazard that may result in minor or slight injuries if the safety measures are not followed.
NOTICE
NOTICE indicates possible property and environmental damage that could arise if the safety measures are not followed.
1.2 Stylistic conventions
Highlighting in the text
In order to improve the readability and clarity within the operating instructions, individual types of information are highlighted.
- Carry out the instructions in the specified order.
Intermediate results indicate the result after a single step.
- Carry out the instructions in the specified order.
√ Final results indicate the result after an overall instruction.
- Unnumbered lists are shown as bullet points.
Item and figure numbers
If necessary, text is illustrated using figures. An image legend can be found below the figure. An item number and a figure number are placed after the descriptive text to reference the image.
Example:
- Press the main switch (1, Fig. 1).
Figures
The figures contained in these operating instructions are schematic representations and merely serve demonstrative purposes. The figures may deviate from the actual delivery state.
References
References to other sections within these operating instructions are given in brackets and the name of the section being referenced is given between quotation marks.
Example: Follow the safety instructions (see Chapter 3, "Safety").
2 Safety
The following safety-related information describes possible hazards and residual risks that may arise when using the machine. In order to prevent personal injury and property damage, please read these instructions carefully and follow them when using the machine.
In case of any uncertainty or if you require any further information, please contact the authorized dealer before starting up the machine.
Authorized service points can be found on our dealer search page at:
https://www.profitec-espresso.com/en/storelocator
2.1 General safety instructions
- Follow all safety information and warnings in these operating instructions.
- This machine may be used by children over 8 years old and by people with physical, sensory or mental disabilities or those with a lack of experience or knowledge if they are supervised or have been instructed on how to safely use the machine and understand the resulting risks.
- The machine, its accessories, and its packaging materials are not toys. Do not let children play with them, as children could injure themselves or others or damage the device. Keep the device and all its parts, accessories, and packaging materials out of the reach of small children.
- Cleaning and servicing work may not be carried out by children without supervision.
- Only connect the machine up to a mains voltage that meets the specifications on the nameplate.
- The mains plug serves as the mains disconnection device and must always be freely accessible.
- Always pull on the actual plug and not on the cable when removing the mains plug. Do not pull the mains plug out of the socket if you have wet or damp hands.
- If the power cable is damaged, it must be repaired immediately by a qualified professional in order to exclude or prevent any hazards.
- Do not power the machine via an external switching device, for example a timer, or connect it to a circuit that is regularly switched on and off by a device.
- Do not put the machine in a cupboard or on a shelf during use.
- Always take the plug out of the socket and allow the machine to cool to room temperature before performing any cleaning and servicing work.
- Do not immerse the machine in water, hold it under running water, or operate it with wet hands.
-
No liquids may get on the mains plug of the machine or on the socket.
-
Do not operate the machine outdoors or expose it to external weather conditions or freezing temperatures.
- Do not operate the machine without water.
2.2 Hazard due to high temperatures
2.2.1 Hazard due to hot media
During the extraction process, hot media may spray out and cause injuries and scalding.
- During the extraction process, keep hands and other body parts away from the outlet nozzles.
- Hold the hot water nozzle fully in the receptacle to be filled.
- Hold the steam nozzle fully in the liquid to be foamed.
- Use the cup raiser for espresso cups.
2.2.2 Hazard due to hot surfaces
The following components or surfaces become hot during operation of the machine. Do not touch hot surfaces during operation and only use the handles provided. Allow hot components to cool down completely before starting any repair and servicing work.
- Valve region
- Steam pipe and steam nozzle
• Hot water wand and hot water nozzle - Brew group
- Portafilter installed in the brew group
- Front, top, and sides of the housing
3 Quick guide to your first espresso
When preparing an espresso, please adhere to all safety instructions and warnings contained in these operating instructions. Before preparing your first espresso, the machine must have been installed (see Chapter 7, "Installation") and started up (see Chapter 8, "Initial start-up") correctly.
natural_image
Concentric circles diagram with no text or symbols- Switch on the machine using the on/off button.
The LED ring will light up and the brew boiler will start to heat up.
text_image
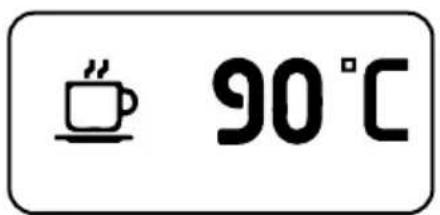
90°C- Wait until the brew temperature has been reached.
natural_image
Technical line drawing of a mechanical device with a numbered component (no text or symbols)-
Fill the desired portafilter with ground coffee.
-
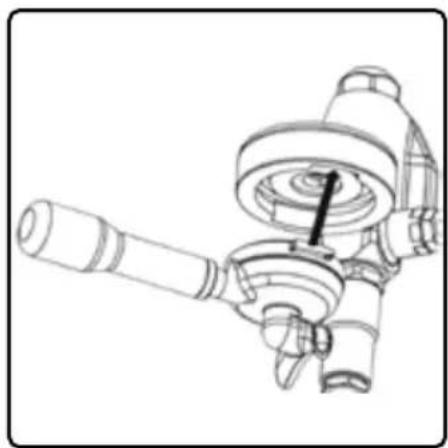
Position the portafilter at an angle of approx. 45^ below the brew group.
-
Push the portafilter into the holder of the brew group until the latches on the portafilter engage in the recesses on the brew group.
natural_image
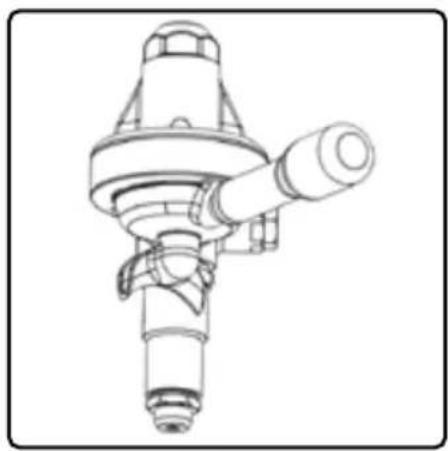
Technical line drawing of a mechanical component with no visible text or symbols- Carefully turn the portafilter handle to the right until you feel some resistance.
The portafilter is now installed in the brew group.
natural_image
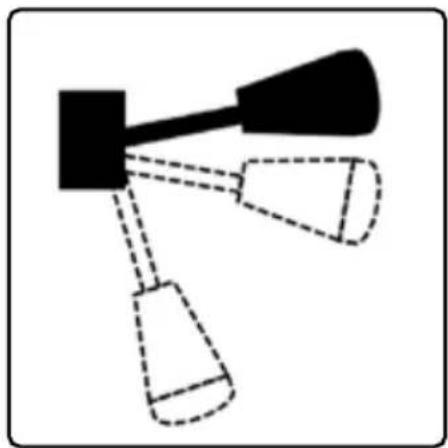
Simple line drawing of a mechanical device with two protruding components (no text or symbols)- Move the brew lever into the drawing position.
The espresso extraction process begins.
natural_image
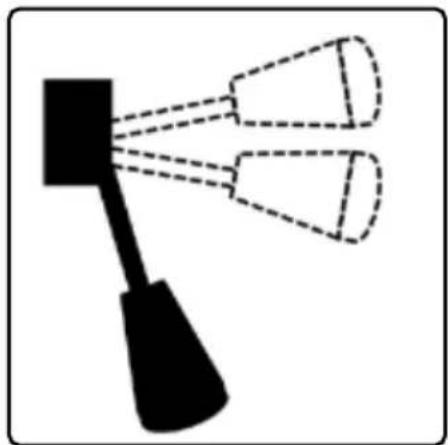
Silhouette of a hand holding a device with three dashed outline shapes extending outward (no text or symbols)- When the desired quantity of espresso has been reached, move the brew lever back into the starting position.
√ The extraction process is complete. Residual water is drained and residual pressure released via the residual water outlet of the brew group.
4 Intended use
The DRIVE espresso portafilter machine may only be used to prepare espressos and to extract hot water and steam.
This machine is intended for use at home and in the following environments:
- Kitchens in shops, offices, or other work environments;
- Farms;
• Hotels, motels, or other accommodation;
• B&Bs.
The machine may only be used with the approved accessories (see Chapter 6.2, „Scope of delivery“). All instructions for cleaning (see Chapter 11, „Cleaning“) and servicing (see Chapter 12, „Servicing“) the machine must be observed and followed.
Any use for other purposes is not permitted.
Foreseeable misuse
The machine may not be used for any purpose other than that intended. The following cases of foreseeable misuse are not permitted:
- Connecting the machine to a power strip.
- Using the machine at unsuitable locations, e.g. outdoors.
- Using the machine to produce large quantities of hot water for purposes other than for preparing coffee drinks.
- Converting the machine to increase performance.
5 Description of the machine
5.1 Machine structure
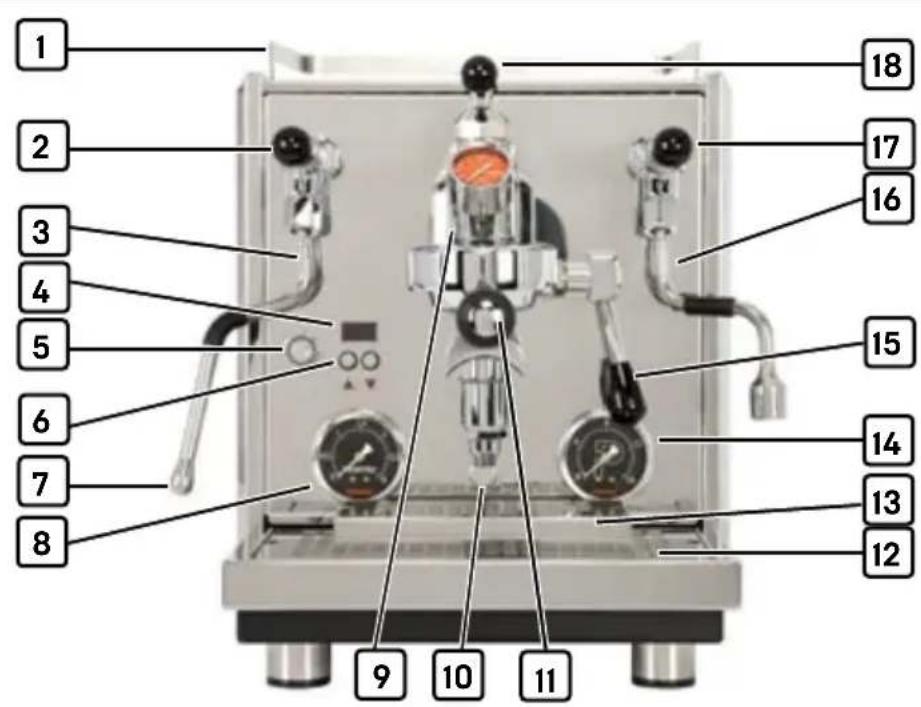
text_image
1 2 3 4 5 6 7 8 9 10 11 12 13 14 15 16 17 18Fig. 1 Structure and components
1 Cup tray; water tank below with water filter adapter for receiving a water filter cartridge
2 Steam tilt valve for drawing hot steam
3 Steam wand with rubber handle
4 Display for showing and configuring settings
5 On/off button with power indicator (LED ring)
6 Navigation buttons
7 Steam nozzle for dispensing hot steam
8 Boiler pressure gauge
9 Brew group with brew pressure gauge
10 Residual water outlet of brew group
11 Portafilter, here with 2 spouts
12 Drip tray with grid
13 Cup raiser for espresso cups
14 Pump pressure gauge
15 Brew lever for pulling espressos
16 Water wand with rubber handle
17 Water tilt valve for drawing hot water
18 Flow control with stainless steel bell
5.2 Control elements
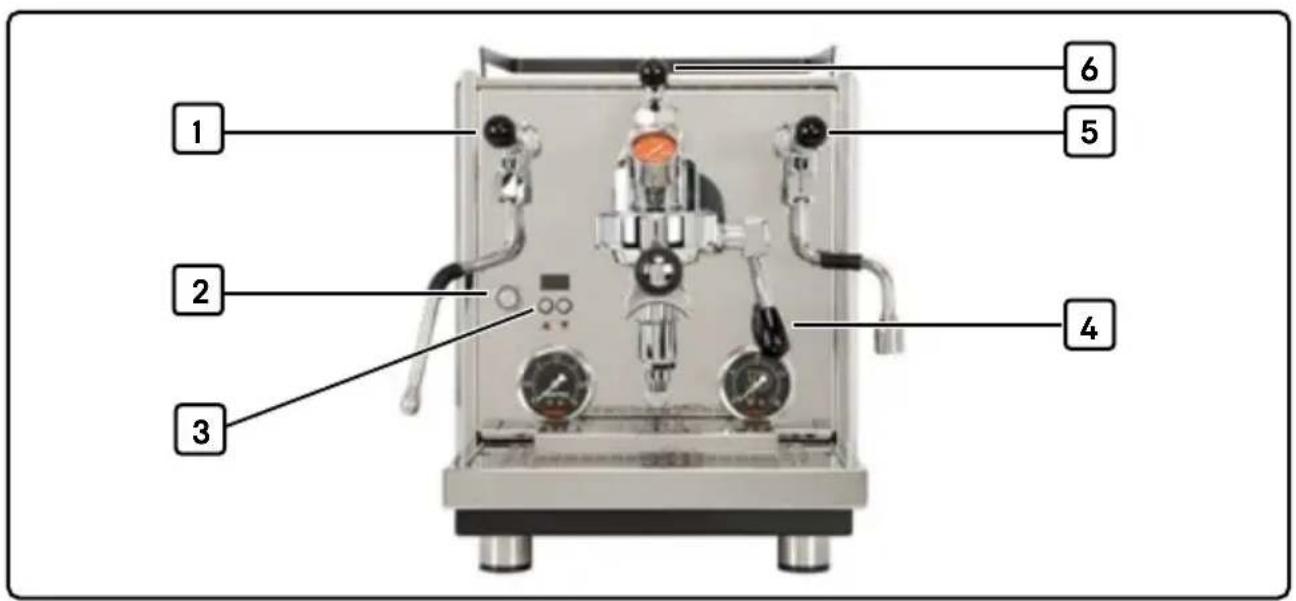
text_image
1 2 3 4 5 6Fig. 2 Control elements
1 Steam tilt lever
2 On/off button
3 Navigation buttons
4 Brew lever
5 Hot water tilt lever
6 Flow control
5.2.1 On/off button
The machine is switched on and off using the on/off button [2, Fig. 2]. The LED ring of the button indicates the following states:
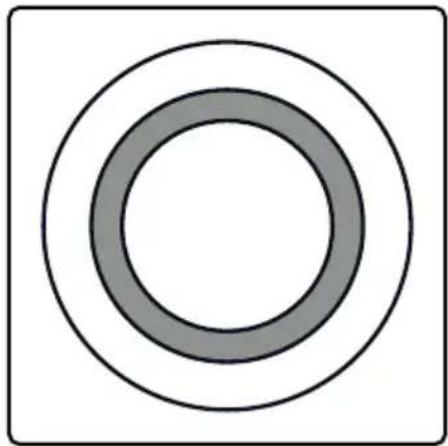
natural_image
Simple concentric circle diagram with no text or symbolsOff
The machine is switched off.
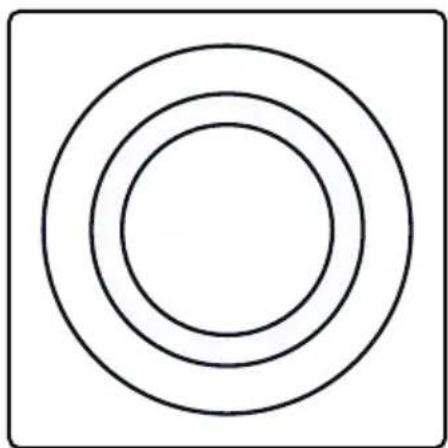
natural_image
Concentric circles diagram with no text or symbolsOn
The machine is switched on. If the LED ring and display are switched on, the machine is ready to use. If the LED ring lights up but the display is switched off, the machine is in ECO mode (see Chapter 9.1.4, "ECO-Modus") and is not ready to use.
5.2.2 Navigation buttons
The following functions are performed using the two navigation buttons [3, Fig. 2]:
- Open the main menu (see Chapter 10.2.1, „Opening the main menu“)
- Select and open the submenus (see Chapter 10.2.2, „Selecting and opening submenus“)
- Change settings in the submenus (see Chapter 10.2.3, „Changing settings“)
- Shortcut functions [see Chapter 9.4, „Shortcut functions“] while the machine is operational.
5.2.3 Operating levers
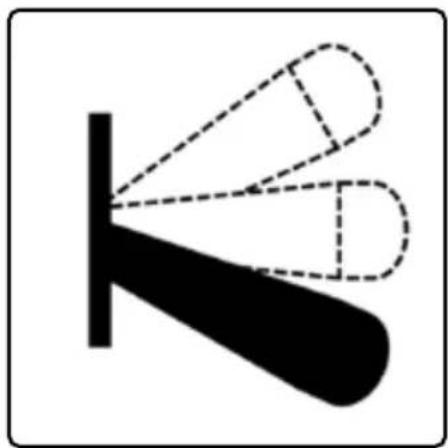
Steam tilt lever
The steam tilt lever (1, Fig. 2) is used to open and close the steam wand for drawing hot steam.
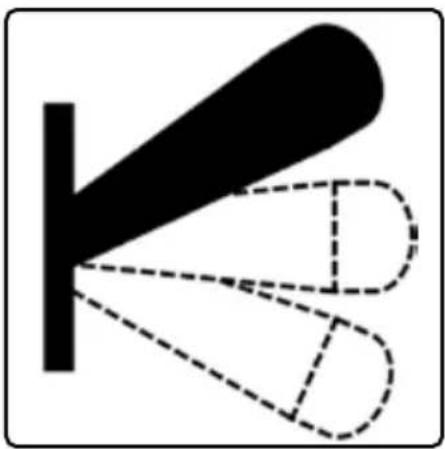
natural_image
Pure diagram of a double cone with dashed lines indicating projection or angle, no text or symbols presentTop position
The steam wand is open and hot steam is drawn.
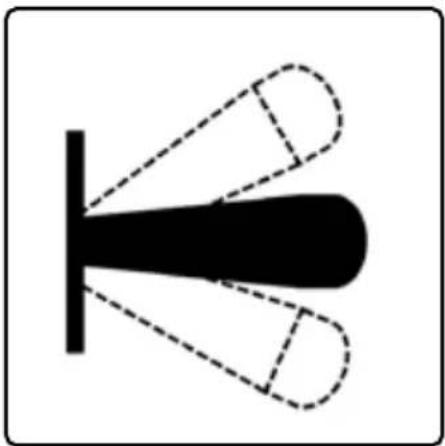
natural_image
Abstract black shape with dashed outline, resembling a stylized arrow or fan (no text or symbols)Middle position
The steam wand is closed.
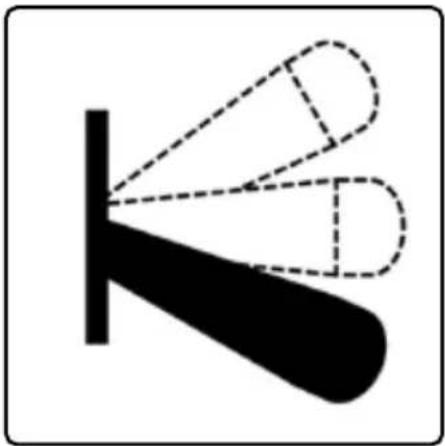
natural_image
Abstract black-and-white diagram of a stylized object with dashed and solid lines, no text or symbols present.Bottom position
The steam wand is open and hot steam is drawn.
Hot water tilt lever
The hot water tilt lever (5, Fig. 2) is used to open and close the hot water wand for drawing hot water.

natural_image
Simple diagram of a beam or optical setup with dashed lines indicating paths or components (no text or symbols)Top position
The hot water wand is open and hot water is drawn.
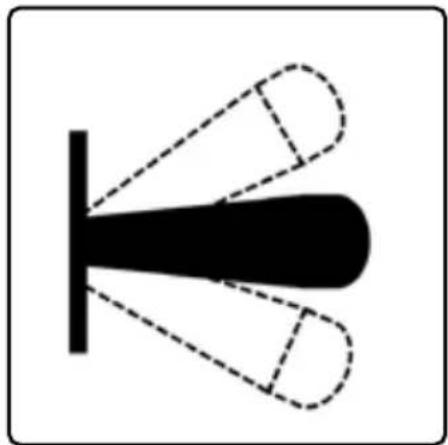
natural_image
Simple black-and-white diagram of a conical object with dashed lines indicating internal or external components (no text or symbols)Middle position
The hot water wand is closed.
natural_image
Abstract black-and-white diagram of a stylized object with dashed and solid lines, no text or symbols present.Bottom position
The hot water wand is open and hot water is drawn.
Brew lever
The brewing process is started, interrupted, or ended using the brew lever [4, Fig. 2].
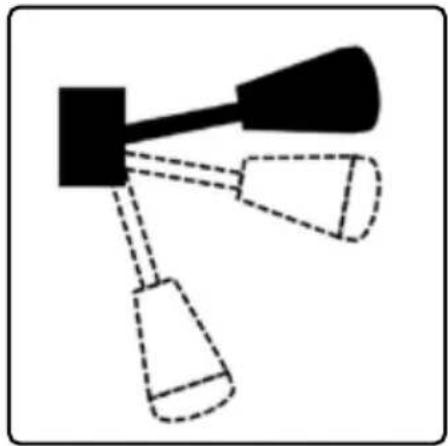
natural_image
Simple line drawing of a device with two connected components (no text or symbols)Drawing position
The brewing process is started and water is drawn.
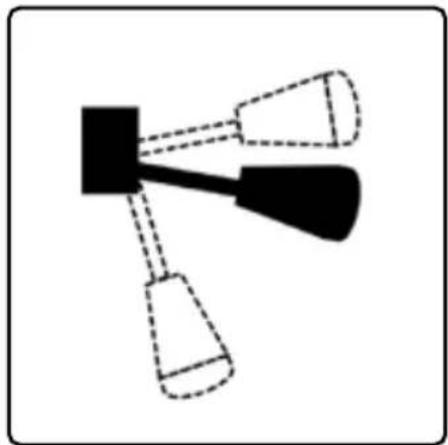
natural_image
Simple line drawing of a rocket with two propellers and a central body (no text or symbols)Half position
The brew group is open, but the brewing process is interrupted. No water is drawn.
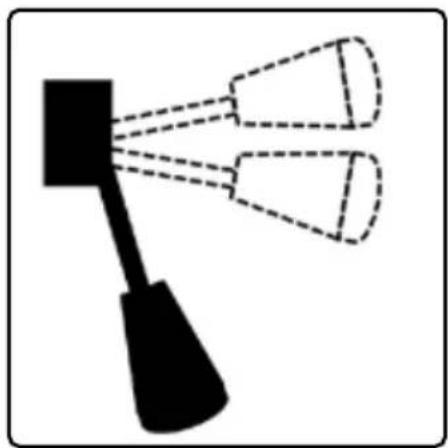
natural_image
Silhouette of a hand holding a megaphone with dashed lines indicating motion or spray (no text or symbols)Starting position
The brew group is closed and the brewing process is ended.
5.2.4 Flow control
The water flow to the brew group can be controlled using the flow control [6, Fig. 2]. The brewing pressure can be read off of the integrated brew group gauge. The flavor can be altered by adjusting the water flow before or during the espresso preparation process.
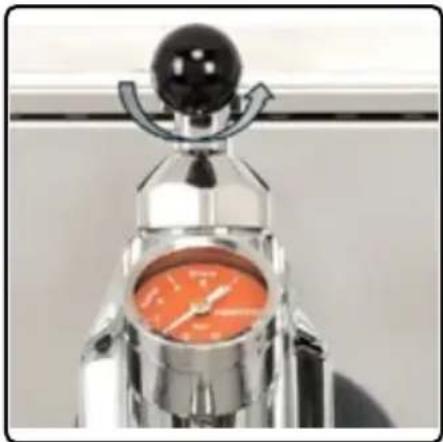
natural_image
Close-up of a metallic mechanical device with orange dial and black top (no visible text or symbols)Open the flow control.
Turn the flow control counterclockwise to the desired setting.
Turn to the stop to fully open the flow control.
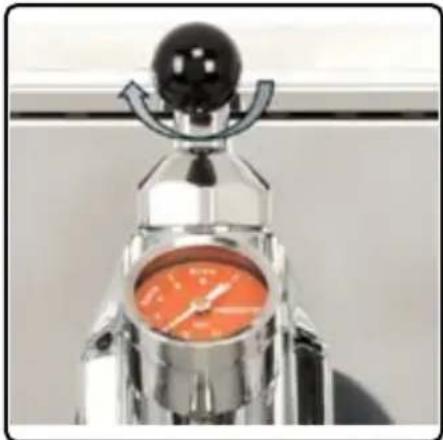
natural_image
Close-up of a metallic mechanical device with orange dial and black head mount (no visible text or symbols)Close the flow control.
Turn the flow control clockwise.
Turn to the stop to fully close the flow control.
Setting a regular flow rate (stock flow)
This setting is suitable for preparing a classic espresso with a fast pressure build-up to approx. 9 bar. The water output in this setting corresponds to around 10 to 12 g per second.
- First, fully close the flow control.
- Open the flow control approx. 1 ^1/4 turns.
Setting the desired flow rate
Turn the flow control to the desired setting until the optimal flow rate is achieved. To find the optimal setting, it is recommended not to change any other parameter such as espresso, coarseness, quantity, etc., at the same time.
Manually setting the pump pressure
The brewing pressure can be manually set using an adjusting screw on the underside of the machine. This setting may only be made by qualified specialist personnel!
6 Transport
When transporting the machine, make sure to observe all markings on the transport packaging and all instructions in this manual.
6.1 Markings on the packaging
Marking Meaning
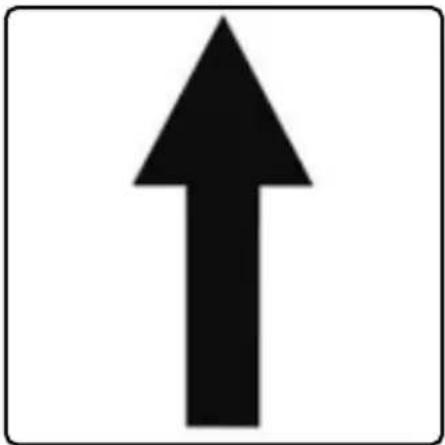
natural_image
Black upward-pointing arrow symbol on white background (no text or labels)This side up
Denotes the top of the package. The arrow must always point up during transportation, handling, and storage of the package.
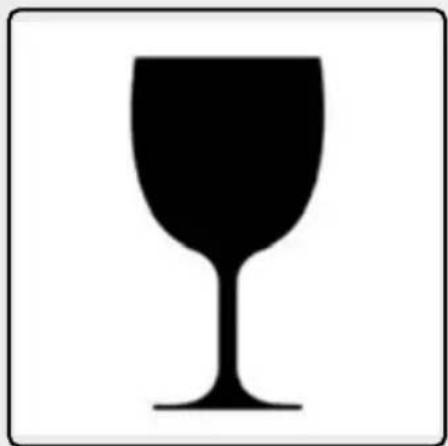
natural_image
Silhouette of a wine glass against a white background (no text or symbols)Fragile
Indicates that the contents of the package are fragile or sensitive to knocks. Store the package carefully, do not throw or drop it.

natural_image
Silhouette of an open umbrella with a curved handle (no text or symbols)Keep dry
Indicates that the contents of the package are sensitive to moisture and humidity.
Marking Meaning
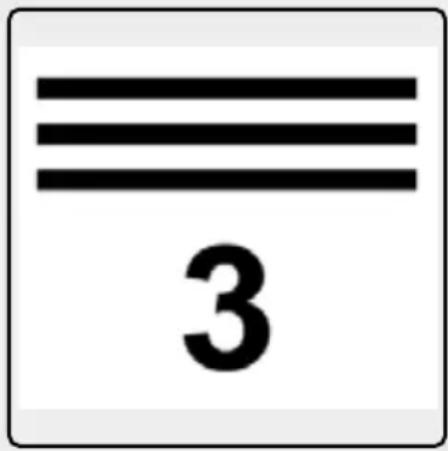
text_image
3Stacking limit
Provides information on the maximum number of packages that can be stacked on top of one another.
6.2 Scope of delivery
The standard scope of delivery includes:
- DRIVE espresso portafilter machine
- Operating instructions
- Portafilter with 1 spout, with integrated one-cup filter
- Portafilter with 2 spouts, with integrated two-cup filter
- Drip tray with grid
- Cup raiser
- Cleaning brush
- Tamper
- Blind filter
• Water connection hose - Drain pan
In addition to the standard scope of delivery, the following accessories can optionally be acquired:
- Espresso grinders
- Tamper station
- Tamper pad
• Coffee grounds drawer - Milk jugs
- Portafilter, bottomless
- Filter screen
- Espresso and cappuccino cups
6.3 Removing the transport packaging

CAUTION
Risk of injury due to packaging material
Children could injure themselves if they play with packaging material.
- Keep packaging material out of the reach of children.
The machine is packaged with a protective cover and is protected by foam padding. All accessories come in a separate box and are protected by foam. Both the transport box and the accessories box have handles for easier handling. Always handle boxes using these handles. Due to the weight of the machine, it is recommended that two people carry the box.
- Make sure that the transport box is upright (see Chapter 6.1, „Markings on the packaging“).
- Carefully open the transport box with a cutter knife.
- Take accessories out with both hands and place them on a flat surface.
- Open the box and take all accessories out of the cut-outs in the foam insert.
- Lift the machine out of the transport packaging with both hands and place it on a flat, sufficiently load-bearing surface.
- Remove the foam padding and protective cover.
- Store the original packaging in a dry location.
6.4 Checking the scope of delivery
When you get your machine, make sure you check the following:
- that all parts are there as per the scope of delivery (see Chapter 6.2, "Scope of delivery")
- that the individual components and their packaging are undamaged
If the machine or packaging is damaged or components are missing, contact the manufacturer or dealer immediately and do not use the machine.
6.5 Transportation
NOTICE
Damage due to improper transportation
The machine may become damaged if not transported properly.
- Only use the original packaging for transportation.
- Make sure that the machine is upright, if possible on a pallet, during transportation.
- Do not place any other heavy objects on the packaging.
- Stack a maximum of 3 packages on top of one another.
- Protect the machine from the elements (e.g. snow, rain, frost, direct sunlight).
Carry out the following steps to transport the machine. Due to the weight of the machine, it is recommended that two people transport the machine:
- Switch off the machine (see Chapter 9.2.1, „Switching the machine on and off“) and disconnect the mains plug from the mains.
- Drain all water out of the machine (see Chapter 11.6, „Emptying the boiler“).
- Allow the machine to cool down.
- Empty the water tank.
- Clean the machine and accessories (see Chapter 11, „Cleaning“) and allow them to dry.
- Insert the accessories in the corresponding cut-outs in the original foam insert.
- Pack the machine with the original protective cover.
- Lift the machine from underneath using both hands and pack it in the original box.
- Transport the machine to the desired location.
7 Installation
The machine must be installed as per the instructions in this manual.
The machine can be used both with a mains water connection and in water tank mode. Depending on the type of use, there are different requirements for installation. These will be explained in more detail in the following chapters. The machine is delivered in water tank mode by default.
7.1 Requirements at the installation site
The following conditions must be met at the installation site:
- The installation surface must be stable and horizontal.
- The installation surface must be water-resistant.
- The installation surface must not be hot.
- There must be a socket for connecting the mains plug.
- The installation surface must be sufficiently load-bearing for the weight of the machine and its accessories.
7.2 Connecting to the power supply

DANGER
Danger to life by electrical voltage
There is a risk of fatal electrical shock if the machine is connected to the wrong voltage.
- Only connect the machine to a socket with a voltage that matches that specified on the nameplate. The nameplate can be found on the front of the machine in the drip tray holder.
- Only connect the machine to an earthed socket.
- Fully unwind the mains cable. Do not bend or crush it.
- Do not use extension cables or power strips.
7.3 Installation in water tank mode
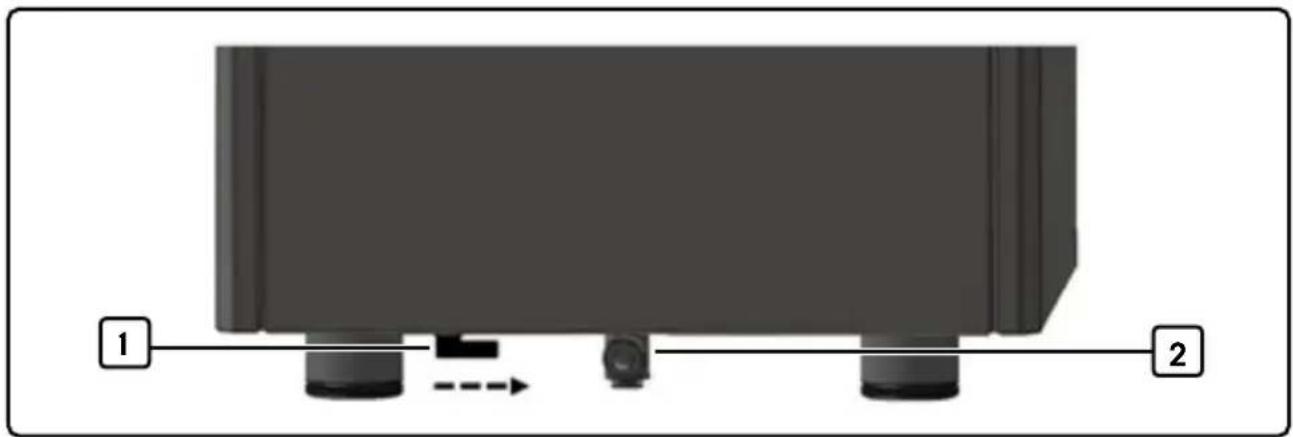
natural_image
Diagram of a mechanical component with two ports and a directional arrow, labeled 1 and 2 (no text or symbols beyond labels)Fig. 3 Rear view with rotary valve and water connection nozzle
1 Rotary valve in water tank mode position 2 Water connection nozzle
- Move the rotary valve [1, Fig. 3] into the tank mode position. The valve points towards the water connection nozzle [2, Fig. 3].
- Activate the tank mode via the menu (see Chapter 10.4.5, „Tank Mode“).
7.4 Installation with mains water connection
CAUTION
Damage due to improper installation
If the machine is not connected up properly to the water supply, this could damage the water lines and the machine.
• In case of any doubt, have a specialist install the machine.
• The water pressure must not exceed 2 bar.
- Only use the water connection hose included in the scope of delivery. Do not re-use old hoses.
For use with the mains water connection, the machine must be connected up to the water supply. The machine must be connected up to the water supply as per the instructions in this manual. Applicable laws and regulations must be observed when installing the machine.
7.4.1 Additional requirements at the installation site
There must be a drinking water connection with an operating pressure of at least 1 bar and at most 2 bar at the installation site.
7.4.2 Additionally required accessories
- Pressure reducer: The water supply often does not remain at a consistent pressure. If it is possible that the pressure will temporarily exceed 2 bar, a pressure reducer must be used.
- Shut-off valve: The water supply can be shut off at any time using a shut-off valve. The shut-off valve must be easily accessible after installation.
- Wastewater hose with thread, inner diameter 1/2 inch, outer diameter 3/4 inch
- Stainless steel hose clamp
- PVC threaded connection, inner diameter 1/2 - 3/4 inch, outer diameter 3/4 - 1 inch
7.4.3 Connecting the machine to the water supply
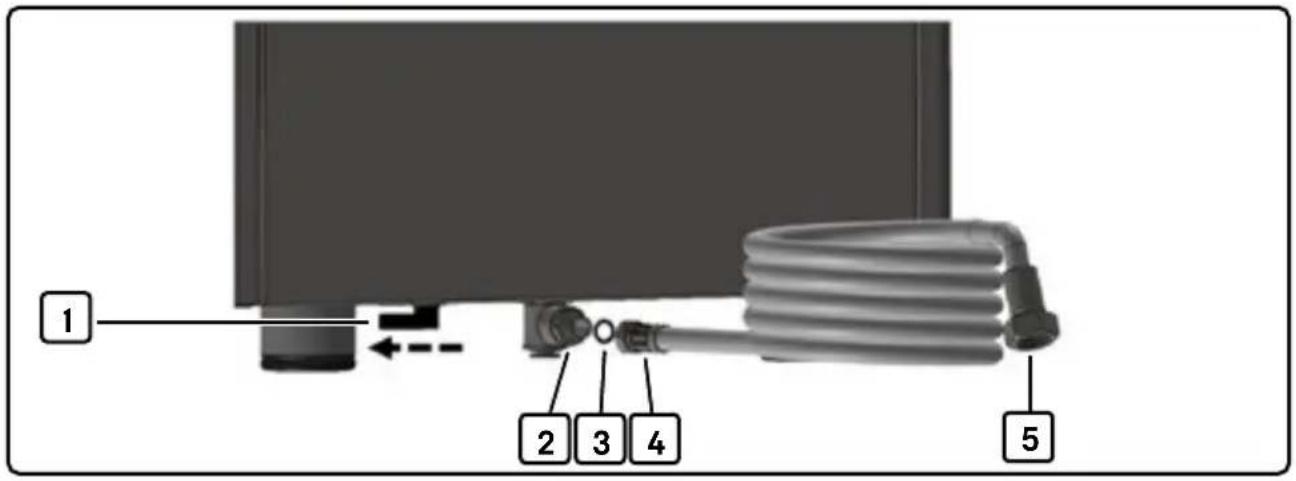
text_image
1 2 3 4 5Fig. 4 Rear view with rotary valve and water connection nozzle
1 Rotary valve in mains water position
4 Device-side hose connection
2 Water connection nozzle
5 Water supply hose connection
3 Gasket
- Disconnect the existing hose from the water supply.
- Screw the water connection hose (4, Fig. 4) included in the scope of delivery to the water connection nozzle (2, Fig. 4) on the underside of the machine. Use the gasket (3, Fig. 4) for this.
- Install the pressure reducer and shut-off valve (not included in scope of delivery) at the water supply.
- Connect the water connection hose (5, Fig. 4) to the water supply.
- Move the rotary valve (1, Fig. 4) into the mains water position. The valve points towards the outside of the machine.
- Activate the mains water mode via the menu (see Chapter 10.4.5, „Tank Mode“).
7.4.4 Installing the drain pan
If desired, the drain pan included in the scope of delivery can be connected to the machine and wastewater connection.
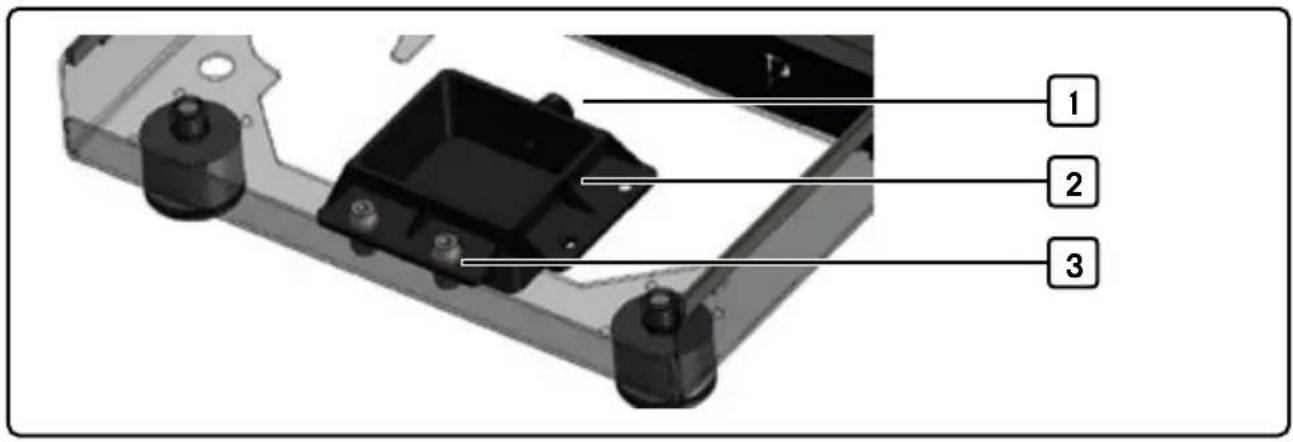
text_image
1 2 3Fig. 5 Drain pan, installed
1 Connection for wastewater hose
3 Fastening screws and washers
2 Drain pan
- Fasten the drain pan [2, Fig. 5] to the drip tray holder.
- Connect the wastewater hose to the connection (1, Fig. 5) and secure with the hose clamp.
- Connect the threaded connection to the other end of the hose.
- Connect the wastewater hose to the wastewater connection.
7.5 Installing the accessories
CAUTION
Risk of injury due to sharp edges
The edges of the drip tray, grid, and cup raiser are sharp and may cause injuries.
• Always be careful when touching the edges.
- Avoid pressing too hard on them.
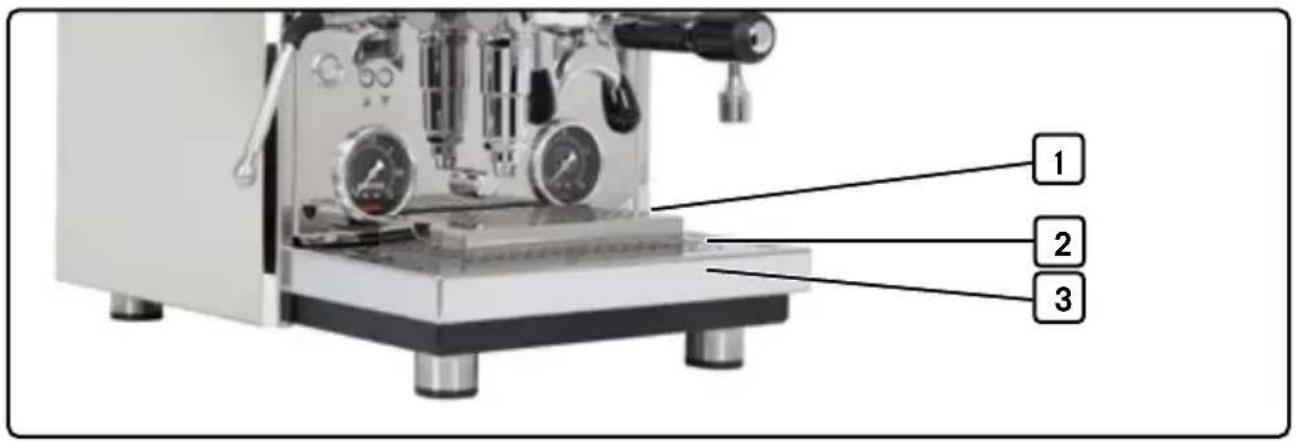
text_image
1 2 3Fig. 6 Drip tray, grid, and cup raiser
1 Cup raiser
3 Drip tray
2 Grid
7.5.1 Installing the blind filter and drip tray
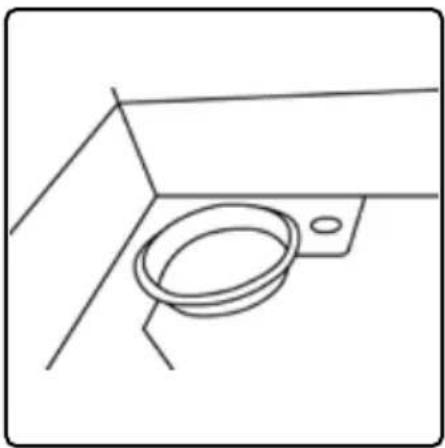
natural_image
Simple line drawing of a mechanical component or bracket (no text or symbols)Tip
The blind filter can be stored underneath the drip tray. There is a corresponding recess for it in the drip tray holder.
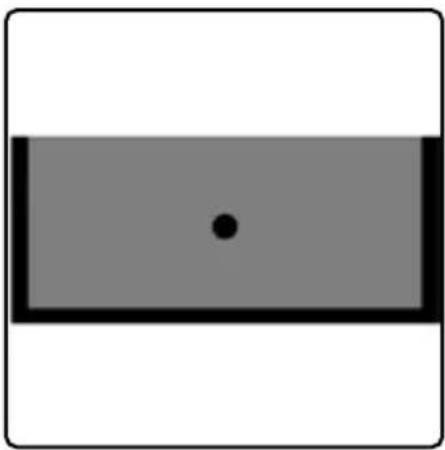
natural_image
Simple geometric shape with a black rectangle and a central dot (no text or symbols)Store the blind plug in a safe place.
If the drain pan is installed on the device, the blind plug in the middle of the drip tray must be removed. If the drain pan is not installed, the rubber stopper must be put back.
- Insert the blind filter.
- If the drain pan is installed (see Chapter 7.4.4, „Installing the drain pan“), remove the rubber stopper in the middle of the drip tray.
- Insert the grid [2, Fig. 6] in the drip tray [3, Fig. 6].
- Place the drip tray with the recesses on the underside onto the holder on the machine and push it in until it latches in place.
7.5.2 Installing the cup raiser
When using espresso cups, it is recommended that you install the cup raiser [1, Fig. 6] in order to prevent the espresso from splashing out.
- Place the cup raiser on the drip tray.
- Position it so that the edges of the cup raiser latch into the drip tray grid.
- Make sure that the cup raiser does not wobble or tilt, but rather is securely latched in place.
7.5.3 Installing the water filter
The water filter can optionally be acquired (see Chapter 12.1, „Spare parts and accessories“). Install it as follows:
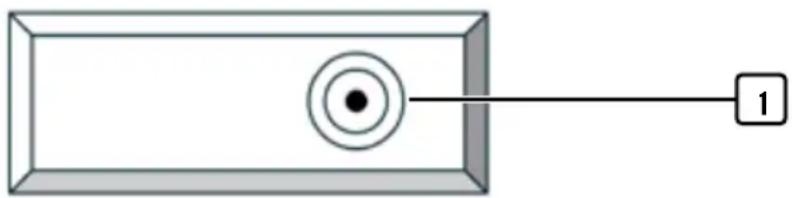
natural_image
Simple diagram of a rectangular object with a central circular element and an arrow pointing to the number 1 (no text or symbols present)Fig. 7 Plan view of water tank
1 Position of water filter adapter
1. Unpack and prepare the filter cartridge according to the manufacturer's specifications.
2. Remove the cup tray from the top of the machine.
3. Insert the filter cartridge into the water filter adapter (1, Fig. 7) in the water tank so that it latches in place.
4. Install the cup tray.
8 Initial start-up
When using the machine for the first time, make sure that:
- the machine has been installed correctly and the corresponding operating mode is activated (see Chapter 10.4.5, „Tank Mode“),
- the mains plug is disconnected from the power supply,
- the drip tray has been inserted correctly (see Chapter 7.5.1, „Installing the blind filter and drip tray“),
- the steam and hot water tilt valves are closed [see Chapter 5.2.3, "Operating levers"], and
- the brew lever is in the starting position (see Chapter 5.2.3, „Operating levers“).
8.1 Initial start-up in water tank mode
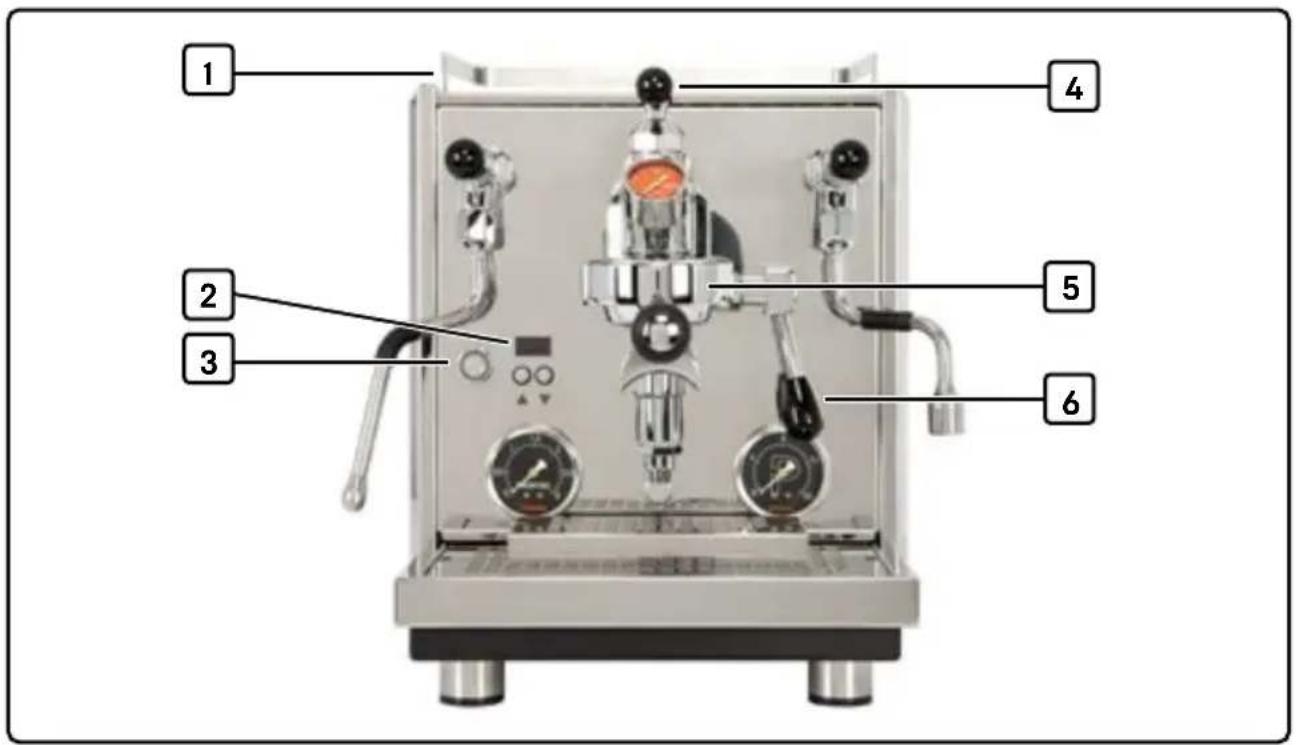
text_image
1 2 3 4 5 6Fig. 8 Figure without portafilter installed
1 Cup tray; water tank below
2 On/off button with LED ring
3 Display
4 Flow control
5 Brew group
6 Brew lever
8.1.1 Connecting and switching on the machine
-
Remove the water tank (1, Fig. 8) and clean it thoroughly (see Chapter 11.5, "Cleaning the water tank").
-
Fill the water tank with water and insert it back into the machine [see Chapter 9.5, "Filling the water tank with water"].
-
Plug the mains plug into the socket.
- Press the on/off button [2, Fig. 8].
The LED ring of the on/off button lights up and the "Fill" icon appears on the display.
8.1.2 Filling the boiler with water (fill mode)
- Open the flow control (4, Fig. 8) by at least one turn (see Chapter 5.2.4, "Flow control").
- Place a receptacle under the brew group (5, Fig. 8). The opening of the receptacle should be at least as big as the brew group.
- Move the brew lever [6, Fig. 8] into the drawing position (see Chapter 5.2.3, „Operating levers“).
The pump starts to fill the brew boiler.
-
Leave the brew lever in the drawing position for at least 30 seconds.
When water comes out of the brew group, this means that the brew boiler is full. -
Move the brew lever into the starting position (see Chapter 5.2.3, "Operating levers").
The "Fill" icon disappears from the display and the steam boiler is filled.
6. Wait until you cannot hear any more pump noise.
√ The steam boiler is full and the machine starts to heat up the boilers. The "Heating Up" icon appears on the display. After the boilers have heated up, the brew temperature is shown on the display. The machine is ready to use.
8.1.3 Rinsing the machine
Rinse the machine with 2 - 3 water tank refills before preparing your first espresso:
- Switch off the heated-up machine using the on/off button.
The LED ring goes out. - Drain water out of the machine via the hot water wand (see Chapter 11.6, "Emptying the boiler").
- Refill the water tank (see Chapter 9.5, "Filling the water tank with water")
- Switch on the machine using the on/off button.
The LED ring lights up. - Wait until the brew temperature is shown on the display.
- Repeat this procedure three times.
- With the machine switched on, empty the remaining quantity of water via the brew group.
8.2 Initial start-up with mains water connection
8.2.1 Connecting and switching on the machine
- Plug the mains plug into the socket.
- Press the on/off button (2, Fig. 8).
The LED ring of the on/off button lights up and the "Fill" icon appears on the display.
8.2.2 Filling the boiler with water (fill mode)
- Open the flow control [4, Fig. 8] by at least one turn (see Chapter 5.2.4, "Flow control").
- Place a receptacle under the brew group (5, Fig. 8). The opening of the receptacle should be at least as big as the brew group.
- Move the brew lever into the drawing position (see Chapter 5.2.3, "Operating levers").
The pump starts to fill the brew boiler.
- Leave the brew lever in the drawing position for at least 30 seconds.
When water comes out of the brew group, this means that the brew boiler is full. - Move the brew lever into the starting position (see Chapter 5.2.3, "Operating levers").
The "Fill" icon disappears from the display and the steam boiler is filled.
6. Wait until you cannot hear any more pump noise.
√ The steam boiler is full and the machine starts to heat up the boilers. The "Heating Up" icon appears on the display. After the boilers have heated up, the brew temperature is shown on the display. The machine is ready to use.
8.2.3 Rinsing the machine
Rinse the machine with 5 - 8 liters of water before preparing your first espresso.
- Switch off the heated-up machine using the on/off button.
The LED ring goes out. - Drain water via the hot water wand (see Chapter 11.6, „Emptying the boiler“).
- Switch on the machine using the on/off button.
The LED ring lights up. - Allow the machine to heat up.
- Repeat this procedure three times.
- With the machine switched on, empty the remaining quantity of water via the brew group.
8.3 After initial start-up
It is recommended that you place espresso cups on the cup tray after initial start-up. This will keep the cups warm for later use.
9 Operation
9.1 Operating modes
9.1.1 Operational readiness
The machine starts to heat up after being switched on. The respectively reached brew temperature and, if activated, the steam temperature are shown on the display. As soon as the set temperature values are shown on the display, the machine is ready to use.
9.1.2 Continuous operation
The machine operates continuously after being switched on. Continuous operation can be ended as follows:
- Set ECO mode via the menu or activate it via the shortcut function (see Chapter 9.1.4, „ECO mode“);
- Switch off the machine (see Chapter 9.2.1, „Switching the machine on and off“).
9.1.3 Standby mode of the display
When the machine has been switched on but has not performed a function for several minutes, the display goes into standby mode. A running text that alternately displays the brew temperature and, if activated, the steam temperature is shown in the standby mode of the display.
9.1.4 ECO mode
ECO mode makes it possible to program the machine so that the heating function is deactivated and the display is switched off after a certain period of time has elapsed. The machine remains switched on (the LED ring of the on/off button lights up). The countdown of the set time starts after the last brewing process is complete or after the last button press.
ECO mode can also be activated directly via the shortcut function (see Chapter 9.4, „Shortcut functions“). To activate ECO mode automatically, the function must be activated and the countdown set via the menu (see Chapter 10.3.5, „Eco Mode“).
natural_image
Simple line drawing of a crescent moon with 'z' and 'z' labels inside a rounded rectangle (no additional text or symbols)Sleep icon
Shortly before the machine activates ECO mode, the sleep icon appears on the display and indicates that the machine is going into ECO mode.
ECO mode can be ended as follows:
- Briefly press the left-hand ▼ or right-hand ▲navigation button. The display is switched on and the machine starts to heat up.
- Actuate the brew lever (see Chapter 5.2.3, „Operating levers“).
- Program an automatic switch-on time (see Chapter 10.4.3, „Schedule Set“).
9.2 Putting the machine into operation
9.2.1 Switching the machine on and off
Switching on the machine:
- Press the on/off button.
√ The LED ring lights up and the following information appears on the display one after the other:
- The welcome message "MAKE COFFEE YOURS"
- The software version
- The quantity of liters used so far, if the filter reminder is set (see Chapter 10.4.1, „Filter Reminder“)
- The brew temperature and, if activated, the steam temperature.
Switching off the machine:
- Press the on/off button.
√ The LED ring goes out and the display is switched off.
9.2.2 Machine in tank mode
-
Fill the water tank with water (see Chapter 9.5, "Filling the water tank with water") and insert it into the machine (see Chapter 11.5.1, "Orientation of the water tank").
-
Switch on the machine using the on/off button.
The LED ring lights up.
- If the "Flush" icon appears on the display, perform a flush (see Chapter 9.9, „Perform a flush“).
√ The machine heats up. If the setting "Fast Heating" is activated (see Chapter 10.4.8, „Enable Fast Heating“), the heat-up time is approx. 12-13 minutes. The machine has finished heating up when the temperature set via the menu (see Chapter 10.3.1, „Brew Temperature“) appears on the display.
9.2.3 Machine in mains water mode
NOTICE
Damage due to incorrect water pressure
The machine may become damaged if the wrong water pressure is used.
- There must be water pressure in the line for operating the machine.
-
The water pressure in the line may not exceed 2 bar.
-
Switch on the machine using the on/off button.
The LED ring lights up.
- If the "Flush" icon appears on the display, perform a flush (see Chapter 9.9, "Perform a flush").
√ The machine heats up. If the setting "Fast Heating" is activated (see Chapter 10.4.8, „Enable Fast Heating“), the heat-up time is approx. 12-13 minutes. The machine has finished heating up when the set temperature (see Chapter 10.3.1, „Brew Temperature“) appears on the display.
9.3 Opening and closing the shut-off valve
In machines used with a mains water connection and for which no automatic switch-on and switch-off times are programmed:
- Open the shut-off valve of the water supply line before operation to supply the machine with water.
- After operation, close the shut-off valve to prevent potential leakage of water.
9.4 Shortcut functions
All machine functions are set via the menu. The following functions can also be set via shortcuts without having to call up the menu.
9.4.1 Switching on ECO mode
- Press and hold the left navigation button for 3 seconds during operation.
√ The machine activates ECO mode.
9.4.2 Activating or deactivating pre-infusion
- Press and hold the right-hand navigation button for 3 seconds during operation.
√ Depending on the setting, pre-infusion is then activated or deactivated.
natural_image
Simple icon of a water drop with a person inside a speech bubble, enclosed in a rounded rectangle (no text or symbols)This icon appears when pre-infusion has been activated.
natural_image
Simple icon of a water drop with a person inside a container, enclosed in a rounded rectangle (no text or symbols)This icon appears when pre-infusion has been deactivated.
9.4.3 Switching the steam boiler on or off
- Press the right-hand button once during operation.
√ The steam boiler is switched on or off depending on the current setting.
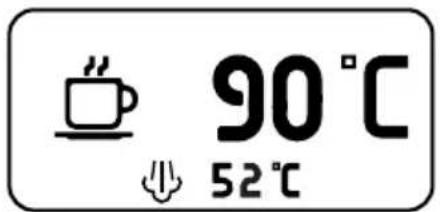
text_image
90°C ↓ 52°CSteam boiler switched on: The steam temperature is shown below the brew temperature on the display.

text_image
90°CSteam boiler switched off: Only the brew temperature is shown on the display.
9.5 Filling the water tank with water
NOTICE
Damage due to overflowing water
The water tank can overflow and leaking water can get into the machine.
- Fill the water tank to just below the edge.
- Do not spill any water over the machine when filling the tank.
To fill the water tank, it can be taken out of the machine or filled directly using a container. Only operate the machine with fresh, soft drinking water (up to 4^0 dH = German degree of hardness) Do not use carbonated water.
The following messages indicate that the water needs to be topped up:
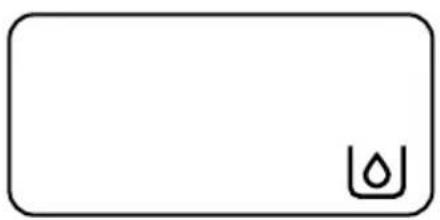
natural_image
Simple rectangular outline with a small water droplet icon in the bottom right corner (no text or symbols)Tank is almost empty
The current drawing process is continued. Top up with water soon.
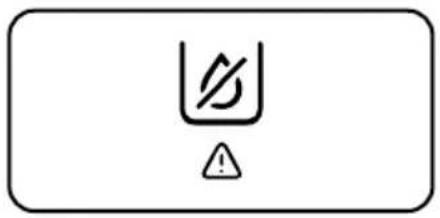
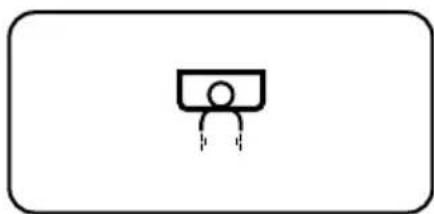
text_image
Warning symbol with a checkmark inside a U-shaped box and an exclamation mark below itTank is empty
The pumping process is ended and no more water can be drawn. Top up with water.
Proceed as follows to refill the tank:
- Remove the cup tray from the top of the machine.
- Fill the water tank with water.
- Put the cup tray back.
9.6 Pouring ground coffee into the portafilter and pressing (tamping)
When preparing an espresso, it is recommended to prepare the ground coffee as well as possible. The tamper included in the scope of delivery can be used to press and compact the ground coffee in the portafilter. Compacting the ground coffee ensures that the water does not take the path of least resistance through the ground coffee (so-called channeling) and the espresso is extracted evenly.
- Fill the portafilter with ground coffee. Use the markings in the filter to identify the optimal amount of ground coffee.
- Gently tapping the portafilter with your fingers evenly distributes the ground coffee in the filter.
- Place the provided tamper on top of the ground coffee and exert an even, controlled pressure. Do not tilt the tamper when doing this.
- Turn the tamper slightly to achieve an even surface.
√ The ground coffee is now pressed and compacted.
9.7 Inserting the filters in the portafilter
Three filters are included in the scope of delivery of the machine: a one-cup filter, a two-cup filter, and a blind filter.
• One-cup filter: Portafilter with 1 spout
- Two-cup filter: Portafilter with 2 spouts
- Blind filter: Can be inserted in both portafilters
Insert the filters as follows:
- Hold the portafilter in one hand.
- Use the other hand to insert the relevant filter into the portafilter.
- Press the filter in using both thumbs until it latches into place.
9.8 Inserting the portafilter in the brew group
NOTICE
Damage due to overtightening of the portafilter
When inserting the portafilter, the portafilter or machine may become damaged if overtightened.
- Carefully tighten the portafilter.
- Only tighten the portafilter until you can feel some resistance. Do not turn it too much.
It is recommended to leave the portafilter clamped in the brew group so that it does not cool down. If the portafilter becomes too cold, it can be warmed up with a flush. Do not fill the portafilter with ground coffee when doing this.
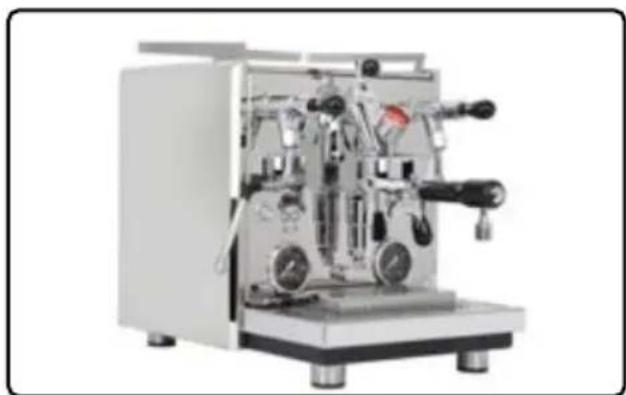
natural_image
Industrial espresso machine with visible mechanical components and control panel (no text or labels)Fig. 9 Portafilter installed, handle pointing to the front
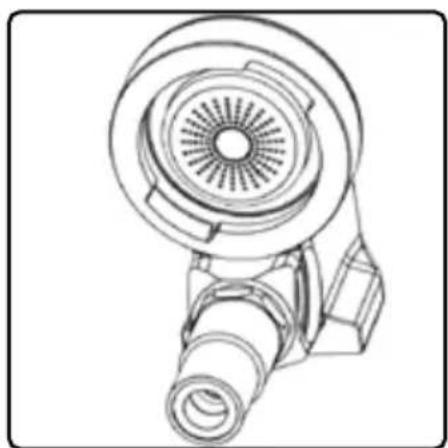
natural_image
Technical line drawing of a mechanical device with a circular component and cylindrical shaft (no text or symbols)View of brew group from below
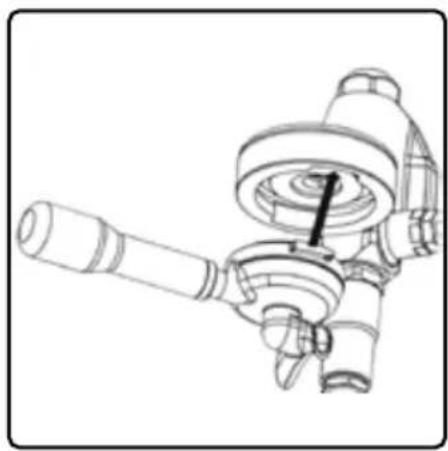
natural_image
Technical line drawing of a mechanical device with a numbered component (no text or symbols)- Hold the portafilter with one hand.
- Position the portafilter under the brew group so that the handle of the portafilter is at an angle of approx. 45^ to the left.
- Push the portafilter upwards into the holder of the brew group until the latches on the portafilter engage in the recesses on the brew group.
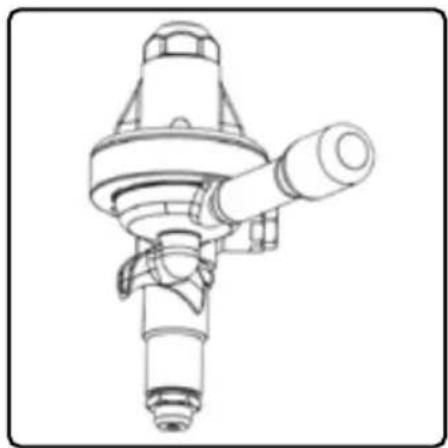
natural_image
Technical line drawing of a mechanical component with no visible text or symbols- Carefully turn the portafilter handle to the right until you feel some resistance.
√ The portafilter is now installed in the brew group.
9.9 Perform a flush
natural_image
Simple line drawing of a person standing on a platform with a flag, enclosed in a rounded rectangle (no text or symbols)Drawing icon
This icon appears when the brew lever is moved into the drawing position.
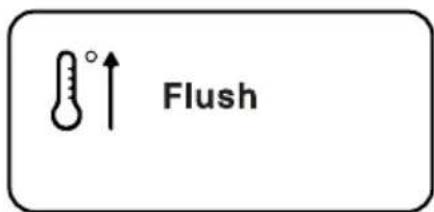
text_image
Flush"Flush" icon
Indicates that a flush should be performed.
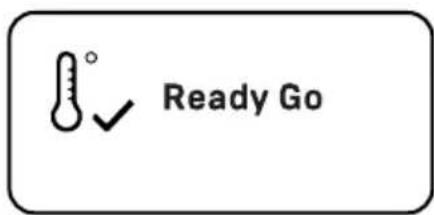
text_image
Ready Go"Ready Go" icon
Indicates that the lines have been flushed.
9.9.1 Flush after heating up
The machine heats up after being switched on. If the function “Enable Fast Heating” is activated, the machine quickly heats up to 120^ C in order to heat up the brew group faster. When this temperature has been reached, the “Flush” icon appears on the display. This icon indicates that a flush needs to be performed within 60 seconds in order to lower the boiler temperature to the normal set temperature:
- Place an empty receptacle under the brew group.
- Move the brew lever into the drawing position (see Chapter 5.2.3, "Operating levers").
The duration in seconds is shown on the display.
- If the "Ready Go" icon appears after 20 seconds, move the brew lever into the starting position.
√ The machine is ready to prepare espressos.
If the flush has not been performed within 60 seconds, the machine stops heating up and reduces the brew temperature. The “Flush” icon and the current brew temperature appear alternately on the display.
9.9.2 Flush for rinsing the lines
A flush can also be used to rinse the lines of the brew group in order to remove coffee residues. Proceed as follows:
- Place an empty receptacle under the brew group.
- Move the brew lever into the drawing position.
The drawing icon appears on the display and the lines are flushed.
- Once the water coming out of the brew group is clean and clear, move the brew lever back into the starting position.
√ The brew group has been flushed and the machine is ready to prepare espressos.
9.10 Preparing espressos

WARNING
Risk of injury due to hot surfaces and hot liquids spraying out
During the extraction process, hot liquids may spray out and cause injuries or scalding.
Injuries may occur due to the high temperatures of the brew group
- Only operate the brew group via the brew lever.
- Keep your face, hands, and other body parts away from the brew group.
- Use the cup raiser when preparing espressos.
Select the appropriate portafilter depending on the number of cups to be brewed:
- Portafilter with 1 spout: 1 cup
-
Portafilter with 2 spouts: 2 cups
-
If not yet installed, insert the relevant filter into the chosen portafilter (see Chapter 9.7, „Inserting the filters in the portafilter“).
-
Fill the filter with the desired quantity of ground coffee.
-
Press and compact the ground coffee evenly using the tamper (see Chapter 9.6, „Pouring ground coffee into the portafilter and pressing [tamping]“).
-
Insert the portafilter in the brew group (see Chapter 9.8, „Inserting the portafilter in the brew group“).
-
Place an empty cup underneath each spout of the portafilter used.
-
Move the brew lever into the drawing position (see Chapter 5.2.3, "Operating levers").
The espresso preparation process starts. If set, the pre-infusion timer first runs backwards on the display (see Chapter 10.3.4, „Pre-infusion“). The espresso pulling timer then starts. The pump pressure is displayed on the pump pressure gauge.
7. Once the desired amount of espresso has been poured into the cup, move the brew lever back into the starting position.
√ The espresso pulling process is complete. Residual water is drained into the drip tray and residual pressure released via the residual water outlet of the brew group.
9.11 Removing the portafilter from the brew group

WARNING
Risk of injury due to hot surfaces and liquids spraying out
When removing the portafilter, hot water and coffee grounds may spray out and cause injuries or scalding.
The stainless steel surfaces of the portafilter become hot when the portafilter is installed during operation of the machine.
- To end the brewing process, move the brew lever fully into the bottom position.
-
Always operate the portafilter by the black plastic handle.
-
Hold the portafilter with one hand.
- Turn the portafilter to the left to release the connection.
- Carefully pull the portafilter out downwards.
9.12 Drawing hot water

WARNING
Risk of injury due to hot surfaces and hot water spraying out
Injuries may occur when drawing water due to the high temperatures of the water wand.
Hot liquids may spray out and cause injuries or scalding.
- Only operate the hot water wand via the rubber handle.
- Always keep the nozzle of the hot water wand fully inside the receptacle to be filled.
To be able to draw hot water, the steam boiler must be activated (see Chapter 9.4.3, „Switching the steam boiler on or off“) and the set steam temperature (see Chapter 10.3.3, „Steam Temp“) must have been reached.
- Place a suitable receptacle with a heat-insulated handle (e.g. jug or cup) under the hot water wand.
- Open the hot water tilt valve (see Chapter 5.2.3, „Operating levers“),
- After drawing the desired quantity, close the tilt valve.
The valve is closed and the boiler is automatically filled with water.
- Clean the hot water nozzle (see Chapter 11.3, „Cleaning the steam and hot water nozzles“).
Tip: To draw hot water for several cups one after the other, it is recommended that you switch off the heated-up machine so that no cold water is pumped back into the boiler.
9.13 Drawing hot steam

WARNING
Risk of injury due to hot surfaces and hot media spraying out
Injuries may occur when drawing steam due to the high temperatures of the surfaces and media spraying out.
- Only operate the steam wand via the rubber handle.
- Place a suitable receptacle underneath the steam nozzle when draining condensation.
- Always keep the nozzle of the steam wand fully under the surface of the liquid to be heated or foamed when drawing steam.
- Keep your face, hands, and other body parts away from the steam nozzle.
The machine can generate steam to heat or foam liquids, for example milk or mulled wine.
To be able to draw hot steam, the steam boiler must be activated (see Chapter 9.3, „Opening and closing the shut-off valve“) and the set steam temperature (see Chapter 10.3.3, „Steam Temp“) must have been reached.
- Place an empty receptacle under the steam nozzle.
- Open the steam tilt valve (see Chapter 5.2.3, „Operating levers“).
▶ Condensation is drained. - Close the steam tilt valve after approx. 3 seconds, when no more condensation comes out.
- Place the receptacle with the desired liquid under the steam nozzle.
- Immerse the steam nozzle fully under the surface of the liquid.
- Open the steam tilt valve.
The liquid is heated or foamed.
- Close the steam tilt valve and remove the receptacle from the drip tray.
- Briefly open the steam tilt valve and close it again.
➢ Steam is let out into the drip tray to prevent the nozzle from becoming clogged.
- Clean the steam nozzle immediately (see Chapter 11.3, „Cleaning the steam and hot water nozzles“).
10 Navigation and settings in the menu
10.1 Icons on the display
All menu settings and machine statuses are shown on the display.
10.1.1 Menus for basic settings
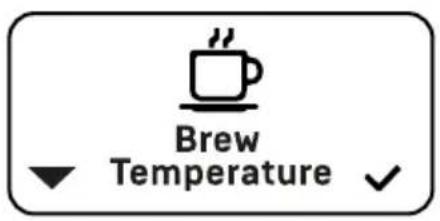
text_image
Brew Temperature ✓"Brew Temperature" menu: Set the brew temperature (see Chapter 10.3.1, „Brew Temperature“)
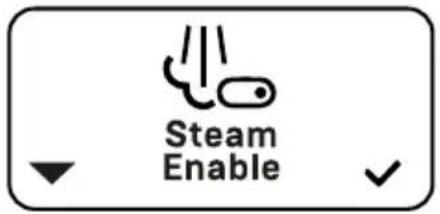
text_image
Steam Enable"Steam Enable" menu: Switch the steam boiler on or off [see Chapter 10.3.2, "Steam Enable"]
text_image
Steam Temperature ✓"Steam Temp" menu: Set the steam temperature (see Chapter 10.3.3, "Steam Temp")
text_image
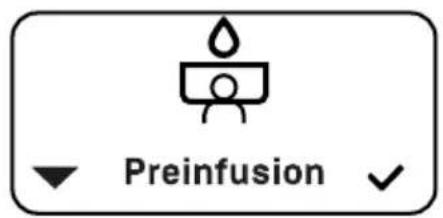
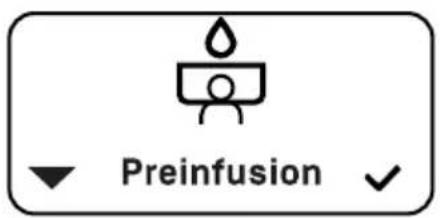
Preinfusion"Pre-infusion" menu: Switch pre-infusion on and off and enter times for active and passive pre-infusion (see Chapter 10.3.4, "Pre-infusion")
text_image
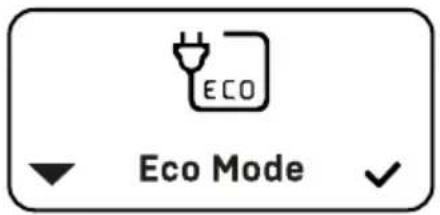
ECO Eco Mode ✓"ECO Mode" menu: Switch ECO mode on and off and set the duration for ECO mode (see Chapter 10.3.5, "Eco Mode")
text_image
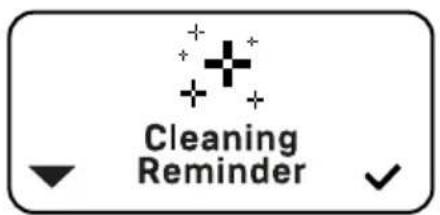
Cleaning Reminder"Cleaning Reminder" menu: Set reminder for cleaning the brew group (see Chapter 10.3.6, „Cleaning Reminder“)
text_image
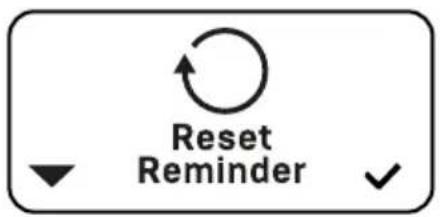
Reset Reminder"Reset Reminder" menu: Reset the reminder functions "Cleaning Reminder" and "Filter Reminder" (see Chapter 10.3.7, „Reset Reminder“)
text_image
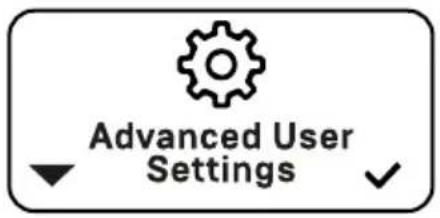
Advanced User Settings"Advanced User Settings" menu: Hide/show advanced optional settings (see Chapter 10.4, „Advanced menu [user] settings”)
10.1.2 Menus for advanced user settings
text_image
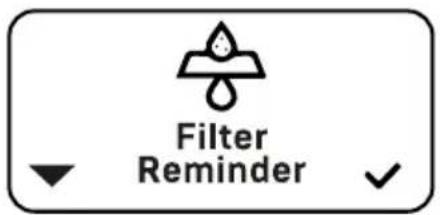
Filter Reminder"Filter Reminder" menu: Set reminder for changing the filter (see Chapter 10.4.1, „Filter Reminder“)
text_image
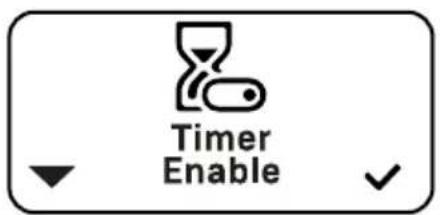
Timer Enable"Timer Enable" menu: Activate or deactivate the timer for automatically switching the machine on or off (see Chapter 10.4.4, "Timer Enable")
text_image
Clock Set"Clock Set" menu: Set the time (see Chapter 10.4.2, "Clock Set")
text_image
Schedule Set"Schedule Set" menu: Program times for automatically switching the machine on and off (see Chapter 10.4.3, „Schedule Set“)
text_image
Tank Mode"Tank Mode" menu: Activate or deactivate operation in water tank mode (see Chapter 10.4.5, „Tank Mode”)
text_image
F C Temperature Unit"Temperature Unit" menu: Set the unit of temperature °C or °F (see Chapter 10.4.6, „Temperature Unit“)
text_image
Coffee Offset Correction"Coffee Offset Correction" menu: Set the offset value between the machine temperature measuring point and the output temperature (see Chapter 10.4.7, "Coffee Offset Correction")
text_image
Enable Fast Heating ✓"Enable Fast Heating" menu: Activate or deactivate fast machine heat-up ("Fast Heating") [see Chapter 10.4.8, „Enable Fast Heating"]
10.1.3 Further icons on the display
In addition to the menus, there are more icons that indicate a particular status or prompt user action during operation.
text_image
Fill +Fill mode (see Chapter 8, „Initial start-up“)
text_image
Heating UpThe machine heats up (see Chapter 8, „Initial start-up“)
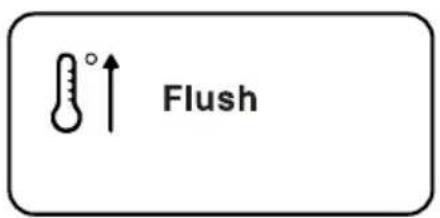
text_image
FlushPerform a flush (see Chapter 9.9, "Perform a flush")
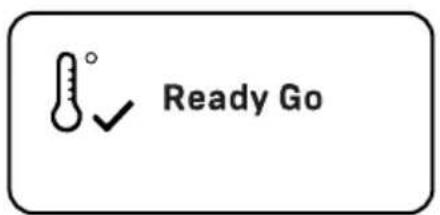
text_image
Ready GoThe machine is ready to brew espressos (see Chapter 9.9, „Perform a flush“)
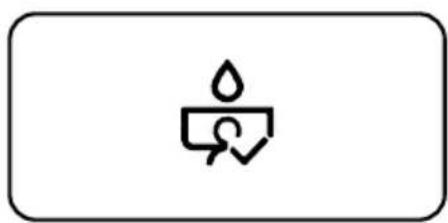
natural_image
Simple icon of a water drop with a person inside a speech bubble, enclosed in a rounded rectangle (no text or symbols)Pre-infusion activated [see Chapter 9.4.2, „Activating or deactivating pre-infusion“]
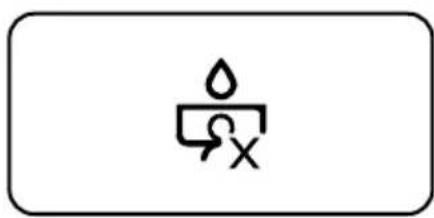
natural_image
Simple icon of a water droplet with a small 'X' symbol inside, enclosed in a rounded rectangle (no text or labels)Pre-infusion deactivated (see Chapter 9.4.2, „Activating or deactivating pre-infusion“)

natural_image
Simple line drawing of a person standing at a podium inside a rounded rectangle (no text or symbols)Passive pre-infusion in progress (see Chapter 10.3.4, „Pre-infusion“)
natural_image
Simple line drawing of a person standing at a podium with sound waves above (no text or symbols)Active pre-infusion in progress (see Chapter 10.3.4, "Pre-infusion")
natural_image
Simple line drawing of a person standing at a desk with a monitor (no text or symbols)Brewing process (extraction) (see Chapter 9.9, „Perform a flush“)
natural_image
Simple geometric pattern with a central plus sign and surrounding plus signs inside a rounded rectangle (no text or symbols)Reminder to clean the machine (see Chapter 10.3.6, "Cleaning Reminder")
natural_image
Simple line drawing of a water droplet with a leaf on a branch, enclosed in a rounded rectangle (no text or symbols)Reminder to replace the water filter (see Chapter 10.4.1, „Filter Reminder“)
text_image
z^zSleep icon to announce ECO mode (see Chapter 9.1.4, „ECO mode“)
text_image
Warning symbol with a checkmark and exclamation mark inside a rounded rectangleWater tank icon Water needs to be topped up [see Chapter 9.5, „Filling the water tank with water“], or Water tank not correctly installed [see Chapter 11.5.1, „Orientation of the water tank“]
natural_image
Simple rectangular outline with a small water droplet icon in the bottom right corner (no text or symbols)Refill icon [see Chapter 9.5, „Filling the water tank with water“]
10.2 Navigation in the menu
It is possible to navigate and change settings using the two navigation buttons.
10.2.1 Opening the main menu
- Press and hold the left-hand right-hand navigation button for 3 seconds.
√ The main menu opens and the "Brew Temperature" icon appears on the display.
10.2.2 Selecting and opening submenus
-
In the main menu, repeatedly press the left-hand navigation button until the desired submenu is displayed.
-
Press the right-hand ▲ navigation button.
√ The selected submenu opens and the corresponding submenu settings are shown on the display.
10.2.3 Changing settings
-
In the submenu, repeatedly press the left-hand ▼ right-hand navigation button until the desired setting is displayed.
-
Wait for 5 seconds.
√ The selected setting is automatically applied and the display returns to the higher menu level. If no input has been made after several seconds, the menu automatically closes and the current brew temperature and, if activated, the steam temperature are shown on the display.
10.3 Basic menu settings
To open menus and change settings, follow the instructions in the Chapter 10.2, „Navigation in the menu“.
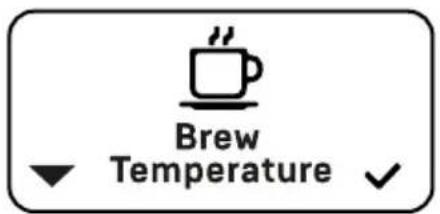
10.3.1 Brew Temperature
By default, the brew temperature is set at 92^ C. You can change the temperature as follows:
- Open the main menu.
- Select and open the "Brew Temperature" submenu.
The currently set brew temperature flashes on the display.
- Set the brew temperature.
√ The set brew temperature appears on the display for a few seconds.
10.3.2 Steam Enable
Liquids can be heated and foamed using the steam nozzle of the machine. Water is heated in the steam boiler for this purpose. To save energy, the steam boiler can be switched off. The steam boiler is activated ("ON") by default. Activation or deactivation takes place via the shortcut function (see Chapter 9.4, "Shortcut functions") or as follows via the menu:
- Open the main menu.
- Select and open the "Steam Enable" submenu.
- Select the setting "ON" (activate steam boiler) or "OFF" (deactivate steam boiler).
10.3.3 Steam Temp
Hot steam is drawn via the steam nozzle to heat or foam liquids. The temperature of the steam can be set via the menu. By default, the steam temperature is set to 128^ C. It can be set to any value between 115^ C and 134^ C.
- Open the main menu.
- Select and open the "Steam Temperature" submenu.
- Set the desired temperature.
10.3.4 Pre-infusion
Pre-infusion ensures that the ground coffee in the portafilter is completely moistened once before extraction is carried out at high pressure.
There are various possibilities for pre-infusion. The flow control can be used to perform a single manual pre-infusion without interrupting the pumping process (see Chapter 5.2.4, „Flow control“). If this pre-infusion is not sufficient, there is also the possibility of actively (with pump activity) and/or passively (without pump activity) influencing the pre-infusion.
How pre-infusion works
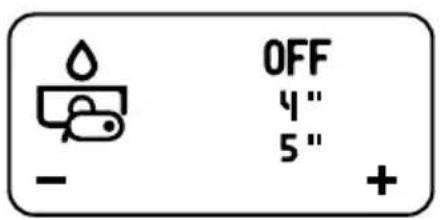
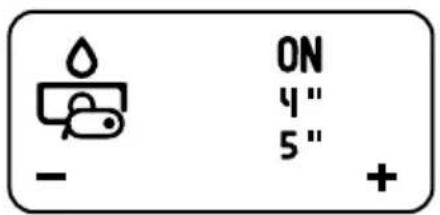
At the start of the espresso extraction process, the pump actively builds the pressure up for a predefined period of time. Before the pump pressure has reached 9 bar, the pump interrupts the activity for another predefined period of time. During this passive phase, the hot water completely soaks the ground coffee. After soaking is complete, the extraction is started at 9 bar.
Example
Active pre-infusion = 4 seconds, passive pre-infusion = 5 seconds:
Pump activity starts for 4 seconds after the start of espresso extraction. After these 4 seconds, the pump activity is interrupted for 5 seconds in order to moisten the ground coffee. After these 5 seconds have elapsed, the pump starts up again and the espresso extraction is started at 9 bar.

natural_image
Simple icon of a person standing at a desk with a monitor, enclosed in a rounded rectangle (no text or symbols)Passive pre-infusion
This icon appears when passive pre-infusion is in progress.
natural_image
Simple line drawing of a person standing at a podium with a monitor and cloud above (no text or symbols)Active pre-infusion
This icon appears when passive pre-infusion is in progress.
Active versus passive pre-infusion
Active pre-infusion is recommended only when operating the machine in water tank mode, as the pressure from the water tank is not sufficient for completely soaking the ground coffee. Exclusively passive pre-infusion is recommended for operation in mains water mode. The line pressure is sufficient for moistening the ground coffee within a preset time.
Setting pre-infusion
text_image
Brew Temperature ✓- Open the main menu.
text_image
Preinfusion- Select and open the "Pre-infusion" submenu.
text_image
OFF 4" 5" - +- Select the setting "ON" (pre-infusion activated) or "OFF" (pre-infusion deactivated).
text_image
ON 4" 5" - +- Wait for 3 seconds.
The setting is applied and the active pre-infusion value (top value) flashes.
-
Set the desired duration (seconds) for the active pre-infusion.
-
Wait for 3 seconds.
The setting is applied and the passive pre-infusion value (bottom value) flashes.
- Set the desired duration (seconds) for the active pre-infusion.
10.3.5 Eco Mode
The following eco mode settings are set by default:
- "ON": Function switched on
- "90": Countdown of 90 minutes until activation of ECO mode
The function can be switched on ("ON") or off ("OFF"). The countdown can be set to a maximum of 600 minutes in steps of 30 minutes. Proceed as follows:
text_image
Brew Temperature- Open the main menu.
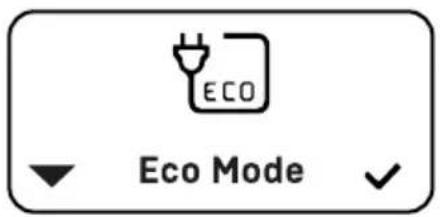
text_image
ECO Eco Mode ✓- Select and open the "Eco Mode" submenu.
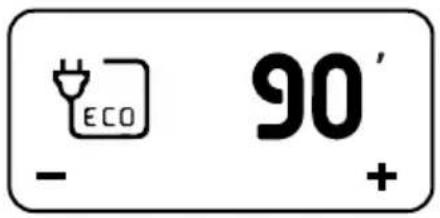
text_image
ECO - 90' +- Select the desired setting.
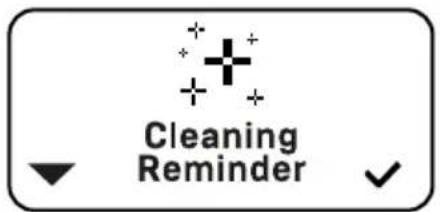
10.3.6 Cleaning Reminder
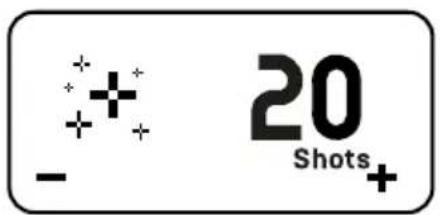
A reminder for the next brew group clean can be set via the menu. This reminder function is deactivated ("OFF") by default. To activate the function, the number of cups is set to a value of between 10 and 200 cups (shots) in steps of 10.
This function is deactivated ("OFF") by default. It is recommended to clean the brew group after 90 to 140 shots. Only a brewing process of more than 15 seconds is counted as a portion of espresso.
text_image
Brew Temperature ✓- Open the main menu.
text_image
Cleaning Reminder- Select and open the "Cleaning Reminder" submenu.
text_image
- + + 20 Shots+- Select the desired setting.
10.3.7 Reset Reminder
The machine supports two reminder functions:
- Cleaning Reminder: Reminder for the next brew group clean (see Chapter 10.3.6, „Cleaning Reminder“)
- Filter Reminder: Reminder for the next water filter replacement (see Chapter 10.4.1, "Filter Reminder")
After cleaning the brew group or changing the water filter, these reminder functions must be reset as follows:
text_image
Brew Temperature ✓- Open the main menu.
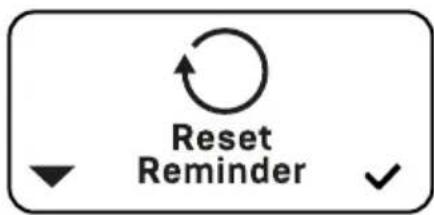
text_image
Reset Reminder- Select and open the "Reset Reminder" submenu.
text_image
+/- + - - --
Select the "Cleaning Reminder" or "Filter Reminder" setting using the left-hand button ▼
-
Press and hold the right-hand button ▲. √ If “---” appears on the display, the selected reminder setting has been successfully reset.
-
Release the button.
10.4 Advanced menu (user) settings
In addition to the basic settings, the machine also has a range of other settings. These are hidden during initial start-up. The machine can be used as normal without the advanced settings. To be able to change the advanced settings, they must be called up via the "Advanced User Settings" menu. Changed advanced settings remain active even when the menu has been closed. The advanced settings can be shown or hidden at any time as follows:
text_image
Brew Temperature ✓- Open the main menu.
text_image
Advanced User Settings- Select and open the "Advanced User Settings" submenu.
text_image
- ON + +- Select the setting "ON" (show) or "OFF" (hide).
√ The setting is applied and the advanced settings are shown in the main menu.
10.4.1 Filter Reminder
A reminder for the next water filter replacement can be set via the menu. To be able to use this function, a water filter must be installed (see Chapter 7.5.3, "Installing the water filter").
The setting is applied in steps of 5 liters up to a value of 200 liters. This function is deactivated ("OFF") by default. The required interval for replacing the filter can be found in the manufacturer's specifications for the water filter used.
text_image
Brew Temperature ✓- Open the main menu.
text_image
Filter Reminder- Select and open the "Filter Reminder" submenu.
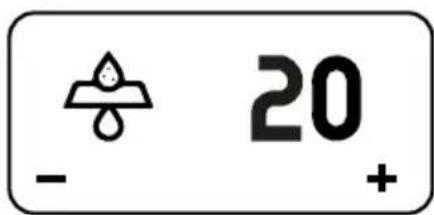
text_image
20 - +- Select the desired setting.
10.4.2 Clock Set
The time can be set to any value between "00:00" and "23:59". The settings "MON" (Monday), "TUE" (Tuesday), "WED" (Wednesday), "THU" (Thursday), "FRI" (Friday), "SAT" (Saturday) and "SUN" (Sunday) can be selected for the day of the week.
The settings are changed by briefly pressing the navigation buttons. For a quick search, for example when setting the time, the buttons can also be pressed for longer until the desired value appears on the display.
text_image
Brew Temperature ✓- Open the main menu.
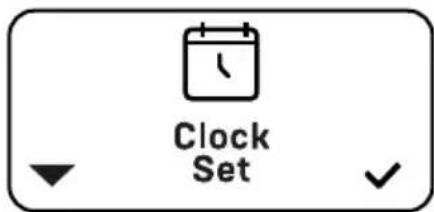
text_image
Clock Set- Select and open the "Clock Set" submenu.
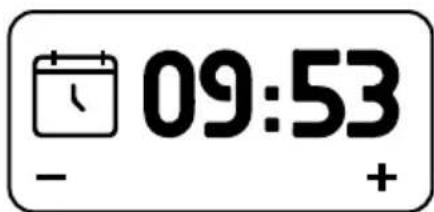
text_image
09:53 - +The hour display flashes.
- Set the hours and wait for 3 seconds.
The minute display flashes.
- Set the minutes and wait for 3 seconds.
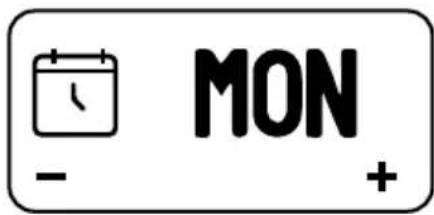
text_image
MON - +The day of the week flashes.
- Set the day of the week.
10.4.3 Schedule Set
The machine offers the possibility of setting two times per day for the automatic switch-on ["ON"] and for the automatic switch-off "["OFF"]. A value does not need to be assigned to each switch-on and switch-off time. To delete a switch-on or switch-off time, select the value "--:--".
text_image
Brew Temperature ✓- Open the main menu.
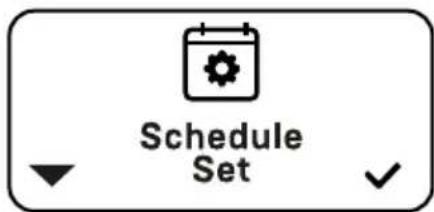
text_image
Schedule Set- Select and open the "Schedule Set" submenu.
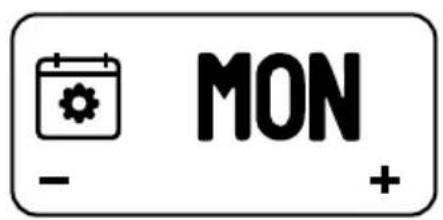
text_image
MON - +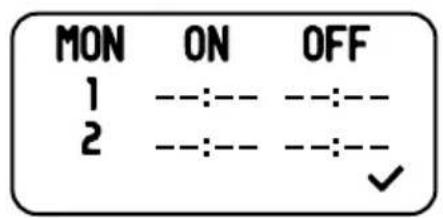
text_image
MON ON OFF 1 ---:--- ---:--- 2 ---:--- ---:--- ✓The display for the day of the week appears.
- Set the desired day of the week using the left-hand button ▼ and confirm using the right-hand button ▲
The display with the switch-on and switch-off times appears.
- Press the right-hand button ▲.
The hour display for the first switch-on time flashes.
- Set the hours using the left-hand button ▼ and confirm using the right-hand button ▲.
The minute display for the first switch-on time flashes.
- Set the minutes using the left-hand button ▼ and confirm using the right-hand button ▲
The hour display for the first switch-off time flashes.
- Set the hours using the left-hand button ▼ and confirm using the right-hand button ▲.
The minute display for the first switch-off time flashes.
-
Set the minutes using the left-hand button ▼ and confirm using the right-hand button ▲
-
The second switch-on and switch-off times are set in the same way.
10.4.4 Timer Enable
To be able to use the programmed switch-on and switch-off times, the timer function must be activated ("ON"). If the timer function is not activated ("OFF"), the machine ignores the programmed switch-on and switch-off times. In this case, the machine uses the time set for ECO mode for automatically switching off the heating function. When the timer function is deactivated, the programmed switch-on and switch-off times are preserved and can be reactivated at any time. The timer function is activated and deactivated as follows:

text_image
Brew Temperature- Open the main menu.

text_image
Timer Enable- Select and open the "Timer Enable" submenu.
text_image
✓ ON - +- Select the setting "ON" (activate timer) or "OFF" (deactivate timer).
10.4.5 Tank Mode
The machine can be used in mains water or water tank mode. To set the corresponding operating mode, tank mode must be activated or deactivated via the menu.
- Tank mode activated ("ON"): The machine runs in water tank mode.
- Tank mode deactivated ("OFF"): The machine runs in mains water mode.
text_image
Brew Temperature ✓- Open the main menu.
text_image
Tank Mode- Select and open the "Temperature Unit" submenu.
text_image
✓ ON - +- Select the setting "ON" or "OFF" depending on the operating mode.
10.4.6 Temperature Unit
The temperature can be displayed in °C or °F. By default, the machine uses the unit °C.
text_image
Brew Temperature- Open the main menu.
text_image
F °C Temperature Unit- Select and open the "Temperature Unit" submenu.
text_image
✓ °C - +- Select the setting ^ C or ^ F.
10.4.7 Coffee Offset Correction
The machine is designed for optimal espresso preparation. External conditions can cause the water to cool down slightly on its way from the boiler to the brew group. To compensate for this temperature loss, you have the option to set the offset at a value of between -10^ and +10^ via the menu. The setting +2^ is activated by default.
text_image
Brew Temperature ✓- Open the main menu.
text_image
Coffee Offset Correction- Select and open the "Coffee Offset Correction" submenu.
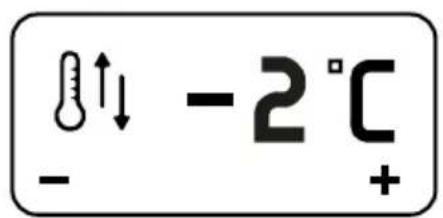
text_image
- 2 °C +- Select the setting.
10.4.8 Enable Fast Heating
After the machine is switched on, it heats up to the preset brew temperature. This can take 30 to 35 minutes, depending on the ambient temperature. The "Enable Fast Heating" function serves to overheat the machine within a short space of time in order to heat the brew group and reach the brew temperature faster.
text_image
Brew Temperature ✓- Open the main menu.
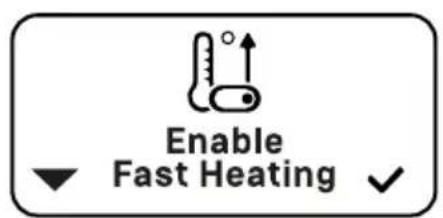
text_image
Enable Fast Heating ✓- Select and open the "Enable Fast Heating" submenu.
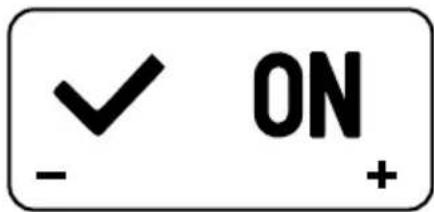
text_image
✓ ON - +- Select the setting "ON" (activate) or "OFF" (deactivate).
11 Cleaning

DANGER
Danger due to electrical voltage
There is the risk of a fatal electric shock if cleaning is not done properly.
- Switch off the machine, take the plug out of the socket, and allow the machine to cool to room temperature before performing any cleaning work.
- Never submerge the machine under water.

WARNING
Risk of injury due to hot surfaces
There is the risk of injury due to hot surfaces.
- Allow the machine and associated components to cool down completely before performing any cleaning work.
Only perform the cleaning work set out in these operating instructions. Improper cleaning could damage the machine and accessories.
For cleaning:
- Only use a soft, moistened, non-abrasive cloth.
- Do not use scouring agents or cleaning products that contain chlorine!
11.1 Cleaning the portafilters and filters
Clean the portafilters and filters daily. Do not put the portafilters in the dishwasher.
Removing the filter from the portafilter
- Hold the portafilter in one hand.
- Use the other hand to remove the filter from the holder.
Tip: The filters fit very tightly in the portafilter so that they cannot fall out during operation. If the filter is very hard to take out, it is recommended that you use your fingers to grip under the edge of the filter and then press it out of the holder.
Cleaning the filter and portafilter
-
Remove the filter from the portafilter as explained in the previous section.
-
Clean the portafilter and filter with warm water, a food-safe washing-up liquid, and a soft cloth.
- Allow the filter and portafilter to dry completely.
- Install the filter in the portafilter (see Chapter 9.7, „Inserting the filters in the portafilter“).
11.2 Cleaning the drip tray, grid, and cup raiser

CAUTION
Risk of injury due to sharp edges
The edges of the drip tray, grid, and cup raiser are sharp and may cause injuries.
- Avoid pressing too hard on the edges.
- Wipe over the edges carefully.
Empty the drip tray in good time. Do not wait until it is full to the brim.
Clean the drip tray, grid, and cup raiser daily. Do not put them in the dishwasher.
- Take the cup raiser off of the grid.
- Pull the drip tray forwards out of the machine. Remove the grid from the drip tray.
- Empty the drip tray over a sink.
- Clean all parts with warm water, a food-safe washing-up liquid, and a soft cloth.
- Allow all parts to dry fully.
- Install all parts in reverse order.
11.3 Cleaning the steam and hot water nozzles

WARNING
Risk of injury
There is a risk of injury when cleaning the steam and hot water nozzles due to high temperatures.
- Do not touch the steam wand, steam nozzle, hot water wand, or hot water nozzle. Only touch them via the rubber handles.
11.3.1 Cleaning the steam and hot water nozzles after use
Clean the steam nozzle and hot water nozzle immediately after every use so that liquid residues can be removed and do not dry on.
- Hold the steam nozzle and hot water nozzle by the rubber handle.
-
Wipe the nozzles with a moistened microfiber cloth.
-
Make sure that there are no residues on the nozzles.
11.3.2 Cleaning a blocked steam nozzle
NOTICE
Damage to the machine
Not cleaning the steam nozzle properly could damage it.
- Insert sharp objects for cleaning carefully into the nozzle.
- Make sure that the gasket between the nozzle and the thread is correctly positioned.
If the steam nozzle is blocked, no steam can come out. Clean the inside of the nozzle as follows:
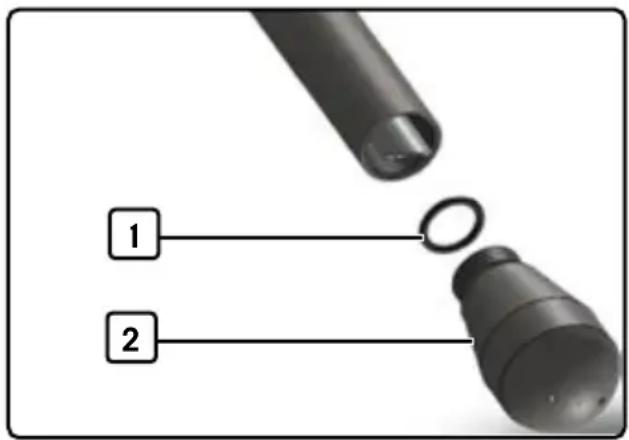
text_image
1 2Fig. 10 Steam wand nozzle, removed
1 Gasket 2 Steam wand nozzle
- Switch off the machine and let it cool down.
- Unscrew the nozzle (2, Fig. 10) of the steam wand by hand and place it to the side.
- Carefully clean the holes of the nozzle with a needle or paper clip.
- Screw the nozzle and gasket (1, Fig. 10) back on.
11.4 Cleaning the machine housing
Wipe the housing with a soft, moistened cloth to remove dirt. Then wipe it dry with a soft cloth.
11.5 Cleaning the water tank
11.5.1 Orientation of the water tank
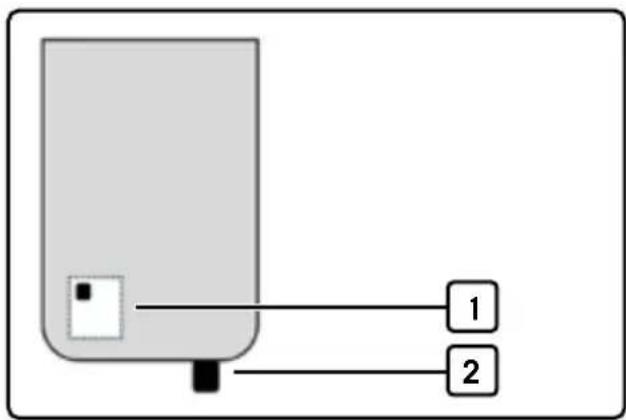
text_image
Diagram showing a device with labeled components, including two numbered connection points.Fig. 11 Orientation of the water tank
1 Float with magnetic point 2 Valve
Orient the water tank so that
- the float is inserted with the magnetic point facing up, and
• the valve is at the bottom right of the tank.
Only when the water tank is correctly oriented can it be inserted in the housing so that the edges of the tank lie completely on the housing.
11.5.2 Cleaning the water tank
Clean the water tank daily. Do not put the water tank in the dishwasher. To clean the water tank, proceed as follows:
- Remove the cup tray from the top of the machine.
- Pull out the water tank upwards using both hands.
- Empty the water tank over a sink and clean with warm water, a food-safe washing-up liquid, and a soft cloth.
- Dry the outside of the water tank using a dry, soft cloth.
- Insert the water tank.
- Put the cup tray back.
11.6 Emptying the boiler
If the machine is not going to be used for a relatively long stretch of time, it should be emptied. Even with frequent use, the boiler water should be emptied every 1-2 weeks and replenished.
-
Allow the machine to start up until the set brew temperature and steam temperature are shown on the display.
-
Switch off the machine using the on/off button.
The LED ring goes out.
-
Place a large container underneath the hot water wand.
-
Open the hot water tilt valve (see Chapter 5.2.3, „Operating levers“),
The boiler water is emptied via the hot water wand.
-
Close the hot water tilt valve.
-
Rinse the boiler with fresh water (see Chapter 8.1.3 or 8.2.3, „Rinsing the machine“).
11.7 Cleaning the brew group
Not cleaning the brew group properly could cause premature wear. Clean the brew group as per the following instructions.
The machine has a reminder function “Cleaning Reminder” (see Chapter 10.3.6, „Cleaning Reminder”). If the function is activated, a reminder to clean the brew group will appear on the display after a preset number of extractions. Clean the brew group after having made approx. 90 to 140 cups of espresso. It is also recommended to clean the brew group once after the machine has not been used for a relatively long stretch of time.
The following are required for cleaning the brew group:
- The cleaning brush provided
- The blind filter provided, and
- A powder detergent available at a specialist retailer for cleaning and degreasing the brew group
Too frequent backwashing with a degreasing agent can lead to degreasing of the shaft and brew lever gasket.
This results in squeaking of the brew group as well as increased wear. The squeaking is reduced over time by the oils in the coffee. However, it is recommended to backwash from time to time using only the blind filter and without grease-dissolving cleaning powder. This dissolves coffee residues and prevents them from settling in the brew group.
11.7.1 Cleaning the brew group gasket and shower screen
- Switch on the machine using the on/off button.
The LED ring lights up.
-
Wait until the set brew temperature is shown on the display.
-
Clean the brew group gasket and shower screen using the brush provided (see Chapter 11.7.1, „Cleaning the brew group gasket and shower screen“).
11.7.2 Cleaning the rest of the brew group
- Remove the cup filter from one of the portafilters (see Chapter 11.1, "Cleaning the portafilters and filters").
- Insert the blind filter in the portafilter (see Chapter 9.7, „Inserting the filters in the portafilter“).
- Fill the blind filter with 3 - 5 g of the cleaning powder.
Repeat the following procedure 5 times:
- Insert the portafilter in the brew group (see Chapter 9.8, „Inserting the portafilter in the brew group“).
- Move the brew lever into the drawing position (see Chapter 5.2.3, "Operating levers").
The blind filter fills with water. A pressure of 9 bar is displayed on the brew pressure gauge after a few seconds.
3. Move the brew lever into the half position and allow the cleaning agent to act for 10 seconds.
4. Move the brew lever slowly into the starting position.
The dissolved grease/oils are drained from the residual water outlet of the brew group.
5. Remove the portafilter from the brew group and rinse out with a short flush. Empty over the drip tray.
6. Insert the portafilter in the brew group.
7. Repeat steps 1 - 5 five times until the water runs out clear from the brew group.
8. Remove the portafilter from the brew group and take out the blind filter.
9. Perform a flush for 5 seconds to remove cleaning residues from the shower screen.
The brew group is now ready to use.
- If the icon for the reminder function "Cleaning Reminder" appears on the display, reset it (see Chapter 10.3.7, „Reset Reminder“).
√ The icon will disappear from the display and the counter will start to count down to the next reminder.
12 Servicing

DANGER
Danger due to electrical voltage
There is the risk of a fatal electric shock if servicing is not done properly.
- Before proceeding to do any servicing work, switch off the machine, take the plug out of the socket, and allow the machine to cool to room temperature.
Observe all safety instructions and warnings in this manual when performing any servicing work. Any servicing tasks not mentioned in these operating instructions may only be carried out by qualified specialist personnel.
12.1 Spare parts and accessories
Only original spare parts may be used for servicing work. Spare parts can be purchased from authorized dealers. Authorized dealers can be found using the dealer search at:
https://www.profitec-espresso.com/en/storelocator
Spare part Item number
| Brew group gasket P1021 | |
| Shower screen E61 C519900103 | |
| One-cup filter C619900104 | |
| Two-cup filter C619900105 | |
| Blind filter C619900106 | |
| Portafilter retaining spring | C619900098 |
| Handle | C439900840 |
| Cleaning brush | R210 |
| 2-hole steam nozzle | P2543 |
| Flex metal tube | P3036 |
| Accessory | Item number |
| Water filter | 89445.K |
| Portafilter, bottomless | Pr5150 |
| Tamper station | Pr5130 |
| Tamper pad | Pr5115 |
| Coffee grounds drawer, stainless steel | Pr5230 |
| Milk jug, 350 ml | Pr5200 |
Spare part Item number
Milk jug, 500 ml Pr5210
Filter screen Pr5140
4x Pro Cups Espresso Pr5127
4x Pro Cups Cappuccino Pr5128
12.2 Replacing the water filter
No reminder function is set for the machine by default. If the function is set via the menu, a corresponding icon indicating that it is time to replace the water filter appears after a preset amount of water has been used.
natural_image
Simple line drawing of a water droplet with a leaf on top, enclosed in a rounded rectangle (no text or symbols)"Waterfilter Reminder" icon
Information on the procedure and on the intervals for replacing the water filter can be found in the manufacturer's specifications for the water filter used.
12.3 Replacing the brew group gasket
12.3.1 Required tools and accessories
- Cleaning brush
- Portafilter without filter
- New shower screen
- New gasket
- Flathead screwdriver or teaspoon (not included in scope of delivery)
12.3.2 Before replacement
- Switch off the machine and disconnect the mains plug from the mains.
- Allow the machine to cool down.
- Unpack the spare parts and lay them out ready.
12.3.3 Replacing the gasket
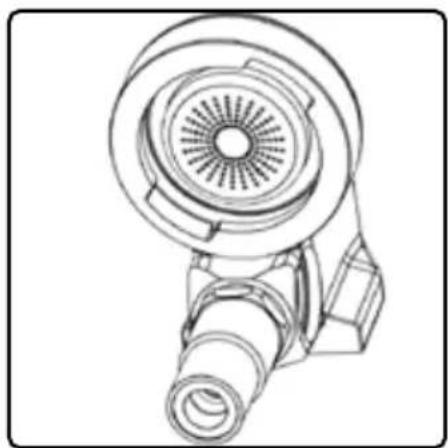
natural_image
Technical line drawing of a mechanical component with no visible text or symbolsView of brew group from below
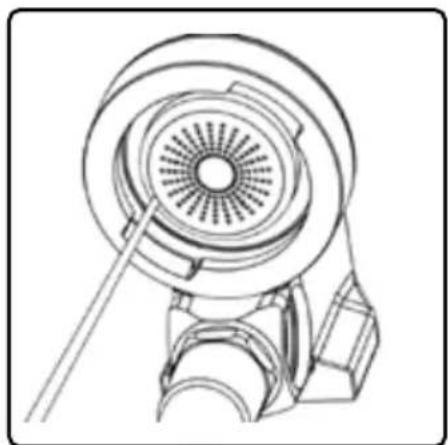
natural_image
Technical line drawing of a mechanical device with concentric circular components and a central shaft (no text or symbols)- Place the flathead screwdriver or teaspoon against the shower screen.
- Lever the shower screen with gasket out using the flathead screwdriver.
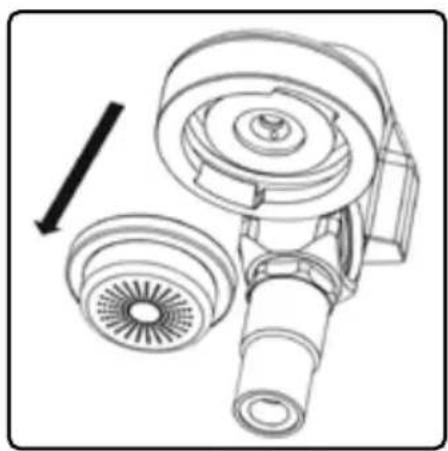
natural_image
Technical line drawing of a mechanical pump assembly with no visible text or symbols- Take the shower screen and gasket out of the brew group.
- Clean the brew group using the cleaning brush.
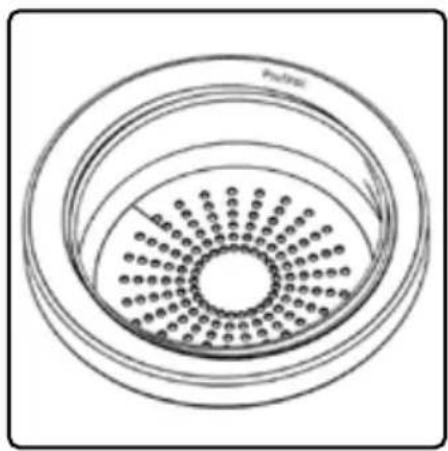
natural_image
Diagram of concentric circular layers with radial dots, no text or symbols present- Insert a new shower screen into a new gasket. When doing so, orient the gasket so that the Profitec logo is pointing up.
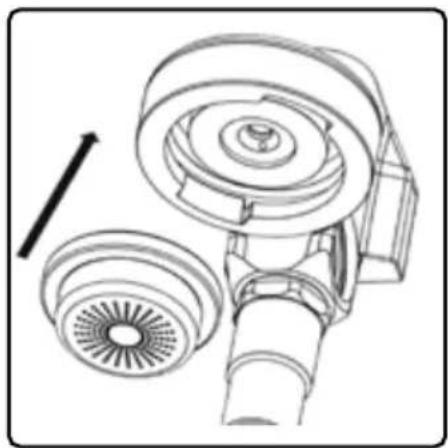
natural_image
Technical line drawing of a mechanical device with two circular components and a shaft (no text or symbols)- Insert the shower screen with gasket into the brew group using your hand and press it in.
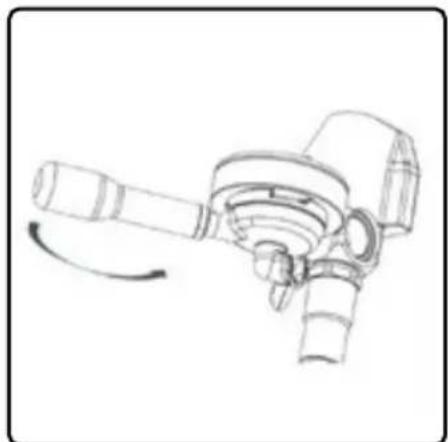
natural_image
Technical line drawing of a mechanical device with rotating shaft and housing (no text or symbols)- Place a portafilter without a filter against the shower screen and lever it in one movement to tighten the shower screen. With the other hand, apply counter-pressure to the brew group from above.
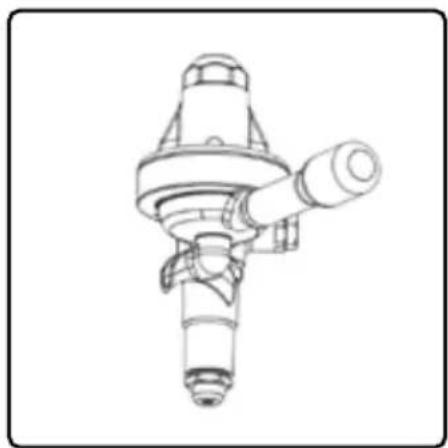
natural_image
Technical line drawing of a mechanical component with no visible text or symbols-
Remove the portafilter from the brew group.
-
Insert the blind filter in the portafilter.
-
Insert the portafilter with blind filter in the filter group and tighten the shower screen in one movement.
√ The brew group is ready to use again.
13 Troubleshooting
The following overview contains information about possible faults and measures to rectify these faults.
If faults that are not unambiguously described in these operating instructions or that cannot be rectified with the described measures occur when using the machine, do not use the machine and contact the dealer.
13.1 Machine faults
| Fault Cause Solution | ||
| During initial start-up with the water tank, the pump is activated when the brew lever is actuated but no water comes out of the brew group. | Insufficient time for filling the brew boiler. | It takes about 30 seconds for the brew boiler to fill up and for water to come out. |
| If there is still no water coming out after 50 seconds, the system is completely dry and the pump cannot pump the water. | Connect the machine to the mains water supply (see Chapter 7.4, „Installation with mains water connection”) and carry out initial start-up with the mains water connection (see Chapter 8.2, „Initial start-up with mains water connection”). Then reactivate tank mode (see Chapter 10.4.5, „Tank Mode”). | |
| The machine does not heat up during initial start-up. | The boiler overfill protection has been triggered. | Briefly turn the machine off and then on again. |
| The machine is switched on but will not start operation. | The water tank has not been installed correctly. | Install the water tank correctly (see Chapter 11.5.1, „Orientation of the water tank”) |
| The machine is connected to the mains water supply but water tank mode is activated | Deactivate water tank mode (see Chapter 10.4.5, „Tank Mode”) | |
| The water filter cartridge is dry. | Clean the water filter cartridge properly. Follow the manufacturer's specifications for the filter used. | |
| The machine is switched on and draws air | Water tank mode is activated, but the machine is connected to the mains water supply. | Activate water tank mode (see Chapter 10.4.5, „Tank Mode”). |
| The machine will not heat up again after water has been drawn from the hot water wand. | The boiler overfill protection has been triggered. | Briefly turn the machine off and then on again.Check that there is enough water in the tank and refill if necessary (see Chapter 9.5, „Filling the water tank with water“). |
| The machine will not switch on or off automatically in spite of a timer being set. | The circuit board battery is flat. | Deactivate the timer functions (see Chapter 10.4.4, „Timer Enable“) and contact the dealer. |
| Water is coming out above the brew group. | There are leaks on the flow control or between the stainless steel bell of the flow control and the brew group. | Contact the dealer. |
| Water is dripping out of the portafilter/brew group even though the brew lever is in the starting position. | The machine is defective. Contact the dealer. | |
| Water is coming out between the portafilter and the brew group. | The portafilter has not been installed correctly. | Install the portafilter correctly (see Chapter 9.8, „Inserting the portafilter in the brew group“). |
| The gasket is worn. Replace the gasket [see Chapter 12.3, „Replacing the brew group gasket“]. | ||
| The water tank cannot be fully inserted. | The water tank is in the wrong orientation. | Orient the water tank correctly and try again (see Chapter 11.5.1, „Orientation of the water tank“). |
| The advanced menu settings are not shown. | The menu is hidden. Call up the advanced settings menu (see Chapter 10.4, „Advanced menu [user] settings“). | |
| The machine is switched on and the steam tilt valve is open, but no steam is coming out of the steam nozzle. | The steam nozzle is blocked. | Clean the steam nozzle (see Chapter 11.3, „Cleaning the steam and hot water nozzles“). |
| The boiler temperature has not been reached. | Wait until the set steam temperature (see Chapter 10.3.3, „Steam Temp“) has been reached. | |
| The machine is not reacting to inputs. | The settings were changed or other unknown causes. | Reset the machine (see Chapter 13.1.1, „Maschine zurücksetzen“). |
13.1.1 Resetting the machine
Resetting the machine deletes all user-defined settings. Initial start-up must be carried out again after resetting the machine (see Chapter 8, „Initial start-up“).
- Switch off the machine using the on/off button.
The LED ring goes out
-
Press and hold the right-hand ▲ navigation button.
-
In the meantime, switch on the machine using the on/off button
-
Wait until the "Reset Done" icon appears on the display.
-
Release the right-hand ▲ navigation button.
-
Switch off the machine.
√ The machine has been reset.
14 Technical data
Specification Value
Machine dimensions (W x D x H) 340 x 485 x 420 mm
Dimensions with portafilter (W x D x H) 340 x 580 x 420 mm
Weight 31 kg
Water pressure min. 1 bar, max. 2 bar
Water tank capacity approx. 2.8 l
Power supply Value
EU, UK, NZ, AU 230 V\~, 50/60 Hz
US, JP 110 V\~, 50/60 Hz
Power Value
EU, UK, NZ, AU 1600 W
US, JP 1600 W
15 Shutdown, dismantling, and storage
15.1 Shutting down the machine
- Switch off the machine using the on/off button.
The LED ring goes out.
- Disconnect the mains plug from the mains.
15.2 Dismantling the machine with a mains water connection
- Empty the machine (see Chapter 11.6, „Emptying the boiler“).
- Shut down the machine.
- Close the mains water shut-off valve.
- Allow the machine to cool down completely.
- Disconnect the water connection hose from the water supply and from the water connection nozzle on the device.
- Remove the cup raiser and grid from the drip tray.
- Pull the drip tray out of the device.
- Remove the blind filter from the drip tray holder.
- Disconnect the drain pan from the wastewater connection and device.
- Remove the water filter from the water tank.
15.3 Dismantling the machine in tank mode
- Empty the machine (see Chapter 11.6, „Emptying the boiler“).
- Shut down the machine.
- Allow the machine to cool down completely.
- Remove the cup raiser and grid from the drip tray.
- Pull the drip tray out of the device.
- Remove the blind filter from the drip tray holder.
- Drain water from the water tank.
15.4 Storage
NOTICE
Danger due to improper storage
The machine may become damaged and its functioning impaired if not stored properly.
- Only store the machine once the boiler has been fully emptied.
- Do not tilt the machine or place it on its head in the packaging.
- Pack the machine correctly and store it in a dry environment.
- Stack a maximum of three packages on top of one another.
- Do not place any other heavy objects on the packaging.
- Do not store at subzero temperatures.
Proceed as follows when storing the machine:
- Shut down the machine.
- Dismantle the machine.
- Empty (see Chapter 11.6, „Emptying the boiler“) and clean (see Chapter 11, „Cleaning“) the machine.
- Pack the machine and accessories in their original packaging.
- Store at the desired location.
16 Disposal
natural_image
Symbol of a trash bin with crossed lines indicating no waste, and a solid black rectangle below (no text or labels)The symbol showing a crossed-out garbage can indicate that a product and its accessories (e.g. charger, USB cable) may not be thrown out with the household waste once they have reached the end of their service life. To prevent damage to the environment and human health due to uncontrolled waste disposal and to promote the sustainable reuse of material resources, please separate these objects from other types of waste and recycle them responsibly.
Dispose of the product as follows:
- Before disposing of the machine, make sure to dismantle it as per the safety instructions and warnings in this manual.
- Before disposing of the product, consider options for waste prevention (e.g. reselling functional products or repairing faulty ones).
- End customers may hand their product over at a local public collection point for disposal. Addresses of suitable collection points can be obtained from the city or local authority.
17 Recommendations for preparing the perfect espresso
Preparing the perfect espresso is not only influenced by subjective factors, but also by factors such as the coffee variety, coarseness, amount of ground coffee, temperature, pre-infusion, flow, extraction duration, etc.
Until the right settings have been found, you may have to adjust and try out different parameters. The following overview outlines common problems, what causes them and how to solve them.
| Problem Cause Solution | ||
| Espresso is not pouring out, just dripping out of the portafilter. | The coarseness of the coffee used is too fine. | Use more coarsely ground coffee. |
| Brew pressure too low. Increase the brew pressure (see Chapter 5.2.4, „Flow control”). | ||
| Ground coffee too densely compacted. | Do not press the ground coffee down as hard (see Chapter 9.6, „Pouring ground coffee into the portafilter and pressing [tamping]“). | |
| Too much ground coffee. Use less ground coffee. The marking in the filters serves as a guide. | ||
| Closed flow control. Open the flow control (see Chapter 5.2.4, „Flow control“). | ||
| Little to no crema on the espresso. | The ground coffee used is too coarse. | Use more finely ground coffee. |
| Ground coffee not com-pacted sufficiently. | Press the ground coffee down more firmly (see Chapter 9.6, „Pouring ground coffee into the portafilter and pressing [tamping]“). | |
| Brew pressure too high. Reduce the brew pressure (see Chapter 5.2.4, „Flow control“). | ||
| Ground coffee too old. Use fresh ground coffee. | ||
| Too little ground coffee. Use more ground coffee. The marking in the filters serves as a guide. | ||
| Too much chlorine in the water. | Use a water filter. | |
| Shower screen is dirty. Clean the brew group (see Chapter 11.7, „Cleaning the brew group“). | ||
| Too little body. The ground coffee used is too coarse. | Use more finely ground coffee. | |
18 Notes
To ensure that you consistently get good espressos, you can make a note of your preferred settings below.
Setting Drink Drink Drink
Coffee variety
Coarseness
Amount of ground coffee
Brew temperature
Steam temperature
Duration of active pre-infusion
Duration of passive pre-infusion
Flow control setting
Extraction duration
Milk starting temperature
Comments
Setting Drink Drink Drink
Coffee variety
Coarseness
Amount of ground coffee
Brew temperature
Steam temperature
Duration of active pre-infusion
Duration of passive pre-infusion
Flow control setting
Extraction duration
Milk starting temperature
Comments
natural_image
Concentric circles diagram with no text or symbolsnatural_image
Technical line drawing of a mechanical device with a numbered component (no text or symbols)natural_image
Technical line drawing of a mechanical component with no visible text or symbolsnatural_image
Simple line drawing of a mechanical device with two protruding components (no text or symbols)natural_image
Silhouette of a hand holding a device with three dashed outline shapes extending outward (no text or symbols)natural_image
Simple concentric circle diagram with no text or symbolsÉteint
natural_image
Concentric circles diagram with no text or symbolsAllumé
natural_image
Pure diagram of a double cone with dashed lines indicating projection or angle, no text or symbols presentPosition haute
natural_image
Simple black-and-white diagram of a conical object with two dashed outline arms (no text or symbols)Position médiane
natural_image
Abstract black-and-white diagram of a stylized object with dashed and solid lines, no text or symbols present.Position basse
natural_image
Simple diagram of a beam or optical component with dashed lines indicating projection or alignment (no text or symbols)Position haute
natural_image
Simple black-and-white diagram of a conical object with dashed lines indicating internal or external components (no text or symbols)Position médiane
natural_image
Abstract black-and-white diagram of a stylized object with dashed and solid lines, no text or symbols present.Position basse
natural_image
Simple line drawing of a device with two connected components (no text or symbols)natural_image
Simple line drawing of a rocket with two propellers and a central body (no text or symbols)natural_image
Silhouette of a hand holding a megaphone with dashed lines indicating motion or spray (no text or symbols)Position initiale
natural_image
Close-up of a metallic mechanical device with orange dial and black top (no visible text or symbols)natural_image
Close-up of a metallic mechanical device with orange dial and black head mount (no visible text or symbols)natural_image
Black upward-pointing arrow symbol on white background (no text or labels)natural_image
Silhouette of a wine glass against a white background (no text or symbols)Fragile
natural_image
Silhouette of an open umbrella with a curved handle (no text or symbols)natural_image
Diagram of a mechanical device with two ports and a directional arrow, labeled 1 and 2 (no text or symbols beyond labels)natural_image
Simple line drawing of a room corner with a circular component and a small hole (no text or symbols)Conseil
natural_image
Simple geometric shape with a black dot centered inside a gray rectangle (no text or symbols)natural_image
Simple diagram of a rectangular object with a central circular element and an arrow pointing to the number 1 (no text or symbols present)natural_image
Simple icon of a water drop with a person inside a speech bubble, enclosed in a rounded rectangle (no text or symbols)natural_image
Simple icon of a water droplet with a checkmark and X symbol inside a rounded rectangle (no text or labels)natural_image
Simple rectangular outline with a small water droplet icon in the bottom right corner (no text or symbols)text_image
Warning symbol with a checkmark and exclamation mark inside a rounded rectanglenatural_image
Industrial espresso machine with visible mechanical components and control panel (no text or labels)natural_image
Technical line drawing of a mechanical device with no visible text or symbolsnatural_image
Technical line drawing of a mechanical device with a numbered component (no text or symbols)natural_image
Technical line drawing of a mechanical component with no visible text or symbolsnatural_image
Simple line drawing of a person standing at a desk with a monitor (no text or symbols)text_image
Brew Temperature ✓text_image
Steam Enabletext_image
Steam Temperaturetext_image
Cleaning Remindertext_image
Advanced User Settingstext_image
Clock Settext_image
Schedule Settext_image
Tank Modetext_image
F C Temperature Unittext_image
Coffee Offset Correctiontext_image
Enable Fast Heating ✓text_image
Heating Upnatural_image
Simple icon of a person with a droplet and speech bubble inside a rounded rectangle (no text or symbols)natural_image
Simple icon of a water droplet with a valve and X symbol inside a rounded rectangle (no text or labels)natural_image
Simple line drawing of a person standing at a podium inside a rounded rectangle (no text or symbols)natural_image
Simple line drawing of a person standing in front of a screen with sound waves above (no text or symbols)natural_image
Simple line drawing of a person standing at a desk with a monitor (no text or symbols)natural_image
Simple geometric pattern with a central plus sign and surrounding plus signs inside a rounded rectangle (no text or symbols)natural_image
Simple line drawing of a water droplet with a leaf on a branch, enclosed in a rounded rectangle (no text or symbols)text_image
Warning symbol with a checkmark and exclamation mark inside a rounded rectanglenatural_image
Simple rectangular outline with a small water droplet icon in the bottom right corner (no text or symbols)Pré-infusion active = 4 secondes, pré-infusion passive = 5 secondes :
natural_image
Simple icon of a person standing at a desk with a monitor, enclosed in a rounded rectangle (no text or symbols)Pré-infusion passive
natural_image
Simple line drawing of a person standing in front of a monitor with sound waves above (no text or symbols)Pré-infusion active
text_image
Brew Temperature ✓text_image
OFF 4" 5" - +text_image
ON 4" 5" - +text_image
Brew Temperature ✓text_image
Brew Temperature ✓text_image
Cleaning Remindertext_image
Brew Temperature ✓text_image
Brew Temperature ✓text_image
Advanced User Settingstext_image
Brew Temperaturetext_image
Brew Temperature ✓text_image
Clock Settext_image
Brew Temperature ✓text_image
Schedule Settext_image
Brew Temperature ✓text_image
Brew Temperaturetext_image
Tank Modetext_image
Brew Temperature ✓text_image
F C Temperature Unittext_image
Brew Temperature ✓text_image
Coffee Offset Correction10.4.8 Enable Fast Heating (Chauffe rapide)
text_image
Brew Temperature ✓text_image
Enable Fast Heating ✓4x tasses Pro expresso Pr5127
4x tasses Pro cappuccino Pr5128
natural_image
Simple line drawing of a water droplet with a leaf, enclosed in a rounded rectangle (no text or symbols)natural_image
Technical line drawing of a mechanical component with no visible text or symbolsnatural_image
Technical line drawing of a mechanical device with concentric circular components and a central shaft (no text or symbols)natural_image
Technical line drawing of a mechanical pump assembly with no visible text or symbolsnatural_image
Diagram of concentric circular layers with radial dots, no text or symbols presentnatural_image
Technical line drawing of a mechanical device with two circular components and a shaft (no text or symbols)natural_image
Technical line drawing of a mechanical device with rotating shaft and housing (no text or symbols)natural_image
Technical line drawing of a mechanical component with no visible text or symbolsEU, UK, NZ, AU 1600 W
US, JP 1 600 W