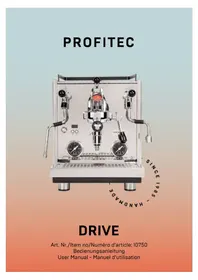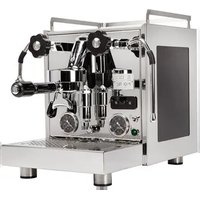
Pro 400 - Coffee machine Profitec - Free user manual and instructions
Find the device manual for free Pro 400 Profitec in PDF.


User questions about Pro 400 Profitec
0 question about this device. Answer the ones you know or ask your own.
Ask a new question about this device
Download the instructions for your Coffee machine in PDF format for free! Find your manual Pro 400 - Profitec and take your electronic device back in hand. On this page are published all the documents necessary for the use of your device. Pro 400 by Profitec.
USER MANUAL Pro 400 Profitec
natural_image
Two FRONTIC coffee machines side by side, one with pressure gauges and the other a handblower device labeled 'SINCE 1985 - HANDMADE' (no additional text or symbols visible)PRO 400 & JUMP
Dear coffee enthusiasts,
With the PRO 400 / JUMP you have purchased an espresso coffee machine of the highest quality. We thank you for your decision to select our product and wish you a lot of pleasure preparing perfe espresso and cappuccino with your espresso coffee machine. Please read the instruction manual carefully before using your new machine. If you have any further questions or require any further information, please contact your local specialized dealer before starting the espresso coffee machine. Please keep the instruction manual within reach for future reference.
 | Caution! Important notices on safety for the user. Pay attention to these notices to avoid injuries. |
 | Attention! Important notice for the correct use of the machine. |
Symboles utilisés
2.1 General safety notes....31
2.2 Proper use....32
3 MACHINE DESCRIPTION....32
3.1 Machine parts 32
3.2 Technical data 33
4 MACHINE INSTALLATION....34
4.1 Preparation for installation....34
4.2 Electrical connection 34
5 FIRST USE....34
6 USE OF THE MACHINE....35
6.1 Preparation of the machine....35
6.2 Manual adjustment of the brewing pressure....35
6.3 Selecting the boiler temperature 36
6.4 Preinfusion 37
6.4.1 Activating the preinfusion 37
6.4.2 Deactivating the preinfusion....39
6.5 The ECO mode 40
6.5.1 Deactivating ECO mode....41
6.5.2 Activating ECO mode 42
6.6 Machine reset 44
6.9 Preparing coffee 47
6.9.1 Dispensing of hot water and steam....48
6.9.2 Dispensing of hot water 48
6.9.3 Dispensing of steam 48
7 CLEANING AND MAINTENANCE....49
7.1 General cleaning 49
7.2 Brew group cleaning 49
7.3 Maintenance....50
8 TRANSPORT AND WAREHOUSING 51
8.1 Packing....51
8.2 Transport....51
8.3 Warehousing 52
9 DISPOSALS....52
10 TROUBLESHOOTING 52
11 RECOMMENDED ACCESSORIES....54
SOMMAIRE FRANÇAIS
text_image
Labeled diagram of a mechanical device with numbered parts for identificationnatural_image
Close-up of a mechanical component with a white arrow pointing to a feature, no visible text or symbolstext_image
Labeled diagram of a coffee machine with numbered parts, showing internal components and a close-up view of the base.natural_image
Technical line drawing of a mechanical assembly with an inset showing a component detail (no text or symbols)natural_image
Diagram of a mechanical device with a downward arrow indicating force or movement (no text or symbols present)JUMP:

Wichtig
natural_image
Exterior view of a modern glass coffee maker with a conical top and side control panel (no visible text or symbols)Mühle PRO T64
natural_image
Exterior view of a modern office building (no signage)Sudschublade
natural_image
Close-up of a black and white reflective stamp or knob with a glossy surface (no visible text or symbols)Tamper
natural_image
Black rectangular object with rounded edges, resembling a tray or container (no visible text or symbols)Tampermatte
natural_image
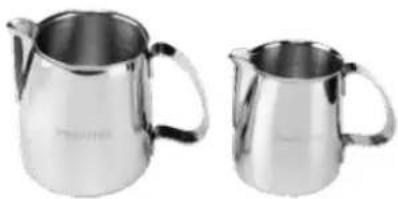
Two metallic pitcher cases, one large and one small, shown side by side (no text or symbols visible)Milchkännchen
1 PRODUCT DELIVERY
1 portafilter 1 spout
1 portafilter 2 spouts
1 filter 1 cup
1 filter 2 cups
1 blind filter
1 coffee tamper
1 brew group brush
1 user manual
PRO 400: 3 pairs of colored valve disclets
2 GENERAL ADVICE
2.1 General safety notes
 | Ensure that the local main supply voltage corresponds to the information given on the machine label on the front panel of the espresso machine.The installation of the machine should be carried out by authorized specialists according to the instructions in chapter 4.Plug the machine into a grounded socket only and do not leave it unattended.Make sure the machine is disconnected from the power supply during service and when replacing parts.Do not roll or bend the power cord.If the power cord is damaged, it must be replaced by a service agent or similarly qualified persons, in order to avoid creating a hazard or causing injury.Do not use a power extension cord or a multiple socket.Place the machine on an even and stable surface. Only use the machine on a water-resistant surface.Do not place the machine on hot surfaces.Do not place the machine in a cabinet when in use.Do not submerse the machine in water or operate the machine with wet hands.Ensure that no liquid gets on the power plug of the machine or on the socket.The machine should only be used by experienced persons.The machine is not intended for use by persons (including children) with reduced physical, sensory or mental capabilities, or lack of experience and knowledge, unless they have been given supervision or instruction concerning the use of the machine by a person responsible for their safety.Ensure children are supervised so that they do not play with the machine.Cleaning and user maintenance shall not be made by children without supervision.Do not expose the machine to inclement weather (frost, snow, rain) and do not use it outdoors.Ensure the packaging is kept out of reach of children.Only use original spare parts.Do not use carbonated water in your machine. Ensure soft, potable water is used.Do not operate the machine without water.Please note that the surface of the machine, in particular the brew group and the steam wand, become hot during operation and are still hot after operation. There is a risk of injury. |
 |
If you have any further questions or if you require any further information, please contact your specialized dealer before starting up the espresso coffee machine.
Our machines comply with the relevant safety regulations.
Any repairs or changes of components must be carried out by an authorized specialty dealer. In case of non-observance, the manufacturer does not assume liability and is not liable to recourse.
See page 1 for your specialized dealer's contact details. Authorized service points can be found in our dealer search on www.profitec-espresso.com.
 | ImportantYou should use water with a max. hardness of 4^o dH in order to protect your machine from lime scale damage. When necessary, make use of a water softener / water filter cartridge to reach an adequate degree of hardness. If these measures are insufficient, a prophylactic descaling of the machine may be necessary. Contact your specialized dealer before undertaking this measure.An already calcified machine may only be descaled by your specialized dealer because a partial disassembly of the boiler and the tubing may be necessary to prevent the system from being blocked by lime residues.A late descaling can cause substantial damage to the machine. |
2.2 Proper use
The PRO 400 / JUMP is designed to be used for the preparation of coffee, hot water and steam only. The machine is not intended for commercial use.
Use of the machine other than for the above-mentioned purpose is not recommended. The manufacturer cannot be held responsible for damages due to unsuitable use of the machine and is not liable to recourse.
 | This appliance is intended to be used in household and similar applications such as:• staff kitchen areas in shops, offices, and other working environments• by clients in hotels, motels and other residential type environments |
3 MACHINE DESCRIPTION
3.1 Machine parts
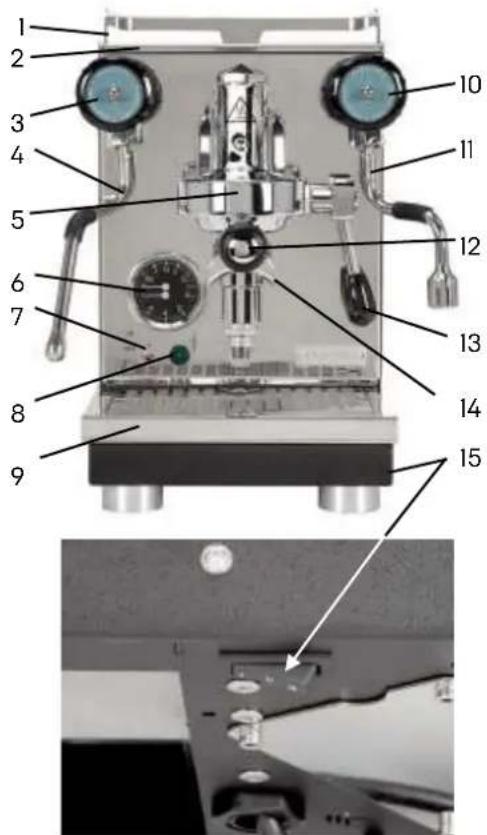
text_image
Labeled diagram of a mechanical device with numbered parts and internal components, including gauges, valves, and a close-up view.1 Cup heater (removable)
2 Fresh water tank (under the cup heater)
3 Steam valve
4 Steam wand
5 Brew group
6 Dual pressure gauge
7 ON/OFF switch
8 Green LED
9 Drip tray (underneath: Bracket for the blind filter)
10 Hot water valve
11 Hot water wand
12 Portafilter
13 Brew group lever
14 Coffee spout
15 3-position switch (on the underside of the machine).
ENGLISH
JUMP
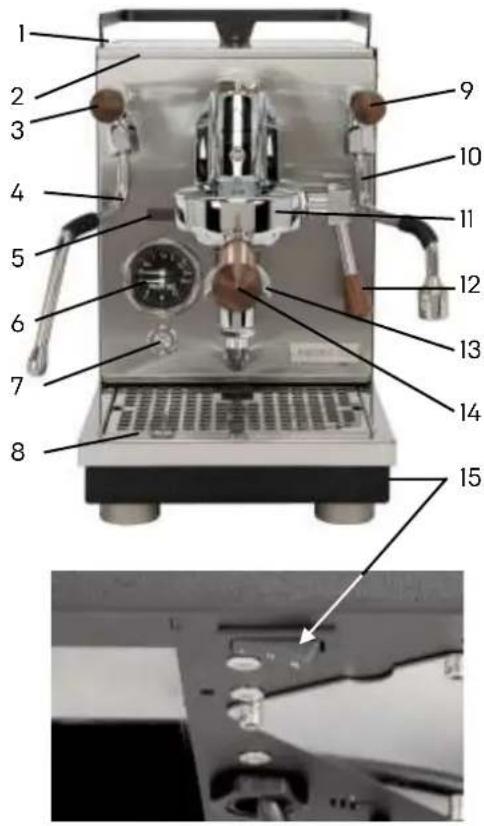
text_image
Labeled diagram of a coffee machine with numbered parts, showing internal components and interior view.1 Cup heater (removable)
2 Fresh water tank (under the cup heater)
3 Steam valve
4 Steam wand
5 Display
6 Dual pressure gauge
7 ON/OFF switch (LED)
8 Drip tray [underneath: Bracket for the blind filter]
9 Hot water valve
10 Hot water wand
11 Brew group
12 Brew lever
13 Coffee spout
14 Portafilter
15 3-position switch (on the underside of the machine).

Caution!
Danger of injury: The following parts are hot or may become hot:
- area around the steam handle and the hot water handle
- steam and hot water wands
- portafilter
- brew group
• body (upper part and side frames)
3.2 Technical data
| Voltages: | Frequency: |
| EU: 230 V | EU: 50 Hz |
| UK: 230 V | UK: 50 Hz |
| NZ: 230 V | NZ: 50 Hz |
| AU: 230 V | AU: 50 Hz |
| US: 115 V | US: 60 Hz |
| JP: 100 V | JP: 50/ 60 Hz |
Power: 1.400 W
Water tank: approx. 2.8 l
Boiler volume: 1.6 l
Measurements: W 228 mm x D 448 mm x H 372 mm
Measurements with portafilter: W 228 mm x D 558 mm x H 372 mm
Weight: 21.5 kg
4 MACHINE INSTALLATION
4.1 Preparation for installation

- Place the machine on an even and stable surface.
- Ensure that the machine is on a water-resistant surface in case of water spillage or leakage.
- Do not place the machine on hot surfaces.
4.2 Electrical connection

- Ensure that the local main voltage supply corresponds to the information on the machine label on the front panel of the espresso machine.
- Ensure that you use the correct power plug for your country.
- Plug the machine into a grounded socket only and do not leave it unattended.
- Do not roll or bend the power cord.
- Do not use a power extension cord or a multiple socket.
5 FIRST USE
Read the instruction manual carefully prior to operating the machine.

Prior to starting the machine, check if:
- the steam and hot water valves are closed.
- the machine is switched off. (Power switch in lower position.)
- the power cord is disconnected.
- the drip tray is inserted correctly.
- the machine is placed on a water resistant surface.
Now you can start up your machine:
1 Open the cup warmer tray.
2 Remove the water tank and rinse thoroughly.
3 Fill the water tank with fresh water low in lime, place it back and close the cup warmer tray. PRO 400: Set the metal toggle switch to "ON" (indicated by the green LED lighting up).
JUMP: Press the on/off switch to turn on the machine (indicated by the LED ring lighting up).
The machine is now on.
4 The pump will start up and fill the machine's boiler with fresh water.
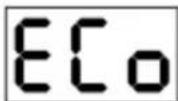
JUMP: The display shows the current settings for preinfusion [Pi], ECO mode [Eco] and temperature unit (°C or °F) and then switches to regular operation.
5 As soon as the boiler has finished filling, you will no longer hear any pump noise. As soon as the fresh water drops below a certain level in the fresh water tank,
PRO 400: the machine switches off electrically and the green LED flashes.
JUMP: The display shows "tAn".
You now need to top up with fresh water. The machine heats up automatically.
6 As a large amount of water is required when first filling the boiler, the water tank will need to be refilled with fresh water.
7 Wait until the boiler pressure (indicated on the upper part of the gauge) shows 1.0-1.5 bar.
8 A manual "boiler ventilation" is not necessary because the PRO 400 and the JUMP is equipped with a professional depression valve that ventilates the boiler during the heating phase.
9 Move the brew group lever into the upper position and dispense approx. 250 ml of water. The heat exchanger will be filled with water and the circulation of the water in the thermosyphon system begins.
10 Move the brew group lever into the lower position. Refill the water tank if necessary.
11 The machine is now ready for use. Place the cups on the cup heater tray to preheat them and enjoy your coffee.

Before making the first coffee, please rinse the machine by extracting about 2-3 water tanks worth from the brew group and the hot water wand. See also chapter 6.9.1 Dispensing of hot water
ENGLISH
 | The PRO 400 / JUMP has a fuse to prevent the machine from overfilling.It is possible that the machine does not heat up when using it for the first time or when dispensing large quantities of water through the hot water valve. In this case please switch the machine off and on again. |
 | Please note that the portafilter, drip tray and water tank are not dishwasher safe. |
6 USE OF THE MACHINE
6.1 Preparation of the machine
The switched off machine is to be placed into operation as follows:
1 Fill the water tank, if necessary.
2 PRO 400: Set the metal toggle switch to "ON" to turn on the machine (indicated by the green LED lighting up).
JUMP: Press the on/off switch to turn on the machine (indicated by the LED ring lighting up). The machine is now on.
3 Wait until the boiler pressure (indicated on the upper part of the gauge) shows 1.0-1.5 bar.
4 Depending on the ambient temperature, the heat-up phase is approx. 25 minutes.
5 The machine is now ready for use.
6 Insert the portafilter and move the brew group lever into the upper position. Release some hot water to heat up the portafilter.
 | It is recommended to leave the portafilter in the brew group, keeping it warm for optimum temperature for coffee extraction. |
 | JUMP:Upon startup, the machine sequentially displays the version number, current preinfusion and eco mode settings, and the temperature settings in either °C or °F.When the switch on the underside of the machine is pressed, the corresponding temperature (120 °C, 124 °C or 128 °C or 248°F, 255°F or 262°F) is displayed. |
 | JUMP:Shot counter: During extraction process, the throughput time is shown on the display until the Brew lever is moved back to the lower position. If pre-infusion is activated, a countdown of 5 seconds followed by a 3-second pause is displayed first. The shot counter then starts. |
6.2 Manual adjustment of the brewing pressure
You can adjust the brewing pressure by turning the adjusting screw individually, between approx. 8.5 and 12 bar.
To adjust the brewing pressure, follow these steps:
1 Open the cup warmer tray.
2 Insert the portafilter with the blind filter into the brew group.
3 Operate the brew group lever and note the brewing pressure on the lower section of the gauge.
4 Use a flat screwdriver or similar tool to adjust the brewing pressure by turning the adjusting screw. Turn the screw anti-clockwise to reduce the brewing pressure and clockwise to increase it.
5 Check the pump pressure (on the lower part of the gauge) to see the adjusted brewing pressure.
6 Return the brew group lever to the lower position. Remove the portafilter from the brew group, then remove the blind filter and insert a coffee filter again.
7 The machine is ready for use again.
ENGLISH
6.3 Selecting the boiler temperature
You can set the boiler temperature of your Pro 400 / JUMP before starting or while using your machine.
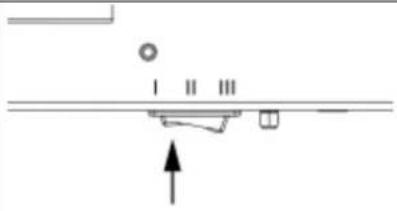
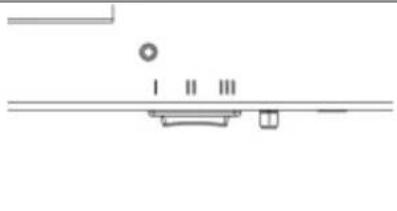
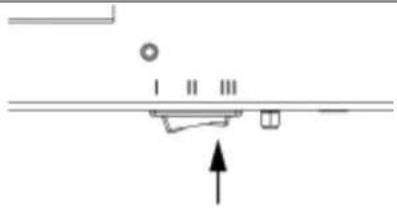
The preset temperatures are selected via the 3-position switch (see below).
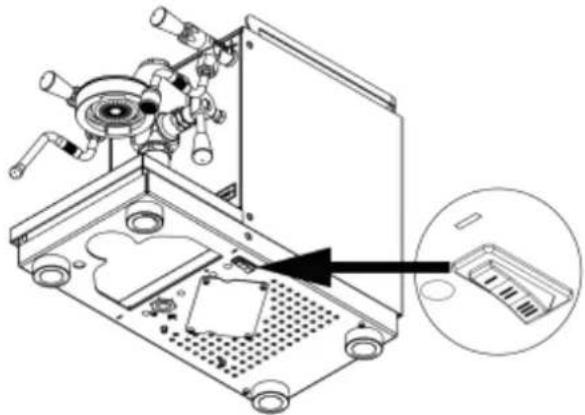
natural_image
Technical line drawing of a mechanical assembly with an inset showing a component detail (no text or symbols)| 120°C (248°F) (Pos. I) | 124°C (255.2°F) (Pos. II) | 128°C (262.4°F) (Pos. III) |
 |  |  |
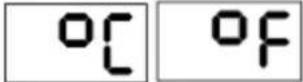 | JUMPThe display showing "°C" or "°F" confirms the temperature values being displayed in either degrees Celsius or degrees Fahrenheit (see chapter 6.7). |
The preset values for the PRO 400 / JUMP are 120°C/248°F (switch position I), 124°C/255.2°F (switch position II), and 128°C/262.4°F (switch position III). For different coffee roasts or compositions, it is advisable to adjust the temperature of the boiler.
The PRO 400 / JUMP is a two-circuit or heat exchanger espresso machine. In a heat exchanger, the brewing water is heated indirectly by the boiler.
After heat-up phase and a short flush*, the specified boiler temperatures of the PRO 400/JUMP are approx. 90°C for switch position I, approx. 94°C for switch position II and approx. 98°C for switch position III. The measured temperatures may vary as they depend on the operating time, the ambient temperature and other factors.
* During a flush, the portafilter is removed from the brew group and a so-called "empty draw" is performed to clean the shower screen from any coffee residue and to remove excessively hot brewing water (this can occur in a heat exchanger machine due to its design) from the heat exchanger. In our measurements, the duration of the flush was two seconds in each case, to ensure comparability between the different brews. It is recommended to adjust the flush duration based on what is seen and heard such as bubbling or hissing. Changing the flush duration affects the brewing temperature.
For different coffee roasts or compositions, it is advisable to adjust the temperature of the boiler.
For optimal flavor balance, adjusting the brewing temperature according to the roast depth is advisable. The darker the roast, the cooler the extraction temperature should be selected for the most balanced flavor impression. This helps to reduce unwanted bitterness in the cup. If, on the other hand, the coffee tastes too acidic, a balance can be achieved by selecting a higher extraction temperature.
ENGLISH
For the following description, we used 16.5g of a dark espresso roast and obtained it in a ratio of 1:2.5 with a reference quantity of 45g. The water was blended with a filter to a total hardness of 4^ dH.
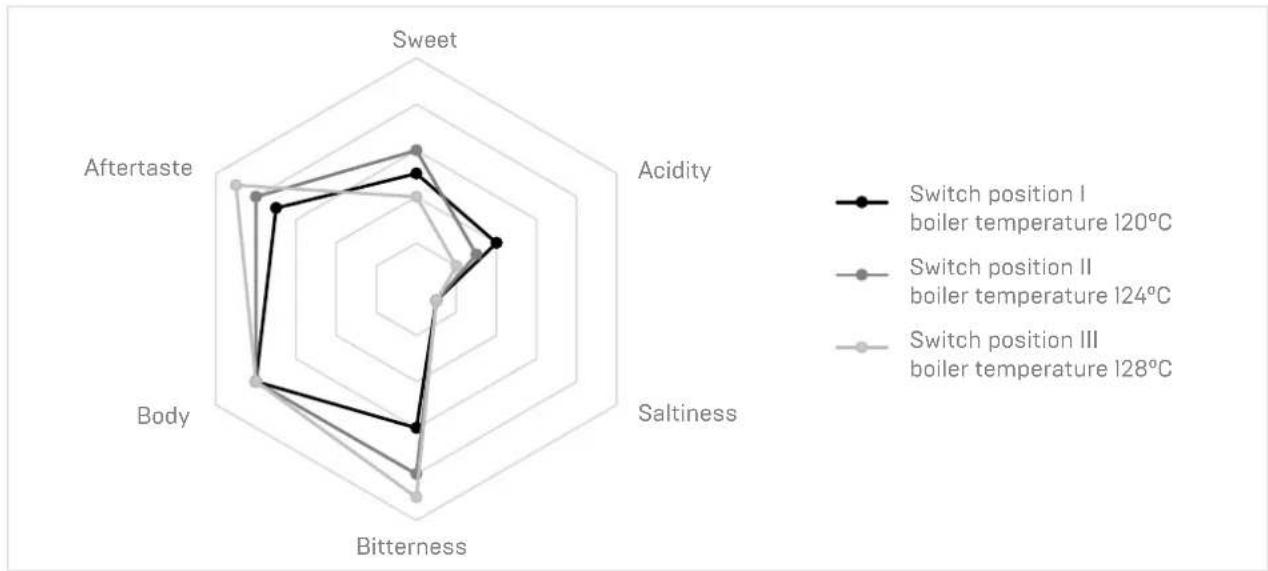
radar
| | Switch position I boiler temperature 120°C | Switch position II boiler temperature 124°C | Switch position III boiler temperature 128°C | |----------|---------------------------------------------|-----------------------------------------------|----------------------------------------------| | Sweet | ~0.6 | ~0.7 | ~0.5 | | Acidity | ~0.5 | ~0.4 | ~0.3 | | Saltiness| ~0.4 | ~0.3 | ~0.2 | | Bitterness| ~0.5 | ~0.6 | ~0.7 | | Body | ~0.7 | ~0.8 | ~0.9 | | Aftertaste| ~0.6 | ~0.7 | ~0.8 || Taste (0-5) | Switch position I 120°C | Switch position II 124°C | Switch position III 128°C |
| Sweet | 1.50 | 0.50 | 1.00 |
| Acidity | 2.00 | 0.50 | 0.50 |
| Saltiness | 1.00 | 1.00 | 1.00 |
| Bitterness | 2.50 | 3.50 | 4.00 |
| Body | 2.50 | 3.00 | 3.00 |
| Aftertaste | 2.00 | 2.50 | 3.00 |
| Corresponds approx. to a brewing temperature of | 90°C | 94°C | 98°C |

We recommend switch positions I and II for espresso and position III for the focus on more steam output.
6.4 Preinfusion
Preinfusion is a process where the coffee grounds in the portafilter are moistened before the brewing begins. This allows the grounds to evenly expand and seal any channels, ensuring consistent resistance throughout the filter. This results in a more uniform extraction of flavors from the coffee. By default, preinfusion is deactivated.
6.4.1 Activating the preinfusion
| 1. Switch the machine off. | PRO 400: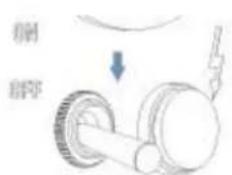 | JUMP: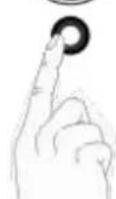 |
ENGLISH
| 2. Ensure that the water tank is at least half full. | 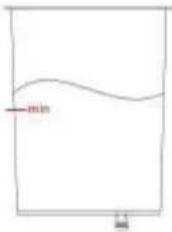 | |
| 3. Set the brew group lever up. | 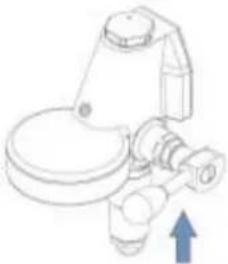 | |
| 4. Set the switch to the middle position (position II). | 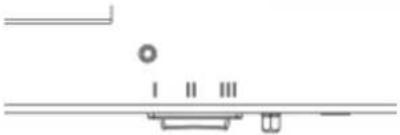 | |
| 5. Switch on the machine. | PRO 400: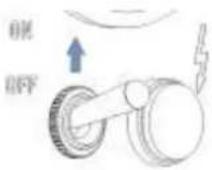 | JUMP: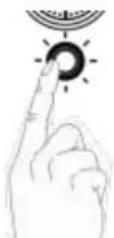 |
| 6. PRO 400:The green LED flashes.JUMP:The display shows "Pi". | PRO 400: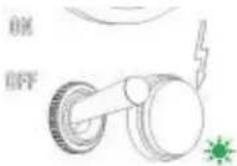 | JUMP: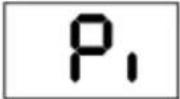 |
| 7. Set the switch to the front position (position I) and then back to the middle position (position II). | 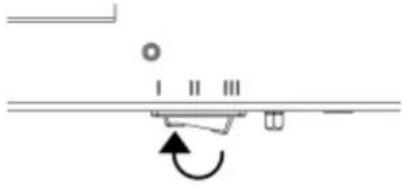 |  |
| 8. PRO 400:The setting is confirmed and saved when the green LED lights up (remains on for 3 seconds).JUMP:The display shows "Pi" and "on". | PRO 400: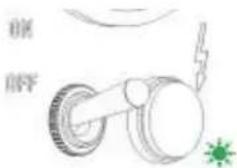 | JUMP: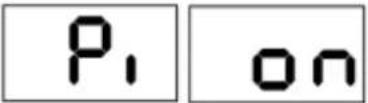 |
ENGLISH
| 9. Pull the brew group lever down again and wait 5 seconds.PRO 400:The machine returns to normal operation.JUMP:The machine shows “ECo” for 5 seconds. To activate and deactivate Eco mode (see chapter 6.5). | 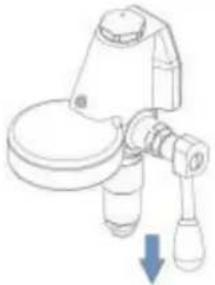 JUMP: JUMP: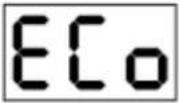 |
6.4.2 Deactivating the preinfusion
| 1. Switch the machine off. | PRO 400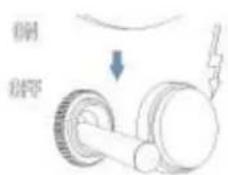 | JILMP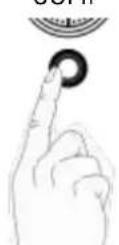 |
| 2. Ensure that the water tank is at least half full. | 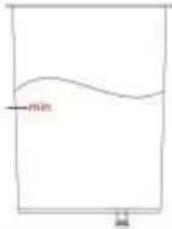 | |
| 3. Set the brew group lever up. | 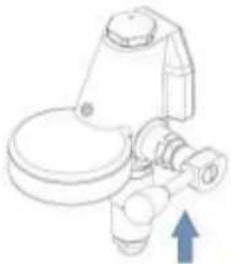 | |
| 4. Set the switch to the middle position (position II). | 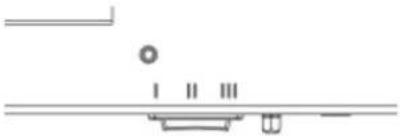 | |
| 5. Switch on the machine. | PRO 400: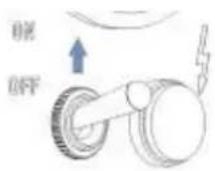 | JUMP: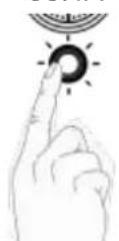 |
ENGLISH
| 6. PRO 400:The green LED flashes.JUMP:The display shows "Pi". | PRO 400: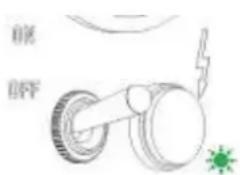 | JUMP: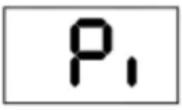 |
| 7. Set the switch to the rear position (position III) and then back to the middle position (position II). |  | 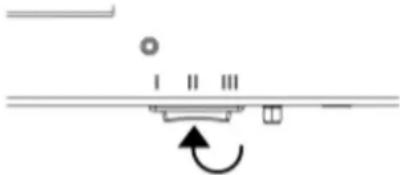 |
| 8. PRO 400:The setting is confirmed and saved when the green LED lights up (remains on for 3 seconds).JUMP:The display shows "Pi" and "oFF". | PRO 400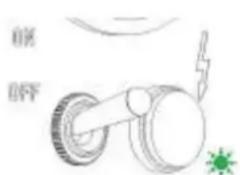 | JUMP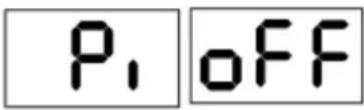 |
| 9. Pull the brew group lever down again and wait 5 seconds.PRO 400:The machine returns to normal operation.JUMP:The machine shows "ECo" for 5 seconds. To activate and deactivate Eco mode (see chapter 6.5). | 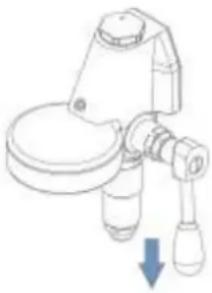 | |

Important
Ensure that the brew group lever remains in the upper position during adjustment.
6.5 The ECO mode
For reasons of sustainability, the machine is delivered with ECO mode activated. This value is set to 90 min by default. ECO mode switches off the heating of the boiler after 90 minutes of inactivity.
PRO 400: The green LED flashes and indicates that the machine is in ECO mode.
JUMP: A dot moves across the display indicates that the machine is in ECO mode.
To reactivate the machine from ECO mode, the brew group lever or switch can be operated. If the brew group lever is operated, it must be closed again so that no draw starts afterwards.
6.5.1 Deactivating ECO mode
| 1. Switch the machine off. | PRO 400: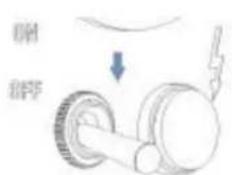 | JUMP: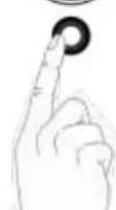 |
| 2. Ensure that the water tank is at least half full. | 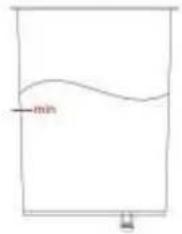 | |
| 3. Set the brew group lever up. | 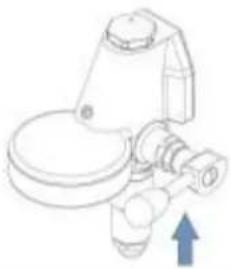 | |
| 4. Set the switch to the middle position (position II). |  | |
| 5. Switch on the machine. | PRO 400: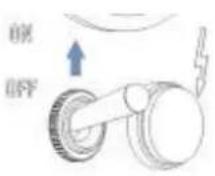 | JUMP: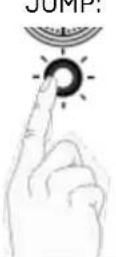 |
| 6. PRO 400:The green LED flashes.JUMP:The display shows "Pi". | PRO 400: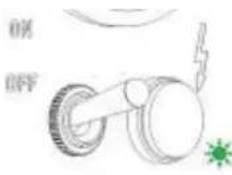 | JUMP: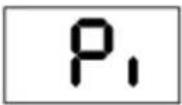 |
ENGLISH
| 7. Pull the brew group lever down.JUMP:The display shows "ECo".Now you have 5 seconds to change the setting.After this time, the machine automatically switches back to normal operation. | 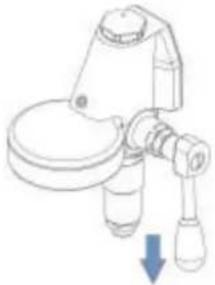 JUMP: JUMP: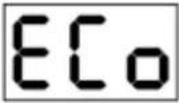 | |
| 8. Set the switch to the rear position (position III) and then back to the middle position (position II). | 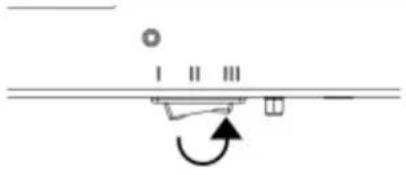 | 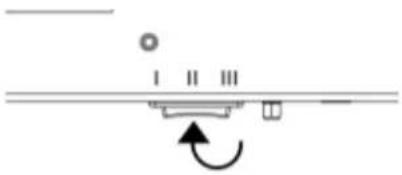 |
| 9. PRO 400:The setting is confirmed and saved by the green LED lighting up (3 seconds).JUMP:The display shows the message "ECo" and "oFF". | PRO 400: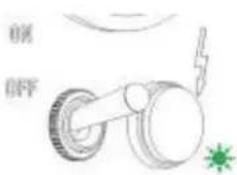 | JUMP: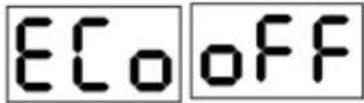 |
| 10. After a short pause of a few seconds, the machine returns to normal operation. | ||
6.5.2 Activating ECO mode
| 1. Switch the machine off. | PRO 400: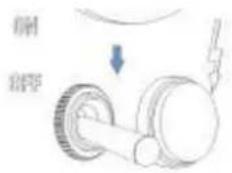 | JUMP: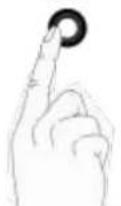 |
| 2. Ensure that the water tank is at least half full. | 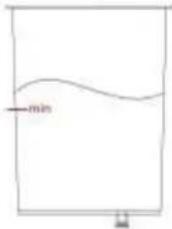 | |
ENGLISH
| 3. Set the brew group lever up. | 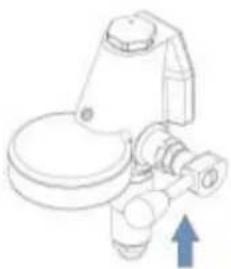 | |
| 4. Set the switch to the middle position (position II). | 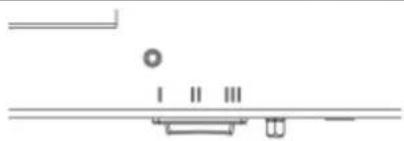 | |
| 5. Switch on the machine. | PRO 400: | .JUMP: |
| 6. PRO 400:The green LED flashes.JUMP:The display shows "Pi". | PRO 400: | JUMP: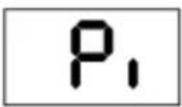 |
| 7. Pull the brew group lever down.JUMP:The display shows "ECo".Now you have 5 seconds to change the setting.After this time, the machine automatically switches back to normal operation. | 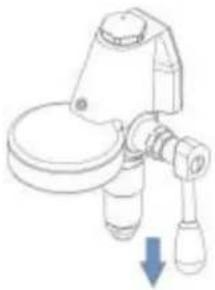 JUMP: JUMP: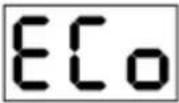 | |
| 8. Set the switch to the front position (position I) and then back to the middle position (position II). | 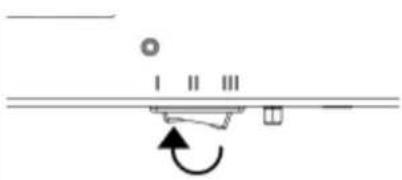 | 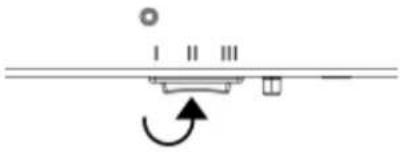 |
ENGLISH
| 9. PRO 400:The setting is confirmed and saved by the green LED lighting up (3 seconds).JUMP:The display shows the message "ECo" and "on". | PRO 400: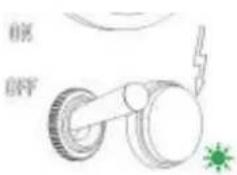 | JUMP: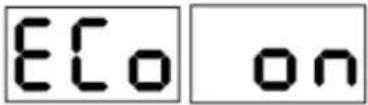 |
| 10. After a short pause of a few seconds, the machine returns to normal operation. | ||
6.6 Machine reset
You can reset the Pro 400 / JUMP to the factory settings.

To reset the Pro 400 / JUMP to factory settings, proceed as follows:
| 1. Switch the machine off. | PRO 400: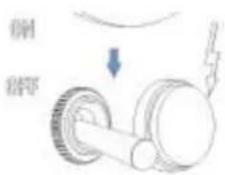 | JUMP: |
| 2. Ensure that the water tank is at least half full. | 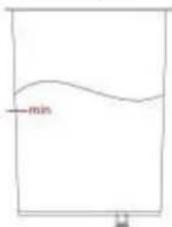 | |
| 3. Set the brew group lever up. | 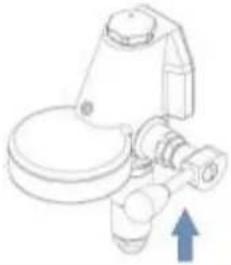 | |
| 4. Set the switch to the middle position (position II). | 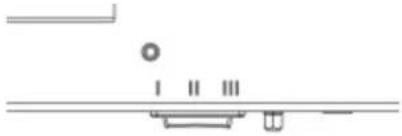 | |
ENGLISH
| 5. Switch on the machine. | PRO 400: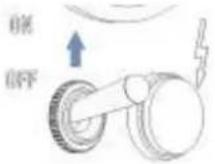 | JUMP: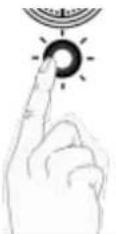 | |
| 6. PRO 400:The green LED flashes.JUMP:The display shows "Pi". | PRO 400: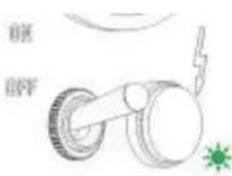 | JUMP: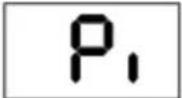 | |
| 7. Remove the water tank. | 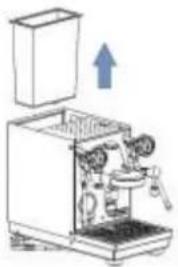 | ||
| 8. Replace the water tank. | 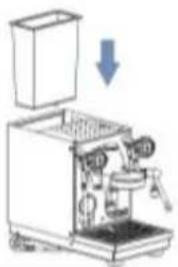 | ||
| 9. PRO 400:The setting is confirmed and saved by the green LED lighting up (3 seconds).JUMP:The display shows the message "rSt" | PRO 400: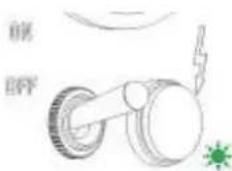 | JUMP: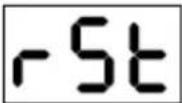 | |
| 10. Pull the brew group lever down again and wait 5 seconds.PRO 400:The machine returns to normal operation.JUMP:The display shows "ECo" for 5 seconds. To activates and deactivate Eco mode (see chapter 6.5). | 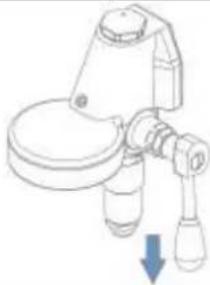 | JUMP: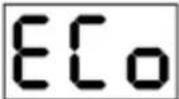 | |
6.7 JUMP: Setting for °C und °F
| 1. Switch the machine off. | 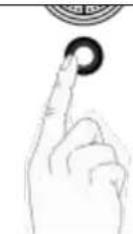 | ||
| 2. Make sure the water tank is filled to at least half | 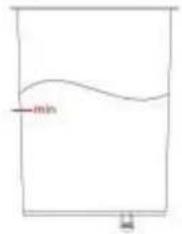 | ||
| 3. Set the switch under the machine to the front position (I) to set °C and to the rear position (III) to set °F. | 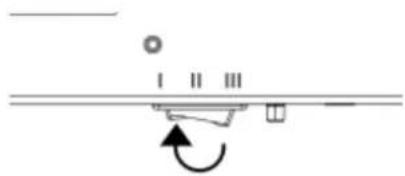 °C °C | 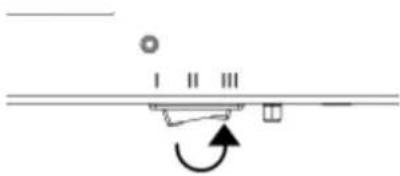 °F °F | |
| 4. Set the brew group lever up. | 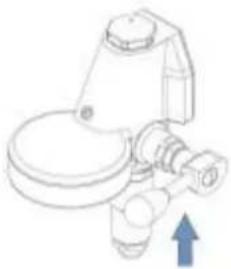 | ||
| 5. Switch on the machine. | 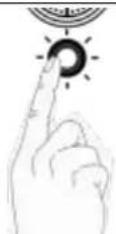 | ||
| 6. The selected setting is confirmed on the display with °C or °F. | 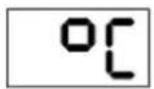 | 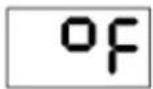 | |
| 7. Pull the brew lever down again and wait for five seconds. The machine switches back to normal operation. Your setting has been saved. | 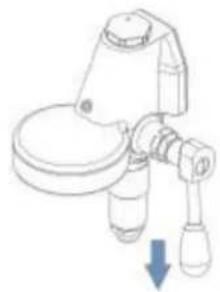 | ||
ENGLISH
6.8 Indicators
6.8.1 PRO 400 - LED indicators
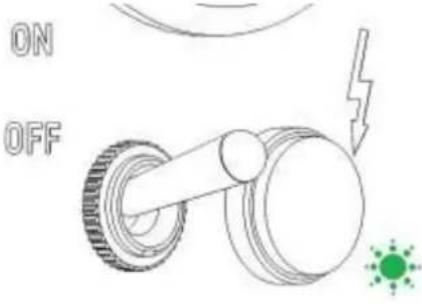 | LED lights up continuously: Machine is switched on. |
| LED flashes (2 seconds on - 1 second off): Water tank is empty/not inserted. | |
| LED flashes (3 seconds on - 1 second off): Machine is in ECO mode. | |
| LED flashes (1 second on - 1 second off): Machine is in setup mode. | |
| LED lights up for 3 seconds: Settings have been saved. |
6.8.2 JUMP - Display-indicators
 | LED lights up and the display shows nothing. The machine is switched on. | |
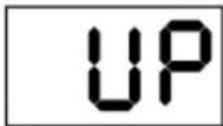 | The machine is heating up. | |
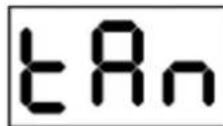 | Water tank is empty / not inserted correctly. | |
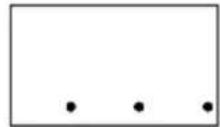 | Running light on the display. The machine is in ECO mode. | |
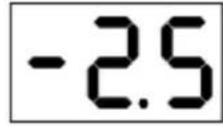 | The display shows active preinfusion. | |
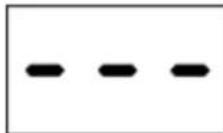 | The display shows the passive preinfusion. | |
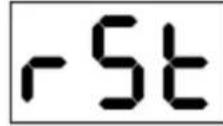 | A successful reset is confirmed. |
6.9 Preparing coffee
Use the portafilter with 1 spout and the corresponding filter (1 cup) for the preparation of 1 cup. Use the portafilter with 2 spouts and the big filter (2 cups) for the preparation of 2 cups. Make sure that the filter is securely locked into the portafilter.
ENGLISH
Fill the filter with ground coffee. (The marking inside the filter basket can help you find the right amount of coffee.)
Compress the ground coffee with the tamper. A tamping pressure of approx. 20 kg is recommended for even compaction. Securely clamp the portafilter into the brew group.
Place the cup under the spout of the portafilter (for the preparation of 2 cups, put 1 cup under each spout).
Now move the brew group lever into the upper position to start the brewing process. The volume for a single espresso is approx. 20 to 30 ml. Place the brew group lever back into the original position once the desired volume is reached.
The remaining pressure/water will be discharged into the drip tray through the lower part of the infusion cylinder.
The pump pressure can be read in the lower section of the gauge. If the ground coffee is too coarse, a brewing pressure of over 9 bars is not possible.
Note: After the brewing process, the gauge still indicates a certain pressure. Only when preparing another cup of coffee will the build-up of pressure be visible again.
 | Caution!If the brew group lever is not moved into the lower position properly, hot water and grounds will squirt out of the brew group while taking out the portafilter. This may cause injuries. |
 | Important!Only freshly ground coffee allows for an optimal coffee result. Therefore, use a professional coffee grinder. In our assortment you will find several professional and compact coffee grinders. |
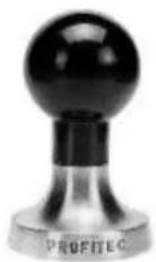
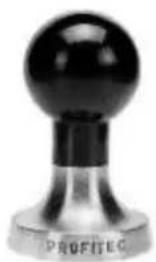
 | We recommend using the Profitec stainless steel tamper with a diameter of 58.4 mm for optimum tamping. |
6.9.1 Dispensing of hot water and steam

6.9.2 Dispensing of hot water
1 Place a suitable water container (with a heat-insulated handle) under the hot water wand. After moving the power switch into the lower position, you can dispense water (e.g. for tea) by opening the hot water valve.
2 After dispensing water, switch the machine on again. The boiler will be filled with water automatically.
 | When the machine is switched off, it is possible to dispense.However, one does not necessarily have to switch off the machine for dispensing hot water. |
 | Caution!To prevent injuries from hot water, always place the nozzle of the wand into the water container. |
6.9.3 Dispensing of steam
The PRO 400 / JUMP is equipped to produce significant amounts of steam for heating or frothing beverages such as milk or punch. It is a professional and compact espresso coffee machine with a large steam volume, allowing you to prepare milk froth within a few seconds.
Do not bring the milk to a boil, otherwise it will not be possible to froth the milk.
1 Important: To get the best result when frothing milk, open the steam valve for approx. 5 seconds to release the condensation water in the pipe.
2 Immerse the steam nozzle (at the end of the steam dispenser) in the liquid.
3 Re-open the steam valve.
4 Heat and/or froth the liquid.
ENGLISH
5 After frothing or heating, release the steam into the drip tray to keep the holes of the steam nozzle clean.
 | Risk of injuryAlways keep the steam nozzle underneath the surface of the liquid while heating or frothing to avoid being sprayed by steam. |
 | ImportantAfter every application, clean the steam nozzle and wand with a non-abrasive, damp cloth to remove possible liquid residue. |
 | Risk of injuryAvoid skin contact with the steam nozzle and wand while cleaning! |
7 CLEANING AND MAINTENANCE
Regular and accurate care is very important for the performance, longevity, and safety of your machine.
 | Caution!Always switch off the machine (power switch in lower position), disconnect the power cord and let the machine cool down to room temperature (for at least 30 minutes) before cleaning.Never submerse the machine in water; there is a danger of an electric shock. |
7.1 General cleaning
Daily cleaning:
The portafilters, filters, water tank, drip tray, drip plate of the drip tray and tamper require daily cleaning. Clean with warm water and/or with a food safe detergent.
Clean the shower screen and the group gasket in the lower part of the group and remove visible dirt without disassembling the parts.
 | Please note: the portafilters, drip tray, water tank and tamper are not dish washer safe. |
Cleaning as necessary:
Clean the steam and hot water wands after every use.
Clean the machine when it has been switched off and cooled down.
Depending on usage, please refresh the boiler water every 2 – 3 weeks by discharging about 0.8L of hot water from either the hot water wand or brew group.
 | Use a soft, damp cloth for cleaning.Never use abrasive or chloric detergents! |
Empty the drip tray regularly before it is full to avoid spillage.
7.2 Brew group cleaning
Brew group cleaner is available at your specialized dealer allowing you to clean and degrease the brew group very easily with the included blind filter. Brew group cleaning should be carried out after approx. every 90 - 140 cups.
Follow the instructions carefully:
1 Heat up the machine until the operating pressure has been reached (1.0-1.2 bar).
2 Clean the brew group using the brew group brush.
3 Place the blind filter into the portafilter.
4 Fill the blind filter with group cleaner according to the package instructions.
5 Clamp the portafilter into the brew group.
6 Operate the brew group lever. The blind filter will fill with water.
ENGLISH
7 Let the detergent react, moving the group lever into the middle position, approx. 45^ . [Do not move it into the lower position.]
8 Move the lever into the lower position after approx. 20-60 seconds to allow the fats and oils to be discharged by the infusion cylinder.
9 Repeat steps 5-7 up to 10 times, until only clear water is discharged out of the infusion cylinder.
10 Rinse the portafilter and the blind filter with fresh water. Then replace it.
11 Operate the brew group lever for approx. 40 seconds. Then move it back into the lower position.
12 Remove the portafilter and repeat step 10. After this, the brew group is ready for use.
13 Replace the blind filter with the coffee sieve again for normal operation.
 | Caution!Beware of hot water while cleaning the group. |
 | If you clean the brew group to often with cleaner, it may start squeaking. Do not clean it too often with cleaner, as it can degrease all the moving parts and risk wearing them out prematurely. It is recommended to clean the brew group from time to time without cleaner. |
Empty the water drip tray regularly and do not wait until it is full.
7.3 Maintenance
 | Caution!Make sure that the machine is disconnected from the power supply during maintenance and when replacing parts. |
Replacing the group gasket and the shower screen
1 Switch off the machine (power switch in position "0") and disconnect the power cord.
2 Let the machine cool down to room temperature.
1Brew group in the beginning.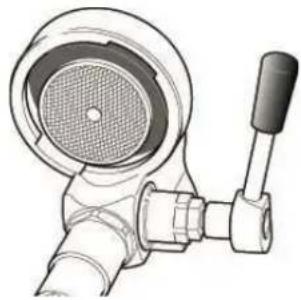 | 2Use a flat screwdriver to carefully pry out the shower screen and the group gasket.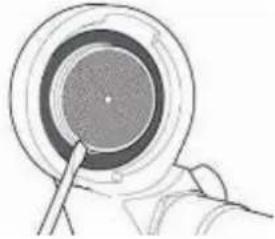 | 3The shower screen and the gasket are now nearly removed.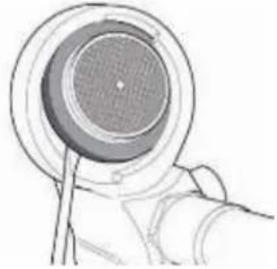 |
4Remove the shower screen and the gasket completely.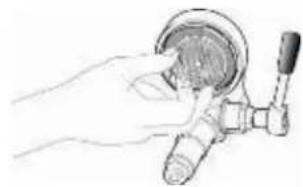 | 5Keep the new spare parts ready at hand (the rounded side of the group gasket faced upwards to the brew group).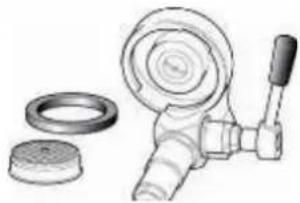 | 6Clean the group with a brush.Lock the shower screen firmly into the gasket.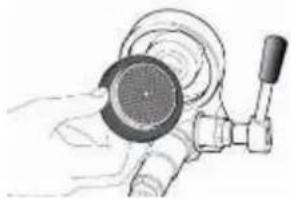 |
ENGLISH
7Insert the shower screen into the brew group.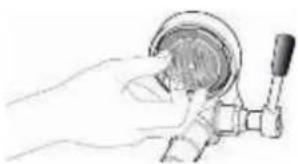 | 8Take the portafilter without filter.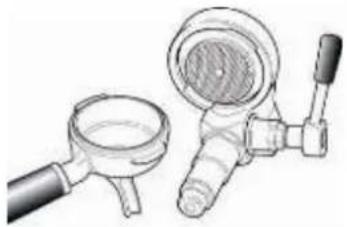 | 9Clamp the portafilter into the brew group.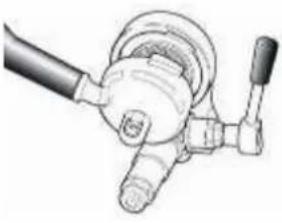 |
10Then, move the portafilter until the shower screen is locked firmly into the gasket.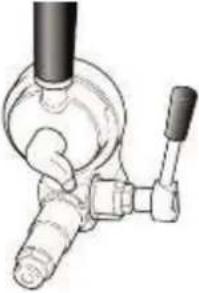 | 11Now you can easily lock the portafilter into place.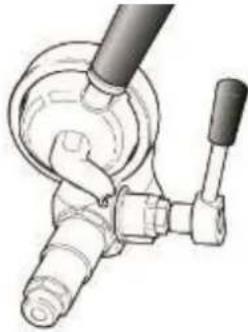 | 12The group is ready for use.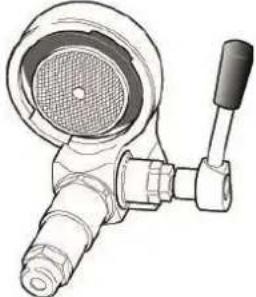 |
The machine is ready to be used again, as described in chapter 6 of the user manual.
The steam nozzle is blocked
Clean the holes of the steam nozzle carefully with a needle or similar.
The steam nozzle may be unscrewed as well to assist in its cleaning.

Important
Do not lose the small gasket situated between the steam nozzle and the thread!
Afterwards, replace the steam nozzle.
8 TRANSPORT AND WAREHOUSING
8.1 Packing
The PRO 400/JUMP is delivered in a special carton and protected by a plastic cover and foam.


Caution!
Keep packing out of the reach of children!
Important
Keep packing and packing material for possible transport! Do not throw it away!
8.2 Transport

- Transport the machine in an upright position only. If possible, on a pallet.
- Do not tilt or turn the machine over.
- Do not stack more than three units on top of each other.
- Do not place other heavy items on the packing.
- Do not expose the machine to inclement weather (frost, snow, rain)
8.3 Warehousing

- Keep the machine packed in a dry place.
- Do not stack more than three units on top of each other.
- Do not place other heavy items on the packing.
9 DISPOSALS

This product complies with EU Directive 2012/19/EU and is registered according to WEEE (Waste Electrical and Electronic Equipment).
10 TROUBLESHOOTING
| Problem | Possible Cause | Troubleshooting |
| Little or no crema on the top of the coffee. | The grind is not fine enough. | Use a finer grind.Tamp the ground coffee more firmly.Reduce the brewing pressure. |
| The coffee is too old. | Use fresh coffee | |
| There is too much chlorine in the water. | Use a chlorine filter. | |
| The amount of ground coffee is not enough. | Use the recommended coffee amount.(The marking inside the filter basket can help you find the right amount of coffee) | |
| The shower screen is dirty. | Clean the brew group. | |
| Sparse coffee dispensing, only drop by drop. | The grind is too fine. | Use a coarser grind.Tamp ground coffee only slightly.Increase the brewing-pressure. |
| There is too much ground coffee. | Use the recommended coffee amount.(The marking inside the filter basket can help you find the right amount of coffee) | |
| Weak “body” | The grind is not fine enough. | Use a finer grind. |
| The coffee is old. | Use fresh coffee. | |
| The amount of ground coffee is not enough. | Use the recommended coffee amount.(The marking inside the filter basket can help you find the right amount of coffee) | |
| The shower screen is dirty. | Clean the shower screen. | |
| Foam instead of crema. | The beans are improper. | Use another coffee bean. |
| The setting of the coffee grinder is not suited for the coffee beans in use. | Adjust the coffee grinder. (When changing the coffee beans, changing the grind can also be necessary.) | |
| The coffee is too fresh. | Depending on the roast, it is recommended to let roasted coffee rest for 10-21 days after roasting. | |
| Portafilter/ brew group is dripping. | Portafilter is not fixed properly. | Ensure the portafilter is properly clamped. |
| Group gasket is broken. | Replace the group gasket (see section 7.3) |
ENGLISH
| Problem | Possible Cause | Troubleshooting |
| PRO 400:The green LED flashes (3 seconds on - 1 second off) indicating that the machine has stopped heating.JUMP:The display shows a running light, signaling that the machine is no longer heating. | ECO mode is activated. | Operate the brew group lever for a short time. How to deactivate the ECO mode is described in section 6.5.1. |
| PRO 400:The green LED flashes (1 second on - 1 second off)JUMP:The display permanently shows the message "Pi". | You are in the setup mode | Pull the brew group lever down and wait 5 seconds. |
| The machine is switched on, but the machine does not work. | PRO 400:The green LED flashes (2 seconds on - 1 second off)JUMP:The display shows the message "tAn"There is not enough water in the water tank or tank is not inserted correctly. | Refill water or ensure the water tank is properly inserted. |
| Water was refilled,PRO 400: LED flashes.JUMP:The display shows "tAn" | Switch off/on the machine.Make sure that the floater in the water tank is in the correct position. (The side of the floater with the magnet must face towards the inside of the machine. The floater itself must be inserted with the magnet on the upper part of the floater.)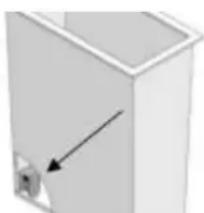 | |
| The water tank is not inserted properly. | Insert the water tank properly. | |
| The coffee extraction (pump) starts for a few seconds, stops and starts again.JUMP:The display shows a negative countdown followed by three dashes ("--"). | Preinfusion mode is activated. | Deactivate the preinfusion (see section 6.4.2). |
| Perform a reset of the machines.(see section 6.6) |
ENGLISH
If the machine is not to be used for a long period of time, it is recommended to:
.. clean the brew group (see instructions in chapter 7.2). Afterwards, please do not clamp the portafilter back into the group.
.. empty the boiler. Switch the machine off (power switch in position "OFF") and open the hot water dispenser. Due to the boiler pressure, the boiler water is now discharged by the hot water dispenser. Close the hot water valve again after emptying the boiler. To restart the machine, see chapter "First use".
How to froth milk like a "barista"
- If possible, use cold milk, so you have longer time to froth the milk. The fat content of the milk is not relevant, the protein content is important. Even homogenized milk is suitable - if you prefer.
- Use a metal frothing container with a minimum volume of 350 ml. The container should not be too wide. A narrow, high container is recommended.
- Open the steam valve for approx. 5 seconds to release the water condensation and to create dry steam.
- Fill 1/3 of the frothing container with milk and place it under the steam nozzle. The nozzle should be immersed in the middle of the frothing container, just below the surface.
- Slowly open the steam valve, steaming the milk.
- Keep the frothing container still.
- After a few seconds you will notice a light suction in the milk jug as frothing begins. Lower the milk jug as the milk level increases. The steam nozzle must be kept under the surface of the frothed milk.
- Attention: When the desired amount of milk froth has been reached, immerse the entire steam nozzle in the frothing container for a short time and close the steam valve.

Milk proteins "froth" at temperatures up to 77°C.
Once this temperature is exceeded, the milk will not froth any further.
- Advice: When milk frothing is finished, just shake the frothing container a little bit to make the milk bubbles ascend to the surface and to get a more compact milk froth.
- After frothing the milk, release the steam into the drip tray to remove milk residue and avoid any blockage of the steam nozzle.
11 RECOMMENDED ACCESSORIES
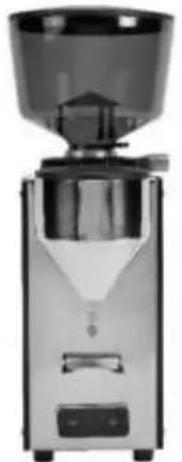
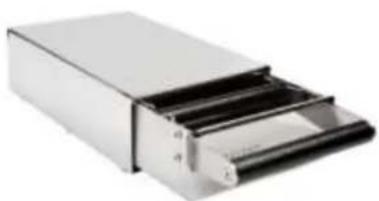
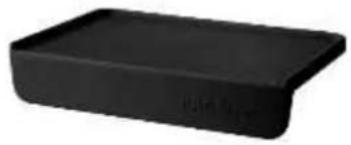
For a perfect coffee result a professional grinder is as important as a good coffee bean.
You will find professional grinders and perfect accessories to complete your set on our website at www.profitec-espresso.com
natural_image
Exterior view of a modern commercial coffee maker (no visible text or labels)Grinder PRO T64
natural_image
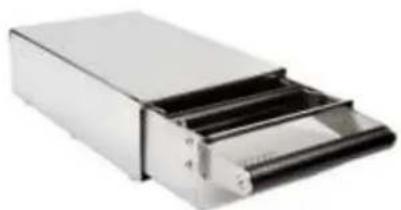
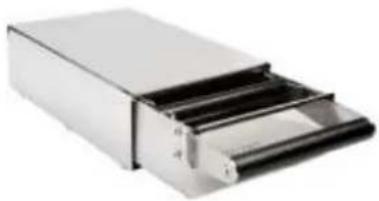
Exterior view of a modern office building (no signage)Knockbox M (drawer)
natural_image
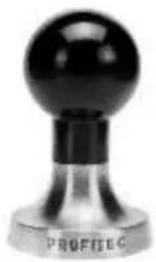
Close-up of a metallic stamp or knob with a glossy black top and engraved text 'PROFITEC' at the base (no other readable text)Tamper
ENGLISH
natural_image
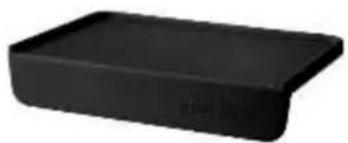
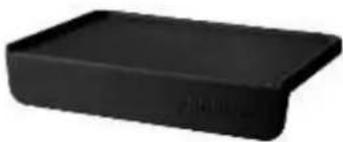
Black rectangular object with a flat top and rounded bottom, resembling a tray or container (no visible text or symbols)Tamper pad
natural_image
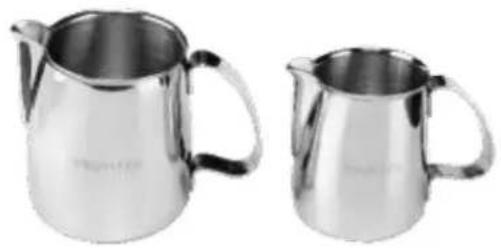
Two stainless steel pitcher cases shown side by side, no text or symbols visibleMilk pitcher
1 LIVRAISON DU PRODUIT
1 porte-filtre 1 bec
1 porte-filtre 2 becs
1 filtre 1 tasse
1 filtre 2 tasses
1 filtre aveugle
text_image
Labeled diagram of a mechanical device with numbered components and a close-up view showing internal components.text_image
Labeled diagram of a coffee machine with numbered parts, showing internal components and a close-up view of the base panel.natural_image
Technical line drawing of a mechanical assembly with an inset magnified view showing a component detail (no text or symbols present)| 120°C (248°F) (Pos. I) | 124°C (255,2°F) (Pos. II) | 128°C (262,4°F) (Pos. III) |
natural_image
Exterior view of a modern glass and straw mixer (no visible text or symbols)Moulin PRO T64
natural_image
Exterior view of a modular electronic device with metallic casing and black insulation layers (no text or symbols visible)Knockbox M (tiroir)
natural_image
Close-up of a black and white reflective stamp or knob with a glossy surface (no visible text or symbols)Pilon
natural_image
Black rectangular plastic tray or container with rounded edges (no visible text or symbols)Tampon pilon
natural_image
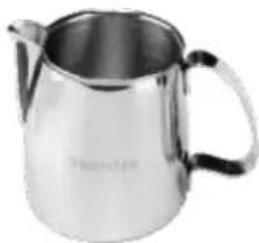
Metallic pitcher with handle and spout, no visible text or symbolsPichet à lait
natural_image
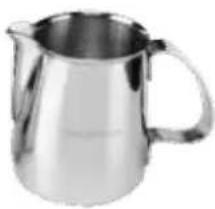
Metallic pitcher with handle and spout (no text or symbols visible)Notizen / Notes / Note
Notizen / Notes / Note
Notizen / Notes / Note