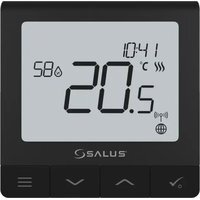
SQ610BRF - Thermostat Salus - Free user manual and instructions
Find the device manual for free SQ610BRF Salus in PDF.


| Product Type | Wireless Room Thermostat |
| Brand | Salus |
| Model | SQ610BRF Quantum |
| Dimensions (W x H x D) | 86 x 86 x 11 mm |
| Weight | Approximately 150 g (with battery) |
| Power Supply | Rechargeable Li-Ion battery 3.7 V, charging via micro-USB 5 V DC (min 0.5 A) |
| Battery Life | Up to several months depending on usage |
| Communication Protocol | ZigBee 2.4 GHz |
| Setpoint Temperature Range | 5 °C to 40 °C |
| Measurement Accuracy | 0.5 °C or 0.1 °C |
| Control Algorithms | ITLC, Hysteresis (±0.25 °C / ±0.5 °C), THB |
| Main Functions | Scheduling, manual mode, holiday mode, key lock, occupancy detection (hotel card), start/stop optimization, valve protection, floor compensation |
| Multifunction Inputs (S1/S2) | Floor sensor, external ambient sensor, dry contact (ON/OFF, occupancy, heating/cooling changeover) |
| Display | LCD screen with icons (heating, cooling, RF, Internet, occupancy, lock, etc.) |
| Compatibility | UGE600 Gateway (online mode), CO10RF coordinator (offline mode), other Salus Smart Home devices (KL08RF, TRV, RX10RF, SR600, SPE600, OS600, SW600) |
| Installation | Wall-mounted, surface-mounted, 1.5 m from the floor, away from direct sunlight and drafts |
| Protection Rating | IP30 |
| Protection Class | Indoor use only |
| Operating Temperature | 0 °C to 45 °C |
| Maintenance and Cleaning | Disconnect the device, clean with a dry, soft cloth. Do not use abrasive products. |
| Safety | Installation by a qualified professional in accordance with national and European regulations. Do not expose to moisture, excessive heat, or shocks. |
| Spare Parts and Repairability | Built-in rechargeable battery (replacement by a professional). No other spare parts available. Repair only by authorized service. |
| General Information | Compliant with directives 2014/30/EU, 2014/35/EU, 2014/53/EU and 2011/65/EU. Declaration of conformity at www.saluslegal.com. |
Frequently Asked Questions - SQ610BRF Salus
User questions about SQ610BRF Salus
0 question about this device. Answer the ones you know or ask your own.
Ask a new question about this device
Download the instructions for your Thermostat in PDF format for free! Find your manual SQ610BRF - Salus and take your electronic device back in hand. On this page are published all the documents necessary for the use of your device. SQ610BRF by Salus.
USER MANUAL SQ610BRF Salus

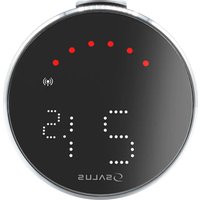
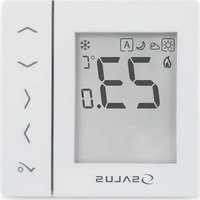
SQ610BRF | SMART THERMOSTAT
SALUS SMART HOME READY

WIRELESS CONTROL

RECHARGEABLE BATTERY

COMFORT OF A WARM FLOOR

5 YEAR WARRANTY
SALUS





EASY INSTALLATION
MULTIFUNCTIONALITY
HUMIDITY SENSOR


Introduction
The SQ610BRF Quantum is a ZigBee temperature controller for wireless control of iT600 series devices, such as the KLO8RF wiring centre, mini TRV head, RX10RF boiler control module.
In order to control SQ610BRF over the Internet or via the SALUS Smart Home mobile app (ONLINE mode), it must be installed together with the UGE600 Internet gateway (sold separately). From the application level, it is possible to pair SQ610BRF with other system elements, e.g. Smart Plug SPE600, Smart Relay SR600 or window/door sensor OS600/SW600.
SQ610BRF can be used locally without an Internet connection (OFFLINE mode), however, it's communication with other devices must be done using the C010RF coordinator (sold separately).
Full manual in PDF format is available at www.salus-controls.eu site.
Product Compliance
This product complies with the essential requirements and other relevant provisions of Directives 2014/30/EU, 2014/35/EU, 2014/53/EU and 2011/65/EU. The full text of the EU Declaration of Conformity is available at the following internet address: www.saluslegal.com.

Safety Information
Use in accordance to national and EU regulations. Use the device as intended, keeping it in dry condition. Product for indoor use only. Installation must be carried out by a qualified person in accordance to national and EU regulations. Disconnect your equipment before cleaning it with a dry cloth.
Package Content:
1) SQ610BRF Quantum Thermostat
2) Wall mounting plate
3) Self-adhesive mounting tape
4) Mounting screws
5) Manual instruction
Before you start:
New SQ610BRF Quantum Thermostat is partially charged, however, we recommend you to fully charge the battery before use.
Connect charger to micro-USB Port which is at the bottom of SQ610BRF Quantum Thermostat to charge the device.
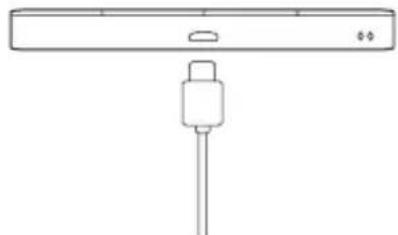
Charging to full battery level may take up to 24h maximum.
3 Mounting: to mount thermostat you can use included accessories (mounting screws or self-adhesive tape). Remove back cover to mount the plate to the wall. After this just attach thermostat to the plate (it has built-in magnet).

Please note:
The ideal position to thermostat mounting is about 1,5m from floor level far from heating or cooling sources. Thermostat can't be exposed to sunlight or any extreme conditions like for example draft.
2 Wiring diagram (S1, S2 Input)
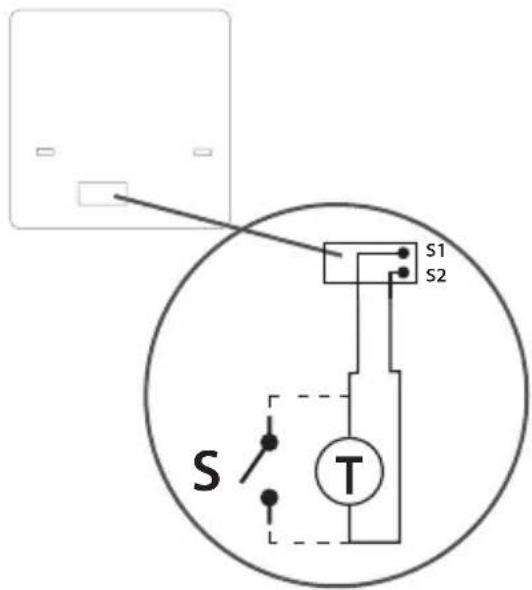
Symbols explanation:
S-volt-free contact
T - temperature sensor
S1,S2 Terminals:
-air or floor temperature sensor
external volt-free contact to connect any
ON/OFF switch or occupancy sensor (Hotel card)
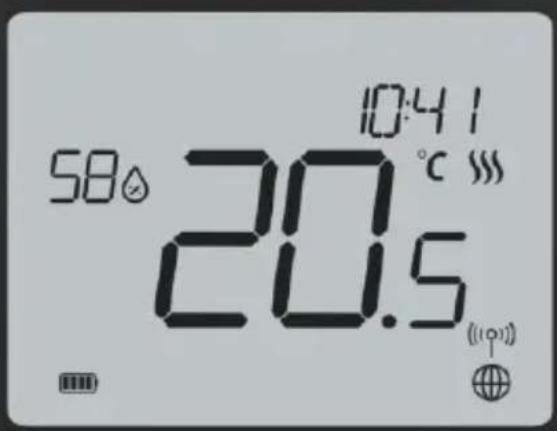
LCD Icon Description
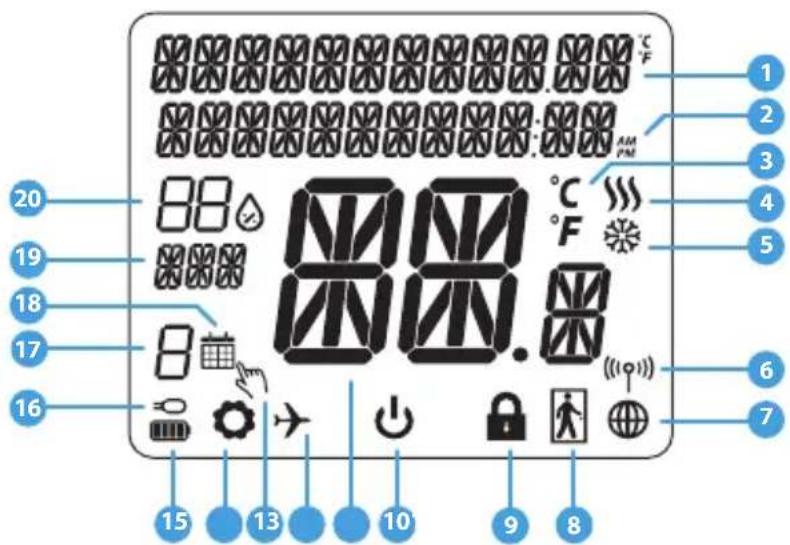
- Menu/Settings description + Clock
- AM/PM
- Temperature unit
- Heating indicator (icon is animating when there is heating demand)
- Cooling indicator (icon is animating when there is cooling demand)
- RF Connection indicator
- Internet connection indicator
- Occupancy sensor (hotel card)
-
Key lock function
-
Standby mode icon
- Current Temperature / Setpoint Temperature
- Holiday mode
- Temporary override mode
- Settings icon
- Batery status indicator
- External / Floor temp sensor indicator
- Schedule program number
- Schedule mode icon
- Day indicator/ SET information
- Current Humidity value
| Buttons Description | |
| Button Function | |
| = | 1) Menu button / Return button. 2) In the MAIN SCREEN: Press and hold for 3 sec to change the thermostat operating mode (Schedule mode / Permanent mode / Temporary override mode). 3) In the SETTINGS SCREEN: Press and hold for 3 sec to go back without saving the changes. 4) In the PAIRING SCREEN (in SYSTEM TYPE Menu): Press and hold for 3 sec to see other pairing options. |
| \ | "Down" Button (Decrease parameter value/moving on the menu in 'DOWN' direction) |
| \ | "Up" Button (Increase parameter value/moving on the menu in 'UP' direction) |
| √ | 1) Press and hold for 3 seconds to POWER UP new device 2) "OK / Tick" Button (Confirm parameter value / Go to the next menu / Save settings) 3) In the MAIN SCREEN: Press and hold for 3 seconds to enter Standby mode 4) In the SETTINGS SCREEN: Press and hold for 3 sec to go back to the MAIN SCREEN & SAVE all the changes. 5) During PAIRING process - hold button for 3 seconds to POWER OFF or REBOOT the thermostat. |
| + | In the MAIN SCREEN - press and hold these buttons together for 3 seconds to LOCK / UNLOCK the Thermostat keys). |
COMPATIBILTY WITH OTHER SALUS CONTROLS DEVICES
Quantum Thermostat can work in ONLINE or OFFLINE mode.
At first step you need to decide in which mode your thermostat will work.
Download the Smart Home App on your iOS or Android device for remote access to your SALUS equipment.
Universal Gateway is CONNECTED TO THE INTERNET
You can configure and use all your devices in the Smart Home App

SALUS Smart Home
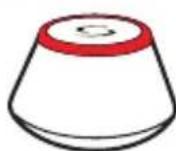
OR
Universal Gateway is NOT CONNECTED TO THE INTERNET
You can use your devices locally without the SmartHome App Gateway works in this mode as standard ZigBee coordinator.
C010RF Coordinator - You can use standard ZigBee network coordinator to install and use your devices.
Compatible devices:
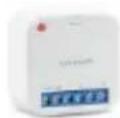
SR600* Smart Relay
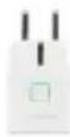
SPE600* Smart Plug
*Only with Online Mode
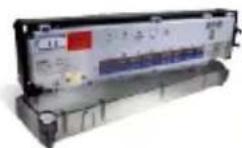
KLO8RF
Wiring Centre for 8-zone underfloor heating (UFH).
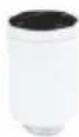
(Thermostatic Radiator Valve) with wireless communication.
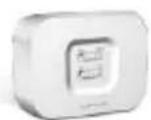
RX10RF receiver
First power up sequence

Please note:
For easier installation, please make sure you have already added other devices to your ZigBee network, such as Underfloor Heating Control Box (KL08RF) or Radiator heads (TRV's) etc.
1
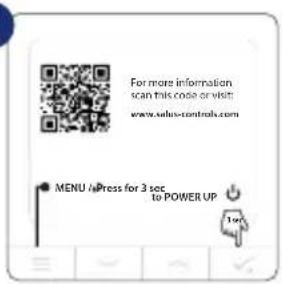
Remove the protection foil
2

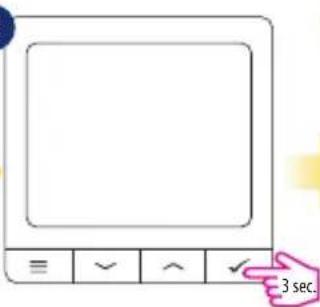
To power on the Thermostat hold · button for 3 seconds...
3
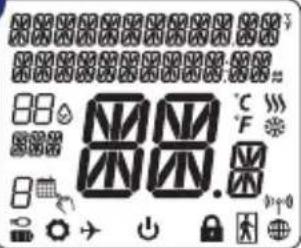
...display will show all icons...
4
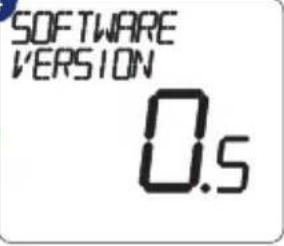
...then thermostat will display the software version.
5
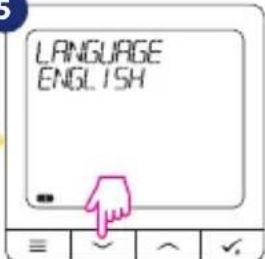
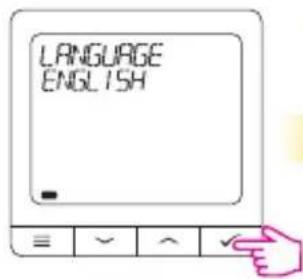
Now, choose your language by "or" buttons. Confirm your language by button.
Installation in ONLINE mode
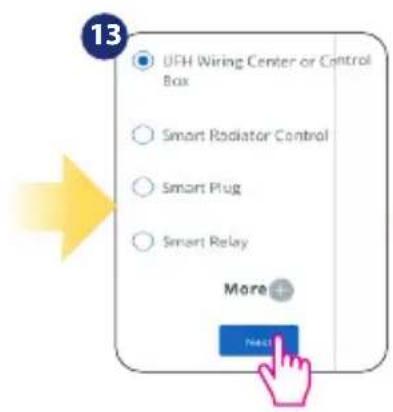
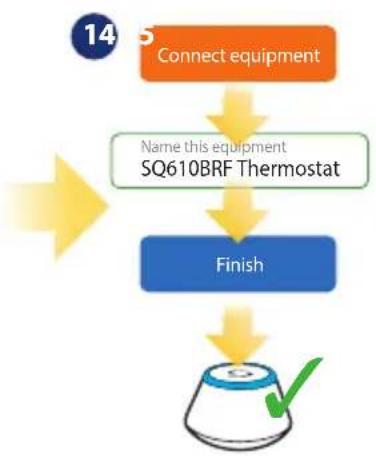
After Language selection follow below steps to add your device to the Smart Home app and pair with other devices:

1
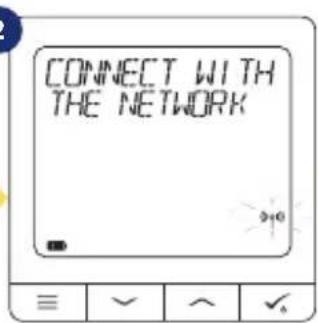
2
3
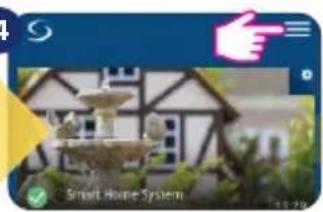
4
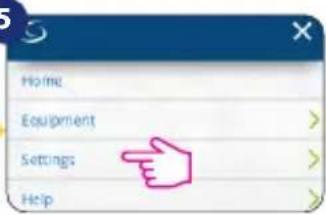
5
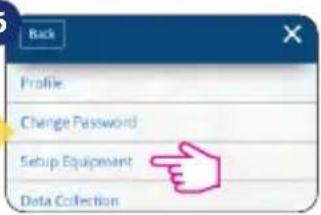
6
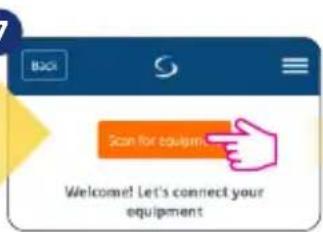
7
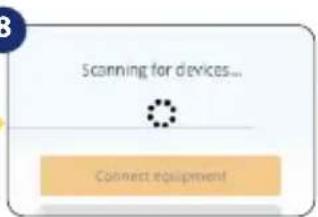
8
9
GO TO SMART HOME APP
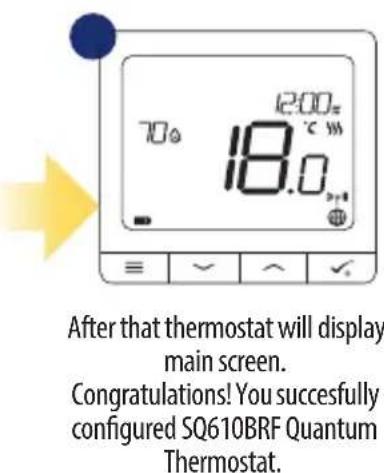
Once your thermostat is added to the app you will see above screen on the LCD.
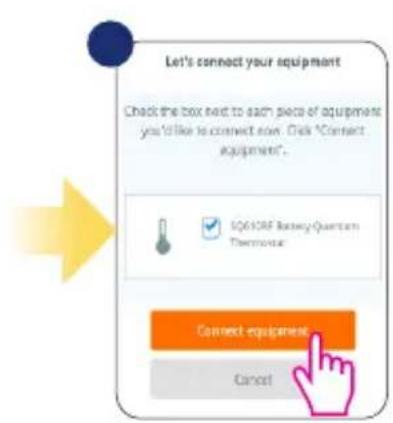
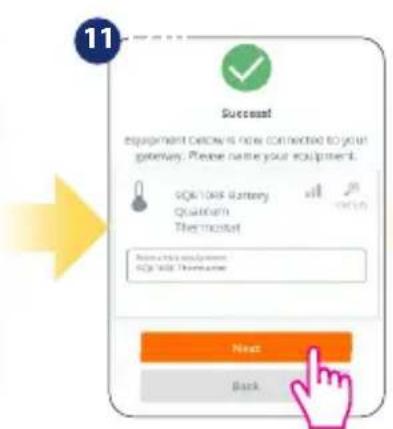
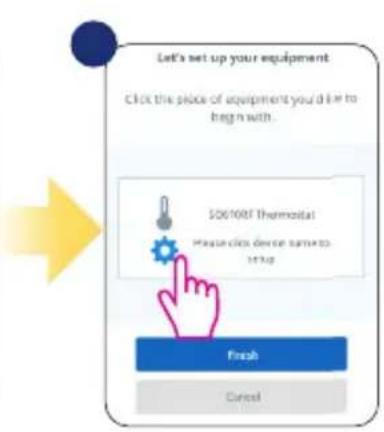
Installation in OFFLINE mode
Pairing with Wiring Centre / Control Box (Install the Wiring Centre / Control Box according to the instructions included with product)


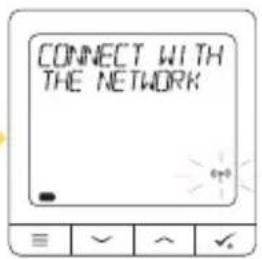

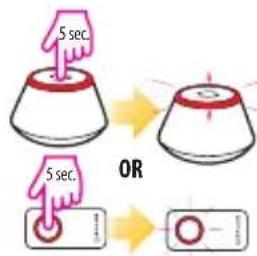
Open the ZigBee network

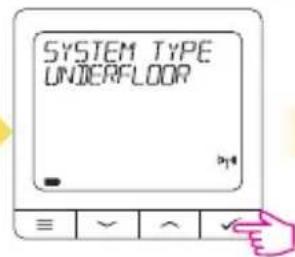


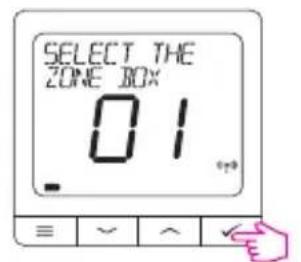
Select system type: UNDERFLOOR, press button to confirm.
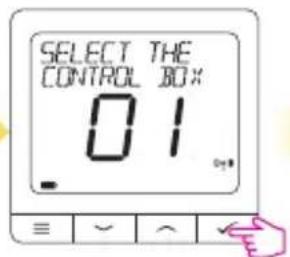
Using and buttons select the Control Box number (press PAIR button on the Control Box to see its address number). Press button to confirm.
Use or buttons to select the zone number and press button to confirm.

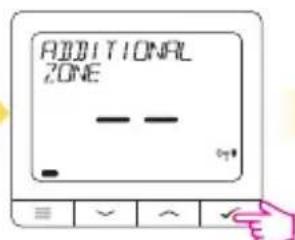

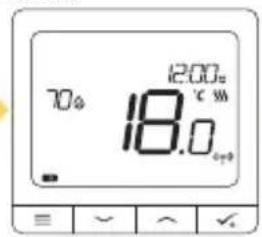

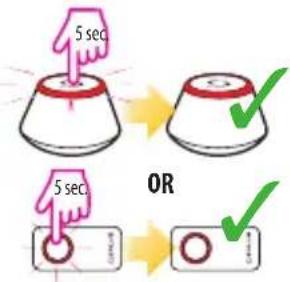
Close the ZigBee network
Now you can pair your thermostat with additional zones. Select one more zone or finish the pairing process by button.
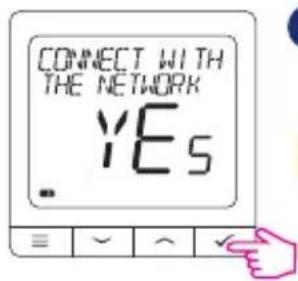
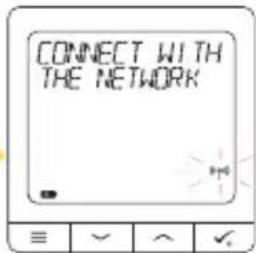
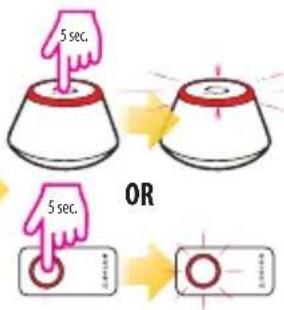
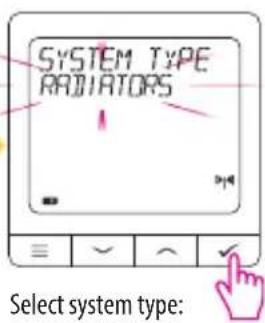
Pairing with TRV radiator head (Install the TRV according to the instructions included with product)
1
2
3
Open the ZigBee network
4
5
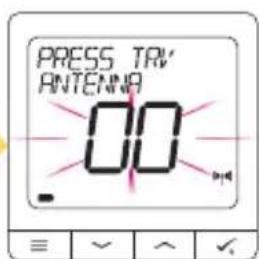
Now hold antenna button for 10 sec. on all TRV's which you want to pair with your Termostat.
6
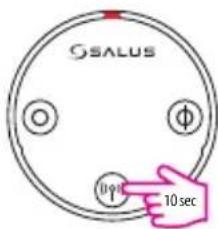
You can pair up to 6 TRV's with 1 Thermostat. All TRV's have to within the same room with Thermostat.
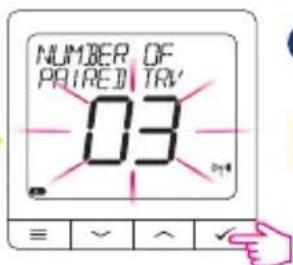
7
8
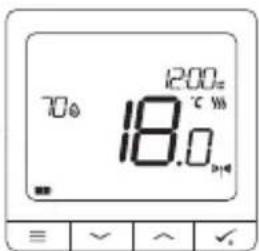
9
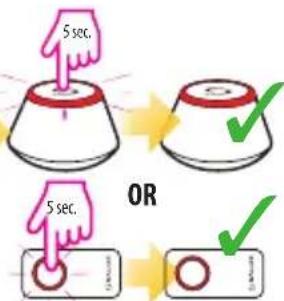
Close the ZigBee network
SQ610BRF Full menu structure

Main menu
Schedule settings
DISABLE
MO-FR+SA-SU
MO-SU
SINGLE DAYS
User settings
TIME/DATE
HOLIDAY MODE
THERMOSTAT CALIBRATION
SHOW/HIDE DISPLAY FLOOR
STANDBY TEMP SETPOINT
HEAT/COOL
RESET USER SETTINGS
Admin settings
TEMPERATURE SCALE
DISPLAY TEMPERATURE RESOLUTION
HEAT CONTROL ALGORITHM
COOL CONTROL ALGORITHM
S1/S2 INPUT3.
MINIMUM SETPOINT
MAXIMUM SETPOINT
VALVE PROTECTION
OPTIMISATION FEATURE
COMFORT WARM FLOOR
PIN CODE
DEVICE INFORMATION
FACTORY RESET
Language
ENGLISH
DANISH
POLISH
华
Short description of some selected functions (all functions are described in the full version of the SQ610BRF manual):
- DISPLAY TEMP RESOLUTION: This function determines the resolution of the displayed temperature - User can temperature set by steps (every 0,5^ or 0,1^ ).
- CONTROL ALGORITHM: This function defines how to control the room temperature. Available options are: ITLC for Underfloor Heating / Radiators / Electrical Heating (that's advanced algorithm for precise maintenance of room temperature), hysteresis +/-0.5^ or +/-0.25^ , THB Actuator (option recommended for systems with THB auto balancing actuators).
- S1/S2 INPUT: A floor sensor, an external temperature sensor or an occupancy sensor can be connected to the S1/S2 input of SQ610BRF. Additionally, by connecting a NO type of ON/OFF voltage-free contact, you can use this input as a OneTouch rules trigger (programmed in the Salus Smart Home app) or as a Heat/ Cool changeover.
- VALVE PROTECTION: This function activates all actuators once a week for 5 minutes (in summer, this function helps to prevent the actuators stuck).
- MIN TURN OFF TIME: Minimum switch-off time (thermostat will not send the signal for heating/ cooling more often than specified in this parameter).
- OPTIMISATION FEATURE: Optimum Start and Optimum Stop functions are energy saving features that makes thermostat most cost effective (in combination with ITLC control algorithm).
- COMFORT WARM FLOOR: This function helps to keep the floor warm, even if the room is warm enough and there is no need to turn on the heating. User can select 3 levels of warm floor feature. Please note it is not an economy feature, as your heating system may be ON even if there is no heating demand from the room thermostat. It is COMFORT feature which keeps your floor warm all the time.
- DEVICE INFORMATION: In this menu user can check: Software Version, Battery Level, RF range value, Paired devices or also user can activate Identification mode.
- FACTORY RESET: Here you can RESET your device to factory settings. After successful reset device will be removed from ZigBee network and you will need to add / pair your device again.
Einleitung:
| QUANTUM SQ610BRF | |
| Power Supply Built-in Li-Ion 3,7V | Battery |
| Charging voltage (no charger included) | Micro-USB 5V DC, min 0,5 A |
| Temperature range 5-40°C | |
| Display temperature accuracy 0.5° | or 0.1°C |
| Control algorithm ITLC | SPAN (±0.25°C / ±0.5°C) THB |
| S1-S2 Input (multifunctional input) | Floor temperature Air temperature Occupancy sensor One Touch Changeover (heating/cooling) |
| Communication protocol ZigBee 2,4GHz | |
| Mounting Surface mounting | |
| Working temperature 0-45°C | |
| IP protection class IP30 | |
| Dimensions Width x Height x Deep) | 86 x 86 x 11 mm |
Deutsch

Ultra slim
Precise temperature control (underfloor heating, radiator heating, electrical heating)
Works with: Amazon Alexa and Google Home
Rechargeable through micro USB

Universal Gateway
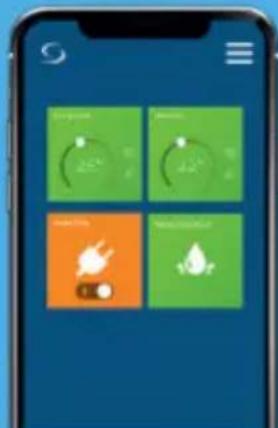
Connect it with Universal Gateway and setup your own SALUS Smart Home system
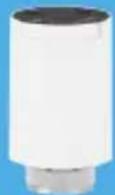
Smart Radiator Control
Pair it with Quantum to achieve the perfect temperature everywhere, not only beside the radiator
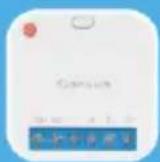
Smart Relay
Connect it with Universal Gateway and control wirelessly pumps, valves, boilers, lighting etc

Google is a trademark of Google LLC, Google Assistant is not available in certain languages and countries.

IV 2023 V07
C E E A C U K
www.saluscontrols.com
- Introduction
- Product Compliance
- Safety Information
- Package Content:
- Before you start:
- Charging to full battery level may take up to 24h maximum.
- Please note:
- Wiring diagram (S1, S2 Input)
- S1,S2 Terminals:
- LCD Icon Description
- COMPATIBILTY WITH OTHER SALUS CONTROLS DEVICES
- Universal Gateway is CONNECTED TO THE INTERNET
- Universal Gateway is NOT CONNECTED TO THE INTERNET
- Compatible devices:
- First power up sequence
- 1
- 2
- 3
- 4
- 5
- Installation in ONLINE mode
- Installation in OFFLINE mode
- Pairing with TRV radiator head (Install the TRV according to the instructions included with product)
- SQ610BRF Full menu structure
- Main menu
- Schedule settings
- User settings
- Admin settings
- Language
- Short description of some selected functions (all functions are described in the full version of the SQ610BRF manual):
- Einleitung:
- Deutsch
- Universal Gateway
- Smart Radiator Control
- Smart Relay
- C E E A C U K
Brand : Salus
Model : SQ610BRF
Category : Thermostat