
CA-407W Smart - Fan Clean Air Optima - Free user manual and instructions
Find the device manual for free CA-407W Smart Clean Air Optima in PDF.

| Product type | Tower fan |
| Brand | Clean Air Optima |
| Model | CA-407W Smart |
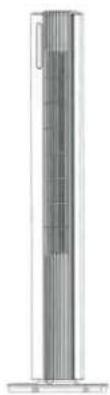
| Dimensions (height x width x depth) | 1100 x 160 x 160 mm (base diameter 280 mm) |
| Weight | 3.6 kg |
| Color | White with black front cover |
| Rated voltage | 220-240 V ~ 50 Hz |
| Rated power | 30 W |
| Maximum airflow | 450 m³/h |
| Maximum air speed | 6 m/s |
| Noise level (min.) | < 10 dB(A) |
| Number of speeds | 12 |
| Ventilation modes | Normal, Natural, Sleep |
| Horizontal oscillation | 80° automatic |
| Timer | 1 to 12 hours (on/off) |
| Remote control | Yes, with CR2032 button battery |
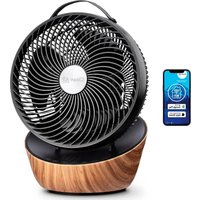
| Wi-Fi | Yes, 2.4 GHz band compatible with CleanAirOptima app |
| Plasma generator | Yes, for sterilization |
| LED display | Yes, with automatic dimming |
| Maintenance and cleaning | Clean the air grilles once a week with a soft cloth and neutral detergent |
| Warranty | 2 years |
| Included accessories | Remote control, battery, user manual |
Frequently Asked Questions - CA-407W Smart Clean Air Optima
User questions about CA-407W Smart Clean Air Optima
0 question about this device. Answer the ones you know or ask your own.
Ask a new question about this device
Download the instructions for your Fan in PDF format for free! Find your manual CA-407W Smart - Clean Air Optima and take your electronic device back in hand. On this page are published all the documents necessary for the use of your device. CA-407W Smart by Clean Air Optima.
USER MANUAL CA-407W Smart Clean Air Optima
Clean Air Optima High and Luxury Tower Fan CA-407W/ CA-407G Smart
(EN) User manual
(DE) Gebrauchsanweisung
(NL) Gebruiksaanwijzing
(FR) Mode d'emploi
(ES) Manual del usuario
(IT) Manuale d'uso
(PL) Instrukcja obsługi
(CZ) Uživatelská příručka
(RO) Manual de utilizare
(LT) Naudotojo vadovas
(EE) Kasutusjuhend
(LV) Lietošanas pamācība
Find more languages on:
www.cleanairoptima.com/
info/manuals

natural_image
Two tall cylindrical smart air purifiers with vertical cooling fins, displayed against a blue cityscape background (no text or symbols visible on the devices themselves)Read these instructions carefully before you start using the Tower Fan and keep the manual for future reference.
Clean Air Optima®
| Table of contents | Page | |
| English | 3 | |
| German | 15 | |
| Dutch | 27 | |
| French | 39 | |
| Spanish | 51 | |
| Italian | 63 | |
| Polish | 75 | |
| Czech | 87 | |
| Romanian | 99 | |
| Lithuanian | 111 | |
| Estonian | 123 | |
| Latvian | 135 |
CA-407W/ CA-407G Smart/ Description of the device
English
Thank you for purchasing the innovative Clean Air Optima CA-407W/ CA-407G Smart High and Luxury Tower Fan.
We wish you many years of healthy indoor air with this efficient and effective product.
Ensure that all safety precautions are followed when using this electrical appliance for the proper operation of the device. These instructions describe the safety precautions to be observed during operation. They are designed to prevent injuries or damage to this device.
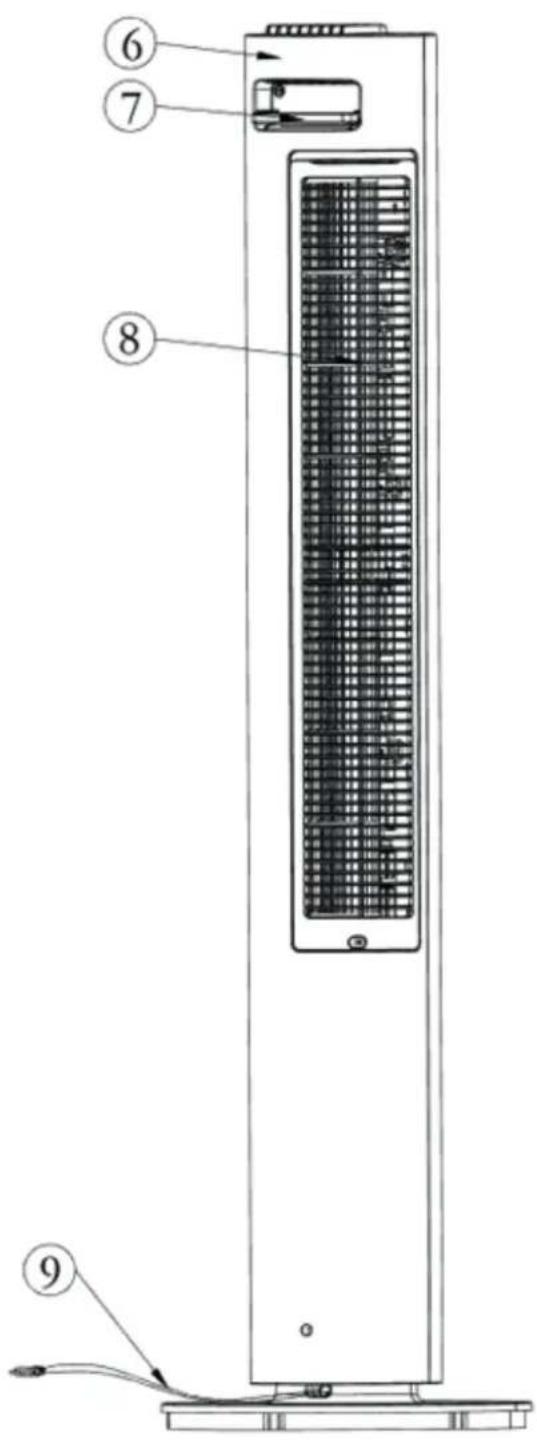
Description of the appliance
The appliance consists of the following main components:
- Control panel
- Display panel
- Front cover
- Oscillation base
- Rear base
- Rear cover
- Handle and remote control holder
- Rear net
- Power cord
Safety warnings
Take the following steps to minimize the risk of personal injury caused by for example electric shocks or fire.
- Only for indoor use. Do not use or store outdoors.
- Use proper voltage: AC 220V - 240V, 50Hz.
- Pull the plug when you do not use the device or when you clean internal or external parts of it.
- Use, maintain and clean the device as described in this manual.
- Do not use the device when there is visible damage on the electrical cord or on the device itself. Do not repair the device yourself in case of damage.
- Make sure that the air outlets are always free, clean up dust, hair and other obstruction for the airflow and at the air outlets.
- Keep your hair, clothes, jewels or fingers away from the air outlets.
- Pay special attention when the fan is used near children, and avoid children playing with the fan.
- Do not stick sharp objects through the grid as it can result in failures or electric shocks.
- Do not use the device in rooms where inflammable liquids or gases are stored, close to heat sources or in particularly humid rooms like the bathroom.
- Touch the device only with dry hands.
- Make sure that the fan does not touch any obstruction when oscillating.
- Pay attention to damages on the electrical cord. Never pull the device by its cord.
- Do not allow children to touch this device.
- Bring discarded devices to the appropriate collecting points. Prevent children from opening the device. The device is not a toy. Children may only use the device under the surveillance of an adult.
-
This appliance can be used by children aged from 8 years and above and persons with reduced physical, sensory or mental capabilities or lack of experience and knowledge if they have been given supervision or instructions concerning use of the device in a safe way and understand the hazards involved. Children shall not play with the device. Cleaning- and user maintenance shall NOT be done by children without supervision.
-
If the power cord is damaged, it must be replaced by the manufacturer, its aftersales service or a similar qualified person in order to avoid danger.
- Do not ingest the battery, the battery is a Chemical Burn Hazard.
- This device contains a coin / button cell battery. If the coin / button cell battery is swallowed, it can cause severe internal burns in just 2 hours and can lead to serious complaints or decease.
- Keep new and used batteries away from children.
- If the battery compartment does not close securely, stop using the device and keep it away from children.
- If you think batteries might have been swallowed or placed inside any part of the body, seek immediate medical attention.
- The batteries contain materials, which are hazardous to the environment, they must be removed from the device before it is scrapped and that they are disposed safely.
- Do not put heavy objects on the unit.
- Please avoid places with direct sunlight. There is a risk that the device discolors.
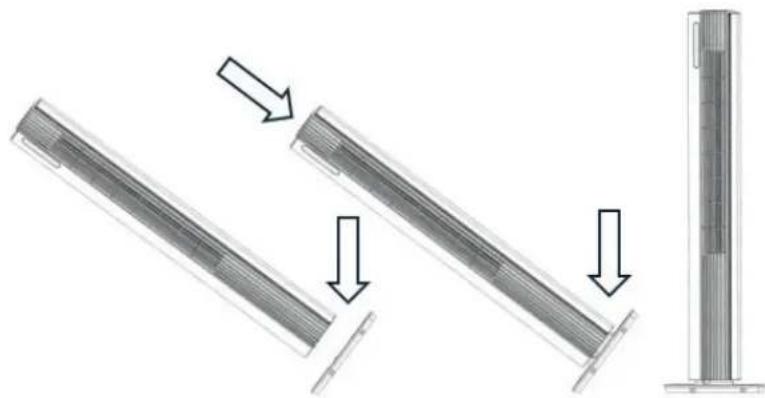
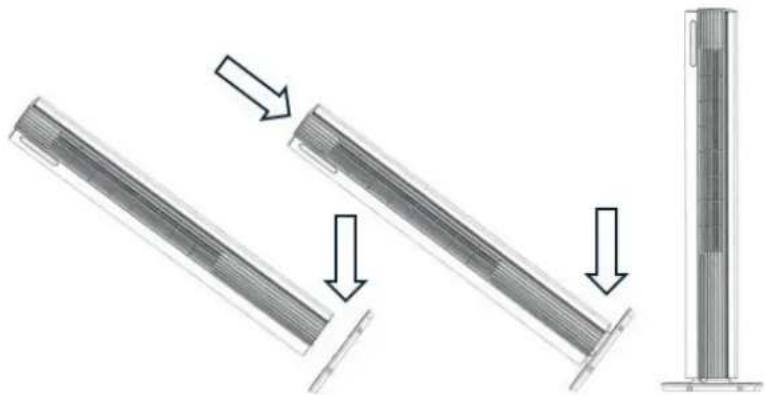
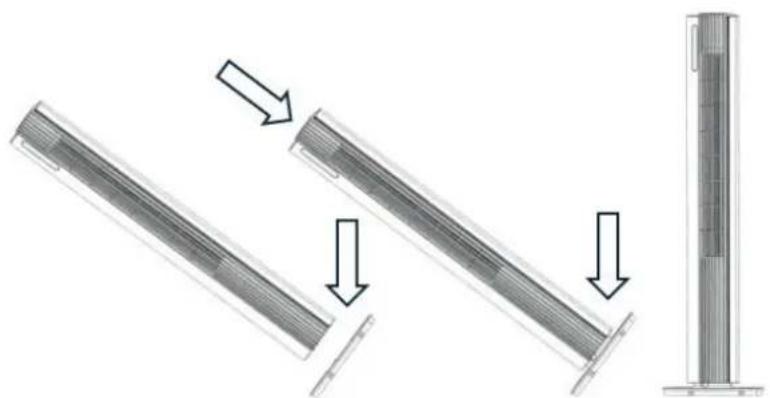
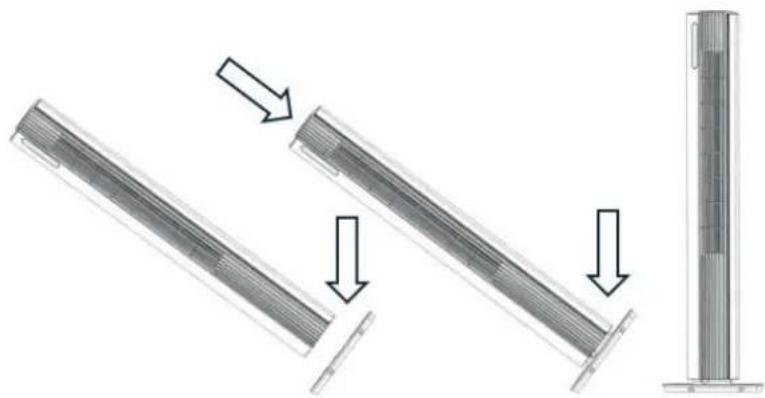
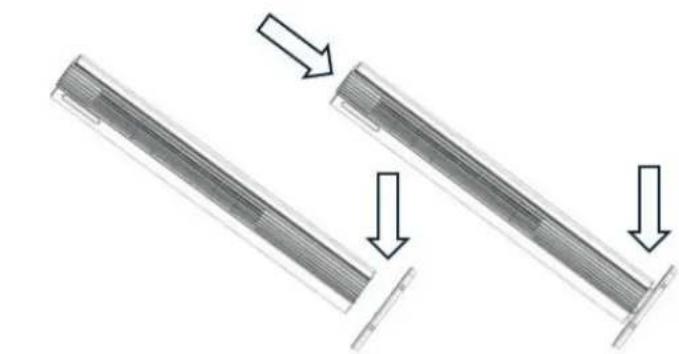
Installation instruction
-
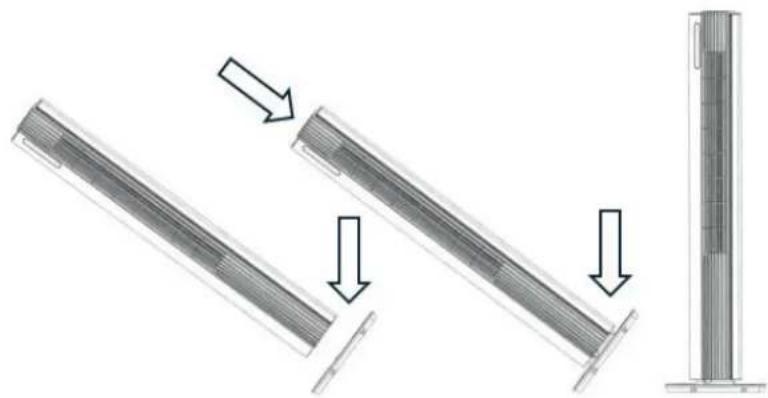
Get the Tower Fan out of the package for assembly and make sure all accessories are included.
-
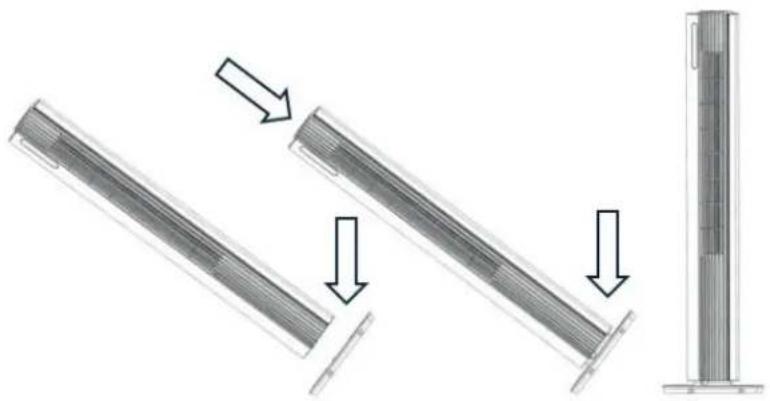
Assemble the fan following the below instructions:
-Lock the rear base and front base together following Diagram 1.
- Put the main body into the assembled base along the locating pole, following Diagram 2.
- After assembled, put the fan in a suitable place, plug it in and operate according to the instruction manual.
-
The device needs to be positioned at least 30 cm from the walls and furniture to obtain good air flow.
-
Make sure that the front air outlet of the device is positioned away from the closest wall or piece of furniture. Make sure that the air in-and outlets are not blocked.
-
Never pull up the device by its loose parts.
natural_image
Technical diagram showing mechanical assembly steps with arrows indicating motion (no text or symbols)Diagram 1
Diagram 2
Note: When you plug in the fan for the fist time, a "BiBi" sound alert means that the fan is correctly connected.
Clean Air Optima®
Remote control
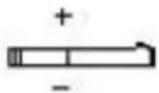
- Open the battery cover at the back side of remote control to place the battery, (see Picture 1).
- To place the battery: there is a "security tab" at the bottom of the remote control that you first have to slide to the right and then pull out the battery holder, (see Picture 2). Insert the battery with the correct polarity, (see Picture 3).
- Push the battery cover back into the remote control.
Features
- Touch control buttons
- Wind modes: Normal, Nature, Sleep mode
- 12 speeds
- Powerful airstream of 6 m/s
- Fan air flow rate up to 450m3/h
- Automatically 80°horizontal oscillation
- Timer: 1 -12Hours
- Sterilization by plasma generator
- LED display: ON/OFF, wind speed, wind modes, oscillation
- Remote control
- WIFI function
Control panel / Operation instruction
Note: When you plug in the fan for the fist time, a "BiBi" sound alert means that the fan is correctly connected.
Control
Panel

ON/ OFF (Power)
Press the Power Button to activate the device.
Press the Power Button again, the device turns off.

SPEED Button
By pressing the Speed button, you can change
the speed level with the button + and the
button - .
The 12 fan speeds offers individual air flow.

MODE Button
s the MODE button to switch between
normal wind, natural wind and sleep mode.
- Normal wind : The f- motor runs at a fixed speed according to the wind speed set by the user.
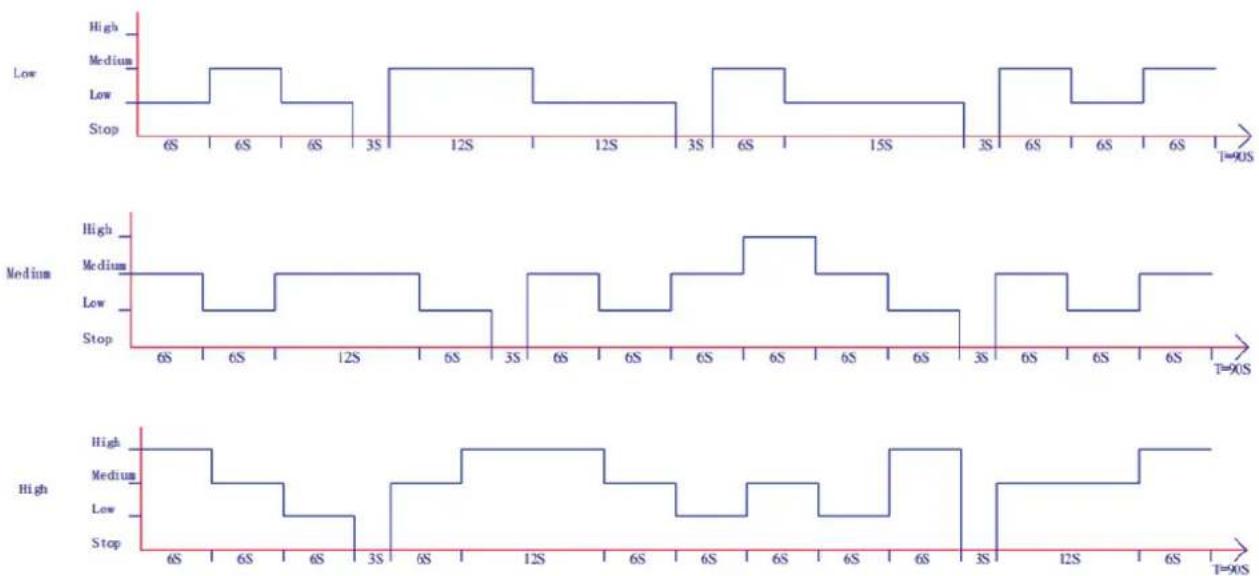
- Natural wind : The ran motor runs irregularly according to the preset program and can be set to low (position 1-4), medium, (position 5-8) and strong (position 9-12) natural wind in combination with the wind speed button. Natural wind is to imitate the effect of natural wind, making the air volume softer and more comfortable. The wind speed level indicator only shows the initial wind speed status.

The image below shows the working principle of the natural wind mode:
3. Sleep mode
3.1. Timed downshift. If the device is running at speed 4-12, the device will switch down one speed every 5 minutes until it reaches the 3rd speed. The device then continues to run unchanged in 3rd speed.
The LED light displays the current wind speed.
3.2. If the device runs in speed 1-3, the device switches to 3d speed.
The device then continues to run unchanged in 3rd speed. The LED light displays the normal wind speed.

TIMER
Press TIMER button to program timer. Following timer programs are available
Power-on function: While the device is in standby, press the Timer button and then use the +/- button to set the number of hours you want the unit to start (1\~12 hours).
Power-off function: While the device is running with the desired settings, press the Timer button and then use the button +/- to set the number of hours after which you want the device to stop (1-12 hours).

SWING
Press the Swing key: the device will oscillate. Press the Swing key again: the device will stop oscillating.

Sterilization/ plasma generator
Function on: the device releases plasma, and the indicator light is on. Function off: the device stops releasing plasma, and the indicator light is off.

LIGHT
Press the Light button, the lighting on the display will go off. Press the Light button once again, the lighting on the display will go on. When the device is on, the light on the display dims automatically after 1 minute. When you press a button, the light automatically turns on again.

WIFI Function
When the device is on, press and hold the Mode button for 5 seconds till it beeps once. The WiFi indicator will flash quickly after 5 seconds, and you can configure the network in the default mode of the App. If it is not connected within 3 minutes, the WiFi indicator will turn off. To connect again, you need to press and hold the Mode button for 5 seconds till it beeps once to reset the WiFi module, the WiFi indicator will flash quickly and you can restart to configure the network in the default mode.
- If the power is turned off within 10 seconds after power on, the WiFi indicator will return to the state before power off. If the power is turned on again after 10 seconds of power off, the WiFi indicator will go off and the device will enter the low-power mode. At this time, you need to press and hold the mode button for 5 seconds to restart it.
- In the process of accessing network, if the network is not matched within 3 minutes, the WiFi indicator will go off. You need to press and hold the mode button for 5 seconds to restart it.
- If the router is powered off after the matching has been completed, the WiFi indicator will go off. When the router is resumed, the WiFi will be automatically connected to the network.
Operation with Clean Air Optima® App
Connectivity
Compatibility with smartphone and tablet:
iPhone, iPad and Android devices
Device connets via WiFi with App:
CleanAirOptima
Attention: The router must be set to the 2.4 GHz broadband. If the router is set to the 5.0 GHz, it is impossible to establish a connection.
Set up WiFi connection
- Download and install the "CleanAirOptima" App in the App Store or Google Play Store.
- Make an account and log in.
- The router must be set to the 2.4 GHz broadband. If the router is set to the 5.0 GHz, no connection can be established.
- Make sure Bluetooth is enabled on your smartphone.
- Plug the device into the power socket and switch it on. The WiFi indicator will blink. If the WiFi light does not blink, press the MODE button for 5 seconds. Then the WIFI light will flash quickly. If the WIFI light blinks quickly, the device is ready to connect.
- Make sure that your smartphone or tablet is successfully connected to your WiFi network.
- Open the 'CleanAirOptima' App and click on 'Add device'. Your device is listed and you can select it. If not choose 'Auto Scan', Follow the on-screen instructions to connect the device to your network.
- Choose to add the Clean Air Optima ^® device on the App, follow the instructions in the App.
- When the device is paired, the WiFi indicator light stays on constantly.
- After the configuration is successful, you can use the Clean Air Optima ^3 App to operate the device.
Note:
- If your default network has changed, reset the WiFi connection, follow step 1 to 9 in the 'Set up WiFi connection' section.
- If you want to pair multiple devices to your smartphone or tablet, you have to do this one after the other.
- Make sure that the distance between your smartphone or tablet and the device is less than 5 meters and there are no obstacles. Also make sure you are in the same room as the device.
Reset the WiFi function:
- Reset the WiFi by pressing the 'Mode' button for 5 seconds, the indicator light of the WiFi will blink rapidly.

Clean Air Optima®
Connect devices to multiple phones
Note: First the other person needs to install the Clean Air Optima® App on his/her phone and create a new account.
Share the device with limited access:
You can choose to share 1 device with several persons.
This person will then have access, but will not be able to manage all the settings.
Follow the instructions below to share the device with several persons:
- Go to the relevant device.
- Go to the pencil or three dots in the top right.
- Select 'Share device.'
- Choose 'Add sharing'.
- Choose the sharing method e.g. via email, whatsapp, sms etc. and continue.
- The device will automatically appear in the Clean Air Optima® App with the other account.
Share device with full access:
You can add a person or several persons to your home management.
That person will then have access to all your devices that are already linked and has full rights and permissions. You will always remain the main administrator.
Follow the instructions below to add someone to your home management:
- Open the Clean Air Optima® App and go to 'Me'.
- Then choose 'Home Management'.
- Choose 'Create a home'.
- Select the relevant 'Home' and 'Add member'.
- Choose the sharing method e.g. via email, whatsapp, sms etc. and continue.
- The corresponding 'Home' will automatically appear in the Clean Air Optima® App of the person with whom you have shared your 'Home'.
- On the other account: Go to the home screen from the Clean Air Optima® App. Go to the top left and select the 'Home'.
Cleaning and maintenance
Accumulation of dust and dirt at the back of the device will negatively influence the performance of the fan. Cleaning the backside of the fan at least once a month is required for an optimal performance. This fan is very safe and easy to clean:
- Switch the device off and pull the plug.
- If used continuously (24 hours/day) under normal circumstances, we advise that the accumulated dust is cleaned once a week from the air inlet at the back of the device and at least once a month at the air outlet. Clean once a month the outer surface with a cloth.
- If necessary you can use a soft cloth with a neutral cleaning product dissolved in warm water (below 50°) to clean the outer side of the fan. Dry carefully.
- If the fan is not used for a longer period of time, we advise to clean the device carefully and let it dry. The device has to be stored in a cool and dry place. Place a bag over the device to avoid dust.
Troubleshooting
The following is a troubling shooting guide to help you solve any issues that you may have using the Clean Air Optima® CA-407W/ CA-407G Smart High and Luxury Tower Fan.
| Problem Possible | Cause Solution | |
| Device does not switch on. | The power cord does not connect correctly.The power cord or power plug may be damaged. | Connect the power plug and power socket correctly.Check the power cord and plug for damage. |
| The device makes a lot of noise or vibrates. | The device is installed askew. Make sure the device is installed uprightly. | |
| The device does not work or with reduced capacity. | Check the minimum distances to walls and objects. | Move the device away from walls and objects. |
| The device does not respond to the remote control. | There are obstacles between the device and the remote control.Battery installed correctly. | Remove obstacles and ensure visual contact between remote control and device.Check battery charge status. |
| Operation with Clean Air Optima® App does not work. | Smartphone or tablet is not connected to WiFi network.The device has no connection to the network. | Switch off the device and reset the WiFi on the device by pressing the Mode button for 5 seconds, the indicator light of the WiFi will blink rapidly. Than follow step 4 to 10 from chapter Operation with Clean Air Optima® App. |
WARNING!
If the above recommended solutions do not work, please contact Clean Air Optima ^® technical support at the telephone number for your region. Do not attempt to disassemble, reassemble, or repair the device as this may void the warranty.
Specifications
| Model | CA-407W/ | CA-407G | Smart | |
| Rated voltage | 220-240V / 50Hz | |||
| Rated power | 30W | |||
| Sound level | Silent fan <10 dB(A) (Low) | |||
| Airflow | ≥ 450 m^3/h | |||
| Air velocity | 6m/s | |||
| Dimensions | 160x160x1100 mm. Base plate diameter 280 mm. | |||
| Weight | 3,6 | kg | ||
| Colour | White with black front cover/ Gray with black front cover | |||
| Type of Wi-Fi network | Single-band 2,4GHz | |||
| Complies with EU regulations | CE/WEEE/RoHS | |||
Ask your retailer or your municipality for updated information regarding the disposal of the packaging and of the device.
Service
WARRANTY CERTIFICATE FOR THE Clean Air Optima CA-407W/ CA-407G Smart Design Tower Fan
Date of purchase: ..... Customers name: ..... Address: ..... Telephone: ..... Email: ..... Seller's name: ..... Address: ....
- Please fill in completely this Warranty Certificate. Send it with the invoice and the unit, postage pre-paid and using the original packing box, to your distributor. Make sure to include the appropriate return postage for the package.
- Please enclose a short description of the damage, fault or malfunction, and the circumstances under which these problems arose.
The Clean Air Optima CA-407W/ CA-407G Smart is subjected to strict testing procedures before leaving the factory. If within two years from the date of purchase the product does not perform according to the specifications, because of factory defects, the purchaser is entitled to free repairs or replacement of parts upon presentation of this warranty (provided that the malfunction or damage to the device and/or parts occurred under normal operating conditions). What is covered: All parts defective in material and workmanship. For how long: two years from purchase date. What we will do: Repair or replace any defective parts.
Other Conditions
The provisions of this warranty are in lieu of any other written warranty whether express or implied, written or oral, including any warranty of merchantability or fitness for a particular purpose. The manufacturer's maximum liability shall not exceed the actual purchase price paid by you for the product. In no event shall the manufacturer be liable for special, incidental, consequential, or indirect damages. This warranty does not cover a defect that has resulted from improper or unreasonable use or maintenance, faulty assembly, accident, natural catastrophes, improper packing, or unauthorized tampering, alteration, or modification as determined solely by us. This warranty is void if the label bearing the serial number has been removed or defaced.
Clean Air Optima International B.V. David Ricardostraat 9-7 / 9-9 7559 SH Hengelo (ov) The Netherlands Tel: +31 (0) 74 - 2670145 E-mail: info@cleanairoptima.com Internet: www.cleanairoptima.com
Thank you for reading!

Share your feedback about the Clean Air Optima® CA-407W/ CA-407G Smart high and luxury tower fan on: www.cleanairoptima.com

For frequently asked questions about the CA-407W/ CA-407G Smart go to: www.cleanairoptima.com and search for the CA-407W/ CA-407 Smart

Download PDF instruction manual on: v.cleanairoptima.com/info/manuals

Watch all Clean Air Optima® Product deo's on:
www.youtube.com
Clean Air Optima International B.V. | David Ricardostraat 9-7 / 9-9 | 7559 SH Hengelo (ov) The Netherlands | Phone: +31 (0) 74 - 2670145
Clean Air Optima Germany GmbH | Enschedestraße 14 | 48529 Nordhorn | Germany Phone: +49 (0) 5921 879-121
E-mail: info@cleanairoptima.com
Internet: www.cleanairoptima.com
Deutsch
natural_image
Diagram showing two circular components with internal gear-like structures, separated by arrows (no text or symbols)Diagramm 1
natural_image
Diagram showing three stages of a mechanical or structural assembly with arrows indicating direction (no text or symbols present)Diagramm 2


Mode-Taste

Clean Air Optima®
natural_image
Diagram showing two mechanical components with arrows indicating direction (no text or symbols)Schema 1
natural_image
Diagram showing three stages of a mechanical or structural assembly with arrows indicating direction (no text or symbols present)Schema 2


MODE-knop
natural_image
Diagram showing two circular components with internal patterns, separated by a double-headed arrow (no text or symbols)Schéma 1
natural_image
Diagram showing three stages of a mechanical component with arrows indicating motion, no text or symbols present.Schéma 2
natural_image
Simple line drawing of a rectangular device with a side panel and an arrow pointing to the right side (no text or symbols)(Illustration 1)
natural_image
Technical line drawing of a rectangular device with two square cutouts and a separate C-shaped bracket (no text or symbols)(Illustration 2)


natural_image
Simple line drawing of a rectangular device with two internal compartments and a side panel (no text or symbols)(Illustration 3)

Pile (CR2032)
Caractéristiques
MARCHE/ARRÊT (Alimentation)


Bouton MODE
natural_image
Technical diagram showing mechanical assembly steps with arrows indicating motion (no text or symbols)natural_image
Technical line drawing of a rectangular electronic device with top, front, and side views (no text or symbols)


Italiano
natural_image
Technical diagram showing mechanical assembly steps with arrows indicating motion (no text or symbols)natural_image
Simple line drawing of a rectangular device with two internal compartments and mounting brackets (no text or symbols)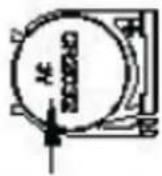
(Figura 3)
Batteria (CR2032)
Caratteristiche

Note:
torre Smart High and Luxury Clean Air Optima CA-407W/ CA-407G su:
leanairoptima.com


Polski
natural_image
Diagram showing two circular components with internal gear-like elements, separated by a double-headed arrow (no text or symbols)Schemat 1
natural_image
Diagram showing three stages of a mechanical or structural assembly with arrows indicating direction (no text or symbols present)Schemat 2
Wyświetlac


Čeština
natural_image
Diagram showing two circular components with internal gear-like structures, separated by a double-headed arrow (no text or symbols)Schéma 1
natural_image
Diagram showing three stages of a vertical panel installation with arrows indicating direction (no text or symbols present)Schéma 2

Tlačítko REŽIM
Clean Air Optima®

Română
natural_image
Diagram showing two circular components with internal gear-like structures, separated by a double-headed arrow (no text or symbols)Diagram 1

natural_image
Diagram showing three stages of a mechanical or structural assembly with arrows indicating direction (no text or symbols present)Diagram 2
natural_image
Simple line drawing of a rectangular device with two internal compartments and a handle (no text or symbols)
(Imaginea 3)
Baterie (CR2032)
Caracteristici

Butonul MOD

Lietuvių kalba
natural_image
Diagram showing two circular components with internal gear-like structures, separated by two arrows (no text or symbols)1
natural_image
Two mechanical components with arrows indicating motion or assembly, no visible text or symbols2
natural_image
Pure vertical cylindrical structure with internal grid pattern, no text or symbols visiblenatural_image
Simple line drawing of a rectangular device with two internal compartments and a side panel (no text or symbols)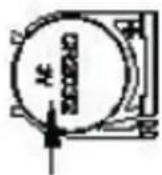
(3 pav.)
Baterija (CR2032)
Ypatybès

REŽIMO mygtukas
line
| Time | Signal | | :--- | :--- | | 6S | Low | | 6S | Medium | | 6S | High | | 3S | Low | | 12S | Medium | | 12S | High | | 3S | Low | | 6S | Medium | | 15S | High | | 3S | Low | | 6S | Medium | | 6S | High | | 6S | Low |
line
| Time | High | Medium | Low | Stop | |---|---|---|---|---| | 6S | 1 | 1 | 1 | 0 | | 6S | 1 | 0 | 0 | 0 | | 12S | 1 | 1 | 0 | 0 | | 6S | 1 | 0 | 0 | 0 | | 3S | 1 | 1 | 0 | 0 | | 6S | 1 | 0 | 0 | 0 | | 6S | 1 | 1 | 0 | 0 | | 6S | 1 | 0 | 0 | 0 | | 6S | 1 | 1 | 0 | 0 | | 6S | 1 | 0 | 0 | 0 | | 3S | 1 | 1 | 0 | 0 | | 6S | 1 | 0 | 0 | 0 | | 6S | 1 | 1 | 0 | 0 | | T=90S | 1 | 0 | 0 | 0 | | End of period (T=90S) | 1 | 0 | 0 | 0 |
line
| Time | Value | |------|-------| | 6S | High | | 6S | Medium| | 6S | Low | | 3S | High | | 6S | Medium| | 12S | High | | 6S | Low | | 6S | Medium| | 6S | Low | | 3S | High | | 12S | Low | | 6S | High | | T=90S| High |- Miego režimas

Eesti
Täname, et ostsite uuendusliku Clean Air Optima CA-407W/CA-407G Smart High and Luxury Tower ventilaatori.
natural_image
Technical diagram showing mechanical assembly steps with arrows indicating motion (no text or symbols)Joonis 1 Joonis 2
natural_image
Simple line drawing of a rectangular device with two internal compartments and mounting brackets (no text or symbols)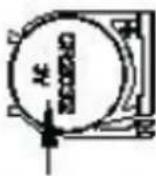
(Pilt 3)
Patarei (CR2032)
Funktsioonid
Ekraan

Clean Air Optima®

Latviešu valodā
Paldies, ka iegādājāties inovatīvo Clean Air Optima CA-407W/ CA-407G Smart High and Luxury tornveida ventilatoru.
natural_image
Diagram showing two circular objects with internal patterns, separated by a double-headed arrow (no text or symbols)- diagramma
natural_image
Diagram showing three stages of a mechanical component: linear, vertical, and cylindrical (no text or symbols present)- diagramma
Piezime. Pieslëdzot ventilatoru pirmo reizi, "BiBi" skañas brîdinājums nozimē, ka ventilators ir pareizi pievienots.
Clean Air Optima®
Tālvadības pults
natural_image
Simple line drawing of a rectangular device with two internal compartments and a side panel (no text or symbols)
- Normāla plūsma : venṇa ora motors
Piezime:
E-pasts: info@cleanairoptima.com
Tīmekļa vietne: www.cleanairoptima.com
A guarantee for healthy indoor air quality!

Designed in Germany
More info:
www.cleanairoptima.com


- Clean Air Optima High and Luxury Tower Fan CA-407W/ CA-407G Smart
- Clean Air Optima®
- English
- Thank you for purchasing the innovative Clean Air Optima CA-407W/ CA-407G Smart High and Luxury Tower Fan.
- Description of the appliance
- Safety warnings
- Installation instruction
- Remote control
- Features
- Control panel / Operation instruction
- ON/ OFF (Power)
- SPEED Button
- MODE Button
- Sleep mode
- TIMER
- SWING
- Sterilization/ plasma generator
- LIGHT
- WIFI Function
- Operation with Clean Air Optima® App
- Connectivity
- Set up WiFi connection
- Note:
- Reset the WiFi function:
- Connect devices to multiple phones
- Share the device with limited access:
- Share device with full access:
- Cleaning and maintenance
- Troubleshooting
- WARNING!
- Service
- WARRANTY CERTIFICATE FOR THE Clean Air Optima CA-407W/ CA-407G Smart Design Tower Fan
- Other Conditions
- Thank you for reading!
- Deutsch
- Mode-Taste
- MODE-knop
- Caractéristiques
- MARCHE/ARRÊT (Alimentation)
- Bouton MODE
- Italiano
- Caratteristiche
- Polski
- Čeština
- Tlačítko REŽIM
- Română
- Caracteristici
- Butonul MOD
- Lietuvių kalba
- Ypatybès
- REŽIMO mygtukas
- Eesti
- Täname, et ostsite uuendusliku Clean Air Optima CA-407W/CA-407G Smart High and Luxury Tower ventilaatori.
- Funktsioonid
- Latviešu valodā
- Paldies, ka iegādājāties inovatīvo Clean Air Optima CA-407W/ CA-407G Smart High and Luxury tornveida ventilatoru.
- Tālvadības pults
- Piezime:
- A guarantee for healthy indoor air quality!
Brand : Clean Air Optima
Model : CA-407W Smart
Category : Fan