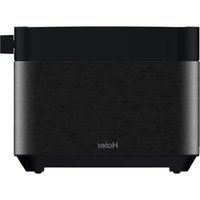
HTO5A3 021 - Toaster HAIER - Free user manual and instructions
Find the device manual for free HTO5A3 021 HAIER in PDF.


User questions about HTO5A3 021 HAIER
0 question about this device. Answer the ones you know or ask your own.
Ask a new question about this device
Download the instructions for your Toaster in PDF format for free! Find your manual HTO5A3 021 - HAIER and take your electronic device back in hand. On this page are published all the documents necessary for the use of your device. HTO5A3 021 by HAIER.
USER MANUAL HTO5A3 021 HAIER
natural_image
Line drawing of a modern toaster with two side grilles and control buttons (no text or symbols)User manual (GB) P01
text_image
K I J A B C D H E F G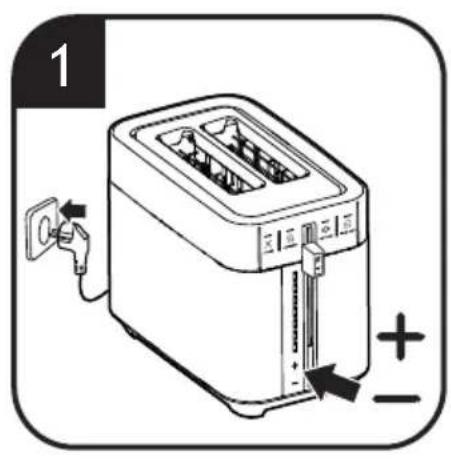
text_image
1 + -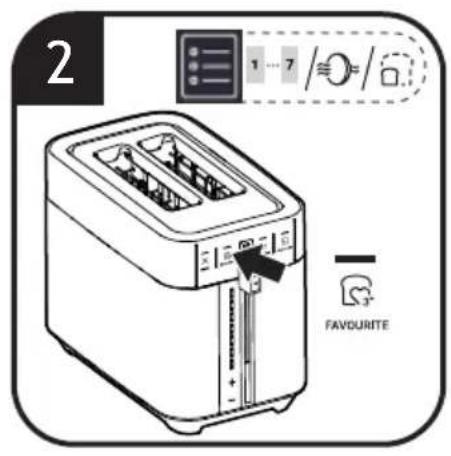
text_image
2 1 ... 7 / ≈ 6 FAVOURITE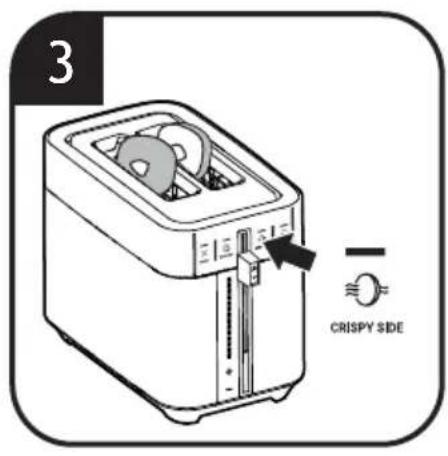
text_image
3 CRISPY SIDE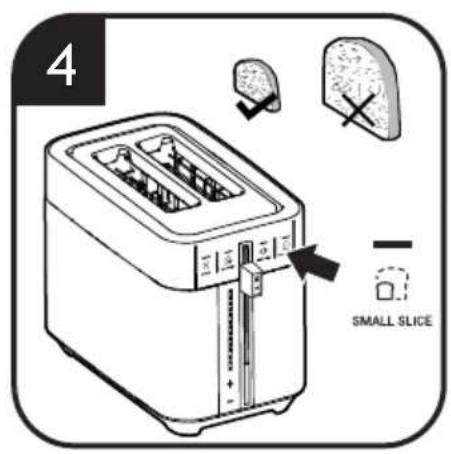
text_image
4 SMALL SLICE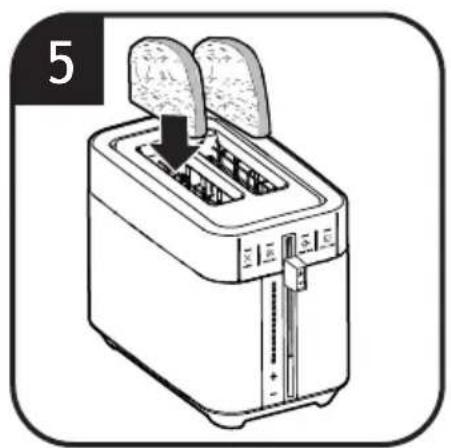
natural_image
Line drawing of a toaster with two blades and a handle, showing internal components (no text or symbols)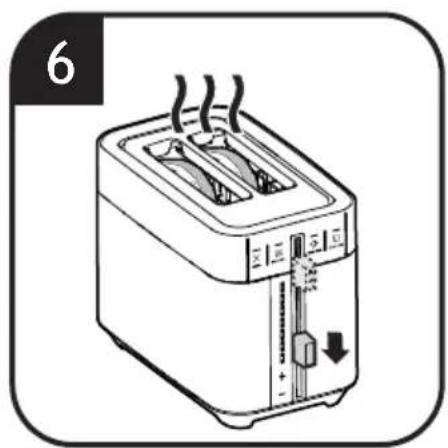
natural_image
Line drawing of a toaster with cooling effect and smoke, no text or symbols present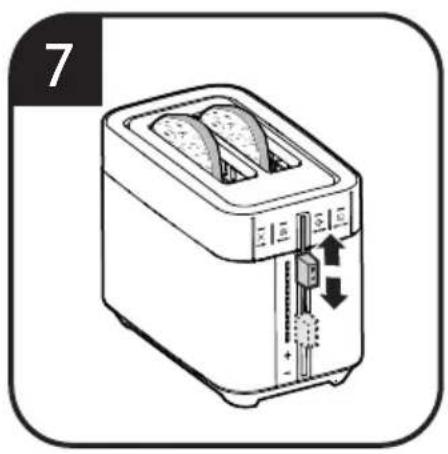
natural_image
Illustration of a toaster with two shades and a double-tinted lid, showing heat transfer arrows (no text or symbols)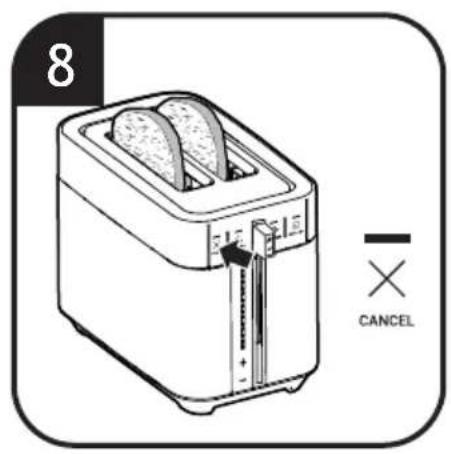
text_image
8 CANCEL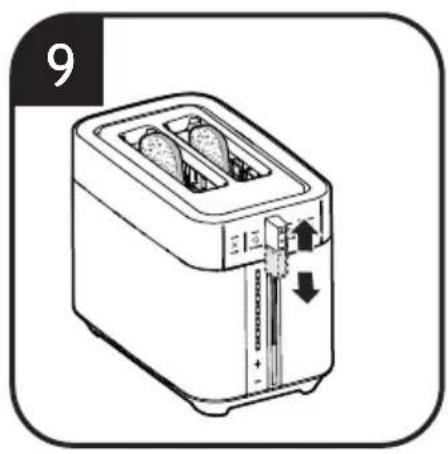
natural_image
Line drawing of a toaster with two grilles and a handle, showing front panel and side panel (no text or symbols)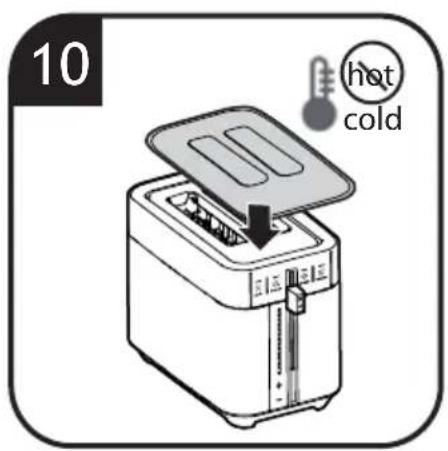
text_image
10 hot cold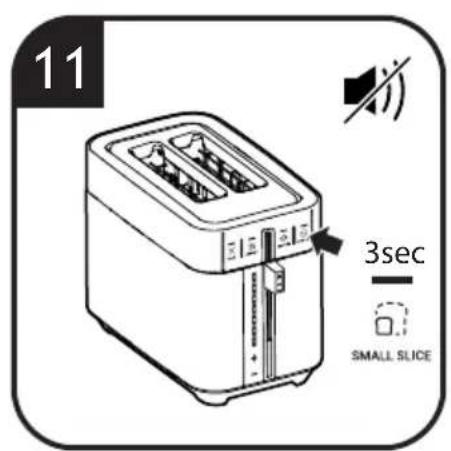
text_image
11 3sec SMALL SLICE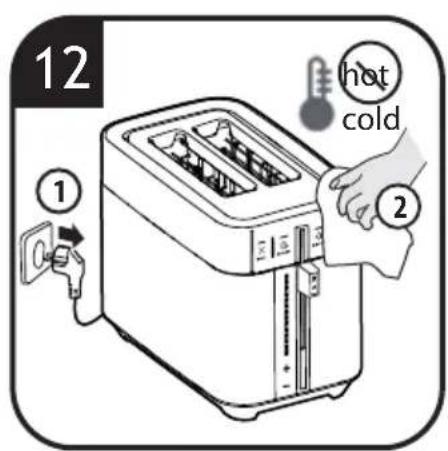
text_image
12 1 hot cold 2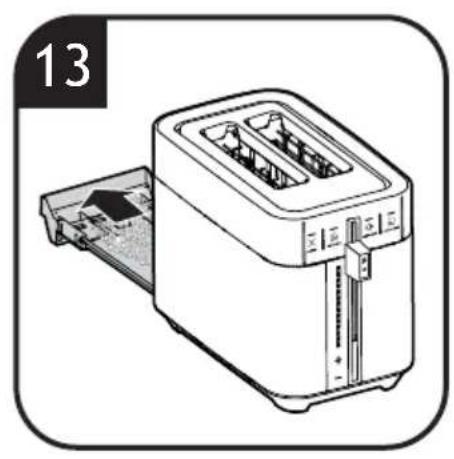
natural_image
Line drawing of a toaster with a separate slot, no text or symbols present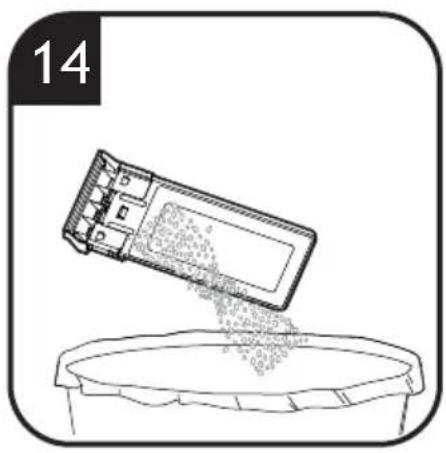
natural_image
Illustration of a mechanical device pouring granular material into a container (no text or symbols)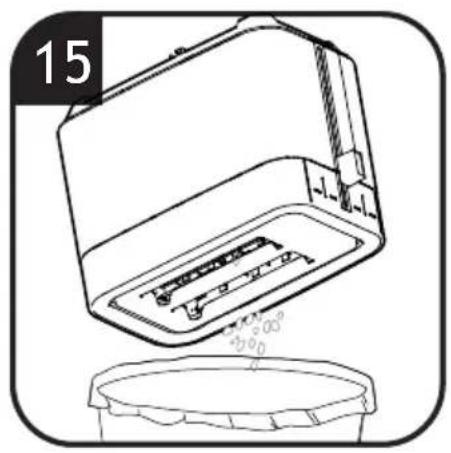
natural_image
Line drawing of a microwave oven with liquid inside and lid placed below (no text or symbols)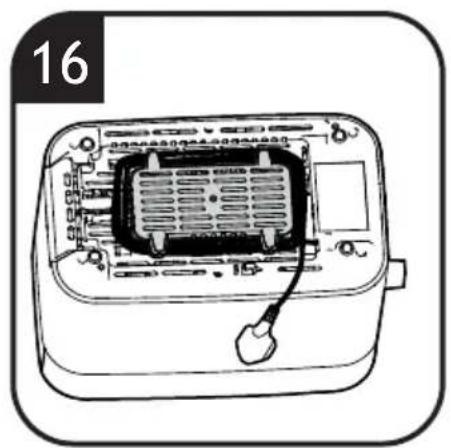
natural_image
Line drawing of a device with internal components and a cable, labeled '16' (no text or symbols on the diagram itself)1. INSTRUCTIONS FOR SAFE USE
This appliance is intended for domestic and indoor use only as described in this user guide. Please ensure that this guide is fully understood before operating the appliance.
WARNING To eliminate suffocation hazard for young children, discard all packaging materials immediately after removing the product.
This appliance can be used by children aged from 8 years and above and by persons with reduced physical, sensory or mental capabilities or lack of experience and knowledge if they have been given supervision or instruction concerning use of the appliance in a safe way and understand the hazards involved. Children shall not play with the appliance. Cleaning and user maintenance shall not be made by children unless they are older than 8 years and supervised. Keep the appliance and its cord out of reach of children less than 8 years.
If the power cord is damaged stop using the appliance immediately. To avoid a safety hazard, an authorised Haier service engineer must replace the power cord.
Use only attachments, consumables or spares recommended or supplied by Haier.
Only use the appliance in accordance with the power specification on the rating plate. WARNING Risk of scalding! The outer surface may get hot when the appliance is in use and after operation. The heating element is subject to residual heat after use. Do not touch hot metal surfaces in particularly of the top surface and toasting slots. The bread may burn, therefore do not use the toaster near or below combustible material, such as curtains.
Do not operate the appliance by means of an external timer or separate remote-control system. Use on worktop only. Do not place the toaster near the edge of a worktop.
Do not pull or carry the appliance by the power cord. Always unplug the appliance from the socket by pulling the plug instead of the cord. Do not place the power cord over sharp edges or near hot surfaces. Do not use an extension cord. Never immerse the appliance or main unit in water or other liquid.
WARNING Risk of fire! Do not cover the appliance or crumb tray with combustible material while in use.
WARNING Risk of injury! A
misuse of the appliance can potentially lead to injury.
CAUTION Take care when inserting or removing the bread during use.
Pay attention to clean surfaces which are intended to come into contact with food! Please note the information on cleaning in the instructions.
The appliance is intended to toast food with recommended size and quantity in the instructions. It must not be used for other than intended use. Do not insert food that is too big for the toasting slots or too little for the rack to carry.
Do not insert the food which may drip during the toasting process.
Do not insert forks or other utensils into the toaster to remove bread. As well as damaging the toaster, there is a high risk of electric shock.
Prevent food touch with heating elements. Excessive or oversized food loads, paper, carboard, plastic or metal foil packages must not be inserted which may cause risk of fire.
Do not operate the toaster on an inclined surface and move it when working.
Do not operate the toaster without crumb tray equipped. Do not leave the toaster unattended while in use.
Regularly clean the crumb tray, otherwise it may smoke or burn. Do not put anti-dust lid on the appliance unless the temperature cools down completely.
Unplug from the socket after use and before cleaning the appliance or any maintenance task.
Allow the appliance to cool down before removing any parts and before cleaning.
Do not continue to use your appliance if it appears faulty.
Haier Service: To ensure the continued safe and efficient operation of this appliance we recommend that any servicing or repairs are only carried out by an authorised Haier service engineer.
 | For indoor use only. |
 | Do not put anti-dust lid on the appliance when the temperature is high. |
The Environment
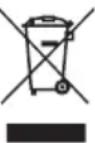
The symbol on this appliance indicates that this appliance, may not be treated as household waste. Instead it must be handed to the applicable collection point the recycling of electrical and electrical equipment. Disposal must be carried in accordance with local environmental regulations for waste disposal. For detailed information about treating recovery and recycling of this appliance please contact your local city or your household and waste disservice or the shop where you purchase the appliance.

This appliance complies with the European Directives 2014/35/EU, 2014/30/EU and 2011/65/EU.
CANDY HOOVER GROUP S.r.l. Via
Comolli,16, 20861 Brugherio (MB) Italy
2. Getting to know your Toaster
COMPONENTS & FEATURES:
A. Cancel function
B. Favourite funtion
C. Crispy side function
D. Small slice function
E. Lift lever
F. Browning level LED indicators
G. Browning level “+/-” buttons
H. Crumb tray
I. Power cable
J. Toasting slots
K. Anti-dust lid
3. Before first use
- Remove any packaging material from the unit.
- Remove all accessories from the package and read this manual carefully. Please pay particular attention to operational instructions, warnings and important safeguards to prevent any injury or property damage.
- Clip excess cord into the cord storage clips underneath the toaster.
- As with all new heating elements, your toaster may emit a slight burning or “new” smell when it is first switched on. This is normal. The smoke is harmless and will soon disappear.
- To eliminate the “new” smell at the first use, operate the toaster on a medium setting without any bread inside. Ensure the room is well ventilated during this operation.
IMPORTANT: Do not probe inside the toaster with a metal object.
4. Using your Toaster
Making toast
- Plug in your toaster, the browning level LED indicator lights will illuminate in a vertical animation (around 1 sec), level 1 will remain illuminated on first use. [1]
- Touch the browning level “+/-” buttons to
increase or decrease browning level to your desired setting. [1]
-
Select the preferred function between “( ) favourite”, “( ) crispy side” and/or “( ) small slice”. [2,3,4]
-
Insert the slices of bread into the toasting slots. [5]
-
Press down the lift lever until it locks into the lower position to start the toasting. [6]
-
You can “lift and look” the browning level of the toast at any time without canceling the toasting cycle simply rising the lift lever and pulling it back in place after checking the toasting level. [7]
-
You can cancel the toasting cycle by simply touching the "cancel" button (✗). [8]
-
When the toasting cycle is finished, your toast will pop up automatically. If the bread is small, you can pull up the lift lever to grab it easily and safely. [9]
-
After the toaster is cooled, you can put on the anti-dust lid. [10]
NOTE: The lift lever can not lock into lower position if the plug is off;
Caution:
- The bread toasting slots become very hot during operation. Do not touch!
- Never operate the toaster without the crumb tray in place. Otherwise, the table surface will become too hot and have crumbs.
Tips of making a perfect toast:
- For slightly dry bread, use a lower setting than you normally would.
- For very fresh bread or whole wheat bread, use a higher setting than normal.
- For best results, ensure the bread slices are of even thickness, freshness and size.
× Cancel function [A, 8]
If you wish to stop the cycle before it is finished, simply touch the "cancel" button.
Favourite function [B, 2]
Use this button to memorize the most frequent combination of settings used.
. Select your settings by pressing Browning level / Crispy side / Small slice
. Press "Favourite" button for 3 seconds
. You will hear a beep sound with LED blinking 2 times indicating the setting has been recorded
You could change the preset to a new one simply by repeating the steps again.
![HAIER HTO5A3 021 - Favourite function [B, 2] - 1](/content/2026/04/697968/images/0cd5480fbca5d2839ee2ae5add7ff11ed76cae0e5d80ef43e5b4f1d62e9c33a0.jpg)
Crispy Side function [C, 3]
The crispy side function allows to toast bread or bagel with internal sides only, while warming up the external sides. Bagels must be sliced in half before toasting and put the internal side toward the toasting slots centre. The LED light will remain lit while the crispy side function is in use.
![HAIER HTO5A3 021 - Crispy Side function [C, 3] - 1](/content/2026/04/697968/images/e2100e2aad5347cfc40898e70caaf141eb9df39b69e69028c05618385ac68909.jpg)
Small Slice function [D, 4]
For small slice bread it is suggested to use this button. The heat power will be adjusted from continuous heating to intermittent heating to achieve the desired browning. The LED light will remain lit while the small slice function is in use.
Lift and Look function [7]
When you'd like to check the current browning level and don't want to cancel the toasting cycle, you can just pull up the lift lever and have a look and then put it down.
High lift function [9]
When the slice bread is small and is difficult to grab after pop-up. You can pull up the lift lever to grab it easily and safely.
Anti-Dust lid [10]
When you don't use your toaster, you can put on the anti-dust lid to avoid dust accumulate on the top surface or inside toasting slots. Never put it on when the toasting slots are still in high temperature.
Standby mode
After you plug in your toaster, without any operation for 15 seconds, the toaster will turn to standby mode automatically with all LED light OFF. You can touch any button or press down the lift lever to wake it up. Pressing down the lever will make the toasting process start with the latest used setting.
Mute function [11]
Your product is fitted with a mute function, this will turn off all acoustic sounds from the appliance.
The mute function can be turned on by pressing and holding the small slice button for 3 seconds. To turn off this function, press and hold the small slice button again for 3 seconds and the function is deactivated.
5. Cleaning & Maintenance
- Always unplug the toaster from the electrical outlet and cool completely before cleaning. [12]
- To clean the exterior surface, simply wipe it with a clean damp cloth and dry thoroughly. You can apply dish detergent to a cloth, but not to the toaster, before cleaning. [12]
- To remove crumbs, push the crumb tray handle and it will pop-out. Slide out the crumb tray and discard crumbs. Wipe clean and replace. It is recommend to empty the crumb tray after each use. [13, 14]
- To remove any pieces of bread remaining in the toasting slots, turn the toaster upside down and gently shake. Never insert any hard or sharp instruments into the toasting slots, as this could damage the toaster and cause a safety hazard. [15]
- Never wrap the cord around the outside of the toaster. Use the cord storage cleats on the underside of the toaster. [16]
IMPORTANT:
- Use only water for crumb tray cleaning.
- Do not immerse the toaster in water for cleaning.
6. Troubleshooting
Toaster does not operate
- Cause: no power
- Solution: check if the toaster is plugged in. Check if the electricity is working in your home.
Lift lever can't lock into lower position
- Cause: toaster not plugged in
- Solution: check if the toaster is plugged in.
Uneven browning
- Cause: bread slices of different size, freshness or thickness being toasted at same time
- Solution: use bread slices that are of even thickness, freshness and size.
Toast colour too light or too dark
- Cause: incorrect browning level setting being used
- Solution: select a higher or lower browning level setting.
Burning smell or smoke from toasting slots
- Cause: crumb tray is full, food particles stuck to element or loose in toasting slots
- Solution: unplug and wait few minutes to have the internal elements cooling down before cleaning the toasting slots. Remove any loose food particles in toasting slots; remove and clean the crumb tray.
All LED light OFF at the plugged in status
- Cause: without any operation for 15s
- Solution: press any button or press down the lift lever.
7. Technical data
| Electrical connection 220-240V~50-60Hz | |
| Power 950-1150W | |
8. Important information
Spares and Consumables
Always replace parts with genuine spares. These are available from your local dealer. When ordering parts always quote your model number.
Quality
Factories have been independently assessed for quality. Our products are made using a quality system which meets the requirements of ISO 9001.
Your Guarantee
The guarantee conditions for this appliance are as defined by our representative in the country in which it is sold. Details regarding these conditions can be obtained from the dealer from whom the appliance was purchased. The bill of sale or receipt must be produced when making any claim under the terms of this guarantee.