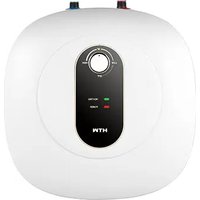
ESSENTIAL HIDE - Boiler HTW - Free user manual and instructions
Find the device manual for free ESSENTIAL HIDE HTW in PDF.


| Product type | Electric storage water heater |
| Brand | HTW |
| Model | ESSENTIAL HIDE |
| Capacity | 15 L or 30 L |
| Dimensions (L x W x H) | 380 x 380 x 325 mm (15 L) / 440 x 440 x 390 mm (30 L) |
| Net weight (empty) | 8 kg (15 L) / 12.2 kg (30 L) |
| Power supply | 220-240 V~ / 50 Hz |
| Rated power | 1500 W |
| Rated pressure | 0.75 MPa (max 0.55 MPa without additional valve) |
| Protection rating | IPX4 |
| Temperature range | 30 °C to 75 °C |
| Water connection | Inlet (blue) and outlet (red) G 1/2 |
| Main functions | Temperature control, automatic heating, keep warm |
| Safety | Safety valve (0.75 MPa), safety drain, frost protection (storage at >0°C) |
| Maintenance and cleaning | Regular descaling (monthly depending on water hardness), drain if unused in winter, exterior cleaning with soft cloth and neutral detergent |
| Service life | 8 years (safe storage life) |
| Installation | Wall-mounted, hook fixing (center distance 62 mm, drilling diameter 10 mm, min depth 90 mm) |
| Package contents | Water heater, wall bracket, manual, sealing gaskets, safety valve, drain hose, red and blue connectors, fixing screws, wall plugs |
Frequently Asked Questions - ESSENTIAL HIDE HTW
User questions about ESSENTIAL HIDE HTW
0 question about this device. Answer the ones you know or ask your own.
Ask a new question about this device
Download the instructions for your Boiler in PDF format for free! Find your manual ESSENTIAL HIDE - HTW and take your electronic device back in hand. On this page are published all the documents necessary for the use of your device. ESSENTIAL HIDE by HTW.
USER MANUAL ESSENTIAL HIDE HTW
EN User manual. Electric water heater
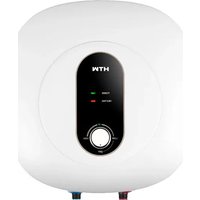
natural_image
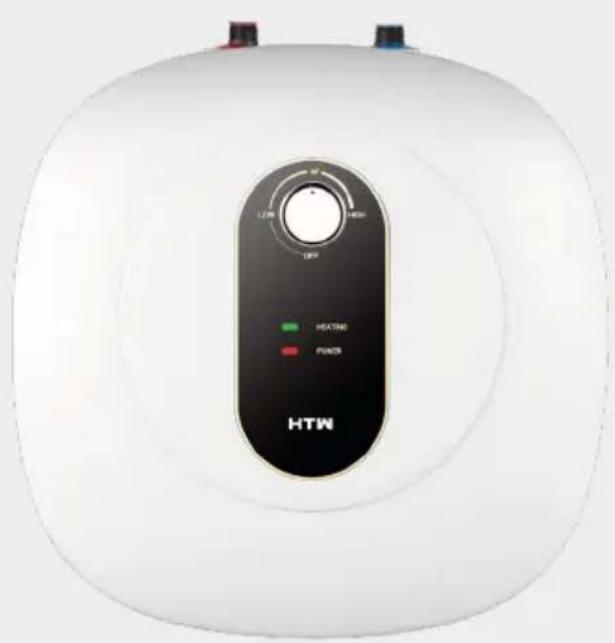
White water heater with control panel and indicator lights, no visible text or symbols on the device itself.- info

Por favor lea atentamente este manual antes de usar este producto | Please, read carefully this manual before using the product | Avant d'utiliser l'équipement, lisez attentivement les instructions | Por favor leia atentamente este manual antes de usar o equipamento | Per favore leggere attentamente questo manuale prima di utilizzare questo prodotto
Gracias | Thank you | Merci | Obrigado | Grazie
ESSENTIAL HIDE
HTW-TV-15ESSHIDE | HTW-TV-30ESSHIDE
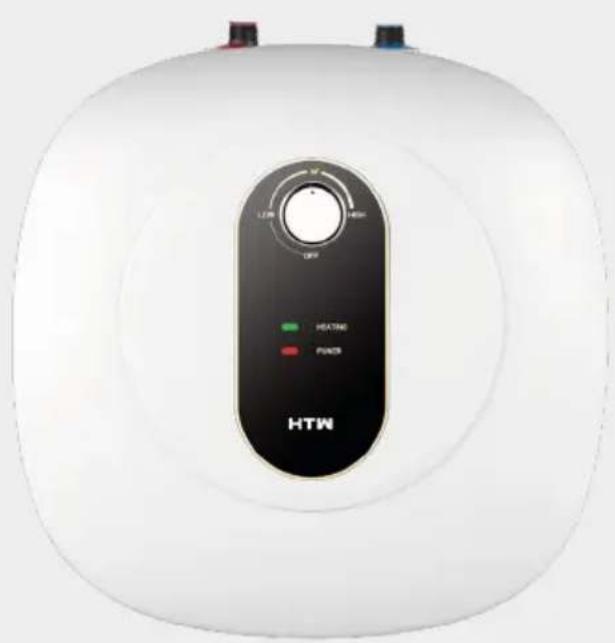
natural_image
White water heater with control panel and indicator lights (no text or symbols on body)ESPAÑOL
flowchart
graph TD
    A["HighLOW"] --> B["OFF"]
    B --> C["Top Left Arrow"]
    C --> D["Bottom Right Arrow"]
natural_image
Technical line drawing of a mechanical component with dimension label 'C' (no text or symbols beyond label)ESSENTIAL HIDE
HTW-TV-15ESSHIDE | HTW-TV-30ESSHIDE
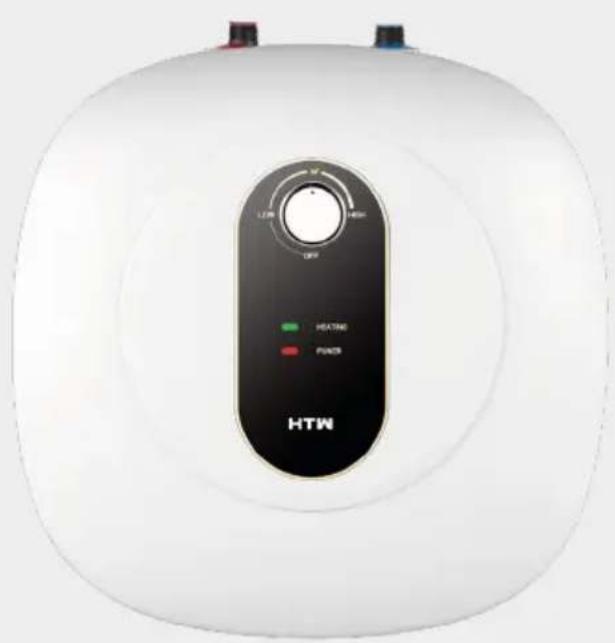
natural_image
White water heater with control panel and indicator lights (no text or symbols on body)ENGLISH
User manual. ELECTRIC WATER HEATER
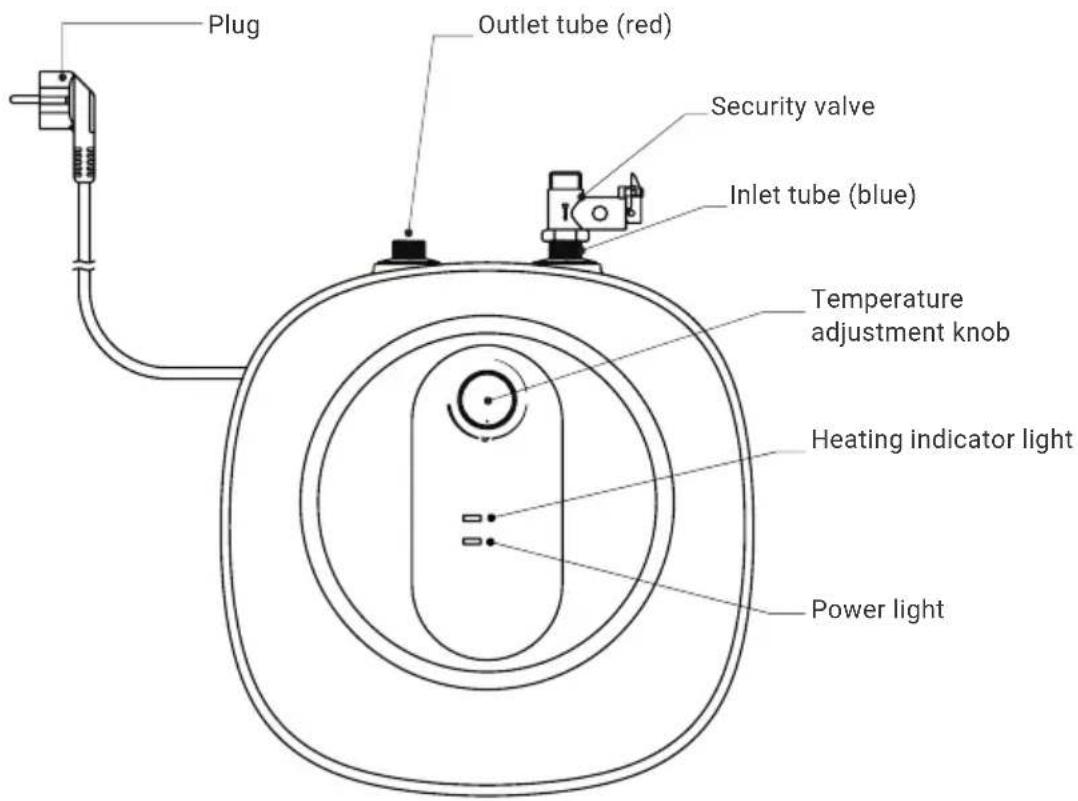
TABLE CONTENTS
01 NAME OF EACH PART OF THE WATER HEATER.... 14
02 INSTALLATION 16
03 WARNING 19
04 METHOD OF USE 20
05 IDENTIFY AND FIX COMMON ERRORS 21
06 DAILY MAINTENANCE 22
07 PRODUCT SPECIFICATIONS 23
THANK YOU for choosing GIAgroup electric storage water heater.
NOTE: Please read the instructions carefully and keep them for reference before use.
- This water heater must be installed by a professional.
For special users (such as children, the elderly, the disabled, etc.) it should be used under the supervision of adults.
*This manual is the property of GIAgroup.
Copying or reproduction prohibited without prior authorization
- The wall for mounting the appliance must be capable of supporting at least four times the total mass of the appliance when filled with water. Take reliable reinforcement measures when necessary.
- The appliance should be installed as close as possible to frequent water points to reduce heat loss through pipes.
- Adequate space should be left around the appliance to facilitate future maintenance. When the appliance is installed above the ceiling, it must be provided with a moving plate and a maintenance window for removing and installing the appliance.
- Safety drainage measures, such as floor drains, must be in place to prevent leaks from appliances causing damage to other facilities.
- It should be installed indoors and where the link temperature is above 0^ C, so as not to cause ice to break the tank water pipe. There should be no flammable or explosive objects around the installation device.
- Do not reverse the connection of the inlet and outlet water pipes.
- Sealing gaskets should be installed at the interface of the inlet and outlet water pipes, and the rotation force should be appropriate during installation
- A safety valve (a pressure relief device) will be installed at the inlet of the appliance, through which water can exit the relief valve drain tube. The outlet of the safety valve must be kept in contact with the atmosphere. The drain tube must be securely attached to the outlet of the relief valve.
- Accessories supplied by our company must be used.
- Sockets that supply power to appliances must be reliably grounded. Do not install power outlets in locations that may be damp or wet.
- Installation must be carried out by professional installation personnel.
Packing list
| Name | Amount | AmountName | |
| ■Water heater Bracket | 1 | 1 | |
| ■Manual Sealing gasket | 1 | 1 | |
| ■Security valve | 1 | ■Plastic expansion tubeo | 2 |
| ■Water drain pipe | 1 | ■Red and blue connectors | 2 |
| ■Fixing screw | 2 |
EQUIPMENT INSTALLATION
-
After determining the installation position of the appliance, drill two holes with a spacing of 62mm and a diameter of 10mm in the horizontal direction of the wall according to the size shown in the following figure, and the depth of the hole should not be less than 90mm.
-
Align the two hanging holes on the back of the appliance with the two hooks on the hanging plate and pull down firmly so that the hanging holes hang on the hook.
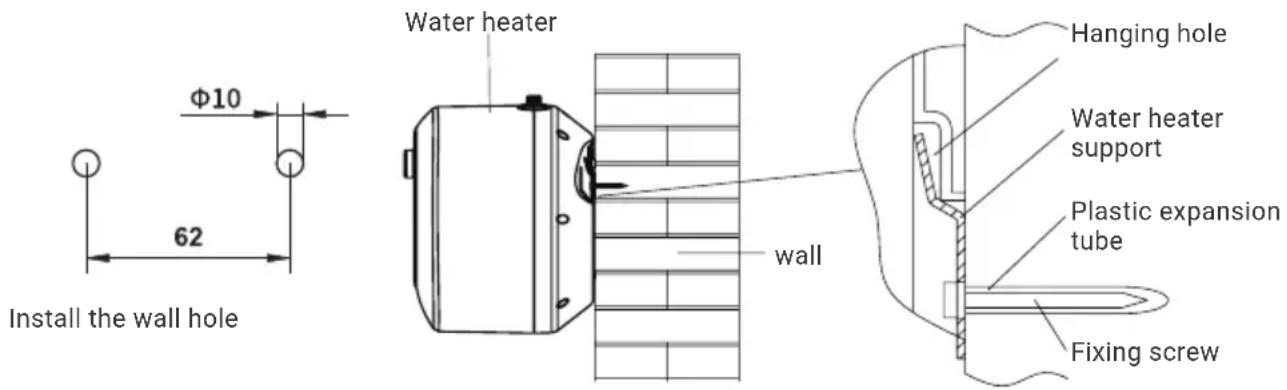
⚠ WARNING: The appliance must be hung securely to prevent personal injury and property damage from falling.
Align the two hanging holes on the back of the appliance with the two hooks on the hanging plate and pull down firmly so that the hanging holes hang on the hook.
Tube connection
● The water inlet and outlet interface specification of this appliance is GI/2.
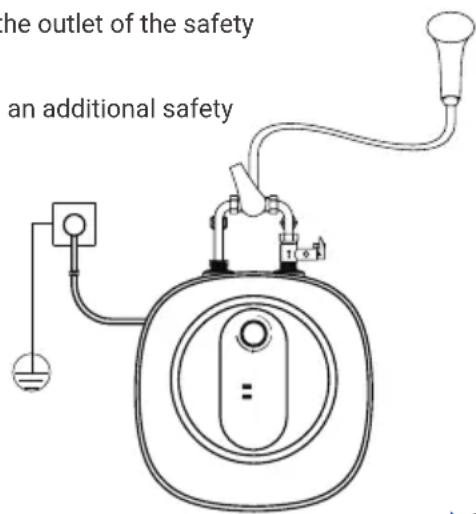
Connect the tubes according to the following figure.
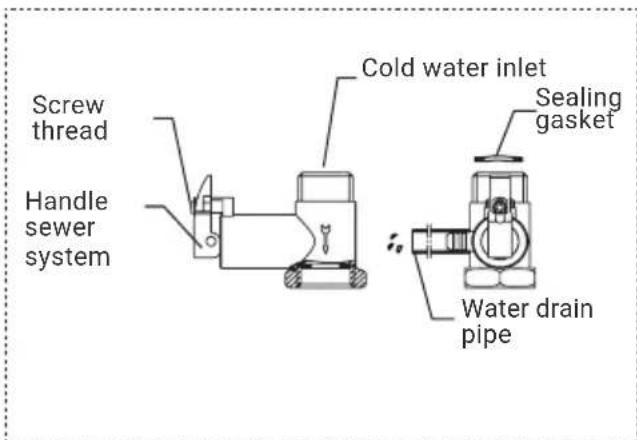
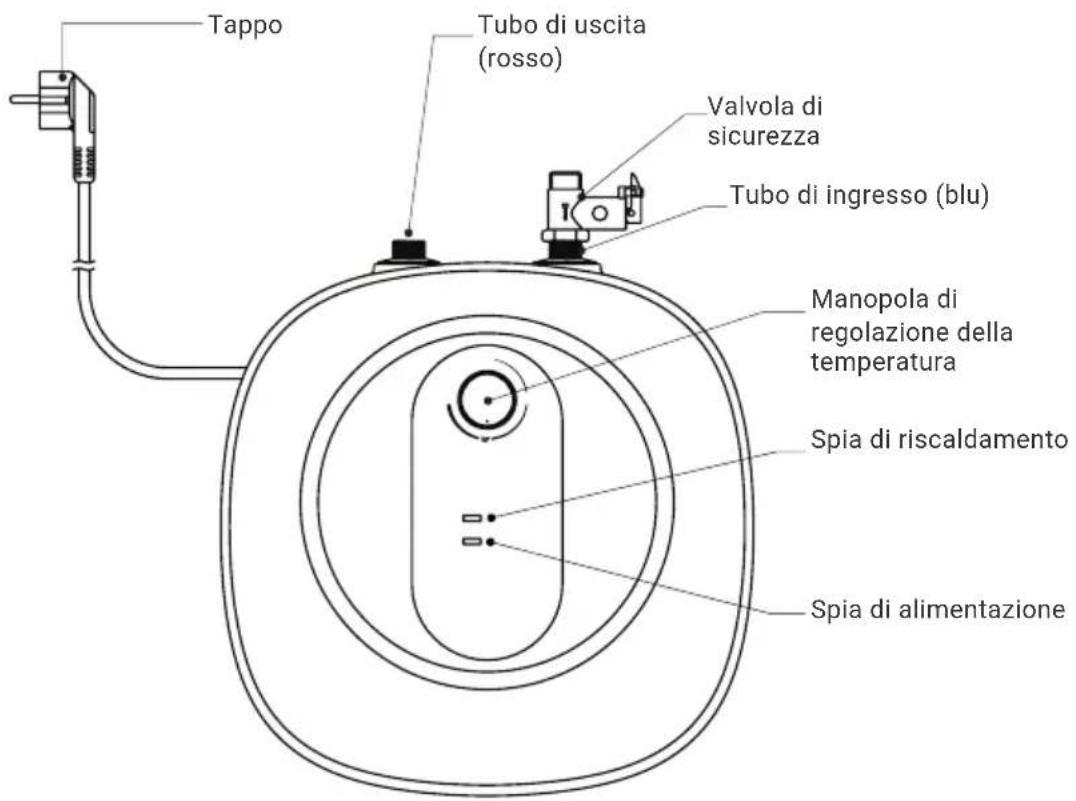
- Connect the safety valve with attached gasket to the inlet port of the appliance with the arrow pointing in the direction of flow.
- Insert the drain pipe into the bottom of the safety valve outlet, the other end of the continuous downward for safe drainage (such as floor drain), the drain pipe should be installation without obstacles, and the outlet of the safety valve is connected with the atmosphere.
- When the water inlet pressure is greater than 0.55 MPa, an additional safety valve should be added to the water inlet pipe.
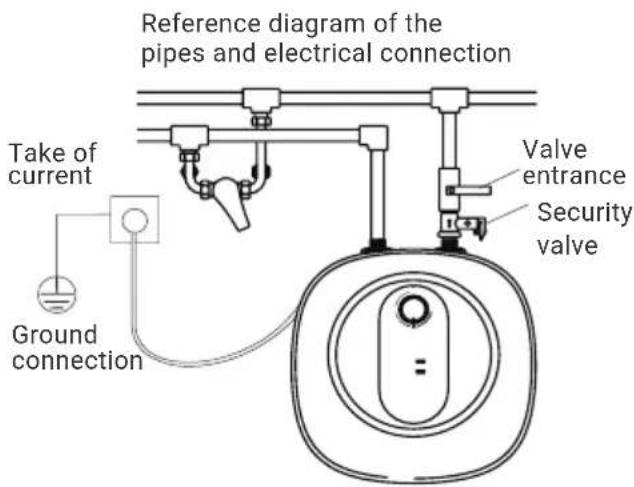
Connection of several outputs
If the user wants to implement a multi-outlet supply system, please refer to the method shown in the drawing for connection.

Warning:
- The rated pressure of the safety valve is 0.75 MPa. When the pressure of the piping system exceeds its rated pressure, the safety valve will automatically drain and relieve the pressure, and the flow of water out of the outlet is a normal phenomenon.
• The drain pipe connected to the pressure relief device (safety valve) should be installed in a continuous downward direction in a frost-free environment. (Run the other end continuously down to a safe drain (e.g. a floor drain) to prevent hot water from escaping). - Blue is the water inlet and red is the water outlet.
- If the hot water pipe is too long, it should be insulated to reduce heat loss.
- When placing a power outlet, determine the installation position based on the actual cable length.
TEST RUN
- After the installation is completed, open all the valves in the pipe, then open the hot water tap, fill the appliance with water and close the hot water tap. Check the pipes for leaks. If so, reconnect the pipes.
- Unscrew the stop screw of the safety valve handle, pull the safety valve handle, and check whether the water discharge of the safety valve is smooth (continuous water output means normal).
- After confirming that the operation is normal, turn on the power and operate it according to the operating methods section. Turn off and disconnect when everything is fine.
⚠ Warning:
- The pressure relief temperature of the safety valve may cause scalding.
- Scalding may occur if the temperature is set above 50^ C. It must be mixed with cold water before using it.
- The device uses a 220-240V\~/50Hz power supply.
- Do not pull the plug or plug it in with wet hands.
- Do not close the water inlet valve and do not turn on the power supply when the appliance is not filled with water, so as not to damage the appliance.
- The safe shelf life is 8 years. If the product is continued to be used beyond the safe service life, it may cause fire or injury due to deterioration in quality from years of deterioration.
- Do not allow children to use the appliance to avoid accidental injury.
⚠ Warning:
- Please confirm the actual water temperature before use to avoid it being too low or too high.
- Turn the thermostat to the lowest temperature before unplugging.
- Periodically pull the safety valve lever to check if the relief valve drain is unblocked. If not, please contact us.
- In cold areas, when the appliance is not used for a long time in winter, the water should be drained to prevent the appliance from freezing and being damaged.
- If the appliance is installed under the sink, frequently check the sink for leaks to prevent the appliance from being endangered.
• WATER INJECTION
When the water heater is used for the first time or used again after a prolonged interruption, you must inject water. Open all valves in the pipeline and turn on the hot water faucet. When water flows continuously, it responds that water heater has filled with water. Turn off the hot water tap, keep Open the valve of the cold water pipe, make sure that cold water can be added automatically after hot water use. And make sure the device always be full of water.
• CONNECT THE POWER
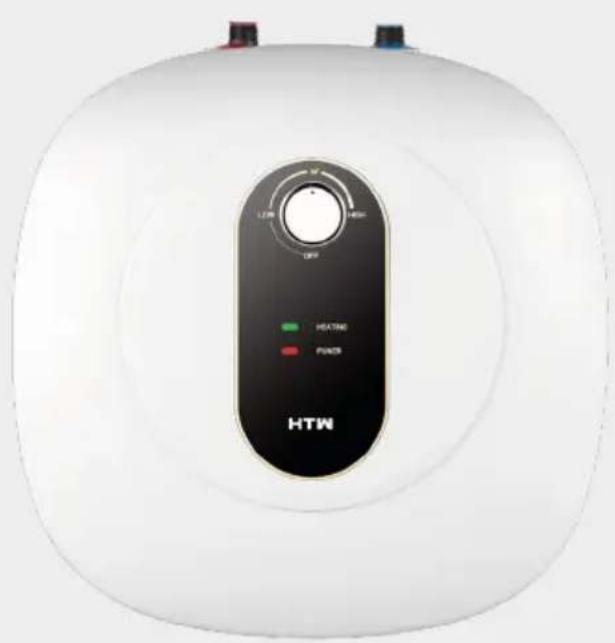
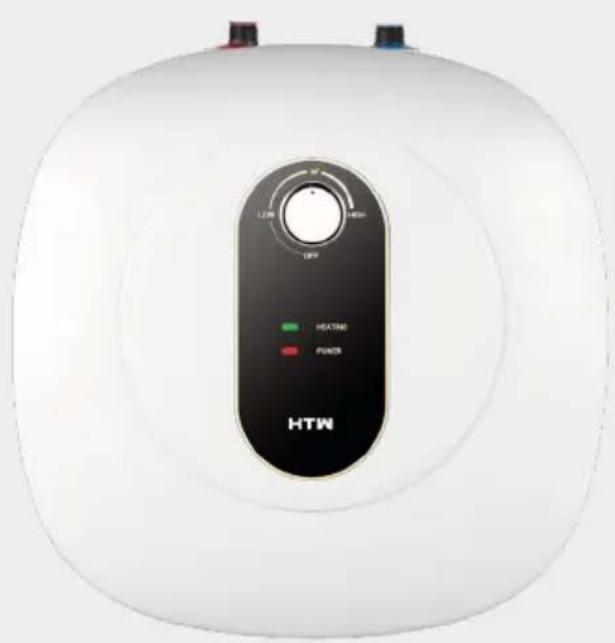
Insert the plug into a reliable outlet, connect the power, the indicator power will be turned on, according to the following method to adjust the power knob temperature control, the water heater works immediately.
• TEMPERATURE REGULATION
Adjust the temperature using the temperature control knob. Turn in the direction clockwise to increase the setting temperature, turn counterclockwise to reduce the setting temperature, and the temperature setting range is approximately 75^ C at room temperature.
After setting the temperature, the water heater works automatically and the heating indicator lights up.
When the water temperature reaches the setting temperature, the power will be cut off automatically, and the heating indicator will light to enter the state heat preservation. When the water temperature drops at any time, the water automatically reheats and the heating indicator lights up. When set to "OFF", the water heater will not work.
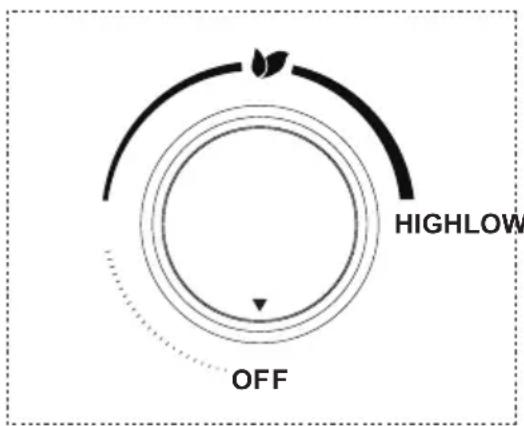
flowchart
graph TD
    A["HighLOW"] --> B["OFF"]
    B --> C["Top Left Arrow"]
    style A fill:#f9f,stroke:#333
    style B fill:#ccf,stroke:#333
    style C fill:#cfc,stroke:#333
Temperature control knob
IDENTIFY AND SOLVE THE MOST COMMON FAULTS
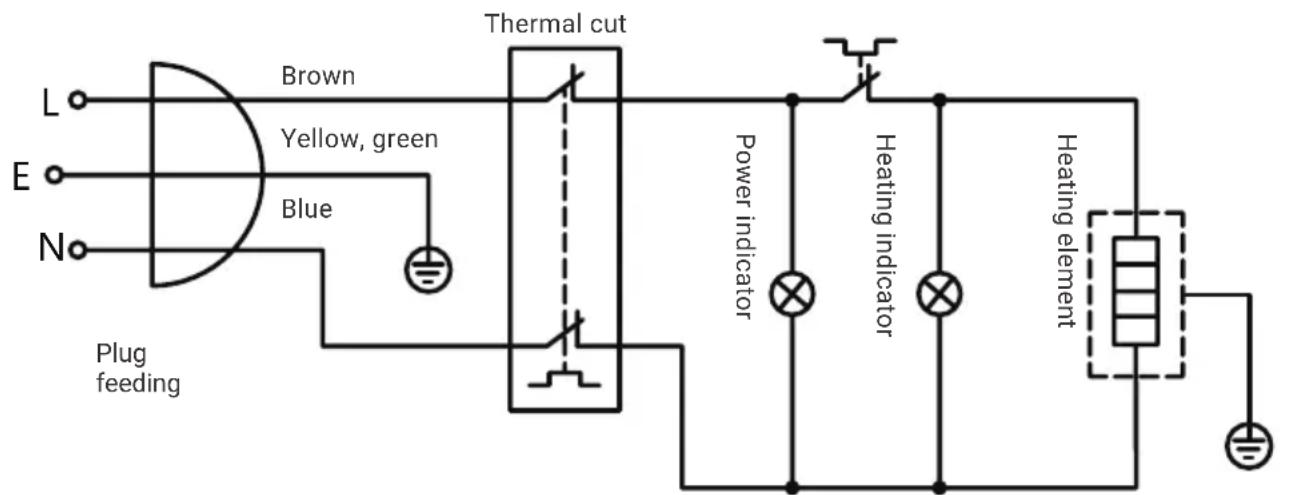
If the water heater breaks down during normal use, please immediately turn off the power, and check according to the following content.
| Breakdowns | Reasons | Solution |
| The water does not flow | 1. If the water is turned off or the pressure is too low2. If the water inlet and outlet globe valve is open3. If the pipes are blocked | 1. Check water supply2. Open the water inlet and outlet globe valve3. Clean the pipes |
| Water does not flow hot | 1. Excess cold water mix2. Low temperature setting3. Insufficient warm-up time4. Internal circuit breakdown | 1. Adjust mixing valve2. Adjust the temperature3. Keep heating4. Maintenance |
| The flowing water comes out hot and cold | The external pressure of water is unstable | Wait for the pressure of the water is normalized |
| The water drips down the valve outlet of security | Normal | Connect the drain pipe and route it to a safe drain |
| The water drips continually of the valve outlet of security | The water pressure is too high | Install a valve pressure limiter in the water inlet pipe |
- CLEANING
Use a dry or damp cloth to wet some neutral cleaner to clean the surface of the water heater, do not use gasoline or other solvents, you should not spray water.
- DESCALING
According to local water quality conditions, when the water heater is used a certain time (usually 1 month), it is necessary to remove dirty lime: first turn off the water heater, close the inlet valve, separate the connection between inlet and outlet, empty the water from the internal tank. After descaling, reinstall the internal tank connection between inlet and outlet.
- DRAINING
In case of prolonged outage or maintenance, first cut off the power supply, close the water inlet valve, separate the connection between the inlet and outlet water pipe, empty it upside down and install the connection between the internal tank and the connection between the inlet and outlet water. When used again, the inside of the tank must be filled with water before connecting the power supply.
- REPLACE THE MAGNESIUM ANODE
In case of prolonged outage or maintenance, first cut off the power supply, close the water inlet valve, separate the connection between the inlet and outlet water pipe, empty it upside down and install the connection between the internal tank and the connection between the inlet and outlet water. When used again, the inner tank must be filled with water before connecting the power supply.

CAUTION
- Unplug the power cord before performing maintenance.
- Non-professional maintenance personnel are strictly prohibited from disassembling, maintaining and modifying the water heater.
- The safety valve (pressure relief devices) needs to be actioned regularly, to remove calcium carbonate sediments and test that it is not blocked.
- If it is blocked, please repair it in time.
| Parameters\Model | HTW-TV-15ESSHIDE | HTW-TV-30ESSHIDE |
| Rated capacity | 15L | 30L |
| Net weight (anhydrous condition) | 8Kg | 12.2kg |
| Rated power | 1500W | |
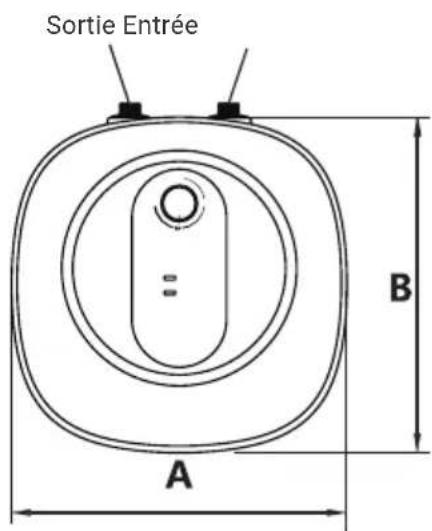
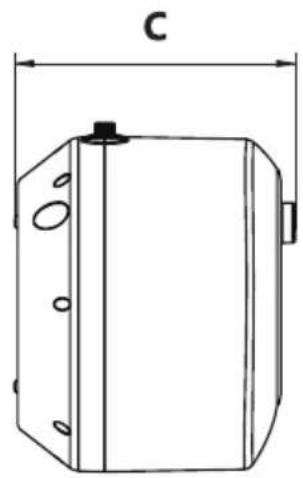
| Product size (WxBxCmm) | 380x380x325mm | 440x440x390mm |
| Nominal voltage | 220-240V~/50Hz | |
| Nominal pressure | 0.75MPa | |
| Impermeability | IPX4 | |
| Setting temperature range | 30 to 75°C | |
PRODUCT DIMENSIONS UNIT:MM

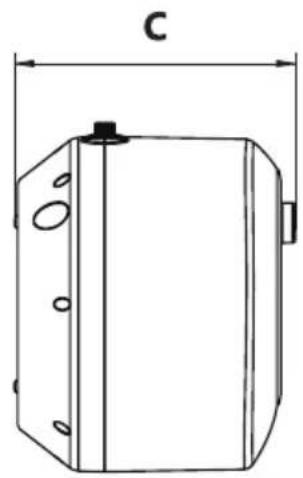
natural_image
Technical line drawing of a mechanical component with dimension label 'C' (no text or symbols beyond label)ESSENTIAL HIDE
HTW-TV-15ESSHIDE | HTW-TV-30ESSHIDE
natural_image
White water heater with control panel and indicator lights (no text or symbols on body)FRANÇAIS
flowchart
graph TD
    A["HighLOW"] --> B["OFF"]
    B --> C["Top Left Arrow"]
    C --> D["Bottom Right Arrow"]
DIMENSIONS DU PRODUIT UNITÉ:MM
natural_image
Technical line drawing of a mechanical component with dimension label 'C' (no text or symbols beyond label)ESSENTIAL HIDE
HTW-TV-15ESSHIDE | HTW-TV-30ESSHIDE
natural_image
White water heater with control panel and indicator lights (no text or symbols on body)PORTUGUÊS
flowchart
graph TD
    A["HighLOW"] --> B["OFF"]
    B --> C["Top Left Arrow"]
    C --> D["Bottom Right Arrow"]
natural_image
Technical line drawing of a mechanical component with dimension label 'C' (no text or symbols beyond label)ESSENTIAL HIDE
HTW-TV-15ESSHIDE | HTW-TV-30ESSHIDE
natural_image
White water heater with control panel and indicator lights (no text or symbols on body)ITALIANO
Manuale utente. SCALDABAGNO ELETTRICO
flowchart
graph TD
    A["HighLOW"] --> B["OFF"]
    B --> C["Top Left Arrow"]
    C --> D["Bottom Right Arrow"]
natural_image
Technical line drawing of a mechanical component with dimension label 'C' (no text or symbols beyond label)GIAGroup
C. Can Cabanyes, 88 08403 Granollers
España info@htwspain.com | France info@htwfrance.com
Portugal info@htw.pt | Italy info.it@htwspain.com
SAT

España sat@groupgia.com
France sat.fr@groupgia.com
Portugal sat.pt@groupgia.com
Italy sat.it@groupgia.com
tel. +34 933904220
tel. +33 465430168
tel.+39 05641715509
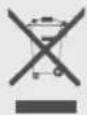
At the end of its working life, the product must not be disposed of as urban waste. It must be taken to a special local authority deifferentiated waste collection centre or to a dealer providing this service. Disposing of a household appliance separately avoids possible negative consequences for the environment and health deriving from inappropriate disposal and enables the constituent materials to be recovered to obtain significant savings in energy and resources. As a reminder of the need to dispose of household appliances separately, the product is marked with a crossed-outwheeled dustbin.
AVERTISSEMENTS POUR L'ÉLIMINATION CORRECTE DU PRODUIT AUX TERMES DE LA DIRECTIVE 2002/96 / CE.
- ESSENTIAL HIDE
- TABLE CONTENTS
- EQUIPMENT INSTALLATION
- Connection of several outputs
- Warning:
- TEST RUN
- ⚠ Warning:
- • WATER INJECTION
- • CONNECT THE POWER
- • TEMPERATURE REGULATION
- IDENTIFY AND SOLVE THE MOST COMMON FAULTS
- - CLEANING
- - DESCALING
- - DRAINING
- - REPLACE THE MAGNESIUM ANODE
- CAUTION
- PRODUCT DIMENSIONS UNIT:MM
- FRANÇAIS
- DIMENSIONS DU PRODUIT UNITÉ:MM
- PORTUGUÊS
- ITALIANO
- GIAGroup
- SAT
Brand : HTW
Model : ESSENTIAL HIDE
Category : Boiler