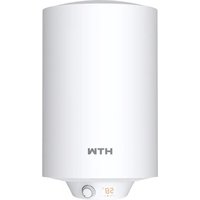
DRY DIGITAL - Boiler HTW - Free user manual and instructions
Find the device manual for free DRY DIGITAL HTW in PDF.


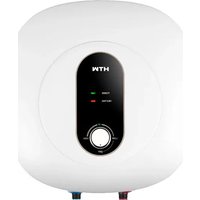
| Product Type | Electric Water Heater |
| Brand | HTW |
| Model | DRY DIGITAL |
| Tank Volume (Liters) | 30 / 50 / 80 / 100 / 120 / 150 |
| Rated Power | 1500 W |
| Rated Voltage | 220-240 V~ |
| Max Water Pressure | 0.75 MPa |
| Max Water Temperature | 75 °C |
| Temperature Adjustment Range | 30 to 75 °C |
| Temperature Control | Automatic with rotary knob |
| Display | 2-digit LED |
| Protections | Quadruple: dry-heat protection, over-temperature, overpressure, anti-rust |
| Tank Material | Enameled steel |
| Insulation | Thick expanded polyurethane (PUF) |
| Heating Element | Low thermal load |
| Power Supply Type | Single-phase, 3-pin plug 230V/16A |
| Inlet/Outlet Connection | 12" BSP |
| Installation | Wall-mounted, clearance on right side ≥ 0.2 m |
| Usage | Not for potable water |
| Maintenance | Drain if freezing, regular tank cleaning, check anode every 6 months |
| Safety | Grounding mandatory, do not obstruct decompression hole, supervise children |
Frequently Asked Questions - DRY DIGITAL HTW
User questions about DRY DIGITAL HTW
0 question about this device. Answer the ones you know or ask your own.
Ask a new question about this device
Download the instructions for your Boiler in PDF format for free! Find your manual DRY DIGITAL - HTW and take your electronic device back in hand. On this page are published all the documents necessary for the use of your device. DRY DIGITAL by HTW.
USER MANUAL DRY DIGITAL HTW
natural_image
White HTW water heater with digital display showing 58°C, no visible text or symbols on bodyESPAÑOL
| Dimensiones\Modelo | D30 - 15ED | D50-15ED | D80-15ED | D100-15ED | D120-15ED | 150-15ED | |
| A (mm) | 340 | 380 | 450 | 450 | 450 | 450 | |
| B (mm) | 595 | 735 | 770 | 910 | 1050 | 1260 | |
| C (mm) | 300 | 340 | 410 | 410 | 410 | 410 | |
| D (mm) | 355 | 395 | 465 | 465 | 465 | 465 | |
| E (mm) | 205 | 205 | 205 | 205 | 205 | 205 |
| Dimensiones\Modelo | D30-15ED (EU) | D50-15ED (EU) | D50-15ED(EU)-S | D80-15ED(EU) | D100-15ED(EU) |
| A (mm) | 340 | 380 | 450 | 450 | 450 |
| B (mm) | 638 | 755 | 595 | 828 | 983 |
| C (mm) | 300 | 340 | 410 | 410 | 410 |
| D (mm) | 355 | 395 | 465 | 465 | 465 |
| E (mm) | 205 | 205 | 205 | 205 | 205 |
natural_image
White HTW water heater with digital display showing temperature reading (no text or symbols on body)ENGLISH
User manual. ELECTRIC WATER HEATER
SPECIAL ADVISE
- Before installing this water heater, check and confirm that the earthing on the supply socket is reliably grounded. Otherwise, the water heater shall not be installed and used.
- Do not use extension boards.
- Incorrect installation and use of the water heater may result in serious injuries and loss of property.
- Children being sup ervisad not to p la y with the appliance.
- WARNING: This appliance is not to be used for a potable water supply. The water inlet of this appliance shall not be connected to inlet water obtained from a ny other water heating system.
• Max inlet water pressure (Pa) : 0.75M Pa
PERFORMANCE CHARACTERISTICS
- Completely automatic control: automatic addition of cold water, automatic heating.
- Four-fold safety protection: multiple safety protection devices, such as dry heating protection, extra-temperatura, high hydraulic pressure protection, anti-rust protection, etc., safe and reliable.
- Enameled inner container : manufactured by using advanced enameling technique. It is anti rust, corrosion-proof, incrustation-resistant, leak-proof, with long life.
- Heating element designad with low thermal load: safe and reliable, for longer life.
- Thick PUF far efficient thermal insulation and energy saving.
- Temperatura controller: Accurate and reliable control of temperatura.
- Adjustable range of water temperatura from 30 to 75^ .
- Simple and easy to use.
SPECIFICATIONS
| Water tank volume (Litres) | 30 | 50 | 80 | 100 | 120 | 150 |
| Rated power | 1500W | |||||
| Rated voltage | 220-240V~ | |||||
| Rated water pressure | 0.75 MPa | |||||
| Max water temperature | 75°C | |||||
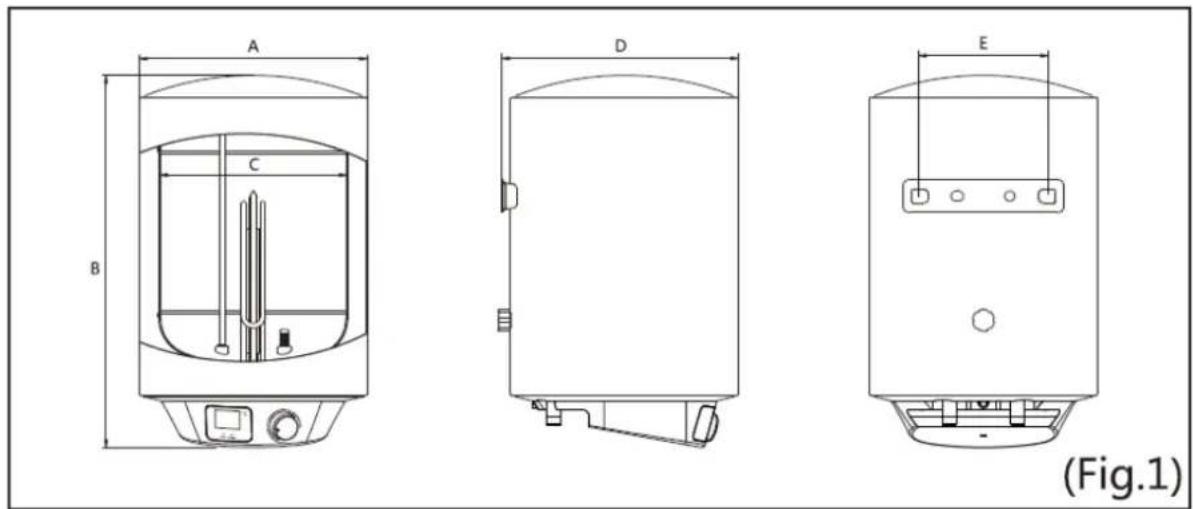
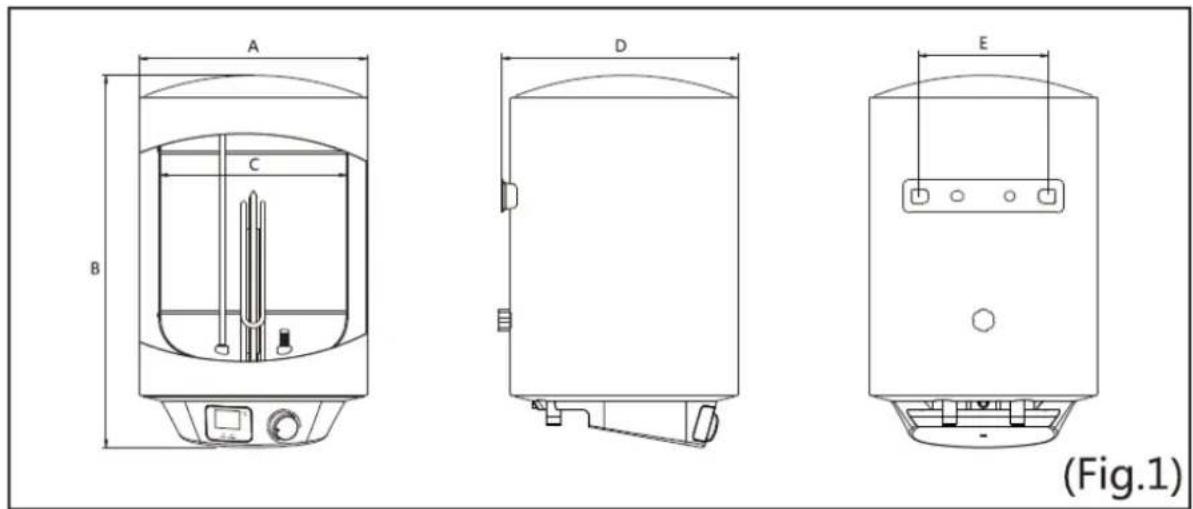
PRODUCT DIMENSIONS FOR INSTALLATION (VERTICAL MODE)
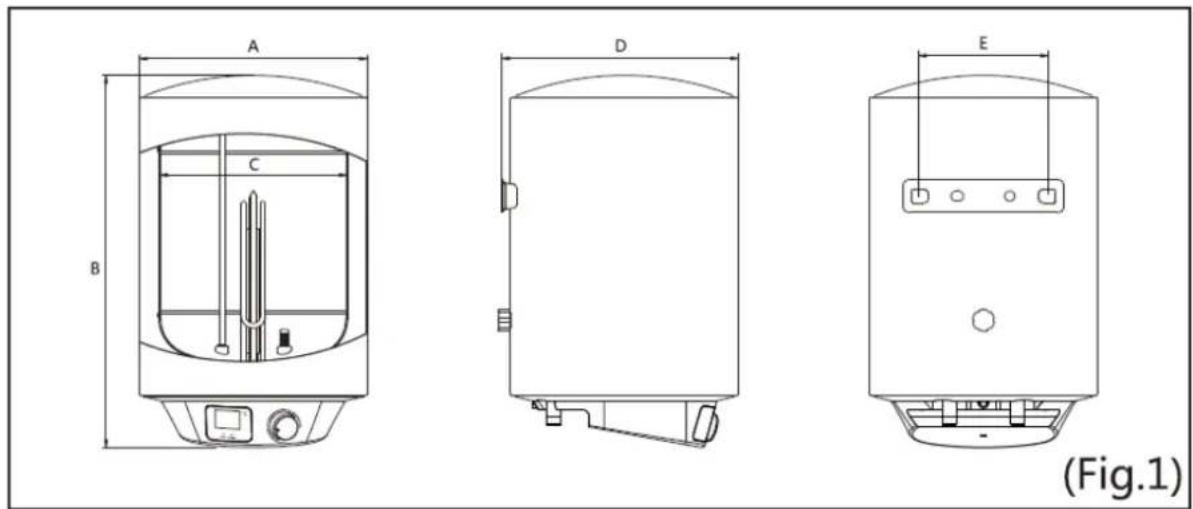
| Dimension\Model | D30 - 15ED | D50-15ED | D80-15ED | D100-15ED | D120-15ED | 150-15ED | |
| A (mm) | φ340 | φ380 | φ450 | φ450 | φ450 | φ450 | φ450 |
| B (mm) | 595 | 735 | 770 | 910 | 1050 | 1260 | |
| C (mm) | φ300 | φ340 | φ410 | φ410 | φ410 | φ410 | φ410 |
| D (mm) | 355 | 395 | 465 | 465 | 465 | 465 | 465 |
| E (mm) | 205 | 205 | 205 | 205 | 205 | 205 | 205 |
| Dimension\Model | D30-15ED (EU) | D50-15ED (EU) | D50-15ED (EU)-S | D80-15ED (EU) | D100-15ED (EU) |
| A (mm) | 340 | 380 | 450 | 450 | 450 |
| B (mm) | 638 | 755 | 595 | 828 | 983 |
| C (mm) | 300 | 340 | 410 | 410 | 410 |
| D (mm) | 355 | 395 | 465 | 465 | 465 |
| E (mm) | 205 | 205 | 205 | 205 | 205 |
Note: All the dimensions are in mm, E: center to center distance
METHODS OF INSTALLATION
Note: Please ensure to use the accessories provided along with the product to install this water heater. The heater cannot be hung on the support until it has been confirmed to be firm and reliable. Otherwise, the heater may drop off from the wall, resulting in damage of the heater, even serious accidents. When determining the location of the bolt holes, it shall be ensured that there is a clearance not less than 0.2m on the right side of the heater. This may be required during maintenance of the heater.
- This water heater shall be installed on a solid wall. If the strength of the wall cannot bear the load equal to two times of the total weight of the heater filled fully with water, it is then necessary to install a special support.
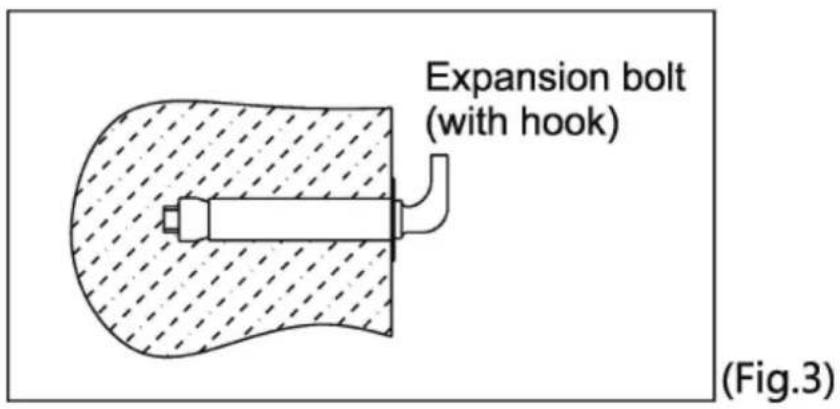
• After selecting a proper location, determine the positions of the two holes used for expansion bolts with hook. (The d distance of two hales is 205mm). Make two holes in the wall with the corresponding depth and size matching the expansion bolts attached with the heater, insert the bolt, turn the hook upwards, tighten the nuts to fix firmly, and then hang the water heater on it (see Fig.3).
• Install the supply socket on the wall. The supply socket should be 3 pins, single phase,230V/16A. It is recommended to place the socket on the right side above the heater. The height of the socket to the ground shall not be less than 1.8m (see Fig.4).
- If the bathroom is too small, the heater can be installed at another place. However, in order to reduce the pipeline heat losses, the installation position of the heater shall be as near as possible to the bathroom.
CONNECTION OF PIPELINES
- The dimension of multifunction valve and the inlet /outlet pipe is 12 " BSP.
- Connection of multifunction valve install the multifunction valve with the heater on the inlet of the water heater.
• In order to avoid leakage when connecting the pipelines, the rubber seal gaskets provided with the heater must be added at the end of the threads. Ensure leak proof joints.
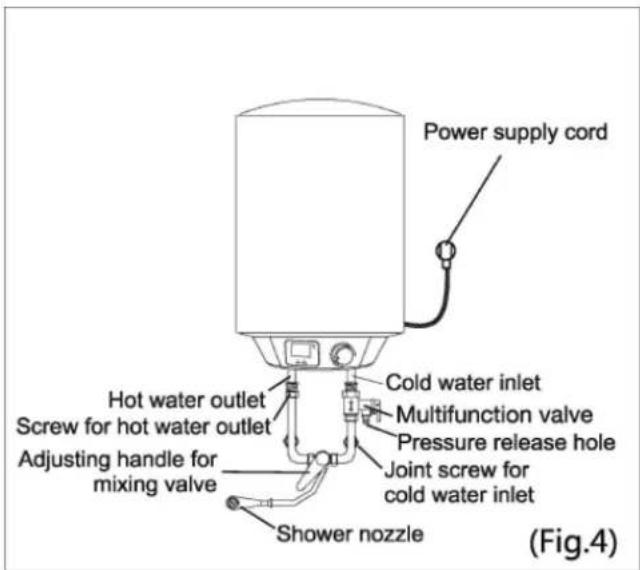
TYPICAL SINGLE OUTLET CONNECTION
MINI OUTLET CONNECTION
- If the users want to install a multi-way supply system, refer to the method shown in Fig.5 for connection of the pipelines.
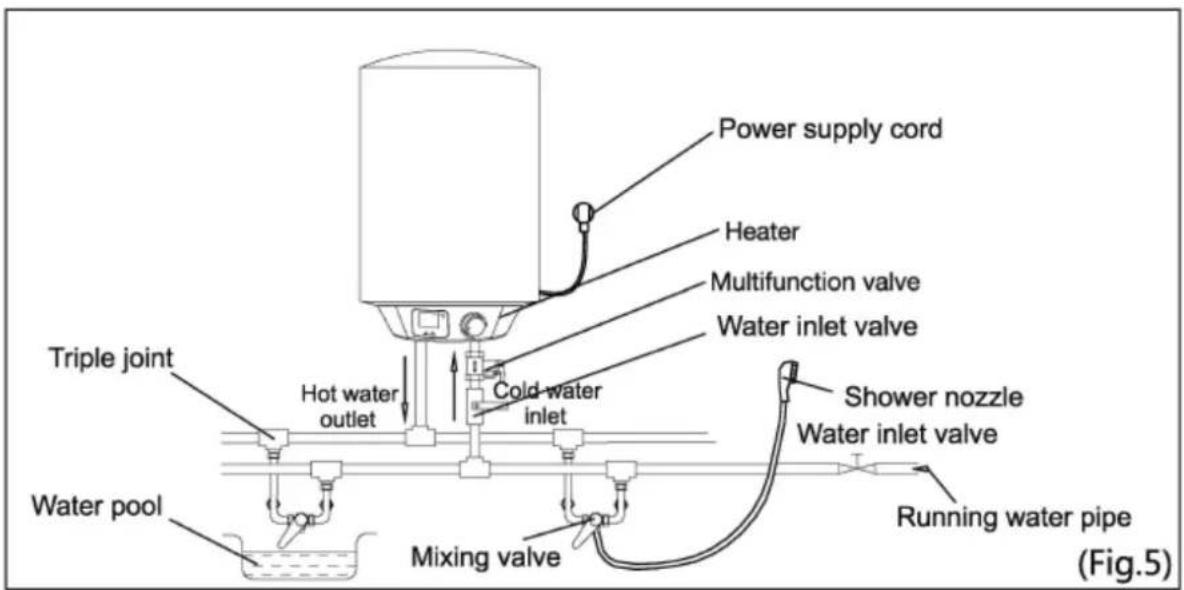
METHODS OF INSTALLATION
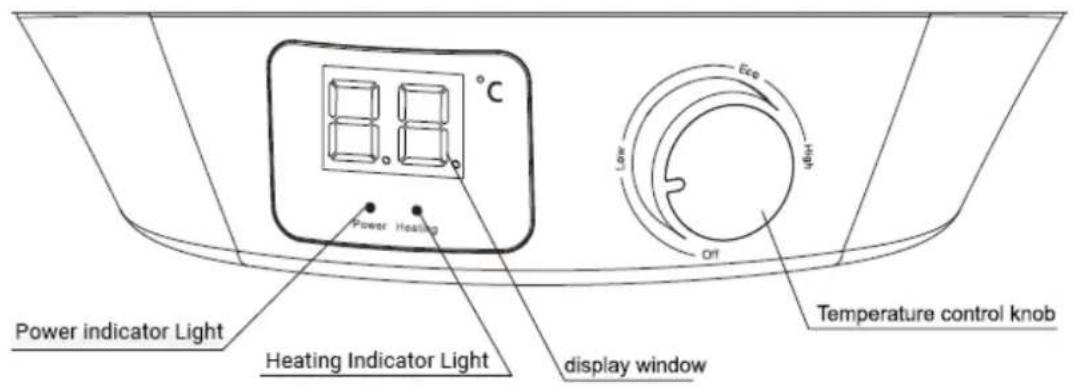
Illustration of Control Panel
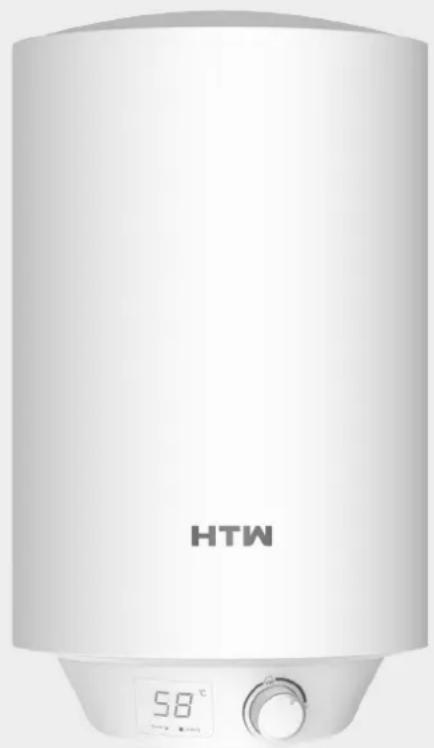
- Display window: 2 digits LED display window can show the current water temperatura.
- Power indicator light: when power supply is connected, green light is on; when power supply is cut off, green light is off.
- Heating Indicator Light: when water heater is heating, red light is on; when water heater stops heating or in warming condition, red light is off.
- Temperatura control knob: adjusting water temperatura.
Operation
- Setting water heating temperature: Turn the temperatura control knob can adjust heating temperature. The temperature adjusting range is 30\~75°C. Rotate clockwise to get higher temperatura, rotate counterclockwise to get lower temperatura. It is better to turn control knob to high temperatura a rea in order to get more hot water.
- Heating and warming: Water heater can control temperatura automatically. When heating to setup temperatura water heater will cut off power supply and stop heating. When water temperatura decrease to certain value, water heater will connect power supply and reheat.
Note: hot water is supplied under heating/warming mode. - Stop heating: When the control knob locales at "off", power supply would be cut off and water heater stop heating.
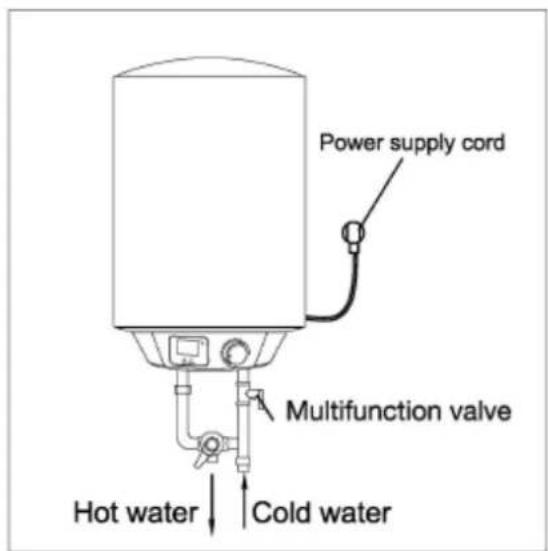
(Fig.6)
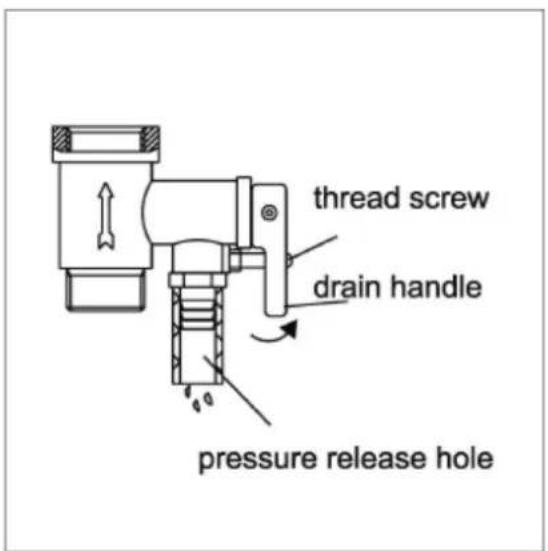
(Fig.7)
CAUTIONS
- During heating, there may be drops of water dripping from the pressure release hole of the multifunction valve. This is a normal phenomenon. If there is a large amount of water leak, please contact customer care center for repair. This pressure release hole shall, under no circumstances, be blockc:t otherwise, the heater may be damaged, even resulting in accidents.
- The drainage pipe connected to the pressure release hole must be kept sloping downwards.
- Since the water temperatura inside the heater can reach up to 75^ , the hot water must not be exposed to human bodies when it is initially used. Adjust the water temperatura to a suitable temperatura to avoid scalding.
- Unscrew the thread screw on the multifunction safety valve, and lift the drain handle upwards (See Fig. 7) to drain the water from the inner tank.
- If the supply cord is damaged, it must be replaced by the manufacturer, its service agent or related qualified person in order to avoid a hazard.
- This appliance is not intended for use by persons(including children)with reduce physical, sensory or mental capabilities, or lack of experience and knowledge, unless they have been give supervision or instruction concerning use of the appliance by a person responsible for their safety.
MAINTENANCE
- Check the power supply plug and socket frequently to make sure that they have good, reliable contact and are well grounded without overheating penomenon.
- If the heater is not used for a long time, especially in the regions with low atmospheric temperature (lower than 0^ C), the water inside the heater shall be drained away. This will prevent the damage to the heater due to water freezing in the inner container, (Refer Cautions in this manual for the methods to drain away the water from the inner container).
- In order to ensure that the water heater operates efficiently for long time, it is recommended to clean the inner container and the desposits on the electrical heating components periodically.
- It is recommended to examine the anode protection materials every six months or so. If all the material has been consumed, please replace with the new material.
WIRING DIAGRAM
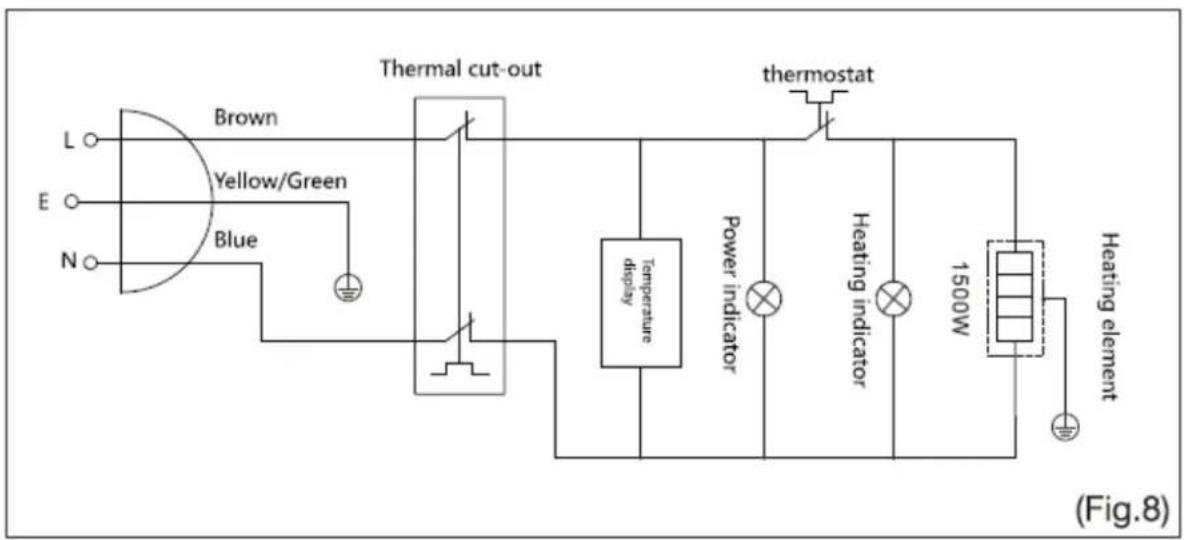
flowchart
graph TD
    A["Thermal cut-out"] --> B["Thermostat"]
    B --> C["1500W"]
    C --> D["Heating element"]
    D --> E["Power indicator"]
    E --> F["Temperature display"]
    F --> G["Blue"]
    G --> H["Yellow/Green"]
    H --> I["L"]
    H --> J["E"]
    H --> K["N"]
    style A fill:#f9f,stroke:#333
    style B fill:#ccf,stroke:#333
    style C fill:#cfc,stroke:#333
    style D fill:#fcc,stroke:#333
    style E fill:#ffc,stroke:#333
    style F fill:#fcc,stroke:#333
    style G fill:#ffc,stroke:#333
    style H fill:#fcc,stroke:#333
    style I fill:#fff,stroke:#333
    style J fill:#fff,stroke:#333
    style K fill:#fff,stroke:#333
FAILURES AND TREATMENT
| Failures Reasons Treatment | ||
| The water not flowing out of the hot water outlet | 1. The water supply system is cut off or the water pressure is too low | Check the water supply |
| 2. The water inlet valve is not open | Open the water inlet valve | |
| 3. The failure of the water outlier valve | Replace the water outlet valve | |
| The water flowing out of the hot water outlet is cold but the heating light is on | 1. The hot water outlet is not open | Open the hot water outlet |
| 2. The water temperature is not adjusted property | Appropriately increased set temperature, the amount of cold and hot water is controlled by adjusting the mixing valve. | |
| 3. The heating time is too short to reach the set temperature | Continue heating | |
| 4. The damage of electric heating element | Not 1,2,3 options, contact the maintenance department | |
| The water flowing out of the hot water outlet is cold but the heating light is not on | 1. Power outage or power switch in off position | Check the power line |
| 2. The failure of thermostat | Not 1 options, contact the maintenance department | |
| 3. The failure of thermal cut-out | Not 1 options, contact the maintenance department | |
| 4. The failure of internal circuit | Not 1 options, contact the maintenance department | |
DRY DIGITAL
HTW-TV-50DRYDIG | HTW-TV-80DRYDIG | HTW-TV-100DRYDIG
natural_image
White HTW water heater with digital display showing 58°C, no visible text or symbols on bodyFRANÇAIS
DIMENSIONS DU PRODUIT POUR L'INSTALLATION (MODE VERTICAL)
| Dimension\Modèle | D30 - 15ED D50-15ED D80-15ED | D100-15ED D120-15ED | 150-15ED | |||
| A (mm) | 340 | 380 | 450 | 450 | 450 | 450 |
| B (mm) | 595 | 735 | 770 | 910 | 1050 | 1260 |
| C (mm) | 300 | 340 | 410 | 410 | 410 | 410 |
| D (mm) | 355 | 395 | 465 | 465 | 465 | 465 |
| E (mm) | 205 | 205 | 205 | 205 | 205 | 205 |
| Dimension\Modele | D30-15ED (EU) | D50-15ED (EU) | D50-15ED(EU)-S | D80-15ED(EU) | D100-15ED(EU) |
| A (mm) | 340 | 380 | 450 | 450 | 450 |
| B (mm) | 638 | 755 | 595 | 828 | 983 |
| C (mm) | 300 | 340 | 410 | 410 | 410 |
| D (mm) | 355 | 395 | 465 | 465 | 465 |
| E (mm) | 205 | 205 | 205 | 205 | 205 |
METHODS OF INSTALLATION
natural_image
White HTW water heater with digital display showing 58°C, no visible text or symbols on bodyPORTUGUÊS
PRODUCT DIMENSIONS FOR INSTALLATION (VERTICAL MODE)
| Dimensão\Modelo | D30 - 15ED D50-15ED D80-15ED | D100-15ED D120-15ED 150-15ED | ||||
| A (mm) | 340 | 380 | 450 | 450 | 450 | 450 |
| B (mm) | 595 | 735 | 770 | 910 | 1050 | 1260 |
| C (mm) | 300 | 340 | 410 | 410 | 410 | 410 |
| D (mm) | 355 | 395 | 465 | 465 | 465 | 465 |
| E (mm) | 205 | 205 | 205 | 205 | 205 | 205 |
| Dimensão\Modelo | D30-15ED (EU) | D50-15ED (EU) | D50-15ED(EU)-S | D80-15ED(EU) | D100-15ED(EU) |
| A (mm) | 340 | 380 | 450 | 450 | 450 |
| B (mm) | 638 | 755 | 595 | 828 | 983 |
| C (mm) | 300 | 340 | 410 | 410 | 410 |
| D (mm) | 355 | 395 | 465 | 465 | 465 |
| E (mm) | 205 | 205 | 205 | 205 | 205 |
natural_image
White HTW water heater with digital display showing 58°C, no visible text or symbols on bodyITALIANO
Manuale utente. SCALDABAGNO ELETTRICO
CONSIGLIO SPECIALE
natural_image
Technical line drawing of a cylindrical container with a curved top and side-mounted legs (no text or symbols)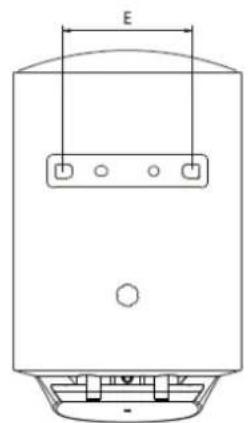
(Fig.1)
| Dimensione\Modello | D30 - 15ED | D50-15ED | D80-15ED | D100-15ED | D120-15ED | 150-15ED | |
| A (mm) | 340 | 380 | 450 | 450 | 450 | 450 | |
| B (mm) | 595 | 735 | 770 | 910 | 1050 | 1260 | |
| C (mm) | 300 | 340 | 410 | 410 | 410 | 410 | |
| D (mm) | 355 | 395 | 465 | 465 | 465 | 465 | |
| E (mm) | 205 | 205 | 205 | 205 | 205 | 205 |
| Dimensione\Modello | D30-15ED (EU) | D50-15ED (EU) | D50-15ED(EU)-S | D80-15ED(EU) | D100-15ED(EU) |
| A (mm) | 340 | 380 | 450 | 450 | 450 |
| B (mm) | 638 | 755 | 595 | 828 | 983 |
| C (mm) | 300 | 340 | 410 | 410 | 410 |
| D (mm) | 355 | 395 | 465 | 465 | 465 |
| E (mm) | 205 | 205 | 205 | 205 | 205 |
TIPICO COLLEGAMENTO A USCITA SINGOLA
CONNESSIONE DI USCITA MINI
España info@htwspain.com | France info@htwfrance.com
Portugal info@htw.pt | Italy info.it@htwspain.com
SAT

España sat@groupgia.com
France sat.fr@groupgia.com
Portugal sat.pt@groupgia.com
Italy sat.it@groupgia.com
tel.+34 933904220
tel.+33 465430168
tel.+39 05641715509
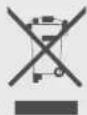
At the end of its working life, the product must not be disposed of as urban waste. It must be taken to a special local authority differentiated waste collection centre or to a dealer providing this service. Disposing of a household appliance separately avoids possible negative consequences for the environment and health deriving from inappropriate disposal and enables the constituent materials to be recovered to obtain significant savings in energy and resources. As a reminder of the need to dispose of household appliances separately, the product is marked with a crossed-out wheeled dustbin.
AVERTISSEMENTS POUR L'ÉLIMINATION CORRECTE DU PRODUIT AUX TERMES DE LA DIRECTIVE 2002/96 / CE.
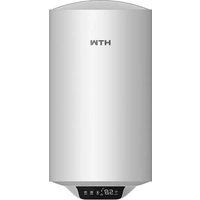
Brand : HTW
Model : DRY DIGITAL
Category : Boiler