
GTH64TF - Cooker Glem Gas - Free user manual and instructions
Find the device manual for free GTH64TF Glem Gas in PDF.

| Product type | Built-in ceramic hob |
| Brand | Glem Gas |
| Model | GTH64TF |
| Number of cooking zones | 4 (including one double) |
| Control type | Touch control |
| Dimensions (W x D x H) | 59 x 52 x 5 cm |
| Net weight | Approximately 8 kg |
| Power supply voltage | 220-240 V ~ 50/60 Hz |
| Total power | 7200 W |
| Power levels | 9 levels (1 to 9) + Keep warm function |
| Special functions | Double zone, Parboiling (Preheating), Warming (Keep warm), Timer, Memo, Control lock |
| Display | Digital with residual heat indicator (H) |
| Safety | Automatic safety shutdown, child lock, residual heat |
| Installation type | Built into a worktop |
| Cleaning | With scraper (optional) and soft cloth, non-abrasive products |
| Surface material | Ceramic glass |
| Power cable length | Approximately 1.2 m (without plug) |
| Supplied accessories | Instruction manual, fixing brackets |
| Spare parts | Contact authorized after-sales service |
| Repairability | Repairs reserved for qualified technician |
| General information | Compliant with WEEE directive (2002/96/EC) |
Frequently Asked Questions - GTH64TF Glem Gas
User questions about GTH64TF Glem Gas
0 question about this device. Answer the ones you know or ask your own.
Ask a new question about this device
Download the instructions for your Cooker in PDF format for free! Find your manual GTH64TF - Glem Gas and take your electronic device back in hand. On this page are published all the documents necessary for the use of your device. GTH64TF by Glem Gas.
USER MANUAL GTH64TF Glem Gas
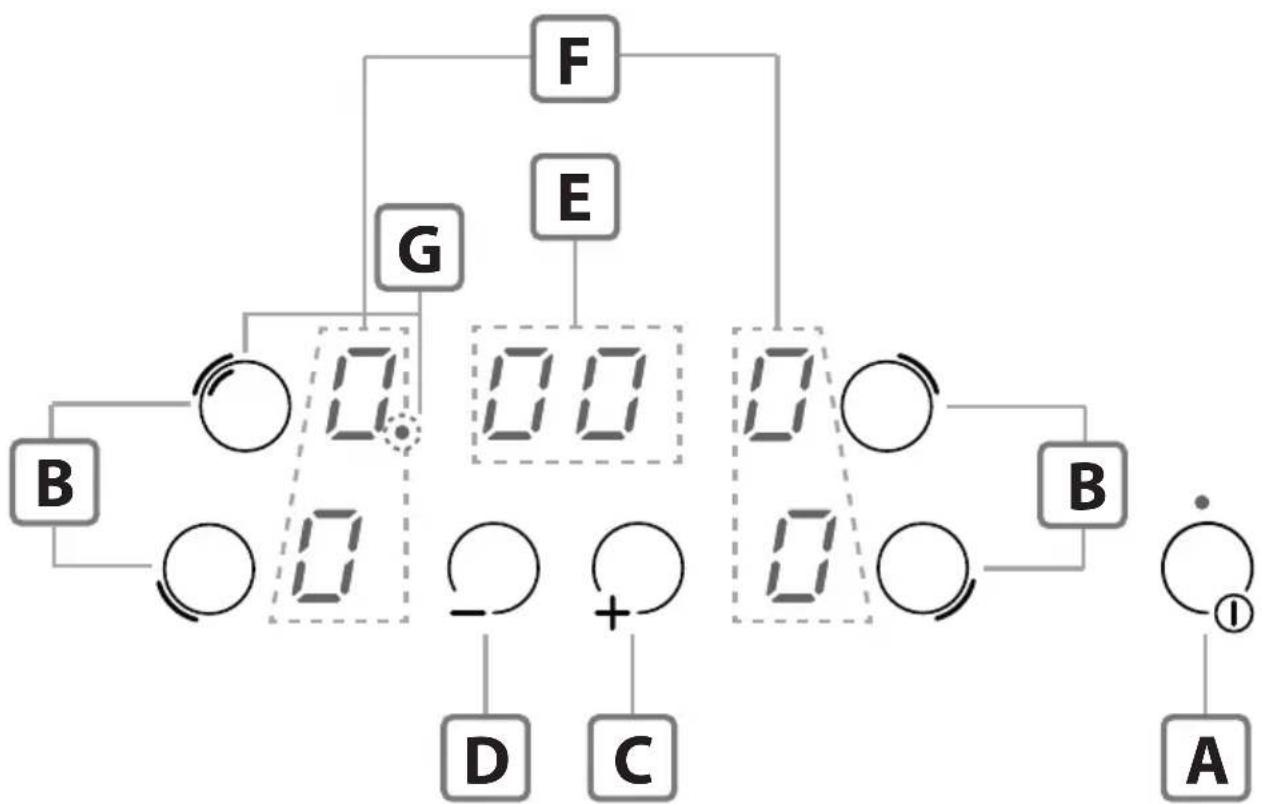
A - On/Off Key
B-Cooking zone selection keys
C - Increment Key "+"
D - Decrement Key “-”
E - Timer Display "
F-Cooking zones display
G - Double cooking zone indicator
DEUTSCH
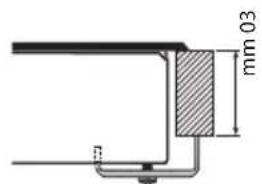
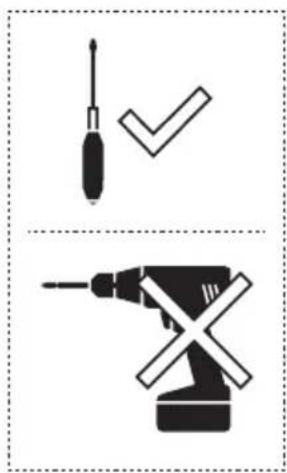


Fig.3
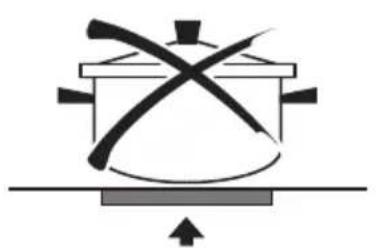
natural_image
Simple line drawing of a cooking pot with crossed handle and base, no text or symbols present
natural_image
Simple line drawing of a cooking pot with crossed handle and arrows indicating direction (no text or symbols)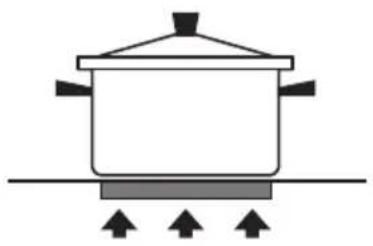
natural_image
Simple line drawing of a cooking pot with three upward arrows indicating heating or pressure (no text or symbols)Fig.5

natural_image
Pure diagram of light rays passing through a lens or aperture (no text or symbols)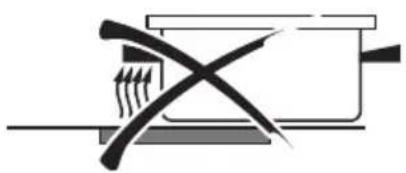
natural_image
Pure electrical circuit lines without any symbols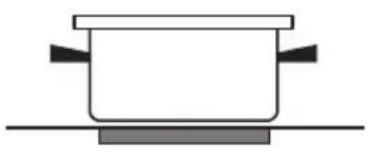
natural_image
Simple line drawing of a cooking pot on a surface (no text or symbols)
natural_image
Illustration of a hand using a power tool to remove or brush the surface in a dark container (no text or symbols)Fig.7

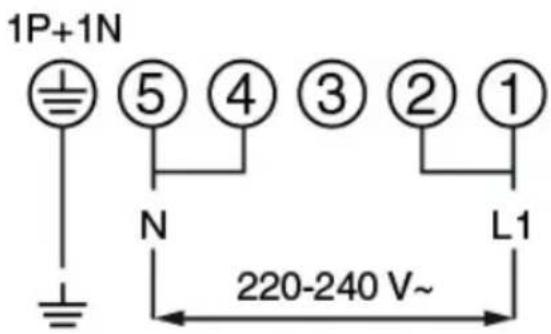
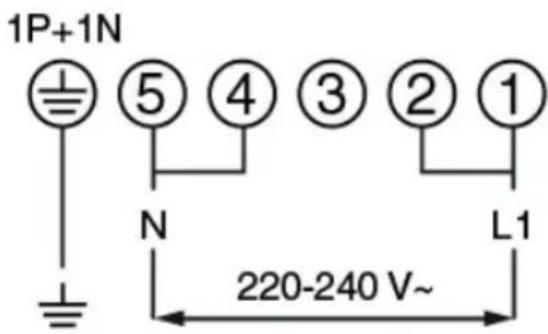
1 Ph + N
3 x 2.5 mm²
H 05 V2V2 - F
ITALIANO
IT
GENERALITA'
Carefully read this use and maintenance manual, where important information about installation, use and maintenance safety is provided. Keep this manual for future reference. Any installation operation (electric connections) shall be performed by specialized personnel, in compliance with all standards and regulations in force.
SAFETY WARNINGS
- Use the cooktop only in household-type situations for the preparation and warming of food. All other types of use are not permitted.
- Individuals who are incapable of using the appliance safely because of their physical, sensory or mental capabilities or their lack of experience or knowledge must not use this appliance without supervision or instruction by a responsible person.
• Children under 8 years of age must be kept away from the cooktop unless they are under constant supervision. - Children 8 years and older must only be allowed to use the cooktop if they have been given supervision or instruction concerning use of the appliance in a safe way and understand the hazards involved.
• Children shall not play with the appliance. - Cleaning and user maintenance shall not be made by children without supervision.
- Installation, repair and maintenance work should only be performed by an authorized service technician. Work by unqualified persons could be dangerous for the user.
• RISK OF ELECTRIC SHOCK! If
the cooktop is defective or chipped, cracked or broken in any way, immediately switch it off and do not continue to use it. Disconnect it from the electrical power supply.
- WARNING: If the supply cord of the appliance is damaged, it must be replaced by the manufacturer, its service agent or similarly qualified persons in order to avoid a hazard.
- WARNING: The appliance and its accessible parts become hot during use. Care should be taken to avoid touching heating elements.
- WARNING: Unattended cooking on a hob with fat or oil can be dangerous and may result in fire. NEVER try to extinguish a fire with water, but switch off the appliance and then cover flame e.g. with a lid or a fire blanket.
- WARNING: The cooktop is hot during use and remains so for some time after being switched off. The risk of burns remains until the residual heat indicators have gone out.
- CAUTION: The cooking process has to be supervised. A short term cooking process has to be supervised continuously.
- DANGER OF FIRE: Do not store items on the cooking surfaces! Metallic objects such as knives, forks, spoons and lids should not be placed on the hob surface since they can become hot.
• Always switch the cooking zones off after use!
- The appliance is not intended to be operated by means of an external timer or separate remote-control system.
INSTALLATIONINSTRUCTIONS
These installation instructions are intended for a specialized installer and are meant as guidelines for the hob installation, adjustment and
maintenance, in compliance with any regulations and standards in force. If a built-in oven or any other appliance generating heat is to be mounted directly under the vitro-ceramic hob, IT IS NECESSARY THAT SUCH AN APPLIANCE (the oven) AND THE VITRO-CERAMIC HOB ARE PROPERLY INSULATED. Failure to comply with this precaution might result in the incorrect operation of the TOUCH CONTROL system.
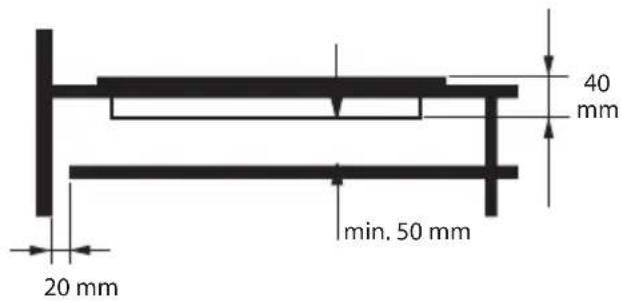
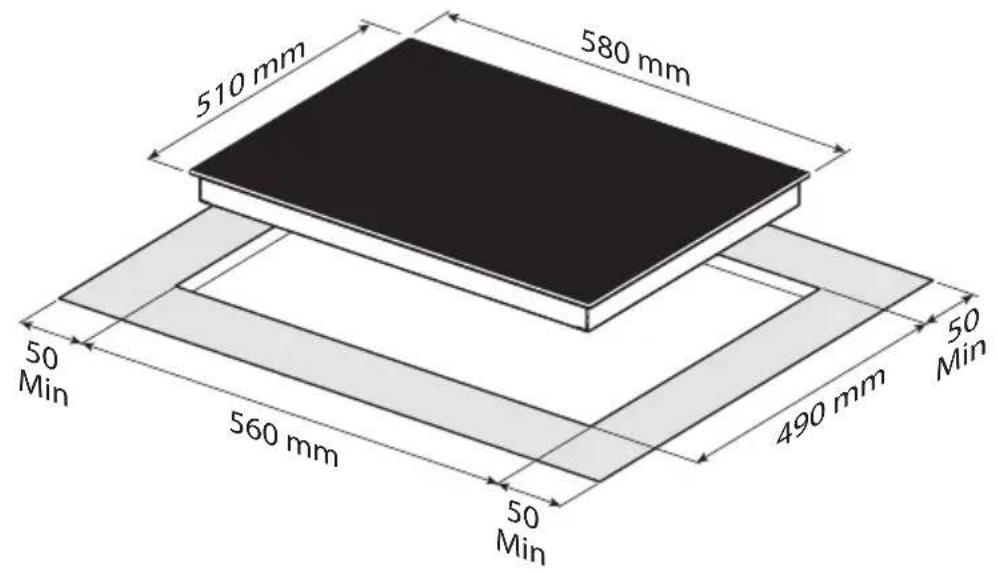
- Positioning:
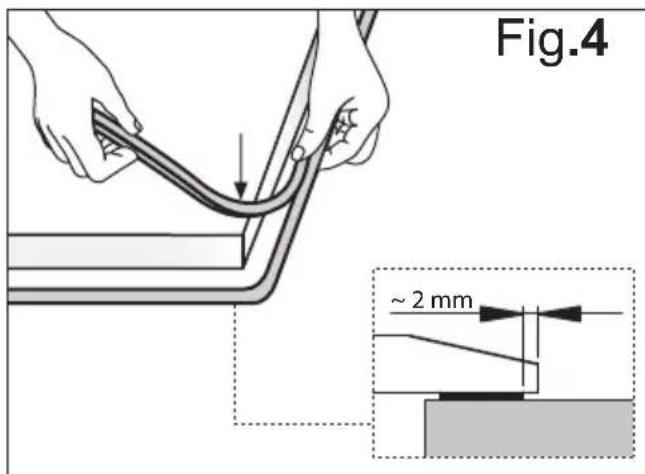
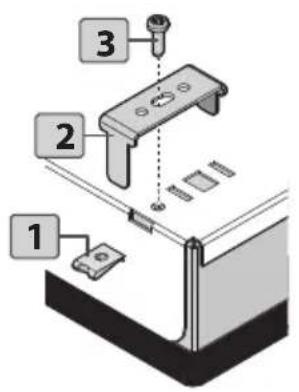
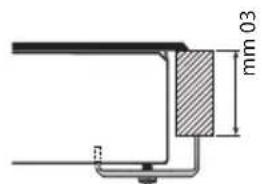
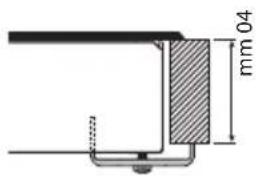
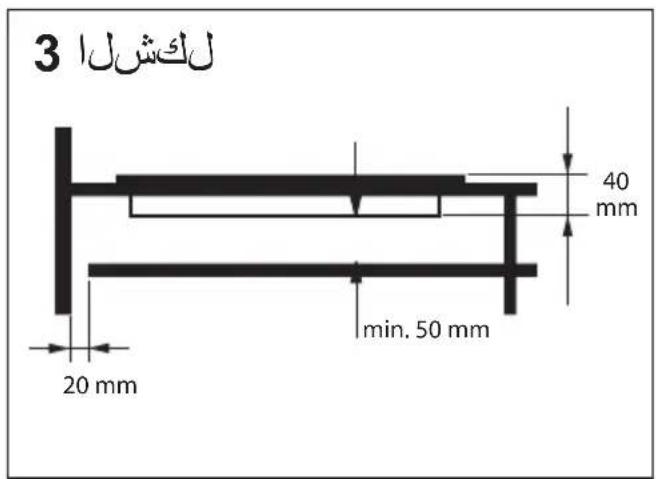
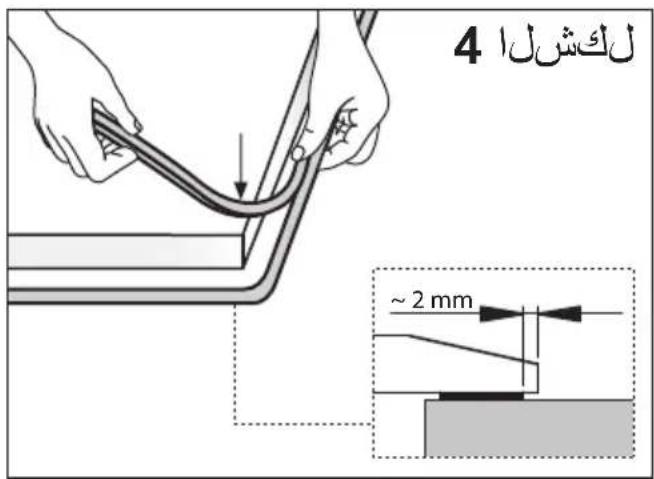
This household appliance has been designed for built –in installation onto a worktop, as shown in the figure (Fig.2). Use sealing material along the whole perimeter - Fig.4 (Cut dimensions-Fig.2). This operation is necessary in order to prevent any liquid from entering inside the hob, being that the flatness of the top, the glass and their coupling cannot be assured. Fix the appliance on the worktop by using the 4 supports, taking the work top thickness into account (Fig.2). If, after installation, the lower part of the appliance is accessible from the lower part of the cabinet, it will be necessary to mount a spacing panel at the distances given (Fig.3). If the appliance is installed under an oven, this step will not be necessary. The appliance is not intended to be operated by an external timer or a separate remote control system.
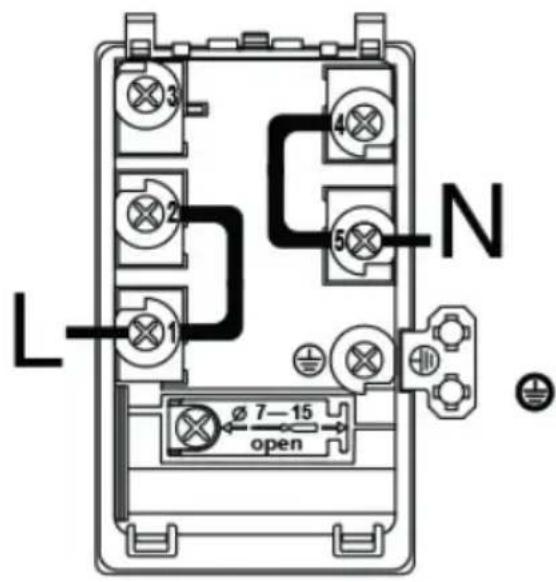
• Electric connections (Fig.7):
Before carrying out any electric connections, please make sure that:
- the ground electric cable is 2 cm. longer than the other cables;
- the electrical system meets any requirement mentioned in the rating label found on the underside of the work top;
- the electrical system is equipped with
an efficient grounding system and compliant with any standards and law directives in force.
The grounding system is required by law.
In the case the appliance is not equipped with a power cord and/or the related plug, please use a material suitable for the power absorption value mentioned in the rating label and for the operating temperature. If a direct connection to the electric network is required, you need to use an omnipolar power switch with a switch-contact gap of at least 3 mm, suitable for the value mentioned in the label, and compliant with the related standards in force (the yellow/green ground connection shall not be interrupted by the change-over switch). Once the appliance installation is completed, the omnipolar switch shall be easily accessible.
USE AND MAINTENANCE
- Maintenance (Fig.6):
Remove any food residue and grease drops from the cooking surface, by using the special scraper provided on request.
Clean the heated area in the best way possible, using suitable products and a paper towel, then rinse with water and wipe away with a clean cloth.
Through the use of the special scraper (optional), promptly remove any pieces of aluminum foil and plastic material, which might have accidentally melted, or sugar or food remains, and/or remains of sugary foods, from the heated surface. In this way, any possible damage to the surface is prevented.
The use of abrasive sponges or irritating chemical cleaners, such as sprays for ovens or cleaning agents is not allowed under any circumstance.
• Use:
Use the touch control system in the corresponding position according to individual cooking needs. Keep in mind that the higher the number, the more heat is produced.
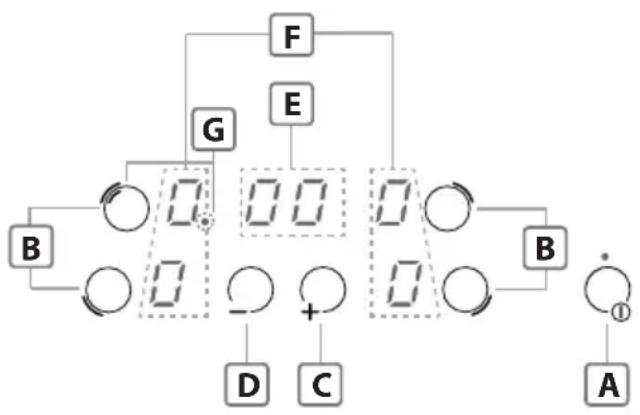
FUNCTIONING (Fig.1)
flowchart
graph TD
    A["Power Source"] --> B["Component B"]
    B --> C["Node 1"]
    B --> D["Node 2"]
    C --> E["Component C"]
    D --> F["Component F"]
    E --> G["Output"]
    F --> H["Component G"]
    G --> I["Output"]
    H --> J["Output"]
    I --> K["Output"]
    style A fill:#f9f,stroke:#333
    style K fill:#ccf,stroke:#333
A - On/Off key
B - Cooking zone selection key
C - Increment Key “+”
D - Decrement Key “-”
E - Timer display "©"
F - Cooking zone display
G - Dual Cooking zone indicator
- Switching the cooking top on:
Press A key to switch the top on.
All the displays F relative to the cooking zones switch on in the standby position 0.
The control unit remains active for 20 seconds.
If no cooking zone is selected within this time, the cooking top switches off automatically.
- Switching cooking zones on:
Press the on/off key to switch the hob on. Select the desired cooking zone, by pressing one of the zone selection keys. Press the [+] or [-] keys to increase or decrease the power of the cooking zone. The power of each single cooking zone can be set in 9 different positions and will be shown in the cooking zone display with a number ranging from 1 to 9.
- Disabling the dual cooking zone:
- To disable this feature, select the zone with the dual cooking zone B.
- Press again the B button (Double zones), the LED on the display (G) will go off.
- Enabling the dual cooking zone:
- To enable this feature, select the zone with the dual cooking zone B.
- Press again the B button (Double zones), the LED on the display (G) will illuminate.
- Warming function:
The warming function sets a power level ranging from ☐ to 1. Once the cooking zone is started, press the ⊕ key and select value 1; then press the [-] key; the symbol ∪ will appear on the F display, meaning that the warming function is activated.
- Parboiling function:
This function allows you to set the maximum power for some minutes, and then to go back to a set power value. Select the desired cooking zone by pressing one of the B keys.
Press the [-] key to increase the cooking zone power, up to value 9; by pressing the [+] key again, the symbol 8 will be displayed.
Then, the desired power level can be set by pressing the [-] key. The set power value and the symbol will appear alternately on the display of the selected
cooking zone. After a few minutes, the function is deactivated and only the power level is displayed.
- Residual Heat:
If the temperature of the cooking zone is still high (over 50^ ) after it has been switched off, the relative display will indicate the symbol H (residual heat). The symbol will only switch off when the burn risk in no longer present.
- Timer:
This function allows you to set the time (from 0 to 19 minutes) for the automatic turn off of the cooking zone selected.
Start a cooking zone by pressing one of the B keys and set the power by pressing the [+] or [-] keys.
Press the [+] and [-] keys simultaneously to start the timer (the E display will be activated), set the time by pressing the [+] or [-] keys and then press the key B again to confirm your selection.
When the timer function elapses, the cooking zone will automatically switch off and an acoustic signal will be heard, which can be deactivated by pressing any key on the control panel.
To disable the timer function, press the B key on the cooking zone previously started, then press the Ⓤ and - keys simultaneously (the E display will be activated), and bring the timer value back to ☐ by using the key and then press the B key again to confirm your selection.
- Egg timer/reminder:
This function allows you to set an acoustic reminder. This function can only be activated with all the cooking zones off.
Switch on the hob by pressing key A, activate the timer zone by pressing the [+] and [-] keys simultaneously, and set the time, ranging from 0 and 99 minutes, by pressing the [+] or [-] keys. When cooking is completed, switch off the hob by pressing key A, (or wait for 5" for the automatic confirmation).
When the timer function elapses, an acoustic signal will be heard which can be deactivated by pressing any key on the control panel.
When the reminder function is active, the timer function cannot be selected.
- Control lock:
Switch on the hob by pressing key A.
Controls can be locked in order to prevent any risk of unintentional changes to the setting ( children, cleaning operations, etc.); this function can only be activated with all the cooking zones off . Press the [-] key within 10" from the hob switching on , then simultaneously press the B key found on the left lower side; the symbol L will appear on the F displays to confirm your selection.
When the control lock is activated you can switch the hob off. In this case, the control lock is still activated, even when the hob is switched on again.
To unlock the hob permanently, press the [-] key again, then simultaneously press the key B found on the left lower side; the symbol 0 will appear on the F displays to confirm your selection.
- Switching cooking zones off:
To switch a cooking zone off , press the key B related to this zone , bring the power level back to ☐ by pressing the [-] key, then press the B key related to this zone to confirm your selection.
- Switching the cooking top off:
To turn off the cooking top entirely hold down the A key.
- Safety switch:
The appliance has a safety switch that automatically switches off the cooking zones when they have been operating for a certain amount of time at a given power level.
| POWER LEVEL | OPERATING TIME LIMIT (hours) |
| 1-26 | |
| 3-45 | |
| 5 | 4 |
| 6-7-8-91 | 5 |
DISPOSAL OF OLD HOUSEHOLD APPLIANCES
The European Directive 2002/96/EC on Waste Electrical and Electronic Equipment (WEEE), requires that old household appliances shall not be disposed of in the standard urban solid waste stream. Old appliances shall be collected separately in order to optimize the recovery and recycling of the materials they contain and reduce the impact on human health and the environment. The crossed-out dustbin symbol on the product reminds you of your obligation regarding separated waste collection. Consumers should contact their local public service or their local dealer for more information on the correct disposal of old household appliances.
THE MANUFACTURER DECLINES ALL RESPONSIBILITY FOR EVENTUAL DAMAGES CAUSED BY BREAKING THE ABOVE WARNINGS.
THE WARRANTY IS NOT VALID IN THE CASE OF DAMAGE CAUSED BY FAILURE TO COMPLY WITH THE ABOVE WARNINGS.
ALLGEMEINEINFORMATIONEN
natural_image
Simple line drawing of a cooking pot with crossed handle and base, no text or symbols present
natural_image
Simple line drawing of a cooking pot with crossed handle and base, no text or symbols present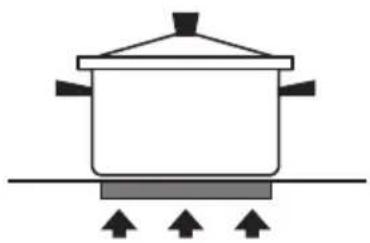
natural_image
Simple line drawing of a cooking pot with three upward arrows indicating heating or pressure (no text or symbols)5 لكشل

natural_image
Pure diagram of intersecting lines and arrows without any text, numbers, or symbols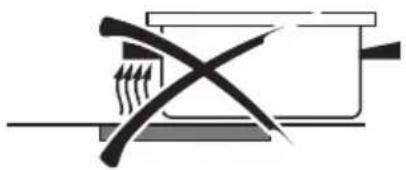
natural_image
Pure electrical circuit lines without any symbols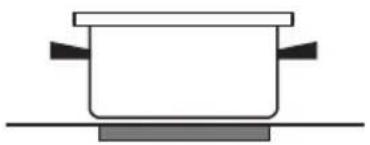
natural_image
Simple line drawing of a cooking pot on a surface (no text or symbols)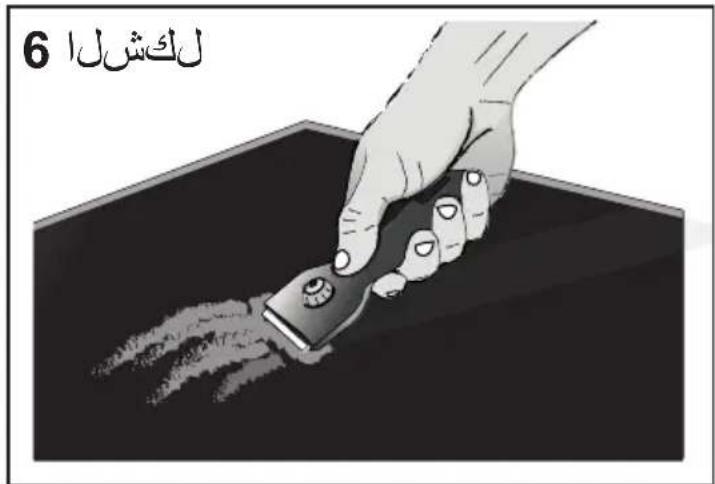
7 لكش
1 Ph + N
3 x 2.5 mm²
H 05 V2V2 - F
2 لكش


1
لکشل
flowchart
graph TD
    F --> G
    E --> G
    G --> B
    G --> D
    G --> C
    D --> B
    D --> A
    C --> D
    C --> C
    style G fill:#f9f,stroke:#333
    style B fill:#ccf,stroke:#333
    style D fill:#cfc,stroke:#333
    style C fill:#fcc,stroke:#333
    style A fill:#cff,stroke:#333

- DEUTSCH
- ITALIANO
- IT
- GENERALITA'
- SAFETY WARNINGS
- INSTALLATIONINSTRUCTIONS
- - Positioning:
- • Electric connections (Fig.7):
- USE AND MAINTENANCE
- - Maintenance (Fig.6):
- • Use:
- - Switching the cooking top on:
- - Switching cooking zones on:
- - Disabling the dual cooking zone:
- - Enabling the dual cooking zone:
- - Warming function:
- - Parboiling function:
- - Residual Heat:
- - Timer:
- - Egg timer/reminder:
- - Control lock:
- - Switching cooking zones off:
- - Switching the cooking top off:
- - Safety switch:
- DISPOSAL OF OLD HOUSEHOLD APPLIANCES
- ALLGEMEINEINFORMATIONEN
Brand : Glem Gas
Model : GTH64TF
Category : Cooker