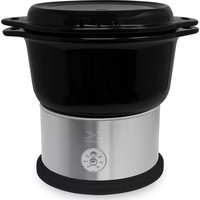
DG 44815 - Steam cleaner KALORIK - Free user manual and instructions
Find the device manual for free DG 44815 KALORIK in PDF.


| Product type | Steam cooker (steam cleaner) |
| Brand | Kalorik |
| Model | DG 44815 |
| Bowl material | Ceramic |
| Water tank capacity | Up to MAX level (approximately 1 liter) |
| Steam enhancer | Yes, removable in the center of the base |
| Removable grid | Yes, with removable handle for two cooking levels |
| Timer | Yes, adjustable via TIME buttons, digital display |
| On/Off button | Yes (On/Off) |
| Included accessories | Oven mitts, removable grid, steam enhancer |
| Use as serving platter | Yes, by turning the lid over |
| Cleaning bowl and lid | Dishwasher safe or hand wash with soapy water |
| Cleaning base | Soft cloth or slightly damp sponge; do not immerse |
| Cleaning steam enhancer | Soapy water or under the faucet |
| Safety precautions | Do not touch hot surfaces; use mitts; do not immerse base; beware of steam |
| Warranty | 1 year (USA and Canada) |
| Power | Polarized plug (120V, ~60Hz) |
| Usage | Household only |
| Compact storage | Yes, base and grid fit into the bowl |
Frequently Asked Questions - DG 44815 KALORIK
User questions about DG 44815 KALORIK
0 question about this device. Answer the ones you know or ask your own.
Ask a new question about this device
Download the instructions for your Steam cleaner in PDF format for free! Find your manual DG 44815 - KALORIK and take your electronic device back in hand. On this page are published all the documents necessary for the use of your device. DG 44815 by KALORIK.
USER MANUAL DG 44815 KALORIK
CUIT-VAPEUR CÉRAMIQUE DIGITAL AVEC GRILLE AMOVIBLE
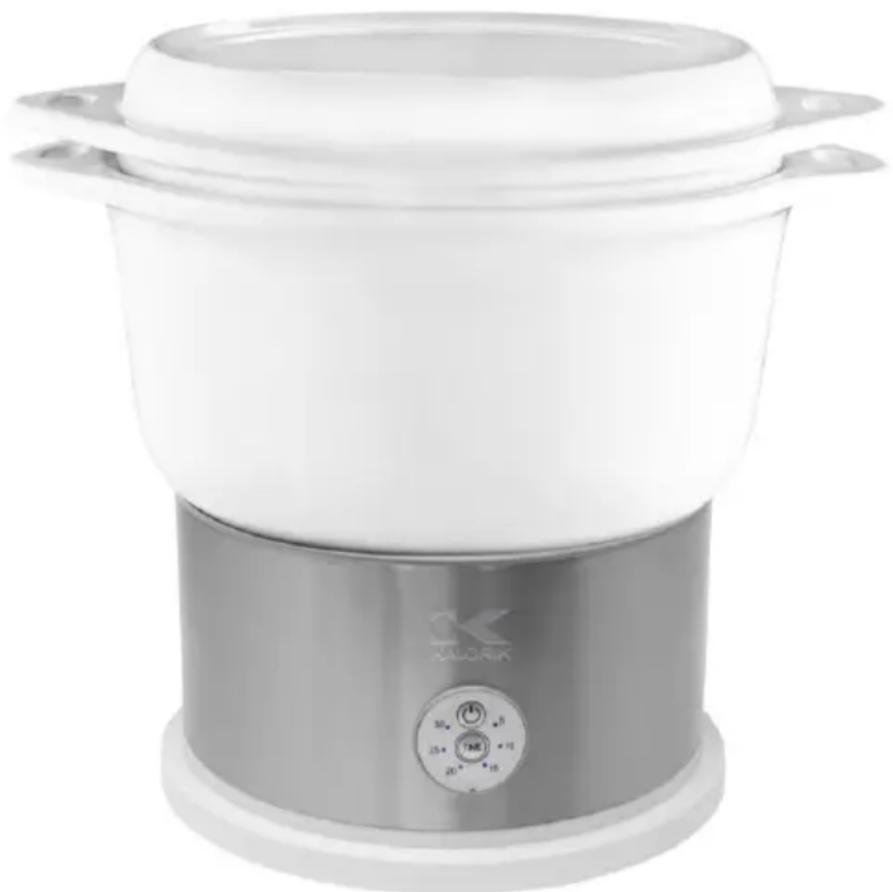
natural_image
White and gray rice cooker with control panel (no visible text or symbols)EN...... 3
ES......15
FR.....27
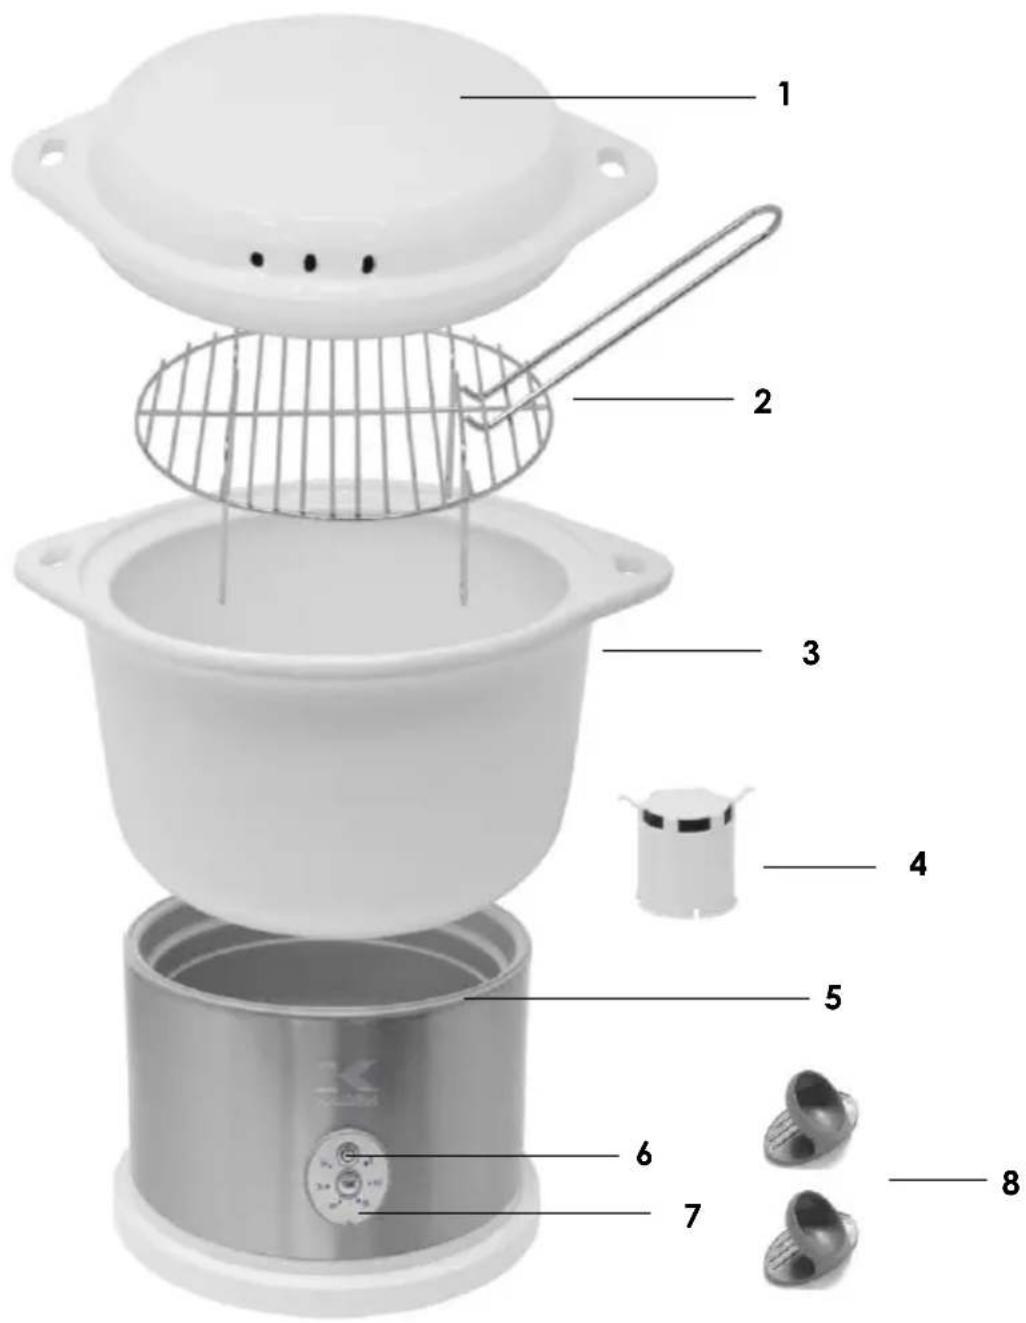
ENGLISH:
- Lid
- Steam Rack with removable handle
- Ceramic bowl
- Steam boost insert
- Base
- ON/OFF switch
- Timer
- Mitts
ESPAÑOL:
When using electrical appliances, basic safety precautions should always be followed, including the following:
1. READ ALL INSTRUCTIONS BEFORE USE
- Check that the voltage in your home corresponds to that stated on the appliance.
- To protect against electrical shock, fire or personal injury, do not immerse cord, plugs, or the appliance in water or other liquid.
- Do not operate any appliance with a damaged cord or plug or after the appliance malfunctions or has been damaged in any manner. Return appliance to the nearest authorized service facility for examination, repair, or adjustment.
- Unplug from outlet when not in use and before cleaning. Allow to cool before cleaning the appliance.
- Your appliance must never be switched on through an external timer or any kind of separate remote-control system.
- Please keep out of reach of children and pets. This product is not intended for use by children, by persons with reduced physical, sensory or mental capabilities, or lacking experience or knowledge, unless they have been given supervision or instruction concerning the use of the product, by a person responsible for their safety. Extra caution is always necessary when using this product.
- Do not use outdoors.
- The use of accessory attachments not recommended by the appliance manufacturer may cause injuries.
- Do not store any materials other than manufacturers recommended accessories in this unit when not in use.
- Do not let the cord hang over the edge of table or counter, or touch hot surfaces.
- Do not place on or near a hot gas or electric burner, or in a heated oven.
- A fire may occur if the appliance is covered or touching flammable material including curtains, draperies, walls and the like when in operation.
- Do not use the appliance for anything other than intended use.
-
When using this appliance, provide adequate airspace above and on all sides for air circulation. On surfaces where heat may cause a problem, an insulated pot holder is recommended.
-
Do not leave unit unattended during use.
- Always operate the appliance on a stable, level, clean, and heat-resistant surface. Do not use on a cloth-covered surface or other flammable materials.
- It is absolutely necessary to keep this appliance clean at all times as it comes into direct contact with food.
- Do not clean with metal scouring pads. Pieces can break off the pad and touch electrical parts, involving a risk of electrical shock.
- Always attach plug to appliance first, then plug cord into wall outlet. To disconnect, turn any control to OFF position, then remove plug from wall outlet.
- Only use the appliance for food that is supposed to be cooked.
- Oversized foods or metal utensils must not be inserted in the appliance as they may cause a fire or risk of electrical shock.
- Do not place any of the following materials inside the unit: Paper, cardboard, plastic and the like.
- Extreme caution should be exercised when using containers constructed of other material other than metal or glass.
- The appliance must not be immersed in water.
- Extreme caution must be used when moving an appliance containing hot oil, other hot liquids or hot food. It is not recommended to move your appliance when it has not completely cooled down.
- Do not touch hot surfaces. Use oven mitts to grab the unit by its handles when hot.
SAVE THESE INSTRUCTIONS HOUSEHOLD USE ONLY
POLARIZED PLUG INSTRUCTIONS
This appliance is equipped with a polarized plug (one blade is wider than the other). To reduce the risk of electric shock, this plug will fit into the polarized outlet only one way. If the plug does not properly fit into the outlet at first, reverse it. If it still does not fit, contact a competent qualified electrician. Do not attempt to modify the plug in any way.
A short power supply cord is provided to reduce the hazards resulting from becoming entangled in, or tripping over a longer cord. Extension cords may be used if care is exercised in their use.
- The electrical rating of the extension cord should be at least that of the appliance. If the electrical rating of the extension cord is too low, it could overheat and burn.
- The resulting extended cord should be arranged so that it will not drape over the counter top or tabletop where it can be pulled on by children or tripped over.
PARTS DESCRIPTION
See page 2-3.
BEFORE THE FIRST USE
- Remove all packaging from the food steamer.
- Please clean the appliance thoroughly before first use to remove any manufacturing residue – see section “CARE AND CLEANING” below.
- Put the appliance on an even, stable and heat resistant work surface.
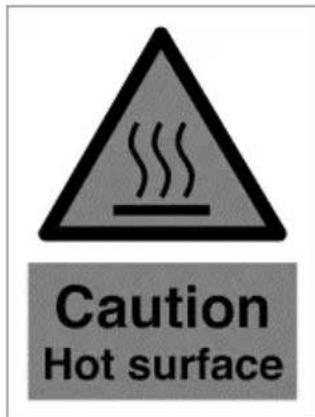
Caution: This is a ceramic appliance. Surfaces become hot from operation.
OPERATION
- Before use, put the steam boost insert (4) in the middle of the base of the appliance to speed up the heating process.
- Fill the base of the appliance with water below the MAX mark.
- Ensure there is sufficient water to avoid having to interrupt cooking. Water can be added during cooking if necessary.
- Place the ceramic pot on the base and make sure it fits correctly.
-
Place the food in the ceramic steaming pot.
-
Make sure that not all the holes are obstructed and at least a few holes are visible and not covered by food. This is done to increase the efficiency of the steaming process.
- Cover the steaming pot with the lid. DO NOT OPERATE THIS APPLIANCE UNCOVERED - STEAM IS GENERATED DURING USE. Ensure it fits correctly otherwise steam will be lost and the food will not cook properly.
- Plug in the appliance.
- Switch on the appliance by pressing the On/Off button.
- Select the cooking time by pressing the appropriate TIME button. The cooking time is displayed in minutes.
- Cooking can be stopped at any time by pressing the On/Off button.
- A series of beeps will indicate when the cooking time is complete.
- To check the food, wait until the steam has stopped escaping through the holes on the lid. Using oven mitts, take the lid off slowly, taking care to avoid escaping steam and the condensation. CAUTION: DO NOT TOUCH THE STEAMING POT OR THE STEAMING UNIT. Using a long-handled utensil, check the food. If the food is not cooked, reset the timer and steam production will start again.
- When the food is cooked, unplug and allow the appliance to cool slightly in order to eliminate the steam. Carefully remove the steaming pot using oven gloves or another thermal hand protection. DO NOT TOUCH THE STEAMING POT OR THE STEAMING UNIT WITH BARE HANDS UNTIL THEY HAVE COOLED. Remove the food and add seasonings, if desired.
- Allow any water to cool before emptying and cleaning.
- If the water level falls below the minimum level during cooking, the power to the heat supply will turn off automatically until more water is added.
Note: After use when the water has not completely evaporated, wait until the steam stops leaking through the holes on the lid. Open the lid carefully to avoid scalding. Let the water drip into the food steamer. Slightly move the lid so that the steam does not reach your hands or your face.
Caution: This appliance generates heat and escaping steam during use. Take proper precautions and avoid placing your hands near escaping steam to prevent the risk of burns.
USING THE RACK:
The rack is a helpful tool to use to increase the cooking area and the cooking quantity in the steamer. It also allows you to cook two different types of foods together in the steamer thus increasing the versatility of the appliance.
Use your thumb and index fingers to hold the handle and fit them inside one end of the rack. Lift up slowly making sure the rack is horizontal. Place the rack inside the steamer and remove the handle. Following that, food can be placed on top of the rack.
After steaming is complete, the rack with food can be lifted in the same way by inserting the handle inside the rack and carefully lifting it.
Note: Do not touch any part of the pot, lid or rack with your bare hands as they might be hot.
USING AS A SERVING PLATE:
This steamer can also be used as a serving container on a dining table. Once the food is done steaming, remove the lid with the provided mitts and drain any excess water on the lid. Place the lid upside-down on a heat resistant surface. Lift the pot carefully using the mitts, drain away any excess water in the sink, and place the pot onto the upside-down lid. This then becomes your serving platter. You can use the handle on the lid to carry the pot filled with food as a serving plate.
Note: For extremely watery foods, please make sure all the hot water is drained out from the bottom of the pot before it is used to serve food. Always remember to use mitts or gloves to touch hot surfaces to avoid scalding yourself. The pot may be a little bulky to carry so user discretion is advised.
Hints:
- It is possible to cook different foods simultaneously in the Steamer. If the foods you are preparing have different cooking times, you should carefully remove the food that is ready first and allow the remaining food to continue baking.
- Frozen food does not need to be defrosted, but its cooking time will be longer.
STORAGE INSTRUCTIONS
One of the advantages of this ceramic food steamer is that it can be stored in an extremely compact fashion. The appliance is designed to pack in the most efficient way. To pack the steamer, follow the below steps:
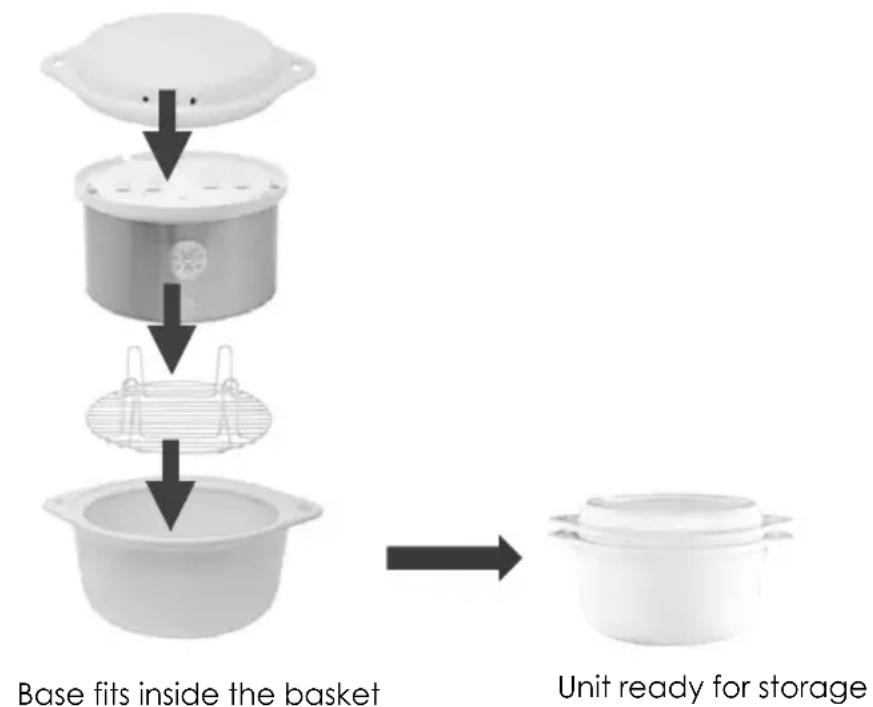
flowchart
graph TD
    A["Base fits inside the basket"] --> B["Storage unit"]
    B --> C["Unit ready for storage"]
-
Make sure the appliance is clean and dry before storing away.
-
Place the steam boost insert, mitts, rack, and the power cord inside the base.
- Flip the pot and place it directly on top of the base.
- Take the entire combination of the pot and the base and flip it. This will mean that the pot is upright and the base is flipped upside down inside the pot.
- Place the lid on top of the pot to complete the storage.
- Store it away in a cool, dry place.
CARE AND CLEANING
- The ceramic pot and the lid may be washed with soapy water or you can place them in the dishwasher. Never use abrasive cleaners to clean your appliance: it could damage the surfaces.
Note: Allow sufficient time for the pot and the lid to cool before immersing in water to avoid cracking.
- The steam boost insert can be cleaned with soapy water or under a running tap.
- The base should be cleaned with a smooth cloth or with a slightly damp sponge.
- Never immerse the base in water or any other liquid.
STEAMING
| Fresh Vegetables | Amount | Approx. time (minutes) |
| Artichoke (whole) | 3 large | 30 |
| Asparagus (spears) | 12 - 1 lb. +/ - 12" | 15 |
| Beans, green / wax (cut or whole) | 1 lb. | 25 |
| Broccoli (spears) | 12 - 1 lb. | 15 |
| Cabbage | 1 lb. | 20 |
| Carrots | 1 lb. | 15 |
| Cauliflower (whole head) | 2 lbs. (medium) | 15 |
| Corn on cob | Max. 8 | 20 |
| Mushrooms (whole) | 12 lb. (medium) | 10 |
| Onions (whole), before grilling | 12 - 1 lb. (medium)+/- 4” | 10 |
| Snap peas, green | 112 lbs. (in pod) | 15 |
| Peppers (whole), before grilling | Max. 4 medium | 10 |
| Potatoes (whole) | 1 lb. or +/- 8 small | 30-35 |
| Spinach | 12 lb. | 10 |
| Squash, summer yellow and zucchini | 1 lb. (medium) | 20 |
| Turnips | 1 lb. or +/- 5 small | 20 |
| Seafood | Amount | Approx. time (minutes) |
| Clams | 12 - 1 lb. (in shell) | 10 |
| Lobster (tails) | 1 or 2 (7/8 oz. each) | 20 |
| Mussels (fresh) | 1 lb. (in shell) | 15 |
| Oysters (fresh) | +/- 12 dozen | 25 |
| Scallops (fresh) | 12 lb. (shucked) | 15-20 |
| Shrimp | 1 lb. (in shell) | 20 |
| Fish | Amount | Approx. time (minutes) |
| Filets: | ||
| Sole | 12 lb. | 10 |
| Tilapia | 1lb. | 15 |
| Steaks: | ||
| Halibut | 12 - 1 lb. | 15 |
| Salmon | +/- 1" thick | 20 |
| Chicken | Amount | Approx. time (minutes) |
| Breast, boneless fillets | 12 lb. pcs | 30 |
| Breast, split with bone | 1 - 1 14 lb. | 40 |
| Drumsticks, with bone | 1 lb. | 40 |
| Thighs, with bone | 1 lb. | 40 |
| Poached chicken (breast), split-boneless or with bone | 1 lb. | 45 |
| Sausages | Amount | Approx. time (minutes) |
| Frankfurters | Max. 1 lb. (8-10 pcs) | 15 |
| Bratwurst | Max. 1 lb. | 30 |
| Other foods | Number of pieces | Approx. time (minutes) |
| Hard-boiled eggs | 1-12 (large size) | 30 |
TROUBLESHOOTING
| Symptom | Possible Cause | Solution |
| No display. | Power connecting failed. | Make sure the appliance is plugged in correctly. |
| Non-stop beeping. | Water level is low. | Top off the water level. |
We suggest that you complete and return the enclosed Product Registration Card promptly to facilitate verification of the date of original purchase. However, return of the Product Registration Card is not a condition of these warranties. You can also fill out this warranty card online, at the following address: www.KALORIK.com
This KALORIK product is warranted in the U.S.A. and in Canada for 1 year from the date of purchase against defects in material and workmanship. This warranty is not transferable. Keep the original sales receipt. Proof of purchase is required to obtain warranty performance.
During this period, if the KALORIK product, upon inspection by KALORIK, is proven defective, it will be repaired or replaced, at Kalorik's option, without charge to the customer. If a replacement product is sent, it will carry the remaining warranty of the original product.
This warranty does not apply to any defect arising from a buyer's or user's misuse of the product, negligence, failure to follow KALORIK instructions noted in the user's manual, use on current or voltage other than that stamped on the product, wear and tear, alteration or repair not authorized by KALORIK, or use for commercial purposes. There is no warranty for glass parts, glass containers, filter basket, blades and agitators, and accessories in general. There is also no warranty for parts lost by the user.
ANY WARRANTY OF MERCHANTABILITY OR FITNESS WITH RESPECT TO THIS PRODUCT IS ALSO LIMITED TO THE ONE YEAR LIMITED WARRANTY PERIOD.
Some states do not allow limitation on how long an implied warranty lasts or do not allow the exclusion of incidental or consequential damages, so the above limitations may not apply to you. This warranty gives you specific legal rights, and you may also have other rights which vary from state to state.
If the appliance should become defective within the warranty period and more than 30 days after date of purchase, do not return the appliance to the store: often, our Customer Service Representatives can help solve the problem without having the product serviced. If
servicing is needed, a Representative can confirm whether the product is under warranty and direct you to the nearest service location.
If this is the case, bring the product, or send it, postage prepaid by the user (all Kalorik customers are responsible for the initial shipment back to the warranty center), along with proof of purchase and a return authorization number indicated on the outer package, given by our Customer Service Representatives. Send to the authorized KALORIK Service Center (please visit our website at www.KALORIK.com or call our Customer Service Department for the address of our authorized KALORIK Service Center).
When sending the product, please include a letter explaining the nature of the claimed defect.
If you have additional questions, please call our Customer Service Department (please see below for complete contact information), Monday through Thursday from 9:00am - 5:00pm (EST) and Friday from 9:00am - 4:00pm (EST). Please note hours are subject to change.
If you would like to write, please send your letter to:
KALORIK Customer Service Department
Team International Group of America Inc.
1400 N.W 159th Street, Suite 102
Miami Gardens, FL 33169 USA
Or call:
Toll Free: +1 888-521-TEAM / +1 888-KALORIK
Only letters can be accepted at this address above. Shipments and packages that do not have a return authorization number will be refused.
USANDO LA REJILLA:
Team International Group of America Inc.
1400 N.W 159th Street, Suite 102
Miami Gardens, FL 33169 USA
O llame gratuitamente (U.S.A.) al +1 888-521-TEAM / +1 888-KALORIK
UTILISER LA GRILLE AMOVIBLE:
Team International Group of America Inc.
1400 N.W 159th Street, Suite 102
Miami Gardens, FL 33169 USA
For questions please contact:
KALORIK Customer Service Department
Team International Group of America Inc.
1400 N.W 159th Street, Suite 102
Miami Gardens, FL 33169 USA
Toll Free: +1 888-521-TEAM / +1 888-KALORIK
www.KALORIK.com

Model DG 44815
User manual content and recipes courtesy of Team International Group – Do not reproduce without consent of the authors - All rights reserved.
KALORIK®
Since 1930
- ENGLISH:
- ESPAÑOL:
- When using electrical appliances, basic safety precautions should always be followed, including the following:
- READ ALL INSTRUCTIONS BEFORE USE
- SAVE THESE INSTRUCTIONS HOUSEHOLD USE ONLY
- POLARIZED PLUG INSTRUCTIONS
- PARTS DESCRIPTION
- BEFORE THE FIRST USE
- OPERATION
- USING THE RACK:
- USING AS A SERVING PLATE:
- Hints:
- STORAGE INSTRUCTIONS
- CARE AND CLEANING
- Note: Allow sufficient time for the pot and the lid to cool before immersing in water to avoid cracking.
- KALORIK Customer Service Department
- USANDO LA REJILLA:
- UTILISER LA GRILLE AMOVIBLE:
- KALORIK®
Brand : KALORIK
Model : DG 44815
Category : Steam cleaner