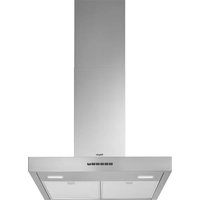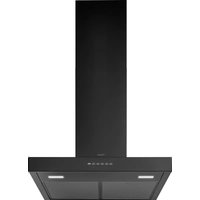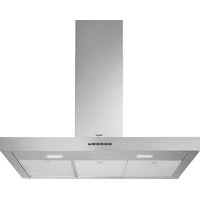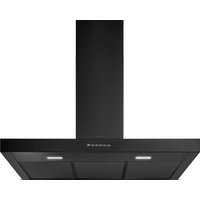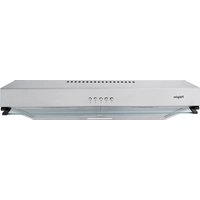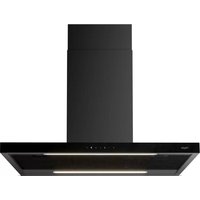
BEGA970MAT - Basket Pelgrim - Free user manual and instructions
Find the device manual for free BEGA970MAT Pelgrim in PDF.


User questions about BEGA970MAT Pelgrim
0 question about this device. Answer the ones you know or ask your own.
Ask a new question about this device
Download the instructions for your Basket in PDF format for free! Find your manual BEGA970MAT - Pelgrim and take your electronic device back in hand. On this page are published all the documents necessary for the use of your device. BEGA970MAT by Pelgrim.
USER MANUAL BEGA970MAT Pelgrim
Instructions for use
Cooker hood
NL
Handleiding 3 - 17
FR
Instructions for use 3 - 17
Gebruikte pictogrammen / Pictogrammes utilisés Verwendete Piktogramme / Pictograms used

natural_image
Diagram of a brick wall with a door and directional arrows indicating movement or force (no text or symbols)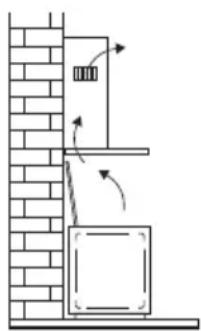
natural_image
Diagram of a vertical structure with brick wall and adjacent panel, showing airflow or movement arrows (no text or symbols)natural_image
Two gray pixelated lightbulb icons with radiating lines, no text or symbols present.natural_image
Technical diagram showing a mechanical assembly with a component being lowered into a slatted plate (no text or symbols present)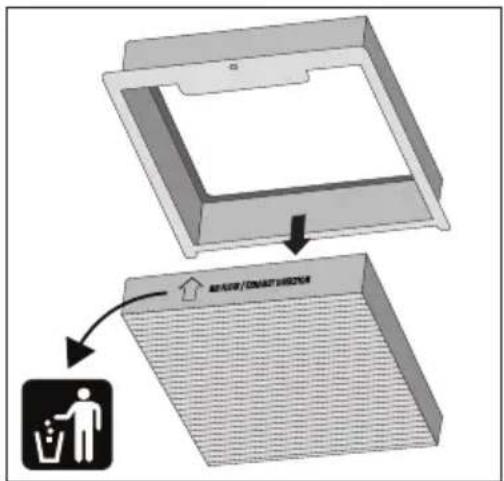
text_image
Airflow / Waste Dissection
text_image
Technical diagram showing a component with warning symbol and labeled parts, including 'FLOW / CONVEIT SWITCH' annotation.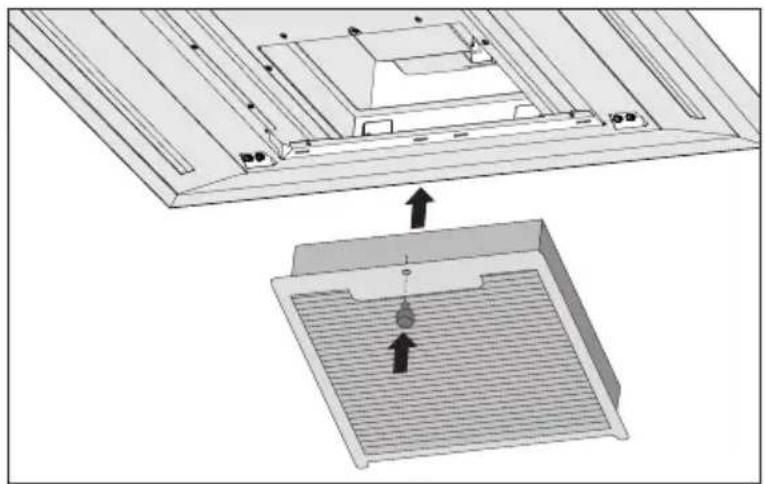
natural_image
Technical diagram showing a mechanical assembly with an upper panel and a lower panel, both without any text or symbols.Belangrijk:
text_image
Diagram showing a mechanical or electrical setup with labeled components and directional arrows, likely illustrating a system or control mechanism.Max. 125 ~cm
text_image
Prohibition sign with crossed-out trash bin and no text or symbolsnatural_image
Diagram of a brick wall with a cabinet and directional arrows indicating movement or force (no text or symbols)natural_image
Diagram of a vertical structure with brick wall and adjacent panel, showing airflow or movement arrows (no text or symbols)natural_image
Two gray pixelated lightbulb icons with radiating lines, no text or symbols present.natural_image
Diagram showing a mechanical assembly with a component being lowered into a slatted base (no text or symbols present)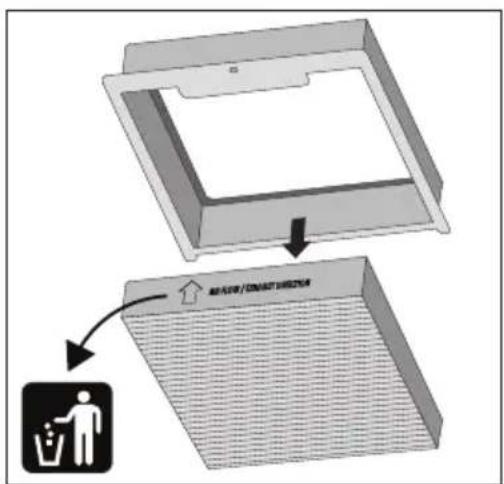
text_image
Diagram showing a waste disposal device with labeled components and a recycling symbol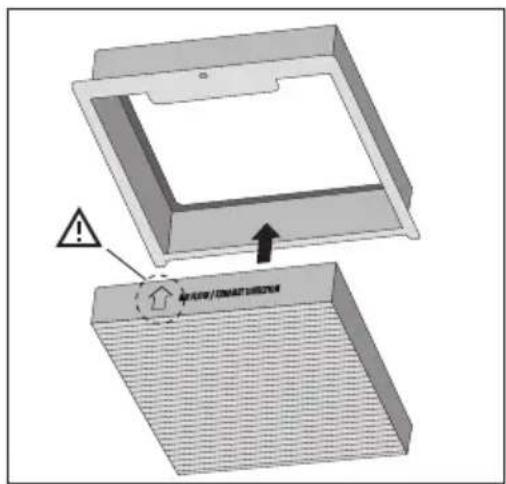
text_image
Technical diagram showing a device with warning symbol and labeled component 'AUTO / ENGLISH SWITCH'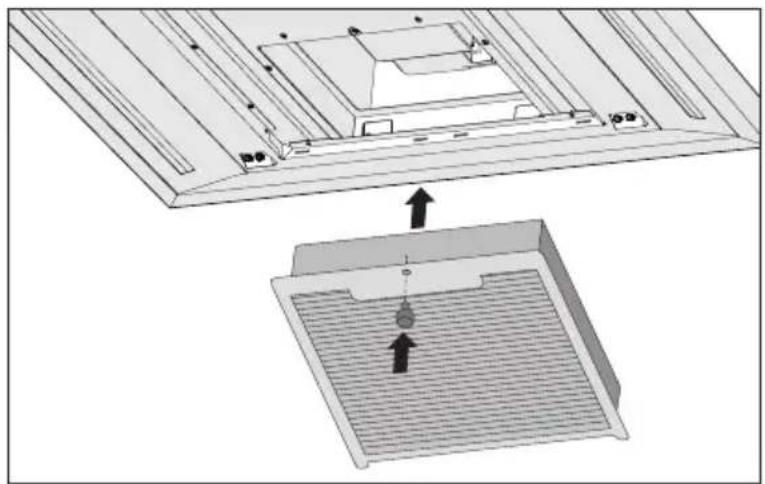
natural_image
Technical diagram showing a mechanical assembly with an inset view of a component (no text or symbols present)Important :
text_image
Two triangular warning symbols with exclamation mark inside, indicating no text or data.$$ \text { MARRON } = \text { Phase (L) } $$
$$ \mathrm{BLEU} = \text { N e u t r e } (\mathrm{N}) $$
text_image
Diagram showing a mechanical or electrical setup with labeled components and directional arrows, likely illustrating a system or control mechanism.Max. 125 ~cm
text_image
Prohibition sign with crossed-out trash bin and no text or symbolsnatural_image
Diagram of a brick wall with a door and directional arrows indicating movement or force (no text or symbols)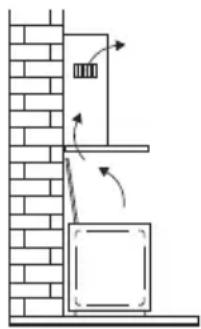
natural_image
Diagram of a vertical structure with brick wall and adjacent panel, showing airflow or movement arrows (no text or symbols)natural_image
Two gray pixelated lightbulb icons with radiating lines, no text or symbols present.natural_image
Diagram showing a mechanical assembly with a component being lowered into a textured surface (no text or symbols present)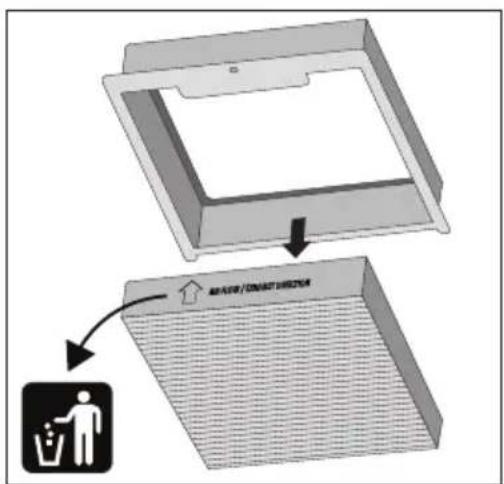
text_image
Diagram showing a plastic waste disposal device with a recycling symbol and labeled components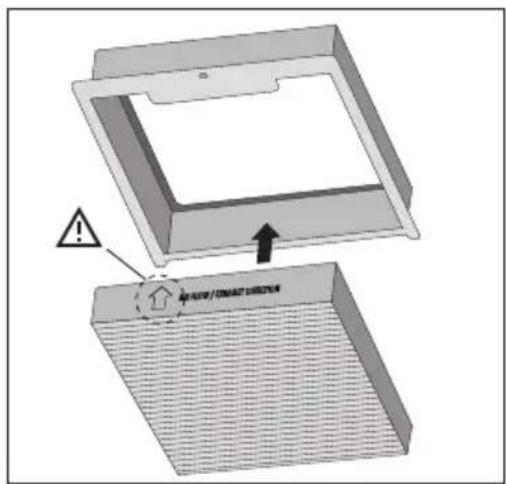
text_image
Technical diagram showing a device with warning symbol and labeled component 'FLOW / CONDUIT SWITCH'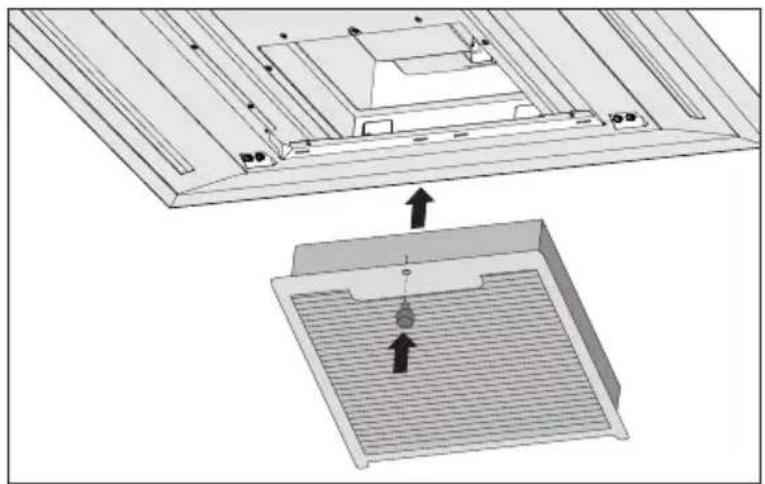
natural_image
Technical diagram showing a mechanical assembly with an upper panel and a lower panel, both without any text or symbols.Wichtig:
text_image
Diagram showing a device with labeled components and directional arrows, possibly illustrating a system or control setup.Max. 125 ~cm
Montage der Haube
text_image
Prohibition sign with crossed-out trash bin and no text, likely indicating no waste or disposal.| Operation | ||
| Cleaning | the | filters |
Operation with a connected hob
Making the connection between cooker hood and hob 9
Automatic mode
Activated intensive setting on the hob 11
Activated timer function on the hob 11
Lighting 11
Maintenance
Cleaning 12
Grease filters
Odour/fine particle filter 13
Lighting 14
Installation
General 15
Connection 16
Mounting the cooker hood 16
Environmental aspects
Disposal of packaging and appliance 17
Introduction
Congratulations on choosing this Pelgrim cooker hood. This product is designed with simple operation and optimum comfort in mind.
This extractor hood has AutoAir functionality. Via a hob with AutoAir function, the cooker hood can then be controlled in 3 different ways: manually, semi-automatically, and fully automatically. Choose the way that suits you best. Of course, you can always adjust the settings yourself.
These instructions for use explain how you can make best use of this appliance. These instructions contain information about the operation of the appliance and background information that may be of help to you during its use.

First read the safety instructions before using the appliance!
Read these instructions thoroughly before you first use the appliance, and keep the instructions for future use.
You can find the most recent version of the instructions for use on our website.
Extraction systems
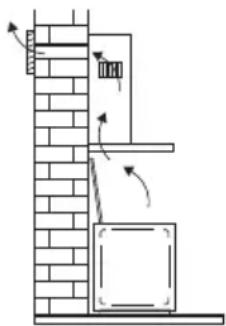
natural_image
Diagram of a building interior with brick walls, a chimney, and directional arrows indicating airflow or movement (no text or symbols)The cooker hood can be connected in two ways:
- As a cooker hood connected to an exhaust duct.
The cooking fumes are drawn into the cooking hood, filtered, and exhausted outdoors. This is the best way!
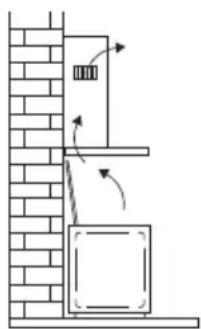
natural_image
Diagram of a vertical structure with brick wall and adjacent equipment, showing airflow direction (no text or symbols)- As a recirculation cooker hood.
The cooking fumes are drawn into the cooking hood and the grease droplets and odours are filtered out. The filtered air is not exhausted outdoors, but is returned to the kitchen. You then need to fit an odour/fine particle filter.
Note! The recirculation set including filter must be ordered separately.
Control panel
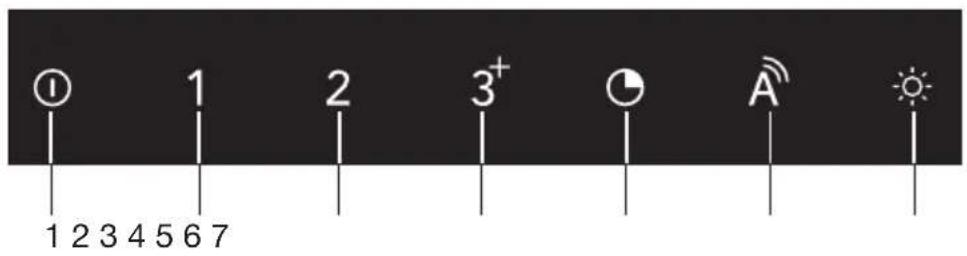
text_image
① 1 2 3 4 5 6 7 3⁺ C A- Switching fan on/off
- Speed setting 1
- Speed setting 2
- Speed setting 3 and intensive setting
- Timer function
- Automatic mode
- Switching on/off and dimming the lighting

Note!
If you have a cooker hood with an odour/fine particle filter, you should activate the recirculation filter cleaning indicator as described in the 'Cleaning filters' paragraph.
Operation
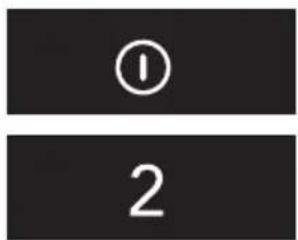
text_image
① 2Switching the extraction on and off
- Touch the on/off key.
The cooker hood is switched on at the lowest setting. - Select the desired extraction setting by touching the appropriate speed setting key.
The speed setting key lights up.
The cooker hood switches to the selected speed setting. - Touch the on/off key.
The on/off key is lit for 5 seconds and a double beep sounds.
The cooker hood is switched off.

Switching to intensive setting
A timer function is automatically used for the intensive setting. The duration is 4 minutes, after which the cooker hood switches to speed setting 3.
- Touch the on/off key. The cooker hood switches on at speed setting 1.
- Touch speed setting key 3. Speed setting key 3 lights up.
- Touch speed setting key 3 again. Speed setting key 3 flashes. The intensive setting is switched on.
Touch the on/off key or any other key to stop the intensive setting at any time.

Switching on the timer
- Switch on the cooker hood at speed 1, 2 or 3.
- Touch the timer key.
The timer key flashes and a single beep sounds.
The timer for the motor is activated; after 10 minutes the cooker hood switches off.
Touch the timer key to stop the timer at any time.

Switching on Clean Air function
- Touch the on/off key and the desired speed setting key 1, 2 or 3 at the same time.
The corresponding key lights up. - Then, within 5 seconds, touch the on/off key again.
The Clean Air function is activated. The cooker hood will be switched on for 10 minutes every hour. The speed setting key flashes while the Clean Air function is active. After 10 minutes, the cooker hood switches off automatically. The Clean Air function cannot be used when the intensive setting is selected.

Switching the lighting on and off
- Briefly touch the lighting key.
The lighting is switched on at maximum brightness. - Touch the lighting key for two seconds to dim the lighting.
- To switch the dimmed lighting off, touch the lighting key for about three seconds.
- If you want to switch off the lighting, briefly touch the lighting key.
Cleaning filters

Grease filter cleaning indicator
After 100 hours of use of the cooker hood, a beep sounds periodically during operation. The on/off key flashes continuously when the cooker hood is switched off. The grease filter must be cleaned.
- To reset the cleaning indicator, touch the on/off key twice with the cooker hood switched off.
You will hear a confirmation beep for 3 seconds.
After 20 hours, the filter cleaning indicator automatically resets.

Carbon filter cleaning indicator
After 200 hours of use of the cooker hood, a beep sounds periodically during use if the carbon filter contamination indicator is activated. The lighting key flashes continuously when the cooker hood is switched off. The odour/fine particle filter must be replaced.
- To reset the cleaning indicator, touch the lighting key twice with the cooker hood switched off.
You will hear a confirmation beep for 3 seconds.
After 20 hours, the filter cleaning indicator automatically resets.

Activation of the carbon filter cleaning indicator
In standard mode, the carbon filter cleaning indicator is not active. If the cooker hood is used as a recirculation hood, the carbon filter cleaning indicator must be activated.

- Switch off the cooker hood and the lighting.
- Touch the timer key for 5 seconds.
The lighting key lights up for 5 seconds as confirmation.
Switching off the carbon filter cleaning indicator:
- Switch off the cooker hood and the lighting.
- Touch the timer key for 5 seconds.
The on/off key lights up for 5 seconds as confirmation.
Making the connection between cooker hood and hob
The connection to an AutoAir hob is not active by default. First the connection to the hob must be activated.

At the same time, a setting must also be made on the hob; see the hob manual for this.

Check our website for the full range of hobs that can be connected to your cooker hood.

Making a connection
- Turn off the hood and the lighting.
- Touch and hold the automatic mode key for three seconds.
The automatic mode key, the lighting key and the timer key will flash simultaneously for a maximum of two minutes.
On your hob, activate the pairing mode in the user menu (see the hob manual). The connection to the hob is established. - The connection is successful when the automatic mode key, the lighting key and the timer key are illuminated continuously for four seconds.

If the automatic mode key, the lighting key and the timer key are no longer illuminated within two minutes, the connection was not successful. Repeat the procedure. If necessary, clear the hood's memory (see “Disconnecting”).

Disconnecting
- Turn off the hood and the lighting.
- Touch and hold the automatic mode key for three seconds.
The automatic mode key, the lighting key and the timer key will blink five times simultaneously.
The hob is no longer connected.
Automatic mode
The hob can control the extraction of the cooker hood in 3 different ways: manually, semi-automatically, and fully automatically. The automatic mode is for the user who wants the extraction level to automatically adjust to the cooking intensity. Extraction starts automatically as soon as a cooking zone is active and the extraction level depends on how the hob is used. When the hob is switched off, the extraction continues for 10 minutes and then stops automatically.
| Automatic mode | |
| Cooking zone setting Speed | |
| 0 - 3 0 | |
| 4 -5 1 | |
| 6 - 8 2 | |
| 9 - P 3 | |
| Semi-automatic mode | |
| Cooking zone setting Speed | |
| 0 | 0 |
| 1 - P 1 | |
Switching on/off the automatic mode on the cooker hood

The key for the automatic mode on the cooker hood only lights up when the hob is active and set to automatic mode.

The hood is switched on and on the hob the automatic mode is active.
-
Shortly touch and release the automatic mode key. The automatic mode key illuminates; the automatic mode on your cooker hood is now switched on.
-
Shortly touch and release the automatic mode key. The automatic mode key is no longer illuminated; the automatic mode on your cooker hood is switched off.
Activated intensive setting on the hob
If the intensive setting for the hood has been set on the hob, it will automatically switch back to speed 3 after six minutes.
Activated timer function on the hob
Lighting
If the timer for the hood is set on the hob, the hood will continue to operate at speed 1 (according to the countdown time that is displayed) after switching off the hob until the set time has elapsed.
When a connected hob is switched on, the lighting of the cooker hood always switches on automatically. You can continuously adjust the brightness of the hood via the hob. When you use the hob again (after you have switched the hob off), the lighting comes on at the preset brightness.
When switching off a connected hob, the lighting of the cooker hood remains on. Manually switch off the lighting with the lighting key on your AutoAir hob or via your hood.
Cleaning

Important!
For all maintenance first switch off the mains power to the cooker hood by pulling the plug out of the socket or by turning off the home's master switch. The hood needs to be cleaned regularly, both inside as well as outside (at least in the same frequency as the grease filter cleaning). Do not use abrasive cleaning products. Do not use alcohol!
Important!
If the instructions regarding cleaning the appliance or replacing the filters are not followed, this can cause a fire. These instructions should be followed! The manufacturer is not liable for damage to the hood or fire damage resulting from incompetent maintenance or from non-adherence to the above safety instructions.
Cooker hood
Clean the cooker hood with soapy water and a soft cloth. Then wash off with clean water. Do not use aggressive cleaning agents such as caustic soda. The cooker hood finish stays in good condition if it is buffed periodically following the application of wax.
Stainless steel cooker hoods
Do not use scouring pads or other abrasive cleaners on stainless steel cooker hoods. Finish with a non-abrasive, non-polishing agent and buff the stainless steel in the direction of the grain.
Metal grease filters
Metal grease filters should be cleaned once a month (or when indicated by the filter saturation indication system, if present on your model), using a neutral cleaning agent, preferably by hand or in the dishwasher on a short, low-temperature program. Place the grease filters with the openings facing downwards in the dishwasher so the water can drain out of the filter. Aluminum-colored and black grease filters become dull as a result of dishwasher cleaning agents. This is normal and does not effect the working.
Grease filters
Remove the filters by pulling on their release handles.
Odour/fine particle filter
Use an odour/fine particle filter when the cooker hood is not connected to an exhaust duct.
The functioning:
- More noise is produced when carbon filters are used than when the cooker hood is used with an exhaust vent.
- Carbon filters function optimally at a lower motor speed. For this reason, avoid the intensive setting.

Replacing the odour/fine particle filter
The odour/fine particle filter must be replaced annually. To replace the filter, follow the instructions supplied with the new filter. The recirculation set HR0014 must be ordered for the first installation.
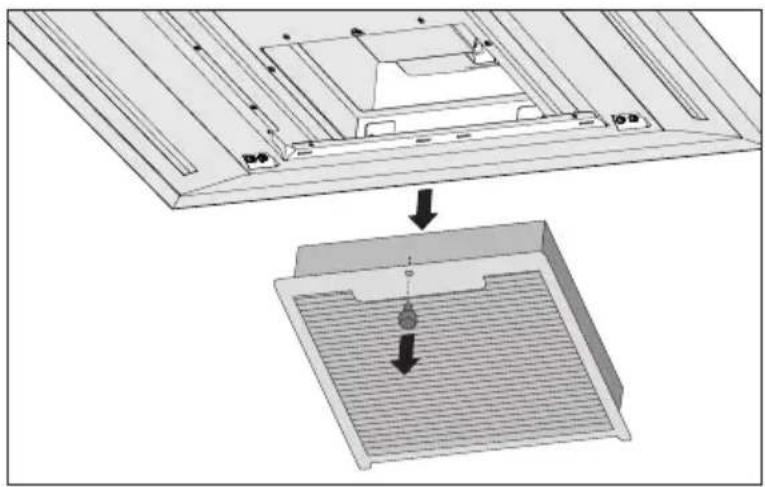
- Remove the grease filter.
- Remove the filter holder by loosening the screw and removing the holder at an angle from the appliance.
- Remove the filter and place a new filter back in the holder. Note the arrow on the filter for correct placement!
- Place the filter holder back in the appliance and tighten the screw.
- Install the grease filter.
natural_image
Diagram showing a mechanical assembly with a component being lowered into a textured surface (no text or symbols present)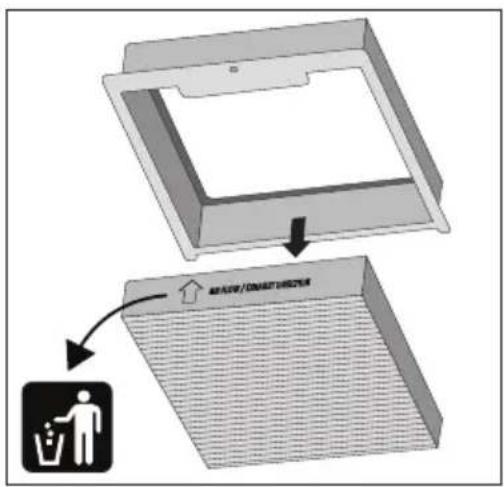
text_image
WATER/CONSUMIT DUCTURE WATER/CONSUMIT DUCTURE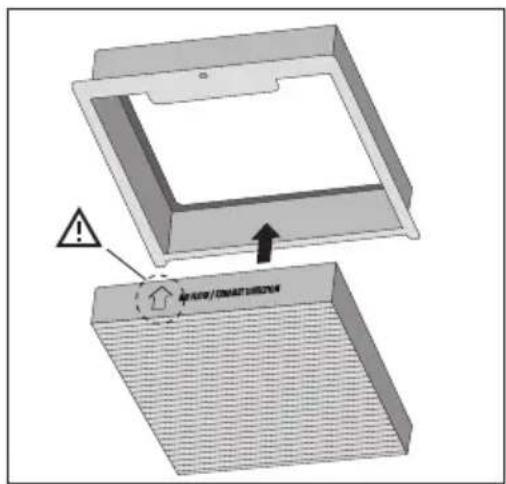
text_image
Technical diagram showing a component with warning symbol and labeled parts, including 'FLOW / CONVEIT SWITCH' annotation.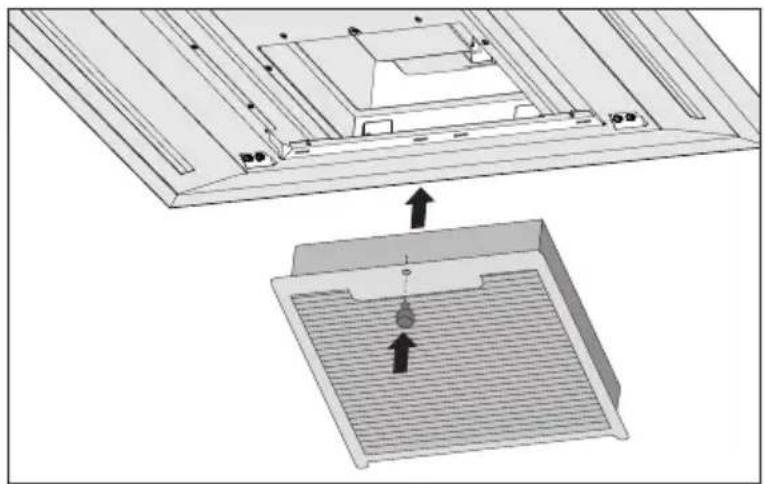
natural_image
Technical diagram showing a mechanical assembly with an upper panel and a lower panel, both without any text or symbols.Important:
- The saturation of the filter depends on the intensity of use, the manner of cooking and the regularity with which the grease filters are cleaned.
It is important that the grease filters are properly dried before installation.
Lighting

- The cooker hood is fitted with LED lighting.
- LED lamps guarantee you optimum lighting, a service life of up to 10 times longer than conventional lamps and energy savings of as much as 90%.
This hood is fitted with a light system. This light system has to be replaced by an authorized technician. Do not attempt to replace it by yourself.

The lamp in this household appliance is only suitable for illumination of this appliance. The lamp is not suitable for household room illumination.
General
This appliance must be connected to the power supply by a recognized installer who is familiar with and works in accordance with the applicable safety regulations. This appliance conforms to the European directives.
Important information:
- The lowest part of the cooker hood must be at least 65 cm above a gas hob. The lowest part of the cooker hood must be at least 55 cm above an electric, ceramic or induction hob.
- The cooker hood may only be connected to an existing exhaust duct to which no other appliances are connected (such as a geyser or heater).
- Gas appliances must be vented in accordance with the local regulations.
- The cooker hood works best when connected to an exhaust duct that is as short and as straight as possible.
- Before drilling any holes, always check to make sure that there are no wires in the area.
- The hood's connection pipe has a diameter of 120 or 150mm . The exhaust duct should preferably be of the same diameter.
- The installation materials supplied with this cooker hood are suitable for reinforced concrete and masonry walls. You will need special plugs and screws to fasten the appliance to some other types of wall.
Connection
Electrical connections
This appliance is a Class II appliance and must be earthed.
Check to make sure that the voltage specified on the type plate matches the mains voltage. The appliance must be connected to the mains as follows:
$$ B R O W N = L (\text { live }) $$
$$ \text { BLUE } = N (\text { neutral }) $$
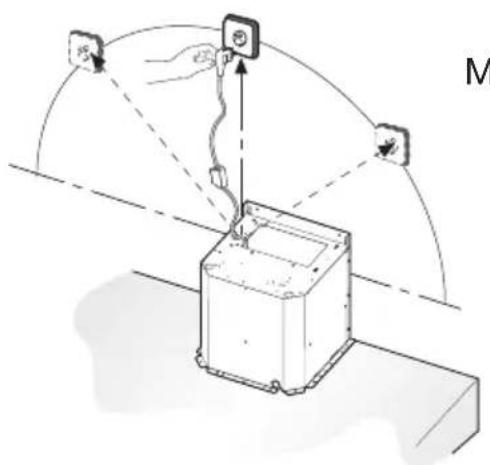
This cooker hood is fitted with a plug. Install the cooker hood so that the plug is accessible. It is preferable to fit the wall socket out of sight, behind the chimney cover.
Note: When you make a fixed connection to the mains you must make sure that the live wire is connected to an omnipolar switch with a break contact distance of at least 3 mm.
text_image
Diagram showing a device with labeled components and directional arrows, likely illustrating a system or control mechanism.Max. 125 ~cm
Mounting the cooker hood
The installation instructions are included separate.
Disposal of packaging and appliance
This appliance is made from sustainable materials. This appliance must be disposed of in a responsible manner at the end of its service life. Contact the local authorities for information about the method.
The packaging of the appliance is recyclable. The following materials may have been used:
- Cardboard;
• Polyethylene film (PE);
• CFC-free polystyrene (hard PS foam).
These materials must be disposed of in a responsible manner and in accordance with government regulations.
text_image
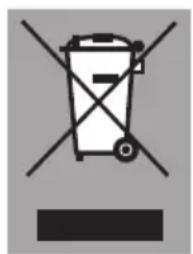
Prohibition sign with crossed-out trash bin and no text, likely indicating no waste or disposal.The appliance is marked with a crossed out wheeled bin symbol to draw your attention to the requirement for the separate disposal of domestic electrical appliances. This means that the appliance may not be disposed of in unsorted household waste at the end of its service life. The appliance must be taken to a special municipal waste processing location for separated waste or to a dealer who provides this service.
Collecting and disposing of domestic appliances separately avoids detrimental consequences for humans and the environment. This ensures that the materials used to make the appliance can be recovered and that substantial savings in the use of energy and raw materials can be achieved.
Declaration of conformity

We hereby declare that our products conform to the applicable European Directives, Regulations and requirements, as well as all requirements in the standards to which reference is made.
www.pelgrim.nl
www.pelgrim.be

881768
Pelgrim