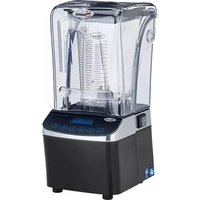
N° 62 - Mixer Santos - Free user manual and instructions
Find the device manual for free N° 62 Santos in PDF.


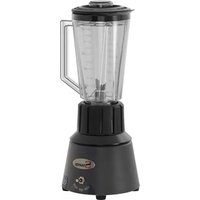
| Product type | Professional mixer (blender) |
| Brand | Santos |
| Model | N° 62 |
| Dimensions (H x W x D) | 441 x 201 x 247 mm |
| Net weight | 8.3 kg |
| Packed weight | 9.8 kg |
| Power supply | 220-240 V or 110-120 V, 50/60 Hz, single-phase |
| Power consumption | 1000 W |
| Maximum current | 5 A (at 220-240 V) |
| Bowl capacity | 1.4 L |
| Speeds | 2500 to 15,000 rpm |
| Number of preprogrammed recipes | 30 |
| Customizable recipes | 6 (via USB key) |
| Screen | Glass touch screen |
| Safety / noise reduction bell | Yes |
| USB Host port | Yes (for firmware and recipe updates) |
| Motor safety | Overload, overheating, overvoltage |
| Cleaning | Automatic cycle (code 1-4-2); bowl and lid dishwasher safe |
| Maintenance | Spare parts available: blade, bearing, seals, etc. |
| Warranty | 12 months (defective parts) |
| Use | Professional (bars, hotels, restaurants) |
Frequently Asked Questions - N° 62 Santos
User questions about N° 62 Santos
0 question about this device. Answer the ones you know or ask your own.
Ask a new question about this device
Download the instructions for your Mixer in PDF format for free! Find your manual N° 62 - Santos and take your electronic device back in hand. On this page are published all the documents necessary for the use of your device. N° 62 by Santos.
USER MANUAL N° 62 Santos
natural_image
Exterior view of a modern blender with transparent casing and black base (no visible text or symbols)*408.062
Model no 62
INHOUDSOPGAVE
"CE"-CONFORMITEITSVERKLARING....3
VEILIGHEIDSVOORSCHRIFTEN....4
WAARSCHUWINGEN: 4
BESCHRIJVING VAN HET APPARAAT 6
INSTALLATIE, HANTERING....6
TYPEPLAATJE VAN HET APPARAAT 23
"CE"-CONFORMITEITSVERKLARING
DE FABRIKANT :
SANTOS SAS - 140-150, Av. Roger SALENGRO 69120 VAULX-EN-VELIN (LYON) FRANKRIJK
BESCHRIJVING VAN HET APPARAAT
text_image
Recipe 10 Smoothie - Large :12text_image
Recipe 19 Milkshake - Small - LID OPEN :18 ② ③ ④ ⑤Cyclusteller
text_image
Select a key 1 2 3 4 5 P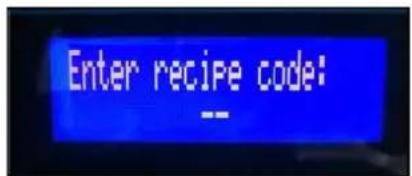
text_image
Enter recipe code: --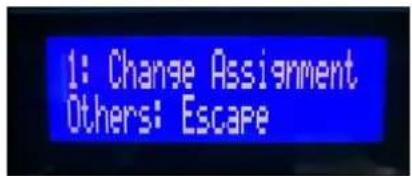
text_image
1: Change Assignment Others: Escapetext_image
Recipe 19 Milkshake - Small - LID OPEN :18natural_image
Close-up of a blue clamp holding a yellow tool with a red arrow indicating rotation (no text or symbols visible)text_image
Reduce load. OVERLOADnatural_image
Exterior view of a transparent cylindrical device with a black base and red label pointing to a small component (no readable text or symbols)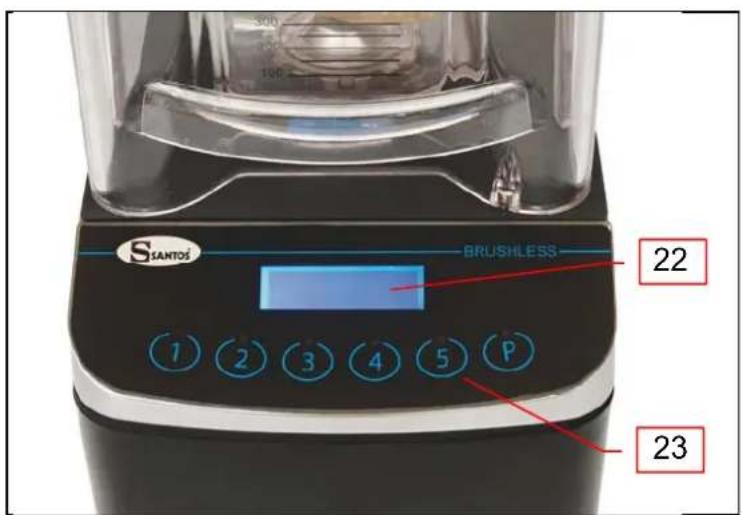
text_image
SANTOS BRUSHLESS 1 2 3 4 5 P 22 23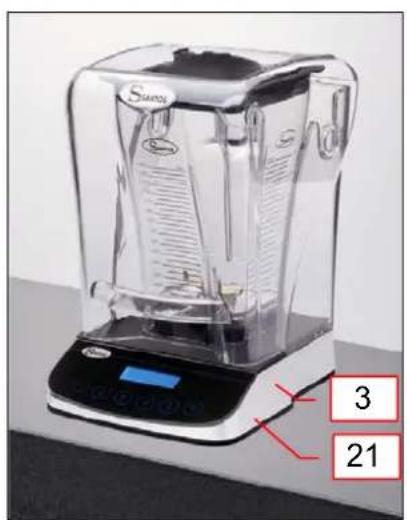
text_image
Sarex 3 21EMGA

text_image
13 14 11 18 17 12 14 15 16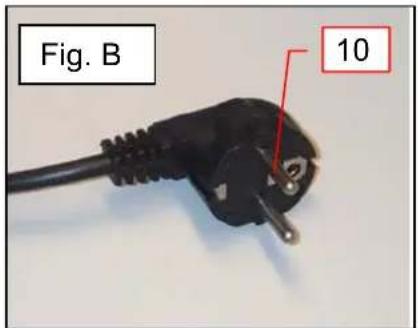
text_image
Fig. B 10GARANTIEBEWIJS
GARANTIE / WARRANTY
Since the 01.01.95, all our appliances comply with CE and possess the CE label. Our guarantee is of 12 months from the manufacturing date mentioned on the descriptive plate. Warranty is strictly limited to the free replacement of any part of origin recognized by us as defective due to a defect or building default and identified as belonging to the concerned appliance. Warranty does not apply to damages resulting from installation or use non-complying with our appliance data sheet (user's manual) or in case of an evident lack of maintenance or disrespect of elementary security electric rules. It does not apply in case of regular wear and tear. Any replacement of parts under warranty will be realized after return of the defective part in our workshops, postage paid, supported by a copy of a conformity statement on which appears the serial number of the appliance. Every appliance is equipped with a descriptive plate conforming to the EC recommendations and of which a duplicate exists in the conformity statement (serial number, manufacturing date, electrical characteristics ...). In case of serious damage judged repairable only in our workshops, and after prior consent from our departments, any appliance under guarantee is sent by the Distributor, carriage paid. In case of repairs or reconditioning of appliances not under guarantee, the round trip transport is payable by the distributor. The parts and workforce are invoiced at the current rate. A preliminary estimate can be supplied.
Coffee grinder not using SANTOS original burrs are not taken under guarantee. The warranty conditions, repairs, reconditioning, of the espresso coffee grinder are the object of a specific note. Our guarantee does not extend to the payment of penalties, the repair of direct or indirect damages and notably to any loss of income resulting from the nonconformity or the defectiveness of products, SANTOS's global responsibility being limited to the sale price of the delivered product and to the possible repair of the defective products.
In case of revelation of an imperfection during the warranty period, the Distributor has to, unless a different written agreement of SANTOS, indicate to his customer to stop any use of the defective product. Such a use would release SANTOS of any responsibility.
TYPEPLAATJE VAN HET APPARAAT
SPECIMEN
IMPORTANT: documents included in this manual to be kept:
- “CE” COMPLIANCE DECLARATION
• WARRANTY CERTIFICATE
natural_image
Exterior view of a modern blender with transparent glass casing and black base (no visible text or symbols)*408.062
Model no 62
CONTENTS
"CE" COMPLIANCE DECLARATION....3
SAFETY RULES 4
DO NOT: 4
ELECTRICAL CONNECTION: 5
1st TIME USE 5
RECYCLING THE PRODUCT AT THE END OF ITS SERVICE LIFE....5
DESCRIPTION OF THE APPLIANCE....6
INSTALLATION AND HANDLING 6
Installation on a counter 6
Installation when built into the countertop....6
USING THE APPLIANCE....8
CONTROL PANEL DESCRIPTION 8
USE 8
Starting up....8
Stopping the appliance: 8
Cycle counter....9
Selecting a pre-recorded menu....9
Custom menu....10
CREATING CUSTOM RECIPES....10
Creating custom recipes 10
CLEANING: 11
Cleaning the jar....11
Sanitizing the jar....11
HOOD SAFETY FEATURE....12
Modifying the safety mode connected with the hood lid....12
MAINTENANCE....12
Spare parts: 12
Changing the drive system: 12
Changing the blade: 13
FAULT FINDING ....15
The appliance will not start: 15
The blade does not rotate....16
The appliance stops as a result of an overload....16
The appliance stops further to an overload "OVERLOAD": 16
The appliance resets while it is operating: 16
Noises, vibrations, leaks at jar blade level 16
Problem with the recipes ....17
APPLIANCE TECHNICAL SPECIFICATIONS .... 18
TECHNICAL SPECIFICATIONS....18
Wiring diagram 110-120V 50/60Hz and 220-240V 50/60Hz....19
Element cross-reference table....20
Simplified list of appliance codes....20
WARRANTY CERTIFICATE 23
APPLIANCE IDENTIFICATION PLATE 23
"CE" COMPLIANCE DECLARATION
THE MANUFACTURER:
SANTOS SAS - 140-150, Av. Roger SALENGRO 69120 VAULX-EN-VELIN (LYON) FRANCE
declares that the appliance intended for the professional market described below:
Description: BRUSHLESS BLENDER
Type number: 62
complies with:
- the statutory provisions defined in appendix 1 of the European "machines" directive n°2006/42/CE and the national legislation transposing it
- the statutory provisions of the following European directives and regulations:
○ N° 2006/95/CE (low voltage directive)
○ N° 2004/108/CE (EMC directive)
○ No. 2002/95/CE (RoHS directive)
○ No. 2002/96/CE (WEEE directive)
○ N° 1935/2004/CE (regulation) relating to materials and articles intended to come into contact with foodstuffs
Harmonised European standards used to give presumption of conformity with the essential requirements of the above-mentioned directives:
- NF EN 12852+A1: 2010, Food processing machinery – Food preparation equipment and blenders - Safety and hygiene requirements.
This European standard is a type-C standard as defined in EN ISO 12100. When the provisions of this type-C standard differ from those stated in the type-A or B standards, the provisions of the type-C standard override the provisions of the other standards. This standard provides the means to comply with the requirements of the "machines" directive n°2006/42/CE, (see appendix ZA)
- NF EN ISO 12100 -1 and 2:2004: Safety of machinery - General principles for design
- NF EN 60204-1: 2006 : Safety of machinery - Electrical equipment of machines-General requirements
- NF EN 1672-2: 2005, Food processing machinery – Basic concepts – Hygiene requirements
• NF EN 60335-1: 2003 : Household and similar electrical appliances. Safety. - NF EN 60335-2-64 :2004 : Particular requirements for commercial electric kitchen machines
Drawn up in VAULX-EN-VELIN on: 01/12/2010
Signatory's position: CHIEF EXECUTIVE OFFICER
Signatory's name: Aurélien FOUQUET
Signature:
SAFETY RULES
At the time of use, maintenance or scrapping of the appliance, always ensure that the following elementary precautions are adhered to.
Read the explanatory instructions in full Keep this user manual
Note: You will find it easier to understand the next few paragraphs if you refer to the diagrams at the end of this manual
DO NOT:

- Use this appliance to process anything other than foodstuffs.
- Pass the pits through the appliance. Remove the pits from fruits before passing them in the appliance (e.g. mangos, apricots, peaches).
- Use the appliance without first correctly installing the jar (1) fitted with its lid (2) on the motor base (3).
- Operate the appliance without any food in the jar.
- Fill the jar beyond the maximum capacity corresponding to the amount marked on the side: 1.4 liters. The maximum capacity must be reduced for thick mixtures.
- The base (6) must not be immersed in water.
- Plunge the base in water or any other liquid for reasons of protection against risks of electrocution.
- Use the appliance if the power cord is damaged. It must be replaced by a special assembly available from an approved SANTOS dealer or from SANTOS itself.
- The appliance must be unplugged before any intervention on it: cleaning, general care, maintenance.
- Use a hose nor a pressure hose for cleaning: this is forbidden
- Use an abrasive sponge to clean the plastic jar (1).
12.Insert or store kitchen utensils in the jar. - Operate the appliance if the jar or a blade is chipped, cracked or broken. Never use a jar if there is any play with respect to the blade.
- It is forbidden to operate the appliance on a surface with a slope in excess of 10^ relative to the horizontal plane. All 4 feet of the appliance must always be resting on this surface. The appliance motor shaft must always be vertical relative to the surface on which it is placed.
- Use of spare parts other than certified original SANTOS parts is prohibited
- Turn the On/Off switch (4) to "0" when the appliance is not operating.
- Connect several appliances to the same power socket.
- Use the appliance outdoors.
- Never place the appliance close to or on a source of heat.
ELECTRICAL CONNECTION:
• The appliance's power supply is available in two single-phase voltages:
- 110-120 V 50/60 Hz:
- 220-240 V 50/60 Hz:
Line protection: the appliance must be connected to a standard 2 pole + ground socket.
The set-up must be fitted with a differential circuit breaker and a 16A fuse. Grounding of the appliance is compulsory.
TAKE CARE:

Before connecting the appliance, check that the mains electrical voltage is the same as the voltage for your appliance. Its value is shown:
- either on the identification plate under the appliance.
or on the identification plate on the last page of this manual.

TAKE CARE:
Check that the on / off switch (4) is in position "0-Off" before plugging the power cord in to the mains power socket.
1st TIME USE
Thoroughly clean all parts in contact with the food. jar (1) lid (2).
See the "cleaning" chapter.
RECYCLING THE PRODUCT AT THE END OF ITS SERVICE LIFE
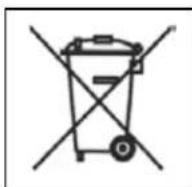
This appliance is marked with the symbol of the selective waste sorting system relating to waste electrical and electronic equipment. This means that the product must be disposed of via a selective waste sorting system in accordance with directive 2002/96/CE (DEEE) – Professional Appliances section – so that it can be either recycled or dismantled in order to reduce any impact on the environment.
For further information you can contact your dealer or SANTOS.
For the disposal or recycling of the appliance components, please refer to a specialist company or contact SANTOS.
Electronic products not covered by a selective sorting system are potentially dangerous for the environment.
The packaging material should be disposed of or recycled in accordance with regulations in force.
Table showing the proportions of materials making up the appliance (percentage weight)
| Total steel | Total aluminum | Total plastic | Total copper | Miscellaneous materials* |
| 31.1% 19.0% | 33.2% 2.8% | 13.8% |
* Weight of miscellaneous materials, e.g.: switches, electronic boards, capacitors, electric cables, etc
DESCRIPTION OF THE APPLIANCE
- Appliance n° 62 is a professional appliance designed exclusively for professional use. It is not designed for household use.
- Appliance n° 62 is made for the preparation of cocktails, smoothies and all types of preparation based on crushed ice and blended fruit which may be produced in bars, cafés, hotels or restaurants.
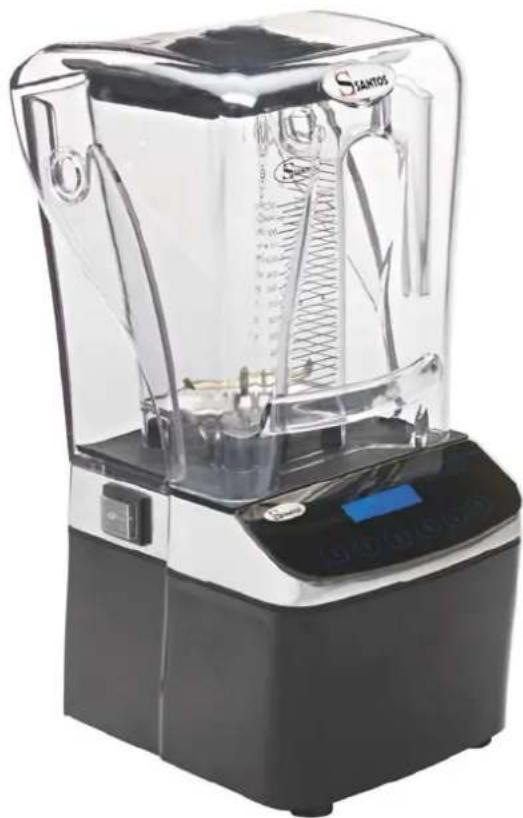
- The appliance consists of a blender jar, a motor base fitted with an On/Off switch, an electronic module, a control panel and a sound-proofing hood.
- Some thirty recipes show how to prepare most of the desired preparations.
- The appliance has a USB Host connection allowing 6 custom recipes to be updated, along with the appliance's Firmware.
INSTALLATION AND HANDLING
Installation on a counter
The appliance can be handled by a single person. For ease of use, it is recommended that the appliance is placed on a table or work surface so as to have the control panel in front of you (recommended height: 90 cm, to be adapted as required for the user).
Installation when built into the countertop
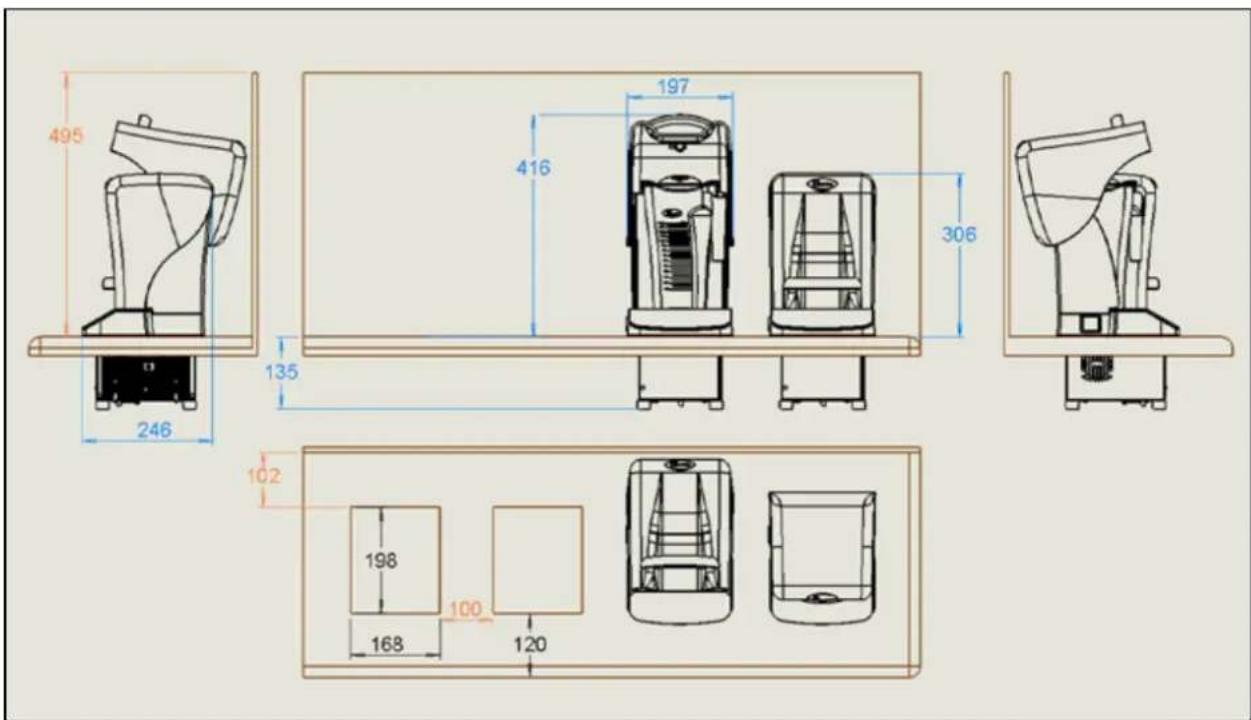
Before cutting out the countertop, check the following points in order to be sure that the appliance will be perfectly usable once built-in:
text_image
495 246 135 197 416 306 102 198 100 168 120Make sure there is sufficient clearance (behind, above, below) for proper installation and operation of the appliance.
The cut-out in the countertop represents a rectangle measuring 168mm x 198mm.
• Make sure there is a minimum clearance of 135mm beneath the countertop
- The free space above must measure at least 495mm
- The minimum clearance to the rear must be 102mm (distance between the cut-out and the wall)
- The minimum clearance sideways must be 30mm
Multiple cut-outs.
It is recommended to leave a distance of 100mm between 2 cut-outs.
Adapting the appliance to use it as a built-in version.
- Disconnect the appliance from the mains.
- Remove the jar (1) and hood lid (8)
- Tip the appliance backwards
- Using a Torx screwdriver, remove the 3 screws located between the metal casing and motor surround (6).
- Remove the motor surround (6)
USING THE APPLIANCE
CONTROL PANEL DESCRIPTION
The control panel (5) is made up of:
• a graphic screen (22),
- 6 "recipe" keys (23) including one P for "pulse".
Each key corresponds to a predefined recipe.
USE
Note: the appliance will not start unless the hood lid (8) is closed.
Starting up
- Power up the appliance by putting the On/Off switch (4) to position 1.
- Put soft foods in the jar (1) first followed by the harder ones, with ice cubes last of all. Using pieces of food of even size make the recipe easier to carry out.
- Put the lid (2) on the jar and check it is correctly positioned.
- Make sure the motor is turned off, then install the jar on the jar mat (9).
- Close the sound-proofing hood by lowering the lid (8). The LCD screen should show: "READY"
- Press one of the 6 keys (23) to start the cycle for the corresponding recipe.
- The lamp for the key activated will remain lit while the cycle is in progress.
- Wait for the cycle to end.
text_image
READY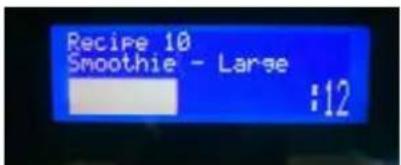
text_image
Recipe 10 Smoothie - Large :12Stopping the appliance:
The appliance will stop either:
• Automatically at the end of the cycle
- Or by manual intervention, by pressing one of the 6 keys on the control panel or by
putting the switch to (0)
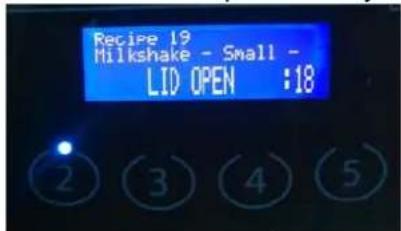
Note: opening the sound-proofing hood will trigger the "pause" mode. The motor will stop. When the sound-proofing hood is closed again, the cycle starts up again from where it stopped, unless the hood remains open for more than 30 seconds.
text_image
Recipe 19 Milkshake - Small - LID OPEN :18Cycle counter
The stop function has a partial cycle counter which allows the number of recipes carried out over a given period to be counted:
This code: "4 - 5 - 2" is used to view the counter,
- Hit the 1 key to reset the counter to zero while viewing it.
The appliance is delivered with 3 basic menus loaded as standard, each containing consisting of 6 recipes among the 30 recipes pre-recorded in the appliance.
- "Universal menu" which allows most recipes usually needed to be carried out
• "Coffee shop menu" which is more suited to coffee shops - "Juice bar menu" which is more suited to juice bars.
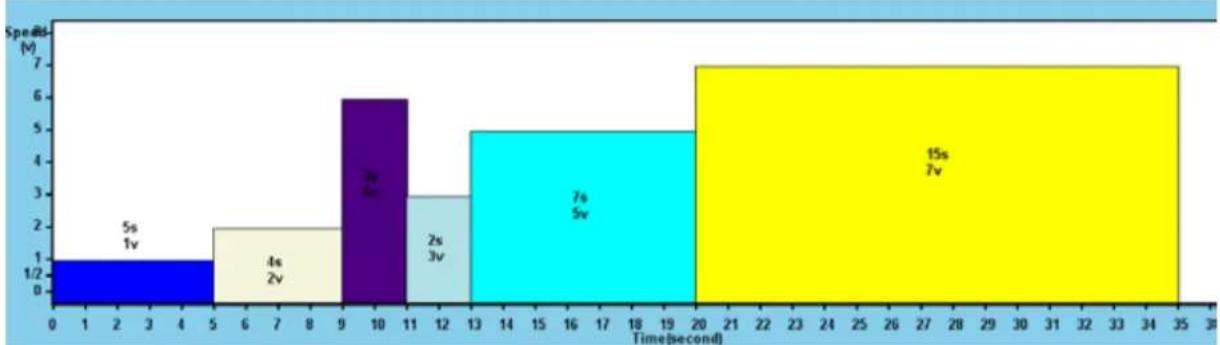
Note: Each menu has 6 recipes. A recipe consists of several sequences (speed/time); here is an example of a recipe:
bar
| Time (second) | Speeds (M) | |---|---| | 0-2 | 1/2 | | 2-3 | 5s | | 3-4 | 1v | | 4-5 | 0 | | 5-6 | 0 | | 6-7 | 2v | | 7-8 | 0 | | 8-9 | 0 | | 9-10 | 6v | | 10-11 | 4v | | 11-12 | 2v | | 12-13 | 0 | | 13-14 | 0 | | 14-15 | 0 | | 15-16 | 0 | | 16-17 | 0 | | 17-18 | 0 | | 18-19 | 0 | | 19-20 | 0 | | 20-21 | 0 | | 21-22 | 0 | | 22-23 | 0 | | 23-24 | 0 | | 24-25 | 0 | | 25-26 | 0 | | 26-27 | 0 | | 27-28 | 0 | | 28-29 | 0 | | 29-30 | 0 | | 30-31 | 0 | | 31-32 | 0 | | 32-33 | 0 | | 33-34 | 0 | | 34-35 | 0 | | 35-36 | 0 |Selecting a pre-recorded menu
The menus are selected using the following key combinations:
"Universal menu" press the following keys in quick succession "2 - 5 - 1"
"Coffee shop menu" press the following keys in quick succession "2 - 5 - 2"
"Juice bar menu" press the following keys in quick succession "2 - 5 - 3
"Custom menu" press the following keys in quick succession "2 - 5 - 4"
Note: when the appliance is delivered, the "Custom menu" is empty. See the following section on how to enter parameters.
Custom menu
Your own menu can be created by assigning one of the 30 pre-recorded recipes to one of the 6 keys on the control panel.
How to assign a recipe to one of the control panel keys
Note: All 6 keys can be parameterized
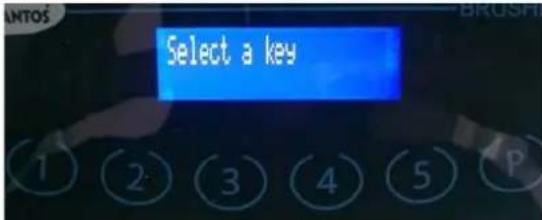
For example: to assign recipe n°34 to key n°2
text_image
Select a key- Type in the following sequence: "3 - 1 - P"
- Select the key to be programmed Press key n^2
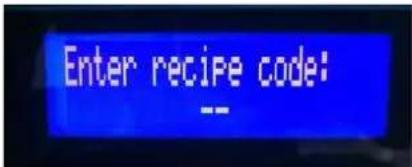
text_image
Enter recipe code: --Enter the code for the desired recipe (see the table of 30 pre-recorded recipes) Type code 34 on the keys
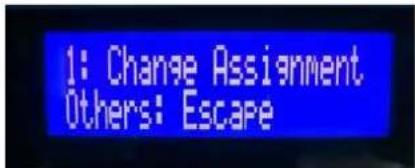
text_image
1: Change Assignment Others: Escape- Press key "1" to validate, or one of the other keys to cancel
Once the "custom menu" has been set up, the standard menus can be activated (using the appropriate code) without deleting the custom menu.
Use the code "2 - 5 - 4" to reactivate the "Custom menu".
Creating custom recipes
Your own recipes can be created by using a special program available from SANTOS and a simple USB key for transfer from computer to the appliance.
Note: No special casing is required.
CLEANING:
IMPORTANT:

• In all cases, stop the appliance and unplug the power cable (10).
- The appliance must not be cleaned with a jet of water nor a high pressure spray
• The motor unit (3) must not be immersed in water.
- Do not use an abrasive sponge to clean the jar (1), protection hood (7) and lid (8) nor the control panel (5).
- Do not hermetically close the jar when the appliance is stored away (remove the lid (2)).
• Take care when handling the blade; risk of cuts
- Do not tap the jar against any surface to unstick ingredients: use a flexible spatula instead
You are advised to clean the appliance as soon as you have finished using it.
It will be easier to clean if you do not allow the remaining scraps of food to dry.
The motor surround (6) can be cleaned using a soft, wet sponge.
Cleaning the jar:
Note: Although the jar and lid can be washed in a dishwasher, it is recommended not to do so in order to make them last longer.
- Empty the contents out of the jar and rinse with running water to remove as must solid residue as possible.
- Fill the jar with 600 ml warm water (40 to 45°C), add 2 drops of household washing up liquid, place the lid on the jar to close it and run the cleaning cycle, code "1 - 4 - 2" (30 seconds)
- Rinse thoroughly with clean water.
Sanitizing the jar:
Use the following procedure in order to be sure it is perfectly sanitized.
- Clean the jar and lid (see preceding chapter)
- Fill the jar with 1 liter of sanitizing solution (75ml of sodium hypochlorite solution containing 2.6% active chlorine, and top up to 1 liter with cold water)
- Close the jar using its lid and run the cleaning cycle, code "1 - 4 - 2" (30 seconds)
- Once the cycle has ended leave the solution to work for 2 minutes.
- Rinse thoroughly with clean water.
HOOD SAFETY FEATURE
Note: the appliance will not start unless the hood lid (8) is closed.
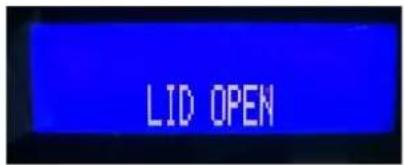
text_image
LID OPENModifying the safety mode connected with the hood lid
"Pause" mode (by default)
While a cycle is running, opening the hood makes the motor stop but does not clear the key that is active. When the hood is closed again, the cycle resumes.
Note: the current cycle will be de-activated if the sound-proofing hood remains open for more than 30 seconds.
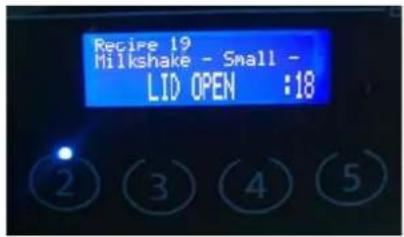
text_image
Recipe 19 Milkshake - Small - LID OPEN :18"Quick stop" mode
Opening the hood makes the motor stop and de-activates the key that was selected.
This code: "4 - P - 1" provides the means for switching from one mode to the other
MAINTENANCE
Prior to carrying out any intervention on the appliance, it must be disconnected from the mains without fail.
Spare parts:
This appliance requires no specific maintenance. The bearings are lubricated for life. If any intervention is necessary to replace parts subject to wear, such as the bearing, blade, electrical or other components, please refer to the parts list (see the exploded view at the end of this manual).
Whenever ordering spare parts (see references in the exploded view at the end of this manual), please quote the following:
the type
the appliance serial number and
the electrical specifications (16)
given under the appliance.

Motor drive (female):
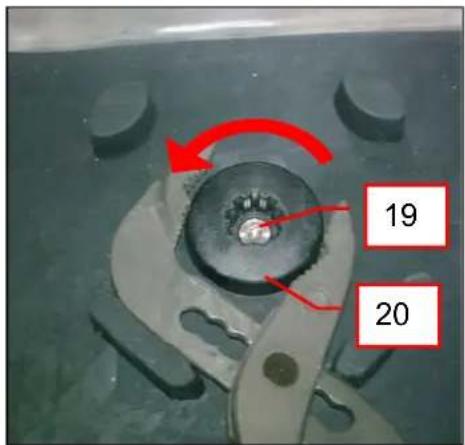
Hold the motor drive (20) in position with multiple slip joint pliers, and unscrew the fixing screw (19) using a TORX wrench (anticlockwise)
text_image
19 20Blade drive (male):
The blade drive is an integral part of the jar ball bearing assembly (12). The whole assembly must be replaced (drive – main bearing – ball bearing)
- Turn the jar upside down.
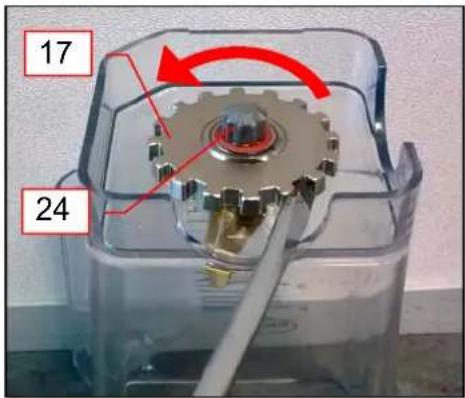
- Using a large flat screwdriver, loosen the bearing fixing ring (17) (anticlockwise)
- Remove the bearing fitted with the blender blade from the jar
(see next section for how to dismantle the blade)
text_image
17 24Changing the blade:
Dismantle the complete bearing assembly (see previous section)
Dismantling the blade
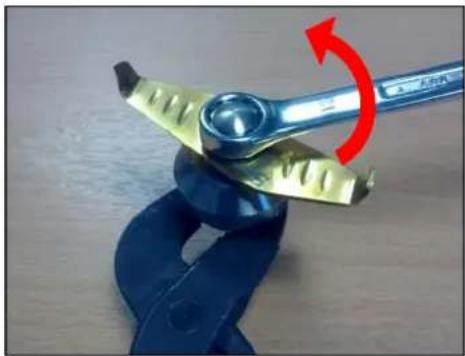
Hold the blade coupling (24) in position with multiple slip joint pliers, and unscrew the fixing nut (13) using a size 12 hexagon wrench (anticlockwise)
natural_image
Close-up of a metal clamp tool with a red arrow indicating rotation (no text or symbols visible)Fitting the blade
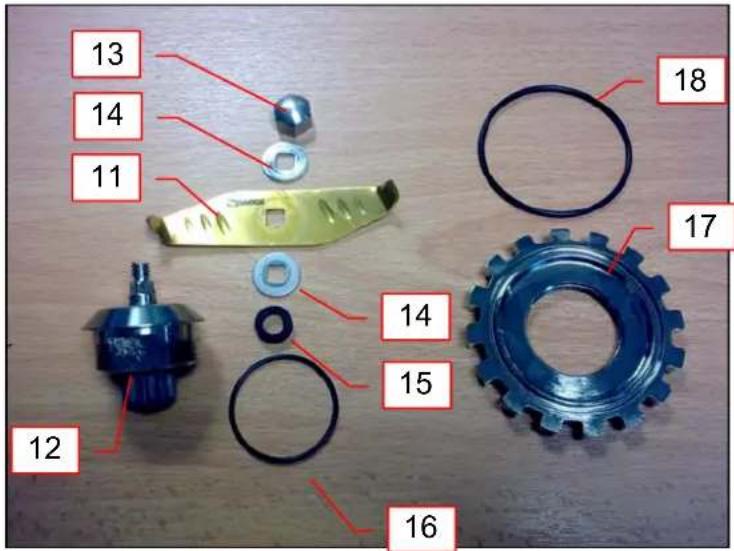
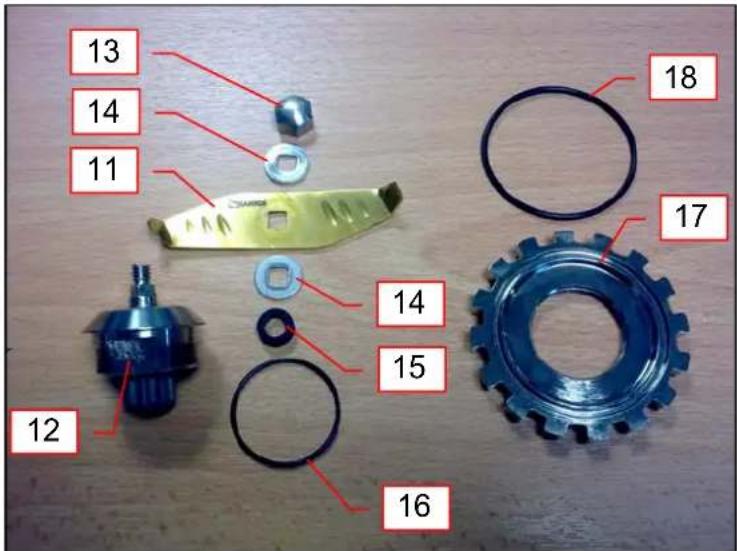
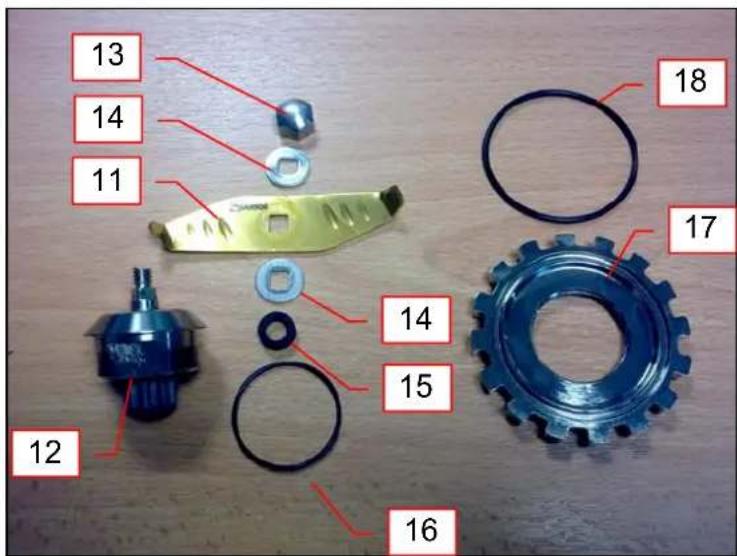
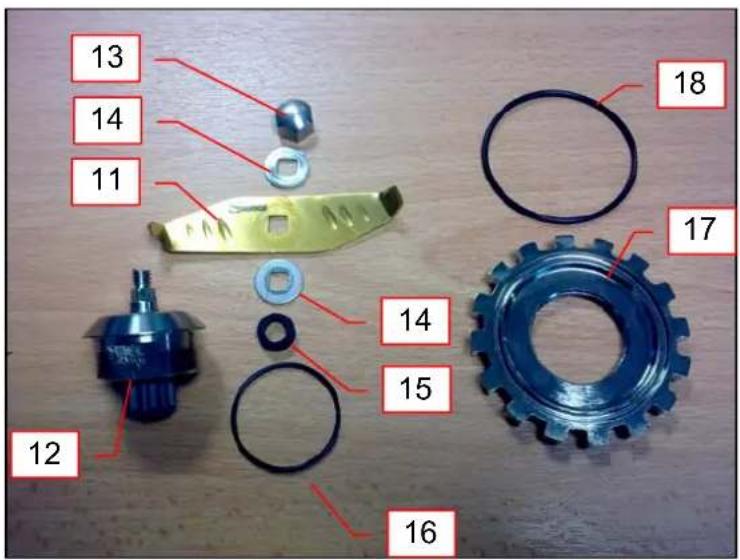
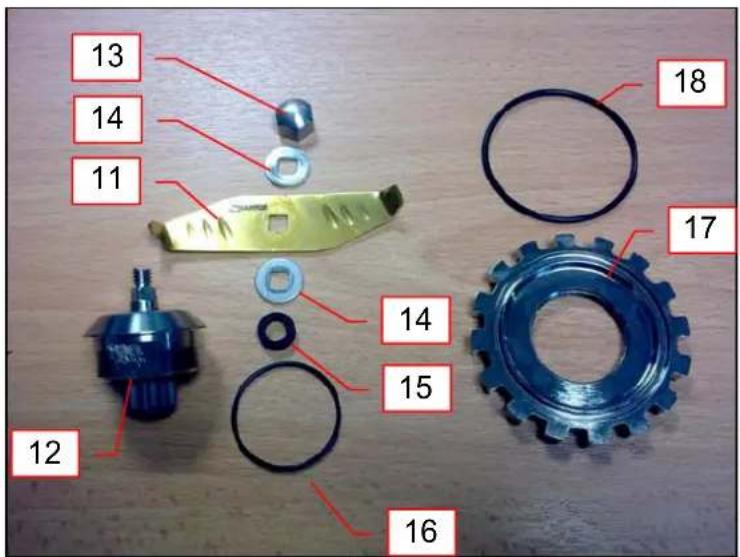
Take care to comply with the order given for assembly of the various components:
- thrust washer (14),
- blade (11) (recesses upwards),
- thrust washer (14) (the lipped seal must be pushed far enough for the square of this washer to work with the square of the shaft)
-
fixing nut (13) (tighten the nut by hand, checking that the washer in point 4 is correctly positioned relative to the square of the shaft.
-
lipped seal (15) (be sure to install correctly with lip downwards),
Tighten the fixing nut.
text_image
13 14 11 18 17 12 14 15 16Assembling the bearing on the jar
- Place the bearing seal (16) on the bearing (12)
- Place the locking ring seal (18) on the locking ring (17)
- Place the bearing (12) inside the jar (1)
- Screw down the locking ring, take care that the locking ring seal remains in its seating
- Tighten well by hand, or with a lever
FAULT FINDING
Identifying the cause of appliance stoppage with precision.
In all circumstances, if the problem persists, disconnect the electric power supply (unplug the mains power cord (10)) and call on someone from the maintenance department or contact an approved SANTOS dealer.
The appliance will not start:
The LCD screen does not light up:
- Check: the mains supply, the condition of the power cord (10).
- Check that the On/Off switch (4) is at position 1
- Check that the ammeter protection system has not been triggered due to an overload. (see the paragraph: "The appliance stops following a motor overload")
- Switch the appliance off then on again
- After powering up the 6 key diodes should light up quickly and the screen display "READY". If not, check on the condition of the wiring and connections in the switch (4), the component support module and the control panel. (this operation must be carried out by a qualified person)
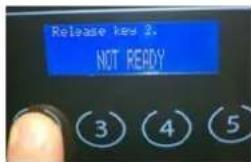
The LCD screen shows "NOT READY":
- This message indicates that one of the keys was already activated before powering up.
- Remove any item liable to activate the keys, clean the control panel.
text_image
Release key 2. NOT READYThe LCD screen shows "LID OPEN":
- Close the safety hood lid (8)
The LCD screen shows "READY":
- Switch the appliance off then on again
- After powering up the 6 key diodes should light up quickly and the screen display "READY".
- If not, check the connections on the cable connecting the control panel to the electronic module (this operation must be carried out by a qualified person).
The blade does not rotate
- Check that there are no foreign bodies stuck in the jar.
- Check the condition of the drive system (motor and blade)
The appliance stops after the motor has overheated, "OVER TEMP": (the motor unit is hot)
- Put the On / Off switch (4) to the 0 position and unplug the appliance.
- Wait for the motor to cool down (20 to 45 minutes) then press the On / Off switch (4) (position 1).
The appliance stops as a result of an overload
The LCD screen does not light up
A motor overload can occur if there is an excessive quantity or something too hard in the jar.
Under these circumstances, either the thermal protection or the excess current protection may be activated and stop the appliance operating.
If the appliance is hot, refer to the section "The appliance stops as a result of motor overheating").
Otherwise:
• Turn off the electric power supply (unplug the mains power cord (10))
- Move the On / Off switch (4) to the 0 position.
- Under the appliance (fig. O), press the button (25) to reset the excess current protection. If the button does not remain in the "reset" position, allow the appliance to cool down before repeating the operation.
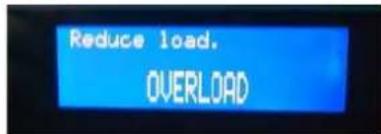
The appliance stops further to an overload "OVERLOAD":
A motor overload can occur if there is an excessive quantity or something too hard in the jar.
text_image
Reduce load. OVERLOAD- The recipe is not appropriate for the quantity and consistency.
- Reduce the quantity.
- Chose a different recipe with slower speeds.
The appliance resets while it is operating:
Eliminate all multiple power sockets and plug the appliance into its own individual power supply.
Noises, vibrations, leaks at jar blade level
- Check the blade is correctly tightened (first dismantle the blade bearing)
- Replace the bearing seals
See the chapter: "Changing the blade"
If the problem persists, turn the appliance electric power off (unplug the mains power cord (4)) and call on someone from the maintenance department or contact an approved SANTOS dealer.
Problem with the recipes
A few basic rules make it easier to understand how a blender works and thus know how to adapt the recipe cycles to the products being processed.
Note: Do not overload the appliance: it is better to run a short recipe twice rather than double the quantities and cycle time: prolonged operation heats the food due to friction and affects the desired texture with the recipe.
The final mixture is too hot. Once an evenly mixed texture has been obtained, carrying on blending will make the food heat up: reduce the speed or recipe time.
The final mixture is not even in texture:
- the recipe is not appropriate for the quantity and products processed; reduce the quantity of food in the jar, increase the cycle time, use smaller pieces of food (having evenly sized pieces of food makes it easier to carry out the recipe).
- Liquid is needed to make the solid food reach the blade. Increase the amount of liquid, pour in the liquid before adding the solid foods.
Ice cubes remain stuck to the jar walls:
- Reduce the quantity of ice cubes when they are processed without any liquid
- It is better to add liquid with the ice cubes, always putting the liquid in first.
The mixture "bounces" fast up and down the jar:
- Reduce the speed to adapt it to the quantity being processed so that the blade is constantly immersed in the mixture. The recipe will take place more quickly and the mixture will be more even.
High speeds are not suitable for recipes with small quantities
- Increase the amount of product being processed.
APPLIANCE TECHNICAL SPECIFICATIONS
TECHNICAL SPECIFICATIONS
| Model 62 Single phase | ||
| Supply voltage (V) 220-240 100-120 | ||
| Frequency (Hz) 50/60 50/60 | ||
| Motor: Nominal Input power (W) 1000 Max. current (A) 5 Speed: (rpm) 2500 to 15000 | ||
| Glass touch screen Yes Cup capacity Pre-recorded recipes Additional recipes parameterizable Partial counter Safety/sound-proofing hood USB Host port Motor overload safety feature: Motor overheating safety feature: Excess voltage safety feature Yes | (L) | 1.4 30 6 Yes Yes Yes Yes Yes |
| Intermittent operation | 60 seconds on and 60 seconds off | |
| Dimensions: Height Width Depth Weight: Net weight Weight including packing Noise: (2) L_pA uncertainty K_pA =2.5dB | (mm) (mm) (mm) (kg) (kg) (dBA) | 441 201 247 8.3 9.8 73 |
(1) These ratings are given for your guidance. The exact electrical specifications of your appliance can be found on the rating plate.
(2) Noise level measured in acoustic pressure of appliance loaded as per the following standards: NF EN 12852 :2010, ISO 11201:1995 and ISO 4871:1996.
Appliance placed on a work surface at 75cm from the floor. Microphone turned towards the appliance at 1.6m from the ground and 1m from the appliance.
Wiring diagram 110-120V 50/60Hz and 220-240V 50/60Hz
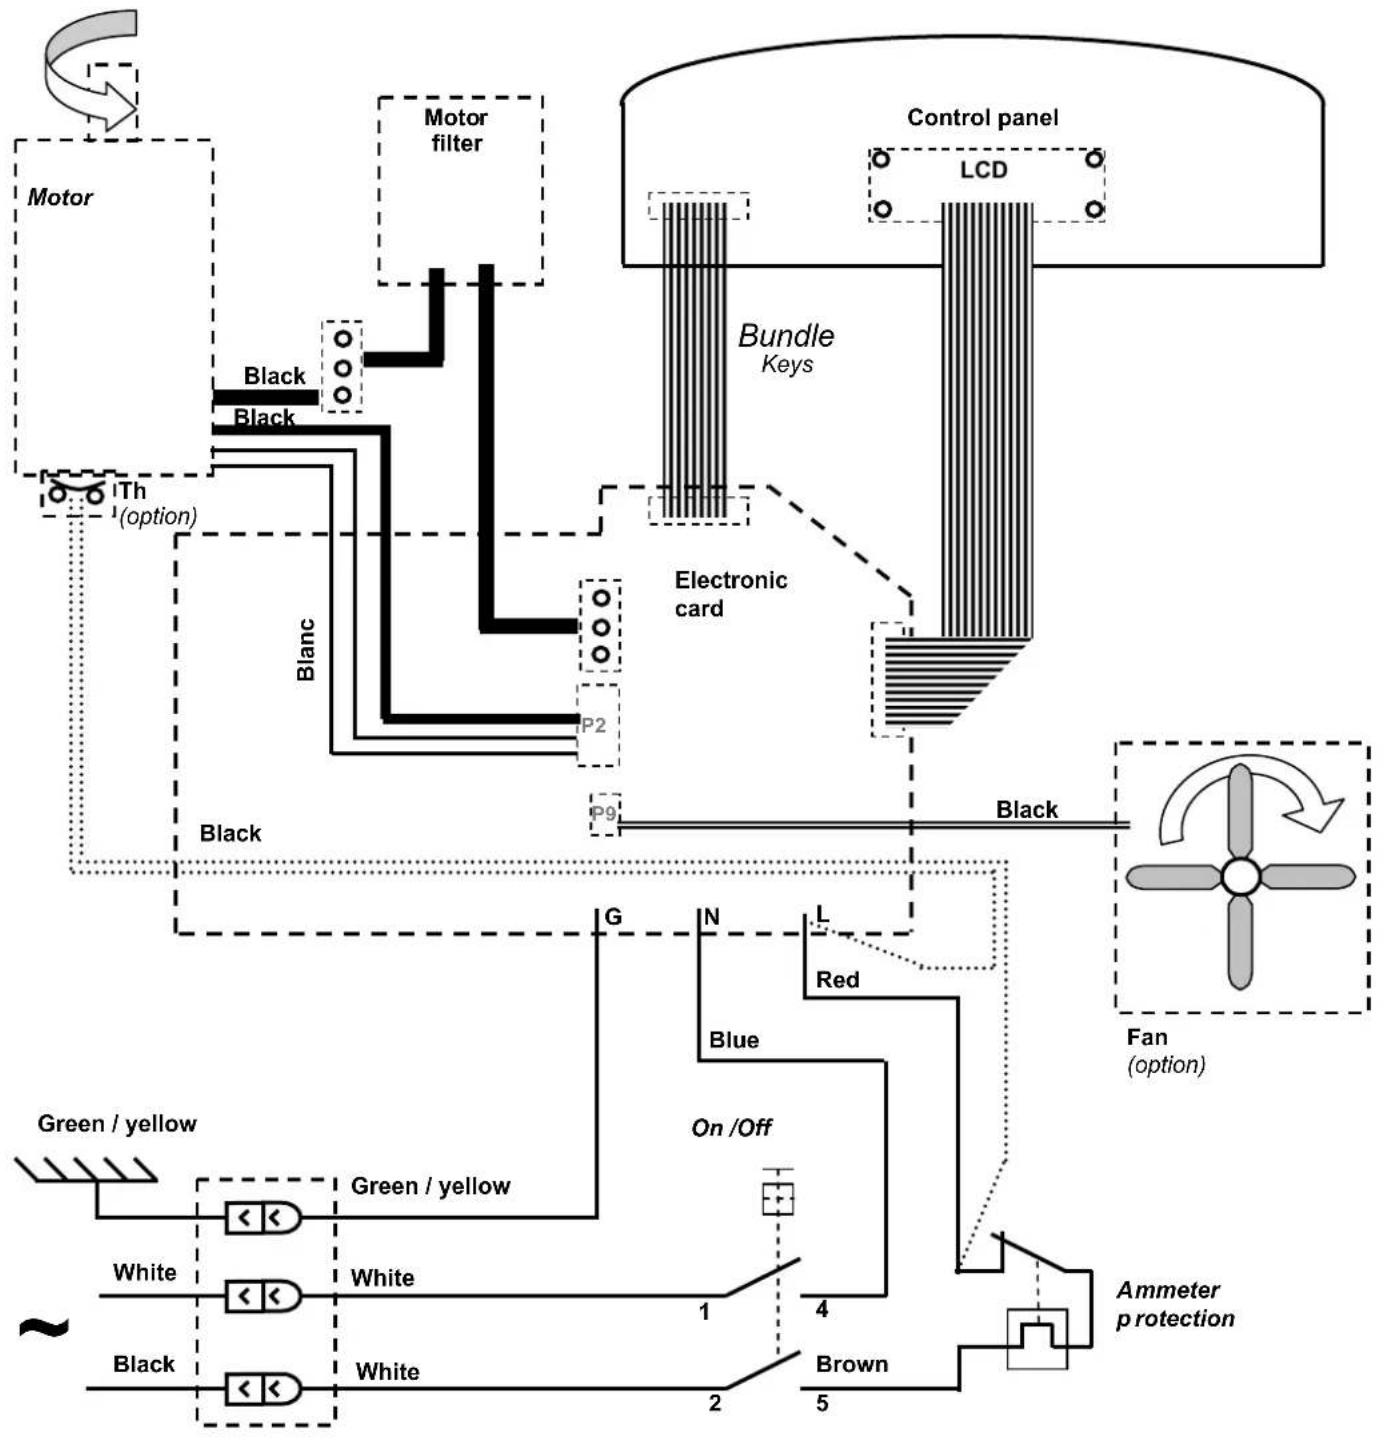
flowchart
graph TD
    A["Motor"] --> B["Th (option)"]
    B --> C["Black"]
    C --> D["Blanc"]
    D --> E["Electronic card"]
    E --> F["Bundle Keys"]
    F --> G["Control panel"]
    G --> H["LCD"]
    H --> I["Fan (option)"]
    I --> J["Ammeter protection"]
    J --> K["Brown"]
    K --> L["On/Off"]
    L --> M["Blue"]
    M --> N["G"]
    N --> O["Green/yellow"]
    O --> P["White"]
    P --> Q["Black"]
    Q --> R["White"]
    R --> S["Green/yellow"]
    S --> T["Blue"]
    T --> U["Red"]
    U --> V["Black"]
    V --> W["P2"]
    W --> X["P9"]
    X --> Y["Black"]
    Y --> Z["G"]
    Z --> AA["N"]
    AA --> AB["Red"]
    AB --> AC["Blue"]
    AC --> AD["On/Off"]
    AD --> AE["Green/yellow"]
    AE --> AF["White"]
    AF --> AG["Black"]
    AG --> AH["White"]
    AH --> AI["Green/yellow"]
    AI --> AJ["Blue"]
    AJ --> AK["Red"]
    AK --> AL["Blue"]
    AL --> AM["On/Off"]
    AM --> AN["Green/yellow"]
    AN --> AO["White"]
    AO --> AP["Black"]
    AP --> AQ["White"]
    AQ --> AR["Green/yellow"]
    AR --> AS["Blue"]
    AS --> AT["Red"]
    AT --> AU["Blue"]
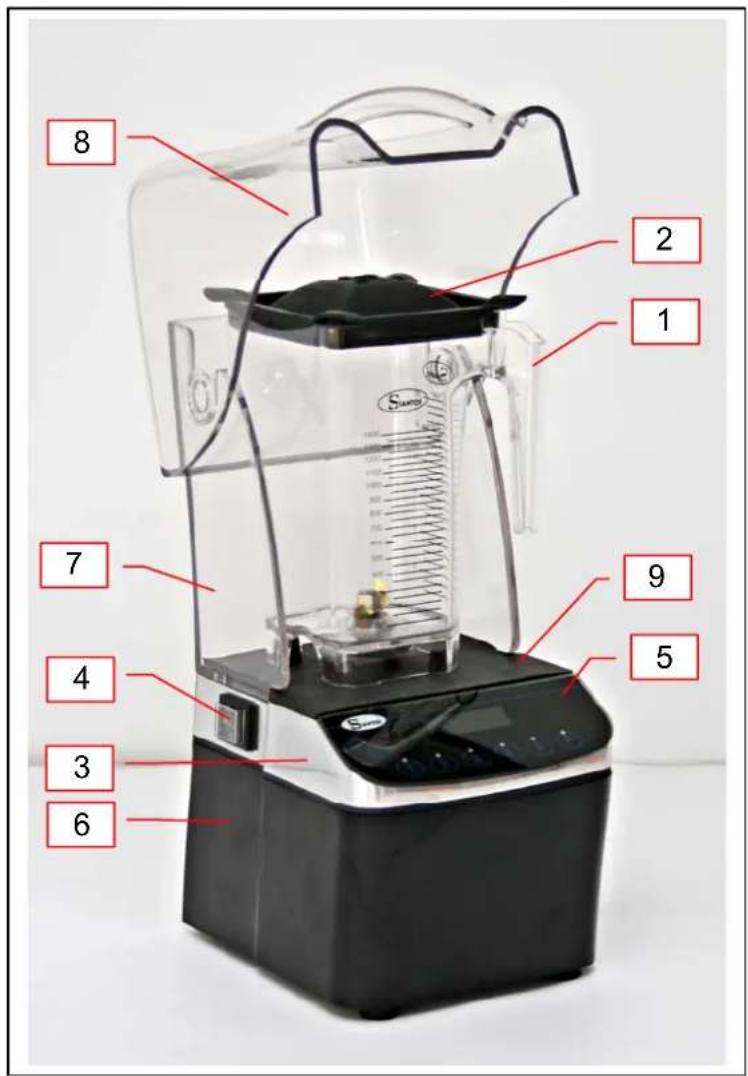
Element cross-reference table
| MARK Description | |
| 1 | Jar |
| 2 | Jar lid |
| 3 | Motor base |
| 4 | Switch |
| 5 | Control panel |
| 6 | Motor housing |
| 7 | Protective hood |
| 8 | Hood lid |
| 9 | Jar mat |
| 10 | Mains plug |
| 11 | Blade |
| 12 | Blade bearing |
| 13 | Blade tightening nut |
| 14 | Blade thrust washer |
| 15 | Blade shaft seal |
| 16 | Bearing seal |
| 17 | Bearing tightening ring |
| 18 | Locking ring bearing seal |
| 19 | Motor drive fixing screw |
| 20 | Motor drive |
| 21 | Table seal |
| 22 | LCD screen |
| 23 | Control panel keys |
| 24 | Blade drive |
| 25 | Current overload protector |
Simplified list of appliance codes
Functions: Codes
"Universal menu" "2 - 5 - 1"
"Coffee shop menu"
"Juice bar menu"
"Custom menu" "2 - 5 - 4"
Allocation of a recipe to a key "3 - 1 - P"
Partial counter "4 - 5 - 2"
Cleaning cycle: "1 - 4 - 2"
Activation of "Pause" / "Quick stop" mode
$$ " 2 - 5 - 2" $$
$$ " 2 - 5 - 3" $$
$$ " 4 - P - 1" $$

text_image
EMGA
Figures
text_image
8 2 1 7 9 4 3 6 5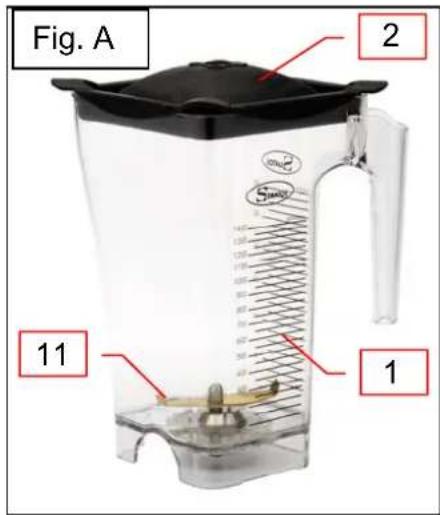
text_image
Fig. A 2 11 1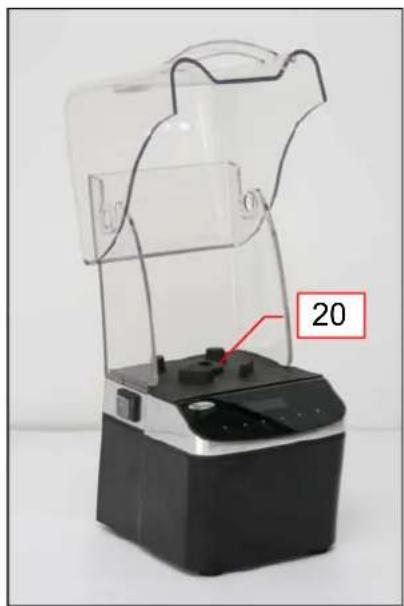
natural_image
Exterior view of a transparent laboratory instrument with a labeled component (no readable text or symbols)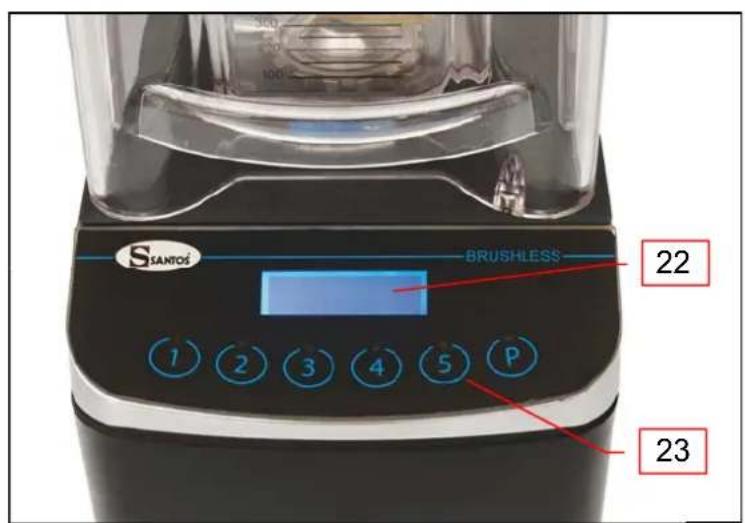
text_image
SANTOS BRUSHLESS 22 1 2 3 4 5 P 23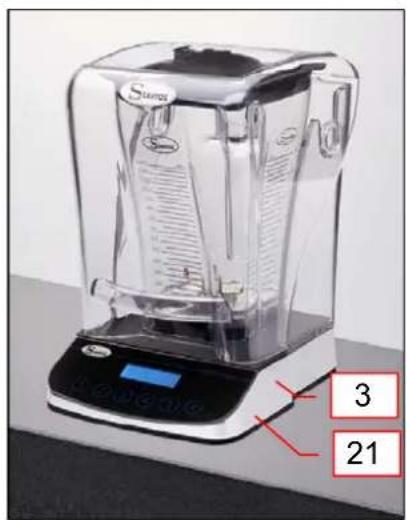
text_image
Stamps 3 21EMGA

text_image
13 14 11 18 17 12 14 15 16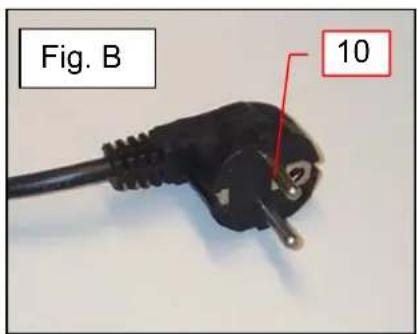
text_image
Fig. B 10WARRANTY CERTIFICATE
WARRANTY
Since the 01.01.95, all our appliances comply with CE and possess the CE label. Our guarantee is of 12 months from the manufacturing date mentioned on the descriptive plate. Warranty is strictly limited to the free replacement of any part of origin recognized by us as defective due to a defect or building default and identified as belonging to the concerned appliance. Warranty does not apply to damages resulting from installation or use non-complying with our appliance data sheet (user's manual) or in case of an evident lack of maintenance or disrespect of elementary security electric rules. It does not apply in case of regular wear and tear. Any replacement of parts under warranty will be realized after return of the defective part in our workshops, postage paid, supported by a copy of a conformity statement on which appears the serial number of the appliance. Every appliance is equipped with a descriptive plate conforming to the EC recommendations and of which a duplicate exists in the conformity statement (serial number, manufacturing date, electrical characteristics ...). In case of serious damage judged repairable only in our workshops, and after prior consent from our departments, any appliance under guarantee is sent by the Distributor, carriage paid. In case of repairs or reconditioning of appliances not under guarantee, the round trip transport is payable by the distributor. The parts and workforce are invoiced at the current rate. A preliminary estimate can be supplied.
Coffee grinder not using SANTOS original burrs are not taken under guarantee. The warranty conditions, repairs, reconditioning, of the espresso coffee grinder are the object of a specific note. Our guarantee does not extend to the payment of penalties, the repair of direct or indirect damages and notably to any loss of income resulting from the nonconformity or the defectiveness of products, SANTOS's global responsibility being limited to the sale price of the delivered product and to the possible repair of the defective products.
In case of revelation of an imperfection during the warranty period, the Distributor has to, unless a different written agreement of SANTOS, indicate to his customer to stop any use of the defective product. Such a use would release SANTOS of any responsibility.
APPLIANCE IDENTIFICATION PLATE
SPECIMEN
For all the documents not delivered with the appliance.
Printed, Faxed, Downloaded
BRUSHLESS BLENDER N° 62
MANUEL D'UTILISATION ET D'ENTRETIEN

natural_image
Exterior view of a modern flat-screen blender with transparent casing and control panel (no visible text or symbols)*408.062
Modèle n° 62
SOMMAIRE
DECLARATION "CE" DE CONFORMITE....3
REGLES DE SECURITES....4
INSTALLATION, MANUTENTION....6
AIDE AU DEPANNAGE....15
INSTALLATION, MANUTENTION
Encastrement multiple.
text_image
Recipe 10 Smoothie - Large :12Arrêt de l'appareil
text_image
Recipe 19 Milkshake - Small - LID OPEN :18Compteur de cycle
text_image
Select a key 1 2 3 4 5 P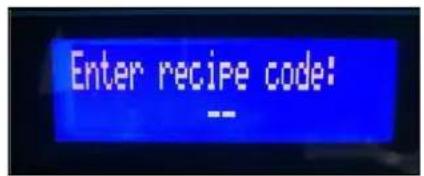
text_image
Enter recipe code: --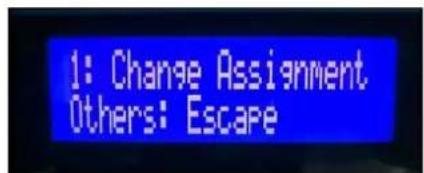
text_image
1: Change Assignment Others: Escapetext_image
Recipe 19 Milkshake - Small - LID OPEN :18Mode « Quick stop »
natural_image
Close-up of a blue and gold tool with a red arrow indicating rotation (no text or symbols visible)text_image
Reduce load. OVERLOADnatural_image
Exterior view of a black and white laboratory instrument with a transparent cover and a red label indicating '20' (no other text or symbols visible)
text_image
SANTOS BRUSHLESS 22 1 2 3 4 5 P 23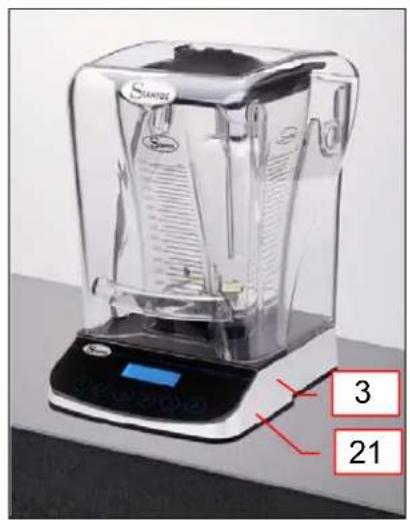
text_image
Sunlit 3 21EMGA

text_image
13 14 11 18 17 12 14 15 16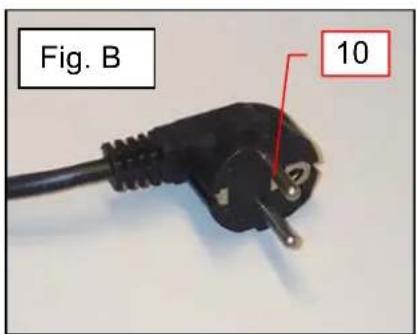
text_image
Fig. B 10CERTIFICAT DE GARANTIE
GARANTIE
natural_image
Exterior view of a modern blender with transparent casing and control panel (no visible text or symbols)*408.062
Modelle Nr. 62
INHALT
DECLARATION "CE" DE CONFORMITE....3
REGLES DE SECURITES....4
INSTALLATION, MANUTENTION....6
AIDE AU DEPANNAGE....15
RECYCLING DES ALTGERÄTS
text_image
Recipe 10 Smoothie - Large :12Stopp des Geräts
text_image
Recipe 19 Milkshake - Small - LID OPEN :18Zykluszähler
text_image
Select a key 1 2 3 4 5 P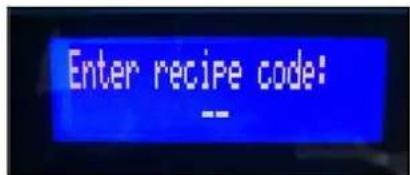
text_image
Enter recipe code: --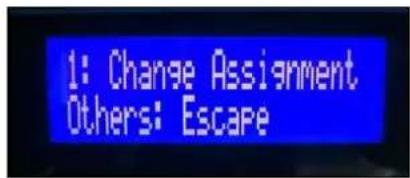
text_image
1: Change Assignment Others: Escapetext_image
Recipe 19 Milkshake - Small - LID OPEN :18"Quick Stop"-Modus
natural_image
Close-up of a metal tool with a yellow handle and blue base, showing a red curved arrow indicating rotation (no text or symbols)Einbau des Messers
text_image
Reduce load. OVERLOAD"Coffee Shop Menu" "2 - 5 - 2"
"Juice Bar Menu" "2 - 5 - 3"
"Custom Menu" "2 - 5 - 4"
natural_image
Exterior view of a black and white electronic device with transparent casing and labeled part '20' (no readable text or symbols beyond label)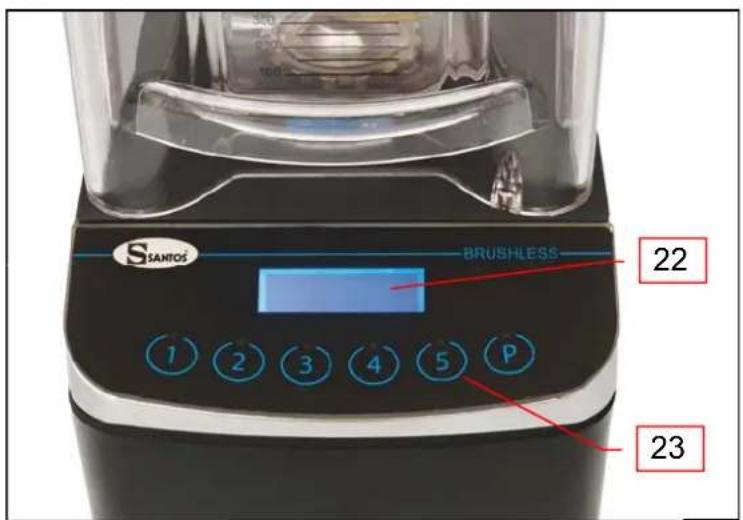
text_image
SANTOS BRUSHLESS 22 1 2 3 4 5 P 23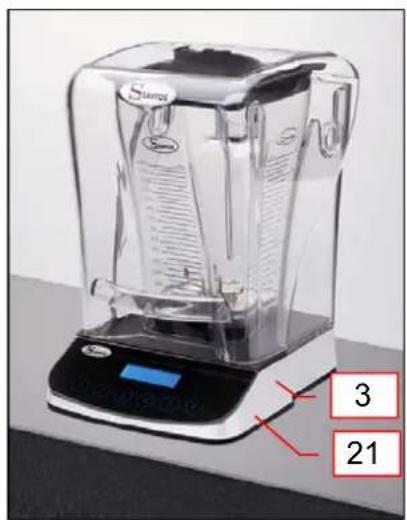
text_image
3 21EMGA

text_image
13 14 11 18 17 12 14 15 16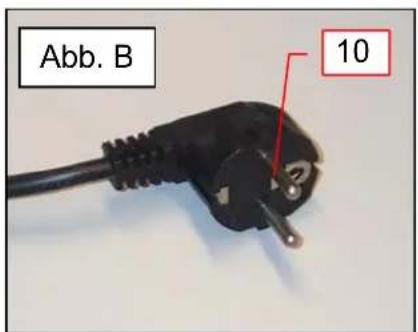
text_image
Abb. B 10GARANTIESCHEIN
GARANTIE / WARRANTY
Since the 01.01.95, all our appliances comply with CE and possess the CE label. Our guarantee is of 12 months from the manufacturing date mentioned on the descriptive plate. Warranty is strictly limited to the free replacement of any part of origin recognized by us as defective due to a defect or building default and identified as belonging to the concerned appliance. Warranty does not apply to damages resulting from installation or use non-complying with our appliance data sheet (user's manual) or in case of an evident lack of maintenance or disrespect of elementary security electric rules. It does not apply in case of regular wear and tear. Any replacement of parts under warranty will be realized after return of the defective part in our workshops, postage paid, supported by a copy of a conformity statement on which appears the serial number of the appliance. Every appliance is equipped with a descriptive plate conforming to the EC recommendations and of which a duplicate exists in the conformity statement (serial number, manufacturing date, electrical characteristics ...). In case of serious damage judged repairable only in our workshops, and after prior consent from our departments, any appliance under guarantee is sent by the Distributor, carriage paid. In case of repairs or reconditioning of appliances not under guarantee, the round trip transport is payable by the distributor. The parts and workforce are invoiced at the current rate. A preliminary estimate can be supplied.
Coffee grinder not using SANTOS original burrs are not taken under guarantee. The warranty conditions, repairs, reconditioning, of the espresso coffee grinder are the object of a specific note. Our guarantee does not extend to the payment of penalties, the repair of direct or indirect damages and notably to any loss of income resulting from the nonconformity or the defectiveness of products, SANTOS's global responsibility being limited to the sale price of the delivered product and to the possible repair of the defective products.
In case of revelation of an imperfection during the warranty period, the Distributor has to, unless a different written agreement of SANTOS, indicate to his customer to stop any use of the defective product. Such a use would release SANTOS of any responsibility.