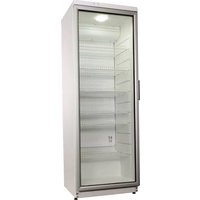
ORCD-351 - Refrigerator Orima - Free user manual and instructions
Find the device manual for free ORCD-351 Orima in PDF.


| Product type | Bottle refrigerator |
| Brand | Orima |
| Model | ORCD-351 |
| Total volume | 350 L |
| Usable volume of the storage compartment | 320 L |
| Dimensions (H x W x D) | 173 x 60 x 60 cm |
| Weight | 65 kg |
| Power supply | 220-230 V / 50 Hz |
| Rated power | 230 W |
| Rated current | 1.7 A |
| Annual energy consumption (at 25 °C) | 744 kWh/year |
| Adjustable temperature range | from -2 °C to +14 °C |
| Defrosting | Automatic |
| Refrigerant | R600a |
| Climate class | 3 (16 °C to 32 °C, max humidity 60 %) |
| Noise level | 50 dB |
| Interior lighting | LED, 3 W |
| Total shelf area | 115 dm² |
| Bottle capacity (0.33 L) | 322 |
| Bottle capacity (0.5 L PET) | 154 |
| Maximum load per shelf | 50 kg |
| Maintenance | Monthly interior cleaning; condenser cleaning every 6 months; regular cleaning of defrost drain |
| Safety | Mandatory fixing for stability; do not obstruct ventilation grilles; do not use mechanical devices to defrost; do not damage the refrigeration circuit |
| After-sales service | Contact the manufacturer or a qualified technician; replace the power cord only by authorized personnel |
Frequently Asked Questions - ORCD-351 Orima
User questions about ORCD-351 Orima
0 question about this device. Answer the ones you know or ask your own.
Ask a new question about this device
Download the instructions for your Refrigerator in PDF format for free! Find your manual ORCD-351 - Orima and take your electronic device back in hand. On this page are published all the documents necessary for the use of your device. ORCD-351 by Orima.
USER MANUAL ORCD-351 Orima
facebook.com/orima.pt
natural_image
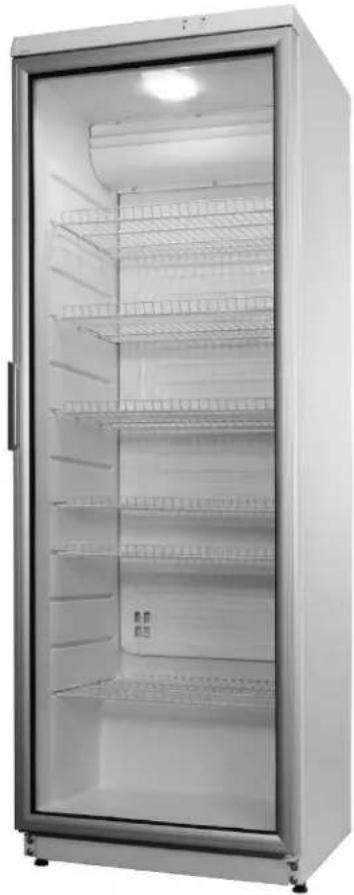
Front view of a stainless steel refrigerator with clear glass doors and internal shelves (no visible text or labels)
MMA
MARIO MIZANDA DE ALMEIDA
VITRINE
Cooler | Vitrina | Vitrine
ORCD-351
SERVIÇO DE APOIO AO CLIENTE
Apoio ao Cliente:
Tel.: (+351) 231 467 436
natural_image
Illustration of a hand holding a pipette above a surface with a downward arrow indicating motion (no text or symbols)natural_image
Illustration of a hand holding a pipette over a surface with a droplet, showing motion direction (no text or symbols)Some provisions in this user manual are unified for refrigerating products of different types (for a refrigerator, refrigerator-freezer or freezer). CAREFULLY READ THE INSTRUCTION MANUAL.
The Manufacturer shall not be held liable for damage arising from the failure to observe the instructions contained in this manual.
Keep this manual for future reference, or to pass it over to the next user.
WARNING!
- Do not cover the ventilation holes at the top and on the sides of the appliance.
- Do not use any mechanical means or electrical devices to hasten the thawing process when cleaning the freezer compartment.
- Do not use electrical appliances inside the food storage compartments of the appliance, unless they are of the type recommended by the manufacturer.
- If the supply cord is damaged it must be replaced by the manufacturer, manufacturer service agent or a similarly qualified person, in order to avoid a hazard.
- Disposal of the appliance should be according to national rules.
- Do not damage the appliance refrigeration system. It contains the refrigerant gas R600a. If the refrigeration system is damaged:
- Do not use any open flame.
- Avoid sparks — do not turn on any electrical devices or lighting fixtures.
- Immediately ventilate the room: air the room in which the appliance is placed for a few minutes (the size of the room for a product containing isobuthane / R600a must be at least 4 m) to avoid damage to the cooling system.
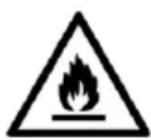
- The appliance should be used only for storing foodstuffs.
- This appliance is not designed for the storage of explosive substances such as aerosol cans with a flammable propellant.
- It is prohibited to store petrol and other flammable liquids near the appliance.
- If the appliance is unplugged (for cleaning, moving to another place, etc.), it may be repeatedly switched on after 15 min.
- It is forbidden to use a technically damaged appliance.
- The appliance can't be disposed of by burning.
- Do not place any switched on electrical devices (such as microwave ovens, hair dryers, irons, electric kettles or other electrical devices) on top of the appliance
because this may cause ignition of plastic parts.
- Do not place any dishes with liquids on top of the appliance and do not keep flowers in vases or other liquid-filled vessels on the appliance. Do not climb on or sit on the appliance, do not lean on or hang on the appliance doors.
- Pull the plug out from the mains socket before each maintenance activity. Do not pull on the cord, but hold the body of the plug instead.
Children and vulnerable people safety:
- Do not allow children to play with the appliance or to plug it in or unplug from the electricity supply socket. Do not allow children to play with the packaging material from the appliance.
- This appliance can be used by children aged from 8 years and above and persons with reduced physical, sensory or mental capabilities or lack of experience and knowledge if they have been given supervision or instruction concerning use of the appliance in a safe way and understand the hazards involved.
- Cleaning and user maintenance shall not be made by children without supervision.
! Requirements for the connection to the mains:
- The appliance should only be connected to an earthed socket installed in accordance with the regulations. Make sure that the supply voltage corresponds with the voltage marked on the rating label. This product complies with all binding CE labelling directives. The earthed electrical socket by which the appliance is connected to the mains should be in an accessible place. It is a legal requirement that the appliance is properly earthed. The manufacturer will not be held liable for any damage or injury which may result from the failure to fulfil this requirement.
- To avoid the exposure to danger, always have faulty cable be replaced only by the manufacturer, by our customer service or by qualified person and with a cable of the same type.
- It is forbidden to readjust or modify any parts of the unit. It is crucial not to damage the capillary tube visible in the compressor recess. The tube may not be bent, straightened or wound. If the capillary tube is damaged by the user the guarantee will be void.
- Do not use adapters, multiple sockets and two-wire extension leads. If it is necessary to use the extension lead, it must be equipped with a protection ring and a single socket and must have a VDE/GS safety certificate.
-
If an extension lead is used (with a protection ring and safety certificate), its socket must be located at a safe distance, away from the sinks, and must not be in a place where it could be flooded by water or waste water.
-
When positioning the appliance, be careful that the electrical cord isn't squeezed in order to avoid its damage. Do not store heavy objects such as cooling devices, furniture or other devices next the appliance in such a way that they could squeeze and damage the electrical cord. This can cause a short circuit and a fire.
- Make sure that the plug of the electrical cord is not squeezed by the back wall of the appliance or otherwise damaged. A damaged plug can be the cause of a fire!
- DO NOT REMOVE THE COVER OF THE LIGHT EMITTING DIODE (LED) LUMINAIRE! If the cooling appliance is equipped with light emitting diode (LED) luminaire and the lighting is not functioning, please contact a maintenance technician to have it replaced. THE LUMINAIRE CAN BE REPLACED ONLY BY A MAINTENANCE TECHNICIAN!

Do not try repair the appliance on your own. Always contact an authorized technician. To avoid the exposure to danger, always have faulty cable be replaced only by the manufacturer, by our customer service or by qualified person whit a cable of same type.

The appliance should be transported in the vertical position. The manufacturer will not be responsible for any damage of the appliance that results from non-compliance with the instructions for transportation.
DESCRIPTION OF THE APPLIANCE, BASIC PARTS
See page 1, fig. 1
| 1 | Switch -(ON/OFF); | 6 | Fan |
| 2 | Thermostat knob | 7 | Shelf |
| 3 | Thermostat indicator | 8 | Cleaner |
| 4 | Electricity supply indicator | 9 | Thermometer |
| 5 | Interior light block (LED) | 10 | Condenser |
11 Compressor
1 — On / off switch for interior light I -(ON) O -(OFF)
2 — Thermostat knob. The thermostat is off when there is a zero (0) in the thermostat indicator space. Turning the thermostat knob clockwise the temperature in the compartment lowers.
4 — Electricity supply indicator. When the appliance is connected to the electricity supply, the green indicator light is illuminated. WARNING! The fan switches on and continuously operates.
GENERAL INFORMATION
The appliance is a vertical display cooler with glass doors and with a fan and is designed for storage of foodstuffs and for chilling of drinks and for a short-term storage of them.
This appliance is intended for commercial use!
The manufacturer guarantees reliable operation of the refrigerator when the ambient temperature is +16 to +32 degrees celsius and the relative air humidity not greater than 60 per cent. The appliance climate class is 3.
Product data sheet
| MODELL | ORCD-351-6003-00-OR-00 | ORCD 350 2P | |
| Refrigerator total gross volume, L | 350 | ||
| Refrigerator net volume, L | 320 | ||
| Dimensions (H x W x D), cm | 173 x 60 x 60 | ||
| Shelf area, dm2 | 115 | ||
| Adjustable temperature, °C | -2 ... +14 | ||
| Noise level, dB | 50 | ||
| Rated current, A | 1,7 | ||
| Voltage used | 220 – 230 V / 50 HZ | ||
| Rated input, W | 230 | ||
| Door opening area, m2 | 0,80 | ||
| General product exposure area, m2 | 0,62 | 0,58 | |
| Loading of the refrigerator quantity of bottles, pcs. | 0,33 l | 322 | |
| 0,5 l PET | 154 | ||
| Maximum loading of one shelf, kg | 50 | ||
| Energy consumption at ambient temperature +25 °C: | 744 | ||
| Nominal imput of luminaire, W | 3 | ||
The manufacturer reserves the right ti make future changes to technical parameters and specifications. Product is subject to changes and improvements.
POSITIONING
- Place the appliance in a dry, well ventilated room.

WARNING! The appliance should not be operated in an unheated room or porch. Place the appliance away from heat sources such as kitchen stove/oven, radiators, or direct sunlight. The appliance must not touch any pipes for heating, gas or water supply or any other electrical devices.
Minimum distances from the heat sources:
- from the electric gas and other ovens - 30 mm,
- from oil or coal fired ovens - 300 mm,
- from built-in ovens - 50 mm
If there is no possibility of ensuring the above-mentioned distances, provide an appropriate insulation board
- Do not cover the ventilation holes at the top of the appliances – it must be a good air circulation around the appliance. There should be a gap of at least 10 cm between the top of the appliance body and any furniture that may be above it. If this requirement is not followed, the appliance consumes more electrical energy and its compressor may overheat.
- If the appliance is placed in a corner, a gap of at least 1 cm must be left between the appliance body and the wall (see page 1, fig. 3).
- The appliance must stand on a level surface and must not touch the wall. If necessary, regulate the height of the appliance by adjusting the levelling feet: by turning them clockwise – the front of the appliance rises, by turning them counter clockwise – it comes down. If the appliance is tilted slightly backward – the doors will close by themselves.
PREPARING THE APPLIANCE FOR OPERATION
It is recommended to prepare the appliance for operation with a helper.
- Remove package. Lift the appliance away from foamed polystyrene base. When placing, moving, lifting the appliance, do not hold the door handles, do not pull the condenser at the rear part of the refrigerator and do not touch the compressor unit. Therefore take out adhesive tapes from sides and simply lift the appliance up and take out the board. Strip adhesive tapes off and open the door.
- When positioning the appliance in chosen location, it will move more easily into position if you lift the front a little and incline it backward allowing it to roll on its casters.
- Take two supports from the bag (see page 1, fig. 2) and insert them into the guides at the top back part of the appliance.
- The appliance should not be connected to the mains until all packing and transport materials aren't removed.
First use:
- Before using the appliance for the first time, the interior and all internal accessories should be washed with lukewarm water and some neutral soap to remove the typical smell of a brandnew product, then dried thoroughly.

Wait at least 4 hours before connecting the appliance to the power supply. This is to allow the oil to flow back in the compressor.
TEMPERATURE REGULATION
The temperature in the refrigerator compartment is controlled using the thermostat knob 2 (see fig. 1) by turning it to one side or the other. The temperature indication in digits is shown beside the thermostat knob. When the door is closed, the temperature setting can be seen on the thermostat indicator display 3 (fig. 1).
The temperature is regulated on the scale of five digits.
0 = Compressor is switched off. WARNING! Electric current is not switched off.
1 = highest temperature (lowest cooling)
5 = lowest temperature (highest cooling)
The temperature in the refrigerator compartment may vary depending on ambient temperature, the amount of foodstuffs, the temperature of the foodstuffs, and how often the appliance doors are opened and closed.
IF THE ROOM IS COOL, THE APPLIANCE COOLS LESS. THE TEMPERATURE IN THE APPLIANCE MAY THEREFORE RISE. Use the thermostat wheel to set a lower temperature.
DEFROSTING. CLEANING AND CARE
The refrigerator compartment defrosts automatically. Drops of ice that form on the back wall of the refrigerator compartment thaw during the time the compressor is not working and the thaw water runs down the thaw water runoff channel to the tray on top of the compressor, where it evaporates.
REGULARLY CLEAN THE APPLIANCE.

Remember that before cleaning you must disconnect the appliance from the electrical energy supply socket by pulling the plug out of the electricity outlet.
- Protect the appliance inner surfaces and plastic parts from fats, acids and sauces. In case of
natural_image
Illustration of a hand holding a pipette over a surface with arrows indicating direction (no text or symbols)accidental spills – immediately clean with warm soapy water or dishwashing detergent. Wipe dry.
- Regularly clean the hermetic gaskets of the doors. Wipe dry.
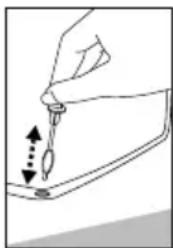
- REGULARLY CLEAN THE THAW WATER CHANNEL SPACE WITH A SPECIAL CLEANER FOR THAT PURPOSE.
- At least once a year clean dust away from the back part of the appliance body and the compressor. A soft brush, electrostatic cloth or vacuum cleaner may be used for cleaning.
- DO NOT use detergents containing abrasive particles, acid, alcohol or benzene for cleaning the appliance inner and outer surfaces. DO NOT use for cleaning cloths or sponges that have coarse surfaces intended for scrubbing. Outer of the doors – glass – clean with agents intended for glass cleaning.
- If the appliance is to be left switched off for an extended period, leave its doors open.
CHANGING THE OPENING DIRECTION OF THE DOORS
It is recommended that changing the opening direction of the doors should be done with a helper. You will need two spanners No. 8 and No. 10 and a Philips head screwdriver.
When changing the opening direction of the doors YOU CAN NOT lay the refrigerator horizontally!
Do the actions below in the order they are listed (see page 1, fig. 4):
For models CD350:
- WARNING! Turn off the appliance and pull the plug out of the electricity supply socket.
- Unscrew two screws 7 and remove the bottom bracket 8 together with the set of washers 6 on the axle and the spacer 5.
- Unscrew two screws 7 and remove the bracket 11. Remove the door 4.
- Unscrew the axle 2 together with the nut 1 and washers 3 from the upper bracket and screw all this set on the reverse side of the door;
- Before hanging the door, turn the door over by 180 ° and insert the upper axle in the door.
- Unscrew fixing screws 12 from doors, remove handles 13 and fix them screwing in free holes on the same side. Plate 10 remains in its place.
- Before screwing the bottom bracket 8 together with the set of washers and spacers on the reverse side of a cabinet, insert the bracket axle to the door.
- Screw the bracket 11 on the reverse side of a cabinet.
For model ORCD350 2P:
- WARNING! Turn off the appliance and pull the plug out of the electricity supply socket.
- Unscrew two screws 12 and remove the bottom bracket 13 together with the set of washers 11 on the axle and the spacer 10.
- Unscrew two screws 12 and remove the bracket 15. Remove the bottom door 9.
- Unscrew fixing screws 7 of the middle bracket. Remove the middle bracket 6 together with washers on the axle and the spacer 5. Remove the top door 4.
- Unscrew the axle 2 together with the nut 1 and washers 3 from the upper bracket and screw all this set on the reverse side of the door.
- Take out the plugs 18 in the crossbar zone and displace them on the reverse side.
- Before hanging the upper door, turn the door over by 180 ^0 and insert the upper axle in the door.
- Before screwing the middle bracket 6 with the set of washers and spacers on the reverse side of
the cabinet, insert the bracket axle into the upper door;
- Before hanging the bottom door on the middle bracket axle, turn them over by 180°.
- Unscrew fixing screws 16 from both of door, remove handles 17 and fix them screwing in free holes on the same side. Plate 14 remains in its place.
- Before screwing the bottom bracket 13 together with the set of washers and spacers on the reverse side of a cabinet, insert the bracket axle to the door.
- Screw the bracket 15 on the reverse side of a cabinet.
OPERATION PROBLEMS AND THEIR SOLUTIONS (TROUBLESHOOTING). What if ...
- The appliance is plugged in to the mains but it does not work and the electricity supply voltage indicator is not illuminated. Check that your house electricity supply installations are in order. Check that the plug is correctly inserted into the electricity supply socket.
- The noise has become louder. Check that the appliance is standing stable, on a level place. To make it level, regulate the front feet. Check if the appliance is not touching any furniture, and that no part of the refrigeration system at the back part of the appliance body is touching the wall. Pull the appliance away from any furniture or walls. Check that the cause of increased noise isn't due to bottles, cans or dishes in the appliance that might be touching each other.
- Water has appeared at the bottom of the refrigerator compartment. Check whether a thaw water channel space isn't blocked. Clean the thaw water channel space with a cleaner intended for that purpose.
- Water has appeared under the appliance. The thaw water collection tray has slipped off the compressor. Place the tray on top of the compressor.
- When the appliance door is opened, the rubber sealing gasket pulls out. The gasket is smeared with sticky foodstuffs (fat, syrup). Clean the sealing gasket and the groove for it with warm water containing soap or dishwashing detergent and wipe dry. Put the rubber sealing gasket back into the place.
- High temperature in appliance, the compressor operation pauses are short. Ascertain whether the appliance door/doors are shutting tightly, whether the door wasn't kept open longer than necessary when taking out or putting in foodstuffs or whether a large amount of warm food was placed in the appliance.
- The top of the appliance has condensation on it. The ambient relative air humidity is above 60 %. Ventilate the room where the appliance stands and if possible remove the cause of the humidity.

Remarks on the appliance operating noise. As the appliance operates and goes through the freezing cycle, various noises will be emitted. This is normal and is not a sign of any malfunction.
As the refrigerant circulates around the refrigeration system, it causes sounds like murmuring, bubbling, or rustling. Louder sounds like popping or clicking may be heard for a short time as the refrigerator compressor switches on.
ENVIRONMENTAL PROTECTION INFORMATION
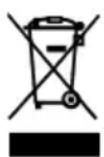
This appliance is marked according to the European directive 2002/96/EC on Waste Electrical and Electronic Equipment (WEEE). By ensuring this product is disposed of correctly, you will help prevent potential negative consequences for the environment and human health, which could otherwise be caused by inappropriate waste handling of this product.
This symbol indicates that once the appliance is no longer needed, it cannot be disposed together with other miscellaneous municipal waste. Disposal must be carried out in accordance with local environmental regulations for waste disposal. For more detailed information about treatment, recovery and recycling of this product, please contact your local authority, your household waste disposal service or the retailer where you purchased the product. If you decided to scrap the appliance, make it impossible to use in order to prevent possible misadventure. Pull out the electric plug from the electricity supply socket and then cut off the cord. Tear off the gasket. Break the door lock if any. Do not dismantle the appliance yourself. Pass it on to recycling companies
FR
natural_image
Illustration of a hand holding a dropper over a container with a downward arrow indicating motion (no text or symbols)
- VITRINE
- SERVIÇO DE APOIO AO CLIENTE
- WARNING!
- Children and vulnerable people safety:
- ! Requirements for the connection to the mains:
- DESCRIPTION OF THE APPLIANCE, BASIC PARTS
- GENERAL INFORMATION
- This appliance is intended for commercial use!
- POSITIONING
- PREPARING THE APPLIANCE FOR OPERATION
- First use:
- TEMPERATURE REGULATION
- DEFROSTING. CLEANING AND CARE
- Remember that before cleaning you must disconnect the appliance from the electrical energy supply socket by pulling the plug out of the electricity outlet.
- CHANGING THE OPENING DIRECTION OF THE DOORS
- For models CD350:
- For model ORCD350 2P:
- OPERATION PROBLEMS AND THEIR SOLUTIONS (TROUBLESHOOTING). What if ...
- ENVIRONMENTAL PROTECTION INFORMATION
- FR
Brand : Orima
Model : ORCD-351
Category : Refrigerator