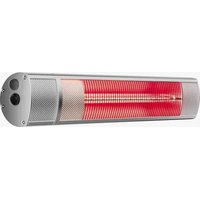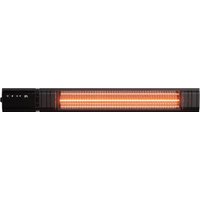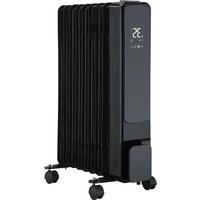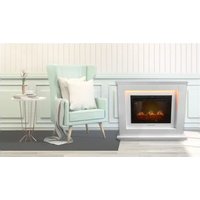
Stockholm - Heating Sonnenkönig - Free user manual and instructions
Find the device manual for free Stockholm Sonnenkönig in PDF.


User questions about Stockholm Sonnenkönig
0 question about this device. Answer the ones you know or ask your own.
Ask a new question about this device
Download the instructions for your Heating in PDF format for free! Find your manual Stockholm - Sonnenkönig and take your electronic device back in hand. On this page are published all the documents necessary for the use of your device. Stockholm by Sonnenkönig.
USER MANUAL Stockholm Sonnenkönig
natural_image
White fire extinguisher appliance with digital display showing flames and a small screen (no visible text or symbols)INDEX
natural_image
White fire extinguisher cabinet with black glass panel and visible flames (no text or symbols)INDEX
Modifications techniques
natural_image
White fire extinguisher appliance with black frame and digital display (no visible text or symbols)IT
INDEX
natural_image
White fire extinguisher cabinet with black glass panel and visible flames (no text or symbols)EN
INDEX
1 Safety 39
2 Operation 40
3 Cleaning and Maintenance....44
4 Technical Details....44
5 Warranty / Disposal / Technical change....45
1 Safety
Please read before first commissioning the safety instructions carefully and observe the safety instructions to prevent damage due to misuse, improper operation, and improper environmental conditions to be avoided. Keep these for later reference.
Check the device after removing the packaging for damage. Do not put the unit in case of suspected corruption in operation and consult a specialist. The recyclable packaging material must not be stored or disposed accessible for young children, but must be disposed of properly.
This appliance is only for the purpose for which it was explicitly developed, ie. for heating rooms. Any other use is regarded as improper and therefore dangerous. The supplier is not liable for damage to persons and / or property damage due to an improper or incorrect use.
Repairs to electrical appliances must only be carried out by trained personnel only. Improperly performed repairs and alterations to the equipment can have dangerous consequences for the user according to what the warranty will be rejected.
The use of all electrical equipment must be observed some fundamentally important rules:
- Do not touch the appliance with wet hands or feet.
- Do not expose the device to the weather.
- The appliance must not be used by children or infirm persons without supervision.
• Pull the plug from the outlet when you no longer need it . not by pulling the power cable or the device to unplug it. - Disconnect before carrying out any cleaning or maintenance operation, unplug the device. The air intake must be cleaned at least once a week.
- Do not use near a bathtub, shower, sink, or swimming pools
- Do not use any accessories or attachments that are not approved by the manufacturer.
- Do not insert objects into the interior of the device.
- Do not cover the appliance with objects.
The device must not be used under the following conditions:
• In areas with potentially explosive atmospheres.
• In rooms with aggressive atmospheres.
- In rooms with high solvent concentration.
• In areas with extremely high levels of dust.
- Disreputable operating conditions, it is recommended that the technical department of SONNENKÖNIG or dealer to contact. The use of an electric heater under the wrong conditions will invalidate the warranty!
This appliance can be used by children aged from 8 years and above and persons with reduced physical, sensory or mental capabilities or lack of experience and knowledge if they have been given supervision or instruction concerning use of the appliance in a safe way and understand the hazards involved. Children shall not play with the appliance. Cleaning and user maintenance shall not be made by children without supervision.
Children aged from 3 years and less than 8 years shall only switch on/off the appliance provided that it has been placed or installed in its intended normal operating position and they have been given supervision or instruction concerning use of the appliance in a safe way and understand the hazards involved. Children aged from 3 years and less than 8 years shall not plug in, regulate and clean the appliance or perform user maintenance.
2 Operation
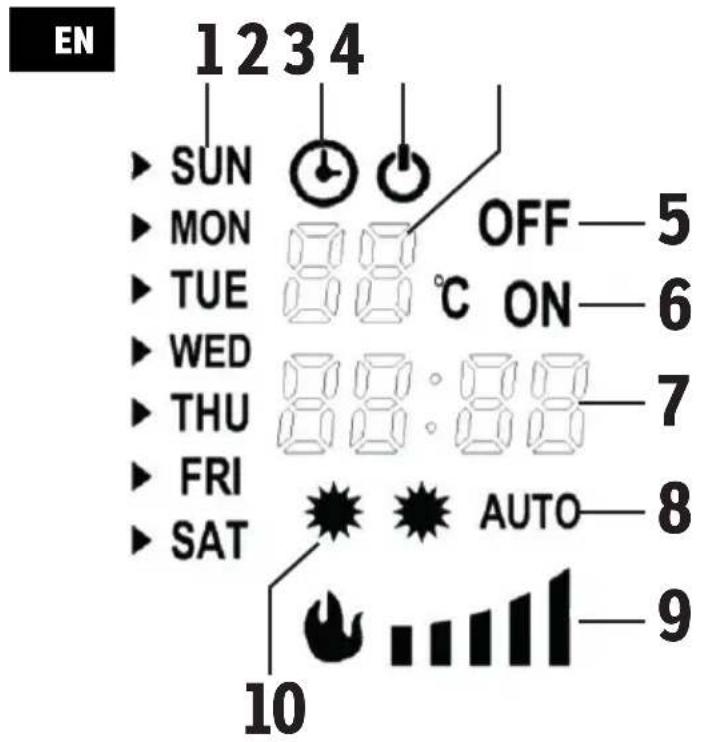
text_image
EN 1234 SUN OFF 5 MON ON 6 TUE 88 °C ON 7 WED 88:88 THU FRI AUTO 8 SAT 9 10- Day display
- Timer
- Standby
- Temperature
- Time OFF
- Time ON
- Time Display
- Automatic Heating
- Flame Brightness
- Heat Level (1 or 2 kW)
Manual Operation
This is done by operating the switches located at the front of the fi re .The standby rocker switch must fi rst be switched on, the fi re will beep to indicate that it is powered up.
Press the O/I button once to turn the heater and fl ame effect on. A red indicator light will appear to indicate that the function is ON. Press the O/I button for 3 seconds this will operate the fl ame brightness setting. Hold the button down until the desired fl ame brightness is obtained and there will be 5 levels fl ame brightness available.
Press the POWER button once for the low heat setting 1000W; press twice for the high heat setting 2000W; press three to switch off the heat setting.
Press the BACK LIGHT button to adjust the colors of LED decoration, 7 colors available.
Remote Operation
The standby rocker switch located at the front of the fire must first be switched on; the device will beep to indicate that it is powered up.
It takes a little time for the receiver to respond to the transmitter. Do not press the buttons more than once within two seconds for the fire to operate normally.
Automatic heating
Press "IC" button on the remote controller to start or exit the automatic heating.
The heater displays AUTO symbol at automatic heating status. The heater will adjust the heat settings between 1000W and 2000W automatically according to the room temperature and temperature setting. During a timed starting process, it is possible to start heating ahead of schedule.
EN
Setting the day and time
- Settings are done on the remote controller
- Press "DATE TIME" button, then press the UP or DOWN key to select the day
- Press "DATE TIME" button again, then press the "+" or "-" to set the hour
- Press "DATE TIME" button again, then press the "+" or "-" to set the minute
- Press "OK" button to complete
Temperature setting
The default set temperature is 20^ C, press “+” or “-” on the remote controller to set the temperature, which ranges from 15 to 30^ C. And this setting is only for the temperature in the normal mode, not for the temperature in the timer mode.
NOTE: The set temperature must be higher than the room temperature for the heater to be working.
Timer setting
There are up to 10 items for timer setting, Each setting item has its date, power-on time and shutdown time. The max. duration of each setting item is 23 hours 50 minutes. The setting date for each item can be any day or days of a week. The date in each setting item represents the date of power-on time. If the shutdown time of the setting falls on the second day, it is unnecessary to set the date – you just set the shutdown time
Steps to view the timer setting
- Press the "TIMER SET" button
- Press the "+" or "-" to check the power-on time of the timer one by one.
- For checking the shutdown time, press the UP button
- Press the "+" or "-" to continue viewing
- For deleting the current item of setting, press "C" to delete
Steps for timer setting
- Press the "TIMER SET" button, and the serial number starts blinking
- Press the "+" or "-" to change the serial number until you get the serial number that you need to set or modify.
- Press "TIMER SET" button once again, and the cursor on the left side of day starts blinking
EN
- Press the UP or DOWN keys to move the cursor to the corresponding day, press the "+" to add the corresponding day, or press "-" to delete the day until you have completed the selection of all dates
- Continue to press the "TIMER SET" button, the hour starts blinking
- Press the "+" or "-" to adjust the hour
- Continue to press the "TIMER SET" button, the minute starts blinking
- Press the "+" or "-" to adjust minute
Set the shutdown time
- Then press the "TIMER SET" button, the display is off, and the hour starts blinking
- Press the "+" or "-" to adjust the hour.
- Continue to press the "TIMER SET" button, the minute starts blinking
- Press the "+" or "-" to adjust minute
Set temperature
- Then press the "TIMER SET" button, and the temperature set starts blinking. At this moment, the temperature displayed is the normally set temperature, which can be adjusted by pressing "+" or "-"
- Press "TIMER SET" button to continue setting, and press "OK" complete the setting
Timer switch
- "TIMER ON/OFF" is to control the timed opening and closing
- Restart the machine after power is cut off, the timer setting is kept, but the current date and time must be reset
- NOTE 1: Press the 1000W button or 2000W button, or IC button to active the heating when timer ON after finish a timing setting. The heater only has flame effect working if you have not selected the desired heating.
- NOTE 2: Repeat the same procedures to set more timing cycles if required after the first timing cycle is finished.
Safety Cut-Off
This appliance is fitted with a safety cut-off which will operate if the fire overheats (e.g. Due to blocked air vents). For safety reasons, the fire will NOT automatically reset.
EN
To reset the appliance, disconnect the appliance from the mains supply for at least 15 minutes. Reconnect the supply to the mains and switch on the appliance.
Remote Control
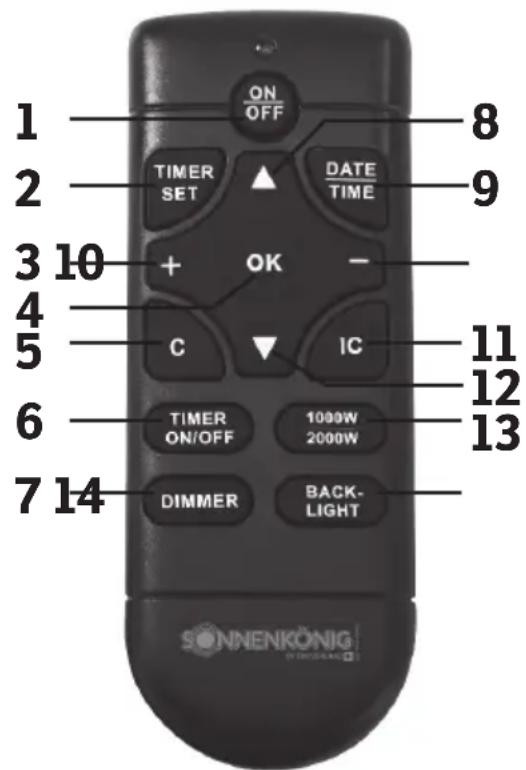
text_image
1 ON OFF 2 TIMER SET DATE TIME 3 10 + OK - 4 C IC 5 6 TIMER ON/OFF 1000W 2000W 7 DIMMER BACK-LIGHT 8 9 11 12 13 14 SONNENKÖNIG- ON / OFF
- Timer Setting
- Increase (+)
- Confirm
- Delete Timer Setting
- Timer ON / OFF
- Light intensity
- Dial key
- Date / Time
- Decrease (-)
- Auto Heating ON / OFF
- Dial key
- Heat Level (1 - 2 kW)
-
Change LED Colors
-
Press the 1000W/2000W button once to set 1000W for low temperatures; press it twice to set 2000W for high temperatures; press it a third time to turn off the setting.
- Press the DIMMER button to activate the dimmer mode, press repeatedly to increase and decrease the brightness.
- Press the BACK LIGHT button to adjust the colors of the LED decoration, 7 colors available.
3 Cleaning and Maintenance
Warning - Always disconnect from the mains supply before cleaning heater.
For general cleaning use a soft clean duster - never use harsh abrasive or cleaners.
The glass viewing screen should be cleaned carefully with a soft cloth. DO NOT use proprietary glass cleaners.
This product does not use a standard bulb for its flame effect. The appliance uses an electronically controlled LED system to create the effect, therefore no parts need to be replaced. There are no user-serviceable parts on this appliance. Under no circumstances should the appliance be serviced by anyone other than a qualified electrician.
4 Technical Details
Modell....STOCKHOLM
Voltage....230 V
Frequency....50 Hz
Power 2000 Watt
Dimensions.... 98 x 27.5 x 80 cm
5 Warranty / Disposal / Technical change
Warranty
The Products are controlled just before delivery. If despite a lack of your product, try trustfully your seller. Please bring your receipt, as this is to be submitted for each warranty. The guarantee period is 24 months from date of purchase.
Disposal
The device must be disposed of properly. The device can be distributed free of charge for disposal at each dealer.
Technical changes
Reserving technical changes in technology and design.
CE Declaration of Conformity
This device complies with the following standards
EN 55014-1:2006+A1+A2
EN 55014-2:2015
EN 60335-1:2012+A11
EN 60335-2-30: 2009+A11
EN 61000-3-2:2014
EN 61000-3-3:2013
EN 62233:2008
2011/65/EU
2014/30/EU
2014/35/EU
2009/125/EU
Information requirements for electric local space heaters
| Model identifier(s): STOCKHOLM | |||||
| Item Symbol Value unit Item unit | |||||
| Heat output Type of heat input, for electric storage | age local space heaters only (select one) | ||||
| Nominal heat output | P_nom | 2,0 kW | manual | heat charge control, with in- integrated thermostat | [no] |
| Minimum heat output (indicative) | P_min | 1.0 kW | Manual | heat charge control with room and/or outdoor temperature feedback | [no] |
| Maximum continuous heat output | P_max,c | 2,0 kW | Electronic | heat charge control with room and/or outdoor temperature feedback | [no] |
| Auxiliary electricity consumption | Fan assisted heat output [no] | ||||
| At nominal heat output | el_max | 0.014(fan motor) | kW Type of heat output/room temperature control (select one) | ||
| At minimum heat output | el_min | 0.014(fan motor) | kW single stage heat output and no room temperature control | [no] | |
| In standby mode | el_sb | 0.48 W | Two or more manual stages, no room temperature control | [no] | |
| with mechanic thermostat room temperature control | [no] | ||||
| with electronic room temperature control | [no] | ||||
| electronic room temperature control plus day timer | [no] | ||||
| electronic room temperature control plus week timer | [yes] | ||||
| Other control options (multiple selections possible) | |||||
| room temperature control, with presence detection | [no] | ||||
| room temperature control, with open window detection | [no] | ||||
| with distance control option [no] | |||||
| with adaptive start control [yes] | |||||
| with working time limitation | [no] | ||||
| with black bulb sensor | [no] | ||||
DISPOSAL INSTRUCTIONS FOR THE ELECTRICAL PART OF THE PRODUCT
In accordance with Article 26 of the Decree-Law of 14 March 2014 implementing Directive 2012/19/EC and the Law of 4 March 2014 implementing Directive 2011/65/EC on the reduction of the use of hazardous substances in electrical and electronic equipment and on waste management.
The crossed-out dustbin symbol on the machine or packaging indicates that the waste generated at the end of its useful life must be collected separately from other waste. The user must therefore take the device to the appropriate collection points at the end of its service life. Sort electronic and electrical waste or send the purchase of new, equivalent devices back to the dealer in a one-to-one process. L'adeguata separate collection for subsequent commissioning of the equipment to be recycled, treatment and environmentally sound disposal, helps to avoid possible adverse effects on the environment and health and promote the reuse and/or recycling of the materials to which they belong. composed the equipment. Misuse of this product by the user will result in the application of the administrative penalties provided for in the applicable legislation. Batteries contained in the device must be disposed of separately in the appropriate containers for the collection of used batteries.

DISPOSAL OF BATTERIES AND ACCUMULATORS
In accordance with Legislative Decree 188 of 20 November 2008 implementing Directive 2006/66/EC on batteries, accumulators and related waste, the symbol of the crossed-out waste bin on the battery indicates that it is prohibited to dispose of used batteries in household waste.
Batteries and batteries contain substances that are highly polluting for the environment. The user is obliged to dispose of used batteries at collection points in the municipality or in appropriate containers. The service is free. In this way, legal requirements will be respected and the environment will be protected. The symbols identifying hazardous materials that may be present in batteries and accumulators are as follows: Hg=Mercury, Cd=Cadmium, Pb=Lead.
Company
Armin Schmid
Olensbachstrasse 9-15
CH-9631 Ulisbach
Tel. Int. +41 58 611 60 00
Tel. Nat. 0848870850
www.sonnenkoenig.ch
Company
Armin Schmid