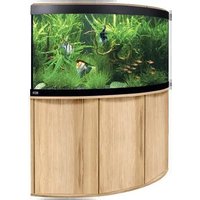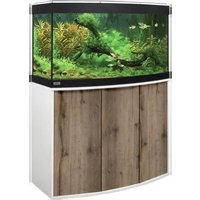
Vicenza - Aquarium Fluval - Free user manual and instructions
Find the device manual for free Vicenza Fluval in PDF.


User questions about Vicenza Fluval
0 question about this device. Answer the ones you know or ask your own.
Ask a new question about this device
Download the instructions for your Aquarium in PDF format for free! Find your manual Vicenza - Fluval and take your electronic device back in hand. On this page are published all the documents necessary for the use of your device. Vicenza by Fluval.
USER MANUAL Vicenza Fluval
natural_image
Blue silhouette illustration of fish swimming among aquatic plants (no text or symbols)Table of Contents
p. 4 Introduction
p. 8 Section #1
Aquarium Cabinet setting up - Glass tank verification and installation
p. 12 Section #2
External Fluval Filter installation and preparation for the start-up
p. 18 Section #3
Heater installation and preparation for the start-up
p. 20 Section #4
Decorate your aquarium to your personal taste
p. 21 Section #5
Strip Light Canopy installation and preparation for the start-up
p. 23 Section #6
Aquarium Start-up
p. 26 Section #7
Maintenance
p. 123 Customer Service
Table des matières
p. 34 Introduction
p. 38 Section n° 1
FLUVAL VICENZA and VENEZIA Aquarium Kits Instruction Manual
Introduction
This instruction manual is for the following Fluval Aquarium Kits:
Vicenza 180 Vicenza 260
Venezia 190 Venezia 350
All kits include a tank, a cabinet, a Strip-Light canopy, a Fluval external filter and a heater.
The Fluval external filter can be connected to the tank easily and safely, thanks to the new "Easy-Connect" system, which makes connecting to powerful external filtration systems easy and eliminates the use of unsightly hosing and prominent cross rim devices.

The kits are packaged in 2 separate boxes:
- One box contains the glass tank with the Strip-Light canopy and an inner white box containing the external filter, the heater, all EasyConnect attachments, and an instruction manual.
- The other box contains the knocked-down cabinet and setup instructions.
Main technical characteristics
| Model | Aquarium capacity* | Weight of the Aquarium without water** | Weight of the Aquarium full with water*** | Cabinet Weight | Strip-Light Canopy lights | Heating Power | Filtration System |
| Liters/U.S. gal. | Kg/Lb | Kg/Lb | Kg/Lb | Type/W | W | Type | |
| Vicenza 180 | 151 / 39.8 | 41 / 90 | 225 / 495 | 28 / 61 | T5 / 2x24 | 200 | Fluval 205 |
| Vicenza 260 | 248 / 65.5 | 60 / 132 | 370 / 815 | 38 / 84 | T5 / 2x39 | 300 | Fluval 305 |
| Venezia 190 | 174 / 45.9 | 45 / 99 | 265 / 584 | 32 / 70 | T5 / 2x24 | 200 | Fluval 205 |
| Venezia 350 | 294 / 77.6 | 77 / 170 | 440 / 970 | 45 / 90 | T5 / 2x39+2x8 | 300 | Fluval 405 |
Important notes:
* Aquarium capacity does not refer to the maximum capacity of the glass tank but to the approximate volume of water up to the "max water level" line (without gravel).
** Approx. weight including filter (without water), heater and Strip-Light Canopy
** approx. weight with the aquarium filled with water and a 15 cm (6") thick layer of gravel only
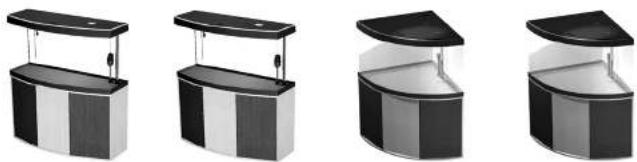
FLUVAL AQUARIUM KIT: PRODUCT RANGE
natural_image
Four identical grayscale and black-and-white product display cases arranged in a row (no text or symbols visible)Vicenza 180 Vicenza 260 Venezia 190 Venezia 350
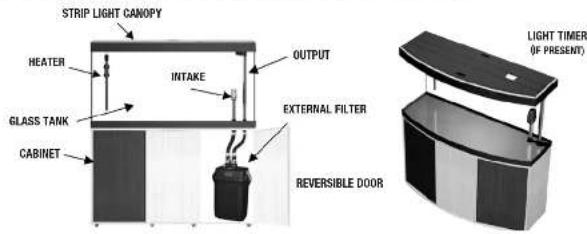
FLUVAL AQUARIUM KITS: MAIN PARTS IDENTIFICATION
text_image
STRIP LIGHT CANOPY HEATER INTAKE OUTPUT GLASS TANK CABINET EXTERNAL FILTER REVERSIBLE DOOR LIGHT TIMER (IF PRESENT)IMPORTANT GENERAL SAFETY INSTRUCTIONS
IMPORTANT! The symbol "has the following meaning: "WARNING! Important advice about hazards"

Read this instruction manual carefully and completely before installing the Aquarium Kit and familiarize yourself with all safety instructions, terms and parts. The instructions for setting up the Cabinet are not included in this manual but are provided in a separate manual included in the Cabinet carton box.

DANGER - To avoid possible electric shock, special care should be taken since water is employed in the use of aquarium equipment.

IMPORTANT: Supply all appliances through a RCD (Residual Current Device) or GFCI (Ground Fault Circuit Interrupter) with rated residual current not exceeding 30mA.

Carefully examine all appliances before and after installation. They should not be plugged in if there is water on parts not intended to be wet.

CAUTION – Always unplug or disconnect all appliances in the aquarium from the electricity supply before placing hands in water, before putting on or taking off parts and while the equipment is being installed, maintained or handled. When inserting or removing equipment from the water, always pull out all main electricity plugs. Never yank the cord to pull the plug from the outlet. Grasp the plug and pull to disconnect. Always unplug an appliance from an outlet when not in use.

All appliances are suitable for indoor use only ⏻. Do not install or store the appliances where they will be exposed to the weather or to temperatures below freezing.

If an extension cord is necessary, a cord with proper rating should be used. A cord rated for less amperes or watts than the appliance rating may overheat. Care should be taken to arrange the cord so that it will not be tripped over or pulled. The connection should be carried out by a qualified electrical installer.

This is not a toy. Close supervision is necessary when any appliance is used near children.

Before handling the aquarium tank and cabinet, check their weight in the table on page 4 to assess whether you have the capability and means to handle them without risk or personal injury.

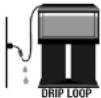
WARNING. Use a drip loop. A "drip loop" should be made by the user for each cord connecting an aquarium appliance to a socket (see illustration). The "drip loop" is that part of the electrical cord below the level of the socket (or connector, if an extension cord is used) to prevent water from running along the cord and coming in contact with the socket. If the plug or socket does get wet, DON'T unplug the cord. Disconnect the fuse or circuit breaker that supplies power to the appliance. Then unplug and examine for presence of water in socket.

WARNING. Risk of overheating: do not place any objects on the aquarium or any other appliance connected to the aquarium at any time.

If air stones are used, always keep them in the middle of the aquarium to avoid water leaks due to capillary action around the top frame.

ADDITIONAL SAFETY INSTRUCTIONS FOR THE INSTALLATION AND MAINTENANCE OF SALTWATER AQUARIUMS
It is commonly known that salt water is far more corrosive, electrically conductive, and generally degrades plastic and metal parts at an accelerated rate versus fresh water. To minimize salt accumulations on the aquarium, take note of the following recommendations:
- Make sure that the filter outputs do not spray above the water surface; position them below the water surface with a slight downward angle, but allow for surface movement (which contributes to oxygenation).
- If an air pump must be used, frequent removal of salt deposits will be necessary.
- Keep the water level as constant as possible (top up regularly to make up for evaporation). This is beneficial in providing stable salinity and will help protect the canopy.
- Clean all aquarium components that come into contact with salt water at least every 15 days. Use a wet cloth (never use chemical products or detergents). Simple lemon juice may be useful for removing calcareous encrustation. Rinse thoroughly afterward to eliminate acid residue.

The electrical cords of the Strip-Lights and the heater can exit the aquarium through the rear openings of the aquarium top frame. For a neat installation, the cords can be supported inside the tank by special clips hooked to the aquarium's internal top rim.
For proper installation and start-up of your aquarium, please follow these guidelines:
A. PREPARING THE AQUARIUM KIT FOR START-UP
- Assemble the aquarium cabinet refer to Section #1 of this Instruction Manual and to the separate Instruction Manual which is found in the cabinet box.
- After verification, place the cabinet refer to Section #1 of this Instruction Manual and the aquarium tank in their final location
- Install the water intake/output systems refer to Section #1 of this Instruction Manual
- Set up the filter unit and connect it to the tank refer to Section #2 of this Instruction Manual
- Position the heater in the tank refer to Section #3 of this Instruction Manual
-
Decorate your aquarium with backgrounds, refer to Section #4 of this Instruction Manual rocks and gravel
-
Place small plants in the aquarium refer to Section #4 of this Instruction Manual
- Fill the aquarium with water refer to Section #4 of this Instruction Manual up to half its height
- Place high plants in the aquarium refer to Section #4 of this Instruction Manual
- Top up the aquarium up to refer to Section #4 of this Instruction Manual "max water level" line
- Prepare the Strip-Light Canopy for start-up refer to Section #5 of this Instruction Manual and place it on the aquarium top
- Plug in the External Filter refer to Section #6 of this Instruction Manual
- Plug in the heater refer to Section #6 of this Instruction Manual
- Plug in the Strip-Light Canopy refer to Section #6 of this Instruction Manual
- Program the Light-Timer, If Included, refer to Section #6 of this Instruction Manual according to your requirements
- Add the fish after the aquarium has matured
B. AQUARIUM START-UP
MAINTENANCE
For any maintenance operation please refer to Section #7
SECTION #1
SETTING UP THE AQUARIUM CABINET - VERIFYING & INSTALLING THE GLASS TANK
Do not attempt to set up the cabinet without reading and following the instruction manual.
natural_image
Exterior view of a modern office building (no signage)
natural_image
Exterior view of a modern office building (no signage)The manual is included with the cabinet. If it is missing or unusable, contact the store or Hagen Customer Service to get another copy.
The Fluval Aquarium must be placed on the appropriate Fluval cabinet designed for that aquarium. Fluval cabinets are guaranteed to provide a suitably solid and level surface that will not bend or warp. Using any other form of support will invalidate your guarantee.
Never attempt to move or transport the Cabinet with the glass tank or any other load on top of it.
Remove all contents from the box. Before you begin, identify, count and check that you have all the parts needed for assembly. If any part is missing, do not proceed with the setup and contact the store or Hagen Customer Service.
Set up the Cabinet following the Instruction Manual.
After completing the assembly, check that ALL parts have been properly used.
The aquarium cabinet is made of wood. We recommend keeping all cabinet surfaces dry.
VERIFYING THE AQUARIUM GLASS TANK SEALING
The aquarium glass tank comes complete with bottom and top plastic frames glued to it. Do not try to remove the top and bottom frames.
Although the glass tank was manufactured with maximum care and the most advanced techniques, inspect it carefully to ensure that it was not damaged during handling and transportation.
- Bring the glass tank to an area where any possible water leakage does not pose a problem.
- Inspect the glass tank for damages or cracks.
- If there is no damage, fill the tank with water and check for leaks.
- If no leak is detected, empty the aquarium and proceed with the aquarium installation.
The tank is made of glass. Always handle it with the extreme care.
Never attempt to move or transport the tank if it is not completely empty of water or any other material.
Always take care not to damage the seals at the edges of the glass panels while maintaining your aquarium.
Never use toxic or aggressive substances to clean your aquarium.
PLACING THE AQUARIUM WITH ITS CABINET IN THE FINAL LOCATION
The location of the aquarium is very important. Place it away from direct sunlight. This will reduce the chances of excessive algae build-up and prevent overheating. Keep the aquarium away from other sources of heat (air ducts, radiators, etc.) for proper temperature maintenance. Drafts should be avoided as well. Do not place the aquarium where water spills will cause damage.
The cabinet's dimensions and structure are specifically designed to bear the weight of a completely filled aquarium. Using a different cabinet or support may cause an unsafe condition.
WARNING. Ensure that the selected location can support the total weight of the cabinet and a completely filled aquarium.
The selected location should have an even and level surface. Place the aquarium and cabinet close to an electrical outlet.

After placing the cabinet, use a spirit level to ensure that it is perfectly level. The cabinet has special feet that can easily be adjusted using the tool supplied with the cabinet.
IMPORTANT: Place the aquarium tank directly on the cabinet without any additional support or damper in between. NEVER insert lining between the cabinet and aquarium. If necessary, use the cabinet feet to make the final leveling adjustments.
INSTALLING WATER INTAKE/OUTPUT WITH EASYCONNECT SYSTEM
All Fluval Vicenza and Venezia aquariums feature the new and innovative EasyConnect system, which allows you to directly connect the tank to the external filter through the bottom glass using special fittings.
With other systems, the same type of connection is achieved using complexdevices that often require the services of expert technicians. With EasyConnect, the installation is done easily and safely, giving your aquarium a clean and professional look.
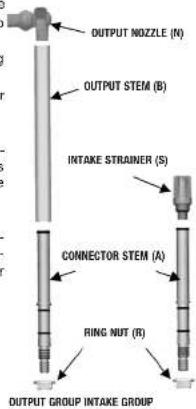
Before proceeding, identify and count all parts required by referring to the exploded view in the side illustration. If any part is missing, do not proceed with the installation and contact the store or Hagen Customer Service.
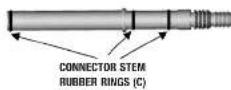
Before proceeding, check stems (A) for the presence of all 3 rubber rings (C). Do not proceed with the installation if one of the rubber rings (C) is missing and contact the store or Hagen Customer Service.
text_image
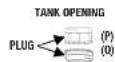
OUTPUT NOZZLE (N) OUTPUT STEM (B) INTAKE STRAINER (S) CONNECTOR STEM (A) RING NUT (R) OUTPUT GROUP INTAKE GROUPLocate the 2 openings (I) and (O) in the tank's bottom glass and the corresponding holes in the cabinet. The 2 openings in the tank's bottom glass come complete with factory-installed special plastic fittings, which must never be removed, turned or loosened, and with two sealing plugs (P) and (Q). The output system should be installed in the opening (O), and the intake should be installed in the opening (I).

Once the output/input systems are installed, do not shift the tank with respect to the cabinet, as this may damage the output/input systems and the glass tank.

Do not force, loosen or turn the factory-installed special fittings on tank openings (I) and (O).
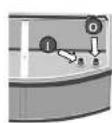
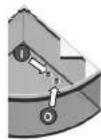
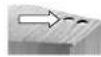
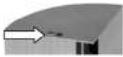
LOCATE THE 2 OPENINGS IN THE TANK'S BOTTOM GLASS AND ENSURE THAT THE CORRESPONDING OPENINGS IN THE CABINET ARE ALIGNED WITH THEM.
Output system installation
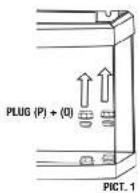
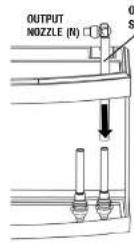
- Manually unscrew plug (P) and remove plug (Q) from opening (O) (Pict.1). Important: keep plugs (P) & (Q) for any future use.
- Slip connector stem (A) fully through opening (O) until it stops (Pict.2)
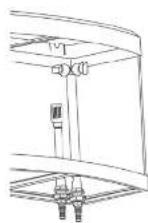
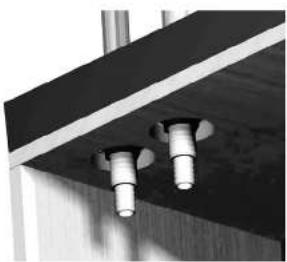
- Open the cabinet. Screw and tighten the ring nut (R) onto the bottom end of stem (A) (Pict. 3).
- Insert the outlet nozzle (N) into one end of outlet stem (B)
- Insert outlet stem (B) in connector stem (A) (Pict.4).
- Regulate the height of the outlet nozzles according to your requirement by sliding outlet stem (B) along connector stem (A).
- The outlet nozzles (N) can be easily rotated to divert the water flow where desired.
Direct the water jets so as not to let water overflow from the tank. Avoid directing the water jets toward the Strip-Light(s) of the canopy
Intake system installation
-
Manually unscrew plug (P) and remove plug (Q) from opening (I) (Pict.1). Important: keep plugs (P) & (Q) for any future use.
-
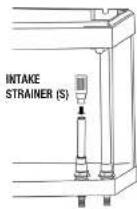
Slip the second connector stem (A) fully through opening (I) until it stops (Pict.2).
- Open the cabinet. Screw and tighten the nut ring (R) onto the bottom end of the second stem (A) (Pict.3).
- Insert the intake strainer (S) in connector stem (A) (Pict.5).
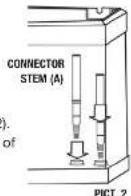

The height of the intake strainer is high enough to suit most standard aquarium decorations. When decorating the aquarium, ensure that it remains at least 5 cm (2") from the gravel bottom at all times to prevent it from sucking gravel or sand and to ensure that decorations do not block the passage of water. Ornaments and rocks should be placed while the aquarium is still dry.

CAUTION! Never force Connector Stems (A) sideways, as this may damage the output/input systems and the glass tank.
If using a different filtration system that does not require the inlet/outlet systems supplied with this unit (e.g. an internal filter), restore the initial conditions by removing the 2 connector stems (A) and closing openings (O) and (I) with plugs (P) & (Q). Plug (Q) ensures a watertight seal and has to be inserted into its seat by pressing it. Plug (P) is designed to protect plug (Q) and ensure that plug (Q) remains in its seat properly. Screw plug (P) by hand only until it will go without forcing it. DO NOT USE ANY TOOLS, AS DOING SO MAY DAMAGE THE UNIT.
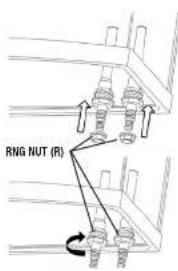
text_image
RNG NUT (R)PICT. 3
OUTPUT STEM (B)
PICT.6
PICT. 4 PICT. 5
natural_image
Close-up of two cylindrical mechanical components mounted on a dark surface, no visible text or symbolsSECTION #2
INSTALLING THE FLUVAL EXTERNAL FILTER AND PREPARING FOR START-UP
!
IMPORTANT SAFETY INSTRUCTIONS
WARNING - To guard against injury, basic safety precautions should be observed, including the following:
1. READ AND FOLLOW ALL SAFETY INSTRUCTIONS
And all the important notices on the appliance before using the filter pump. Failure to do so may result in loss of fish and/or damage to this appliance.
- DANGER - To avoid possible electric shock, special care should be taken since water is employed in the use of aquarium equipment. For each of the following situations, do not attempt repairs yourself; return the appliance to an authorized service facility for service or discard the appliance. A. If the appliance falls in the water, DON'T reach for it! First unplug it and retrieve it. If electrical components of the appliance get wet, unplug the appliance immediately.
B. If the appliance shows any sign of abnormal water leakage or if the RCD (or GFCI- Ground Fault Current Interrupter) switches off, disconnect the power supply cord from the main power supply and remove the pump from the water.
C. Carefully examine the appliance after installation. It should not be plugged if there is water on parts not intended to be wet.
D. Do not operate any appliance if it has a damaged cord or plug, or if it is malfunctioning or it is dropped or damaged in any manner. The power cord of this appliance cannot be replaced; if the cord is damaged, the appliance should be discarded. Never cut the cord.
E. To avoid the possibility of the appliance plug or socket getting wet, make a DRIP LOOP according to the instructions reported in chapter "IMPORTANT GENERAL SAFETY INSTRUCTIONS" in the Introduction.
- Close supervision is necessary when any electrical appliance is used near children. Do not allow children to use this appliance. This appliance is not a toy.
- To avoid injury, do not touch moving parts or hot parts.
- CAUTION – Always unplug or disconnect all appliances in the aquarium from the electricity supply before placing hands in water, before putting on or taking off parts and while the equipment is being installed, maintained or handled. Never yank the cord to pull the plug from the outlet. Grasp the plug and pull to disconnect. Always unplug the appliance from the outlet when not in use.
- This is an aquarium filter pump. Do not use this pump for other than its intended use (i.e.: do not use in swimming pools, bathrooms, etc.). The use of attachments not recommended or sold by the appliance manufacturer may cause an unsafe condition.
- Do not use this filter pump in swimming pools or other situations where people are immersed.
- This filter pump is suitable for use in water temperatures up to 35^ C / 95^ F .
- Do not use this filter pump with inflammable or drinkable liquids.
- This filter pump is suitable for INDOOR use only 📋. Do not install or store the appliance where it will be exposed to the weather or to temperatures below freezing.
- Make sure that the pump is securely installed before operating it. Do not allow the filter pump to run dry.
- If an extension cord is necessary, a cord with proper rating should be used. A cord rated for less amperes or watts than the appliance rating may overheat. Care should be taken to arrange the cord so that it will not be tripped over or pulled. The connection should be carried out by a qualified electrical installer.
SAVE THESE INSTRUCTIONS. For the complete use and understanding of this product it is recommended that this manual is thoroughly read and understood. Failure to do so may result in damage to this product.
FLUVAL EXTERNAL FILTER: TECHNICAL CHARACTERISTICS
| FLUVAL aquarium | FLUVAL filter | Pump output ^a | Mechanical filtration area | Biological filtration volume vol | Total filtration volume | Filter circulation | Max water column height 230-240V | Power absorption 1/50Hz 120V | Power absorption Hz |
| Model | Model | L/H / U.S. gal/H | In2 / cm2 | U.S. Qt. / Liters | U.S. Qt. / Liters | L/H / U.S. gal/H | Ft. Meters | W | W |
| VI180 | 205 | 680/180 | 868/56000 | 2.10/2.0 | 4.84/4.6 | 420/110 | 4.4/1.35 | 10 | 9 |
| VI260 | 305 | 1000/264 | 868/56000 | 3.26/3.1 | 6.94/6.6 | 710/167 | 5.2/1.60 | 15 | 15 |
| VE190 | 205 | 680/180 | 868/56000 | 2.10/2.0 | 4.84/4.6 | 420/110 | 4.4/1.35 | 10 | 9 |
| VE350 | 435 | 1300/343 | 1182/76300 | 4.42/4.2 | 6.94/6.5 | 650/224 | 6.7/2.05 | 20 | 21 |
* Pump Output: flow rates were measured with pump only, with no attachments or accessories connected to it.
** Filter Circulation: flow rates were measured with intake and output hoses, without any in-tank accessories or filtering media.
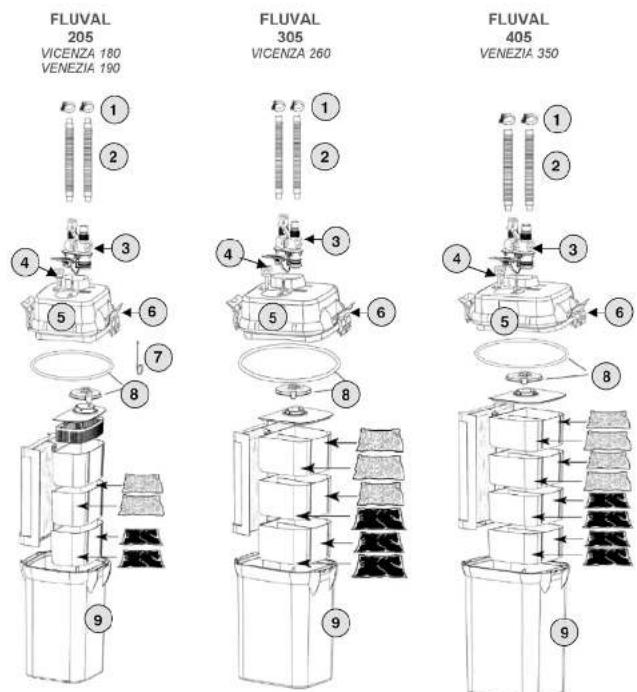
FLUVAL FILTER: PRODUCT PARTS
text_image
FLUVAL 205 VICENZA 180 VENEZIA 190 FLUVAL 305 VICENZA 260 FLUVAL 405 VENEZIA 350IMPORTANT: Since the filter is connected directly to the tank through the bottom of the aquarium glass, the Instant Prime System (Part # 4) is not required. Always keep the Instant Prime handle in the "Down" position
FLUVAL FILTER INSTALLATION
- Unpack and identify all parts. This filter is for installation with this Fluval Aquarium Kit only.
- Prepare intake/output connections

Remove the Aquastop valve (3) from canister cover (5) by first lifting the black lever all the way up and then fully lifting the silver lever.

The black lever closes and opens the Aquastop valves. When the black lever is fully up, the valves are fully closed and do not allow water to flow between the filter and aquarium tank. When the black lever is fully down, the valves are fully open and allow maximum water flow between filter and aquarium tank
The silver lever locks the Aquastop valve to the canister cover (5). When the silver lever is fully up, the Aquastop valve is disengaged from the canister cover (5). Important: to avoid water spill, the silver lever cannot be operated if the black lever is not fully up.
Connect the ribbed hoses (2) to the Aquastop valve (3).
Attach the first hose to the IN and the second hose to the OUT connector of the Aquastop valve in the following way:
a. Push one end of the hosing onto the valve; push it all the way, as far as it will go.
b. Turn the lock nut counter clockwise until it is as tight as you can make it without forcing.

Connect the ribbed hoses to the Aquarium's intake/output stems that you installed in Section #1. Open the cabinet. Connect the loose end of the ribbed hose (2) that is attached to the IN connector of the Aquastop valve (3) to the connector stem that is attached to the aquarium Intake and then connect the loose end of the ribbed hose (2) that is attached to the OUT connector of the Aquastop valve (3) to the connector stem that is attached to the aquarium output, in the following way:
a. Loosen the metal clamp (1) and slide it onto the loose end of the hosing (2).
b. Push the end of the hosing onto the aquarium connector stem; push it all the way, as far as it will go.
c. Position the metal clamp over the rubber connector and tighten with a screwdriver.
WARNING! - Avoid forcing the ribbed hoses sideways near the Aquastop and Connector Stem connections at all times to prevent the ribbed hosing from slipping out of these connections and consequently emptying the aquarium.
3. Prepare the Filter
IMPORTANT: The Carbon and BioMax media supplied with your Fluval filter have been deliberately placed in the Upper, Mid, and Lower level baskets to indicate their recommended placement for optimal basic filtration. Be sure to note this positioning and place the media in baskets at the same levels as you prepare the filter for use.
- Remove the foam screen frame, media cover, and media baskets from the filter canister. As you remove Carbon and BioMax from the baskets, note which levels they were packed in. Then remove their outer wrappers; do not remove carbon from porous bag(s).
- Rinse baskets and media materials under running tap water to remove any dust and place media in baskets. Or, if you prefer, select other media of your own choosing. (See "Fluval Advanced Filtration" for more information)
- Place the rinsed and filled media baskets back in the canister and put the media cover back on the top basket. IMPORTANT: Make sure that each media is positioned at the same level it was packaged in, unless you are deliberately choosing a different filtration plan than the recommended basic setup. Never overfill baskets. If the cover or baskets are out of position, the cover (5) may not close properly.
- Rinse both sides of the foam screen frame under tap water before initial use to remove any possible contaminants and slide it back into position in the canister, with the flat end down. If the screen does not seem to fit properly, be sure it is not upside down.
- Complete the canister cover assembly:
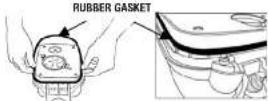
a. Lay the canister cover on a flat surface with its topside down. Remove the lubricated rubber gasket from its plastic bag. To seal the cover opening properly, the gasket must be moist but it need not be wet. Carefully fit the gasket into the channel around the base of the cover.
b. Position the impeller cover over the impeller. Align the shaft so it is seated in the ring on the cover; push down around the entire circumference of the edge until the tabs "click" into the locked position.
- Place the cover on the canister. Be sure to position it properly. There is only one orientation possible. Make certain that the MSF logo on the cover and canister is aligned and that the power cord fits into the notch on the rim of the canister.
- Lock the cover in place: push the double tabs of the lift-lock clamps under the rim; then press the upper tabs firmly against the cover.
DO NOT FILL THE CANISTER WITH WATER
- Place the unit in its final position inside the cabinet.
- Insert the Aquastop valve into the intake and output connectors on the cover and push down on the silver lever to lock it in place.
-
Keep the Aquastop valves closed with the black lever all the way up.
-
DO NOT PLUG IT IN NOW. The Filter is ready for start-up, but it can be started only after all aquarium accessories have been installed and the filter is full of water. For the filter start-up, refer to Section #6.
There are three basic types of filtration. Mechanical filters remove waste particles and solid debris through various kinds of strainers. Biological filters break down and eliminate organic toxins -ammonia and nitrite - through bacterial action. And chemical filters actively change water characteristics through deliberately managed chemical reactions.
Fluval offers a wide variety of filter media. Some perform more than one job. The true power of the Fluval system is that it is very flexible, offering a wide range of media and multiple media placement options.
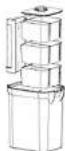
The Fluval Stack of Media Baskets
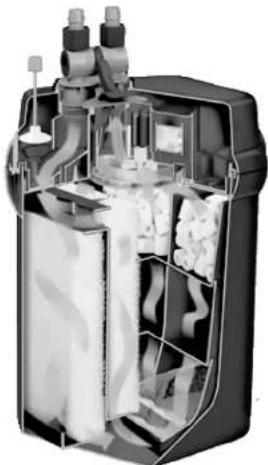
The stack of media baskets in the Fluval 05 Series filters enables you to employ all three types of filtration in whatever configuration or sequence you determine is best for your aquarium environment.
Filtration always begins at the mechanical stage, where waste particles are removed as water flows through the foam screen, and continues with subsequent biological and chemical stages as it flows up through the media baskets.
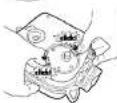
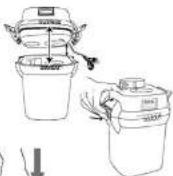
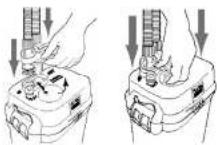
Because you can use the media of your choosing at each level, you can design a system that provides additional mechanical filtration if you wish. Below you'll find detailed information, as well as general guidelines for media selection and use.
General Guidelines
- Location can determine function.
For example, carbon can act primarily as a screen for debris or act more as an environment for growth of beneficial bacteria, depending on where it is placed in the filtration sequence.
•Proper preparation is key.
Some materials, such as Ammonia Remover, require thorough rinsing so that their finest particles do not clog other modules or discharge into the aquarium. For best results and the protection of your fish, always read and follow the preparation instructions for the media you are using. Use mechanical filter media in the first stage of filtration.
This helps ensure that water will be as free of debris as possible when it flows through biological and/or chemical filters, which require clear water for maximum effectiveness. The foam screen is an effective first stage mechanical sieve.
- Protect biological media from debris.
Biological media provide clean, hard attachment points for beneficial bacteria. For these media to be most effective, they need a constant stream of waste-free water that carries ammonia, nitrite and oxygen. Thus, they are best placed after mechanical filtration and chemical media.
Lower Level Basket
Media that continues the mechanical capture of small particles should be placed in the lowest media basket to purify water and/or remove particles before they can clog the delicate pores of biological or chemical substrates. Pre-Filter, Carbon, and Zeo-Carb are all options for screening small particles from the water. Pre-Filter is inert, acting solely to create a screen. Carbon removes dyes, medications, and solubilized wastes that a simple screen cannot. Zeo-Carb removes ammonia; it is often used at the beginning of a setup to keep initial ammonia spikes lower than would occur naturally.
Mid Level Basket(s)
The mid level media basket is useful for chemically modifying water. Peat Granules, for example, will gradually lower the water's pH level. The mid level basket is a good place to begin the biological reduction process. Many media types provide both mechanical filtering and biological treatment, creating an excellent environment for beneficial bacteria to proliferate. Even many chemical compounds will support colonies of bacteria. With the primary mechanical purification of the water stream occurring in the Foam Screen Frame and the lower basket, it is typical to load additional biological media into a Mid Level Media Basket. BioMax, extra Carbon, or Ammonia Remover are commonly used. This is also the place where more exotic media, chosen for a specific application, can be used.
Upper Level Basket
This basket receives the purest water stream, making it the proper place for dedicated biological media. Placed here, BioMax, for example, provides optimal biological power in a very compact ring configuration. With multiple pores perforating both the surface and the internal matrix, it is an ideal substrate for this position, especially because it has a built-in trap to capture any loose strands that might affect the operation of the impeller.
natural_image
Cross-sectional diagram of a mechanical device showing internal components and housing (no text or labels)SECTION #3
INSTALLING THE AQUARIUM HEATER AND PREPARING FOR START-UP

IMPORTANT SAFETY INSTRUCTIONS
WARNING - To guard against injury, basic safety precautions should be observed, including the following:
1. READ AND FOLLOW ALL SAFETY INSTRUCTIONS
and all the important notices on the appliance before using the heater. Failure to do so may result in loss of fish and/or damage to this appliance.
- DANGER - To avoid possible electric shock, special care should be taken since water is employed in the use of aquarium equipment. For each of the following situations, do not attempt repairs yourself; return the appliance to an authorized service facility for service or discard the appliance. A. If the appliance shows any sign of abnormal water leakage, immediately unplug it from the power source.
B. Carefully examine the appliance after installation. It should not be plugged if there is water on parts not intended to be wet.
C. Do not operate any appliance if it has a damaged cord or plug, or if it is malfunctioning or it is dropped or damaged in any manner. The power cord of this appliance cannot be replaced: If the cord is damaged, the appliance should be discarded. Never cut the cord.
D. To avoid the possibility of the appliance plug or socket getting wet, make a drip loop according to the instructions reported in the chapter "IMPORTANT GENERAL SAFETY INSTRUCTIONS" in the Introduction.
3. Close supervision is necessary when any electrical appliance is used near children. Do not allow children to use this appliance. This appliance is not a toy.
4. To avoid injury, do not make contact with hot parts.
5. CAUTION - Always unplug or disconnect all appliances in the aquarium from the electricity supply before placing hands in water, before putting on or taking off parts and while the equipment is being installed, maintained or handled. When inserting or removing the heater from the water, always pull out the plug from the main electrical supply and do not pull the equipment out of the water until after it has been allowed to cool for at least 30 minutes. Never yank the cord to pull the plug from the outlet. Grasp the plug and pull to disconnect. Always unplug an appliance from an outlet when not in use.
6. This is an Aquarium Heater. Do not use an appliance for other than its intended use (i.e. do not use this heater on swimming pools, garden ponds, bath rooms, etc.). The use of attachments not recommended or sold by the appliance manufacturer may cause an unsafe condition.
7. This heater is suitable for INDOOR use only 📋. Do not install or store the appliance where it will be exposed to the weather or to temperatures below freezing.
8. Make sure that the heater is securely installed before operating it. The heater must be immersed in water at least up to the MIN. WATER LEVEL indicated on the heater (but without exceeding the depth of 100 cm). This aquarium heater must never operate out of water.
9. If an extension cord is necessary, a cord with proper rating should be used. A cord rated for less amperes or watts than the appliance rating may overheat. Care should be taken to arrange the cord so that it will not be tripped over or pulled. The connection should be carried out by a qualified electrical installer.
10. SAVE THESE INSTRUCTIONS
AQUARIUM HEATER: PRODUCT PARTS

text_image
EASY SET NUMBERED TEMPERATURE DIAL PILOT LIGHT ON/OFF INDICATOR REGULATION KNOB WATER LEVEL INDICATION HEATER MOUNTING BRACKETHEATER INSTALLATION
Positioning the heater
The Aquarium heater must be positioned to allow free circulation of water around the glass heater tube.
Generally, the heater should be placed at the rear of the aquarium, preferably near a source of water movement to ensure even and thorough distribution of warmed water. Be sure there are no rocks, decorations or gravel obstructing or touching the heater, as they will cause uneven heating in the glass tube and weaken it.

CAUTION - Water level must be maintained to the level indication on the glass heater tube. Always maintain the water level in the aquarium to compensate for water loss due to evaporation.
Heater preparation
- Set the heater to the appropriate temperature using the Easy-Set Numbered Temperature Dial.
- Position the heater in the aquarium with the heater mounting bracket attached. Press suction cups firmly against glass to adhere to the aquarium wall.
- DO NOT PLUG IN NOW. The Heater is now ready for the start-up, but it can be started only after the installation of all aquarium accessories has been completed and the tank is full of water. For Heater start-up refer to Section #6.
SECTION #4
DECORATING YOUR AQUARIUM WITH GRAVEL, ORNAMENTS, AND ROCKS
Remove the Strip Light(s) and top lids from the aquarium top to access the tank fully.
Ornaments and rocks should be positioned while the aquarium is still dry.
Rinse aquarium gravel or marine substrate before placing it at the bottom. In most cases, a 5 – 10 cm (2 - 4") layer of regular aquarium gravel (or crushed coral in marine environments) is sufficient. Use more if you plan to anchor live plants. It is advisable to slope the gravel downward from the back to the front for the best effect.
When decorating the aquarium, ensure that the filter intake strainer sticks out by at least 5 cm from the gravel bottom to prevent the filter pump from sucking gravel or sand.
Also be sure there are no rocks, decorations or gravel obstructing or touching the heater.

CAUTION! Do not place any rock in direct contact with the bottom glass panel. Always keep at least 5 cm of gravel between rocks and the bottom glass panel.

CAUTION! Handle any hard and heavy objects, such as decorative rocks, with extreme care to avoid damaging glass panels. Always avoid knocking them against the glass.

CAUTION! Do not heap rocks or heavy decorations against the Output and Intake systems, to avoid forcing the Connector Stems (A) sideways.
Place small plants in the aquarium
While the aquarium is still empty of water, plant small plants in your aquarium. Ensure that all live plants are firmly rooted in the gravel.
Fill the aquarium with water up to half its height and plant the tall plants
Fill the aquarium about halfway with water before planting tall plants. The water will help make this easier.
To minimize displacing the decorations while filling the aquarium, place a clean plate on the gravel at the bottom of the aquarium then pour the water onto the plate.
We recommend filling the aquarium with water that is close to the desired temperature you are trying to achieve.
Ensure that all live plants are firmly rooted in the gravel.
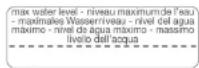
Filling up the aquarium up to the "max water level" line
After the plants are added, fill the aquarium up to the level indicated on the label found on the inside of the aquarium's top frame.

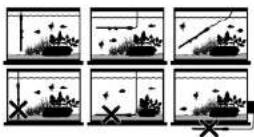
IMPORTANT - Do not overfill. Overfilling the aquarium can cause water to pass under the top frame and run down the outside of the aquarium.
SECTION #5
INSTALLING THE STRIP-LIGHT CANOPY AND PREPARING FOR START-UP
STRIP-LIGHT CANOPY: PARTS
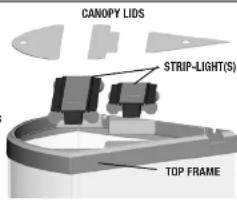
The Strip-Light Canopy consists of :
• 1 TOP FRAME attached to the aquarium tank
• 2 LIDS for opening and closing the aquarium (except Venezia 350 which features 3 lids)
• 1 STRIP-LIGHT complete with 2 T5 fluorescent tubes (except Venezia 350 which features 2 Strip-Lights)
With the only exception of the 2 x 8 W strip which features a conventional ballast, all Strip-Lights are equipped with an
Electronic Ballast for maximum performance and efficiency.
text_image
CANOPY LIDS STRIP-LIGHT(S) TOP FRAMEAll Strip-Lights also feature special PVC Reflectors to maximize the light produced by the powerful T5 fluorescent tubes. PVC Reflectors guarantee excellent reflection performance and better light diffusion. Depending on the version, the Strip-Light may feature either a line cord switch or an automatic Electronic Light Timer to switch the light ON and OFF.
STRIP-LIGHT IMPORTANT SAFETY INSTRUCTIONS
WARNING - To guard against injury, basic safety precautions should be observed, including the following:
1. READ AND FOLLOW ALL SAFETY INSTRUCTIONS
and all the important notices on the appliance before using the STRIP-LIGHT. Failure to do so may result in loss of fish life and/or damage to this appliance.
2. DANGER - To avoid possible electric shock, special care should be taken since water is employed in the use of aquarium equipment. For each of the following situations, do not attempt repairs yourself; return the appliance to an authorized service facility for service or discard the appliance. A. If the appliance falls in the water, DON'T reach for it! First unplug it and retrieve it. If electrical components of the appliance get wet, unplug the appliance immediately.
B. If the appliance shows any sign of abnormal water leakage or if the RCD (or GFCI- Ground Fault Current Interrupter) switches off, disconnect the power supply cord from the main power supply and remove the appliance from the water.
C. Carefully examine the appliance after installation. It should not be plugged if there is water on parts not intended to be wet.
D. Do not operate any appliance if it has a damaged cord or plug, or if it is malfunctioning or it is dropped or damaged in any manner. The power cord of this appliance cannot be replaced; if the cord is damaged, the appliance should be discarded. Never cut the cord.
E. To avoid the possibility of the appliance plug or socket getting wet, make a drip loop according to the instructions in "IMPORTANT GENERAL SAFETY INSTRUCTIONS" in the Introduction.
-
Close supervision is necessary when any electrical appliance is used near children. Do not allow children to use this appliance. This appliance is not a toy.
-
To avoid injury, do not contact hot parts such as heaters, reflectors, lamp bulbs etc.
-
CAUTION – Always unplug or disconnect all appliances in the aquarium from the electricity supply before placing hands in water, before putting on or taking off parts and while the STRIP-LIGHT is being installed, maintained or handled. Never yank the cord to pull the plug from the outlet. Grasp the plug and pull to disconnect. Always unplug an appliance from an outlet when not in use. WARNING: The line cord Switch and the Light Timer on the Strip-Light are not safety switches, as they NEVER cut the power off the unit.
-
This is a non submersible AQUARIUM LUMINAIRE (STRIP-LIGHT), suitable for INDOOR use only, destined to be assembled on the Fluval Vicenza and Venezia TOP COVER FRAMES only, for fresh and salt water aquariums with max 35°C water temperature. Do not use this appliance for different aquariums or applications. The use of attachments not recommended or sold by the appliance manufacturer may cause an unsafe condition.
- IMPORTANT. Use only standard aquarium normal output fluorescent bulbs as per the rating characteristics indicated on the electrical data label located on the Strip-Light.
- Do not install or store this appliance where it will be exposed to the weather or to temperatures below freezing.
- IMPORTANT: Make sure that the STRIP-LIGHT is securely and correctly installed before operating it and that the minimum distance of water from the Strip-Light is 15 mm. This STRIP-LIGHT must never operate in water. WARNING. The safety of this Strip-Light is guaranteed provided that both lamps are inserted and all threaded fittings are properly installed.
- If an extension cord is necessary, a cord with proper rating should be used. A cord rated for less amperes or watts than the appliance rating may overheat. Care should be taken to arrange the cord so that it will not be tripped over or pulled. The connection should be carried out by a qualified electrical installer.
- WARNING. Risk of overheating: do not place any object(s) on the Strip-light. Ensure sufficient air space around the Strip-Light.
- SAVE THESE INSTRUCTIONS. For the complete use and understanding of this product it is recommended that this manual is thoroughly read and understood. Failure to do so may result in damage to this product.
PREPARING AND INSTALLING THE STRIP-LIGHTS
All Aquarium models feature 1 Strip-Light each, with the exception of the Venezia 350, which features 2 Strip-Lights. Each Strip-Light features 2 T5 fluorescent bulbs.
The Strip-Light(s) come with T5 fluorescent tubes already installed.

WARNING: Though the Strip-Lights come with T5 fluorescent tubes already installed, check that the threaded fittings are fully tightened in the socket, before operating the unit. Ensure that there are no visible threads or gaps between the lamp socket and threaded fittings. Ensure threaded fittings are not cross threaded onto the lamp socket.
The threaded fittings must be fully tightened to prevent moisture from entering the socket and corroding the electrical contacts.
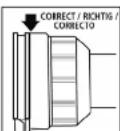
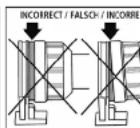

WARNING: The safety of this Strip-Light is guaranteed provided that both lamps are inserted and that all threaded fittings are properly installed.
Replace the Strip-Light(s) first and then place the lids on the top frame to close the aquarium completely.
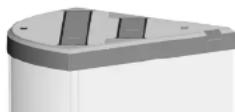
DO NOT PLUG IN NOW. The Strip Light(s) is now ready for start-up, but it can be started only after you have completely installed all aquarium accessories. For Strip-Light start-up, refer to Section #6.
SECTION #6
AQUARIUM START-UP
I. FLUVAL FILTER START-UP.
Before proceeding, verify that the lift-lock clamps are securely closed.
Fill the Filter canister with water by opening the Aquastop valve. Push the black lever on the Aquastop valve all the way down. You will hear the aquarium water flushing into the filter canister for few minutes. As water flows into the canister, it will force air out. Air will be expelled into the aquarium causing water to bubble. Once the bubbling in the tank stops, you will know that the filter canister is full of water. Make sure that there are no water leakages from the filter canister and tank connections.
Since aquarium water is used to fill the filter canister, top off the aquarium to restore the correct water level.
Plug the power cord into an electrical outlet.
The pump will start immediately. Water should flow from the output nozzle continuously. If it does not, unplug the filter and check your installation once again.

WARNING: Never plug the filter in unless the canister is completely full of water.
Adjusting Water Flow
Once the filter is operating continuously, use the black lever on the AquaStop valve to regulate the water flow. To reduce water flow, lift the lever up to half way, but no higher. This can be done once the unit is fully operational and will not harm the motor. However, never run the filter with the black lever up (closed) more than half way.
Air in the Filter
Some air will get trapped in the canister as it fills up; air may also be released by new media. Eventually, the filter will expel all air pockets. If you notice excessive bubble bursts over an extended period of time, check all hosing and connections for air leaks. Also, make sure there is no air source (such as an air stone or aeration device) near the intake strainer.
2. AQUACLEAR HEATER START-UP.

CAUTION - Water level must not drop below the minimum indicated on the glass heater tube.
Always maintain the water level in the aquarium to compensate for water loss due to evaporation.
After filling the tank, wait 30 minutes and then connect the heater to the electrical outlet. This waiting period allows the heater to adjust to the aquarium water temperature.
Note that it may take up to 12 hours for the heater to attain the water temperature you have selected. Once the desired water temperature is reached, monitor it over the next few hours. It is only after this time that the Easy-Set Numbered Temperature Dial should be adjusted to achieve a higher or lower temperature, as required.
The unit heats only when the pilot light is illuminated. When the pre-selected temperature is reached, the pilot light shuts off. It will light again only when the heater is required to maintain the temperature at the selected level.
As before, allow time for the water temperature to adjust before resetting the dial any further.
Do not turn the Easy-Set Numbered Temperature Dial past its limits, as this will damage the heater and cause it to stay on permanently.
The temperature should be verified with an accurate thermometer after the heater has reached the desired temperature, before adding fish to the aquarium, and throughout the life of the aquarium.
For use in an established aquarium, verify the calibration of the heater in a separate tank prior to use.

IMPORTANT SAFEGUARD: Disconnect the plug of this and any other electrical aquarium appliance before placing hands in water.

CAUTION - This or any aquarium heater must never be operated out of water. Before removing from water, unplug and allow 30 minutes for the heater to cool. Always unplug the heater during water changes or maintenance.
Heater performance variables
Heater performance is always affected by variables such as lower room temperature, wide temperature fluctuations, the presence of pumps and filters, or aquarium placement in proximity to cooling sources. If the set temperature is not reached in all conditions, it may be necessary to increase the heating power. We recommend monitoring aquarium temperature on a regular basis using an accurate thermometer such as a Marina Aquarium Thermometer.
3. STRIP-LIGHT(S) START-UP

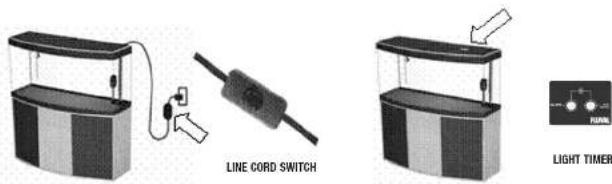
WARNING: The line cord Switch and the Light Timer on the Strip-Light are not safety switches, as they NEVER cut the power off the unit. Before any installation or maintenance operation, disconnect the plug from the electrical supply.
text_image
LINE CORD SWITCH LIGHT TIMERDepending on the specific version supplied, Fluval Aquarium Strip-Lights can be switched on and off by either the line cord Switch or the built-in electronic Light Timer on top of the Strip Light.
Setting the Automatic Light Timer (if included)

IMPORTANT: The Light Timer does not require a battery to work since it uses the main power supply. In case the Strip-Light is disconnected from the power supply or in case of power failure, the internal clock of the Light-Timer will stop. As a consequence, if the automatic On/Off times are set, both times will be delayed by the same time as the duration of the power shortage. If required, set On and Off times once again after resetting the system.
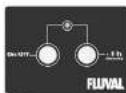

Venezia 350 features 2 Strip-Lights with 2 independent Light Timers. As a consequence, the On/Off time will differ according to the different programming time and/or different settings.
Before proceeding, plug the power cord of the Strip-Light into an electrical outlet.
Manual Operation of the Lights
By pressing the On/Off button once, the lights can be switched on and off manually. The lights can also be switched on and off manually when the automatic On/Off times are set.
Automatic Operation of the Lights
The Light Timer can be switched on and off automatically after setting the On and Off times as per the following instructions.

Be sure the setting sequence "On time" first and "Off time" second is followed and that both On and Off times are set. In case of doubt, reset the Timer by keeping +1h button pressed for at least 5 seconds until the LED light switches off and restart the operation.
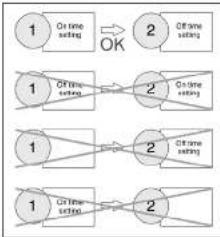
flowchart
graph LR
    A["1 On time setting"] -->|OK| B["2 Off-time setting"]
    C["1 On time setting"] --> D["2 Off-time setting"]
    E["1 On time setting"] --> F["2 Off-time setting"]
    G["1 On time setting"] --> H["2 Off-time setting"]
Setting On time
-
Reset the system by keeping +1h button pressed for at least 5 seconds until the LED light switches off.
-
Verify that the lights are off
-
Press On/Off button and keep it pressed. The lamps will immediately come on and after a few seconds the LED light will come on as well. Do not release the On/Off button now. If no other button is pressed, the Light Timer will acquire the pr lamps will switch on every day (for example 12:00). If you will button for every hour that you want to add to the present time +1h button is pressed 3 times, the On time will be 12:00 +3h = time the +1h button is pressed and released.
-
Now release the On/Off button to let the Timer save the On time. The LED will flash for 5 seconds to confirm that the On time has been set.
Be sure the setting sequence is correct and that both On and Off times are eventually set
Line Cord Switch Light Timer

The Timer saves the On time only after the On/Off button is released. If for any reason the On/Off button is released before the desired On time has been set, restart the procedure from point #1 above.

The On time setting has no effect if the Off time is not set as well.
- Proceed with "Setting Off time".
Setting Off time
-
Verify that the lights are on.
-
Press the On/Off button and keep it pressed. The lights will immediately switch off and after a few seconds the LED light will come on. Do not release the On/Off button now. At this point, press +1h button for every hour that you want the Aquarium lights to stay on (refer to the example below: by pressing +1h button 8 times, the Off time will be 15:00 + 8h = 23:00). The LED will flash every time the +1h button is pressed and released.
-
Release the On/Off button to let the Timer save the Off time. The LED will flash 5 seconds to confirm that the Off time has been set.

The Timer saves the Off time only when the On/Off button is released. If for any reason the On/Off button is released before the desired Off time has been set, restart the procedure from point #1 above.
How to verify that On and Off times have been set
Switch the lights on manually by pressing the On/Off button once. If the automatic On time is set, the LED will flash for 5 seconds. If the LED does not light up, the On time is not set.
Switch the lights Off manually by pressing the On/Off button once. If the Off time is set, the LED will flash for 5 seconds. If the LED does not light up, the Off time is not set.
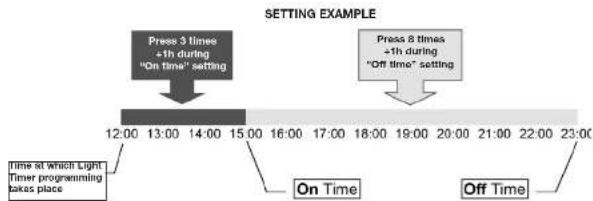
flowchart
graph TD
    A["Press 3 times +1h during 'On Time' setting"] --> B["Time at which Light Timer programming takes place"]
    C["Press 8 times +1h during 'Off Time' setting"] --> D["On Time"]
    E["Off Time"] --> F["Off Time"]
In case of power shortage
In case of power shortage, whatever the cause, the system keeps in memory the status of the lights before the power shortage occurred, either in manual or automatic mode. This means that if the lights were on before the power shortage, they will light up again after power is restored. In the same way, if they were off before the power shortage, they will remain off after power is restored.
If the automatic On and Off times are set, after power is restored both times will be delayed by the same time as the duration of the power failure. With reference to the example above, if a power shortage lasts 30 minutes, the lights
will switch on at 15:30 and off at 23:30. If the delay makes On and Off times inadequate, reset the Timer and set On and Off times once again.
How to reset the Light-Timer
To reset the Light-Timer, keep +1h button pressed for at least 5 seconds until the LED light switches off. After the reset operation, the lights are off and no time is set for the automatic mode operation.uring "On time" setting
Troubleshooting: If the fluorescent tubes do not illuminate
If the fluorescent lamp(s) do not illuminate, even though the Light Timer or the line cord switch are operating correctly, proceed as follows:
- Unplug the Strip-Light.
- Verify that the fluorescent tubes are correctly positioned inside the lamp-holders (refer to Section # 7 Point # 4, titled "Canopy Strip-Light Maintenance").
- If the problem is not solved after doing the above, replace one tube at a time and test it.
IMPORTANT: If one of the 2 fluorescent bulbs of the same Strip-Light is not operating, the other will not light up, even though it is in good working order and has been correctly installed.
- If the problem is not solved after following the above, contact your Hagen retailer or Hagen customer service.
SECTION #7
MAINTENANCE
WARNING: Always disconnect all appliances in the aquarium from the electrical supply before placing hands in the water, before putting on or taking off parts, and whenever the appliances are being installed, maintained or handled.
IMPORTANT: If the Strip-Light canopy includes the Light-Timer, it is necessary to reprogram the automatic ON/OFF times after restoring power.
I. AQUARIUM GLASS TANK CARE AND MAINTENANCE
The aquarium tank does not require particular maintenance, except regular cleaning. Special care should always be taken not to damage the silicone seals while cleaning and maintaining your aquarium.
! NEVER use soap, detergents or any other aggressive chemical substances to clean your aquarium tank, as they may damage the silicone seals.
Do not use magnetic algae scrapers which are designed for standard flat panel aquariums.
In case of salt water aquariums, the following recommendations should be followed:
! ADDITIONAL SAFETY INSTRUCTIONS FOR THE INSTALLATION AND MAINTENANCE OF SALTWATER AQUARIUMS
It is commonly known that salt water is far more corrosive, electrically conductive, and generally degrades plastic and metal parts at an accelerated rate versus fresh water. To minimize salt accumulations on the aquarium, take note of the following recommendations:
- Make sure that the filter outputs do not spray above the water surface; position them below the water surface with a slight downward angle, but allow for surface movement (which contributes to oxygenation).
- If an air pump must be used, frequent removal of salt deposits will be necessary.
- Keep the water level as constant as possible (top up regularly to make up for evaporation). This is beneficial in providing stable salinity and will help protect the canopy.
- Clean all aquarium components that come into contact with salt water at least every 15 days. Use a wet cloth (never use chemical products or detergents). Simple lemon juice may be useful for removing calcareous encrustation. Rinse thoroughly afterward to eliminate acid residue.
REPLACEMENT PARTS
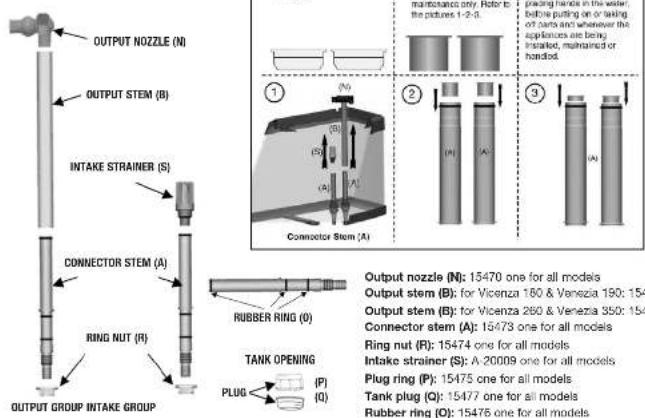
text_image
OUTPUT NOZZLE (N) OUTPUT STEM (B) INTAKE STRAINER (S) CONNECTOR STEM (A) RING NUT (R) OUTPUT GROUP INTAKE GROUP RUBBER RING (O) TANK OPENING PLUG (P) (Q) ① ② ③ ④ ⑤ ⑥ ⑦ ⑧ ⑨ ⑩ ⑪ ⑫ ⑬ ⑭ ⑮ ⑯ ⑰ ⑱ ⑲ ⑳ ⑴ ⑵ ⑶ ⑷ ⑧ ⑨ ⑩ ⑪ ⑫ ⑬ ⑭ ⑮ ⑯ ⑰ Output nozzle (N): 13470 one for all models Output stem (B): for Vicenza 160 & Venezia 190: 154 Output stem (B): for Vicenza 260 & Venezia 350: 154 Connector stem (A): 15473 one for all models Ring nut (R): 15474 one for all models Intake strainer (S): A-20009 one for all models Plug ring (P): 15475 one for all models Tank plug (Q): 15477 one for all models Rubber ring (O): 15476 one for all modelsCAUTION - This or any aquarium heater must never be operated outside of water. Before removing from water, unplug and allow 30 minutes for heater to cool. Always unplug heater during water changes or maintenance.

Once removed from water, never place the heater on a flammable surface

Never attempt to open or repair the heater
Once set, the AquaClear heater requires no particular maintenance.
Clean the glass regularly to remove encrustation and deposits that could impair the heating performance and the sensitivity of the thermostat. Limestone deposits on the glass tube can be removed either by using drops of lemon juice or by soaking the heater tube in white vinegar. It is important to then rinse with fresh water before repositioning the heater in the aquarium. Water must cover the entire glass portion of the heater at all times.
3. EXTERNAL FLUVAL FILTER MAINTENANCE
MEDIA CARE
Filter Media must be periodically cleaned or replaced in accordance with instructions on individual packages. Actual lifespan of media will vary based on usage and the specific characteristics of each aquarium. To remove and replace media, follow the instructions below.
IMPORTANT: Never replace all media at the same time. Stagger filter media changes so that some older media remains in use. This ensures reseeding of beneficial bacteria, so that colonies discarded with old media will be replaced by vigorous new ones. To enhance bacterial action, use Nutrafin Cycle Biological Aquarium Supplement every time you change the media. All rubber parts: cover gasket, primer stem, Aquastop Valve and seal rings should be periodically lubricated.
I. DRAINING THE FILTER
- Close the Aquastop valve by lifting the black lever all the way up. This seals off the intake and out put hosing connections from the tank to the filter.
- Unplug the power cord.
- Lift the silver lock lever to release the Aquastop valve.
- Hold the unit by the canister, not the cover, and move it to an appropriate flat surface near a sink or other drain. (Be sure to keep it upright to avoid spills.)
- Release the lift-lock clamps; then push down on clamps to lift the cover/pump housing off the canister and set it aside.
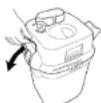
Release the lift-lock clamps

Then push down on clamps to lift the cover/pump housing off the canister
- Holding the media cover in place, tilt the canister over the sink or drain, and pour out as much water as possible.
-
Media and foam screen will be saturated with water. If your sink is not large enough to hold them, have an appropriate bucket nearby. Lift the foam screen, media cover, and media baskets out of the canister and place them in your sink or bucket.
-
Rinse the interior of the canister with clear water. NEVER use soap or detergents when cleaning the canister or rinsing the foam screen or media baskets. Traces of cleaning products may remain on surfaces and damage sensitive fish tissues.
2. CLEANING OR REPLACING MEDIA
- Replace chemical media, as needed. Chemical media cannot be cleaned.
- Rinse biological media with aquarium water, never tap water, or replace as required. Never replace all biological media at one time, as valuable colonies of beneficial bacteria would be lost.
- Rinse foam using aquarium or de-chlorinated tap water or replace foam screen as needed. For the most thorough cleaning possible: slide the foam out of the screen frame and rinse each piece separately; rinse and wipe screen; then reassemble. Be sure that the foam is protruding from the top screen. Rinse any other mechanical media also. Never use soap or detergents on foam or foam screen, as traces of cleaning products could harm fish.
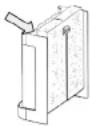
Be sure that the foam is protruding from the top of the screen
3. REASSEMBLING THE UNIT
DO NOT FILL THE CANISTER WITH WATER WHEN REASSEMBLING THE UNIT
- Place rinsed and filled media baskets back in the canister and put the cover back on top basket.
- Replace the foam screen in the canister. (Insert with flat end down.)
- Inspect and lubricate the gasket as needed.
- Replace the cover, making certain that the MSF logo and power cord are properly aligned.
- Use the lock-lift clamps to close the cover securely.
- Place the unit back in position; re-insert the Aquastop valve, and push the silver lever down to lock it in place.
- Push down on the black lever to open the Aquastop valve. Water should start flowing immediately. Allow the canister to fill completely, restore the correct water level in the aquarium and then plug the power cord back into the electrical outlet.
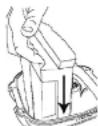
Replace foam screen in canister (insert with flatend down).

IMPORTANT: If the canister is not full before the filter is plugged in, it may not work properly. The filter unit should never be allowed to run dry. Running the unit dry may result in damage to the motor.
IMPELLER CARE
The impeller well has an effective self-cleaning feature. However, it is recommended that you remove the impeller cover and inspect the impeller as part of your routine maintenance. Keeping the impeller clean lengthens its life and the life of the motor.
IMPORTANT: The impeller fan has a ceramic shaft, which is resistant to wear and tear, but is still fragile. Handle carefully during maintenance.
- Remove the impeller cover: squeeze the two tabs and lift off.
- If the impeller needs cleaning, grasp the fan and draw it gently from the well. Rinse it under clean water.
-
If the well needs cleaning, wipe gently with a Fluval Cleaning Brush.
-
Replace the impeller in the well:
a. Align the shaft so it is seated in the ring on the cover and press the cover into place.
b. Slide the tabs outward until they "click" to indicate the cover is locked in position.
Models 105 and 205 only:

WARNING: The yellow ceramic impeller shaft is permanently attached to the plastic holder and is brittle to lateral pressure. Take extreme care when handling the impeller.
Do not remove the ceramic shaft assembly unless it breaks.
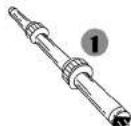
If you need to remove it, insert the ceramic shaft tool until you feel it engage at the base of the shaft, then pull up gently.
To replace it, position a new magnetic impeller on the assembly and insert into the impeller well. Push on the impeller fan until the assembly locks into place.
Replace foam screen in canister. (Insert with flat end down.)
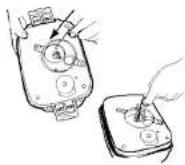
Models 305 and 405 only:

WARNING: The ceramic impeller shaft is fragile. Take extreme care when handling it. The shaft is held at the bottom of the impeller well by a rubber support. The shaft can be extracted easily and reinserted by hand; however, pay close attention to be certain the rubber support does not become unseated. (Always replace the impeller cover to ensure proper alignment).
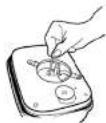
The Impeller will wear out over time. A replacement may be ordered from your local Fluval dealer or by contacting Customer Service at Rolf C. Hagen (UK) Ltd. or Rolf C. Hagen Inc. in Canada.
REPLACEMENT PARTS
Order replacement part from your Fluval dealer or by contacting Customer Service.
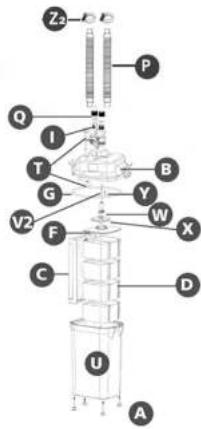
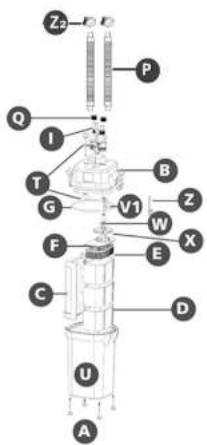
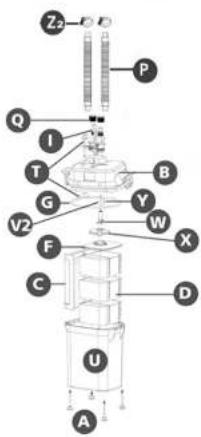
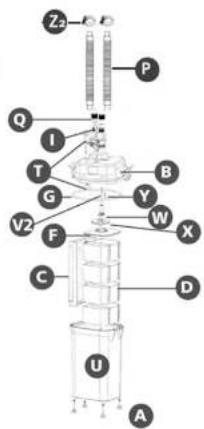
| 205 | 305 | |||
| A | Rubber Feet | A-20121 | A-20121 | |
| B | MSF Motor Housing A-20185 A-20190 | A-20195 | ||
| C | Foam Screen Frame A-20137 | A-20137 A-20177 | ||
| D | Media Basket | A-20045 | A-20070 | A-20070 |
| E | Media Basket Tray | A-20047 | — | — |
| F | Media Basket Cover | A-20042 A-20067 | A-20067 | |
| G | Gasket | A-20038 | A-20063 | A-20063 |
| I | Aquastop Valve | A-20060 | A-20060 | A-20060 |
| P | Ribbed Hosing | A-20012 | A-20012 | A-20012 |
| Q | Hose-Lock Nuts | A-20058 | A-20058 | A-20058 |
| T | Instant-Prime Assembly | A-20020 | A-20020 | A-20020 |
| U | MSF Filter Canister | A-20187 A-20192 | A-20197 | |
| V1 | Ceramic Shaft Assembly | A-20041 | — | — |
| V2 | Ceramic Shaft & Rubber Support — | A-20066 | A-20066 | |
| W | Magnetic Impeller | A-20111 | A-20152 | A-20172 |
| X | Impeller Cover | A-20136 | A-20156 | A-20156 |
| Y | Impeller Well Insert | — | A-20174 | A-20174 |
| Z | Ceramic Shaft Tool | A-17015 | — | — |
| Z2 | Metal Clamp | A-20013 | A-20013 | A-20013 |
FLUVAL 205
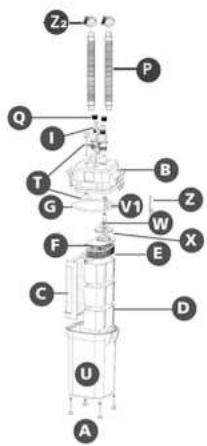
text_image
Z P Q I T G V1 B Z W X F C D U AFLUVAL 305
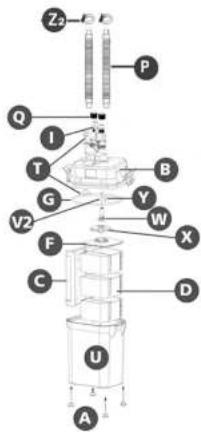
text_image
Z P Q I T G V2 F C D U A B Y W XFLUVAL 405
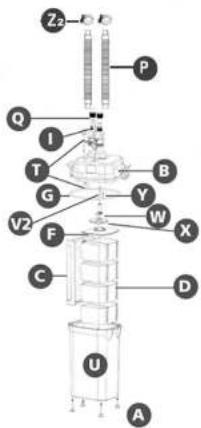
text_image
Z P Q I T B G Y V2 F W X C D U AA-20121
4. STRIP-LIGHT CANOPY MAINTENANCE

WARNING: Fluorescent tubes are made of glass. Handle Strip-Lights and tubes with care.

RECOMMENDATION: Use only standard aquarium normal output fluorescent bulbs as per the wattage rating indicated on the electrical data label located on the Strip-Light. Always use original spare parts only.
REPLACING THE FLUORESCENT TUBE(S) OF THE STRIP-LIGHT 1. Disconnect the Strip-Light from power supply.

WARNING: Be sure you unplug the power cord. Switching off the lights with the line cord switch or the Light Timer is NOT enough.
- Remove the Strip-Light from the aquarium and place it with the fluorescent tubes facing up on a solid surface, far enough from the aquarium to prevent parts from accidentally falling into the water.
- Unscrew the lamp holder threaded fitting with one hand while supporting the lamp holder with the other hand (to prevent accidental cracking of this plastic component). This procedure must be performed at both ends of each fluorescent tube being replaced.
- Carefully slide out the old fluorescent bulb.
- Slide the two threaded fittings with gaskets onto the new fluorescent tube, towards the middle, so that the threads are facing the ends of the fluorescent bulb (as shown in diagram 1). Ensure that the gaskets are properly positioned.
- Carefully insert the pins of the new fluorescent tube into the lamp holder slots until it clicks.
- Carefully support the lamp holders with one hand and gently screw the threaded fittings with the other hand. Firmly hand-tighten these fittings, the use of any tool is not recommended. These units are plastic, avoid cross-threading the fittings.
- Place the Strip-Light back on the aquarium.
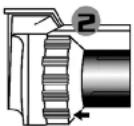
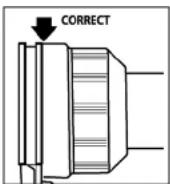
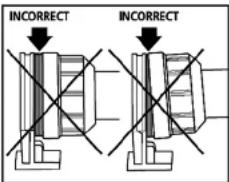
WARNING: To prevent moisture from entering the lamp socket and corroding the electrical contacts, fully tighten threaded fittings onto socket. Ensure there are no visible threads or gaps between the lamp socket and threaded fittings. Ensure threaded fittings are not cross threaded onto the lamp socket.
text_image
INCORRECT INCORRECT5. REPLACING THE STRIP-LIGHT REFLECTOR
The Strip-Light is equipped with replaceable reflectors to ensure maximum light emission. To maintain optimal light output, it is recommended to replace the reflectors when they become discolored.
-
Disconnect the Strip-Light from power supply.
WARNING: Be sure you unplug the power cord. Switching off the lights with the cord line switch or the Light Timer is NOT enough -
Remove the Strip-Light from the aquarium and place it with the fluorescent tubes facing up on a solid surface, far enough from the aquarium to prevent parts from accidentally falling into the water.
- Removal of the fluorescent lamp is necessary to access the white plastic reflector (refer to "Replacing the fluorescent tube(s)" paragraph above).
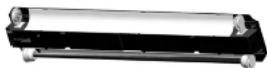
- Gently press on the edge of the white plastic reflector panel at both ends, simultaneously, beside the upper locking tabs. This will release the reflector, it can now be lifted out.
- Position the new reflector by first locating it within the lower locking tabs and then gently pressing it, simultaneously, at both ends beside the upper locking tabs until it snaps into place.
- Reinstall the fluorescent tube (refer to "Replacing the fluorescent tube(s)" paragraph above).
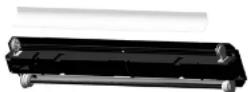
6. CLEANING THE STRIP LIGHT CANOPY
Disconnect the Strip-Light from power supply before any maintenance operation.

WARNING: Be sure you unplug the power cord. Switching off the lights with the line cord switch or the Light Timer is NOT enough.

Never place the Strip-Light under water jets or submerge in water.
No special maintenance is required for the Fluval Strip-Light Canopy, other than periodic cleaning with a damp cloth (never use harsh chemical products or detergents). To remove calcareous deposits, use a mild acid such as lemon juice, then wipe down the surface with a damp cloth to remove any residue. Saltwater aquariums require regular and thorough cleaning to remove salt accumulations on the Strip-Light Canopy and the fluorescent tube(s). Please refer to paragraph "Additional safety instructions for the installation and maintenance of saltwater aquariums" in the Introduction.
7. REPLACEMENT PARTS
Always use genuine Fluval spare parts to ensure continued performance and safety.
| Model | Fluorescent tubes | Threaded | Reflector fitting | Complete (no bulbs) | Step strip | |
| Vicenza 180 | T5 2x24W 15499 | 15490 15460 | ||||
| Vicenza 260 | T5 2x39W 15499 | 15491 15462 | ||||
| Venezia 190 | T5 2x24W 15499 | 15490 15464 | ||||
| Venezia 350 Strip 39W | T5 2x39W 15499 | 15491 15466 | ||||
| Venezia 350 Strip 8W | T5 2x8W | 15499 | 15492 | 15488 |
natural_image
Four identical grayscale office furniture display cases with curved and striped designs, no visible text or symbols.Vicenza 180 Vicenza 260 Venezia 190 Venezia 350
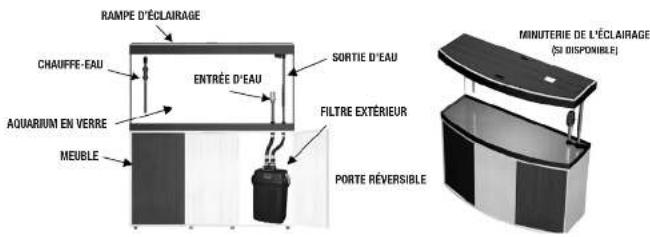
PRINCIPALES PIÈCES DES AQUARIUMS ÉQUIPÉS FLUVAL
text_image
RAMPE D'ÉCLAIRAGE CHAUFFE-EAU ENTRÉE D'EAU AQUARIUM EN VERRE MEUBLE SORTIE D'EAU FILTRE EXTÉRIEUR PORTE RÉVERSIBLE MINUTERIE DE L'ÉCLAIRAGE (SI DISPONIBLE)MESURES DE SÉCURITÉ IMPORTANTES
natural_image
Exterior view of a modern office building (no signage)
natural_image
Exterior view of a modern office building (no signage)natural_image
Mechanical assembly diagrams showing gear and cam mechanism (no text or symbols)natural_image
Cross-sectional diagram of a mechanical device showing internal components and fluid flow (no text or labels)flowchart
graph LR
    A["1 On-time setting"] --> B["2 Off-time setting"]
    C["1 Off-time setting"] --> D["2 On-time setting"]
    E["1 On-time setting"] --> F["2 Off-time setting"]
    G["1 On-time setting"] --> H["2 Off-time setting"]
    I["1 On-time setting"] --> J["2 Off-time setting"]
    K["OK"] --> L["OK"]
text_image
Z P Q I T G V1 B Z W X F C D U AFLUVAL 305
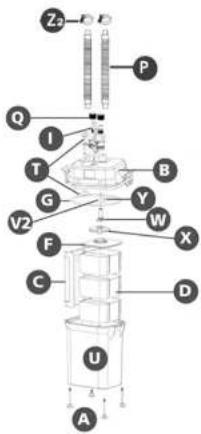
text_image
Z P Q I T G V2 F C D U A B Y W XFLUVAL 405
text_image
Z P Q I T G V2 F C D U A B Y W X4. ENTRETIEN DE LA RAMPE D'ÉCLAIRAGE

natural_image
Two black plastic cylindrical components with metallic fittings, shown from different angles (no text or symbols visible)6. NETTOYAGE DE LA RAMPE D'ÉCLAIRAGE
natural_image
Two modern architectural or furniture models with metallic panels and curved surfaces, no visible text or symbols.natural_image
Mechanical assembly diagrams showing gear and cam mechanism (no text or labels)natural_image
Cross-sectional diagram of a mechanical device showing internal components and housing (no text or labels)m = 311
2
The image is too blurry to recognize any text content.
070
FLUVAL 205
text_image
Z P Q I B T V1 Z G W E X F C D U AFLUVAL 305
text_image
Z P Q I T B G Y V2 W X F C D U AFLUVAL 405
text_image
Z P Q I T G V2 F B Y W X C D U Anatural_image
Four identical grayscale and black-and-white product display cases with curved and rectangular designs (no text or symbols visible)Vicenza 180 Vicenza 260 Venezia 190 Venezia 350
natural_image
Exterior view of a modern office building (no signage)
natural_image
Exterior view of a modern office building (no signage)natural_image
Cross-sectional diagram of a mechanical device showing internal components and housing (no text or labels)106 107
SECCIÓN NO. 3
Provided that the instructions have been followed, Rolf C. Hagen guarantees this product for defective parts and workmanship for a period of 2 years from the date of purchase. This guarantee excludes any damage through accident or misuse.
This guarantee does not affect your statutory rights.
If at sometime in the future you have cause to claim under the guarantee you will need to provide proof and date of purchase and we recommend that you retain your receipt for this purpose. We reserve the right to repair or replace, at our discretion.
Rolf C. Hagen wishes you many hours of enjoyment with your Fluval aquarium.
FRENCH:
California Dr. Whitwood Industrial Estate
Castleford, W. Yorkshire WF10 50H
Tel.: 01977 556622
FRANCE:
Rolf C. Hagen France S.A.
Montreal, Quebec, H9X OA2
U.K.: Rolf C. Hagen (U.K.) Ltd.,
Castleford, W. Yorkshire WF10 5QH
France: Hagen France SA.,
F-77388 Combs la Ville