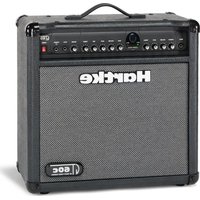
GT60C - Receiver Hartke - Free user manual and instructions
Find the device manual for free GT60C Hartke in PDF.


| Product Type | Guitar Combo Amplifier |
| Brand | Hartke |
| Model | GT60C |
| Power | 60 Watts RMS |
| Preamplifier | High-voltage 12AX7 tube |
| Number of Channels | 2 (channel 1 clean/crunch, channel 2 saturated) |
| Speaker | 1 x 305 mm (12") Hartke GXL12, 75 Watts |
| Cabinet | Open/closed back, plywood and MDF, vinyl covering |
| Reverb | Built-in spring, with level control |
| EQ | Channel 1: BASS, TREBLE; Channel 2: BASS, MID, TREBLE |
| Inputs | 1 x 6.35 mm guitar jack, 1 x RCA CD/MP3 (line level) |
| Outputs | 1 x 6.35 mm stereo headphone jack, 1 x external speaker jack (4 Ohms min) |
| Effects Loop | Send and Return unbalanced 6.35 mm jacks |
| Footswitch | 6.35 mm jack input for channel switching |
| Power Supply | AC mains, fuse: 1 A (US/Japan), 2 A (UK/Europe) |
| Dimensions (H x W x D) | 483 mm x 508 mm x 305 mm |
| Weight | 21.82 kg |
| Construction | Steel chassis, plywood and MDF baffle, mesh grille |
| Maintenance and Cleaning | Clean with a damp cloth. Do not block ventilation openings. |
| Safety | Do not expose to moisture. No user-serviceable parts. |
| Warranty | Manufacturer warranty – requires online registration (see manual) |
Frequently Asked Questions - GT60C Hartke
User questions about GT60C Hartke
0 question about this device. Answer the ones you know or ask your own.
Ask a new question about this device
Download the instructions for your Receiver in PDF format for free! Find your manual GT60C - Hartke and take your electronic device back in hand. On this page are published all the documents necessary for the use of your device. GT60C by Hartke.
USER MANUAL GT60C Hartke
WARNING: To reduce the risk of fire or electric shock, do not expose this unit to rain or moisture. To reduce the hazard of electrical shock, do not remove cover or back. No user serviceable parts inside. Please refer all servicing to qualified personnel. The lightning flash with an arrowhead symbol within an equilateral triangle, is intended to alert the user to the presence of uninsulated "dangerous voltage" within the products enclosure that may be of sufficient magnitude to constitute a risk of electric shock to persons. The exclamation point within an equilateral triangle is intended to alert the user to the presence of important operating and maintenance (servicing) instructions in the literature accompanying the product.
Important Safety Instructions
- Please read all instructions before operating the unit.
- Keep these instructions for future reference.
- Please heed all safety warnings.
- Follow manufacturers instructions.
- Do not use this unit near water or moisture.
- Clean only with a damp cloth.
- Do not block any of the ventilation openings. Install in accordance with the manufacturers instructions.
-
Do not install near any heat sources such as radiators, heat registers, stoves, or other apparatus (including amplifiers) that produce heat.
-
Do not defeat the safety purpose of the polarized or grounding-type plug. A polarized plug has two blades with one wider than the other. A grounding type plug has two blades and a third grounding prong. The wide blade or third prong is provided for your safety. When the provided plug does not fit your outlet, consult an electrician for replacement of the obsolete outlet.
-
Protect the power cord from being walked on and pinched particularly at plugs, convenience receptacles and at the point at which they exit from the unit.
-
Unplug this unit during lightning storms or when unused for long periods of time.
-
Refer all servicing to qualified personnel. Servicing is required when the unit has been damaged in any way, such as power supply cord or plug damage, or if liquid has been spilled or objects have fallen into the unit, the unit has been exposed to rain or moisture, does not operate normally, or has been dropped.
Hartke GT60 Guitar Amplifier Features....3
Guided Tour - Front Panel 4
Guided Tour - Rear Panel 6
Setting Up and Using Your Hartke GT60 Guitar Amplifier 7
Using the Footswitch Jack and Effects Loop 9
GT60 Sample Settings....42
Specifications....45
FRANÇAIS
Introduction....10
Copyright 2005, Samson Technologies Corp.
Printed April, 2005 - 2006 v5.0
Samson Technologies Corp.
Phone: 1-800-3-SAMSON (1-800-372-6766)
Fax: 516-364-3888
www.samsontech.com
Introduction
We know you don't like reading owners manuals, but you've just purchased one of the finest guitar amplifiers around, and we want to tell you about it! So, before you plug in and start strumming and shredding, we'd like to suggest you take just a few moments to scan these pages. We'll make it as painless as possible, we promise—and, who knows, you might just pick up a tip or two.
The Hartke GT60 Series amplifiers have been designed for modern guitar players looking for a new sound that respects the tone of a classic amp. The GT60/408 “Piggyback” and GT60C combo are powerful amplifiers, with an amazingly wide variety of tone, allowing guitar players to rediscover the sound from a favorite old vintage amp, or dial up a new sound that’s uniquely their own. Both models feature the GT60, tube-pre, 60-watt, 2-channel amplifier section with a matching GH408 4 x 8-inch mini-stack for the Piggyback, and a custom designed 12-inch speaker in a convertible Closed-back / Open-back design for the GT60C. The GT60 pre-amplifier section features a high voltage, 12AX7 “bootstrap” tube circuit providing a layer of harmonic overtones that add to the warmth and richness of the sound. The 2-channel per-amp design with foot switch control lets you quickly and easily switch from rhythm to lead. Plus, unique Channel 1 circuitry employs VOLUME, BASS, TREBLE plus CRUNCH allowing you to dial up a sweet clean sound, or add a bit of overdrive for a great roots-rock rhythm tone. The Channel 2 has VOLUME, BASS, TREBLE plus MID and high GAIN for smooth to shredding distortions. In addition, special attention was also taken in designing a Reverb effect that you actually want to use! The warm spring sound has been optimized by carefully selecting both the electronic and mechanical components. The GT60’s feature a steel amplifier chassis, enclosures made of rugged Plywood and MDF construction, with durable vinyl covering, and the GH408 is set upon four heavy-duty casters for easy transport. The GT60/408 “Piggyback” and GT60C combo are perfect amplifiers for use in small or large venues. Plus, the CD input and dedicated headphone output makes them awesome practice amps! There are two different GT60 models, and this manual covers the GT60/GH408 “Piggyback” and GT60C combo. Whichever of these models you’ve purchased, you’re assured of robust construction and that great Hartke sound.
In these pages, you'll find a detailed description of the many features of your GT60 Series Amplifier, as well as a guided tour through its front and rear panels, step-by-step instructions for setting up and using the amp, plus full specifications. You'll also find a warranty card enclosed—please don't forget to fill it out and mail it so that you can receive online technical support and so we can send you updated information about this and other Hartke and Samson products in the future. Also, be sure to check out our website (http://www.samsontech.com) for complete information about our full product line.
SPECIAL NOTE: Should your Hartke GT60 Amplifier ever require servicing, a Return Authorization (RA) number is necessary. Without this number, the unit will not be accepted. If purchased in the United States, please call Samson at 1-800-372-6766 for a Return Authorization number prior to shipping. Please retain the original packing materials and, if possible, return the unit in its original carton and packing materials. If purchased outside the United States, please contact your local distributor for warranty information.
Hartke GT60 Guitar Amplifier Features
natural_image
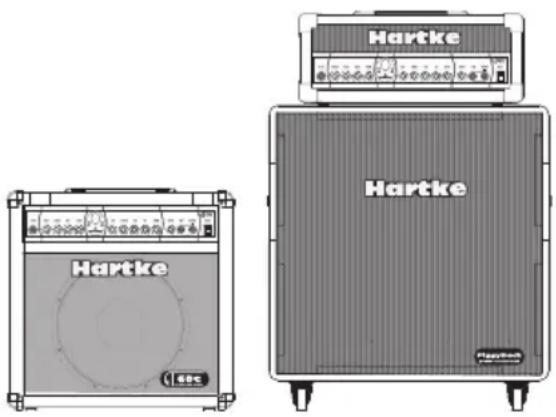
Technical line drawings of Hartke audio equipment (no text or symbols on main components)The Hartke GT60 Series amplifiers have been designed for modern guitar players looking for a new sound that respects the tone of a classic amp. Here are some of their main features:
- The GT60 amplifier offers a roaring 60-Watts of power with a 2-channel front-end control section built around a tube pre-amp.
- The Piggyback is comprised of the GT60 head and matched up with the GH408 mini angled half-stack cabinet with four custom designed eight-inch, 20-Watt Hartke GXL speakers.
- The GT60C combo features a Hartke GXL12 75-Watt twelve-inch speaker installed in a convertible enclosure allowing for closed-back, or open-back configuration.
- The GT60 amplifier utilizes a 12AX7 bootstrap tube pre-amp circuit, which gives the amplifier its inherently personal tone.
- Front panel CHANNEL switch with LED indicators for selecting the GT60's Channel 1 or Channel 2.
- Channel 1 features CRUNCH, VOLUME with BASS and TREBLE equalizer.
- Channel 2 employs GAIN and VOLUME plus an equalizer comprised of BASS, TREBLE and MID.
- The GT60 boasts a sweet and lush spring REVERB with level control.
- A dedicated CD input is included allowing you to hook up a portable CD or MP3 player to practice along with.
- The GT60 features a separate headphone output, which automatically disconnects the speaker output, allowing use as a high-quality practice amp.
- Rear panel Effect IN and Effect OUT jacks for connecting external signal processors.
- Jack for optional footswitch provides great on-stage channel selection.
- Hartke guitar cabinets are constructed from Plywood and MDF (medium density fiber - board) and feature mesh fabric grill and durable vinyl covering.
- Rugged construction makes the GT60 Series eminently road-worthy.
Guided Tour - Front Panel
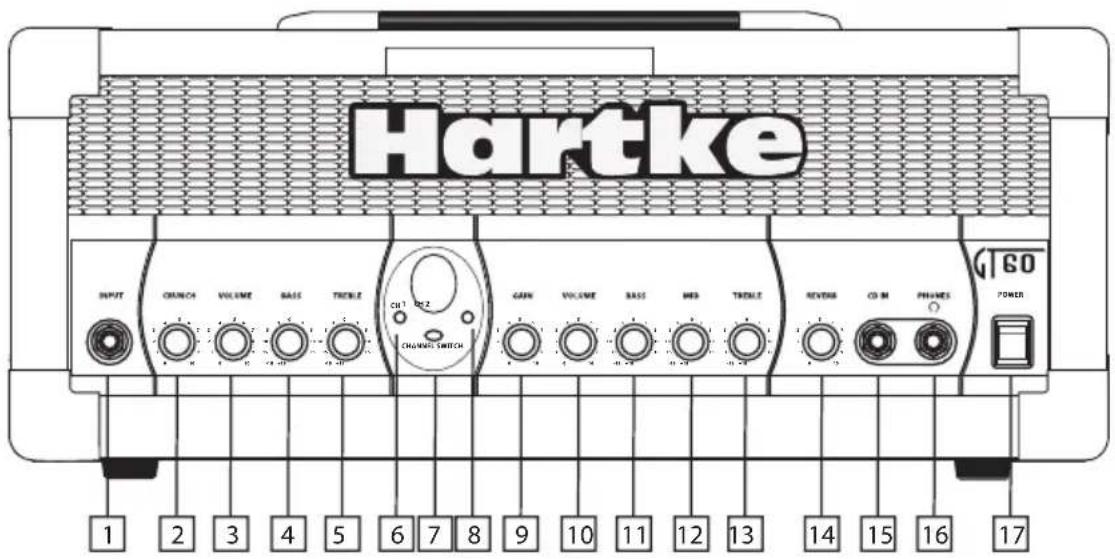
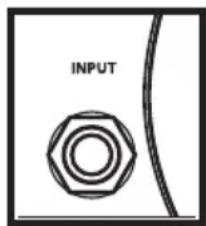
1 INPUT - Connect your guitar to this standard 1/4" unbalanced jack. This GT Series Input was designed to handle the signals from guitar with a wide range of output levels from lipstick singe coils to the beefiest humbucker.
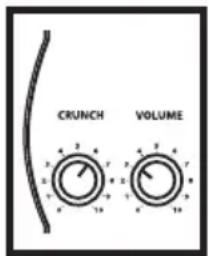
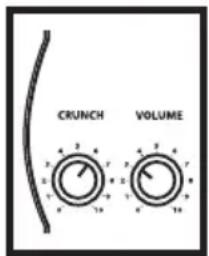
2 CRUNCH – CHANNEL 1's pre-amp level control used to dial up tube overdrive tone for just a touch of harmonic warmth for blues all the way to a dirty rhythm of classic and modern rock
3 VOLUME - (CH1) This is the overall volume control for CHANNEL. 1
4 BASS - This control provides approximately 15 db of cut or boost at 100 Hz, with a peak (bell) curve. When the knob is at the 12 o'clock ("5") position, there is no boost or attenuation (that is, flat response). As it is turned clockwise from the "5" position, the frequency area is boosted; as it is turned counterclockwise from the "5" position, the frequency area is attenuated.
5 TREBLE - This peaking control provides approximately 15 db of cut or boost at 5 kHz. When the knob is at the 12 o'clock ("5") position, there is no boost or attenuation (that is, flat response). As it is turned clockwise from the "5" position, the frequency area is boosted; as it is turned counterclockwise from the "5" position, the frequency area is attenuated.
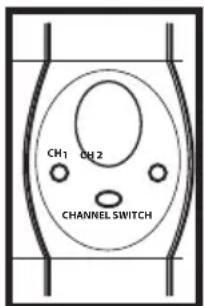
6 CH1 LED – When this light is illuminated, CHANNEL 1 is selected.
7 CHANNEL SWITCH The switch allows you to select either CHANNEL 1 or CHANNEL 2.
8 CH2 LED - When this light is illuminated, CHANNEL 2 is selected.
9 GAIN - CHANNEL 2's pre-amp level control used to dial up tube overdrive tone for classic metal distortion, shredding leads and fat modern chunk.
10 VOLUME (CH2) - This is the overall volume control for CHANNEL 2.
Guided Tour - Front Panel
11 BASS - This control provides approximately 15 db of cut or boost at 100 Hz, with a peak (bell) curve. When the knob is at the 12 o'clock ("5") position, there is no boost or attenuation (that is, flat response). As it is turned clockwise from the "5" position, the frequency area is boosted; as it is turned counterclockwise from the "5" position, the frequency area is attenuated.
12 MID - This control provides approximately 15 db of cut or boost at 2.5 kHz, with a peak (bell) curve. When the knob is at the 12 o'clock ("5") position, there is no boost or attenuation (that is, flat response). As it is turned clockwise from the "5" position, the frequency area is boosted; as it is turned counterclockwise from the "5" position, the frequency area is attenuated.
13 TREBLE - This peaking control provides approximately 15 db of cut or boost at 5 kHz. When the knob is at the 12 o'clock ("5") position, there is no boost or attenuation (that is, flat response). As it is turned clockwise from the "5" position, the frequency area is boosted; as it is turned counterclockwise from the "5" position, the frequency area is attenuated.
14 REVERB – The control knob used to set the level of the internal Spring Reverb.
15. CD IN - Your GT Series amplifier features a CD input which you can use with a portable CD player, cassette, mini disk or MP3 player. You can use the CD input to jam with pre-recorded tracks or to learn a riff from a favorite recording.
16. PHONES - Connect any stereo headphone (600 ohms or less) to this standard 1/4" stereo jack. When a plug is inserted into the headphone jack, the speaker output is disconnected, allowing you to use your GT60 as a practice amplifier. The level of the signal sent to the headphones is determined by the setting of the Volume knob—at the point where a connected speaker would clip, the headphones will clip.
WARNING: Because even the smallest GT Series amplifier is capable of generating extremely high headphone signal levels, always start with the Volume knob at minimum and then slowly turn it up. In particular, a clicking sound is an indication of distortion and possible damage to the headphones (and/or your hearing!); don't let things get to that point!
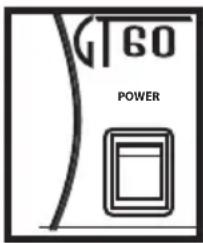
- POWER switch - Use this to power the GT Series on or off. When powered on, an LED inside this switch is lit.
Guided Tour - Rear Panel
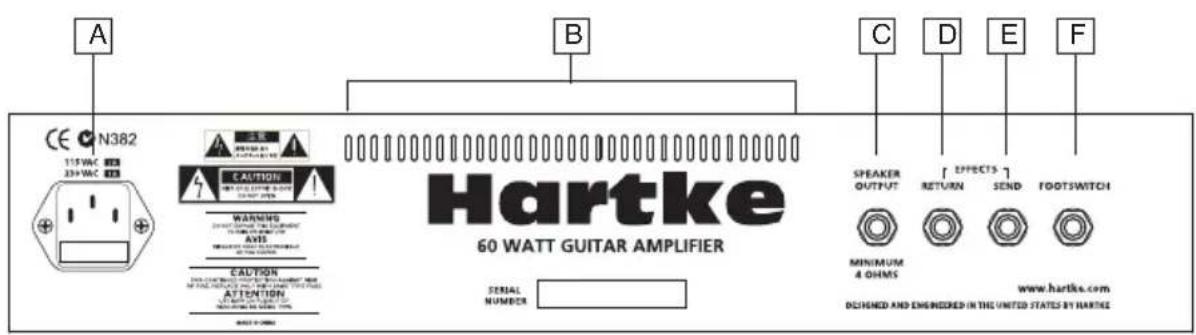
A. AC POWER INLET - Use the supplied grounded AC power cord to connect your GT Series amplifier to mains power. This cord comes supplied with the appropriate plug for your geographic area. CAUTION: Do not use an adapter to defeat the third grounding pin on this plug or severe electric shock may result!
B. VENT - The Vent provides vital cooling to your Model GT60. Make sure that it is kept free of all obstructions and that cool, fresh air is accessible at all times. Also, try to ensure that the Model GT60 is used in a dust-free environment.
C. SPEAKERO OUTPUT – The jack is used to connect the internal driver of the combo cabinet or to the external GH 408 cabinet.
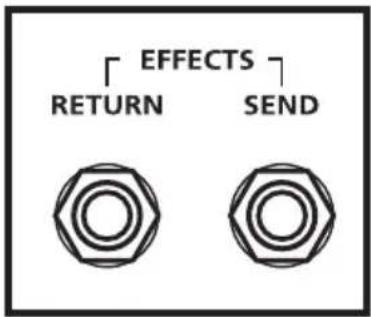
D. EFFECTS RETURN - Use this 1/4" unbalanced jack to return signal from a professional outboard effects processor.*
E EFFECTS SEND - Use this 1/4" unbalanced jack to send signal to a professional outboard effects processor.* Output level is approximately 0 dB to +4 dB and is post-EQ and post-Volume. The signal from this output can also be used as a Direct Out for recording.
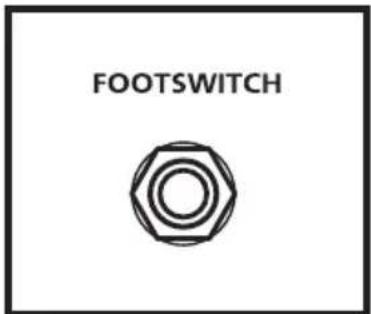
F. FOOTSWITCH jack - Connect a standard footswitch for channel selection.
* In-line effects (such as footpedals) intended for low signal levels should be placed between your guitar and the front panel GT SERIES amplifier Input and not connected with the rear panel Effects Loop jacks.
Setting Up and Using Your Hartke GT60 Guitar Amplifier
- Remove all packing materials (save them in case of need for future service) and decide where the amplifier is to be physically placed. To avoid potential overheating problems, make sure that the rear panel is unobstructed and that there is good ventilation around the entire unit.
- Before you plug-in the power cable, be sure the POWER switch is in the off (down) position. Connect the supplied power cable to the AC INLET located on the rear panel. Then, plug-in the 3-pin AC plug into any grounded AC socket. Don't turn the GT Series on just yet, though.
- If you are using the GT60/408 PIGGYBACK connect the included speaker cable from the SPEAKER OUT located on the GT60's rear panel to the INPUT on the rear of the HG408 speaker cabinet.
WARNING: The GT60 is to be used only when connected to an 4 or 8 ohm speaker load. Use with speaker loads of less than 4 ohms can result in severe damage to the unit due to excessive heat and current limiting and will void your warranty!
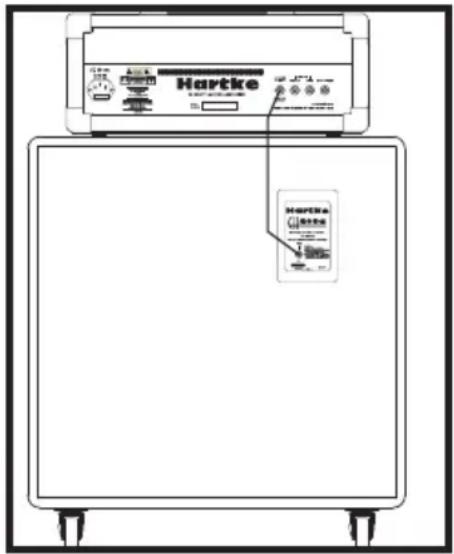
- Use a standard music instrument cable to connect your guitar to the INPUT jack on the front panel.
- On the front panel of the GT Series, turn the CRUNCH and VOLUME on CHANNEL 1, and GAIN and VOLUME on CHANNEL 2 controls to their minimum (fully counterclockwise) position. Set the BASS, TREBLE and MID controls to their "5" position.
- Press the front panel Power switch in order to turn on your GT Series amp; the switch will light up and you will see the tube heating up through the front panel window.
- Press the front panel CHANNEL SWITCH to select CHANNEL 1. Note: If a footswitch is connected to the rear panel FOOTSWITCH input jack you will need to change the channel using the foot switch.
- Set the output of your guitar to maximum and then, while playing, slowly turn the GT Series CHANNEL 1 VOLUME control up until the desired level is achieved. You will get a nice clean tone when using just VOLUME (no CRUNCH) for level, so set it to the level you like.
Setting Up and Using Your Hartke GT60 Guitar Amplifier

- Adjust the CHANNEL 1 BASS and Treble equalizer controls to taste. (When you get a great setting that complement your instrument and playing style, it's a good idea to write it down for future use.)
- Now, press the CHANNEL SWITCH (or the footswitch) to select CHANNEL 2.
- Set the CHANNEL 2 GAIN to "10" position (fully clockwise) and then, while playing, slowly turn the GT Series CHANNEL 2 VOLUME control up until the desired level is achieved.
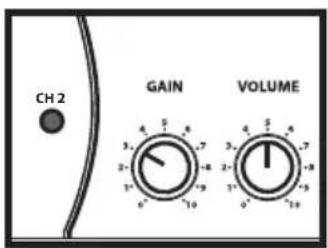
NOTE: With the GAIN control on "10" you will get the most overdrive from CHANNEL 2. You can turn down the GAIN control for less distortion.
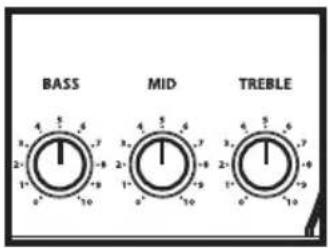
- Adjust the CHANNEL 2 BASS, MID and TREBLE equalizer controls to taste. (When you get a great setting that complement your instrument and playing style, it's a good idea to write it down for future use.)
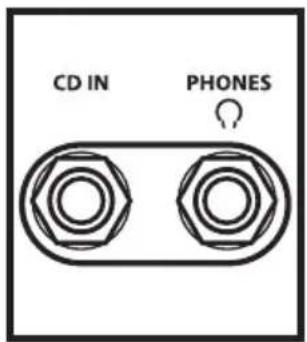
- Your GT series amplifier features a CD input which you can use with a portable CD player, cassette, mini disk or MP3 player to jam with pre-recorded tracks or learn a riff from a favorite tune. In fact, you can plug any line level signal into the CD input including the signal from a keyboard or drum machine. Connect the CD player or other Line level device to the CD Input using standard RCA cable. You will want to use the volume control on the CD player or other Line level device to set the balance between the track and your guitar. So, start with the volume control all the way down and slowly raise it until you reach a good balance with your guitar
- Test the headphone output by turning the Volume control to its minimum (fully counterclockwise) position and then connect a standard stereo headphone to the front panel Phones jack. While playing your guitar, slowly turn the Volume control up—you should hear sound from the headphones and none from the connected speaker.
Using the Footswitch Jack and Effects Loop
-
If you're using a professional external signal processor that has Line-level inputs and outputs, turn your GT Series amp off momentarily and then connect a standard audio cable between the rear panel EFFECTS SEND jack and your effects processor input and another standard audio cable between the EFFECTS RETURN jack and your effects processor output. (If required, multiple effects processors can be daisy-chained together, output to input). Then turn the GT Series amp back on and play your guitar while adjusting the controls of your effects processor(s). For best results, set both the input and output gain of the connected effects processor(s) to 0 dB (unity gain), so that there is no increase or decrease in level whether the effects are switched in or out.
-
The Hartke GT60 has a footswitch jack located on the rear chassis panel. You can connect a standard footswitch terminated with a 1/4-inch phone plug, readily available at your musical instrument retailer, so that channel switching is hands-off easy.
Introduction
natural_image
Three technical illustrations of Hartke audio equipment (no text or symbols visible)

Einleitung
natural_image
Two separate illustrations of Hartke audio equipment cases: one with a front panel and back panel, the other with a front panel and back panel (no visible text or symbols)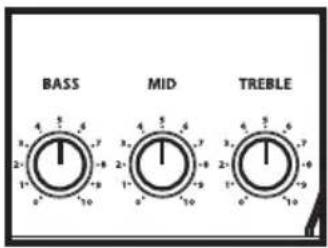
Introducción
natural_image
Technical line drawings of Hartke audio equipment (no text or symbols on main components)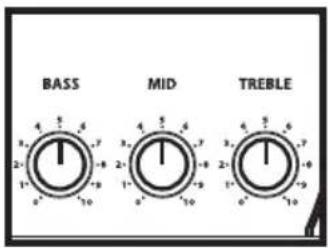
Introduzione
natural_image
Technical line drawings of Hartke audio equipment (no text or symbols on main components)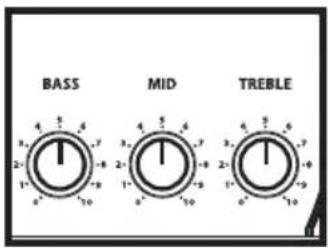
GT60 Sample Settings
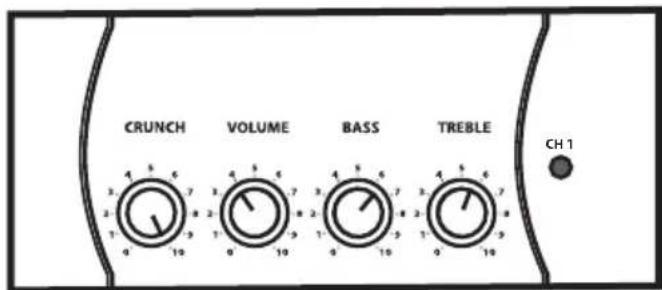
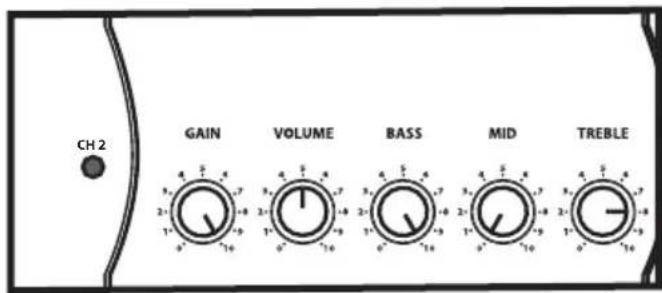
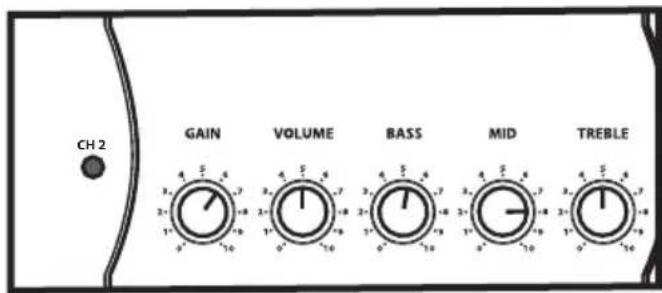
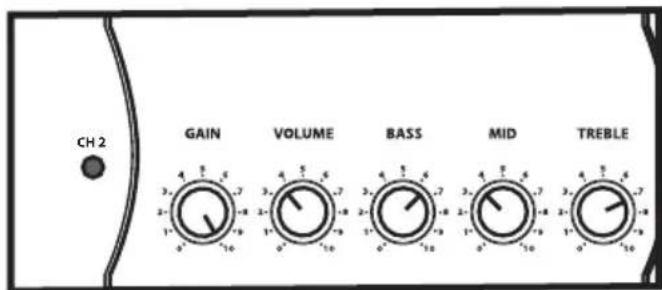
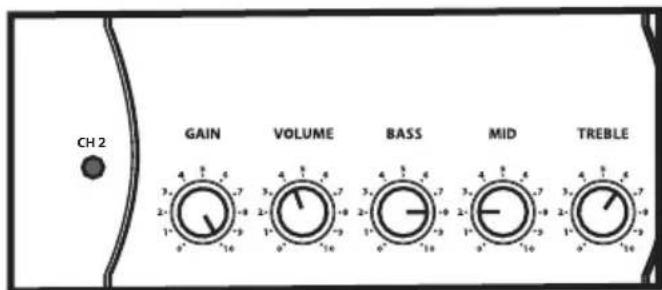
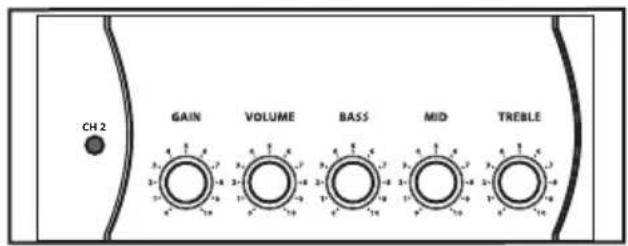
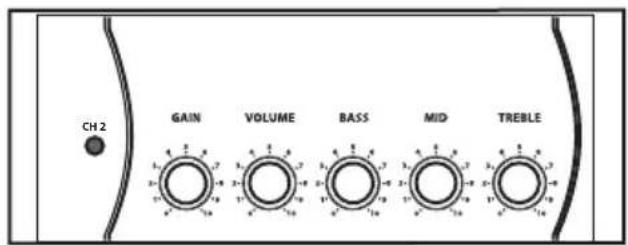
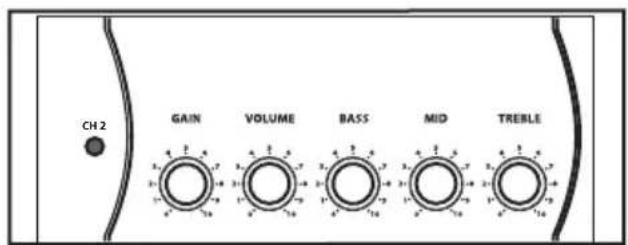
The GT60/408 PIGGYBACK and the GT60C combo are powerful amps with a lot of personality. The amplifiers offer guitarist a wide range of sounds and after playing just a short time; you'll find the tone that's perfectly suited for your playing style and your sound. To get you started, try some of the samples settings below. Don't forget to add a little (or a lot) REVERB to any of the settings. Remember, GT60/408 and GT60C use different speaker systems, plus different guitars are made of different wood and have different pick-ups, so the sound will vary a little bit on each individual set up. But still, the sample settings will get you close enough, so you can use you ear to tweak up the sound that's perfect for you. On page 48 you'll find blank templetes of Channel 1 and Channel 2. Use these templates to write down the settings for your favorite sounds. Feel free to photocopy or scan the template page if needed.
CH-1 - BLUES
CH-2 - NU-METAL
CH-2 - BACK IN BLACK
CH-2 - UN-CHAINED
CH-2 - 80's METAL
Setting Templates
CHANNEL 1
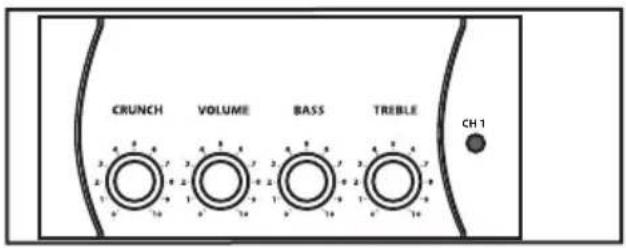
CHANNEL 1
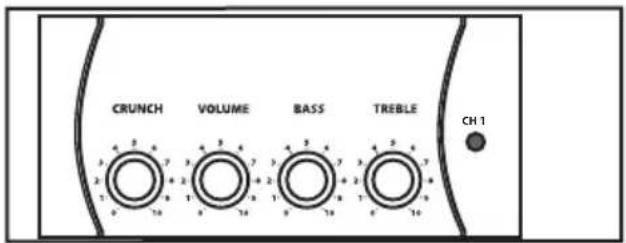
CHANNEL 1
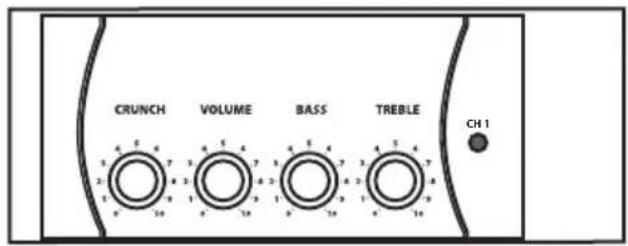
CHANNEL 2
CHANNEL 2
CHANNEL 2
CHANNEL 2

Specifications/Caractéristiques techniques/Technische Daten/Especificaciones técnicas/Specifiche
ENGLISH
Rated Output Power 60 w
Input Impedance 1M OHM
Headphone Output 200 mW (typical) @ 600 ohms
Connector 1/4-inch Phone Jack
Fuse Rating
US & Japan 1A
UK & European 2A
Weight
GT60 / GH408 68 lbs. (30.9 kg)
GT60C 26 lbs. (21.82 kg)
Dimensions
GT60C 19" (483 mm) H x 20" (508 mm) W x 12" (305 mm)D
GT60 7 1/2" (191 mm) H x 20" (508 mm) W x 9" (229 mm) D
GT408 26 1/2" (673 mm) Hx 24" (610 mm) W x 12 1/2" (319 mm)D
FRANÇAIS
Puissance nominale 60 Watts
Impédance d'entrée
1 MOhms
200 mW (typical) @ 600 ohms
Connettore
Jack da 1/4"
Fusibile
US & Giappone
1A
UK & Europa
2A
Peso
GT60 / GH408 30.9 kg (68 lbs.)
GT60C
21.82 kg (26 lbs.)
Dimensioni
GT60C
483 mm (19") A x 508 mm (20") L x 305 mm (12") P
GT60
191 mm (7 1/2") A x 508 mm (20") L x 229 mm (9") P
GT408
673 mm (26 1/2") A x 610 mm (24") L x 319 mm (12 1/2") P
Hartke
575 Underhill Blvd.
P.O. Box 9031
Syosset, NY 11791-9031
Phone: 1-800-3-SAMSON (1-800-372-6766)
Fax: 516-364-3888
www.hartke.com


- Important Safety Instructions
- FRANÇAIS
- Introduction
- Hartke GT60 Guitar Amplifier Features
- Guided Tour - Front Panel
- Guided Tour - Rear Panel
- Setting Up and Using Your Hartke GT60 Guitar Amplifier
- Using the Footswitch Jack and Effects Loop
- Einleitung
- Introducción
- Introduzione
- GT60 Sample Settings
- Setting Templates
- CHANNEL 1
- CHANNEL 2
- Specifications/Caractéristiques techniques/Technische Daten/Especificaciones técnicas/Specifiche
Brand : Hartke
Model : GT60C
Category : Receiver