Blinds Collection - Roller blind EVE - Free user manual and instructions
Find the device manual for free Blinds Collection EVE in PDF.


User questions about Blinds Collection EVE
0 question about this device. Answer the ones you know or ask your own.
Ask a new question about this device
Download the instructions for your Roller blind in PDF format for free! Find your manual Blinds Collection - EVE and take your electronic device back in hand. On this page are published all the documents necessary for the use of your device. Blinds Collection by EVE.
USER MANUAL Blinds Collection EVE
powered by eve. Motionblinds

matter

BUILT ON THREAD
REQUIRES BORDER ROUTER
natural_image
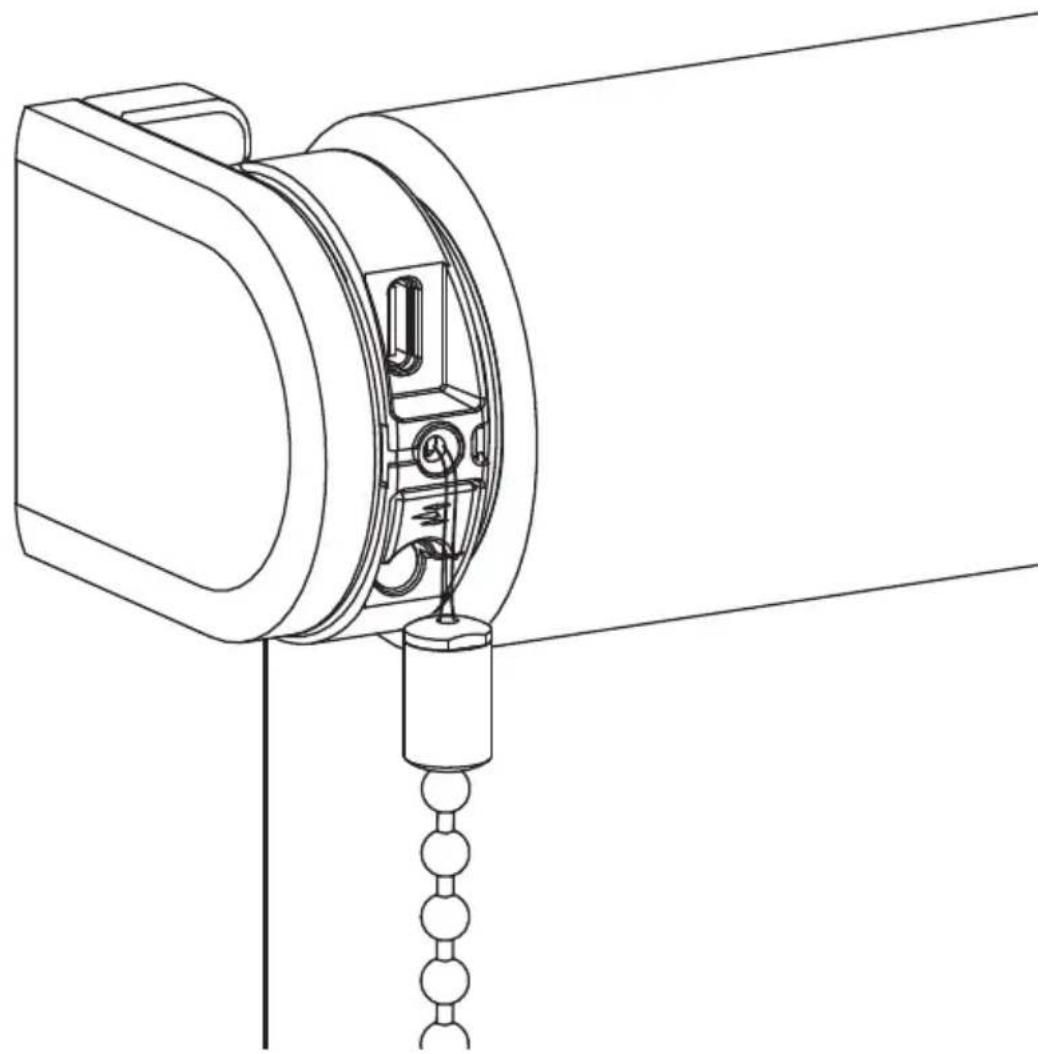
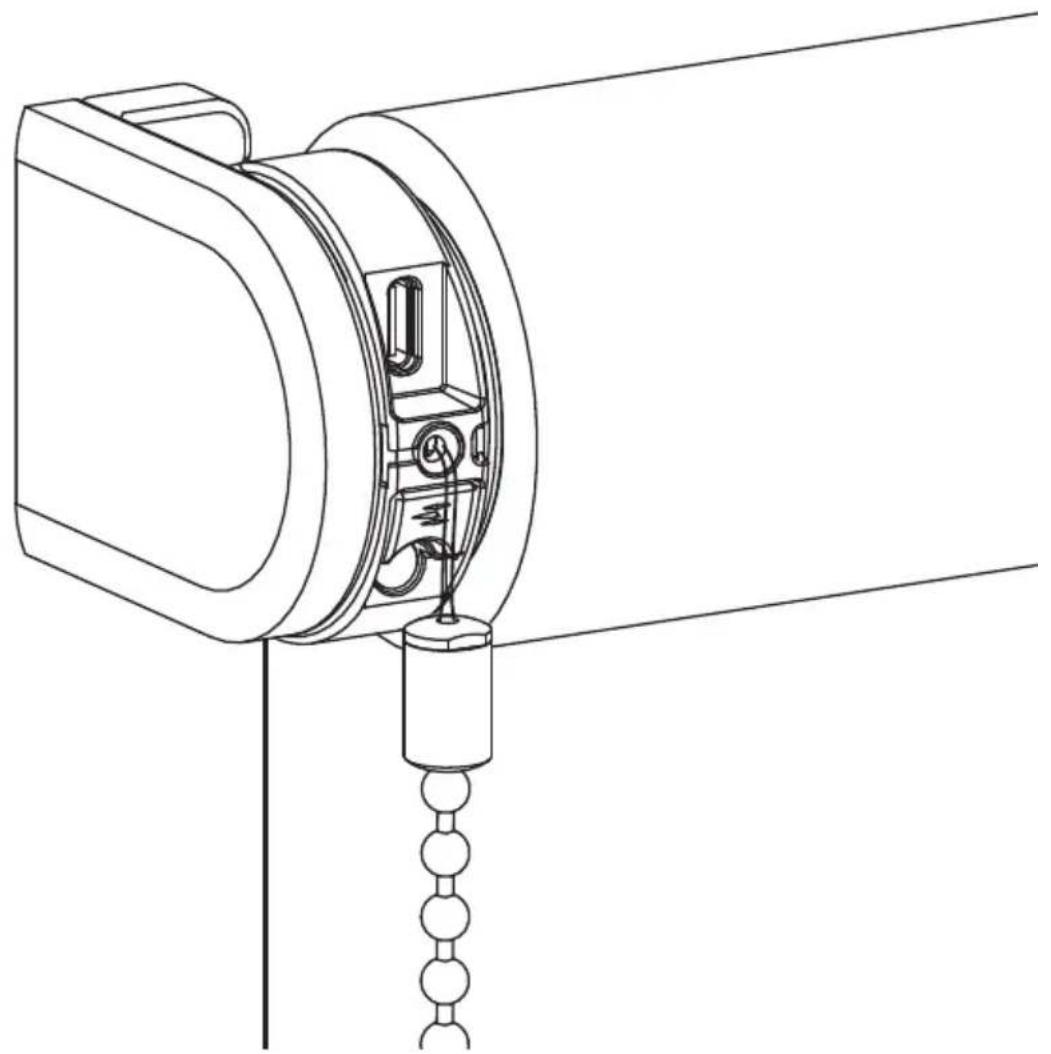
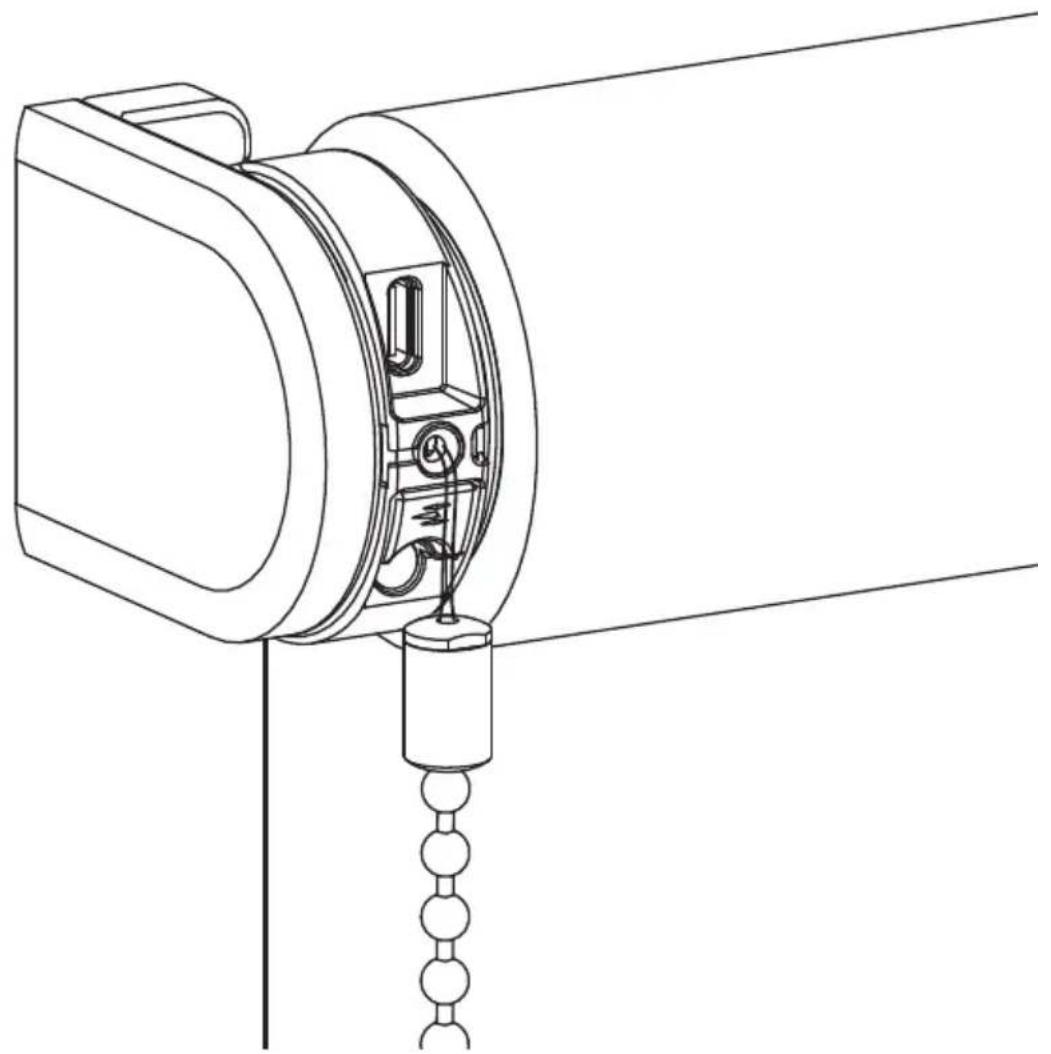
Technical line drawing of a mechanical device with attached chain and hanging component (no text or symbols)i WARNING
Read the instructions carefully before assembling and using the product. Assembly can be completed by non-professionals. For indoor use only.
text_image
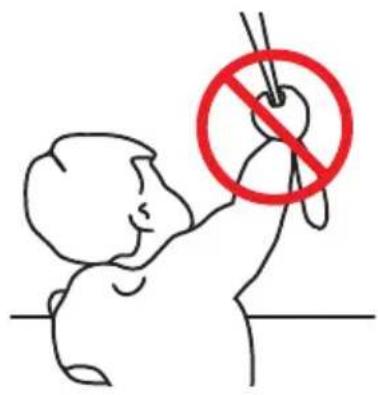
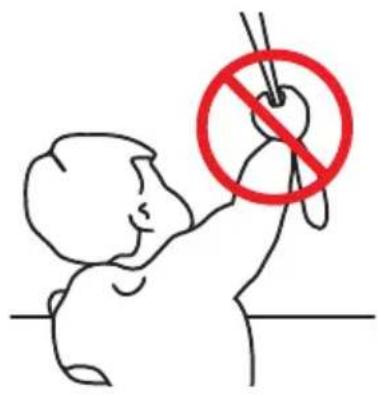
Illustration showing a child using a device with a red prohibition symbol, indicating no usage or no prohibition.■ Young children can strangle themselves with the loop of pull cords, chains and tapes, and cords that operate window coverings.
■ To avoid strangulation entanglement, keep cords out of reach of young children.
Cords may ensnare a child's neck.
■ Move beds, cots and furniture away from window covering cords.
■andDo not tie cords together.
■ Make sure cords do not twist together and form a loop.
Cleaning
Follow these general rules when cleaning the outside of the device and its components:
■ Use a damp, soft, lint-free cloth. Avoid getting moisture in openings.
■ Do not use aerosol sprays, solvents, alcohol, or abrasives.
Service & Support
Do not perform repairs yourself. Do not attempt to open the device or disassemble it. You run the risk of electric shock and voiding the limited warranty. No user-serviceable parts are inside.
Warranty Service
First follow the advice in this manual. If the product appears to be damaged or does not function properly, go to your local dealer for instructions on how to obtain warranty service.
Recycle
This marking indicates that this product should not be disposed with other household wastes throughout the EU. To prevent possible harm to the environment or human health from uncontrolled waste disposal, recycle it responsibly to promote the sustainable reuse of material resources. To return your used device, please use the return and collection systems or contact the retailer where the product was purchased. They can take this product for environmental safe recycling.
i Buttons and functions
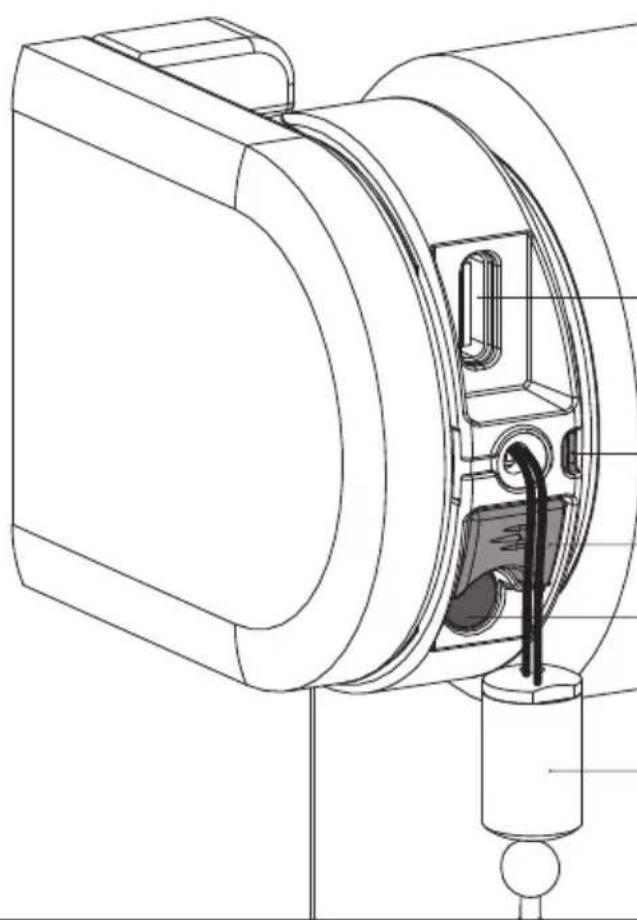
natural_image
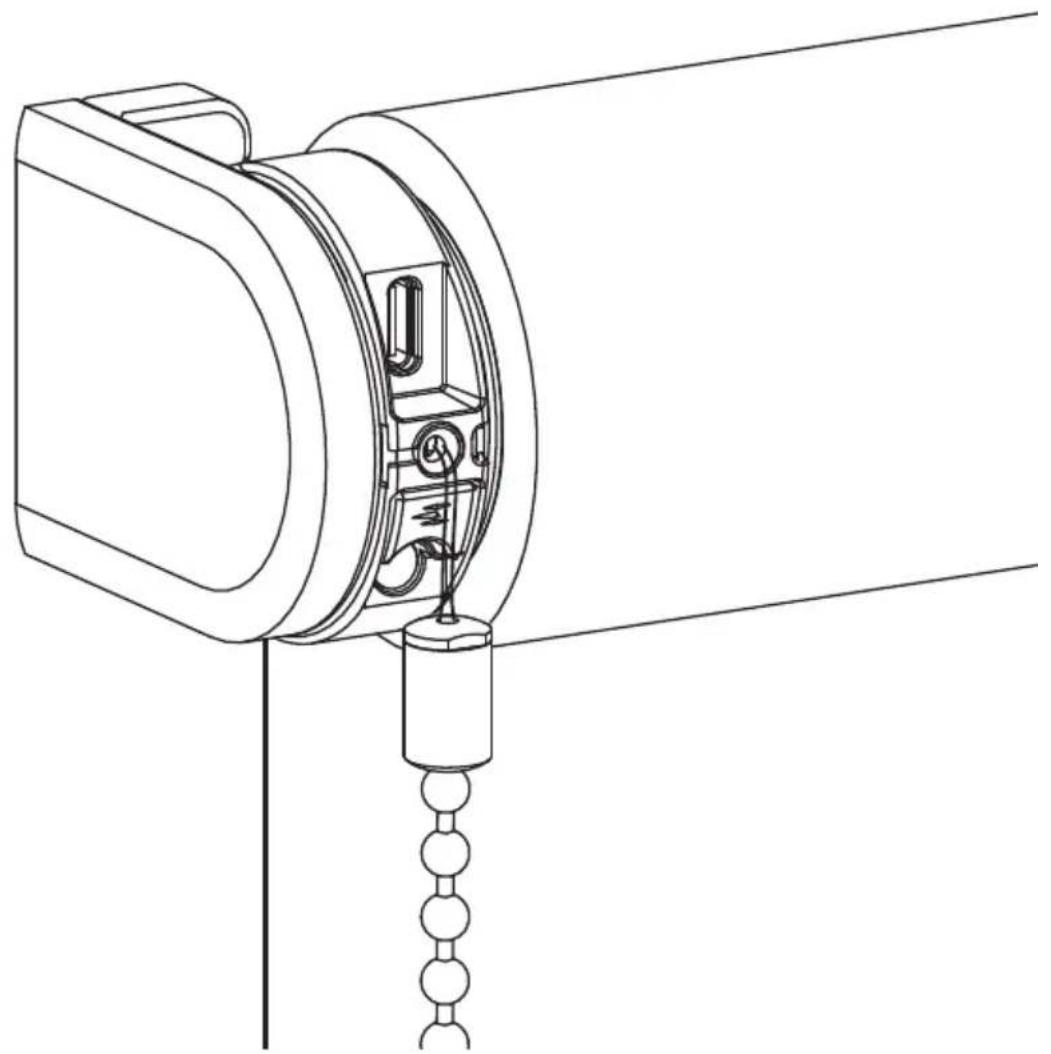
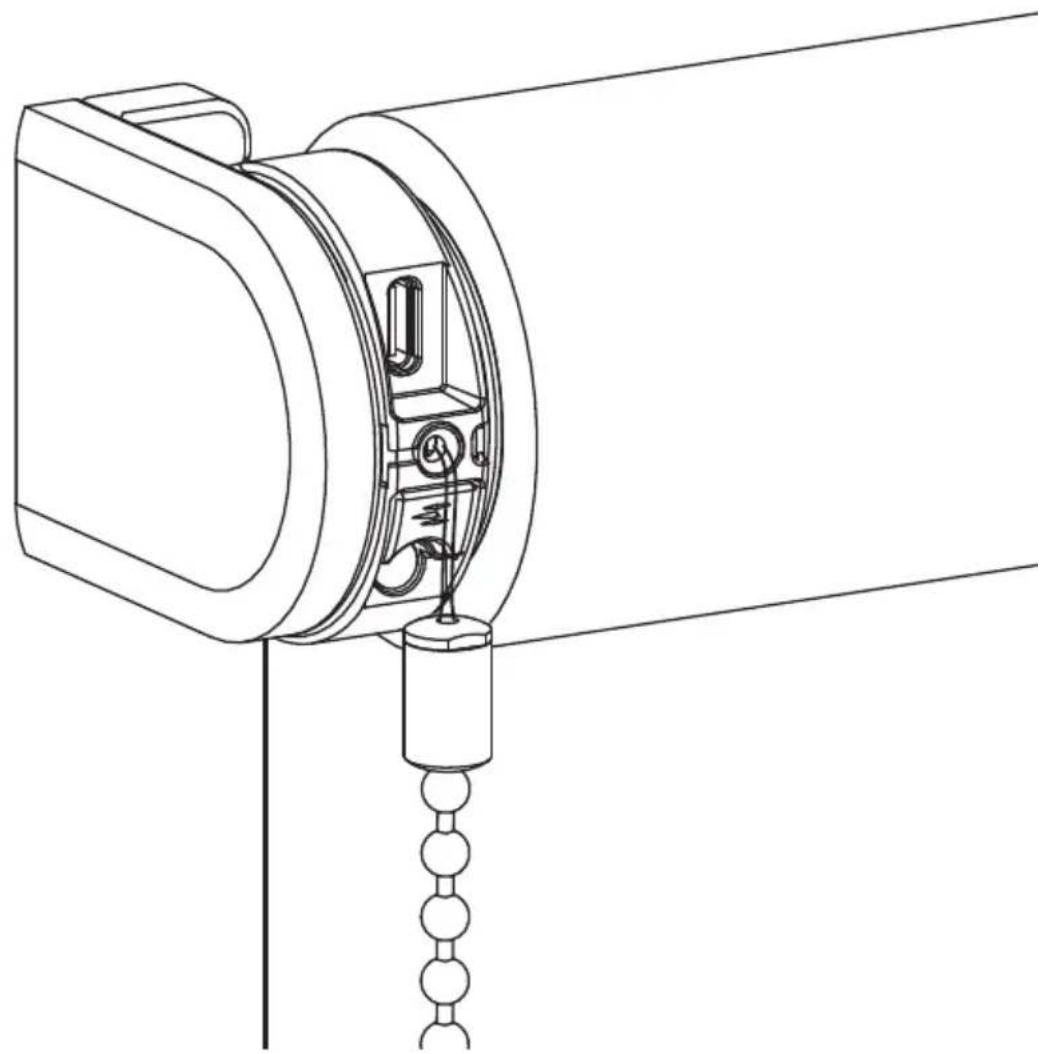
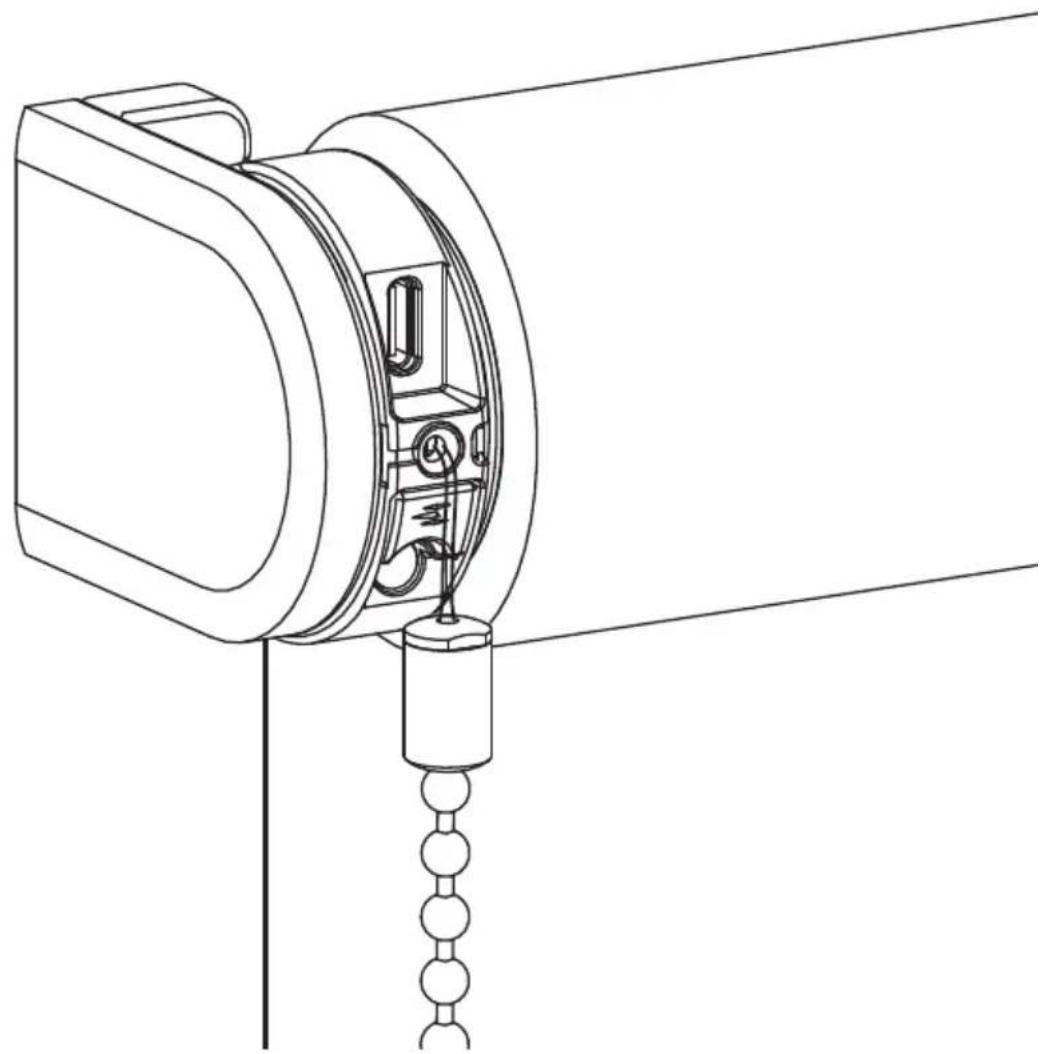
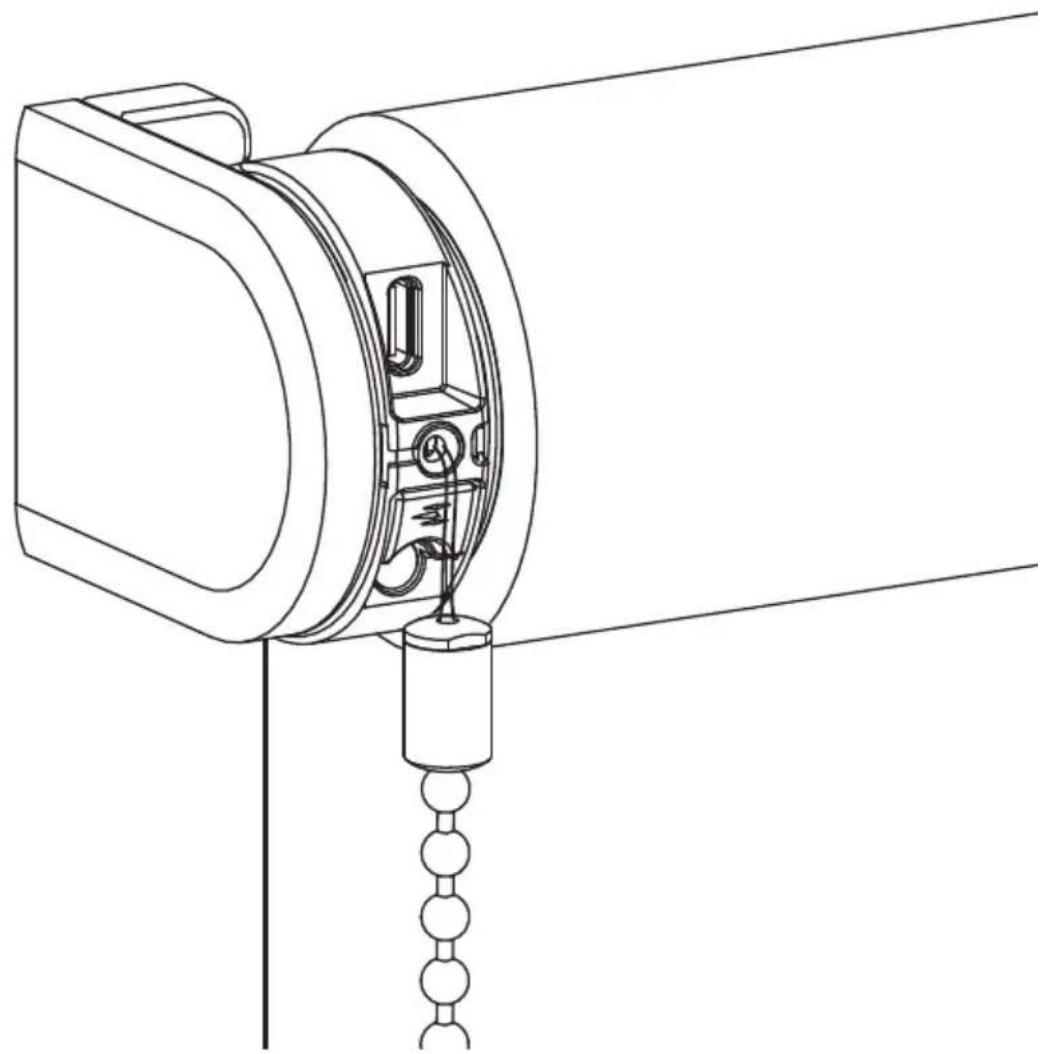
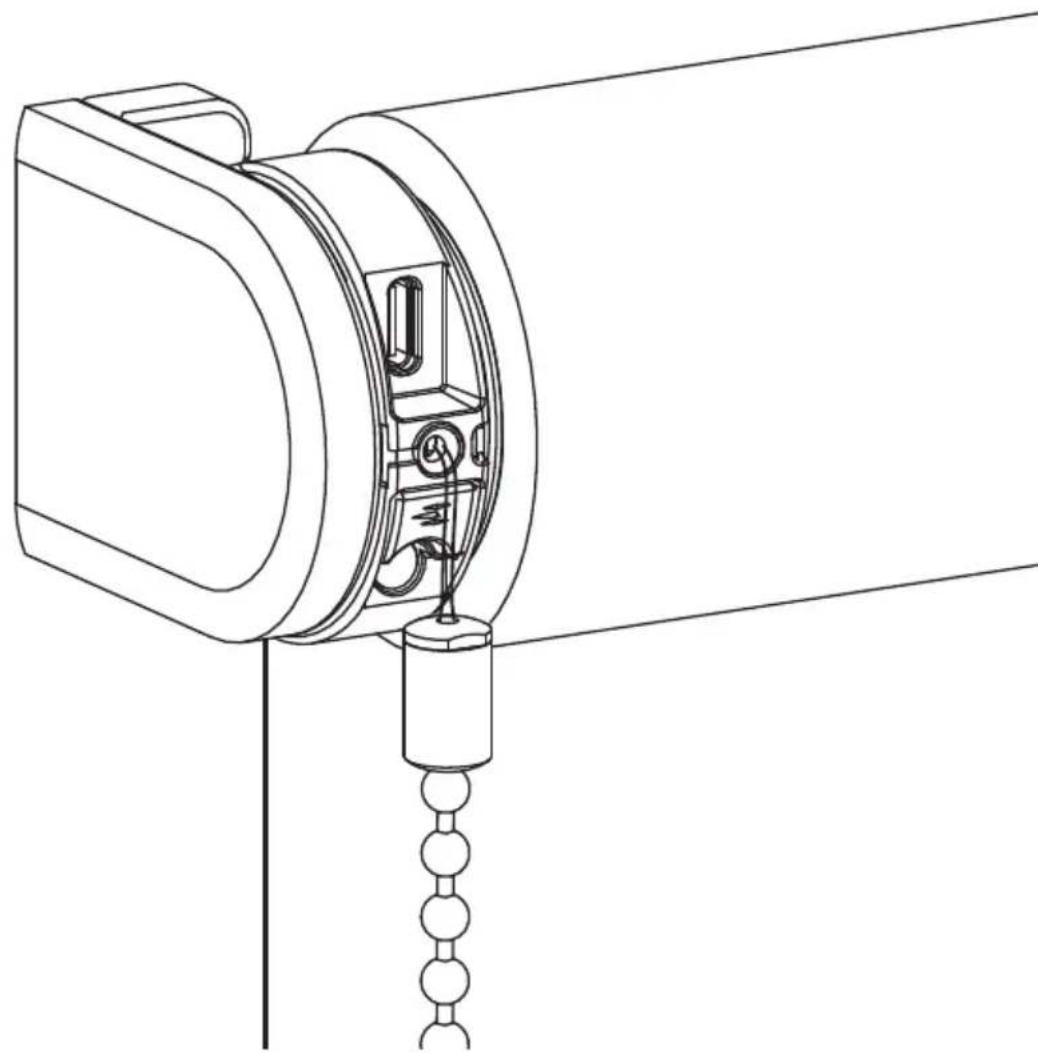
Technical line drawing of a mechanical device with internal components and wiring (no text or symbols)USB-C charging port
LED (Battery/Reset indicator)
End position button
Reset/Program button
Pull control
1 Install the blind
Follow the steps in the installation instructions to install the blind.
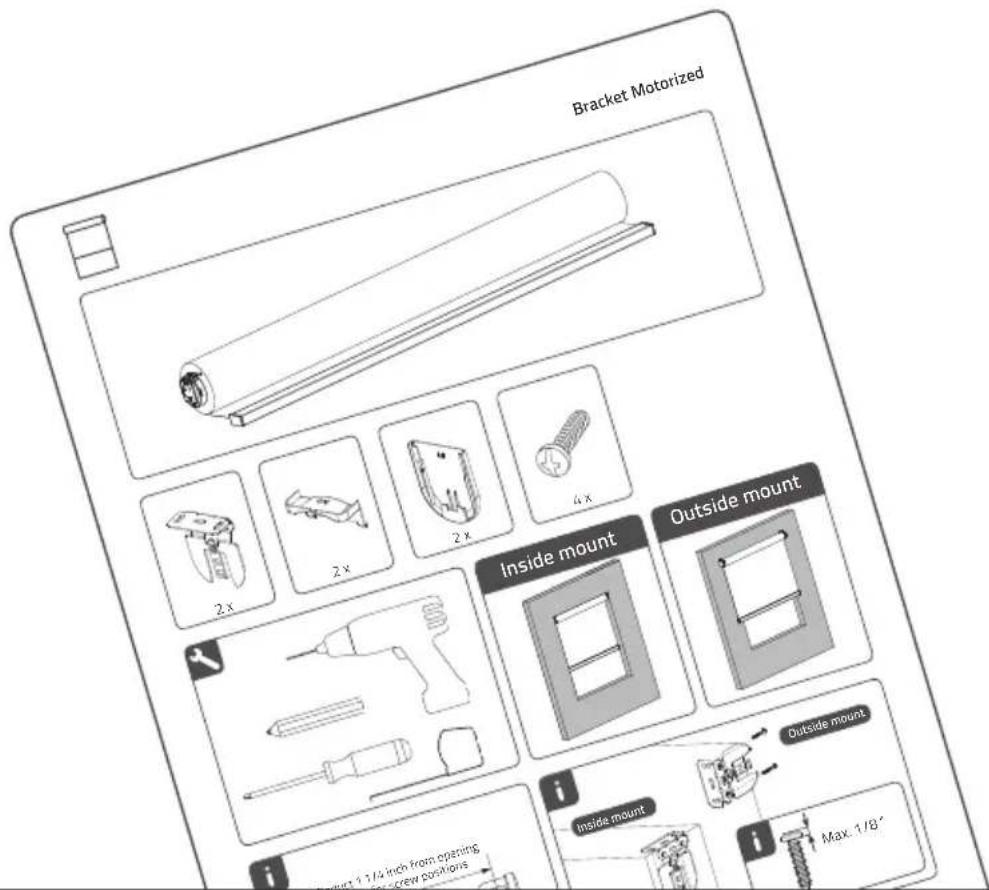
text_image
Bracket Motorized Inside mount Outside mount i Inside mount i Max. 1/8"4
2 Activate the blind
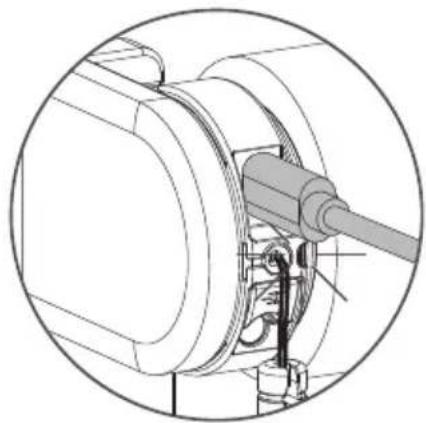
To activate the blind, connect it to a standard USB-C 5V power supply via a USB-C cable. This can be your smartphones power adapter, for example.
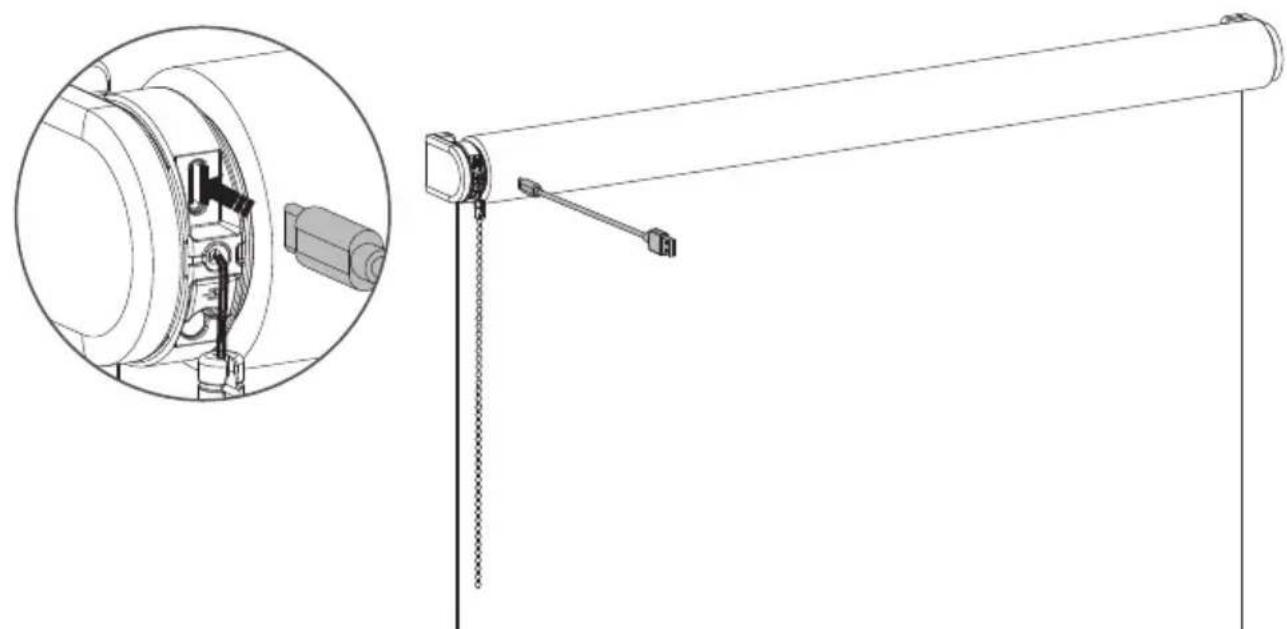
natural_image
Technical line drawing of a mechanical device with an inset close-up showing internal components (no text or symbols)3 Add Eve MotionBlinds to your platform
Eve Motionblinds motors support Matter and Thread, making them work with all major platforms. To setup and control Eve Motionblinds, you need a border router with Thread and Matter from the platform you choose and your devices must meet specific requirements.
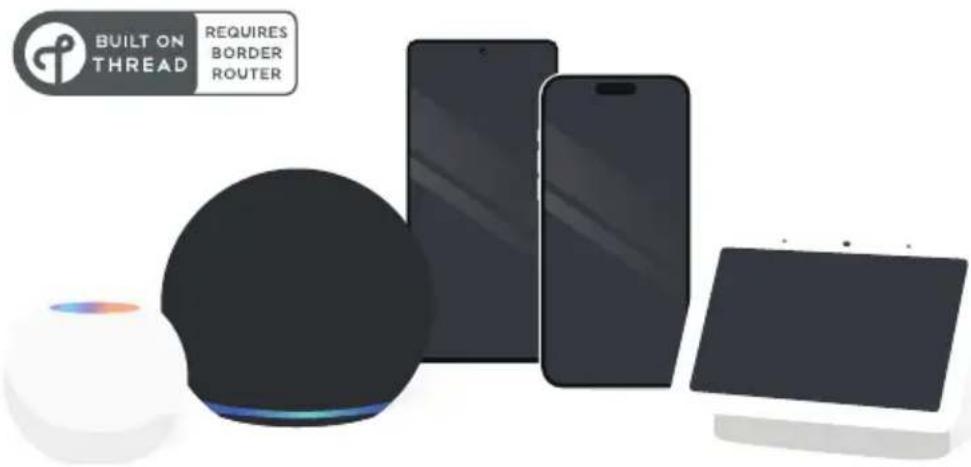
text_image
BUILT ON THREAD REQUIRES BORDER ROUTER4 Setup the blind
Scan the Matter Setup Code through the app from the smart home platform of your choice to add Eve Motionblinds to the platform.
Eve MotionBlinds needs end positions to work properly. End positions can be programmed in two ways. In the Eve app or by the end position programming button on your blind. (Step 5)
After scanning you can hide your Matter Setup Code.
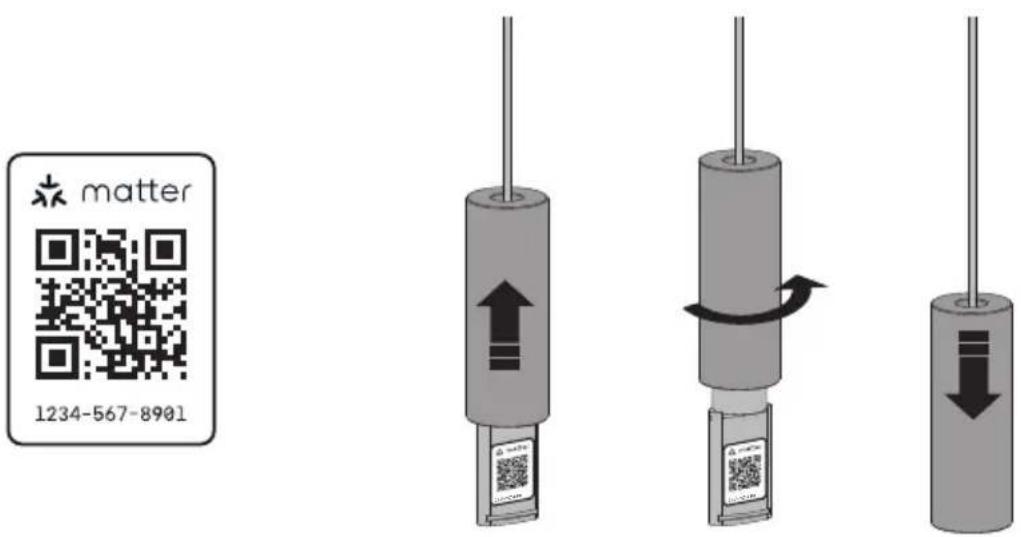
text_image
matter 1234-567-89015 Set end positions
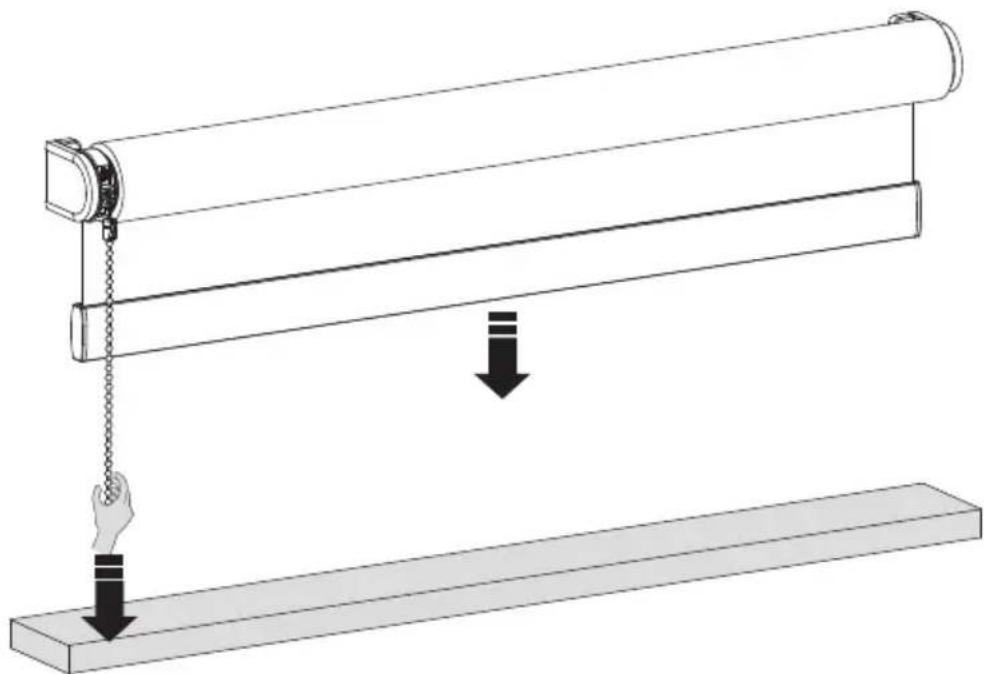
Beside setting the end positions by the app you are able to set the end positions by pressing the button on the motor. Pull and hold the chain until the blind has reached the bottom position. If the blind moves in the opposite direction, release the chain and pull and hold again.
Adjust until the desired bottom position has been reached.
natural_image
Diagram of a mechanical lever system with a roller and hanging weights, showing motion direction (no text or symbols)6 Save your bottom position
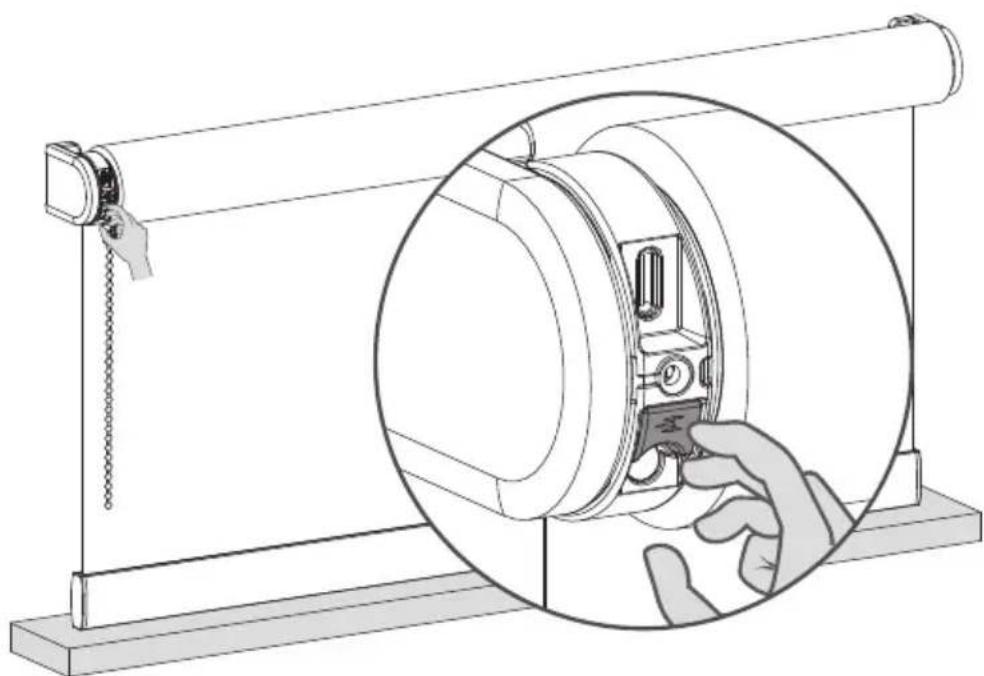
When your blind is positioned at your bottom position hold the button until the blind moves up and down to save your bottom position.
natural_image
Technical line drawing of a mechanical device with a hand inserting a component into a circular housing (no text or symbols)7 Move your blind to the top position
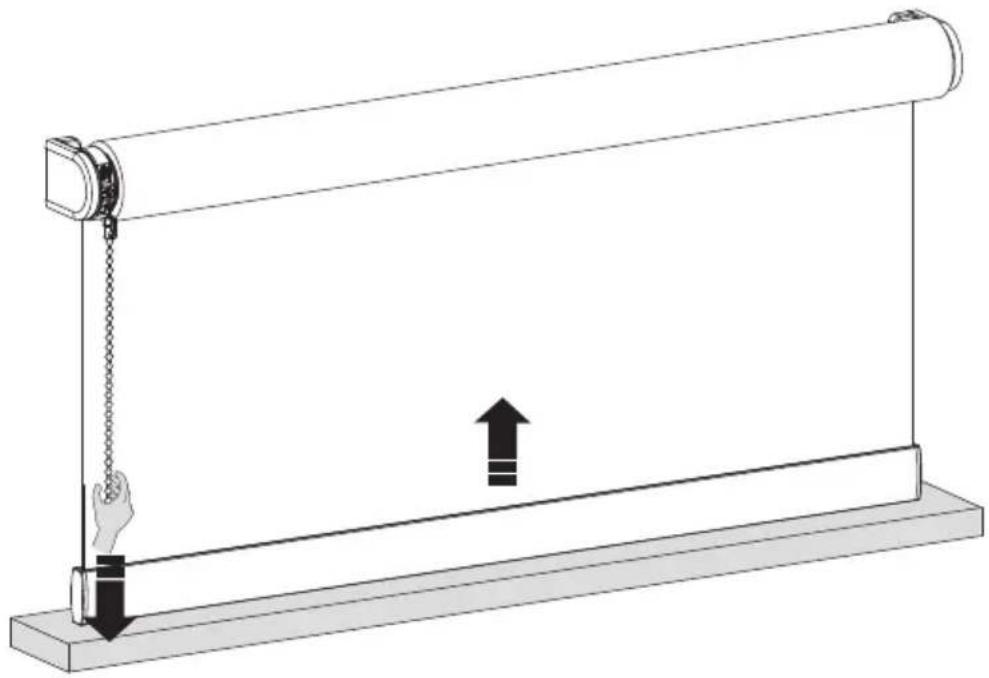
Pull and hold the chain until the blind has reached the top position. If the blind moves in the opposite direction, release the chain and pull and hold again.
Adjust until the desired top position has been reached.
natural_image
Diagram of a mechanical device with a roller and hanging chain, showing motion direction (no text or symbols)8 Save your top position
When your blind is positioned at your top position hold the button until the blind moves up and down to save your top position.
natural_image
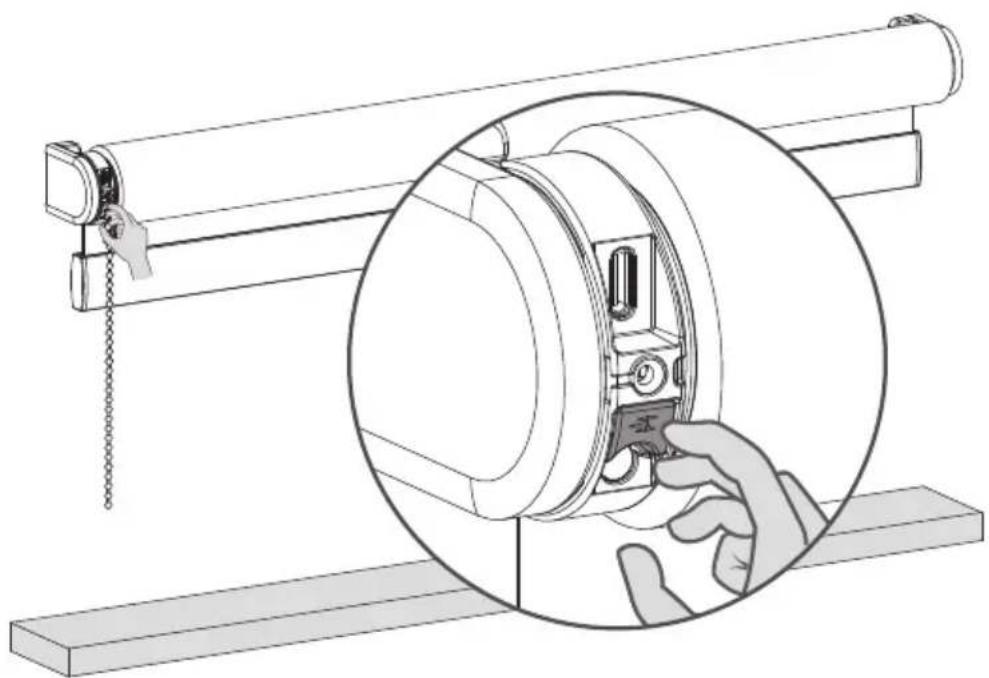
Technical line drawing of a mechanical assembly with a magnified inset showing a hand interacting with a component (no text or symbols present)9 Adjust your end positions
To adjust one of your end positions you need to place your blind at the end position you want to adjust. Pull and wait until the blind has reached the end position you want to adjust.
natural_image
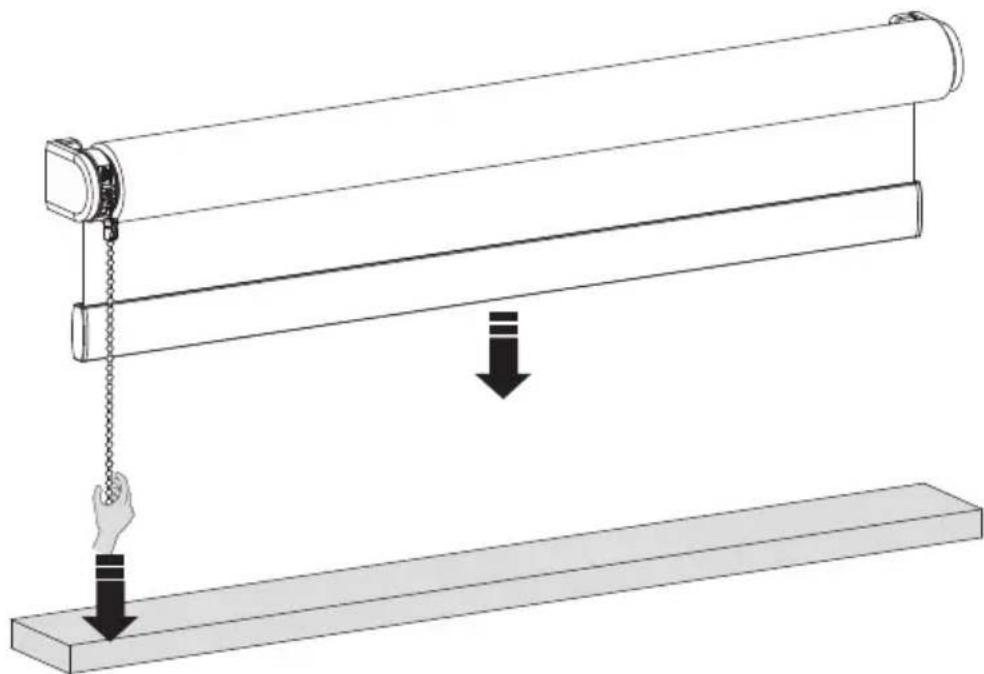
Diagram of a mechanical lever system with a hanging slide and a horizontal base, showing motion direction (no text or symbols)10 Remove your (bottom/top) position
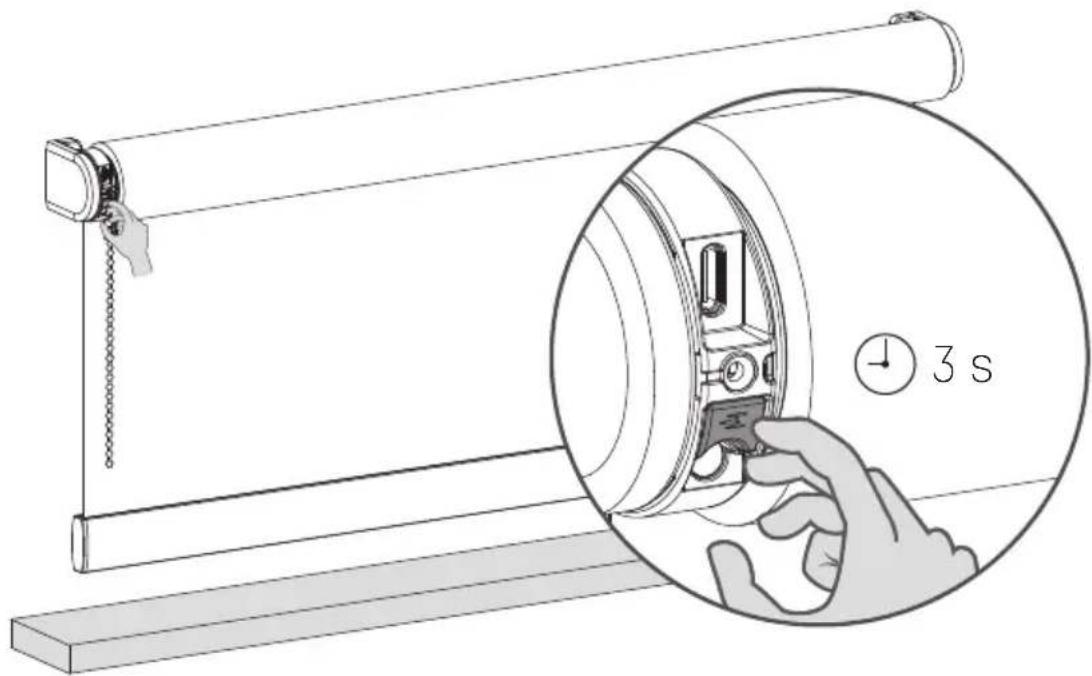
Hold the end position program button for 3 seconds to remove your (bottom/top) position. The blind will step up and down once to confirm that your end position has been removed. You are now able to set a new (bottom/top) position.
natural_image
Illustration of a roller roller with a hand adjusting the dial, showing time measurement (3s) and no text or symbols on the diagram itself.11 Move your blind to the new (bottom) position
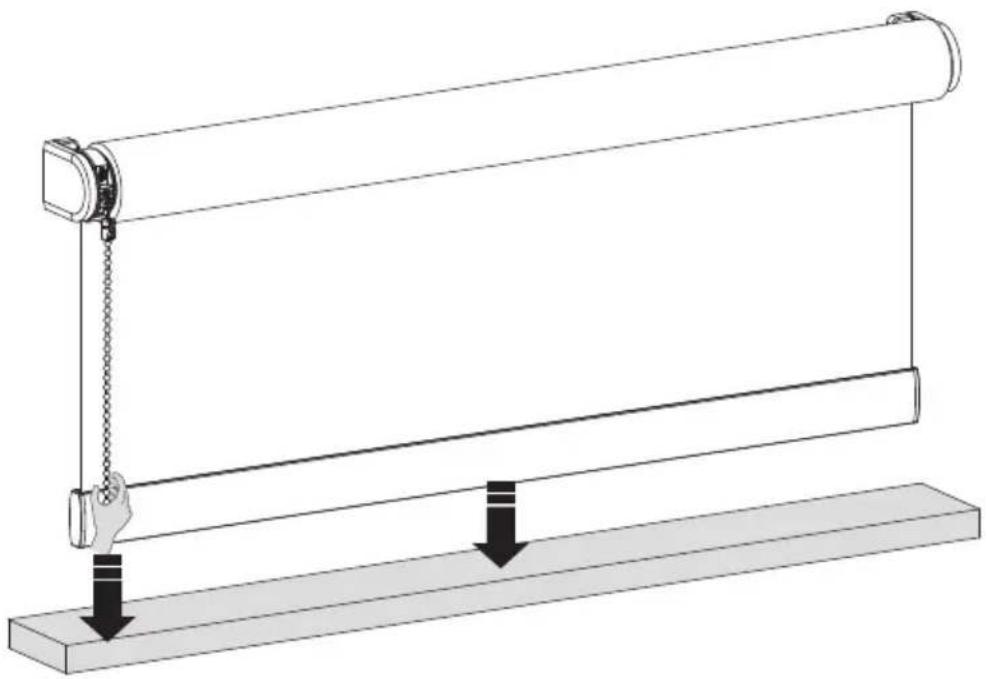
Pull and hold the chain until the blind has reached the bottom position. If the blind moves in the opposite direction, release the chain and pull and hold again.
Adjust until the desired bottom position has been reached.
natural_image
Diagram of a roller roller system with a hand operating the frame and two downward arrows indicating motion (no text or symbols)12 Save your (bottom) position
When your blind is positioned at your bottom position hold the button until the blind moves up and down to save your bottom position.
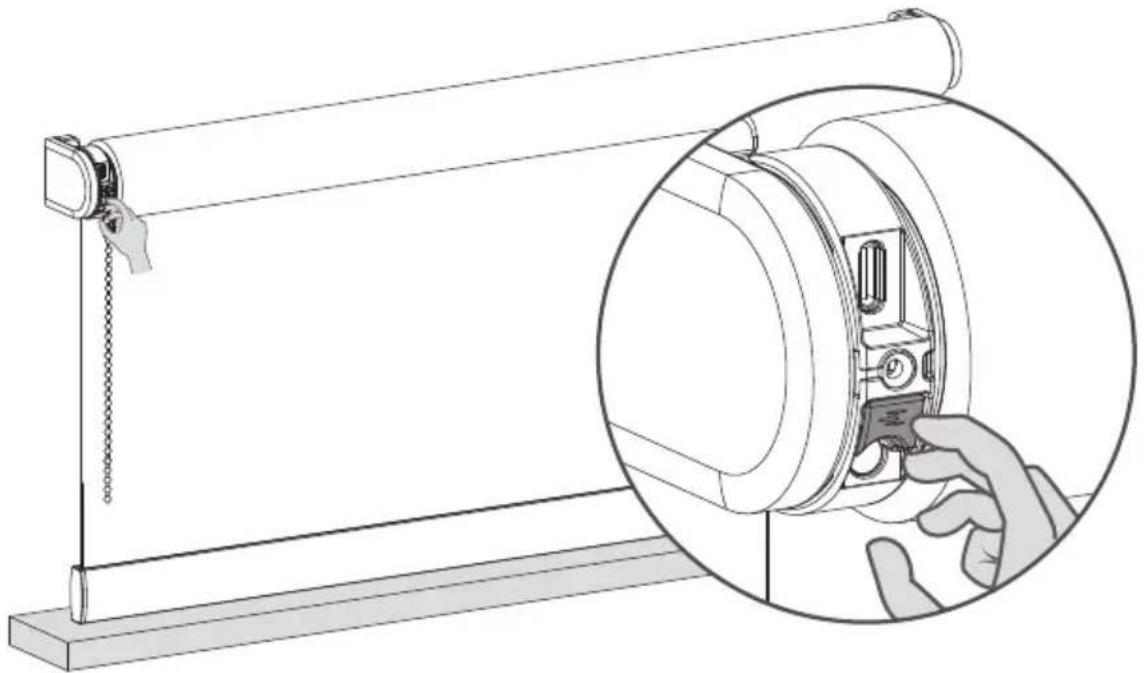
natural_image
Technical line drawing of a mechanical device with a magnified inset showing a hand adjusting the component (no text or symbols present)13 Save the favorite position
When there is no favorite position programmed you need to position your blind at your favorite position. When the blind is at your favorite position hold the pull until the blind steps up and down once .(Approximately 7 seconds)
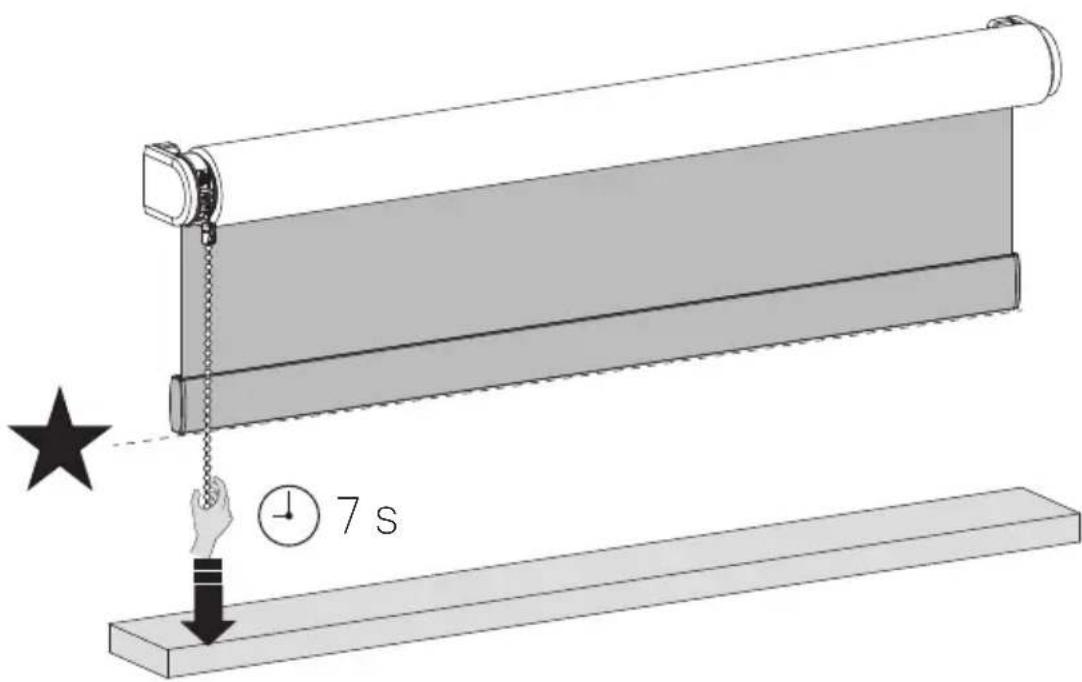
text_image
Diagram illustrating a sliding window mechanism with time and duration labels14 Control your blind to favorite position
When your blind is not positioned at the favorite position hold the pull for 5 seconds and your blind will move to it's favorite position.
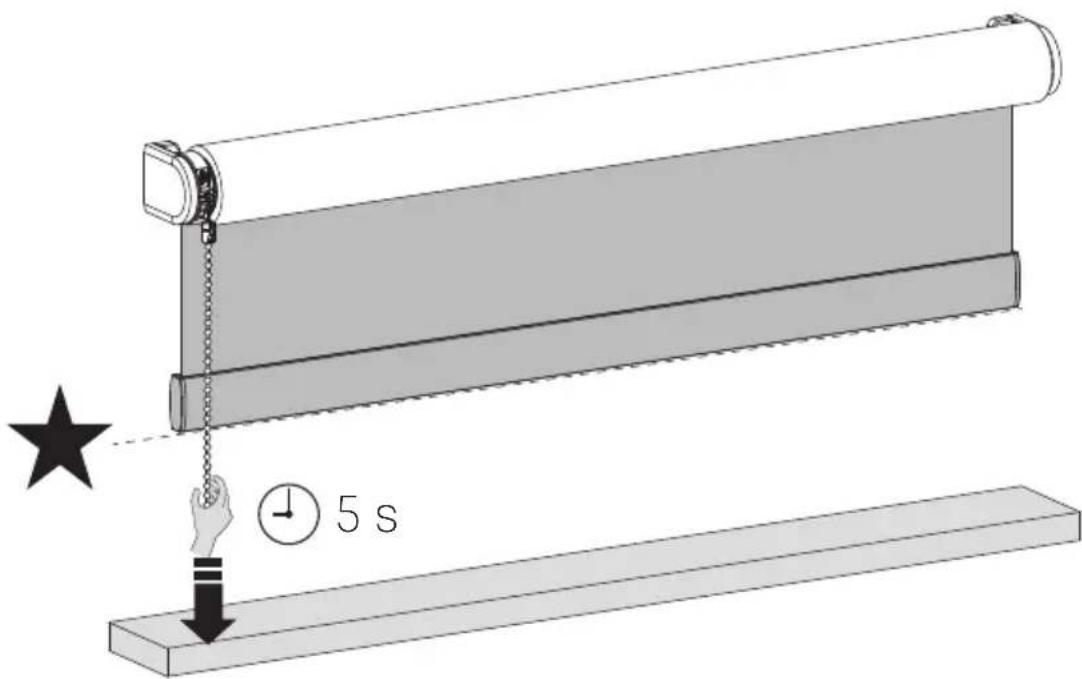
text_image
Diagram illustrating a sliding window mechanism with time and duration labels15 Save a new favorite position
To remove your previous favorite position you need to place your blind at your current favorite position. (Step 10) Then Hold the pull until the blind steps up and down once. (Approximately 7 seconds) Your favorite position is now removed. Follow step 9 to set your new favorite position.
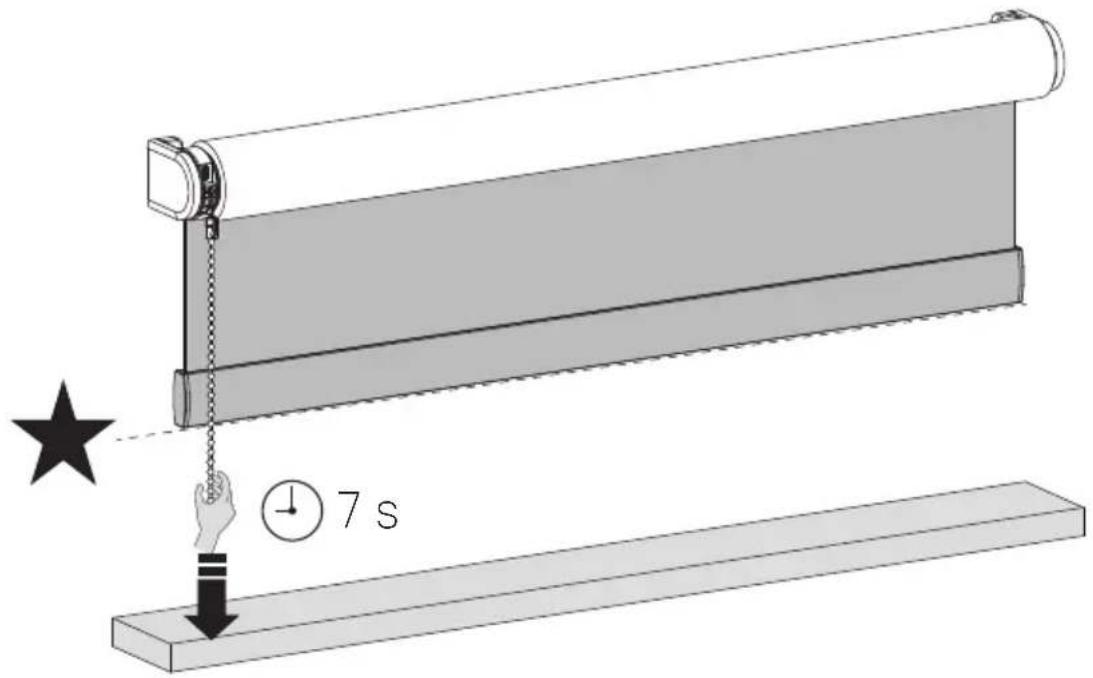
text_image
Diagram illustrating a sliding window mechanism with time and duration labelsi Change direction of rotation
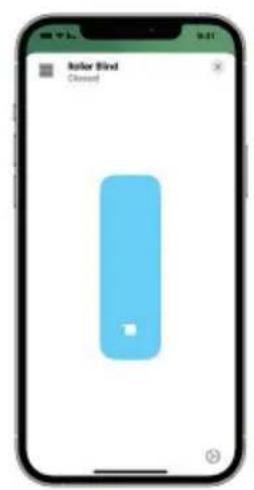
If the position of the blind in the app is opposite to your blind, change the direction of rotation by pressing the End Position button twice within one second.
text_image
Iolor Blind Closed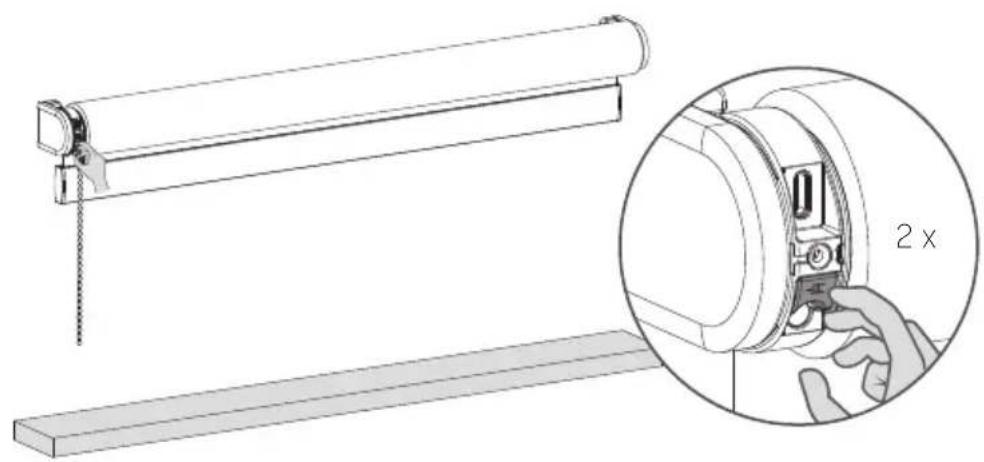
natural_image
Technical line drawing of a mechanical assembly with a magnified inset showing a 2x ratio of a component (no text or symbols present)i Recharge the blind
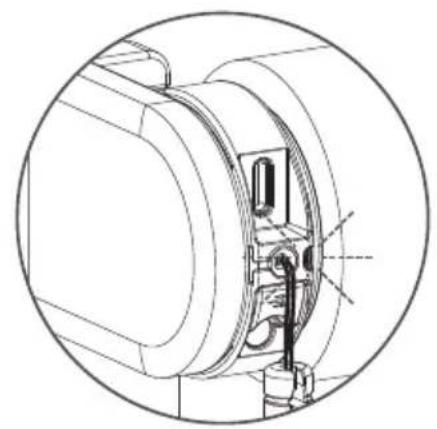
To charge the blind, connect it to a standard USB-C 5V power supply via a USB-C cable. This can be your smartphones power adapter, for example. Charge at least once a year.
natural_image
Technical line drawing of a mechanical assembly with no visible text or symbols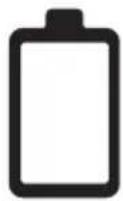
LED light flashes red during operation; Charge the battery
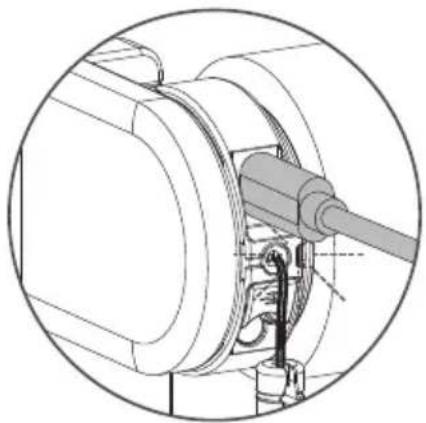
natural_image
Technical line drawing of a mechanical assembly with no visible text or symbols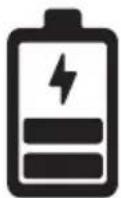
LED light flashes green; battery is charging
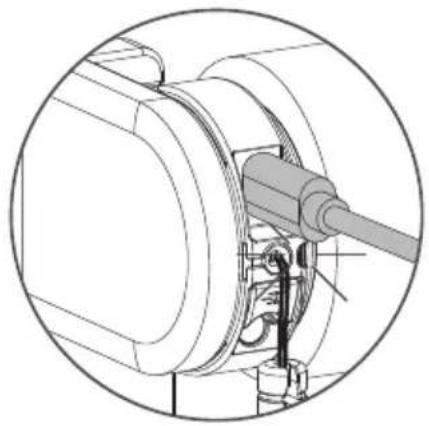
natural_image
Technical line drawing of a mechanical assembly with no visible text or symbols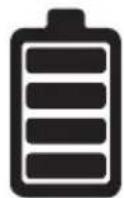
LED light constantly green; battery is fully charged
Important Safety instructions
WARNING: To reduce the risk of severe injury or death, it is important to follow these instructions for personal safety. Save these instructions.
- Read and follow all installation instructions.
This appliance can be used by children aged 8 years and above and persons with reduced physical, sensory or mental capabilities or lack of experience and knowledge if they have been given supervision or instruction concerning use of the appliance in a safe way and understand the hazards involved. Children should not play with the appliance. Cleaning and user maintenance should not be performed by children without supervision.
■ Do not allow children to play with fixed controls. Keep remote controls away from children.
■ Frequently examine the installation imbalance and signs of wear or damage to cables and springs. Do not use if repair or adjustment is necessary.
■ This instruction manual is also available on the website.
■ The drive must be disconnected from its power source during cleaning, maintenance and when replacing parts.
■ The A-weighted emission sound pressure level of the drive is equal to or less than 70dB(A).
■ Indoor and household use only.
■ Disconnect the drive from the power supply or switch off the automatic controls when maintenance, such as window cleaning, is being carried out in the vicinity.
■ When operating a biased switch, make sure that other persons are kept away.
■ Do not operate when maintenance, such as window cleaning, is being carried out in the vicinity.
■ The tube motor must only be supplied with safety extra low voltage corresponding to the marking on the appliance.
■ Maximum operating temperature of motor is +55°C. Maximum charging temperature of battery pack is +45°C.
■ This appliance contains batteries that are non-replaceable.
Important Installation instructions
WARNING: Important safety instructions. Follow all instructions, since incorrect installation can lead to severe injury.
■ This motor can only be used with soft material for driven parts.
■ Hazardous unprotected moving parts of the drive must be installed higher than 2.5m above the floor or any other level surface that could provide access to it.
■ Install the actuating member of a manual release at a height less than 1.8m.
■ The actuating member of a biased switch is to be located within direct sight of the driven part but away from moving parts. It is to be installed at a minimum height of 1.5m and not accessible to the public.
■forThe mass and the dimension of the driven part must be compatible with the rated torque and rated operating time.
■ Fixed controls have to be clearly visible after installation.
■ The driven part must be compatible with the rated torque 1.1 N.m and rated operating time (12 min).
■ Minimum tube diameter: ∅25mm.
■ The drive is intended to be installed at a height of at least 2.5m above the floor or any other accessible level surface.
■ All-pole disconnection switches must be incorporated in the fixed wiring in accordance with the wiring rules.
■ The appliance must only be supplied at safety extra low voltage corresponding to the marking on the appliance.
■ Before installing the drive, remove any unnecessary cords or components and disable any equipment not needed for powered operation.
FCC Manual | FCC ID: ZY4CM03E IC:28177-CM03E
Regulatory Information
1 FCC Information for User
This product does not contain any user serviceable components and is to be used with approved antennas only. Any product changes or modifications will invalidate all applicable regulatory certifications and approvals.
2 FCC Electronic Emission Notices
This device complies with part 15 of the FCC Rules. Operation is subject to the following two conditions:
- This device may not cause harmful interference
- This device must accept any interference received, including interference that may cause undesired operation.
3 FCC Radio Frequency Interference statement
This equipment has been tested and found to comply with the limits for a class B digital device, pursuant to Part 15 of the FCC Rules. These limits are designed to provide reasonable protection against harmful interference when the equipment is operated in a commercial environment.
This equipment generates, uses and can radiate radio frequency energy and, if not installed and used in accordance with the instructions, may cause harmful interference to radio communications.
Operation of this equipment in a residential area may cause harmful interference, in which case the user will be required to correct the interference at their own expense. If this equipment does cause harmful interference to radio or television reception, which can be determined by turning the equipment off and on, the user is encouraged to try to correct the interference by one or more of the following measures:
■ Reorient or relocate the receiving antenna
■ Increase the distance separating the equipment and receiver
■ Connect the equipment to an outlet on a circuit different from that to which the receiver is connected
■ Consult the dealer or an experienced radio/TV technician for help
To satisfy FCC / IC RF exposure requirements, a separation distance of 20 cm or more should be maintained between the antenna of this device and persons during device operation. To ensure compliance, operations at closer than this distance is not recommended.
EU Declaration
Hereby, Coulisse declares that the radio equipment type CM-03-E is in compliance with directive 2014/53/EU. The full text of the EU declaration of conformity is available at the following internet address: support.motionblinds.com
■ Frequencyrange: 433MHz, RF power: 2.32dBm
■ Frequency range BLE: 2402 - 2480 MHz, RF power: 3 dBm EIRP
■ Frequency range Thread: 2405 - 2480 MHz, RF power: < 20 dBm EIRP
ISED Compliance
This device contains licence-exempt transmitter(s)/receiver(s) that comply with Innovation, Science and Economic Development Canada's licence-exempt RSS(s). Operation is subject to the following two conditions: This device may not cause interference. This device must accept any interference, including interference that may cause undesired operation of the device.
i Change motor speed / sound level
Hold the program button for 5 seconds to change the motor speed / sound level. The blind steps up and down 1 time to indicate that the speed has been adjusted to 1 of the 5 levels. Warning: release the button after 5 seconds when the blind steps up and down to avoid resetting the connection.
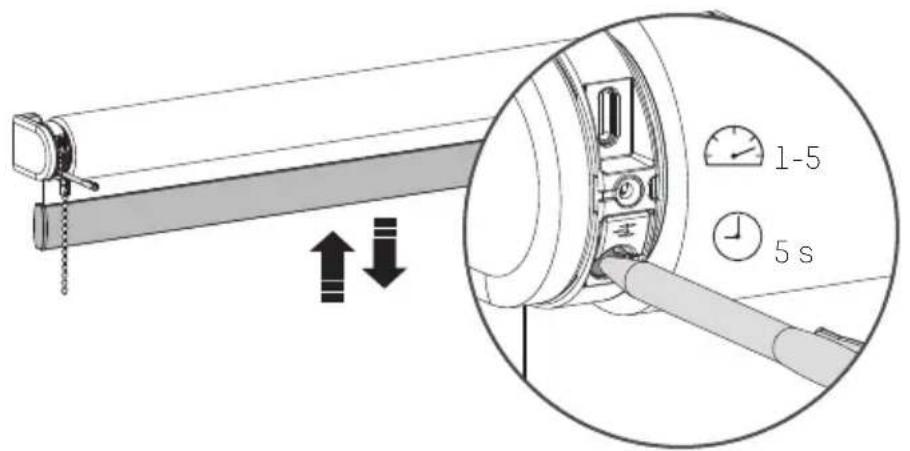
text_image
Diagram showing a mechanical device with directional arrows and a magnified inset highlighting a 1-5 second time interval.Reset the connection
Hold the program button for 10 seconds to delete the connection between the blind and the app. The LED lights up 5 times and the blind steps up and down 1 time to indicate that the connection is reset. Now the blind can be reconnected.
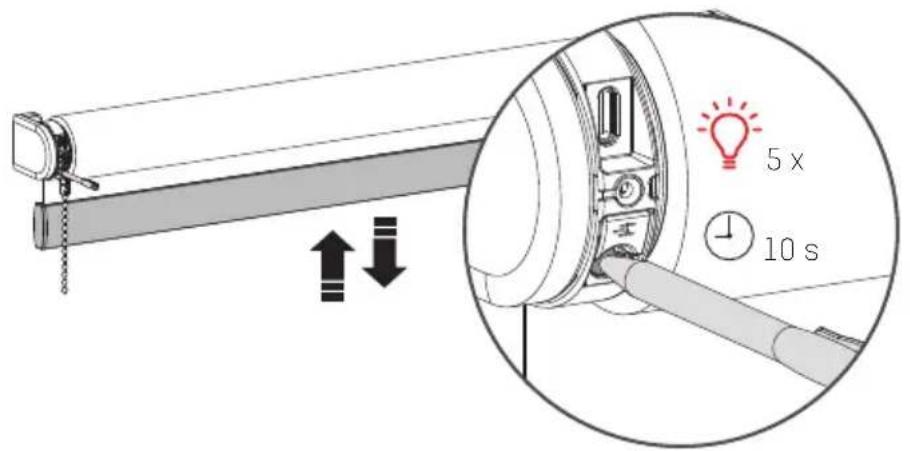
text_image
5 x 10 si Reset the blind
Resetting the blind results in deleting the end positions and connections of the blind with apps and remote controls. Shortly press the program button to activate program mode. The blind will start stepping up and down. Hold the reset/program button for at least 20 seconds to reset the blind. The blind will stop stepping twice. After the second stop, the blind will give one extra step to indicate that is has been reset.

text_image
Short press + 5 x 20 sREMOTE PROGRAMMING
1 Pair a remote control
Any MotionBlinds remote can be connected to your blind.
.1 Select a channel on the remote and press the program button on the motor to activate program mode. The blind will start stepping up and down.
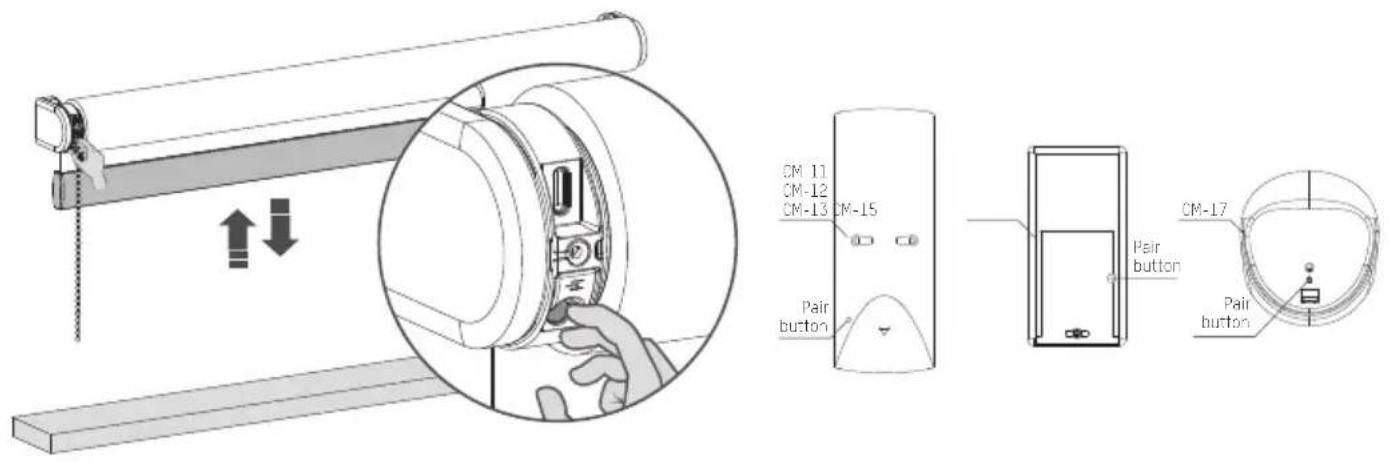
text_image
CM-11 CM-12 CM-13 CM-15 Pair button Pair button CM-17 Pair button.2 Press the pair button on the back of the remote control to pair the blind with the selected channel. The blind will shortly stop stepping, indicating that the remote has been paired to the blind.
.3 Shortly press the program button to deactivate program mode. The blind stops stepping and can be operated.
2 Check rotational direction
WARNING: risk of damage. Stop the blind before reaching the end positions.
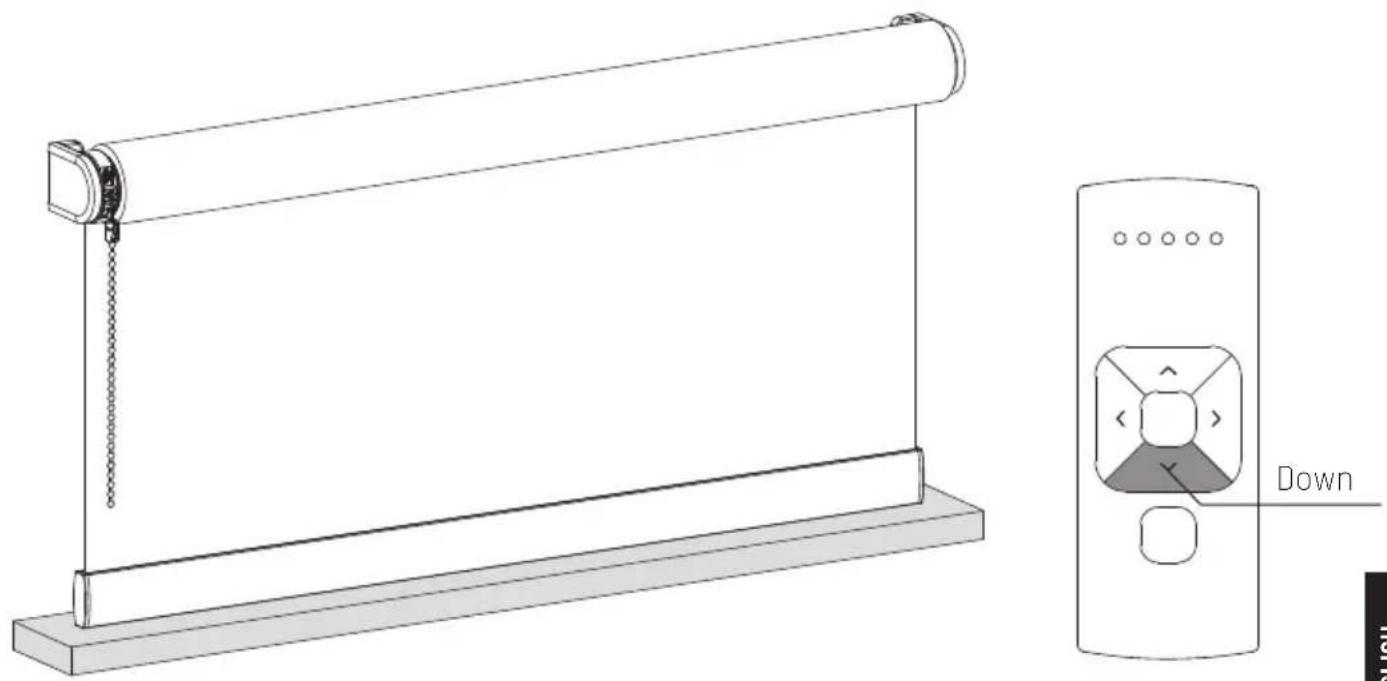
.1 Shortly press the down button to check if the blind unrolls the right way. If the blind moves up, the rotational direction must be changed.
.2 Simultaneously press the up and down button to change the rotational direction.
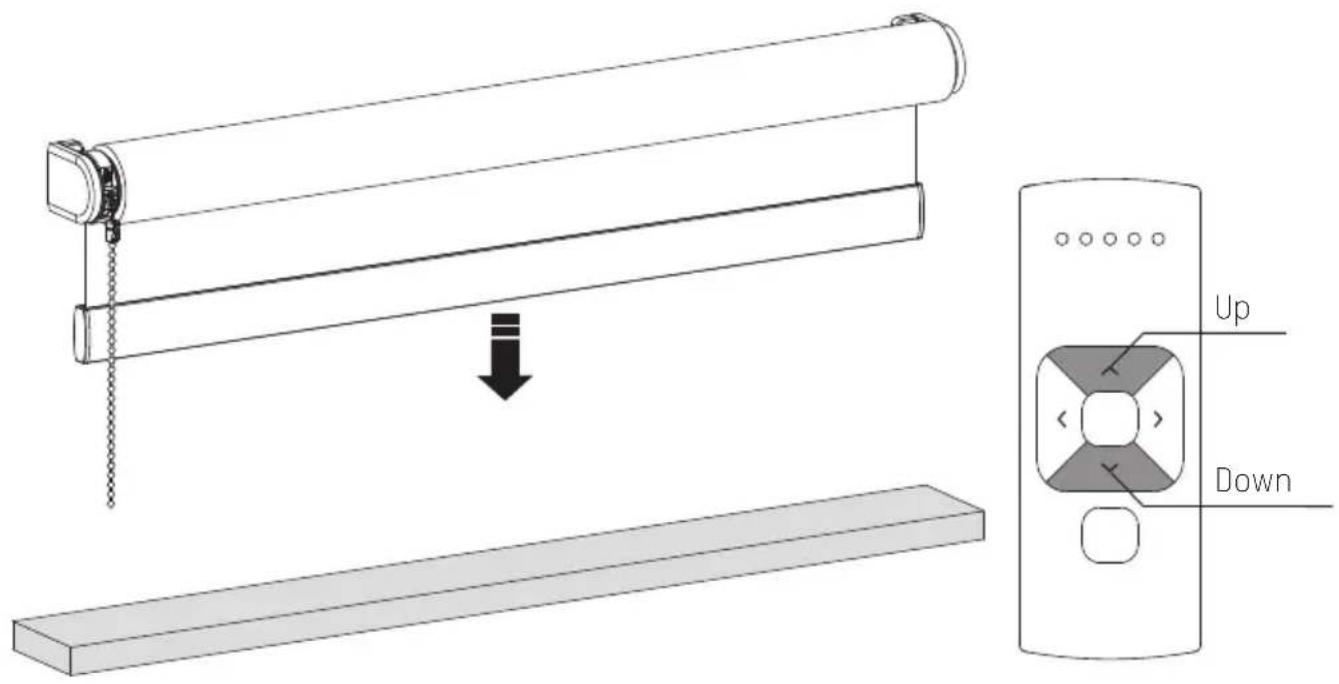
text_image
Diagram showing a slide setup with an open lid and a downward arrow indicating motion, labeled 'Up' and 'Down'.3 Set bottom position
Press and hold the down button until the blind reaches the desired bottom position. WARNING: risk of damage. Slowly approach the bottom position.
natural_image
Technical line drawing of a scroll roller with a slide and a door panel, showing no text or symbols4 Save bottom position
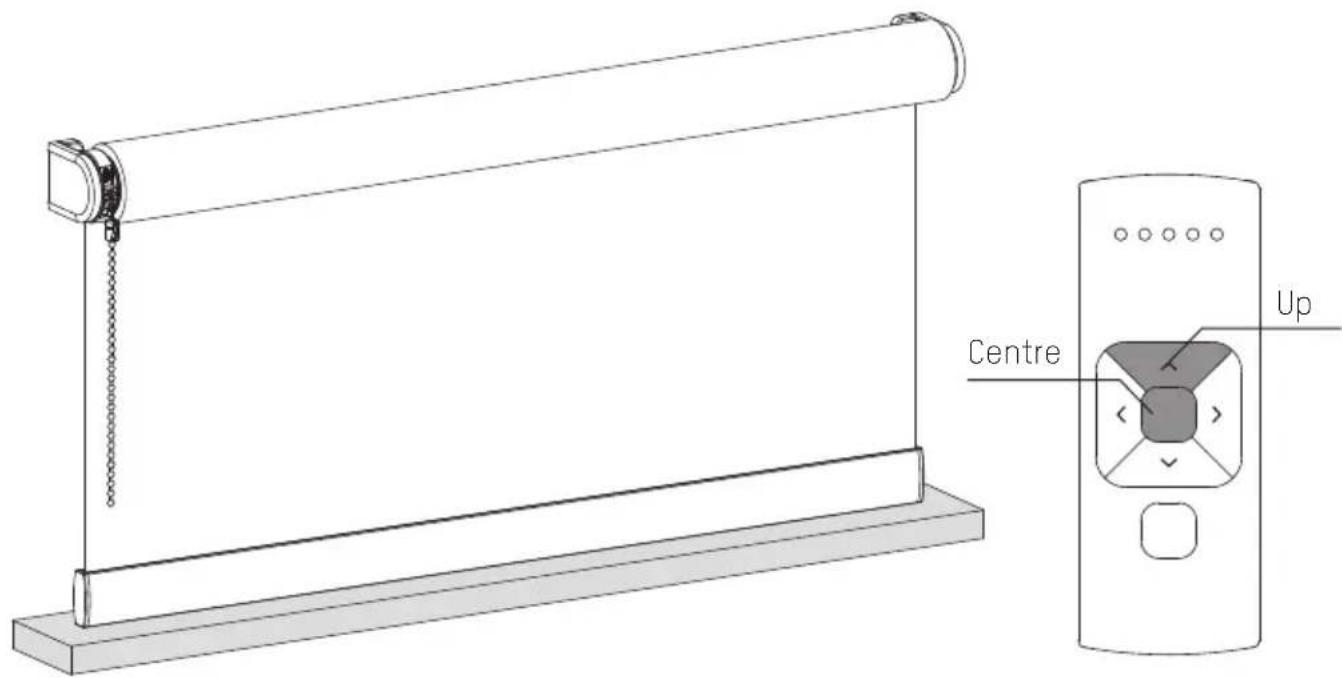
Simultaneously hold the centre and the up button until the blind stops stepping and starts stepping again. The bottom position has been saved.
text_image
Centre Up5 Set top position
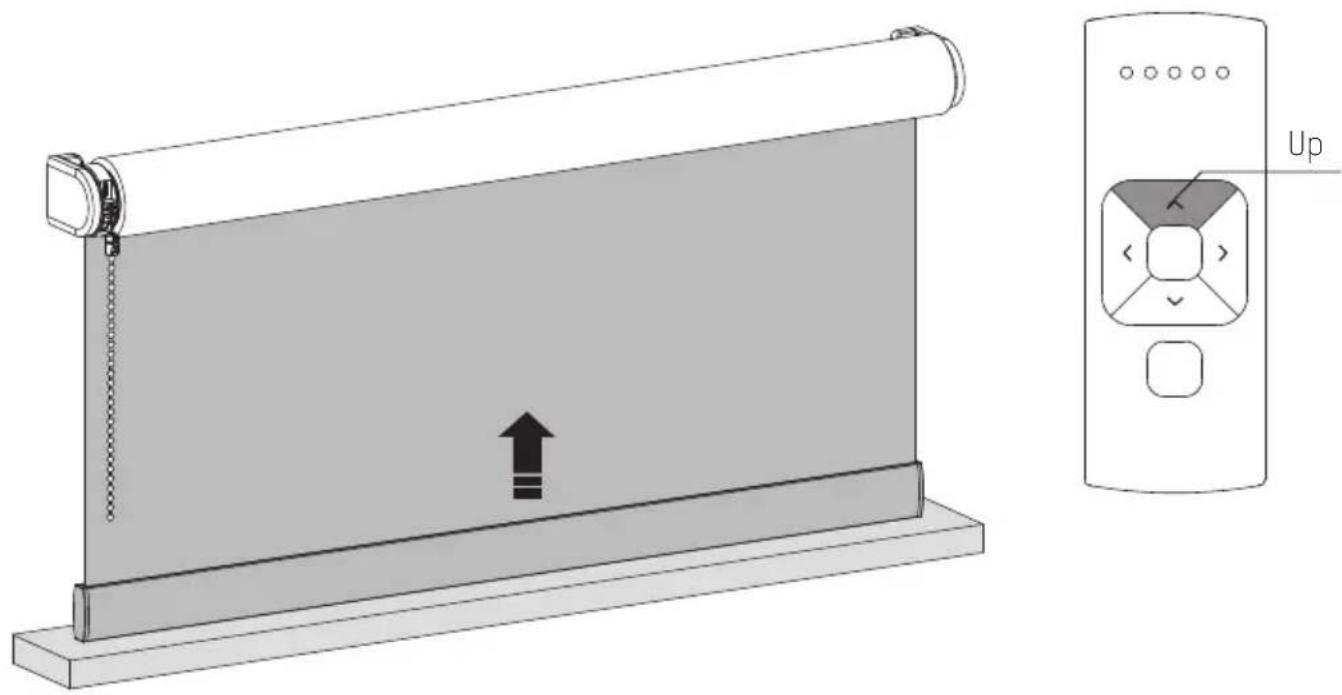
Press and hold the up button until the blind reaches the desired top position.
WARNING: risk of damage. Slowly approach the top position.
natural_image
Diagram showing a slide roller with an upward arrow and a control panel labeled 'Up' (no text or symbols on the slide itself)6 Save top position
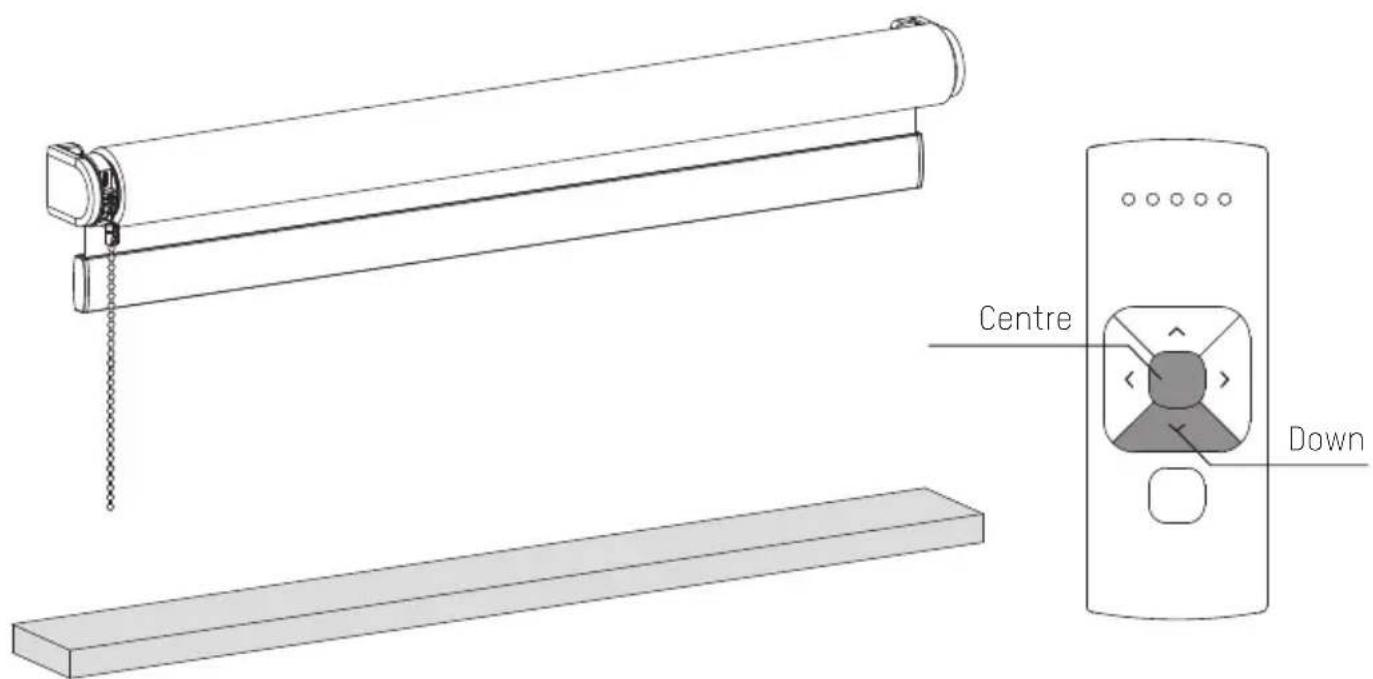
Simultaneously hold the centre and the down button until the blind stops stepping and starts stepping again. The top position has been saved.
text_image
Centre Down7 Set favorite position (optional)
.1 Move the blind to a desired favourite position.
.2 Hold the centre button to save this Favourite position. The blind shortly stops stepping indicating the favourite position has been saved.
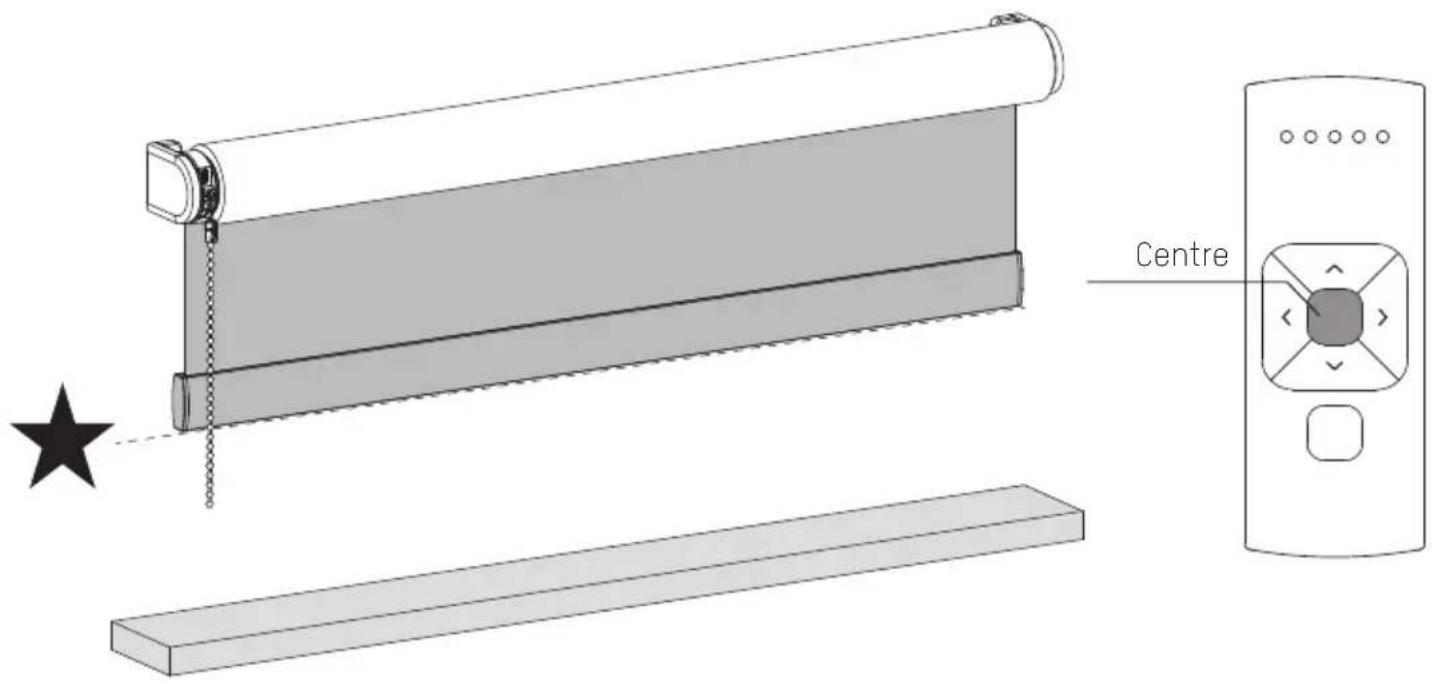
text_image
Centre8 Deactivate program mode
Shortly press the program button to deactivate program mode. The blind stops stepping and can be operated.
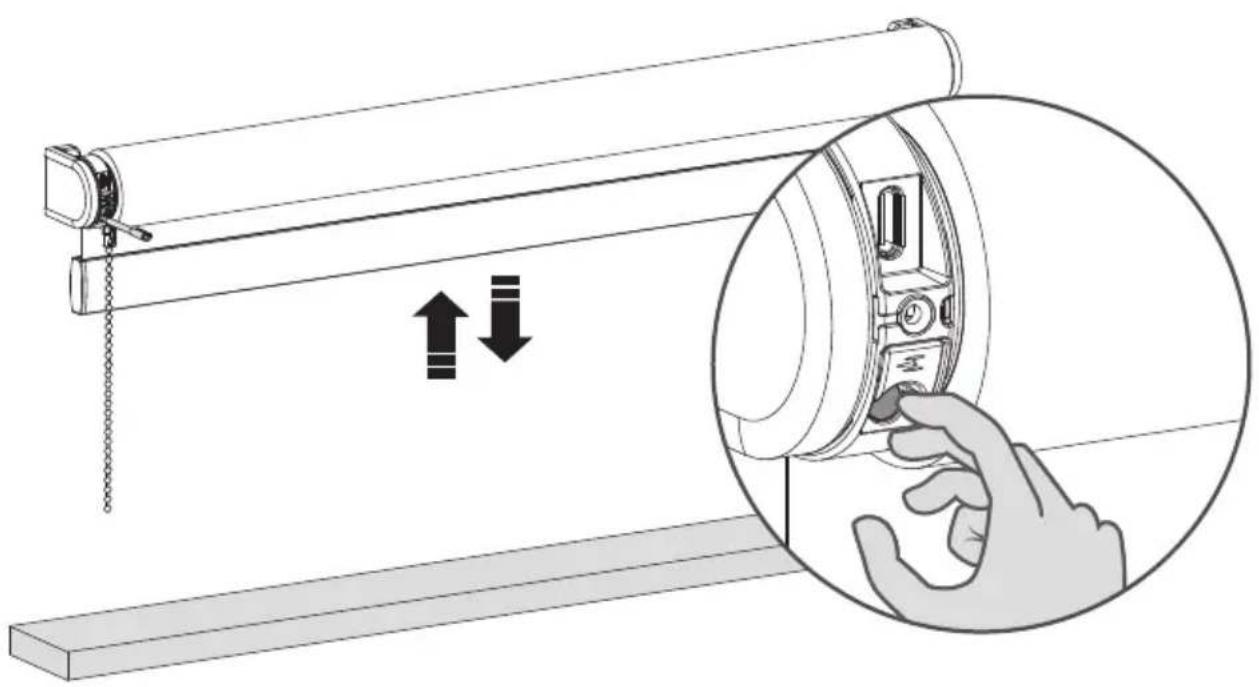
natural_image
Diagram showing a hand inserting a button into a device via a lock mechanism, with no text or symbols present.i Deactivate direct control for remote control
When pressing the up or down button on the remote control, the blind directly moves to its end positions (direct control). To operate the blind with smaller steps using the up and down button, direct control can be deactivated. Now, the blind only directly moves to its end positions when the up or down button is held longer than two seconds.
.1 Press the program button on the motor to activate program mode. The blind starts stepping.
.2 Hold the program button until the blind stops stepping (approximately 5 seconds) to deactivate or reactivate direct control.
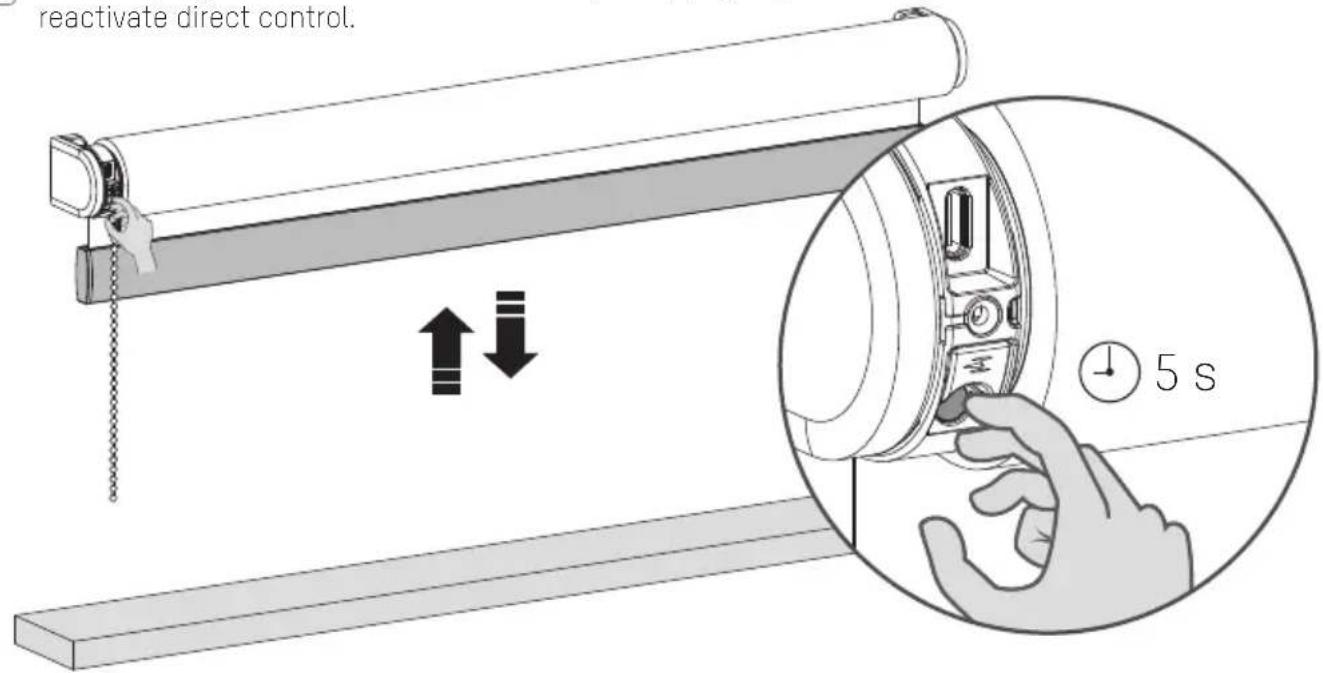
text_image
reactivate direct control. ↑↓ 5 sFAQ
i Activate / deactivate the motor (Transport mode)
To prevent the blind from getting damaged, the motor has a transport mode that makes sure the blind will not be activated before installation.
.1 Hold the program button and pull twice to activate or deactivate the motor. (When the motor is activated a green LED will light up, When the motor is deactivated a red LED will light up)
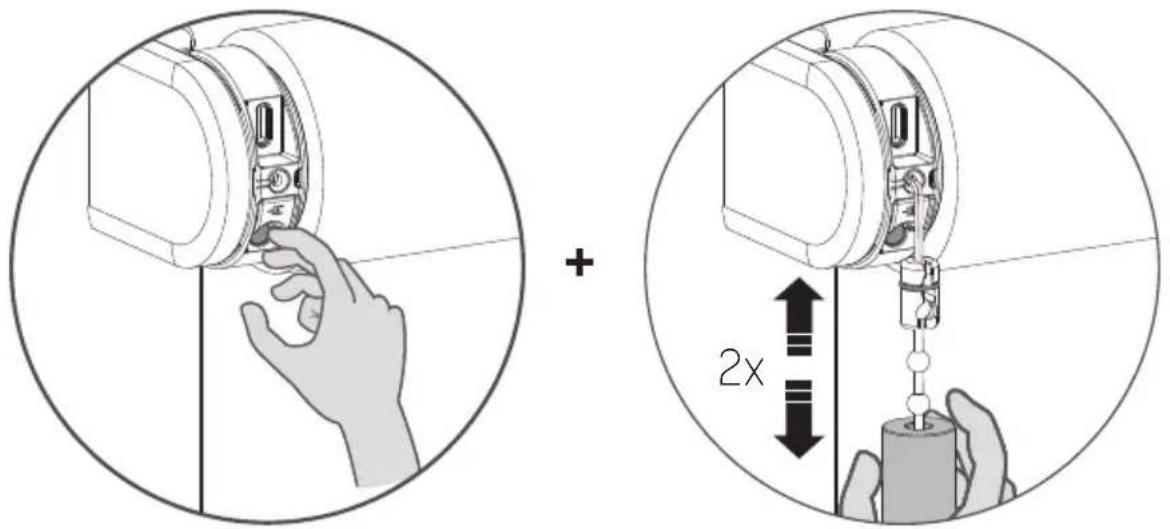
text_image
Diagram illustrating the correct and incorrect assembly of a mechanical device, showing hand positioning and 2x speed adjustment.| Problem Cause Solution | ||
| Blind does not work. | Motor is in transport mode. Activate the motor. See page 4/24. | |
| Motor battery is empty. Charge the motor. See page 12. | ||
| Remote battery is empty. (LEDS of remote are flashing rapidly.) | Replace the battery in the remote.See the manual of the remote. | |
| Remote battery is inserted incorrectly. | Replace the battery in the remote.See the manual of the remote. | |
| Radio-frequency interference Make sure that the antenna of the motor is out of the way of metal objects. | ||
| The distance from the phone/bridge/remote to the motor is too far. | Move closer to the motor. | |
| The remote is not connected to the blind. | Pair the remote with the motor.See page 18. | |
| Motor LED flashes red. The battery of the motor is empty. Charge the motor. See page 12. | ||
| Blind is not charging. Charger is not plugged in or does not work. | Try a different charger or make sure the charger is plugged in the outlet. | |
| Multiple blinds respond to a remote. (Unable to program a single blind) | Multiple blinds are paired with a single channel. | Pair the blind with a free channel to program or use single select to program the blind. |
| Blind moves in small steps. | 1) No end limits are programmed.2) Direct control is deactivated. | 1) Program end limits. See page 6-7, 18-20.2) Activate direct control. See page 22. |
| Favourite position can not be programmed. | No end limits are programmed. Program end limits. | See page 6-7, 18-20. |
| Blind lowers too far. End limits are programmed incorrectly. Reprogram end limits. | See step 6-7, 18-20. | |
| Blind moves in the opposite direction. | The rotational direction has been set incorrectly. | Change the rotational direction.See page 11, 18. |
| The blind keeps moving up and down. | The blind is in program mode. | Press the program button on the motor to exit program mode. |
| The blind will not connect with your Thread-network. | The blinds connection is not stable. | 1) Turn on Bluetooth2) De-activate the motor and re-activate the motor and try to connect again. See page 243) Close the app and reconnect with your motor. |
Gebrauchsanweisung
Rollo
Rohrmotor CM-03-E

powered by eve. Motionblinds

matter

BUILT ON THREAD
REQUIRES BORDER ROUTER
natural_image
Technical line drawing of a mechanical device with attached chain and hanging component (no text or symbols)i ACHTUNG
text_image
Illustration showing a child using a medical device with a red prohibition symbol over the dose
Conforms to UL Std. 325
natural_image
Technical line drawing of a mechanical device with internal components and wiring (no text or symbols)USB-C-Ladeanschluss
text_image
Bracket Motorized Inside mount Outside mount i Inside mount i Max. 1/8"natural_image
Technical line drawing of a mechanical device with an inset close-up showing internal components (no text or symbols)natural_image
Diagram of a mechanical lever system with a roller and hanging weights, showing motion direction (no text or symbols)natural_image
Technical line drawing of a mechanical device with a hand inserting a component into a circular housing (no text or symbols)natural_image
Diagram of a mechanical device with a hanging chain and directional arrows, no text or symbols presentnatural_image
Technical line drawing of a mechanical assembly with a magnified inset showing a hand interacting with a component (no text or symbols present)natural_image
Diagram of a mechanical lever system with a hand pulling a chain and a load applied downward (no text or symbols)natural_image
Diagram of a roller roller system with a hanging hook and downward force arrows, no text or symbols presentnatural_image
Technical line drawing of a mechanical device with a magnified inset showing a hand adjusting the component (no text or symbols present)text_image
Diagram illustrating a sliding window mechanism with time and duration labelstext_image
Diagram illustrating a sliding window mechanism with time and duration labelstext_image
Iolor Blind Closed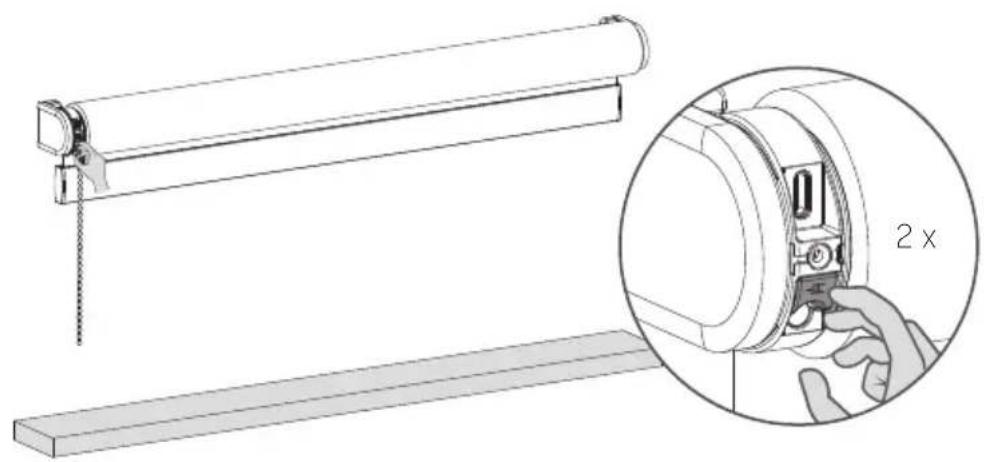
natural_image
Technical line drawing of a mechanical assembly with a magnified inset showing a 2x ratio adjustment (no text or symbols present)natural_image
Technical line drawing of a mechanical component with internal parts and a tool inserted (no text or symbols)natural_image
Technical line drawing of a mechanical assembly with no visible text or symbolsnatural_image
Technical line drawing of a mechanical assembly with no visible text or symbolsRegulatory Information
text_image
Diagram showing a mechanical device with directional arrows and a magnified view of the component, including time and duration labels.text_image
CM-11 CM-12 CM-13 CM-15 Pairing- Taste CM-17 Pairing- Taste Pairing Tastetext_image
Diagram showing a roller roller system with a Hoch control panel and a Runner device, illustrating mechanical assembly or motion.natural_image
Technical line drawing of a roll-up device and a running controller (no text or symbols)natural_image
Diagram showing a hand pressing a button on a roller, with an inset close-up of the action (no text or symbols present)text_image
Diagram illustrating the correct and incorrect assembly of a device, showing hand positioning and 2x speed adjustment.powered by eve. Motionblinds

matter

BUILT ON THREAD
REQUIRES BORDER ROUTER
natural_image
Technical line drawing of a mechanical device with attached chain and hanging component (no text or symbols)i AVERTISSEMENT
text_image
Illustration showing a child using a device with a red prohibition symbol, indicating no usage or no prohibition.Conforms to UL Std. 325
natural_image
Technical line drawing of a mechanical device with internal components and wiring (no text or symbols)Port de charge USB-C
text_image
Bracket Motorized Inside mount Outside mount i Inside mount i Max. 1/8"4
2 Activer le store
natural_image
Technical line drawing of a mechanical device with an inset close-up showing internal components (no text or symbols)natural_image
Diagram of a mechanical lever system with a roller and hanging weights, showing motion direction (no text or symbols)natural_image
Technical line drawing of a mechanical device with a hand inserting a component into a circular housing (no text or symbols)natural_image
Diagram of a mechanical device with a hanging chain and directional arrows indicating motion (no text or symbols)natural_image
Technical illustration of a mechanical assembly with a magnified inset showing a hand interacting with a component (no text or symbols present)natural_image
Diagram of a mechanical lever system with a hanging slide and a horizontal base, showing motion direction (no text or symbols)natural_image
Diagram of a roller roller system with a hanging hook and downward force arrows, no text or symbols presentnatural_image
Technical line drawing of a mechanical device with a magnified inset showing a hand adjusting the component (no text or symbols present)text_image
Diagram illustrating a sliding window mechanism with time and duration annotationstext_image
Diagram illustrating a sliding window mechanism with time and duration labelstext_image
Iolor Blind Closed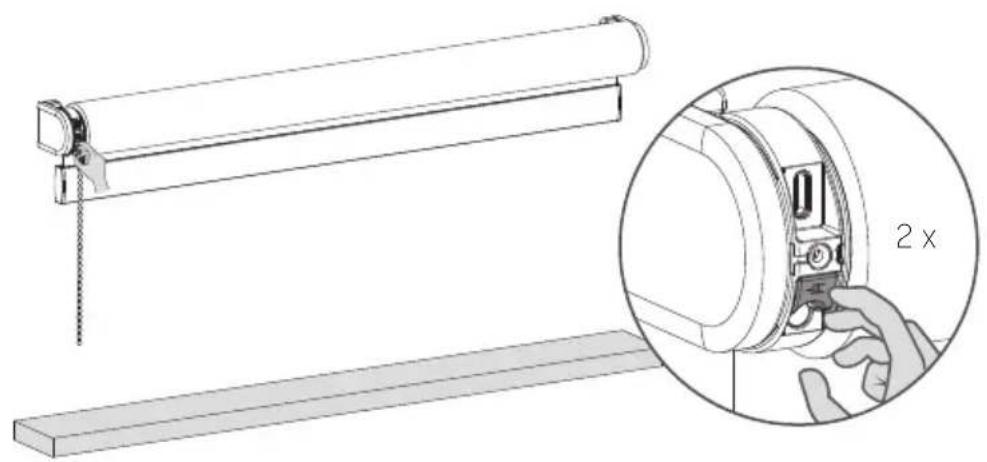
natural_image
Technical line drawing of a mechanical assembly with an inset showing a close-up of a component labeled '2 x' (no text or symbols beyond the label)i Recharger les stores
natural_image
Technical line drawing of a mechanical component with no visible text or symbols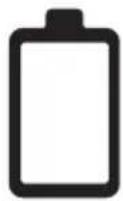
natural_image
Technical line drawing of a mechanical assembly with no visible text or symbols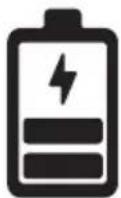
natural_image
Technical line drawing of a mechanical assembly with no visible text or symbols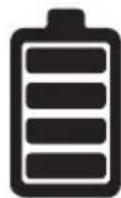
text_image
Diagram showing a mechanical device with directional arrows and a magnified inset highlighting measurement intervals (1-5s and 5s).i Réinitialiser la connexion
text_image
Diagram showing a door lock system with labeled components: 'Haut' and 'Bas', including a drop in the lock mechanism.natural_image
Technical line drawing of a scroll roller with a base and a control panel labeled 'Bas' (no text or symbols beyond label)text_image
Centre Hauttext_image
Centre Basnatural_image
Diagram showing a hand inserting a button into a device via a lock mechanism, with no text or symbols present.text_image
Diagram illustrating the correct and incorrect assembly of a mechanical device, showing hand positioning and 2x speed adjustment.powered by eve. Motionblinds

matter

BUILT ON THREAD
REQUIRES BORDER ROUTER
natural_image
Technical line drawing of a mechanical device with attached chain and hanging component (no text or symbols)i WAARSCHUWING
text_image
Illustration showing a child using a device with a red prohibition symbol, indicating no usage or no prohibition.Conforms to UL Std. 325
natural_image
Technical line drawing of a mechanical device with internal components and wiring (no text or symbols)USB-C oplaadpoort
LED (batterij-/reset indicator)
Eindpositions knop
Reset/Programmeer knop
Trekbediening
text_image
Bracket Motorized Inside mount Outside mount i Inside mount i Max. 1/8"4
natural_image
Technical line drawing of a mechanical device with an inset close-up showing internal components (no text or symbols)natural_image
Diagram of a mechanical lever system with a roller and hanging weights, showing motion direction (no text or symbols)natural_image
Technical line drawing of a mechanical device with a hand inserting a component into a circular housing (no text or symbols)natural_image
Diagram of a mechanical device with a hanging chain and directional arrows, no text or symbols presentnatural_image
Technical line drawing of a mechanical assembly with a magnified inset showing a hand interacting with a component (no text or symbols present)natural_image
Diagram of a mechanical lever system with a hanging rod and load, showing motion direction (no text or symbols)natural_image
Diagram of a roller roller system with a hanging hook and two downward arrows indicating motion (no text or symbols)natural_image
Technical line drawing of a mechanical device with a magnified inset showing a hand inserting a component into a circular housing (no text or symbols present)text_image
Diagram illustrating a sliding window mechanism with time and duration labelstext_image
Diagram illustrating a sliding window mechanism with time and duration labelstext_image
Iolor Blind Closed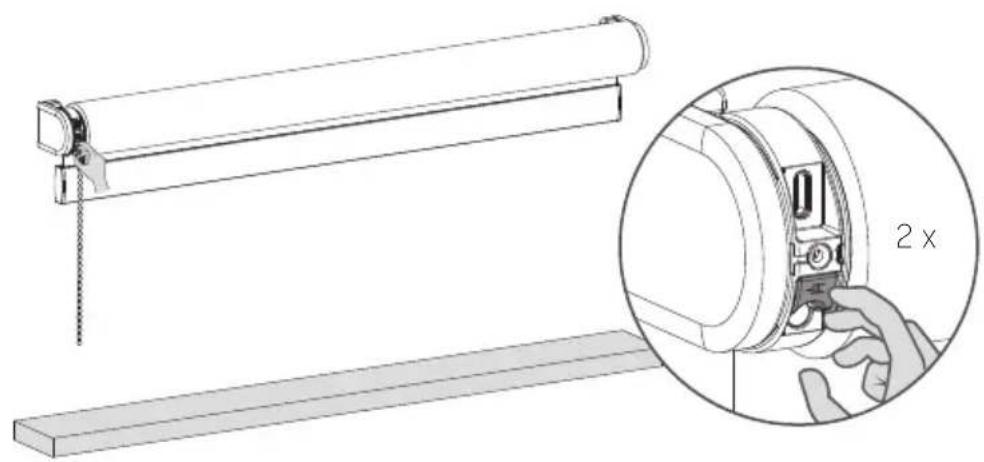
natural_image
Technical line drawing of a mechanical assembly with a magnified inset showing a 2x ratio of a component (no text or symbols present)natural_image
Technical line drawing of a mechanical component with no visible text or symbols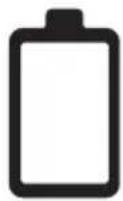
natural_image
Technical line drawing of a mechanical assembly with no visible text or symbols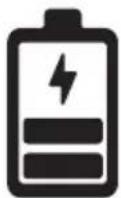
natural_image
Technical line drawing of a mechanical assembly with no visible text or symbols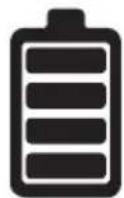
text_image
Diagram showing a mechanical device with directional arrows and a magnified inset highlighting measurement intervals (1-5s and 5s).Reset de verbinding
natural_image
Technical line drawing of a roller roller with a flat base and a digital display unit labeled 'Omlaag' (no text or symbols on the diagram itself)natural_image
Diagram showing a hand inserting a button into a device via a lock mechanism, with no text or symbols present.text_image
Diagram illustrating a hand operating a 5-second door lock mechanism with bidirectional arrows indicating clockwise motion.VEELGESTELDE VRAGEN
Activeer/deactiveer de motor (transportmodus)
text_image
Diagram illustrating the correct and incorrect assembly of a device, showing hand positioning and 2x speed adjustment.powered by eve. Motionblinds

matter

BUILT ON THREAD
REQUIRES BORDER ROUTER
natural_image
Technical line drawing of a mechanical device with a hanging chain and clamping mechanism (no text or symbols)i ADVERTENCIA
text_image
Illustration showing a child using a device with a red prohibition symbol, indicating no usage or no prohibition.
Conforms to UL Std. 325
natural_image
Technical line drawing of a mechanical device with internal components and wiring (no text or symbols)text_image
Bracket Motorized Inside mount Outside mount i Inside mount i Max. 1/8"4
natural_image
Technical line drawing of a mechanical device with an inset close-up showing internal components (no text or symbols)natural_image
Diagram of a mechanical lever system with a hand pulling a chain and a load applied downward (no text or symbols)natural_image
Technical line drawing of a mechanical device with a hand operating the button (no text or symbols present)natural_image
Diagram of a mechanical device with a hanging chain and directional arrows, no text or symbols presentnatural_image
Technical illustration of a mechanical assembly with a magnified inset showing a hand interacting with a component (no text or symbols present)natural_image
Diagram of a mechanical lever system with a hanging bar and load, showing motion direction (no text or symbols)natural_image
Diagram of a roller roller system with a hanging hook and downward force arrows, no text or symbols presentnatural_image
Technical line drawing of a mechanical device with a magnified inset showing a hand adjusting the component (no text or symbols present)text_image
Diagram illustrating a sliding window mechanism with time and duration labels10
text_image
Diagram illustrating a sliding window mechanism with time measurement and hand gesture, showing 5 seconds time indicatortext_image
Diagram illustrating a sliding window mechanism with time and duration labelstext_image
Iolor Blind Closed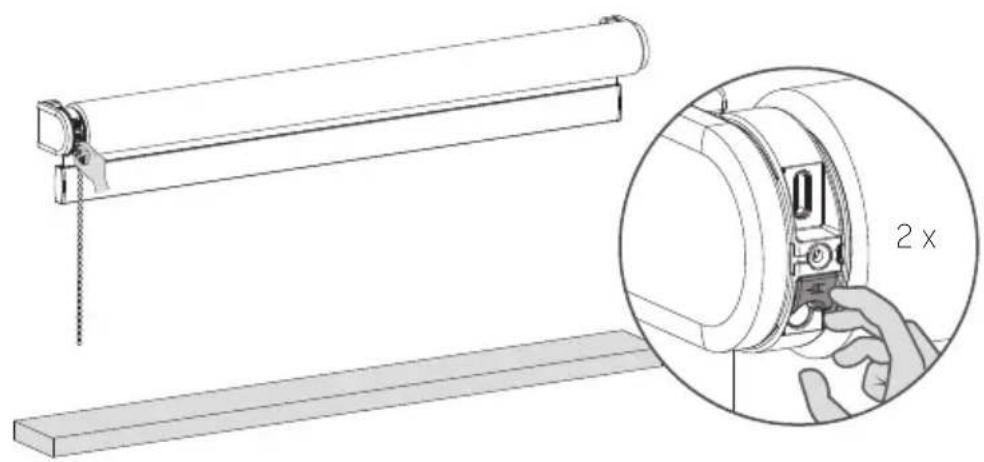
natural_image
Technical line drawing of a mechanical assembly with a magnified inset showing a 2x ratio adjustment (no text or symbols present)natural_image
Technical line drawing of a mechanical component with internal parts and a tool inserted (no text or symbols)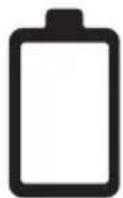
natural_image
Technical line drawing of a mechanical assembly with no visible text or symbols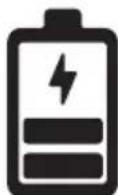
natural_image
Technical line drawing of a mechanical assembly with no visible text or symbols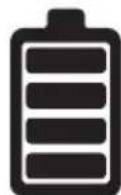
text_image
Diagram showing a mechanical device with directional arrows and a magnified inset highlighting a 1-5 second time interval.text_image
Subir Bajarnatural_image
Technical line drawing of a roller roller with a Bajar device labeled, showing no text or symbols beyond the label.natural_image
Diagram showing a hand pressing a button on a roller, with an inset close-up of the action (no text or symbols present)text_image
Diagram illustrating the correct and incorrect assembly of a mechanical device, showing hand positioning and 2x speed adjustment.powered by eve. Motionblinds

matter

BUILT ON THREAD
REQUIRES BORDER ROUTER
natural_image
Technical line drawing of a mechanical device with attached chain and hanging component (no text or symbols)i OSTRZEŻENIE
text_image
Illustration showing a child using a device with a red prohibition symbol, indicating no usage or no prohibition.natural_image
Technical line drawing of a mechanical device with internal components and wiring (no text or symbols)text_image
Bracket Motorized Inside mount Outside mount i Inside mount i Max. 1/8"natural_image
Technical line drawing of a mechanical device with an inset close-up showing internal components (no text or symbols)natural_image
Diagram of a mechanical lever system with a roller and fulcrum, showing downward force application (no text or symbols)natural_image
Technical line drawing of a mechanical device with a hand inserting a component into a circular housing (no text or symbols)natural_image
Diagram of a mechanical device with a hanging chain and directional arrows indicating motion (no text or symbols)natural_image
Technical line drawing of a mechanical assembly with a magnified inset showing a hand interacting with a component (no text or symbols present)natural_image
Diagram of a mechanical lever system with a hanging rod and load, showing motion direction (no text or symbols)natural_image
Diagram of a roller roller system with a hand suspended and two downward arrows indicating motion (no text or symbols)natural_image
Technical line drawing of a mechanical device with a magnified inset showing a hand adjusting the component (no text or symbols present)text_image
Diagram illustrating a sliding window mechanism with time and duration labels10
text_image
Diagram illustrating a sliding window mechanism with time and duration labelstext_image
Diagram illustrating a sliding window mechanism with time and duration labelstext_image
Iolor Blind Closed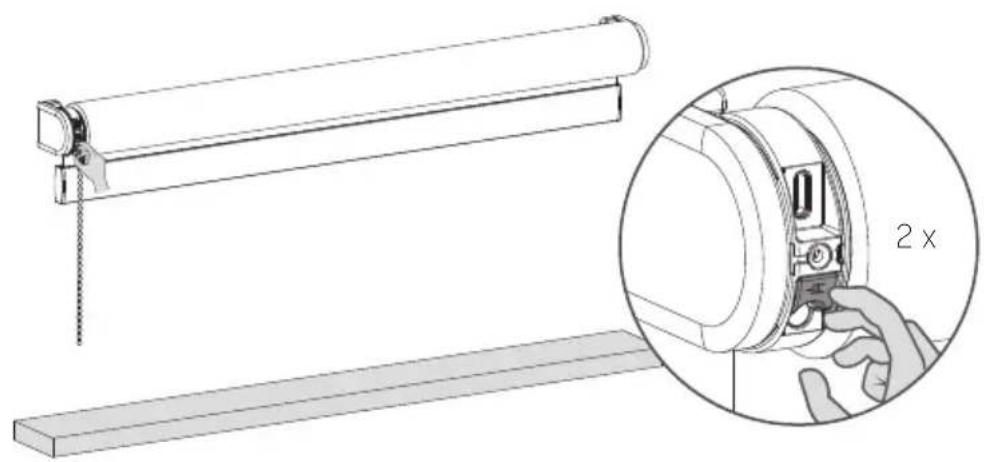
natural_image
Technical illustration of a mechanical assembly with a magnified inset showing a 2x ratio adjustment (no text or symbols present)i Ładowanie rolety
natural_image
Technical line drawing of a mechanical assembly with no visible text or symbolsnatural_image
Technical line drawing of a mechanical assembly with no visible text or symbolsnatural_image
Technical line drawing of a mechanical assembly with no visible text or symbolstext_image
Diagram showing a mechanical device with directional arrows and a magnified inset highlighting a 1-5 second time interval.natural_image
Technical line drawing of a scroll roller with a flat base and a digital display unit labeled 'W dót' (no text or symbols on the diagram itself)natural_image
Diagram showing a hand inserting a button into a device via a lock mechanism, with no text or symbols present.text_image
Diagram illustrating a hand operating a 5-second door lock mechanism with bidirectional arrows indicating clockwise motion.FAQ
text_image
Diagram illustrating the correct and incorrect assembly of a mechanical device, showing hand positioning and 2x speed adjustment.powered by eve. Motionblinds

matter

BUILT ON THREAD
REQUIRES BORDER ROUTER
natural_image
Technical line drawing of a mechanical device with attached chain and hanging component (no text or symbols)i ADVERTÊNCIA
text_image
Illustration showing a child using a device with a red prohibition symbol, indicating no usage or no prohibition.natural_image
Technical line drawing of a mechanical device with internal components and mounting base (no text or symbols)Entrada de carregamento USB-C
text_image
Bracket Motorized Inside mount Outside mount i Inside mount i Max. 1/8"2 Ativar a persiana
natural_image
Technical line drawing of a mechanical device with an inset close-up showing internal components (no text or symbols)natural_image
Diagram of a mechanical lever system with a roller and fulcrum, showing downward force application (no text or symbols)natural_image
Technical line drawing of a mechanical device with a hand inserting a component into a circular housing (no text or symbols)natural_image
Diagram of a mechanical device with a roller and hanging chain, showing motion direction (no text or symbols)natural_image
Technical line drawing of a mechanical assembly with a magnified inset showing a hand interacting with a component (no text or symbols present)natural_image
Diagram of a mechanical lever system with a hanging slide and a horizontal base, showing motion direction (no text or symbols)natural_image
Diagram of a roller roller system with a hanging hook and directional arrows indicating motion (no text or symbols)natural_image
Technical line drawing of a mechanical device with a magnified inset showing a hand adjusting the component (no text or symbols present)text_image
Diagram illustrating a sliding window mechanism with time and duration labelstext_image
Diagram illustrating a sliding window mechanism with time measurement and hand gesture, showing 5 seconds speed indicatortext_image
Iolor Blind Closed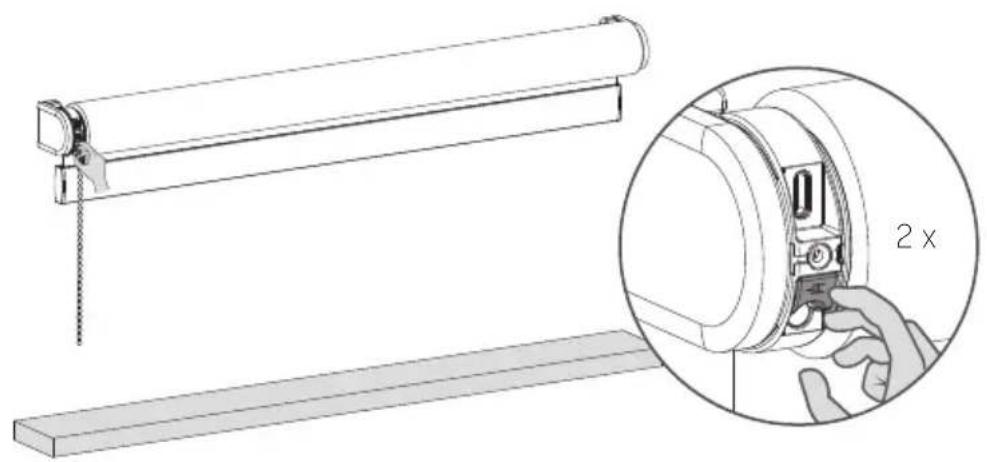
natural_image
Technical line drawing of a mechanical assembly with an inset showing a close-up of a component labeled '2 x' (no text or symbols beyond the label)i Recarregar a persiana
natural_image
Technical line drawing of a mechanical component with no visible text or symbols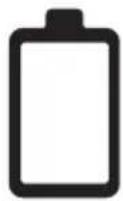
natural_image
Technical line drawing of a mechanical assembly with no visible text or symbols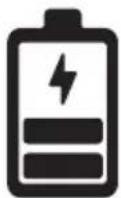
natural_image
Technical line drawing of a mechanical assembly with no visible text or symbols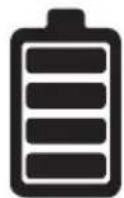
text_image
Diagram showing a mechanical device with directional arrows and a magnified inset highlighting a 1-5 second time interval.text_image
Central Para cimanatural_image
Diagram showing a hand pressing down on a mechanical component with an arrow indicating motion (no text or symbols present)text_image
Diagram illustrating the correct and incorrect assembly of a mechanical device, showing hand positioning and 2x speed adjustment.powered by eve. Motionblinds

matter

BUILT ON THREAD
REQUIRES BORDER ROUTER
natural_image
Technical line drawing of a mechanical device with attached chain and hanging component (no text or symbols)警告
text_image
Illustration showing a child with a red prohibition symbol over a ring, indicating no chemical or chemical use.text_image
Bracket Motorized Inside mount Outside mount i Inside mount i Max. 1/8"2 激活卷帘
natural_image
Technical line drawing of a mechanical device with an inset close-up showing internal components (no text or symbols)natural_image
Diagram of a mechanical lever system with a hanging rod and load, showing motion direction (no text or symbols)6
6 保存底端位置
natural_image
Technical line drawing of a mechanical device with a hand operating the button (no text or symbols present)7 将窗帘移至顶端
拉住拉绳不放,直到窗帘滑动到顶端。
natural_image
Diagram of a mechanical device with a roller and hanging chain, showing motion direction (no text or symbols)8 保存顶端位置
natural_image
Technical line drawing of a mechanical assembly with a magnified inset showing a hand interacting with a component (no text or symbols present)9 调整端点
natural_image
Diagram of a mechanical device with a roller and hanging weights, showing motion direction (no text or symbols)8
10 删除(底端/顶端)位置
natural_image
Diagram of a roller roller system with a hand operating the frame and two downward arrows indicating motion (no text or symbols)12 保存底端位置
natural_image
Technical line drawing of a mechanical device with a magnified inset showing a hand adjusting a component (no text or symbols present)13 保存常用位置
text_image
Iolor Blind Closed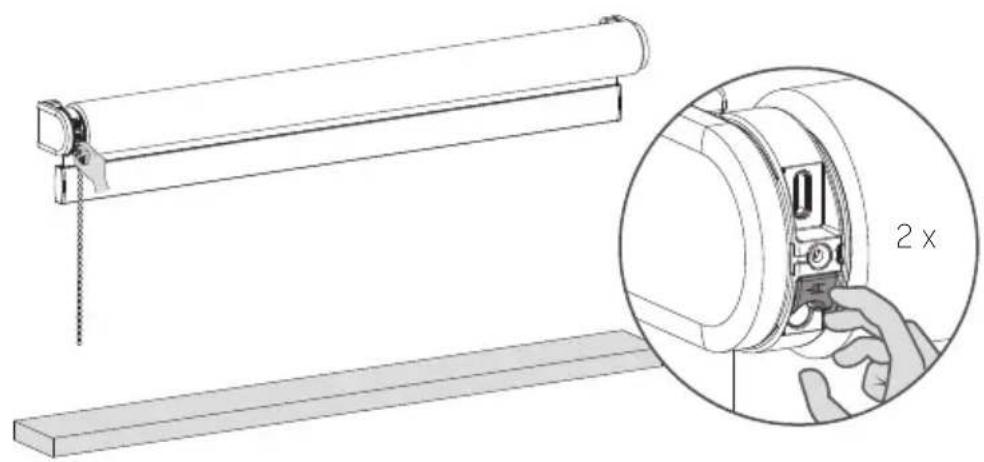
natural_image
Technical illustration of a mechanical assembly with a magnified inset showing a 2x ratio adjustment (no text or symbols present)i 窗帘充电
natural_image
Technical line drawing of a mechanical assembly with internal components (no text or symbols)natural_image
Technical line drawing of a mechanical assembly with no visible text or symbols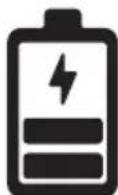
绿色LED灯闪烁;正在充电
natural_image
Technical line drawing of a mechanical assembly with no visible text or symbols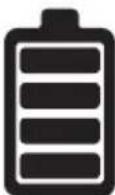
绿色 LED 灯常亮;电已充满
重要的安全说明
text_image
Diagram showing a mechanical device with directional arrows and a magnified inset highlighting a 1-5 second time interval.重置连接
natural_image
Diagram showing a hand pressing down on a mechanical component with an arrow indicating motion (no text or symbols present)关闭遥控器控制的直接控制
natural_image
Empty white rectangle with a thin black border (no text or symbols)room:
notes: