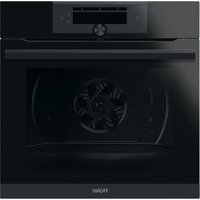
HWO60SM6FE9XHP - Oven HAIER - Free user manual and instructions
Find the device manual for free HWO60SM6FE9XHP HAIER in PDF.


User questions about HWO60SM6FE9XHP HAIER
0 question about this device. Answer the ones you know or ask your own.
Ask a new question about this device
Download the instructions for your Oven in PDF format for free! Find your manual HWO60SM6FE9XHP - HAIER and take your electronic device back in hand. On this page are published all the documents necessary for the use of your device. HWO60SM6FE9XHP by HAIER.
USER MANUAL HWO60SM6FE9XHP HAIER
CANDY HOOVER GROUP Via Comolli 16 Brugherio - Italy
Haier
| User Instructions OVENS | EN | 4 |
| Mode d'emploi FOURS | 21 R | |
| Istruzioni per l'uso FORNI | IT | 38 |
| Pokyny pro uživatele TROUBY | CZ | 55 |
5
Important safety indications
12
Product description
15
Use of the appliance
19
Cleaning & maintenance
20
Environmental protection and disposal
72
Installation
Thank you for choosing one of our products. For the best results, please read this manual carefully and retain it for future reference. Before installing the oven, take note of the serial number, which you may need if any repairs are required. Check that the oven has not been damaged during transportation. If in doubt, consult a qualified technician before using the oven. Keep all packaging materials out of reach of children. When the oven is switched on for the first time, strong-smelling smoke
may develop. This is caused by the glue on the insulation panels heating for the first time. If it occurs, do not worry, just wait for the smoke to dissipate before putting food in the oven. The manufacturer accepts no responsibility in cases where the instructions contained in this document are not observed.
NOTE: The oven functions, properties and accessories cited in this manual will vary depending on the model you have purchased.
SAFETYINSTRUCTIONS
Children should not play with the appliance.
- The appliance can be used by those aged 8 or over and by those with limited physical, sensorial or mental capacities, without experience or knowledge of the product, only if supervised or provided with instruction as to the operation of the appliance, in a safe way with awareness of the possible risks.
- Cleaning and maintenance should not be carried out by unsupervised children.
- WARNING: the appliance and accessible parts become hot during use. Be careful not to touch any hot parts.
- WARNING: the accessible parts may become hot during use. Young children should be kept away.
- WARNING: in order to avoid any danger caused by the accidental resetting of the thermal interruption device, the appliance should not be powered by an external switching device, such as a timer, or be connected to a circuit that is regularly switched on and off.
- Children under 8 should be kept at a safe distance from the appliance if not continuously supervised.
- Do not use a steam cleaner or high pressure spray for cleaning operations.
- Disconnect the appliance from the mains electricity supply before carrying out any work or maintenance on it.
INSTALLATION RECOMMENDATIONS/WARNINGS
- The manufacturers have no obligation to carry this out. If the assistance of the manufacturer is required to rectify faults arising from incorrect installation, this assistance is not covered by the guarantee. The installation instructions for professionally qualified personnel must be followed. Incorrect installation may cause harm or injury to people, animals or belongings. The manufacturer cannot be held responsible for such harm or injury.
-
No additional operation/setting is required in order to operate the appliance at the rated frequencies.
-
The appliance must not be installed behind a decorative door in order to avoid overheating.
- The oven can be located high in a column or under a worktop. Before fixing, you must ensure good ventilation in the oven space to allow proper circulation of the fresh air required for cooling and protecting the internal parts. Make the openings specified on last page according to the type of fitting. Always fix the oven to the furniture with screw provided with the appliance.
ELECTRICALWARNINGS
- If the oven is provided by the manufacturer without plug:
THE APPLIANCE MUST NOT BE CONNECTED TO THE POWER SOURCE USING PLUG OR SOCKETS, BUT MUST BE DIRECTLY CONNECTED TO THE SUPPLY MAINS. The connection to the power source must be carried out by a suitably qualified professional. In order to have an installation compliant to the current safety legislation the oven must be connected only placing an omnipolar breaker, with contact separation compliant to the requirements for overvoltage category III, between the appliance and the power source. The omnipolar breaker must bear the maximum connected load and must be in line with current legislation. The yellow-green earth cable should not be interrupted by the breaker. The omnipolar breaker used for the connection must be easily accessible when the appliance is installed. The connection to the power source must be carried out by a suitably qualified professional considering the polarity of the oven and of the power source. The disconnection must be achieved incorporating a switch in the fixed wiring in accordance with the wiring rules
- If the oven is provided by the manufacturer with plug:
- The socket must be suitable for the load indicated on the tag and must have ground contact connected and in operation. The earth conductor is yellow-green in colour. This operation should be carried out by a suitably qualified professional. In case of incompatibility between the socket and the appliance plug, ask a qualified electrician to substitute the socket with another suitable type. The plug and the socket must be conformed to the current norms of
the installation country. Connection to the power source can also be made by placing an omnipolar breaker, with contact separation compliant to the requirements for overvoltage category III, between the appliance and the power source that can bear the maximum connected load and that is in line with current legislation. The yellow-green earth cable should not be interrupted by the breaker. The socket or omnipolar breaker used for the connection should be easily accessible when the appliance is installed. The disconnection may be achieved by having the plug accessible or by incorporating a switch in the fixed wiring in accordance with the wiring rules.
- If the power cable is damaged, it should be substituted with a cable or special bundle available from the manufacturer or by contacting the customer service department. The type of power cable must be H05V2V2-F. This operation should be carried out by a suitably qualified professional. The earth conductor (yellow-green) must be approximately 10 mm longer than the other conductors. For any repairs, refer only to the Customer Care Department and request the use of original spare parts.
- Failure to comply with the above can compromise the safety of the appliance and invalidate the guarantee.
- WARNING: the accessible parts can become hot when the grill is in use. Children should be kept at a safe distance.
- Do not use rough or abrasive materials or sharp metal scrapers to clean the oven door glasses, as they can scratch the surface and cause the glass to shatter.
- WARNING: ensure that the appliance is switched off before replacing the bulb, to avoid the possibility of electric shocks.
- The oven must be switched off before removing the removable parts. After cleaning, reassemble them according the instructions.
- Only use the oven for its intended purpose, that is only for the cooking of foods: any other use, for example as a heat source, is considered improper and therefore dangerous. The manufacturer cannot be held responsible for any damage resulting from improper, incorrect or unreasonable usage.
-
The use of any electrical appliance implies the observance of some fundamental rules:
-
Do not pull on the power cable to disconnect the product from the power source;
- Do not touch the appliance with wet or damp hands or feet;
- In general the use of adaptors, multiple sockets and extension cables is not recommended;
- In case of malfunction and/or poor operation, switch off the appliance and do not tamper with it.
- ENSURE THAT AN ELECTRICIAN OR QUALIFIED TECHNICIAN MAKES THE ELECTRICAL CONNECTIONS. The power supply to which the oven is connected must conform with the laws in force in the country of installation. The manufacturer accepts no responsibility for any damage caused by the failure to observe these instructions. The oven must be connected to an electrical supply with an earthed wall outlet or a disconnector with multiple poles, depending on the laws in force in the country of installation. The electrical supply should be protected with suitable fuses and the cables used must have a transverse section that can ensure correct supply to the oven.
- CONNECTION. The oven is supplied with a power cable that should only be connected to an electrical supply with 220-240 Vac power between the phases or between the phase and the neutral. Before the oven is connected to the electrical supply, it is important to check power voltage indicated on the gauge and the setting of the disconnector. The grounding wire connected to the oven's earth terminal must be connected to the earth terminal of the power supply.
- WARNING. Before connecting the oven to the power supply, ask a qualified electrician to check the continuity of the power supply's earth terminal. The manufacturer accepts no responsibility for any accidents or other problems caused by failure to connect the oven to the earth terminal or by an earth connection that has defective continuity.
- NOTE: as the oven could require maintenance work, it is advisable to keep another wall socket available so that the oven can be connected to this if it is removed from the space in which it is installed. The power cable must only be substituted by technical service staff or by technicians with equivalent qualifications.
USE RECOMMENDATIONS/WARNINGS
- During cooking, moisture may condense inside the oven cavity or on the glass of the door. This is a normal condition. To reduce this effect, wait 10-15 minutes after turning on the power before putting food inside the oven. In any case, the condensation disappears when the oven reaches the cooking temperature.
- Cook the vegetables in a container with a lid instead of an open tray.
- Avoid leaving food inside the oven after cooking for more than 15/20 minutes.
- A long power supply failure during an occurring cooking phase may cause a malfunction of the monitor. In this case contact customer service.
- When you place the shelf inside, make sure that the stop is directed upwards and in the back of the cavity. The shelf must be inserted completely into the cavity.
- WARNING: Do not line the oven walls with aluminium foil or single-use protection available from stores. Aluminium foil or any other protection, in direct contact with the hot enamel, risk melting and deteriorating the enamel of the insides.
- WARNING: Never remove the oven door seal.
- CAUTION: Do not refill the cavity bottom with water during cooking or when the oven is hot.
- When inserting the grid tray pay attention that the anti-slide edge is positioned rearwards and upwards
- For a correct use of the oven it is advisable not to put the food in direct contact with the racks and trays, but to use oven papers and/or special containers.
- The dripping pan collects the residues that drip during cooking.
WARNING
- Any excess of spilled material should be removed before cleaning.
-
WARNING: before initiating the automatic cleaning cycle:
-
Clean the oven door;
- Remove large or coarse food residues from the inside of the oven using a damp sponge. Do not use detergents;
- Remove all accessories and the sliding rack kit (where present);
-
Do not place tea towels.
-
In ovens with meat probe it is necessary, before making the cleaning cycle, close the hole with the nut provided. Always close the hole with the nut when the meat probe is not used.
- During the pyrolytic cleaning process (if available), surfaces can heat up more than usual, children must therefore be kept at a safe distance.
- If a hob has been fitted above the oven, never use the hob while the Pyrolizer is working, this will prevent the hob from overheating.
- When filling in the water tank the level of the water must not exceed the maximum level indicated on the tank.
- WARNING: Risk of burn and damage to the appliance: using the steam function released steam can cause burns: Open the door carefully to avoid injury after using a cooking function with steam.
- Use only drinking water to fill in the tank.
- Use only drinking water to fill in the cavity bottom during the steam function.
- Only use the meat probe recommended for this oven.
Preci Probe (Wireless temperature probe) WARNINGS
WARNING:
- This product is exclusive for oven appliances.
It should only be used as described in this User Manual.
DO NOT TOUCH Preci Probe WITH BARE HANDS JUSTAFTER COOKING. Always wear oven gloves to remove Preci Probe from the food after cooking.
- It is required to FULLY INSERT Preci Probe metal bar properlyinto the food until the BLACK ceramic EDGE of it during cooking.
insert Preci Probe
in the food up to here
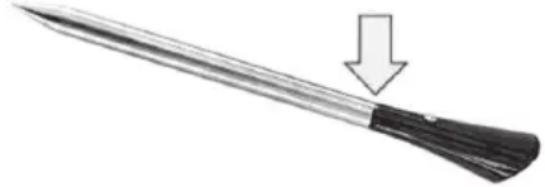
- Do not expose the metal part of Preci Probe to the heat generated by oven directly. Do not expose the metal part of Preci Probe to the heat generated by the appliance.
- Do not use Preci Probe in another appliance except for the built-in oven.
- Do not use Preci Probe in a microwave oven.
- Preci Probe can be cleaned and washed but do not immerse itlong in water.
This product is not intended for use by persons with ages 12 and under. - The supplier will not be liable for any damage of Preci Probe due to misuse of the device.
- Clean the Preci Probe before the use
- Probe can work in this range of temperature: 10^ to an internal maximum temperature of 100^ of the metal part. Ceramic part can reach 350^ .
- If the Preci Probe temperature exceeds 100^ , cooking will stop and the Preci Probe must be removed from the oven as soon as possible, wearing gloves, to avoid damage to the probe.
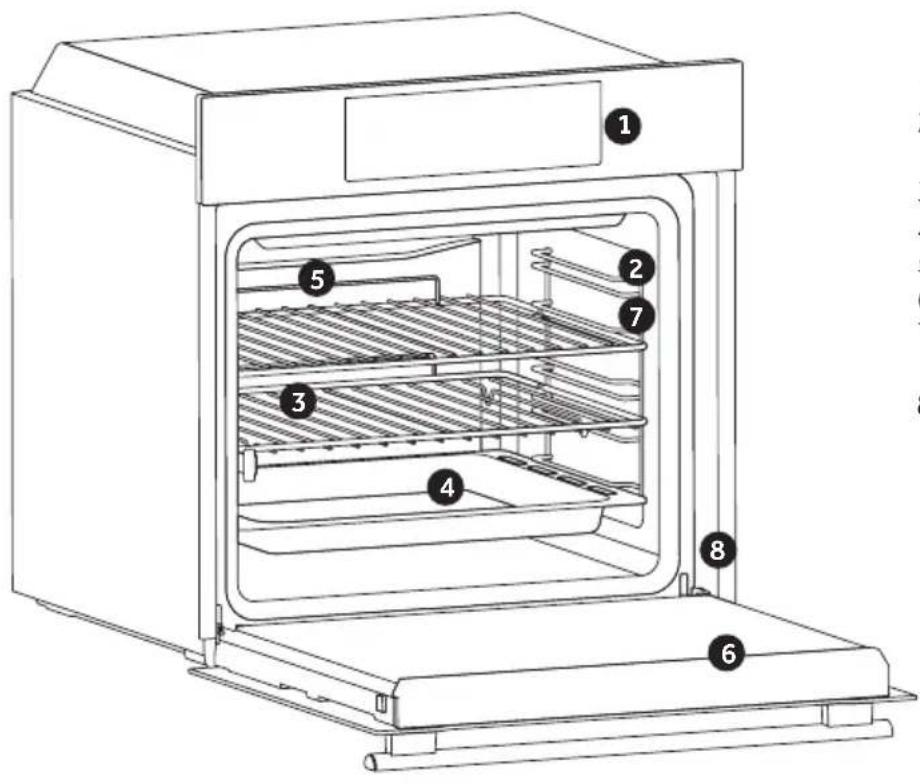
- Control panel
- Shelf positions (lateral wire grid if included)
- Grids
- Trays
- Fan (if present)
- Oven door
- Lateral wire grids (if present: only for flat cavity)
8. Serial number
Write here your serial number for future reference.
ACCESSIONS
Drip tray
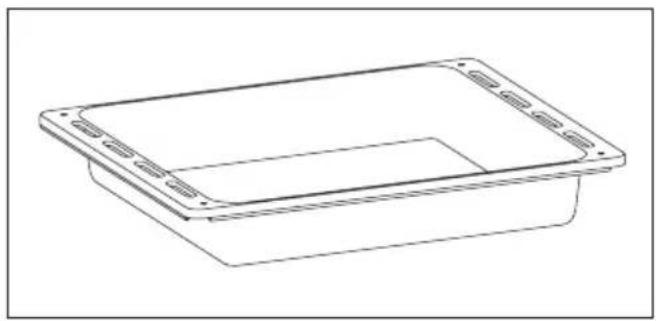
Collects residues that drip when cooking food on the grills.
Metal grid
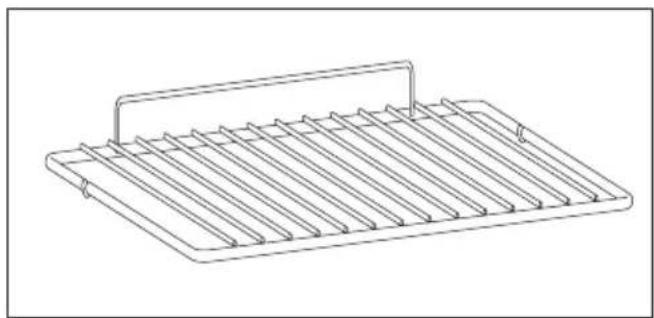
Holds baking trays and plates.
Lateral wire grids (only if present)
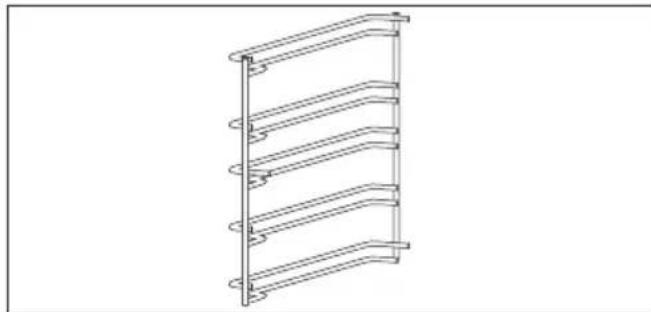
Located on both sides of the oven cavity, holds metal grills and drip pans.
Chef panel (only if present)
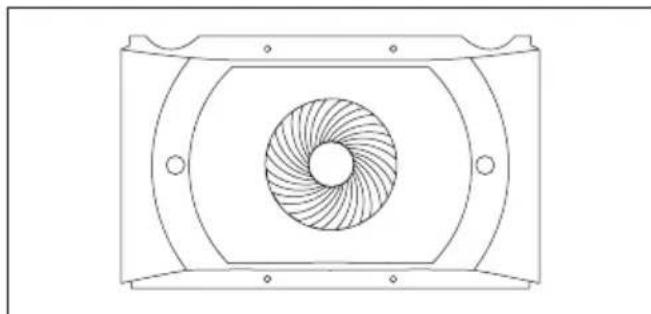
An air conveyor that increases air circulation inside the oven. This enables improved cooking performance, more even cooking of food at all temperatures, shorter cooking times and, lastly, an even temperature distribution inside the oven.
Softclose (only if present)
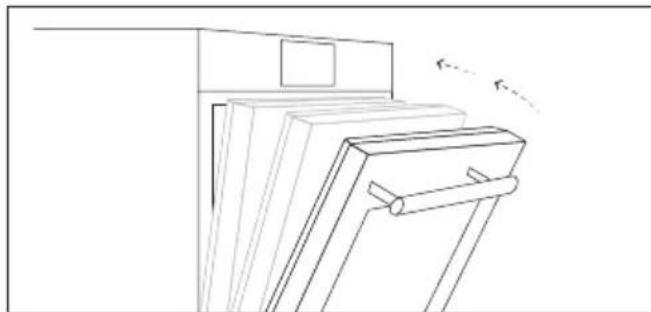
Hinges which ensure an automatic soft and smooth movement during the closing phase of the oven door.
Telescopic guides (only if present)
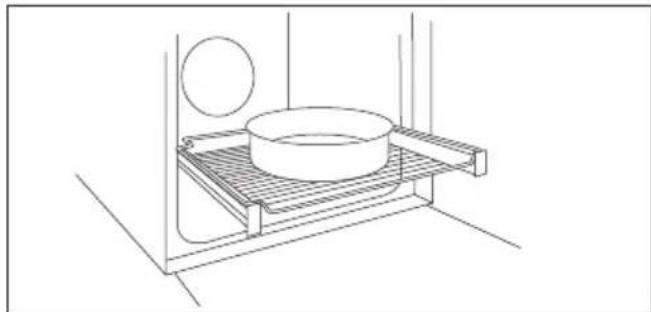
Two guide rails which facilitate the cooking status check as they allow easily the extraction and repositioning of trays and grids inside the oven cavity.
Catalytic panels (only if present)
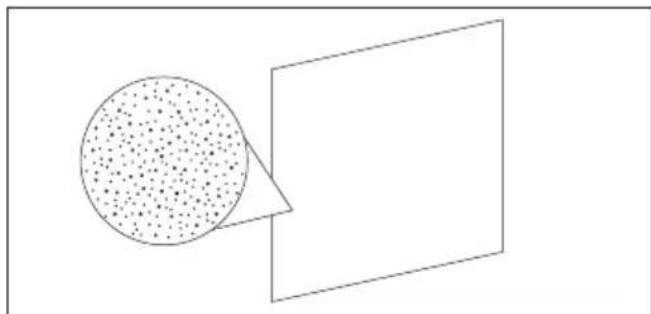
Special panels coated with enamel, made with a microporous structure to turn fat into gaseous elements that are easy to remove. Replace after 3 years of use (at 2/3 cooking cycles per week).
Preci probe
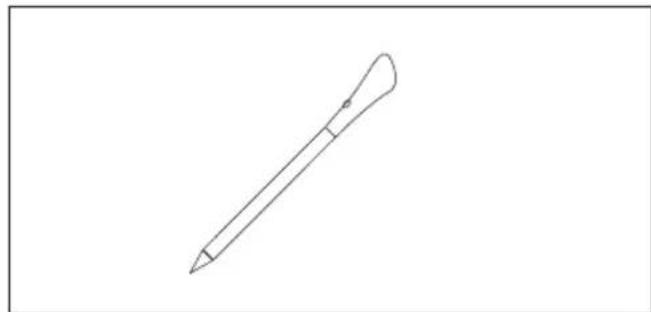
Measures the internal temperature of food during cooking. Insert into the hole on the top of the cavity. Should be inserted while oven is cool.
WARNING:
- Do not preheat or start cooking before properly inserting the meat probe.
- Do not try to insert the Preciprobe in frozen food.
PRECI PROBE
-
Before the use verify the charge of the Preci Probe:
-
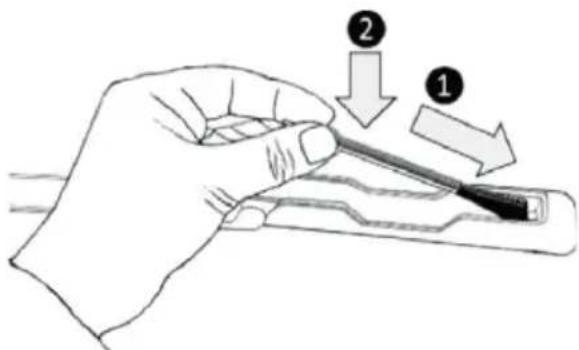
Put Preci Probe into the charger and close the cover.
- Connect the charger to a USB power source, such as USB adapter or USB socket of PC/notebook with the USB cable. The charger may not be working properly with power bank because of its auto switch-off function.
- LED of the charger will turn on and is flashing during charging. It will turn off when Preci Probe is fully charged.
- Verify that Bluetooth of the oven is turned on.
Make sure the Preci Probe is within the range of monitoring distance. With long distances the Preci Probe cannot be detected by the oven. - If the Preci Probe is covered by an insulated material doses not communicate with the oven. If the probe is disconnected while standard cooking using the probe is underway (flat battery, Bluetooth turned off, etc....), the cooking process will be interrupted after a brief interval. During cooking with recipe and probe, the cooking process continues for the remaining scheduled time if disconnected.
Cooking tips - Preci Probe
The Preci Probe can be used with manual functions (Static, static+fan, grill, supergrill, grill + fan, bottom and bottom + fan) and with FOOD COOKING CATEGORIES.
The Preci Probe has one measuring point, insert it fully into the food with the metal tip located at the centre of the food.
That point should be placed as close as possible to the thickest (coldest) part of the food in order to correctly monitor the cooking process.
Thanks to its wireless design, the Preci Probe can be used also to monitor foods that change volume during cooking (i.e. breads).
MEAT/ROASTS/STEAKS: insert the probe diagonally in the thickest part. For cylindrical shape foods (i.e. beef roasts) place the tip as close as possible to the geometric center. Suggested core temperatures:
- 45^ C for roast beef (then wrap in foil and let it rest for 15-20' before serving)
- 55^ C / 60^ C / 65^ C for other roasted meats
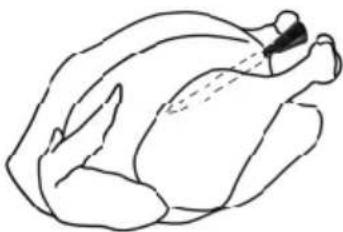
POULTRY: Insert the Preci Probe into the thickest part of the breast. Suggested core temperature for poultry is 83 - 85^
FISH (WHOLE/STEAKS): insert the probe diagonally in the thickest part
Suggested core temperature: 65^
BREAD/CASSEROLES: insert the Preci Probe close to the geometric center of the food.
Suggested core temperature: 90^
COOKING MODES*
| Symbol Description Suggestions | ||
| Conventional ***150-200°C **2nd/3rdlevel | IDEAL FOR: cakes, breads, biscuits, quiches on one level using both upper and lower heating. Can be used with Preci Probe. Fast Preheat option available. | |
| Convection + Fan180-200°C **2nd/3rdlevel | IDEAL FOR: roasts, casseroles, vegetables and pies with moist fillings on one level. Ideal for cooking foods with high water content. Can be used with Preci Probe. Fast Preheat option available. | |
| Multi-level150-230°C **3rdfor single level1st+3rdfor double level | IDEAL FOR: cakes, biscuits and pizzas on one or more levels. Ideal to cook different foods. Can be used with Preci Probe. Fast Preheat option available. | |
| GrillL3 (power)**5thlevel for thin food3rd/ 4thlevel for thick food | IDEAL FOR: gratin, grilled meat, fish, vegetables. This function uses only the top heating element, and the grill level can be adjusted. Use with the door closed. Place white meats at a distance from the grill. Red meats and fish fillets can be placed on the shelf with the drip tray underneath. Turn food two thirds of the way through cooking (If necessary). | |
| Grill + Fan200°C **2nd/3rd/4thlevel | IDEAL FOR: whole pieces of meat (roasts). Uses the top heating element with the fan to circulate the air inside the oven. Use with the door closed. Slide the drip tray under the shelf to collect juices. Turn food over halfway through cooking. Preheating is required for red meats but not for white meats. | |
| Bottom heating160-180°C **1st/2ndlevel | IDEAL FOR: crème caramel, puddings and bain marie on one level. This function can be also used for finishing a preparation. Can be used with Preci Probe. Fast Preheat option available. | |
| Bottom heating + Fan170-230°C **2nd/3rdlevel | IDEAL FOR: pizzas, salty cakes, tarts and foods with liquid toppings on one level. Can be used with Preci Probe. Fast Preheat option available. | |
| Supergirl L3 (power)** 4th/5thlevel | IDEAL FOR: big quantities of sausages, steaks and toast bread. The entire area below the grill element becomes hot. Use with the door closed. Turn food two thirds of the way through cooking (If necessary). Use L5 (power) without preheating when grilling toasts. | |
| Soft + 150-200°C 2nd/3rdlevel | IDEAL FOR: cakes and breads on one level. | |
| Grill+Turnspit L3 power | IDEAL FOR roasting foods such as chicken breasts, quails or fish fillets both sides at the same time. Place a baking tray underneath the food at Level 1 to collect drips and juices. | |
| Grill+Fan+Turnspit 200°C | IDEAL FOR roasting foods such as large chicken or turkey on both sides at the same time. Place a baking tray underneath the food at Level 1 to collect drips and juices. | |
| Conventional+ Turnspit 200°C | IDEAL FOR: Roasting beef or pork roasts. Place a baking tray underneath the food at level 1 to collect drips and juices. | |
ADDITIONAL FUNCTIONS
| Symbol Description Suggestions | ||
| Key lock | This function enables to lock the screen in order to prevent any unwanted use by minors. Press and hold down Temperature (4) for 5 seconds to activate the screen lock. Do the same to deactivate it. | |
| Favourite function | To save a favourite function and display it first when your oven is turned on, hold down the (2) key for 5 seconds. | |
FOOD COOKING CATEGORIES
| Symbol | Description Preheat | Cooking position | Heat Feel temperatures (°C) | Description |
| Red Meat Y 2-3 | 58-62-65°C for beef | For roasts and cuts of beef, veal. | ||
| White Meat Y 2-3 70-74-85°C | for pork roasts, chicken and tur- key pieces and white meat in general. | |||
| Fish Y 2-3 65°C | For whole fish and fillets. | |||
| Veggies Y 3-4 70°C | For roasted vegetables and potatoes. |
Perfect cooking results guaranteed thanks to the pre-set parameters by category. The default values of time and temperature refer to quantities for 4 servings. Use the table below to set the cooking time correctly; use the Preci Probe for best results.
| Food Category | Serving size/grams (in bold, default setting) | Cooking time (min)**** after preheat |
| Red Meat | 4/800; 6/1200; 8/1600 | 50; 52; 55 |
| White Meat | 4/800; 6/1200; 8/1600 | 57; 60; 65 |
| Fish | 4/600; 6/900; 8/1200 | 36; 38; 40 |
| Veggies | 4/800; 6/1200; 8/1600 | 57; 60; 65 |
SPECIAL FUNCTIONS *
| Symbol Description Suggestions | ||
| Tailor bake ***180-200°C **2° level | Ideal to keep food soft inside and crunchy outside.For healthy cooking, this function reduces the amount of fat or oil required. The combination of heating elements with a pulsating cycle of air ensures even baking results. | |
| Bread65/100/220°C2° level | This function allows to cook bread in different steps ensuring perfect cooking results using a convection + fan cycle. We suggest a specific recipe tested by our Chef to cook a perfect bread (see chapter "Bread recipe"). | |
BREAD RECIPE
- With simple bread flour:
500 g of special flour for bread
10 g of salt
7.5 g of baker's dehydrated yeast
Approximately 325 g of water
- With bread flour with yeast and salt incorporated (to recommend):
500 g of special flour for bread
7.5 g of dehydrated baker's yeast (it's better to add a bag)
Approximately 325 g of water
Method
Dissolve yeast in water in a salad bowl, put the flour, salt (if necessary) and water
Mix the whole to form a homogeneous dough
Put the dough on the work plan, and with the palm of the hand, stretch the dough and pull it down on itself (the objective being to lock a maximum for of air into the dough). Repeat this movement during approximately 5 minutes.
Put the dough in the bowl and cover it with a clingfilmlet the dough rise (in proving function of the oven) during approximately 30 min. (it has to double in volume)
Take back the dough, fold up it 2 or 3 times on itself (to push away the air) and shape the breads (baguette, farmhouse bread, round loaf.)
Put breads on the pastry baking tray of the oven covered before with a baking paper
Sprinkle slightly breads of flour (optional, only to give an effect farmhouse bread)
Give some net knocks of razor blade (or well sharpened knife) on the top of breads
Let rest about ten minutes before putting in the oven install the tray with breads in the 2nd level (from the bottom) of the oven
Measure exactly 1 dl (10 cl or 100g ) of water and pour it directly on the bottom of the oven
Close the door and engage the bread or bakery function.
CLEANING FUNCTIONS*
| Symbol Function Description | ||
| H2O clean For simple, efficient cleaning of the oven. | ||
| ECO | Pyrolysis Eco | For perfect, regular cleaning of the oven cavity. This function enables to lock the door during the process (d4). |
| + | Pyrolysis+ | For extremely thorough cleaning and removing large amounts of dirt from the oven cavity. This function enables to lock the door during the process (d4). |
- Depending on the oven model.
Ideal temperature for suggested foods.
*** Tested in accordance with the EN 60350-1 for the purpose of energy consumption declaration and energy class.
** Suggested cooking time may vary according to food type and user preferences.
GENERAL NOTES ON CLEANING:
Regular cleaning can extend the lifecycle of your appliance. Wait for the oven to cool before carrying out manual cleaning.
WARNING: Never use abrasive detergents, steel wool or sharp objects for cleaning, as they may irreparably damage enamelled parts. Use only water, soap or bleach-based detergents (ammonia).
GLASS PARTS
Clean the glass oven window with absorbent kitchen towel after every use. For stubborn stains, use a detergent-soaked sponge, wrung out, then rinse with water.
OVEN WINDOW SEAL
If dirty, the seal can be cleaned with a damp sponge.
RECOMMENDATIONS:
After each use of the oven, a minimum of cleaning will help keep the oven perfectly clean.
- Do not line the oven walls with aluminium foil or single-use protection available from stores. Aluminium foil or any other protection, in direct contact with the hot enamel, risks melting and deteriorating the enamel of the insides.
- In order to prevent excessive dirting of your oven and the resulting strong smokey smells, we recommend not using the oven at very high temperature. It is better to extend the cooking time and lower the temperature a little.
- In addition to the accessories supplied with the oven, we advise you only use dishes and baking moulds resistant to very high temperatures.
CHANGING LAMP:
- Disconnect the oven from mains supply.
- Undo the the glass cover, disassemble the bulb and replace it with a new bulb of the same type.
- Once the defective bulb is replaced, replace the glass cover.
NOTE: In case of a LED lamp oven contact the assistance for changing the bulb.
This product contains one or more light sources of energy efficiency class G (Lamp) / F (10 Led)
SAVING AND RESPECTING THE ENVIRONMENT
Where possible, avoid pre-heating the oven and always try to fill it. Open the oven door as infrequently as possible, because heat from the cavity disperses every time it is opened. For a significant energy saving, switch off the oven between 5 and 10 minutes before the planned end of the cooking time, and use the residual heat that the oven continues to generate. Keep the seals clean and in order, to avoid any heat dispersal outside of the cavity. If you have an electric contract with an hourly tariff, the "delayed cooking" programme makes energy saving more simple, moving the cooking process to start at the reduced tariff time slot.
WASTE MANAGEMENT AND ENVIRONMENTAL PROTECTION
This appliance is labelled in accordance with European Directive 2012/19/EU regarding electric and electronic appliances (WEEE). The WEEE contain both polluting substances (that can have a negative effect on the environment) and base elements (that can be reused).
It is important that the WEEE undergo specific treatments to correctly remove and dispose of the pollutants and recover all the materials. Individuals can play an important role in ensuring that the WEEE do not become an environmental problem; it is essential to follow a few basic rules:
- The WEEE should not be treated as domestic waste;
The WEEE should be taken to dedicate - ed collection areas managed by the town council or a registered company.
In many countries, domestic collections may be available for large WEEEs. When you buy a new appliance, the old one can be returned to the vendor who must accept it free of charge as a one-off, as long as the appliance is of an equivalent type and has the same functions as the purchased appliance.
ADDITIONAL FUNCTIONS
EN If the furniture is coverage with a bottom at the back part, provide an opening for the power supply cable.
EN If the mounting of the plinth does not allow air circulation, it is necessary to create an opening of 500 × 10 ~mm or the same surface in 5000 ~mm^2 .