PC530 - Surveillance Camera Victure - Free user manual and instructions
Find the device manual for free PC530 Victure in PDF.


User questions about PC530 Victure
0 question about this device. Answer the ones you know or ask your own.
Ask a new question about this device
Download the instructions for your Surveillance Camera in PDF format for free! Find your manual PC530 - Victure and take your electronic device back in hand. On this page are published all the documents necessary for the use of your device. PC530 by Victure.
USER MANUAL PC530 Victure
text_image
Logo with text 'Victure' and a downward-pointing arrow symbol above itUser Manual
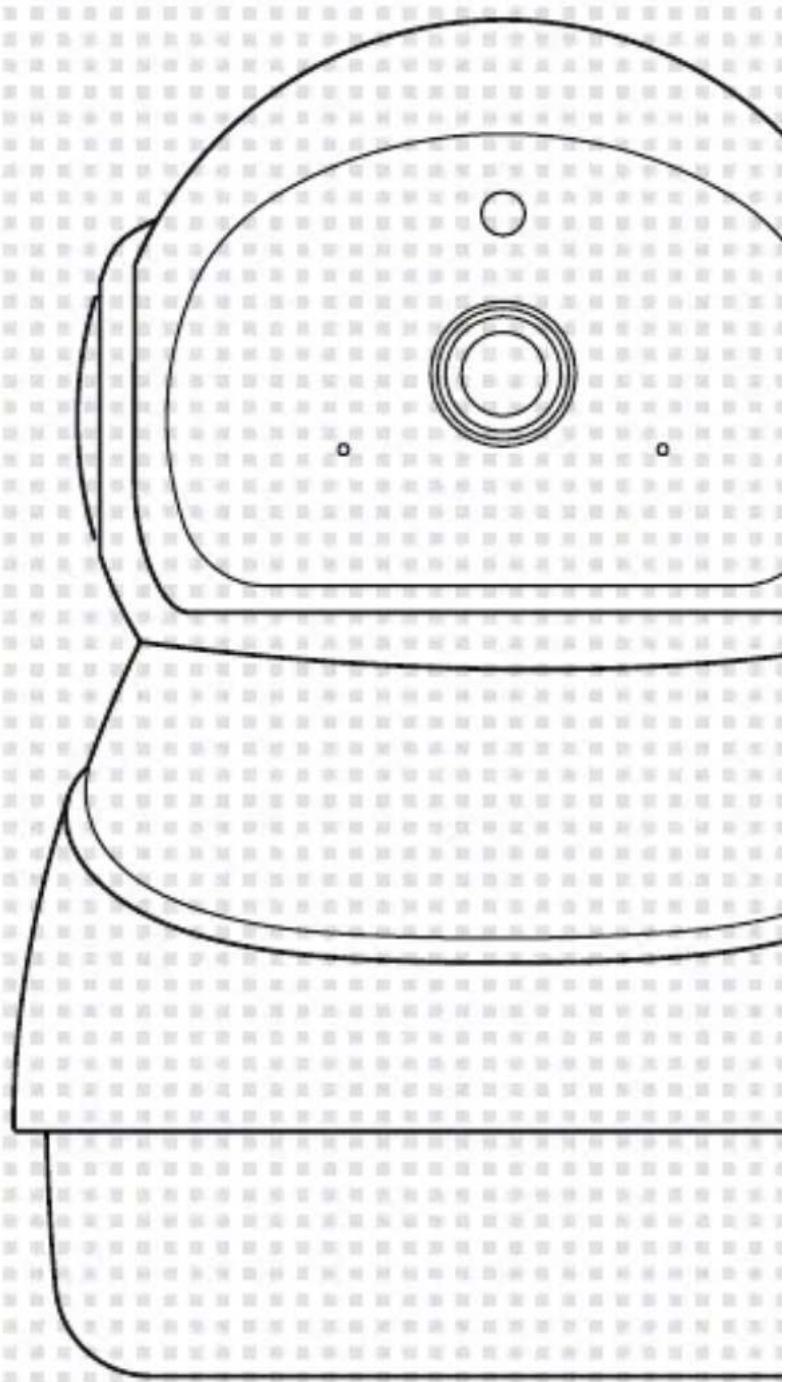
Wireless Security Camera
PC530
natural_image
Line drawing of a stylized human figure with concentric circles and a dot, set against a dotted grid background (no text or symbols)Menu
1English
23Deutsch
45Français
67Italiano
89Español
111日本語
Contents
Foreword 2
Product introduction 3
Instructions for use of software 4
User registration/login
Add camera
Details of software function
Specifications 20
FAQ 21
Warranty 22
Foreword
Dear Customer,
We are truly grateful that you have chosen us as your ideal product dealer. You are one of our most highly-valued customers and it has always been a sincere pleasure to serve you.
Speaking on behalf of the company, we hope that you have enjoyed the fantastic quality of our products and service. We will make every effort and continue to meet your requirements and expectations in the future.
Your suggestion and feedback have helped us shape our business to perfectly fit your standards. As a token of our appreciation, we are soon to introduce series of new products for our valued customers like you. Please share this with all of your friends.
Again, thank you very much for choosing Victure. Please note that items purchased from Victure are covered by one year warranty. Let us know if there is anything at least we can do to assist you further.
Contact Us
support@govicture.com
We look forward to serving you for many years to come.
Kind Regards,
Picture Team
Product introduction
EN
text_image
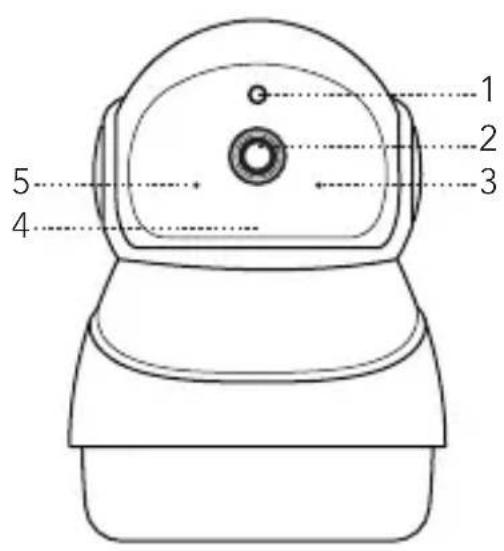
1 2 3 4 5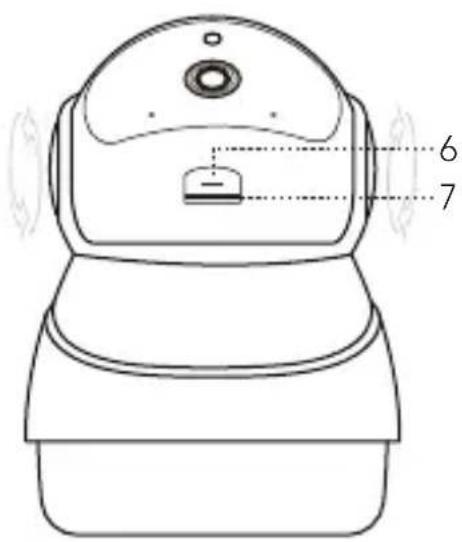
text_image
6 7- Photoresistor
- Lens
- Microphone
-
Infrared lamp
-
Power indicator
- Reset button
- SD card slot
Instructions for use of software
EN
User registration/login
IPC360 is an application software for the camera on mobile devices. It supports both iOS and Android system. You can achieve remote control and video acquisition on mobile devices through the software.
Download APP
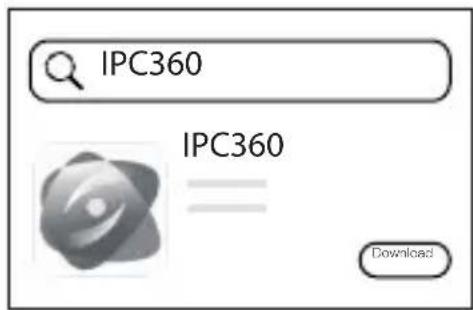
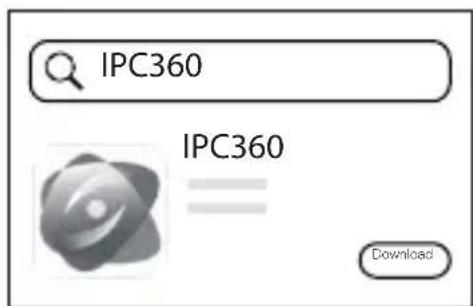
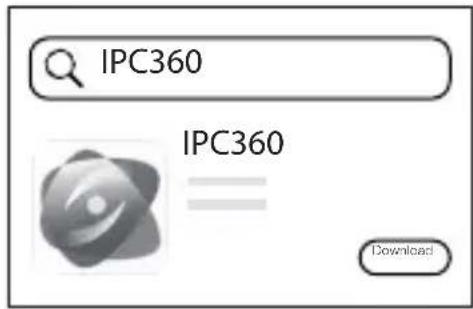
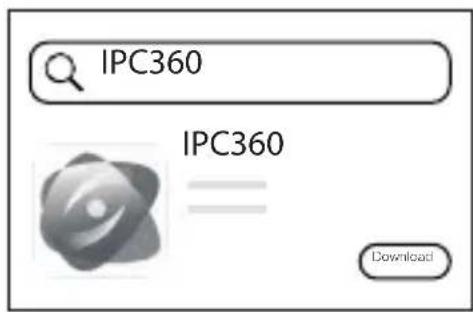
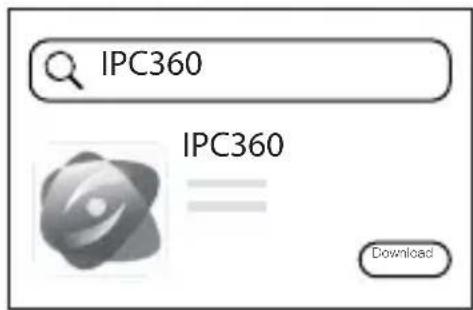
Scan the QR code below or search "IPC360" in App store (for Apple users) and Google Play (for Android users) and download the latest version of APP.

text_image
QR code image containing encoded data, no visible human-readable textor
text_image
IPC360 IPC360 DownloadRegister, login and retrieve password
EN
text_image
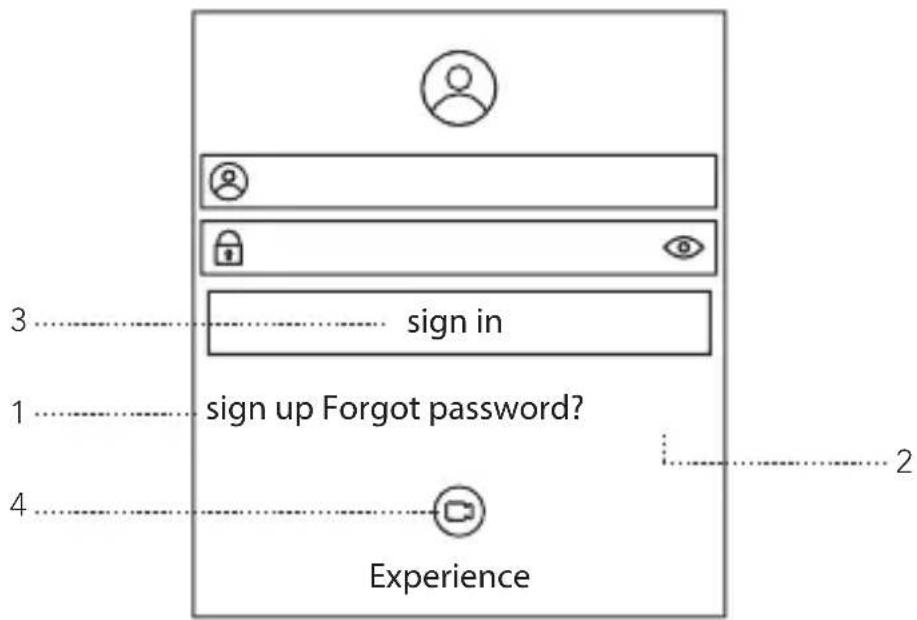
3 sign in 1 sign up Forgot password? 4 Experience 21. Registration
Once the APP is downloaded, you can register an account. Only mailbox registration is currently supported.
- Click Register to select country or region where you are located;
- Enter your e-mail address and verification code received in the mailbox and click Next;
- Set your password and repeatedly input the password for confirmation. Make sure the password you entered is consistent with password you have set. Click Register to complete the registration.
2. What if you forgot password
If you forget the password or the password is stolen, please modify the password in time in "Forget Password".
- Click Forget Password and select country or region where you are located;
- Enter your register email address. Click to get verification code, obtain the verification code from your register email box and enter the code;
- Set a new password and repeatedly input the new password to complete password modification
- Log in by using the new password.
3. Login
Enter your register email into the column "Account Number". Input the corresponding password in the column "Password". Click Register and proceed with the next step.
- Click "Experience Right Now" to experience the imaging effect of various installation modes in advance, so as to better select the installation mode and camera model.
Warm tips:
- Passwords can only be 6-16 alphanumeric combinations, case-sensitive.
- You can click " 🔒" in the password bar and select on/ off password in visual state.
- The mobile phone number and mailbox must be authentic and valid. Currently, the mobile number registration is not supported temporarily in the areas other than mainland China.
- An exclamation mark in the camera list indicates that the current mobile phone number and the device are not logged in on the same server. It is required to click Play the Device, and the APP will automatically change the server after confirmation by user, and the device can be watched normally.
Add camera
EN
text_image
My camera + No camera,add by + ↑Camera power startup
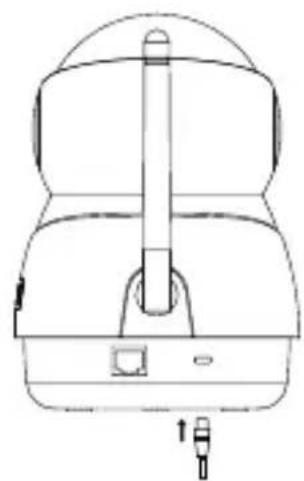
- Connect the camera with the power adapter by using a USB charging cable.
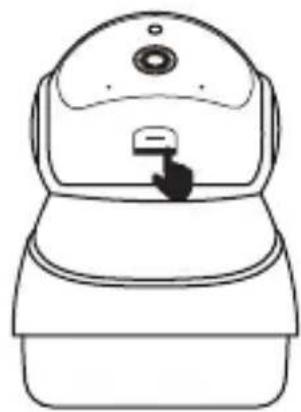
After the camera is connected with the power supply, the start-up is completed (the indicator light will turn red and flash in green). If the red light does not flash, press RESET button for 3-4 seconds and the camera will rotate up and down and side to side and the red light will flash or emit the "Beep" sound, indicating that the camera has been started.
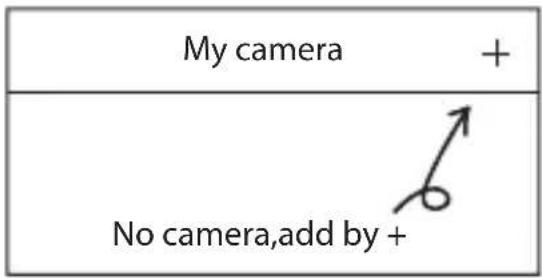
After the power supply has been successfully started up, the device can be added by clicking [+] in the upper right corner of "My Camera" (please select the right adding method according to the actual situation).
natural_image
Line drawing of a mechanical device with a cylindrical shaft and base mount (no text or symbols)
natural_image
Line drawing of a smart speaker with a button and sensor icon (no text or symbols)Add camera in a wired way
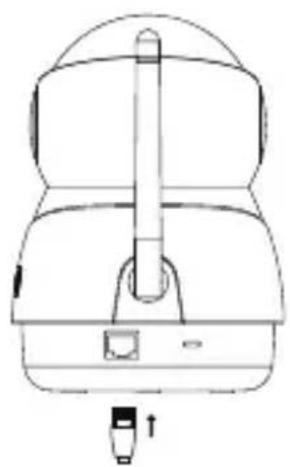
Provide the camera with network access by connecting it to a router via network cable.
natural_image
Line drawing of a mechanical device with a cylindrical shaft and base, showing no text or symbols.- Select the Wired Add. According to the prompt in APP, insert one end of network cable into the Ethernet interface of machine, and the other end to the router, and the mobile phone shall be simultaneously connected with WIFI network sent by the same router.
- When connection is completed, perform "Search". After search is successful (the list indicating MAC address of the wired equipment), click MAC address of the device and "Add this device", and the device sends sound "Tinkling", and the indicator light turns green.
- The camera broadcasts "Connected to the Internet" (green light flashes), indicating that the addition is successful. To name the device, you can name it or skip the step (the name cannot contain a special symbol).
Make 360° panoramic shooting or skip this step. If 15 pictures had been taken, you can then view the pictures on your phone.
Wireless connection
Pair the camera with WIFI (5G band network pairing is not supported temporarily).
After confirming that the mobile phone has been provided with stable WIFI, select the wireless addition. Confirm that the camera has been successfully started, and then click Next. If starting is not successful, repeat the above-mentioned power-start steps; enter the password for the WIFI that mobile phone currently connects (click on “ 📄 ” on the right side of the column Password to show or not show the password), and click Next.
- Select the country where you are currently located. Adjust the volume of mobile phone and approach the camera as far as possible, and click Next.
- At this time, the mobile phone will emit sound wave for addition, and click the Next Step after hearing "Tinkling" sound from the camera, and the wait prompt is provided according to the time at the lower part of APP.
- The camera broadcasts "Connected to the Internet" (green light flashes), indicating that the addition is successful. To name the device, you can name it or skip the step, and if the step is skipped, APP will automatically generate a name for a number.
- Make 360 ° panoramic shooting or skip this step, if 15 pictures had been taken, you can then view the pictures on your phone.
Warm prompt:
- The camera currently supports only 2.4GHz Wi-Fi network.
- The camera can support (max.) 64G SD card, and is not allowed to pull out or insert into the SD card when energized.
- If, during wireless connection, the connection fails, repeat the normal operation without restarting or resetting. You can try replacing the WIFI network.
- When the camera is provided with power supply and SD card, the monitored motion will be automatically recorded and stored in the SD card; if no SD card is inserted, the video can also be recorded directly by the APP (the alarm function is available even if no SD card is provided).
- The name of camera does not allow for special symbols.
- The RESET key is located at the SD card slot at the lower end of the camera.
Details of software function
My camera
text_image
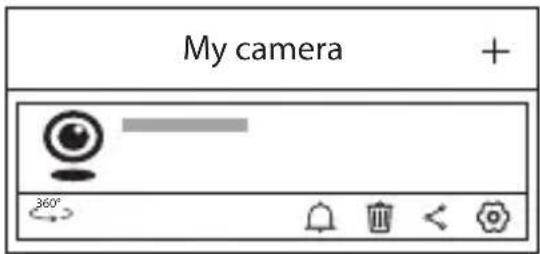
My camera + 360°Access to panoramic navigation interface, and click "Try" to make 360° panoramic shooting, 15 pictures in total. Then the pictures can be viewed on the mobile phone.
:Click On/ Off to enable or disenable mobile monitoring and give alarm.
: Unbind the camera and the mobile phone.
<:Click the icon and "+" in the upper right corner and enter the mobile phone number or mailbox registered by the user, and then the camera can be shared with the users who registered the APP.
:Set.
text_image
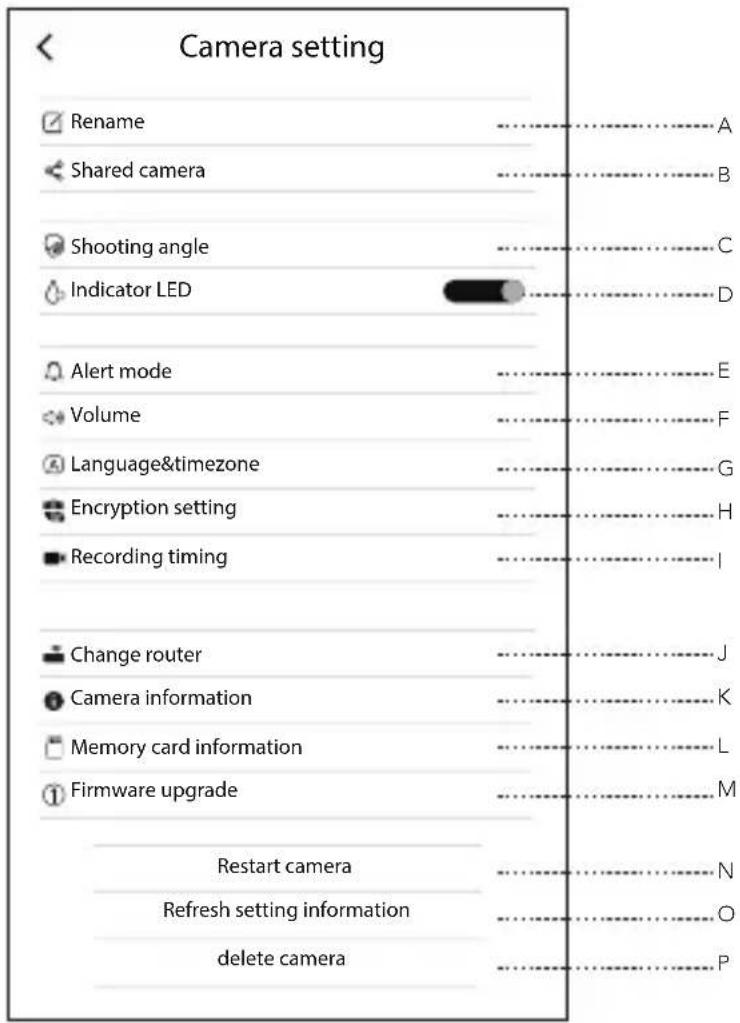
Camera setting Rename Shared camera Shooting angle Indicator LED Alert mode Volume Language&timezone Encryption setting Recording timing Change router Camera information Memory card information Firmware upgrade Restart camera Refresh setting information delete camera A B C D E F G H I J K L M N O PEN
A. Rename the camera (special symbol is not acceptable);
B. Share a camera with the users with the same registration (with the above-mentioned steps).
C. Set the normal and reversed installation, and if the camera is installed reversely (inverted installation), select the reversed installation, and you may select normal installation for normal placement.
D. Select to turn on or off the power indicator.
E. Enable/ Disenable Mobile Monitoring;
F. Select whether to enable the voice broadcast during Internet access, and the voice broadcast, intercom volume adjustment, broadcast volume and microphone volume when the video is turned on/ off;
G. Select the broadcast language and time zone of the camera;
H. Select setting default encryption (built-in encryption mode) and user-defined encryption (set encryption password);
I. Setting the time of recording.
J. Restart the camera and reset the wired or wireless network mode (in the same manner as 3.2).
K. View the camera model, connected WIFI, system version, IP address, MAC address and WIFI signal strength.
L. You may check the total capacity of video and pictures, remaining capacity and status, or format the memory card.
M. Check if it is necessary to update your firmware (if it is unnecessary to update the firmware, it will indicate that you have updated to the latest version and this function cannot be activated).
N. Restart the camera.
O. Refresh setting information.
P. Delete the camera.
Enter the camera--click the camera you want to select
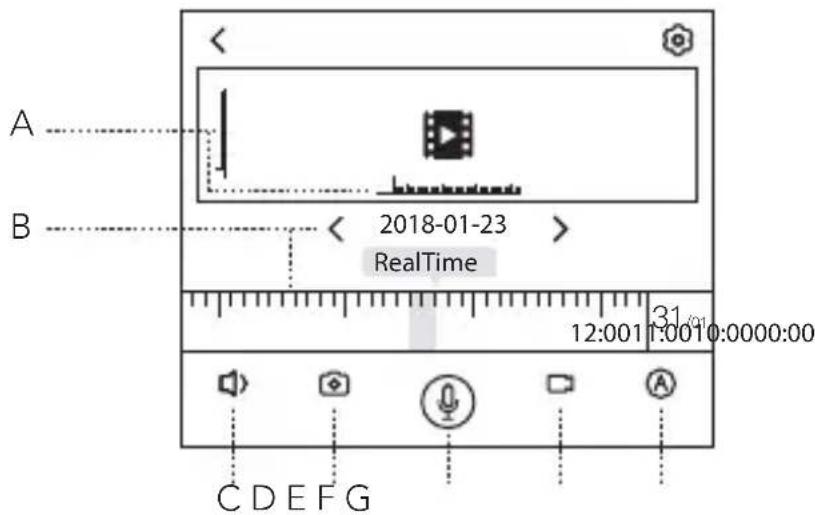
Vertical screen
text_image
A B 2018-01-23 RealTime C D E F G 12:001 1:0010:0000:00A. The shooting angle of camera can be adjusted by sliding the middle screen up and down and side to side (the horizontal and vertical directions can be also adjusted by sliding the screen slantwise).
B. You can select a date and adjust a specific time to view the historical recording. (If there is no picture at the selected time, it will automatically jump to the time nearest to the selected time).
C. Select whether to enable the recording sound.
D. Shoot current pictures by the mobile phone, and view the pictures in the Album;
E. Real-time camera conversation --press and hold and then speak, the sound comes out at the camera end, and you may directly receive the voice signal directly at the mobile phone side.
F. Record screens by the mobile phone and view the screens in the Album
G. Select Definition—Low Definition (720P), High Definition (1080P) and Adaptive Mode (automatically select the definition according to the network speed) are optional.
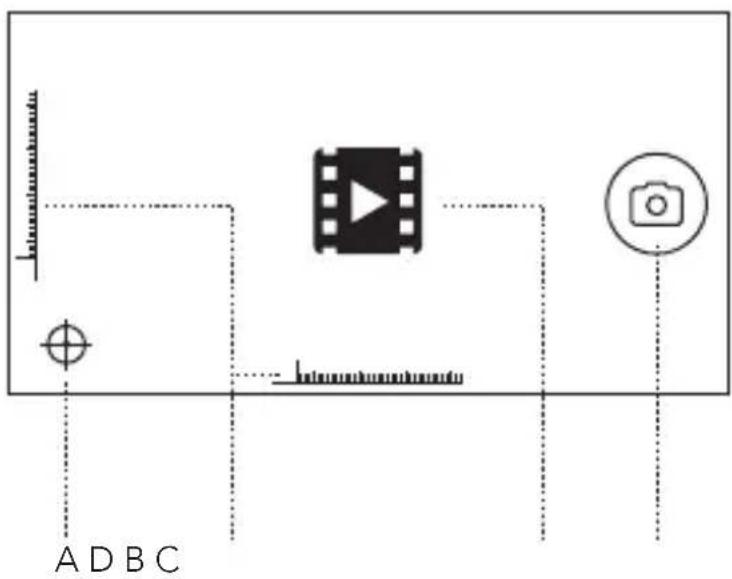
Horizontal screen
EN
text_image
A D B CA. Camera position correction function: the machine can rotate 360^ for positioning and alignment.
B. Quick positioning-quickly adjust the camera angle by clicking anywhere on the screen as the center point.
C. Shoot current screens, and view them in the Album;
D. Adjust the camera angle by sliding the screen up and down and side to side (the horizontal and vertical directions can be also adjusted by sliding the screen slantwise).
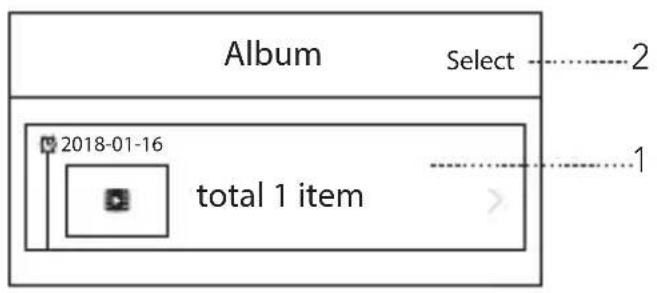
Album
text_image
Album Select 2 2018-01-16 total 1 item 1EN
-
You can view and download previous photos and videos according to time.
-
The "Select" function button in the upper right corner can be used for selection in batches for deletion.
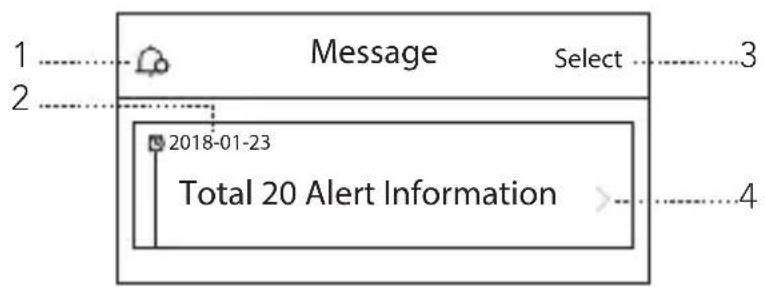
Message
flowchart
graph TD
    A["Message"] --> B["Select"]
    B --> C["2018-01-23"]
    C --> D["Total 20 Alert Information"]
    D --> E["4"]
- Alarm settings
A. Alarm can be turned on/off.
B. After enabling the reset, the alarm time can be set to daytime (08:00-18:00), night (18:00-08:00), all-day (00:00-24:00), a self-defined time;
C. Set the sensitivity 0-5 (the larger the numerical value, the higher the sensitivity), depending on the change degree of screen in a certain time interval. - View and download the past alarm messages according to the time sequence.
- The "Select" function button can be used for selection in batches for deletion.
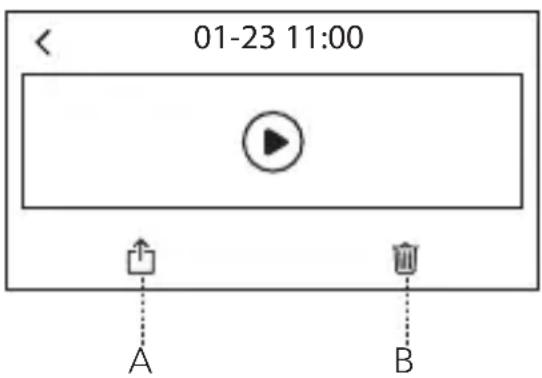
- After clicking the alarm video, it will be automatically downloaded and can be selected.
text_image
01-23 11:00 A BA. The downloaded video can be shared to other applications.
B. Delete the current video.
My
text_image
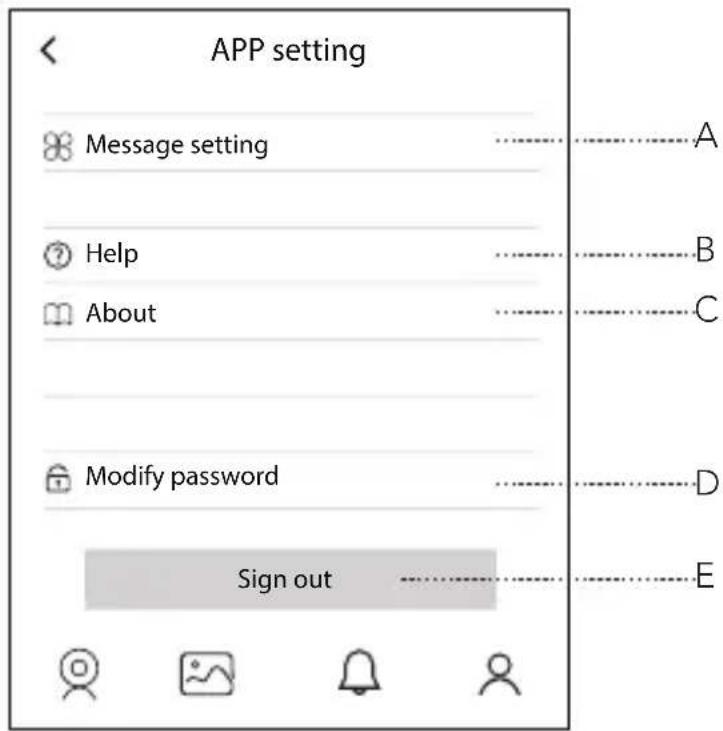
APP setting Message setting Help About Modify password Sign out A B C D EEN
A. Turn on/off alarm tone.
B. Some common use guidelines and suggestions that can help you use this camera in a better way;
C. The current version, you can contact us to check for the latest version.
D. Enter the old password and new password, repeat inputting new password, and the login password can be modified (the password can only be 6-18 alphanumeric combination, and you can adjust if all passwords are visible by "Eye").
E. Exit the login under current account.
Specifications
EN
| CPU | Grain Media GM8135S |
| Antenna | 2.4Ghz-2.5Ghz |
| Sensor | SC2145 |
| Lens | Focal length: 3.6mm |
| Pixel: 2Mp | |
| Infrared LED | 850nm 10PCS |
| WIFI | Protocol: 802.11 b/g/n |
| Frequency band: 2.4G | |
| Channel: 1TX/1RX | |
| Video | Format: H.264 |
| Resolution: 1920X1080 | |
| Max. frame rate: 1080P/25FPS | |
| Storage | Above C10 |
| Microphone/ loudspeaker | -38dB; 8ohm, 1W |
| Max. 7W | Max. 7W |
| 5V | 5V |
| Max. support 64G SD card | Max. support 64G SD card |
FAQ
Q: Any WiFi connection tips?
A: Camera can only support 2.4G frequency signal, and 802.11b/g/n WiFi network.
-
The connected WiFi password should be less than 16 characters, and can not contain the special characters, such as: @ ¥ ! ect (suggest to revise the password which only contains letters and number).
-
Please upgrade to the latest version APP.
Q: No vision at nighttime?
A: 1. Check if the IR function is enabled.
-
Check if the IR LED is turned on.
-
Restore camera back to factory default setting, and then check the visual effect.
-
Try to upgrade the camera by the latest firmware.
Q: How to do if camera picture is blurred?
A: 1. Enter video interface, adjust the picture quality to the HD mode.
- Clean the camera lens with a cotton swab.
Warranty
EN
All Victure products come with a limited warranty of 12 months from the date of purchase. And we have professional customer service team for your support as soon as we can.
If you have any questions or confusions about our product or the warranty, please feel free to contact us via: support@govicture.com. We will do our best to help you solve the problem until you are satisfied.
Inhalt
Vorwort 24
text_image
QR code image containing encoded data, no visible human-readable textor
text_image
IPC360 IPC360 Downloadtext_image
sign in sign up Forgot password? ExperienceDE
1. Registrieren
text_image
My camera + No camera,add by + 6Die Kamera starten
natural_image
Line drawing of a device with a cylindrical component and a small connector (no text or symbols)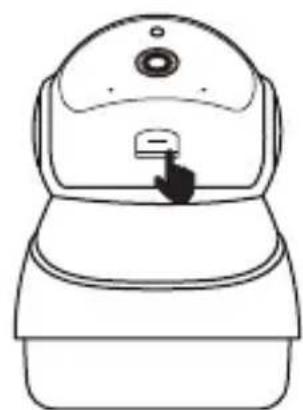
natural_image
Line drawing of a robot-like device with a button and sensor array (no text or symbols)Kabel hinzufügen
natural_image
Line drawing of a mechanical device with a cylindrical component and a base, showing no text or symbols.text_image
My camera + 360°text_image
Camera setting Rename Shared camera Shooting angle Indicator LED Alert mode Volume Language&timezone Encryption setting Recording timing Change router Camera information Memory card information Firmware upgrade Restart camera Refresh setting information delete camera A B C D E F G H I J K L M N O Ptext_image
APP setting Message setting Help About Modify password Sign out A B C D EDE
text_image
QR code image containing encoded data, no visible human-readable textor
text_image
IPC360 IPC360 Downloadtext_image
3 sign in 1 sign up Forgot password? 4 Experience 2FR
1.Enregistrement
text_image
My camera + No camera,add by +natural_image
Line drawing of a mechanical device with a cylindrical component and base mount (no text or symbols)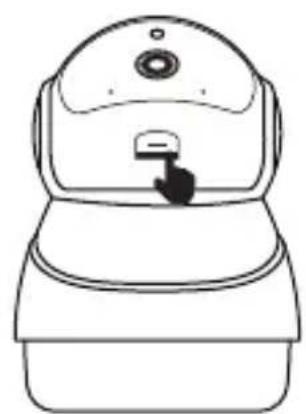
natural_image
Line drawing of a robot's head with a button and pointer (no text or symbols)Ajout filaire
natural_image
Line drawing of a mechanical device with a cylindrical rod inserted into a housing (no text or symbols)text_image
My camera + 360°text_image
Camera setting Rename Shared camera Shooting angle Indicator LED Alert mode Volume Language&timezone Encryption setting Recording timing Change router Camera information Memory card information Firmware upgrade Restart camera Refresh setting information delete camera A B C D E F G H I J K L M N O Ptext_image
APP setting Message setting Help About Modify password Sign out A B C D EFR
text_image
QR code image containing encoded data, no visible human-readable textor
text_image
IPC360 IPC360 Downloadtext_image
sign in sign up Forgot password? ExperienceIT
1. Registrazione
text_image
My camera + No camera,add by + ↑natural_image
Line drawing of a mechanical device with a cylindrical component and a base, showing no text or symbols.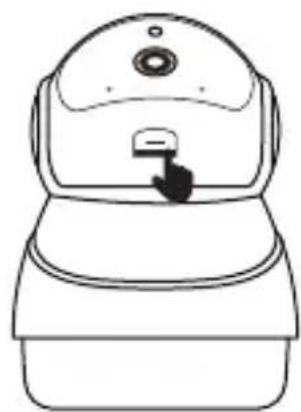
natural_image
Line drawing of a robot-like device with a button and sensor array (no text or symbols)natural_image
Line drawing of a device with a cylindrical rod inserted into a housing (no text or symbols)text_image
My camera + 360°text_image
Camera setting Rename Shared camera Shooting angle Indicator LED Alert mode Volume Language&timezone Encryption setting Recording timing Change router Camera information Memory card information Firmware upgrade Restart camera Refresh setting information delete camera A B C D E F G H I J K L M N O Ptext_image
APP setting Message setting Help About Modify password Sign out A B C D EIT
text_image
QR code image containing encoded data, no visible human-readable textor
text_image
IPC360 IPC360 Downloadtext_image
3 sign in 1 sign up Forgot password? 4 Experience 2ES
1. Registrarse
text_image
My camera + No camera,add by + 6Encender la cámara
natural_image
Line drawing of a device with a cylindrical component and a base, no text or symbols present