Compact Professional XL - Coffee machine Cremesso - Free user manual and instructions
Find the device manual for free Compact Professional XL Cremesso in PDF.


User questions about Compact Professional XL Cremesso
0 question about this device. Answer the ones you know or ask your own.
Ask a new question about this device
Download the instructions for your Coffee machine in PDF format for free! Find your manual Compact Professional XL - Cremesso and take your electronic device back in hand. On this page are published all the documents necessary for the use of your device. Compact Professional XL by Cremesso.
USER MANUAL Compact Professional XL Cremesso
natural_image
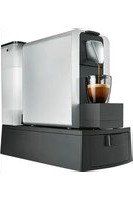
Modern coffee maker with white and black casing, pouring coffee into a glass cup (no visible text or symbols)cremesso
CAPSULE SYSTEM
COMPACT PRO
PROFESSIONAL LINE
USER MANUAL
natural_image
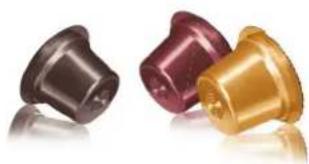
Three metallic mechanical components in black, maroon, and gold, displayed against a white background (no text or symbols visible)DE EN FR NL

Inhalt
Safety instructions 7
Overview 19
Overview of attachments
Compact Pro XL 20
Emptying the capsule drawers......20
Key functions ......21
Key illumination....22
Starting up 23
Flush out piping....24
Coffee preparation....24
Preinfusion function....26
Eject capsule 27
Programming the coffee quantity..28
Programming reset 29
Energy-saving mode 29
Cleaning for the best
coffee quality 30
Descaling....30
Cleaning the machine ....31
Transport / storage 33
Disposal....34
Technical data....34
Troubleshooting....51
Sommaire
This manual is an integral part of your product.
Please read this manual thoroughly before erection, installation and commissioning the machine, and keep it for future reference.
▶Always hand this manual over to future owners or users of the product.
The manufacturer cannot be held responsible for damage or defects caused by disregarding this instruction manual.
▶Only operate the machine with the appropriate capsules.
Intended use
This machine may be used only as described in this manual. Using it for other purposes is abusive and dangerous.
This machine is intended for domestic use and in other similar areas, such as:
• in kitchens for use by employees
• in offices and other commercial areas
• in agricultural holdings
- in hotels, motels, boarding houses and similar residential type environments
The machine is not suitable for commercial use.
The machine is not designed for use outdoors.
The machine must not be used in a non-stationary location (e.g. on ships, in vehicles, in trains, etc.).
The manufacturer assumes no liability for consequences resulting from improper use.
Requirements on the location
▶Use the machine only in dry rooms.
▶Do not use the machine inside a cupboard.
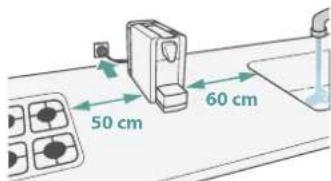
Maintain a distance of 60 cm from the sink and 50 cm from an open flame (a mains water connection is not permitted).
▶Ensure the machine and its power cable are not located next to hobs, gas cookers, naked flames or similar hot surfaces.
▶Never place the machine on a hot surface.
Place the machine on a dry, horizontal, stable and flat surface. The surface must be resistant to heat and liquids such as water, coffee, descaling fluid or the like.
- Do not place on marble surfaces or untreated / oiled woodwork (no liability in the event of non-removable coffee of descaler stains).
Requirements for the target group
This machine can be used by children aged 8 years and above under supervision, if they have been given instruction concerning use of the appliance in a safe way and understand the hazards involved.
Cleaning and maintenance must not be carried out by children unless they are 8 years or older and are supervised.
The machine and its power cable must not be accessible to children under 8 years old.
Persons with limited physical, sensory or mental abilities, or lack of experience and knowledge, must be supervised or given instruction concerning use of the appliance in a safe way. They must have understood the dangers associated with its use.
Children must not play with the machine. The machine must be kept out of reach of children.
Requirements for the user
▶Do not move the machine whilst it is in operation.
▶Never operate the machine without water in the tank.
- Fill the water tank with fresh, cold water only. Do not use mineral water or carbonated water in the machine.
- Disconnect the plug from the power socket and empty the water tank if the machine is not to be used for a long period.
- Keep packaging materials (plastic bags, film, cardboard boxes, etc.) away from children.
Before setting up the machine, check it for any visible damage. Never put a damaged machine into use.
Before connecting the machine to the mains supply, make sure that the rating on the data plate corresponds to the voltage and frequency of the household supply. These data must correspond in order to avoid the risk of damage to the machine. Consult a qualified electrician if in any doubt.
The electrical safety of this machine can be guaranteed only when it is correctly earthed. If in any doubt, have the electrical installation tested by a qualified electrician.
- Do not connect the machine to the mains electricity supply by an extension lead or multiple socket.
▶Use the machine only at ambient temperatures between +16°C and +38°C.
Only use genuine original accessories and spare parts. Using accessories or spare parts from other manufacturers will invalidate the guarantee and product warranty liability.
Requirements for cleaning
Withdraw the power plug and allow the machine to cool down completely before re-positioning it, cleaning it or carrying out maintenance work.
▶Never immerse the machine completely or partially in water or any other liquid.
▶Never hold the machine under running water.
▶Use only clean cleaning materials to clean the machine.
Do not use strong cleaning detergents or solvents.
▶Use a soft, damp cloth to clean the surface of the machine.
Only use cleaning and descaling agents recommended by the manufacturer. Avoid contact with eyes, skin and other surfaces.
text_image
Diagram of a device with labeled parts, showing a container and base with numbered labels.Übersicht Overview
4 Capsule container, removable
5 Drainage tank
6 Cup platform, removable
7 Upper drip tray with drain grill, removable
8 Lower drip tray with drain grill, removable
text_image
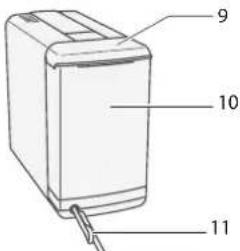
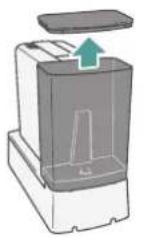
Diagram of a device with numbered parts labeled 9, 10, and 119 Water tank cover, removable
10 Water tank 1.1 litres
11 Power cable
text_image
Technical diagram of a device with numbered parts labeled 1 to 4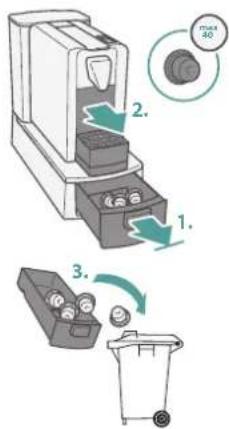
text_image
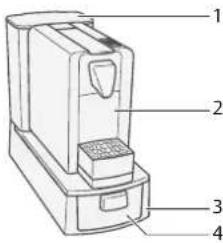
Diagram illustrating three steps of a cleaning or sorting device with labeled components and directional arrows.Overview of attachments Compact Pro XL
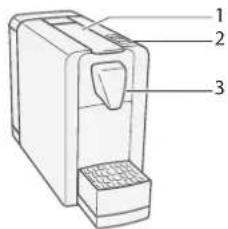
1 Water tank 3 l
2 Upper capsule drawer
3 Drawer block
4 Capsule drawer
Kapselschubladen leeren Emptying the capsule drawers
The capsule drawer has a capacity of max. 40 capsules (equivalent to approx. 40 beverages).
If the capsule drawer is not emptied after 40 beverages, subsequent capsules will fall down within the drawer block.
▶Slowly pull the capsule drawer out of the drawer block to the first stop.
▶Pull the upper capsule drawer out so that any capsules that have become stuck will fall into the lower drawer.
▶ Empty the capsule drawers and clean them.
▶ Reinsert the capsule drawers.
Tipps:
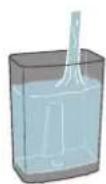
- Empty the capsule drawers when you fill the water tank (40 beverages of 75 ml is equivalent to 3 l).
- Throw the used capsules into a water-tight rubbish bag.
Tastenfunktion Key functions
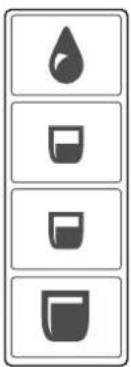
natural_image
Vertical toolbar with four icons: water drop, water drop, water drop, and water drop (no text or labels)Reinigungs-Taste
natural_image
Line drawing of a desktop computer with a magnified inset showing internal components (no text or symbols)Tastenbeleuchtung Key illumination
Alle Tasten
Light up: Coffee machine is ready for use.
Coffee key
Lights up: Brewing.
Flashing: Warm-up, programming of coffee quantity in progress.
Lungo key □ and cleaning
key ◆ flash: Steaming out in progress.
Cleaning key
Flickering 🔒 Energy-saving mode active.
text_image
50 cm 60 cmPlace the coffee machine on a dry surface that is water-proof and heat-proof.
Do not place the coffee machine directly on marble or wood (risk of coffee or descaler stains).
Maintain a distance of 60 cm from the sink and 50 cm from an open flame.
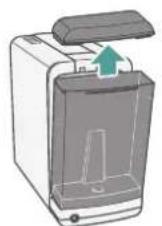
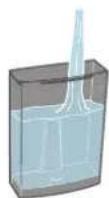
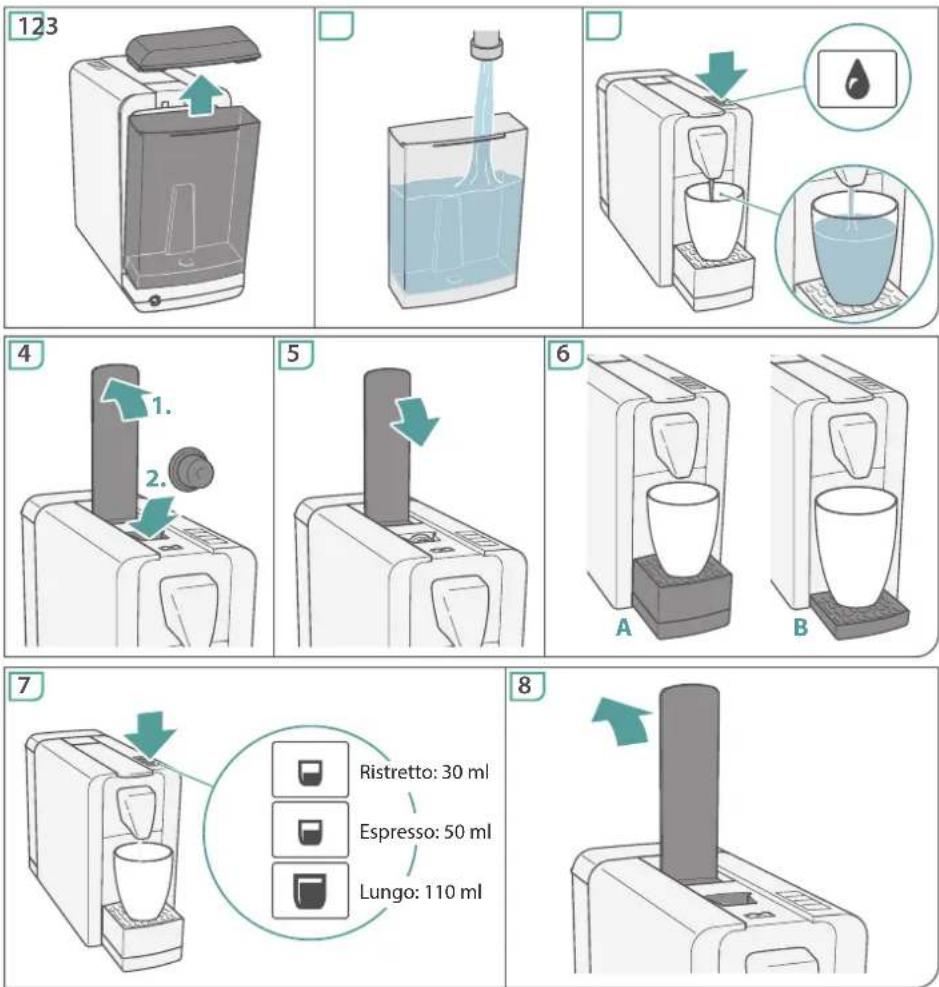
Clean the water tank and fill with cold water.
Insert power plug in an earthed socket.
The cleaning key 🔊 flickers.
Press any key.
Flush out piping at least 5 times ( page 24).
If the temperature of the coffee machine is below 5°C or very high, the machine cannot be started and all keys flash.
Temperature of coffee machine below 5°C:
▶Allow the coffee machine to warm up for 30 minutes at room temperature.
Temperature of coffee machine very high:
▶Allow the coffee machine to cool down.
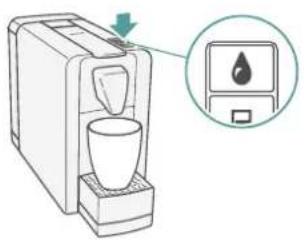
text_image
Diagram showing a coffee maker with a water drop icon and its corresponding water level indicator.Place a cup under the output.
▶Press the cleaning key 🔊.
The flushing process starts.
▶Press the cleaning key again until a cup of water is dispensed.
If the flushing process does not start:
Remove the water tank and re-insert.
▶Press the cleaning key
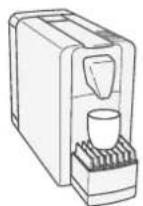
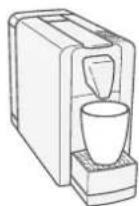
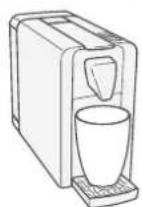
One capsule is required for each cup of coffee.
▶After long pauses, flush out the piping.
Depending on the cup size, adjust the drip tray or cup platform:
Insert cup platform or remove upper drip tray.
Place a cup under the output.
Tips:
- Crema – The closer the cup is to the outlet, the better the crema.
- Preheat the cup – Press the ristretto key (without capsule) and fill the cup with water.
text_image
Diagram of a printer with labeled parts and a magnified inset showing the component's viewKapsel laden
natural_image
Illustration of a coffee maker with a cup and a hand inserting into it, showing a close-up inset (no text or symbols)Kaffee ausgeben
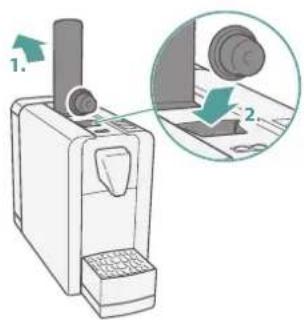
▶Push the operating lever upwards.
▶ Drop the capsule into the opening.
▶ Pull the operating lever downwards to pierce the capsule.
Coffee output
▶Press the coffee key:
Ristretto: small cup (30 ml)
Espresso: medium cup (50 ml)
Lungo: large cup (110 ml)
text_image
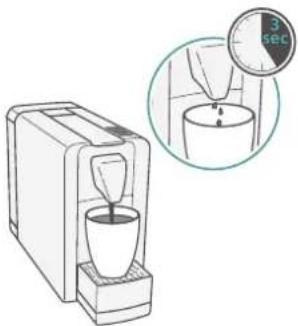
Diagram showing a coffee machine with a magnified view of its cup, highlighting time measurement of 3 seconds.The preinfusion function gives your coffee more aroma. For coffee quantities up to 80 ml, a small amount of coffee is dispensed first.
The "pre-brewing pause" function starts and the output stops for 3 seconds.
The output then continues.
Output stops automatically or press the key again to stop earlier.
The pre-brewing pause function depends on the output quantity and is not associated with the individual keys.
When programming the keys ( page 28) the pre-brewing pause remains unchanged for output quantities up to 80 ml. For output quantities over 80 ml, pre-brewing pause is not carried out.
text_image
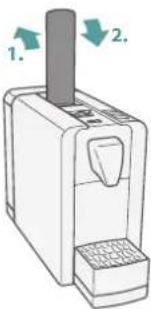
1. 2.Tip: To prevent drips from the outlet – eject the capsule after the coffee output.
▶Push the operating lever upwards.
The used capsule drops into the capsule container.
▶ Pull operating lever down.
Forgotten capsules may stick in the opening.
Caution! Risk of injury due to sharp opening point inside the machine!
▶Push capsule down carefully.
text_image
Diagram showing two views of a coffee maker with labeled parts and a magnified inset highlighting the interior components.Kaffeemenge programmieren Programming the coffee quantity
The output quantities can be adjusted for each coffee key. The default settings are:
The programmable output quantity for coffee is 30–250 ml.
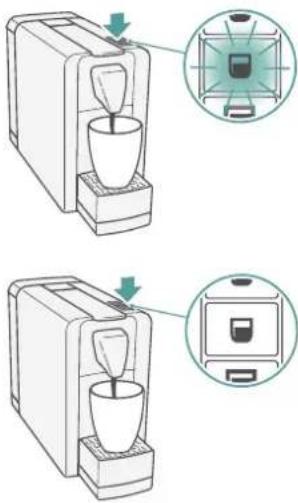
Place a cup under the output.
▶Check the level of the water tank. Fill with water, if required.
Load capsule.
Hold down the key to be programmed (e.g. espresso ☐) for at least 3 seconds, until it flashes rapidly three times.
Release the key.
Coffee output starts.
When your cup is full enough: Press the key to be programmed (e.g. espresso □) again.
Coffee output stops. All keys light up.
The new programmable quantity setting is applied.
If the water tank empties during programming:
▶ Repeat the programming with a full water tank.
natural_image
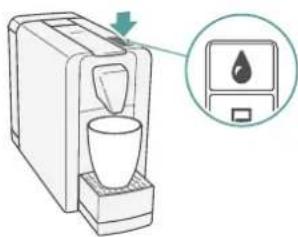
Illustration of a coffee maker with a water drop symbol and a close-up of its water droplet (no text or labels)▶ Pull out the power plug.
▶Hold down the cleaning key and re-insert power plug.
Release the key.
Cleaning key ◆ flashes rapidly three times. The default settings are restored.
text_image
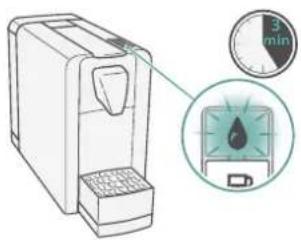
Diagram of a water purifier with a magnified view showing a droplet inside the chamber and a 3-minute timer.When the coffee machine is not being used, it switches to energy-saving mode.
The cleaning key 🔊 flickers (slowly light/dark).
After a further 3 minutes of inactivity, the machine switches to standby mode.
The cleaning key 🔊 light goes out.
Tip: To switch off the machine – Press the cleaning key and the Lungo key 🖼 multaneously.
When preparing coffee, deposits of water as well as coffee oils and fats are left behind in the piping of the coffee machine.
These residues have a negative effect on the coffee taste.
Regular descaling of the machine can remove these residues.
Coffee machines which are calcified invalidates the warranty.
Entkalken
text_image
Diagram illustrating a chemical process involving a bottle, a container with liquid, and a washing machine with a beaker, showing a magnified view of the device.To prevent damage, descale the coffee machine after 300 cups or 1-2 months.
Attention! Only use descalers for coffee machines. Never use vinegar.
Mix the descaler with water according to the manufacturer's instructions and fill the water tank.
Remove all capsules from the coffee machine.
▶Pull the lower drip tray upwards and remove.
Place a large bowl (min. 1.2 litres) under the output.
Press the Lungo key
▶ Wait for 3 minutes and press the Lungo key 📁gain.
▶ Repeat until the water tank is empty.
When the water tank is empty, rinse well, fill with water and replace.
▶ Empty the descaler fluid bowl and place it under the output.
▶Press the Lungo key until the water tank is empty.
When the water tank is empty, fill the tank with water and replace.
The machine is now ready for use.
Caution! Always pull out the power plug first before cleaning!
Attention! Never immerse the coffee machine in water! Never wash under running water!
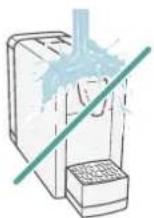
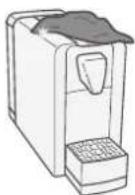
Clean the coffee machine and output with a damp cloth. Never rub dry or use abrasive detergents.

natural_image
Illustration of a desktop computer with icons for washing machine, battery pack, and keyboard (no text or symbols)Empty the drip tray, capsule container and water tank daily
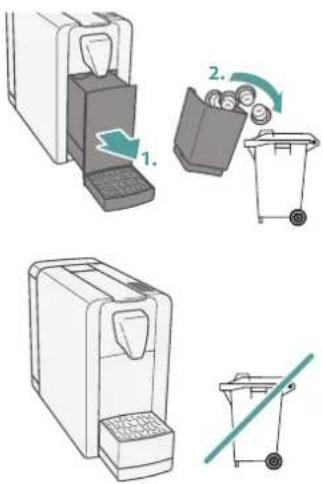
The capsule container holds approx. 10-12 capsules and the drainage tank approx. 150 ml residual water (equivalent to approx. 12 beverages).
▶ Lift the lower drip tray slightly and pull it forward.
Remove the upper drip tray and clean.
▶ Pull capsule container upward.
▶ Empty the capsule container and clean.
▶ Empty the drainage tank and clean.
▶ Reinsert the capsule container, drainage tank and the drip tray into the coffee machine.
▶ Empty the water tank and clean.
natural_image
Illustration of a portable water dispenser with a cable inserted, showing internal components and a green arrow indicating direction (no text or symbols)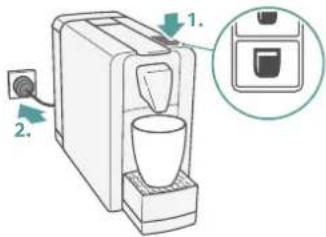
text_image
Diagram of a coffee maker with labeled parts and a close-up inset showing its device.Transport / Lagerung Transport / storage
During transport and storage, no water must be present in the coffee machine.
▶ Pull out the power plug.
▶ Empty the water tank and replace it.
Place a cup under the output.
Hold down the Lungo key and re-insert the power plug.
▶ Release the Lungo key □ after approx. 2 seconds.
The pump starts and the cleaning key ⚠ and the Lungo key ☑ flash. The residual water is pumped out of the coffee machine.
As soon as the pump stops, the key lights extinguish and emptying out is finished.
▶ Pull out the power plug.
▶Allow the coffee machine to cool down.
▶Store the coffee machine in the original packaging in a dry, dust-free place, out of reach of children.
▶ Flush out the machine and piping before using again.
text_image
Illustration showing four different waste sorting methods: sorting, recycling bin, cleaning bin, and sweeping.Entsorgung Disposal
▶ Dispose of used capsules and worn-out machines according to the regulations in your country.
Worn-out machines can be returned to your dealer for professional disposal free of charge.
Technische Daten
| Parameter Value | |
| Rated voltage 220–240 V, 50/60 Hz | |
| Rated power 1455 W | |
| Energy-saving mode 0.3 W | |
| Dimensions (mm) (W × H × D) | 140 × 360 × 255 |
| Weight 3.9 kg | |
| Water tank capacity 1.1 l | |
text_image
Diagram of a water dispenser with labeled parts 1, 2, and 3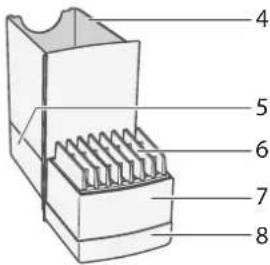
text_image
Diagram of a mechanical component with numbered parts labeled 4 through 8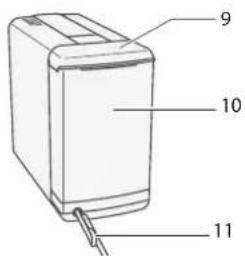
text_image
9 10 11text_image
Technical diagram of a device with numbered parts labeled 1 to 4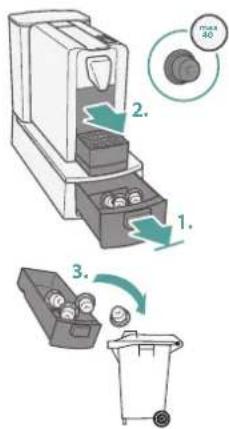
text_image
1. 2. 3.natural_image
Vertical toolbar with four icons: water drop, square, square, and square (no text or symbols)Touche de nettoyage
Rince les circuits.
natural_image
Line drawing of a desktop computer with a magnified inset showing internal components (no text or symbols)Éclairage des touches Toetsverlichting
Toutes les touches
natural_image
Illustration of a water dispenser and a glass with liquid, showing mechanical components and fluid flow direction (no text or symbols)natural_image
Illustration of a coffee maker with a water droplet icon (no text or symbols)Rinçage des circuits Leidingen spoelen
text_image
Diagram of a printer with labeled parts and a magnified inset showing the component's viewCharger la capsule
natural_image
Illustration of a coffee maker with a cup and a hand inserting into it, showing a close-up inset (no text or symbols)Écoulement du café
text_image
Diagram showing a coffee machine with a magnified view of its cup, highlighting time measurement of 3 seconds.text_image
Diagram showing two steps of a coffee maker with a cup, highlighting the process with an inset image of the device.text_image
Diagram showing a coffee maker with a water droplet icon and a magnified view of its water droplet inside the device.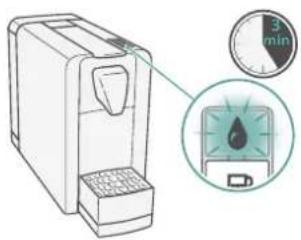
text_image
Diagram of a digital washing machine with a close-up showing its 3-minute time dial and water droplet inside.Réinitialiser la programmation
text_image
Diagram illustrating a chemical process involving a bottle, a container with liquid, and a washing machine with a magnified view of the device.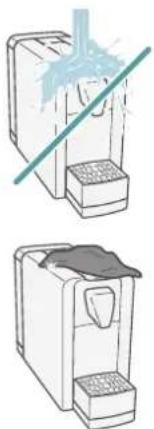
natural_image
Illustration of two household appliances with a diagonal line indicating a safety or cleaning concept (no text or symbols present)natural_image
Illustration of a printer with a paper airplane being processed, accompanied by a washing machine and various electronic devices (no text or symbols present)natural_image
Illustration of a portable water heater with a power outlet and a green arrow indicating direction (no text or symbols)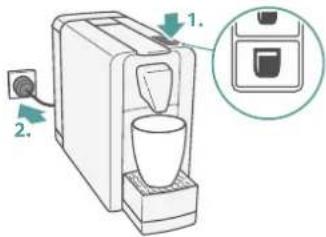
text_image
Diagram of a coffee maker with labeled parts and a close-up inset showing the device's internal structure.Transport / rangement Transport / opslag
text_image
Illustration showing four different waste sorting methods: sorting, recycling bin, cleaning bin, and sweeping.If this troubleshooting guide does not help you solve your problem, please contact your nearest service centre.
Repairs may only be carried out by an authorized service centre.
No liability will be accepted for any damage due to unprofessional repairs and use of non-original spare parts, which may endanger the user and will render the guarantee null and void.
Caution! Immediately disconnect the power supply to faulty or defective appliances or in case of suspected defect after a fall.
Problèmes
natural_image
Line drawing of a coffee machine with a cup and lid, no text or symbols present
www.cremesso.com