AC2P - Generator BLUETTI - Free user manual and instructions
Find the device manual for free AC2P BLUETTI in PDF.


| Product Type | Portable Power Generator |
| Brand | BLUETTI |
| Model | AC2P |
| Battery Capacity | 230.4 Wh (9 Ah) |
| Battery Type | Lithium Iron Phosphate (LiFePO₄) |
| AC Output Power | 300 W (peak 600 W in power lifting mode) |
| AC Output Voltage | 230 V AC |
| AC Output Frequency | 50/60 Hz (switchable) |
| DC Outputs | 1 cigarette lighter socket 12 V/10 A, 2 USB-A 5 V/2.4 A, 1 USB-C (max 20 V/5 A) |
| AC Input | 230 V, 2.5 A max |
| Solar Input (PV) | 12-28 V DC, 8.2 A max, 200 W max |
| Charging Methods | AC, solar, car (96 W max), generator |
| AC Charging Time (Turbo) | 80% in 45 min, full in 80 min |
| AC Charging Time (Standard) | 2 h |
| AC Charging Time (Silent) | 4 h |
| Weight | 3.6 kg |
| Dimensions (L × W × H) | 250 × 156.5 × 174.5 mm |
| Operating Temperature | Charge: 0 to 40 °C; Discharge: -20 to 40 °C |
| Main Features | Power lifting mode (600 W), ECO mode, Turbo charging, Bluetooth app, self-adaptive grid mode |
| Maintenance and Cleaning | Storage at 40-60% charge, discharge/recharge every 3 months; clean with a dry cloth |
| Safety | Overload, overheat, short circuit, low voltage protection, etc.; certificates not listed |
| Spare Parts and Repairability | Internal battery not user-replaceable; repair by authorized personnel only |
| Included Accessories | AC cable, solar cable (MC4), grounding screw, manual, warranty card |
| Warranty | Refer to the included warranty card |
Frequently Asked Questions - AC2P BLUETTI
User questions about AC2P BLUETTI
0 question about this device. Answer the ones you know or ask your own.
Ask a new question about this device
Download the instructions for your Generator in PDF format for free! Find your manual AC2P - BLUETTI and take your electronic device back in hand. On this page are published all the documents necessary for the use of your device. AC2P by BLUETTI.
USER MANUAL AC2P BLUETTI
Portable Power Station
User Manual v1.0
Please read this manual carefully before use and keep it for future reference.
Warning
- Charge the unit before first use.
- Do not use solar panels with open circuit voltage higher than 28V. Solar input voltage range for the unit is 12V-28VDC.
- Charge the unit immediately when the SoC drops below 5%. If the SoC drops to 0, power off the unit and charge it for at least 30 minutes before restarting.
- The unit is for off-grid use only. Do not connect its AC output to the grid.
- If not used for more than 3 months, charge the unit to 40%-60% SoC and store it with the power off. For optimum battery life, discharge and charge the unit every 3 months.
Thank You!
Thank you for making BLUETTI a part of your family.
From the very beginning, BLUETTI has tried to stay true to a sustainable future through green energy storage solutions while delivering an exceptional eco-friendly experience for our homes and our world.
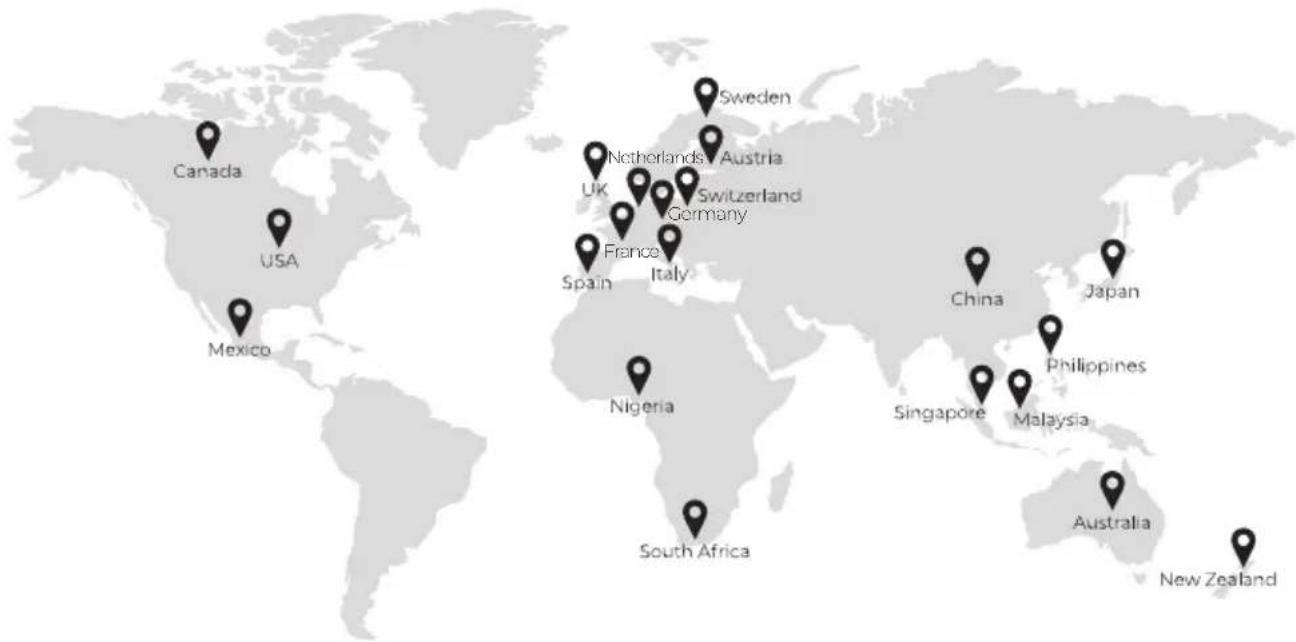
That's why BLUETTI makes its presence in 100+ countries and is trusted by millions of customers across the globe.
Copyright © Shenzhen PowerOak Newener Co., Ltd. All rights reserved.
No part of this document may be reproduced or transmitted in any form or by any means without the prior written consent of Shenzhen PowerOak Newener Co., Ltd.
Notice
BLUETTI's products, services, and features are subject to the agreed-upon terms and conditions during purchase. Please note that some products, services, or features described in this manual may not be available under your purchase contract. Unless otherwise specified in the contract, BLUETTI makes no representations or warranties of any kind, express or implied, with respect to the contents of this manual.
The contents of this manual are subject to change without notice. Please get the latest version from: https://www.bluettipower.com/pages/user-guides
If you have any questions or concerns about this manual, please contact BLUETTI support for further assistance.
Contents
1 Safety Instructions 05
2 Packing List 09
3 Product Introduction 10
4 Product Overview 11
5 Power ON/OFF 12
6 LCD Display 13
7 Charging 15
8 Discharging 17
9 Settings 18
10 BLUETTI App 20
11 Specifications---- 21
12 Button Operation Instructions 22
13 Troubleshooting 23
Appx.1 Estimating Operation Time 25
Appx. 2 FAQ 26
1. Safety Instructions
Read this manual for instructions on the proper use and safety information for the product. The safety instructions provided herein are for illustrative purposes that include but are not limited to those listed in this manual. Actual operation shall comply with all applicable safety standards. If you have any questions, feel free to contact BLUETTI support or your local BLUETTI dealers.
1.1 Statement
To ensure a safe operation, it's crucial to observe and adhere to the following conditions:
• Always operate or store the product in the conditions specified in this manual.
- Avoid unauthorized disassembly, component replacement, or modification of software codes.
⚠ BLUETTI shall not be liable for damages resulting from the following circumstances:
- Force majeure events such as earthquakes, fires, storms, floods, or mudslides.
- Damage caused by the customer's own transportation.
- Damage resulting from inadequate storage conditions as specified in the manual.
- Damage caused by customer negligence, improper operation, or intentional actions.
- System or hardware damage caused by third parties or customers, including but not limited to improper handling and installation not in accordance with the instructions in this manual.
- Usage of the product with devices that require a high-performance Uninterruptible Power Supply (UPS), including but not limited to data servers, workstations, medical equipment, and other similar devices.
1.2 General Requirements
INSTRUCTIONS PERTAINING TO RISK OF FIRE, ELECTRIC SHOCK, OR INJURY TO PERSONS IMPORTANT SAFETY INSTRUCTIONS
WARNING:
When using this product, basic precautions should always be followed, including the following:
- Read all the instructions before using the product.
- To reduce the risk of injury, close supervision is necessary when the product is used near children.
- Do not put fingers or hands into the product. And do not insert foreign objects into any
ports of the product.
- Use of an attachment not recommended or sold by the manufacturer may result in a risk of fire, electric shock, or injury to persons.
- To reduce the risk of damage to the electric plug and cord, pull the plug rather than the cord when disconnecting the product.
- Do not use a battery pack or appliance that is damaged or modified, as they may exhibit unpredictable behavior resulting in fire, explosion, or personal injury.
- Do not operate the product with a damaged cord or plug, or a damaged output cable.
- Do not attempt to replace the internal battery or any other component of the product by anyone other than authorized personnel. There are no end-user serviceable components. Do not disassemble the product, take it to a qualified service person when service or repair is required. Incorrect reassembly may result in a risk of fire or electric shock.
- To reduce the risk of electric shock, unplug the product from the outlet before attempting any instructed servicing.
- WARNING - RISK OF EXPLOSIVE GASES. To reduce the risk of battery explosion, follow these instructions and those published by the battery manufacturer and manufacturer of any equipment you intend to use in the vicinity of the battery. Review cautionary markings on these products and engines.
• PERSONAL PRECAUTIONS
a.Wear complete eye protection and clothing protection. Avoid touching eyes while working near the battery.
b. Never smoke or allow a spark or flame in the vicinity of the battery or engine.
c.Be extra cautious to reduce the risk of dropping a metal tool onto the battery. It might spark or short-circuit the battery or other electrical parts which may cause an explosion.
- When charging the internal battery, work in a well ventilated area and do not restrict ventilation in any way.
• Under abusive conditions, liquid may be ejected from the battery; avoid contact. If contact accidentally occurs, flush with water. If liquid contacts eyes, additionally seek medical help. Liquid ejected from the battery may cause irritation or burns.
- Do not expose the product to fire or excessive temperature. Exposure to fire or temperature above 130°C (266°F) may cause an explosion.
- Have servicing performed by a qualified repair person using only identical replacement parts. This will ensure that safety is maintained
- Do not stack anything on top of the product while in storage or use. Do not move the product while operating as vibrations and sudden impacts may lead to poor connections to the hardware inside.
- In case of fire, use only a dry powder fire extinguisher appropriate for the product.
- WARNING - RISK OF ELECTRIC SHOCK. Never use the product to supply power tools to cut or access live parts or live wirings, or materials that may contain live parts or live wirings inside, such as building walls, etc.
1.3 Grounding Instructions
The product is designed for portable use and typically does not require earth grounding. However, if you connect it to the power grid, it's important to ensure proper grounding for safety. If it should malfunction or break down, grounding provides a path of least resistance for electric current to reduce the risk of electric shock. This product is equipped with an AC power cord having an equipment-grounding conductor and a grounding plug. The plug must be plugged into an outlet that is properly installed and grounded in accordance with all local codes and ordinances.
WARNING:
Improper connection of the equipment-grounding conductor can result in a risk of electric shock. Check with a qualified electrician if you are in doubt as to whether the product is properly grounded. Do not modify the plug provided with the product - if it does not fit the outlet, have a proper outlet installed by a qualified electrician.
1.4 Handling Requirements
During transportation or storage, take care to avoid dropping, violently impacting, or tilting the product as it may result in internal damage. If necessary, use mechanical assistance such as carts or adjustable height workbenches to ensure safe handling.
Recommended Number of People Based on the Weight of Product
| Weight | Number of people |
| <18kg (39.7lbs) | 1 |
| 18kg~32kg (39.7lbs~70.5lbs) | 2 |
| 32kg~55kg (70.5lbs~121.3lbs) | 3 |
| >55kg (121.3lbs) | 4 or a cart |
1.5 Storage Instructions
- When the SoC drops to 5% , please charge the product immediately.
- Before storing the product, charge it to 40% to 60% SoC to keep it in optimal condition. In addition, power off the product and disconnect all electrical connections from it.
- Store the product in a cool and dry place, keeping it away from flammable or combustible
materials and gases.
- The product can be safely stored within a temperature range of -20°C to 40°C (-4°F to 104°F). However, if the storage duration exceeds one month, it's recommended to maintain an ideal storage temperature of around 30°C (86°F).
- Fully cycle the product every 3 months to maintain the battery's health. It's NOT recommended to store the product for extended periods of time, as it may affect its performance and overall lifespan.
If the SoC drops to 0 (during storage or upon startup), take the following actions to safely restart the product:
- Shut down immediately.
- Charge within 48 hours.
- Keep it at an ambient temperature of 5°C to 35°C (41°F to 95°F) for 6 hours before charging. It's recommended to charge the product via an AC source. If charging via solar energy, ensure that your solar system provides an output of more than 100W.
The symbol displayed is intended to remind you to read the instructions in the literature accompanying the product before operation and maintenance.
- Connect the product to a socket-outlet that has an earthing connection using the power cord provided.
- The socket-outlet should be installed near the product and easily accessible for safety purposes.
- Never dispose of a battery by throwing it into fire or a hot oven, or by mechanically crushing or cutting it, as these may cause it to explode.
- Avoid leaving batteries in extremely high-temperature environments, as this can result in an explosion or the leakage of flammable liquid or gas.
- The battery subjected to extremely low air pressure may result in an explosion or the leakage of flammable liquid or gas.
- Attention should be drawn to the environmental aspects of battery disposal.
- Please refer to the information on the exterior bottom enclosure for electrical and safety information before installing or operating the apparatus.
SAVE THESE INSTRUCTIONS
⚠ BLUETTI shall not be liable for any equipment damage caused by the violation of the above instructions.
2. Packing List
Standard Accessories
| Item Picture Qty. | ||
| AC2PPortable Power Station |  | 1 |
| AC Charging Cable | 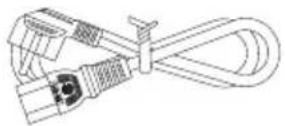 | 1 |
| Solar Charging Cable | 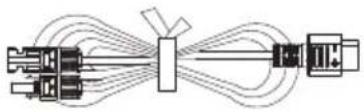 | 1 |
| Grounding Screws | 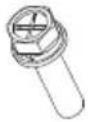 | 1 |
| User Manual |  | 1 |
| Warranty Card |  | 1 |
Optional Accessory
(Available on the official BLUETTI website: https://www.bluettipower.com)
Item Picture
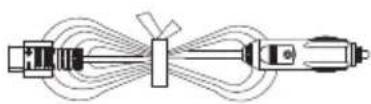
Car Charging Cable
3. Product Introduction
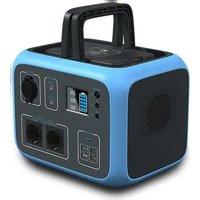
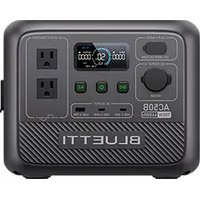
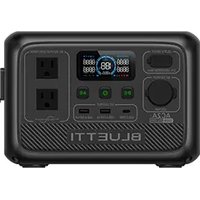
Introducing the BLUETTI AC2P, your perfect partner for lightweight and minimalist travel. With its 230.4Wh capacity and 300W output, it effortlessly charges smartphones, cameras, lights, laptops, drones, and more. Pair it with solar panels to extend its usage time, ensuring you stay powered up throughout your trip.
But it's not just for travel - it's also ideal for gatherings at home. Power your favorite devices, whether it's music speakers, ambient lighting, or other entertainment gadgets, to create an unforgettable delightful atmosphere. Get ready to experience the true potential of portable power with the AC2P!
Danger:
Do not connect the AC output of AC2P to the grid.
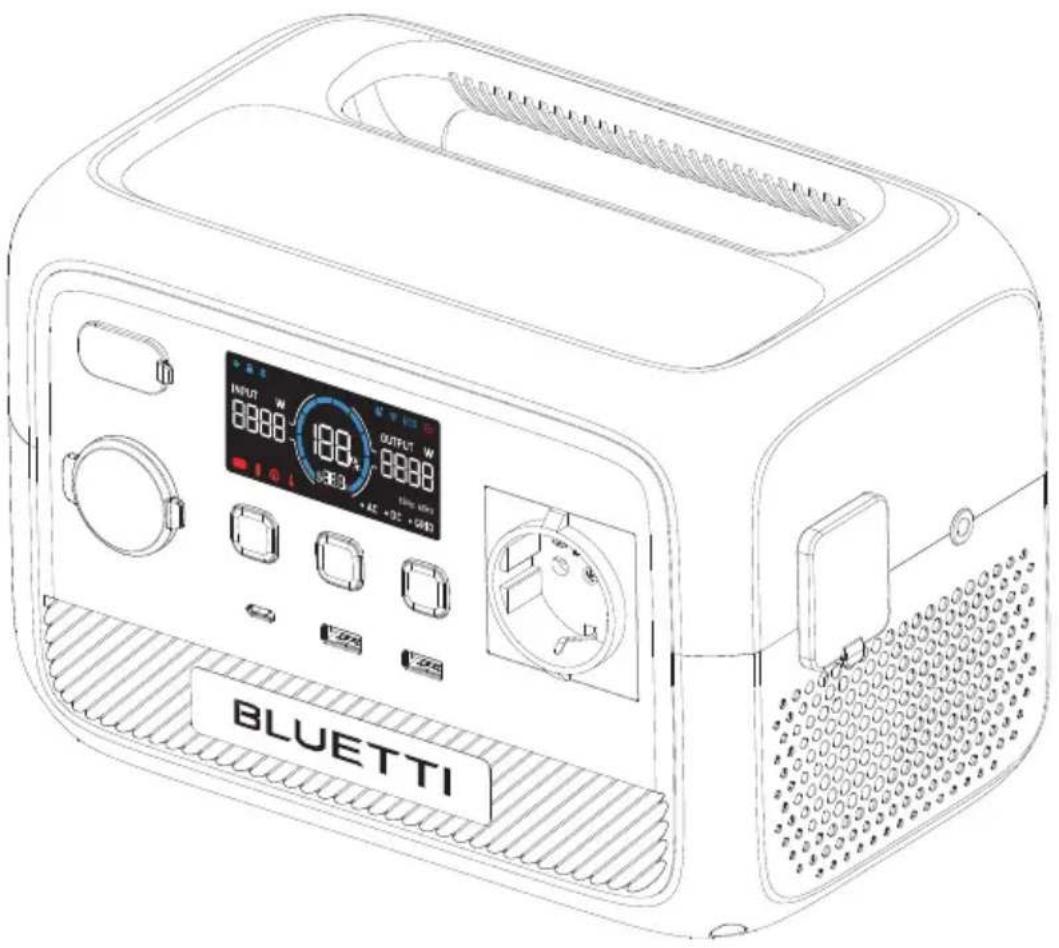
4. Product Overview
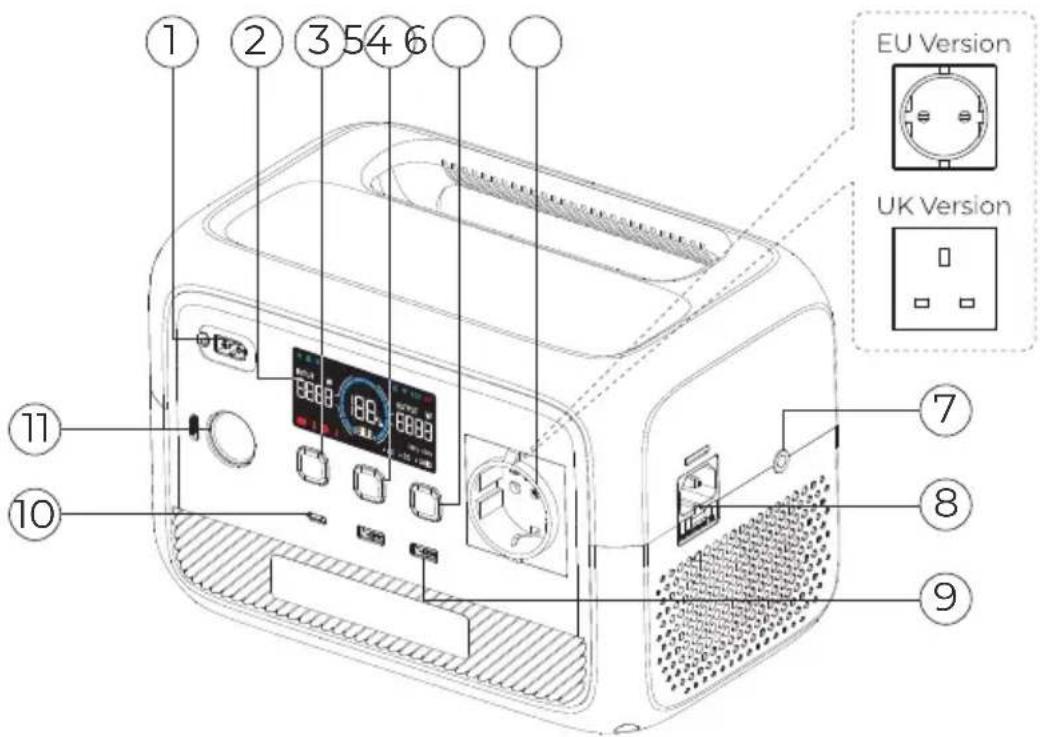
① DC Input
② LCD Display
③ DC Power Button
④ POWER Button
⑤ AC Power Button
⑥ AC Outlet
⑦ Grounding Pole
⑧ AC Input
⑨ USB-A Port
⑩ USB-C Port
⑪ Cigarette Lighter Port
5. Power ON / OFF

Attention:
Please place the unit on the platform firmly and stably.
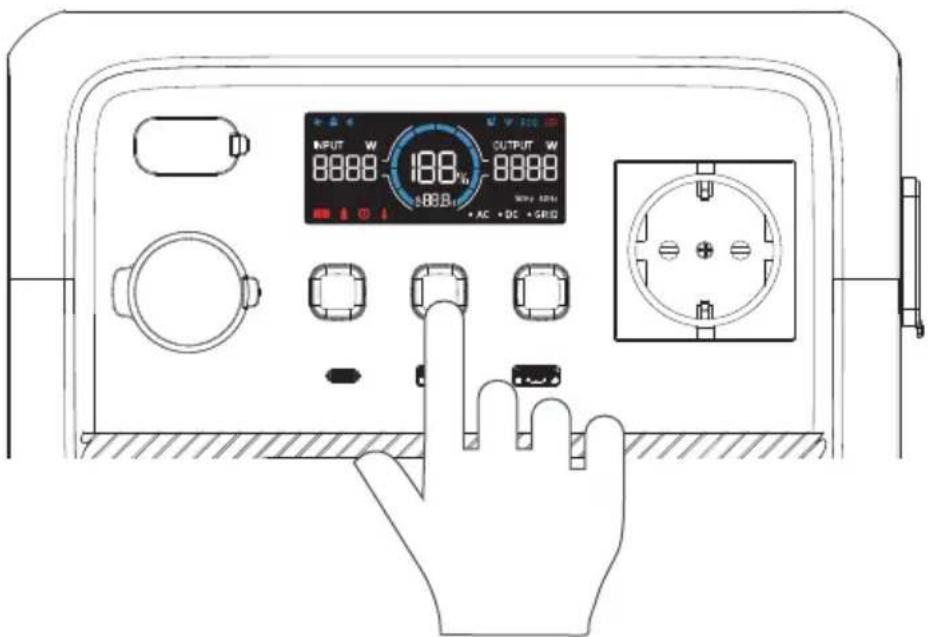
- Power ON: Press and hold the POWER Button for about 2 seconds, the button lights up indicating that the AC2P is now on standby.
• Power OFF: Press and hold the POWER Button for about 2 seconds to turn off the unit. - AC ON/OFF: When the AC2P is on, press the AC Power Button to turn it on/off.
· DC ON / OFF: When the AC2P is on, press the DC Power Button to turn it on / off. - Restart: Power off the AC2P first, then press the POWER Button to restart.
Note: When the AC2P is on, you can activate the LCD display by interacting with any of the buttons.
When AC and DC is off for more than 1 minute, the AC2P will be off automatically.
6. LCD Display
The AC2P features an informative LCD display that offers easy access to all the essential information about the unit's status and performance. When you power on the unit, the LCD display lights up, and when you power off the unit, the display turns off as well.
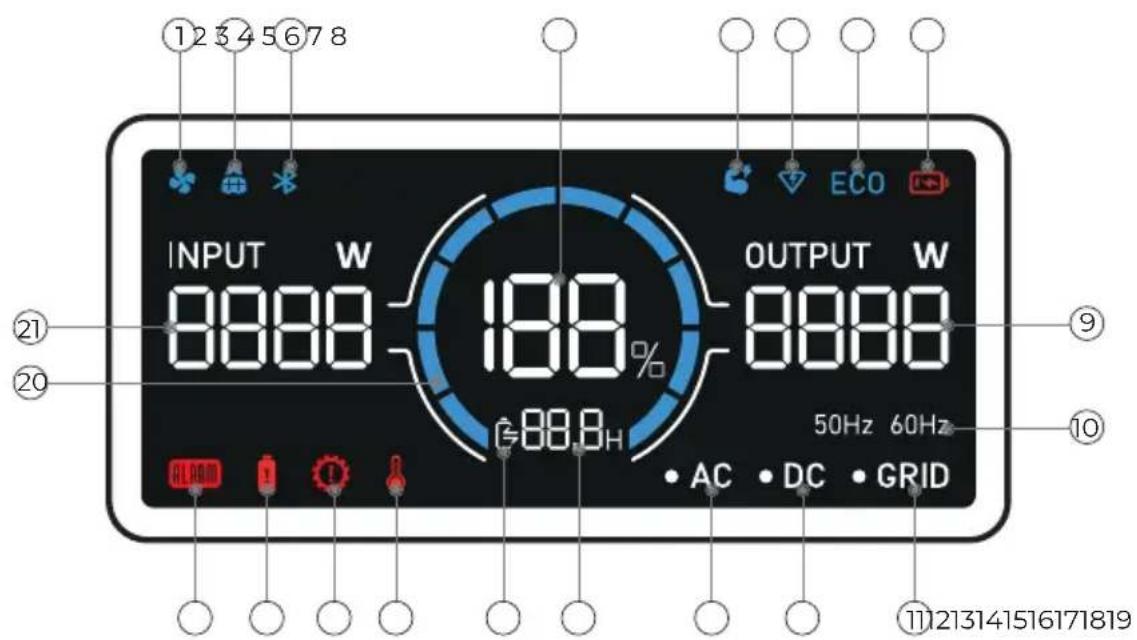
① Fan Status
⑧ Low Battery Alert
⑮ Charge / Discharge Status
② PV Input
⑨ Output Power
⑯ High Temperature Alert
③ Bluetooth Connection
⑩ AC Output Frequency
⑰ Overcurrent Alert
④ Battery Capacity (SoC)
⑪ Grid Connection
⑱ Overload Alert
⑤ Power Lifting Mode
⑫ DC Output
⑲ Fault Alert
⑥ Turbo Charging
⑬ AC Output
⑳ Charge / Discharge Progress
⑦ ECO Mode
⑭ Charge / Discharge Remaining Time
②1 Input Power
| LCD Instructions | |
| Startup | LCD lights up |
| Shutdown | LCD lights off |
| When it lights up, the fan is activated and working properly. |  |
| If it flashes, there may be a problem with the fan. | |
| The AC2P is charging from solar panels. |  |
| The AC2P connects to BLUETTI App via Bluetooth. |  |
| The remaining battery capacity. |  |
| The AC2P is operating in Power Lifting Mode. |  |
| The AC2P is charging in Turbo Charging Mode. |  |
| The ECO Mode is enabled to save power. |  |
| The SoC drops below 5%. |  |
| The real-time total output power. |  |
| The real-time AC output frequency. |  |
| The AC2P is charging from the home grid. |  |
| The DC output is turned on. |  |
| The AC output is turned on. |  |
| The remaining time of charging or discharging. |  |
| :Charging :Discharging |  |
| The temperature inside the unit is higher than 70°C (158°F). |  |
| The AC2P is drawing too much current, which can cause damage to the unit or any connected devices. |  |
| The AC2P is overloaded. |  |
| There's an issue with the AC2P, which may require troubleshooting or repair. |  |
| The bar increases during charging and decreases during discharging. |  |
| The total input power. |  |
7. Charging
AC2P supports four charging methods: AC, solar, car, and generator.

Attention:
• Double-check that all cables are firmly plugged in.
- Avoid getting the plug and socket wet to prevent any potential damage.
7.1 AC Charging
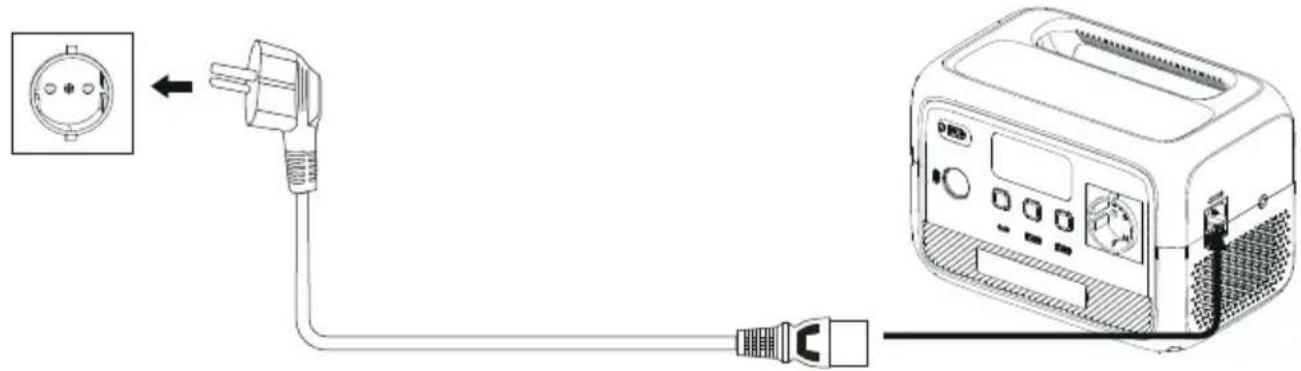
Plug the AC2P into a standard wall outlet and start charging. Once it's fully charged, the AC2P automatically stops charging to prevent overcharging. For a fast charge, you can enable Turbo Charging in the BLUETTI App, which allows for an 80% capacity in just 45 minutes at an ambient temperature of 25° C ( 77° F).
7.2 Solar Charging
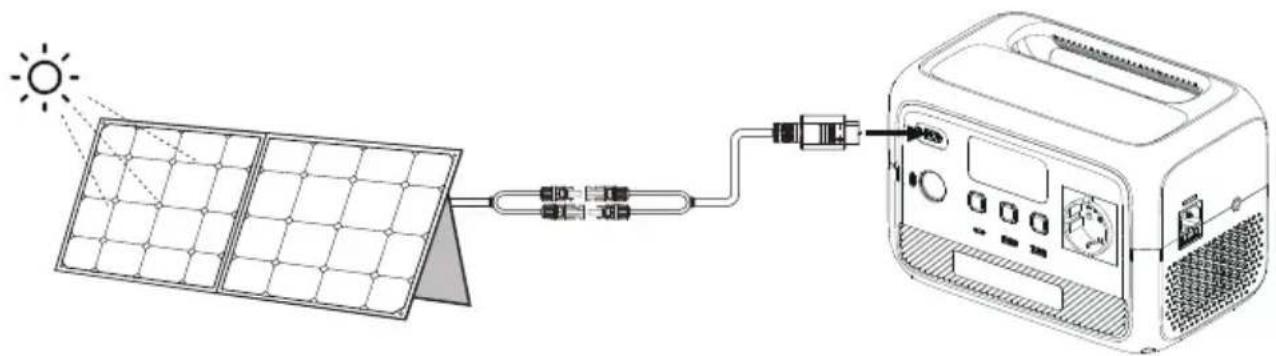
Connect the solar panels (in series or parallel) to AC2P via the solar charging cable. When receiving a continuous input of 200W, the AC2P will automatically stop charging within 1.5 hours. However, please be aware that the charging time may vary based on weather conditions, sunlight intensity, panel orientation, and other variables.
Note: Make sure your solar panel(s) meet the following requirements:
Voc: 12V-28V
Current: 8.2A Max.
Power: 200W Max.
7.3 Car Charging
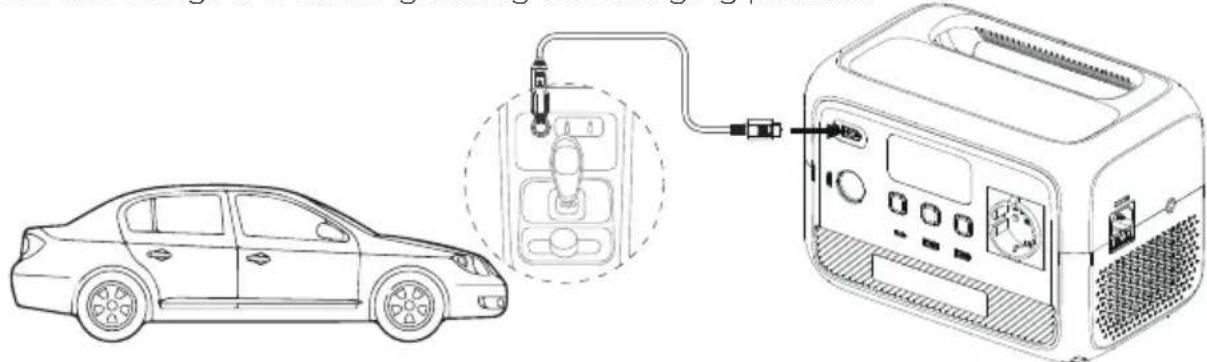
Connect AC2P to the vehicle's 12V cigarette lighter port via the car charging cable. The AC2P can charge at a maximum of 96W, and it'll automatically stop charging once it's fully charged.
Note: Make sure your vehicle meets the following conditions for charging:
• The vehicle is capable of supplying power.
• The vehicle's engine is running during the charging process.

Attention:
The AC2P has a low-voltage disconnect function designed to protect your vehicle's battery during charging. If the input voltage drops below 10.5V, the unit will automatically stop charging to prevent over-discharging and potential damage to the battery.
7.4 Generator Charging
Connect the AC2P to a generator via the AC charging cable. The AC2P will also automatically stop charging when it's fully charged, typically within 1.4 hours if the generator output is stable.
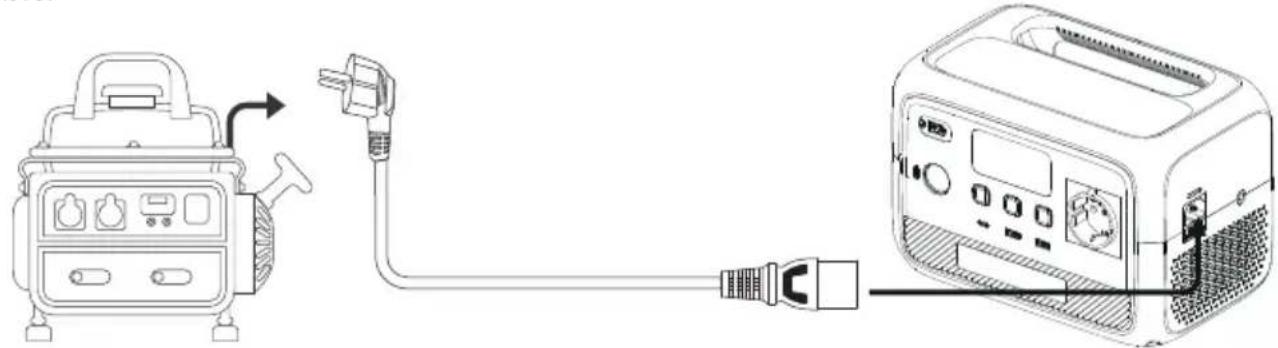
Note: Make sure your generator delivers the AC output with charging voltage, frequency, and Grid Self-adaption Mode voltage that meet AC2P's specifications.
If the total power demand of your connected devices exceeds the generator's output capacity, please turn on the Grid Self-adaption Mode to ensure a seamless charging experience.
8. Discharging
8.1 AC Discharging
| Port | Specifications | Compatible Loads |
| AC Outlet x1 | 230V50Hz / 60Hz | Appliances up to 300W power. |
Note: Do not apply AC2P to loads higher than 300W, as this may cause damage to AC2P and your devices.
8.2 DC Discharging
| Port | Picture Specifications | ||
| Cigarette Lighter Port x 1 |  | 12V / 10A | 12V DC appliances up to 120W power. e.g. car refrigerator, air conditioner |
| USB-A x 2 |  | 5V / 2.4A | Mobile phones and other small loads. |
| USB-C x 1 |  | 5/9/12/15/20V,3A; 20V / 5A | Mobile phones, laptops, etc. |
Note: To ensure optimal performance, avoid short-circuiting the ports and keep them dry during use or storage. Additionally, do not block or cover the ports while ensuring proper ventilation.
9. Settings
The AC2P offers the convenience of adjusting its settings either via physical buttons or the BLUETTI App. With the buttons located on the device itself, you have direct control over various settings such as ECO Mode, Power Lifting Mode, output frequency, charging modes, and other functionalities. Additionally, by using the BLUETTI App, you can access a user-friendly interface on your phone to conveniently monitor and control the AC2P.
9.1 Setting Mode
When the display is on, press and hold the AC and DC Power Buttons for about 2 seconds till the output frequency flashes to enter the Setting Mode.
9.2 ECO Mode
The AC2P has two ECO modes that help you save power and extend battery life:
- AC-ECO Mode
In this mode, if the AC power output falls below or remains at a certain level for a set period of time, the AC power will automatically turn off.
- DC-ECO Mode
In this mode, if the DC power output falls below or remains at a certain level for a set period of time, the DC power will automatically turn off.
i Attention:
- The AC-ECO and DC-ECO modes are enabled by default to save energy, and it's recommended to keep them enabled at all times.
- Use the BLUETTI App to enable or disable AC-ECO Mode and DC-ECO Mode separately. If you use the LCD display, they'll be turned on or off at the same time.
- To avoid any interruption in charging, disable ECO Mode when charging a small device that consumes less than 15W of power.
In the Setting Mode, press the DC Power Button to navigate through the setting items. When the ECO icon flashes on the display, press the AC Power Button to enable or disable the ECO Mode.
9.3 Frequency Switching
The current output frequency (50Hz / 60Hz) is displayed in the lower right corner of the display. When the AC output is off, in the Setting Mode, press the AC Power Button to
switch the frequency options based on your requirements.
9.4 Power Lifting Mode
The Power Lifting Mode is specifically designed to handle resistive loads up to 600W, including electric blankets, kettles, hairdryers, and other heating devices. To enable it, access the Setting Mode, navigate with the DC Power Button until the 🎨 appears, and press the AC Power Button to enable the mode.
Note: The Power Lifting Mode is not enabled by default and is only suitable for resistive loads with a power rating between 300W-600W.
Although the AC2P can handle higher power demands, its actual operating power remains at 300W.
9.5 AC Charging Mode
The AC2P supports 3 AC charging modes - Standard, Turbo, and Silent to fit your specific needs. In the Setting Mode, use the DC power button to navigate until the 🎨 icon starts flashing on the screen ( P03 ) . Then, press the AC power button to choose the Turbo mode.
| Mode | Recharging Time | Note | Icon |
| Standard | 2 hours | More friendly to AC2P's battery. It can only be configured using the BLUETTI App. | None |
| Turbo | 80% charge in 45 minutes; full charge in 80 minutes | Comes in handy when recharging time is a priority. |  |
| Silent | 4 hours | Offers a quiet, low-power operation for long battery life. It can only be configured using the BLUETTI App. | None |
9.6 Grid Self-adaption Mode
If you can not charge the AC2P properly using a generator or unstable grid voltage, it is recommended that you enable the Grid Self-adaption Mode through the BLUETTI App to ensure a stable, safe charging experience for both the AC2P and your devices.
9.7 Exit Setting Mode
To save your AC2P settings and exit the Setting Mode, press and hold both the AC and DC Power Buttons at the same time.
Note: If you do not perform any operation in 1 minute, the AC2P will automatically exit the Setting Mode, and no changes will be saved.
10. BLUETTI App
Scan the QR code below or search "BLUETTI" in the App Store or Google Play to download the BLUETTI App.

For more details, please refer to BLUETTI APP INSTRUCTIONS.
- Specifications
| Model AC2P | |||
| Battery Capacity | 230.4Wh / 9Ah | ||
| Cell Type | Lithium Iron Phosphate (LiFePO4, LFP) | ||
| AC + DC Charging Power | 270W Max. | ||
| Weight | 3.6kg / 7.9lbs | ||
| Dimensions (L × W × H) | 250mm × 156.5mm × 174.5mm / 9.8in × 6.1in × 6.8in | ||
| Charging Temperature | 0°C to 40°C | ||
| Discharging Temperature | -20°C to 40°C | ||
| Storage Temperature | -20°C to 40°C | ||
| Working Humidity | 10% to 90% | ||
| AC Output | |||
| Power | 300W in total | ||
| Voltage | 230VAC | ||
| Current | 1.3A | ||
| Frequency | 50Hz / 60Hz | ||
| DC Output | |||
| Cigarette Lighter Port × 1 | 12VDC / 10A | ||
| USB-A × 2 | 5V / 2.4A | ||
| USB-C × 1 | 5/9/12/15/20VDC, 3A; 20VDC / 5A | ||
| AC Input | |||
| Voltage | 230VAC | ||
| Max. Current | 2.5A | ||
| Frequency | 50Hz / 60Hz | ||
| UPS | Switching time ≤20ms | ||
| Charging Power | 270W Max. (0%-80% in 45 minutes @ 10°C-30°C / 50°F-86°F) | ||
| Input Power | 570W Max. (pass-through charging, 270W charging power + 300W load power) | ||
| DC Input | |||
| Interface | XT60PM-M | ||
| Power | 200W Max. | ||
| Current | 8.2A Max. | ||
| Voltage | 12V to 28VDC | ||
| Radio Frequency | |||
| Operating Frequency | Maximum Transmit power | Modulation mode | |
| BLE5.0 | 2402MHz ~ 2480MHz | -2.26dBm | GFSK |
- Button Operation Instructions
| Operation Function | Description | |
| Press the AC Power Button | Turn on / off the AC output | / |
| Press the DC power button | Turn on / off the USB-A, USB-C, DC output | / |
| Press the AC and DC Power Buttons simultaneously and hold for more than 2 seconds till the output frequency flashes | Enter / exit the Setting Mode | In the Setting Mode, the icons for the currently enabled functions remain lit, except for the flashing output frequency icon.If you do not perform any operation in 1 minute, the AC2P will automatically exit the Setting Mode, and no changes will be saved. |
| Press the DC Power Button in the Setting Mode | Navigate through the setting items | The flashing setting item is selected and editable. In the Setting Mode, the corresponding codes will be displayed on the left side:P01: Output FrequencyP03: Charging ModeP04: Power Lifting ModeP05: ECO ModeP06: Bluetooth |
| Press the AC Power Button when the setting item is flashing | Enable or disable the selected function | / |
| Press and hold the DC Power Button in the Setting Mode | Switch the status page | You can view relevant information on the status page. : Serial Number : Error code : Historical faults : Version |
13. Troubleshooting
In the Setting Mode, press and hold the DC Power Button for more than 2 seconds until the error code appears on the display. Please refer to the table below for helpful guidance.
| Error Code | Description | Troubleshooting | |
| E001 | 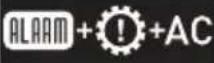 | Inverter overload | Check if the power consumption of your devices is too high. Reduce the load if necessary. |
| E002 | 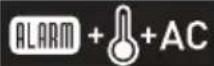 | Inverter overtemperature protection, AC output off | Wait for about 10 minutes until the unit cools down, then turn on the AC output again. |
| E003 | 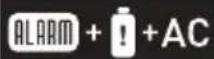 | Inverter short circuit | 1.Check if the power consumption of your devices is too high.2.Check if any of your electrical devices are causing a short circuit. |
| E033 | 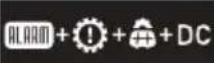 | PV overvoltage | Make sure the PV input voltage is within the range of 12V to 28VDC. |
| E039 | 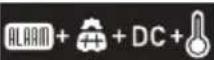 | PV overtemperature | Wait for about 10 minutes until the unit cools down, then re-enable the PV input. |
| E065 | 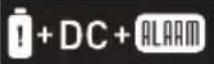 | DC output short circuit | 1.Check if the power consumption of your devices is too high.2.Check if any of your electrical devices are causing a short circuit. |
| E067 | 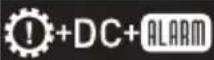 | DC output overcurrent | Check if the power consumption of your devices is too high. Reduce the load if necessary. |
| E068 | 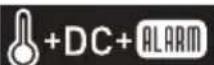 | DC output overtemperature | Wait for about 10 minutes until the unit cools down, then restart your devices. |
| E085 | 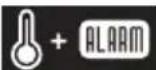 | Charging temperature too high | Wait for the unit to cool down before charging. |
| E086 | 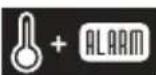 | Charging temperature too low | Make sure the unit is placed in an ambient temperature of 0°C to 40°C (32°F to 104°F). |
| E087 |  | Discharging temperature too high | Wait for the unit to cool down before discharging. |
| E088 |  | Discharging temperature too low | Make sure the unit is placed in an ambient temperature of -20°C to 40°C (-4°F to 104°F). |
| E113 |  | Grid overvoltage | Check if the grid voltage is too high. Change the input source if necessary. |
| E114 |  | Grid undervoltage | Check if the grid voltage is too low. Change the input source if necessary. |
| E115 |  | Grid overfrequency | Check if the grid frequency is too high. Contact your local power provider if necessary. |
| E116 |  | Grid underfrequency | Check if the grid frequency is too low. Contact your local power provider if necessary. |
| Others | / | / | Please contact BLUETTI support for assistance. |
Appx. 1 Estimating Operation Time
To estimate the operation time of the AC2P, consider the load you're applying:
Operation time = Battery Capacity (Wh) × DoD × η ÷ (Load Power + AC2P Self-consumption)
Note: DoD refers to the depth of discharge. AC2P works at 90% DoD for longer battery life.
η is the conversion efficiency of the inverter, typically over 85% for AC2P.
The self-consumption of AC2P is approximately 12W.
E.g. If you have a 40W refrigerator, you can run it for about 3.4 hours.
Operation time = 230.4Wh × 90% × 85% ÷ (40W + 12W) ≈ 3.4 hours.
Please keep in mind that the estimated operation time provided is for reference
purposes and may vary based on actual usage conditions. Factors such as low temperature and excessive loads can significantly affect the battery capacity, leading to a reduction in the average operation time.
Appx. 2 FAQ
Q1: How do I know whether my devices will work well with this product?
A: Please evaluate the total constant load of your devices. If it doesn't exceed the Max. output power of AC2P (300W), you can use this power station to run your devices. Note: Some devices with built-in motors or compressors may start at 2-4 times the rated power, which can easily overload the AC2P.
Q2: Can I use third-party solar panels to charge this product?
A: Yes, you can. However, make sure your solar panels have an open circuit voltage of 12V-28V and are equipped with MC4 connectors. It's also important not to mix different types of solar panels.
Q3: Can it charge and discharge at the same time?
A: Yes. It supports pass-through charging. The AC2P comes with the premium LiFePO 4 battery and proprietary Battery Management System to ensure that it can charge and discharge at the same time.
Q4: Why is the charging power often too low?
A: AC2P has a built-in intelligent BMS that automatically adjusts the charging power in response to the battery temperature and SoC, thus protecting the battery and extending its service life.
AC2P
Tragbare Powerstation
https://www.bluettipower.com/pages/user-guides
7.3 Laden per Auto

Zu beachten:
https://www.bluettipower.com/pages/user-guides
⑱ Alerte de surcharge
i Avertissement :
EU DECLARATION OF CONFORMITY
Hereby, Shenzhen Poweroak Newener Co., Ltd declares that the equipment type AC2P is in compliance with Directives 2014/53/EU and 2011/65/EU.
The full text of the EU declaration of conformity is available at the following internet address:
https://de.bluettipower.eu/products/bluetti-ac2p
For more information, please visit:

@ BLUETTI Support
@ BLUETTI Official

@bluetti_official

@ bluetti.inc

@bluetti_inc

sale-eu@bluettipower.com
EU REP
Address: Lise-Meitner-Str. 14 28816
Stuhr Germany
Mail: logi@bluetti.de
UK REP
Address: Unit 2 NorthGate, Bolsover Business Park,
Woodhouse Lane Chesterfield England, S44 6BD
Mail:poweroak.eu@bluetti.com
Customer Service(DE)
Tel: +49 8006273016
Service Hours: Monday to Friday
9:00 - 17:00 (local time)
Customer Service(UK)
Tel: +44 8000472906
Service Hours: Monday to Friday 9:00 - 17:00
(local time)

SHENZHEN POWEROAK NEWENER CO., LTD.
Address: F19, BLD No.1, Kaidaer, Tongsha Rd No.168,
Xili Street, Nanshan, Shenzhen, China

BLUETTI
[Figure]
L
Certificate
Inspector:
QC:____
- PORTABLE POWER STATION
- WARNING
- THANK YOU
- COPYRIGHT © SHENZHEN POWEROAK NEWENER CO., LTD. ALL RIGHTS RESERVED
- NOTICE
- CONTENTS
- SAFETY INSTRUCTIONS
- 1.1 STATEMENT
- 1.2 GENERAL REQUIREMENTS
- 1.3 GROUNDING INSTRUCTIONS
- 1.4 HANDLING REQUIREMENTS
- 1.5 STORAGE INSTRUCTIONS
- SAVE THESE INSTRUCTIONS
- PACKING LIST
- OPTIONAL ACCESSORY
- ITEM PICTURE
- PRODUCT INTRODUCTION
- DANGER
- PRODUCT OVERVIEW
- POWER ON / OFF
- ATTENTION
- LCD DISPLAY
- CHARGING
- 7.1 AC CHARGING
- 7.2 SOLAR CHARGING
- 7.3 CAR CHARGING
- 7.4 GENERATOR CHARGING
- DISCHARGING
- 8.1 AC DISCHARGING
- 8.2 DC DISCHARGING
- SETTINGS
- 9.1 SETTING MODE
- 9.2 ECO MODE
- I ATTENTION
- 9.3 FREQUENCY SWITCHING
- 9.4 POWER LIFTING MODE
- 9.5 AC CHARGING MODE
- 9.6 GRID SELF-ADAPTION MODE
- 9.7 EXIT SETTING MODE
- BLUETTI APP
- TROUBLESHOOTING
- APPX. 1 ESTIMATING OPERATION TIME
- APPX. 2 FAQ
- AC2P
- TRAGBARE POWERSTATION
- 7.3 LADEN PER AUTO
- ZU BEACHTEN
- I AVERTISSEMENT
- EU DECLARATION OF CONFORMITY
- FOR MORE INFORMATION, PLEASE VISIT
- EU REP
- UK REP
- BLUETTI
- CERTIFICATE
Brand : BLUETTI
Model : AC2P
Category : Generator