
BET 750 - Stapler Bavaria by Einhell - Free user manual and instructions
Find the device manual for free BET 750 Bavaria by Einhell in PDF.

| Product type | Electric stapler |
| Brand | Bavaria by Einhell |
| Model | BET 750 |
| Power supply | 230 V ~ 50 Hz, mains |
| Working speed | 20 staples per minute |
| Staple width | 10 mm |
| Staple length | 8 to 16 mm |
| Staple thickness | 0.7 mm |
| Nail length | 8 to 16 mm |
| Nail thickness | 0.7 mm |
| Magazine capacity | 120 staples maximum |
| Weight | 0.95 kg |
| Insulation type | Insulation protection (symbol) |
| Stapleable materials | Textiles, leather, wood |
| Safety | Integrated anti-staple safety; unplug before any maintenance |
| Maintenance and cleaning | Clean after use; remove jammed staples with pliers |
| Warranty | 2 years, material and manufacturing defects |
| Box contents | Stapler, 1000 staples, 1000 nails |
Frequently Asked Questions - BET 750 Bavaria by Einhell
User questions about BET 750 Bavaria by Einhell
0 question about this device. Answer the ones you know or ask your own.
Ask a new question about this device
Download the instructions for your Stapler in PDF format for free! Find your manual BET 750 - Bavaria by Einhell and take your electronic device back in hand. On this page are published all the documents necessary for the use of your device. BET 750 by Bavaria by Einhell.
USER MANUAL BET 750 Bavaria by Einhell
GB Directions for Use Electric Stapler/Nailer
natural_image
Close-up of hands operating a white hard shaver or clamp device (no visible text or symbols)natural_image
Close-up of hands using a sewing machine to adjust a small component (no visible text or symbols)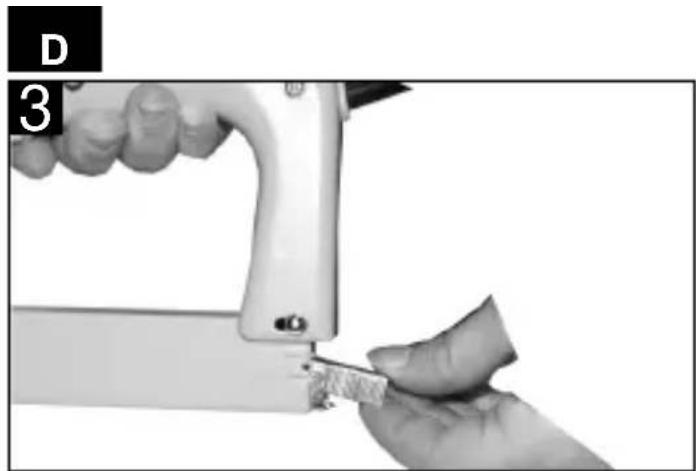
natural_image
Close-up of a hand using a sewing machine to cut a small piece of material (no text or symbols visible)natural_image
Close-up of a mechanical bracket assembly with mounting holes and a metallic part (no visible text or symbols)natural_image
Close-up of a mechanical bracket or bracket assembly with a metallic rod and mounting hole (no visible text or symbols)natural_image
Close-up of hands installing or adjusting a small mechanical component (no visible text or symbols)natural_image
Close-up of a hand holding a metal tool with a clip, next to a device component (no visible text or symbols)1 ON/OFF switch
2 Magazine retention pin
3 Magazine slide
4 Magazine
5 Stapler nose
Dear Customer,
Before you use your electric stapler/nailer for the first time, please read these directions for use and note the instructions for operating and looking after your new tool.
Always keep these directions for use together with the stapler/nailer.
1. Items supplied
1 electric stapler/nailer
1000 staples
1000 nails
2. Technical data
Power supply: 230 V \~ 50 Hz
Shots per minute: 20
Staple width 10 mm
Staple length 8 - 16 mm
Staple thickness 0.7 mm
Nail length 8 - 16 mm
Nail thickness 0.7 mm
Weight: 0.95
Totally insulated
N.B.:
It is important to wear suitable protective clothing, and particularly safety goggles, when working with the electric stapler/nailer. Please follow the safety instructions.
3. Proper use
The electric stapler/nailer is designed for the stapling and fastening of textiles, leather and wood using the correct staples and nails. It is designed for intermittent operation only. If used continuously, the stapler/nailer will overheat and cease to perform as efficiently.
In the event of overheating, take a break from your work and allow the stapler/nailer to cool down.
CAUTION!
For your own safety, use only staples and nails listed in the directions for use. The use of staples and nails other than those listed in the directions for use may result in risk of injury.
Be sure to pull out the power plug whenever the tool is not being used, each time before carrying out any maintenance, and whenever you want to change the staples or nails!
4. Getting started
- Loading the staples, Fig. 1-3
Switch off the electric stapler/nailer and pull out the power plug.
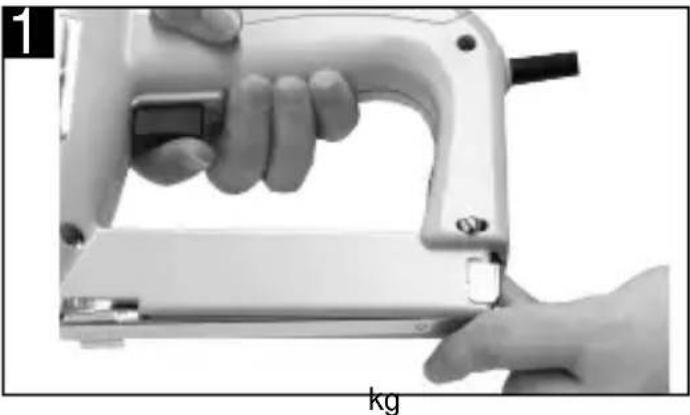
Press on the magazine lock and push it down (Abb. 1).
natural_image
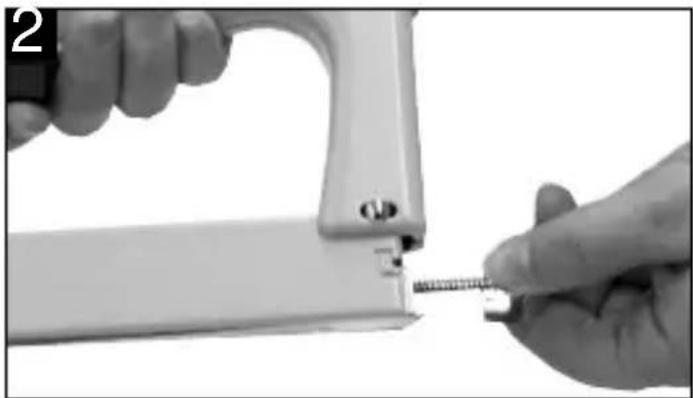
Close-up of hands operating a white manual sewing machine with a black tool, labeled 'kg' at the bottom (no other text or symbols visible)Pull the magazine slide out of the back of the electric stapler/nailer (Fig. 2).
natural_image
Close-up of hands using a sewing machine to adjust a small object (no visible text or symbols)
natural_image
Close-up of a hand using a sewing machine to cut a piece of material, with no visible text or symbols.Fill the magazine with staples or nails. The magazine holds a maximum of 120 staples (Fig. 3).
Reassemble in reverse order.
Push in the magazine slide as far as the stop, press the magazine lock and push it up so that it latches in place.
• Operation
Shooting can only be triggered, therefore, as follows:
Press the nose of the electric stapler/nailer against the material you want to fasten and actuate the ON/OFF switch.
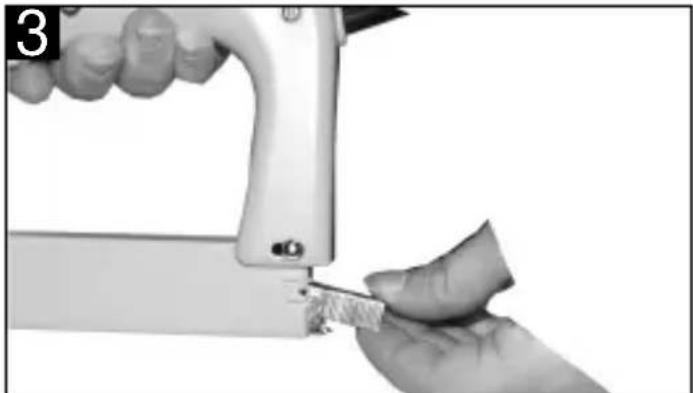
Working with staples
Place the staples in the magazine as shown in Figure 4.

natural_image
Close-up of a metallic mechanical bracket with mounting holes and a small inset detail (no text or symbols visible)Working with nails
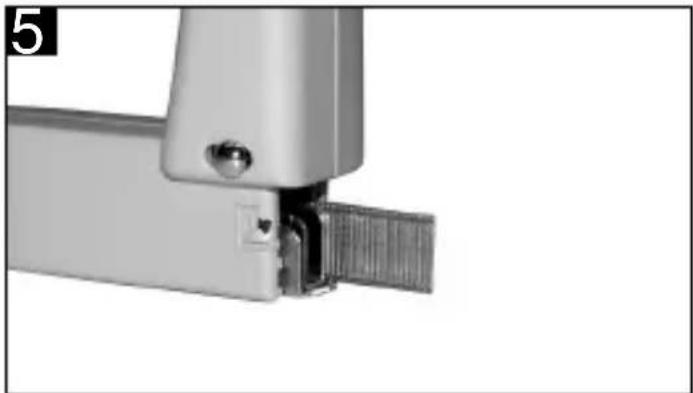
Place the nails in the magazine as shown in Figure 5.
natural_image
Close-up of a mechanical bracket with a metallic clip and metal rail, no visible text or symbolsStapling/nailing of textiles, fabrics, leather etc.
Press the nose of the electric stapler/nailer against the object in question and actuate the ON/OFF switch.
Nailing of wood strips
You should use only nails to fasten wood strips. Do not press the electric stapler/nailer too firmly against the wood strip or you may damage its surface.
5. Care and maintenance
Follow these maintenance instructions and your electric stapler/nailer will reward you with many years of troublefree service.
Each time before beginning with your work, check that the magazine is firmly seated. Clean the tool thoroughly as soon as you have finished working with it.
Staples may become jammed, particularly when positioning the electric stapler/nail at an angle. If jamming occurs, switch off the electric stapler/nailer immediately and pull out the power plug
Important! Always pull out the power plug before carrying out any work on the electric stapler/nailer!
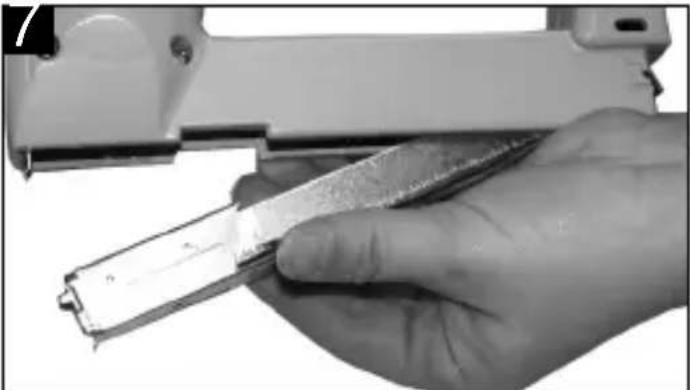
- Removing jammed staples
To free jammed staples you must completely remove the magazine. Pull out the pin as shown in the following picture (Fig. 6).

natural_image
Close-up of hands installing or adjusting a small mechanical component (no visible text or symbols)You can then remove the complete magazine and carefully free the jammed staples with a suitable pair of pliers (Fig.7).
natural_image
Close-up of a hand holding a plastic tool with a metallic clip, next to a white mechanical device (no visible text or symbols)Reassemble in reverse order.
Before you start up the stapler/nailer again, check that the magazine is properly and completely inserted and that the pin is pushed right through.
natural_image
Close-up of hands operating a white electronic device with a black handle, labeled 'kg' at the bottom (no other text or symbols visible)natural_image
Close-up of hands using a sewing machine to adjust a small screw (no text or symbols visible)
natural_image
Close-up of a hand using a sewing machine to cut a piece of material (no text or symbols visible)natural_image
Close-up of a metallic mechanical bracket with mounting holes and a small inset detail (no text or symbols visible)natural_image
Close-up of a mechanical bracket or bracket assembly with a metallic end and internal metal component (no visible text or symbols)Agrafer des textiles, tissus, cuirs etc.
natural_image
Close-up of hands installing or adjusting a small mechanical component (no visible text or symbols)natural_image
Close-up of a hand holding a tool with a metallic object, no visible text or symbolsnatural_image
Close-up of hands operating a white electronic device with a tool, no visible text or symbolsnatural_image
Close-up of hands using a sewing machine to adjust a small screw (no text or symbols visible)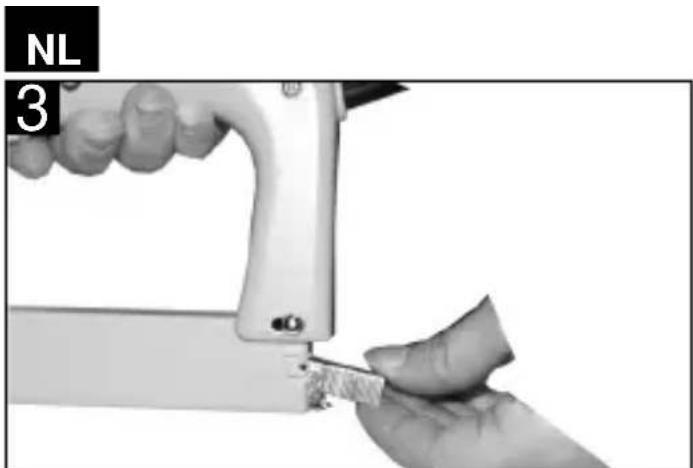
natural_image
Close-up of a hand using a sewing machine to cut a small object, with no visible text or symbols.natural_image
Close-up of a metallic mechanical bracket with mounting holes and a small inset detail (no text or symbols visible)natural_image
Close-up of a mechanical bracket with a metallic hinge and textured surface (no text or symbols visible)natural_image
Close-up of hands using a tool to adjust or install a mechanical component (no visible text or symbols)natural_image
Close-up of a hand holding a metal tool, possibly a cutting or cleaning tool, with no visible text or symbols.natural_image
Close-up of hands using a sewing machine to adjust a small screw (no text or symbols visible)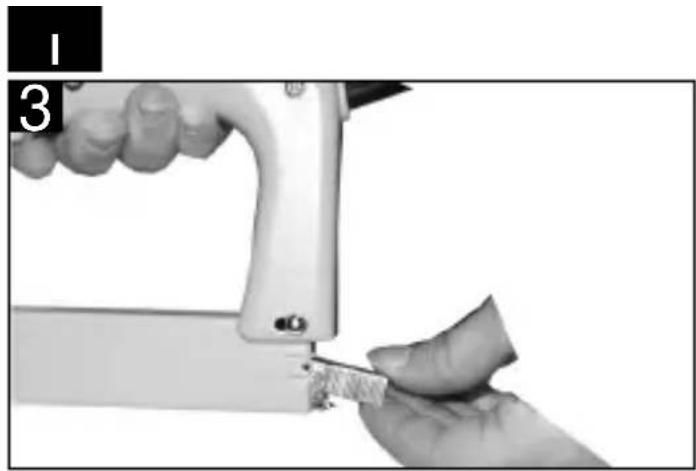
natural_image
Close-up of a hand using a sewing machine to cut a piece of material (no text or symbols visible)natural_image
Close-up of a mechanical bracket assembly with mounting holes and a metallic part (no visible text or symbols)Uso di chiodi
natural_image
Close-up of a mechanical component with a metallic bracket and textured surface (no visible text or symbols)natural_image
Close-up of hands installing or adjusting a metal component on a white structural joint (no text or symbols visible)natural_image
Close-up of a hand holding a metallic tool or device, no visible text or symbolsnatural_image
Close-up of hands operating a white electronic device with a tool, no visible text or symbolsnatural_image
Close-up of hands using a sewing machine to adjust a small screw (no text or symbols visible)
natural_image
Close-up of a hand using a sewing machine to cut a piece of material (no text or symbols visible)natural_image
Close-up of a metallic mechanical bracket with mounting holes and a small inset detail (no text or symbols visible)Anvendelse af søm
natural_image
Close-up of a mechanical bracket or bracket joint with a metallic clip and metal sheath (no text or symbols visible)natural_image
Close-up of hands installing or adjusting a metal component on a white panel (no text or symbols visible)natural_image
Close-up of a hand holding a tool interacting with a device (no visible text or symbols)natural_image
Close-up of hands operating a white electronic device with a handle and screwdriver (no visible text or symbols)natural_image
Close-up of hands using a sewing machine to adjust a small spring (no text or symbols visible)RUS
natural_image
Close-up of a hand using a sewing machine to cut a small piece of material (no text or symbols visible)natural_image
Close-up of a metallic mechanical bracket with mounting holes and a small inset detail (no text or symbols visible)Применение гвоздей
natural_image
Close-up of a metallic bracket with a screw and mounting hole (no visible text or symbols)natural_image
Close-up of hands installing or adjusting a small mechanical component (no visible text or symbols)natural_image
Close-up of a hand holding a small electronic component, possibly a battery or connector (no visible text or symbols)natural_image
Close-up of hands operating a handheld electronic device with a tool, no visible text or symbolsnatural_image
Close-up of hands using a sewing machine to adjust a small object (no text or symbols visible)PL
natural_image
Close-up of hands using a sewing machine to cut a small piece of fabric (no text or symbols visible)natural_image
Close-up of a mechanical bracket assembly with mounting holes and a metallic part (no visible text or symbols)natural_image
Close-up of a metallic mechanical bracket with a textured metal strip and a small inset detail (no text or symbols visible)natural_image
Close-up of hands using a tool to adjust or install a component, no visible text or symbolsnatural_image
Hand holding a handheld electronic device with a metallic clip (no visible text or symbols)Eschenstraße 6 · D-94405 Landau/Isar (Germany)
Technical changes subject to change
The guarantee period begins on the sales date and is valid for 2 years.
Responsibility is assumed for faulty construction or material or functional defects.
Any necessary replacement parts an necessary repair work are free of charge.
We do not assume responsibility for consequential damage.
Your customer service partner
① CERTIFICATO DI GARANZIA EINHELL
Brook House, Brookway
North Chesire Trading Estate
Prenton, Wirral, Chesire
CH 43 3DS
Tel. 0151 6084802, Fax 0151 6086339
S.C. A Ap. 9 Sector 1
RO 75 121 Bucharest
Tel. 01 4104800, Fax 01 4103568
©Marimex cz
Libusská 264
CZ-14200 Praha 4
Tel. 02 4727740, Fax 02 61711056


- Items supplied
- Technical data
- N.B.:
- Proper use
- CAUTION!
- Getting started
- Reassemble in reverse order.
- • Operation
- Stapling/nailing of textiles, fabrics, leather etc.
- Nailing of wood strips
- Care and maintenance
- - Removing jammed staples
- Agrafer des textiles, tissus, cuirs etc.
- RUS
- PL
- ① CERTIFICATO DI GARANZIA EINHELL
Brand : Bavaria by Einhell
Model : BET 750
Category : Stapler