Naia - Turntable REGA - Free user manual and instructions
Find the device manual for free Naia REGA in PDF.


User questions about Naia REGA
0 question about this device. Answer the ones you know or ask your own.
Ask a new question about this device
Download the instructions for your Turntable in PDF format for free! Find your manual Naia - REGA and take your electronic device back in hand. On this page are published all the documents necessary for the use of your device. Naia by REGA.
USER MANUAL Naia REGA
Click to select your language.
English
Français
Deutsch
Italiano
Español
Português
Nederlands
Dansk
Svenska
Polski
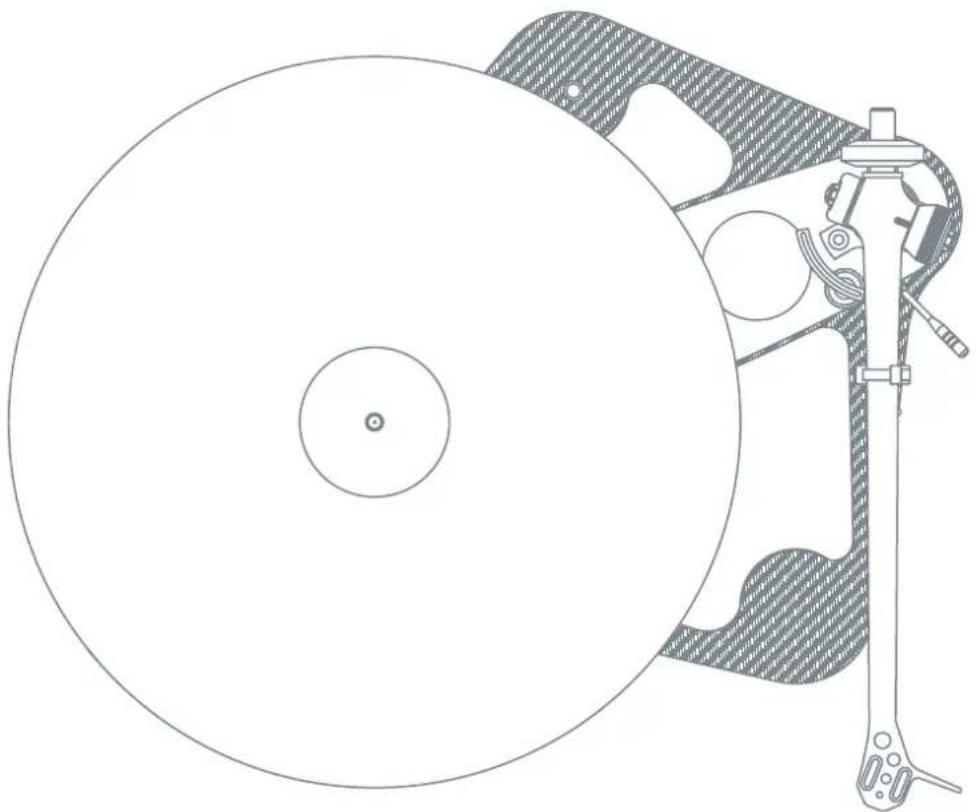
natural_image
Technical line drawing of a mechanical assembly with concentric circular components and a central tool (no text or symbols)NAIA Reference Turntable / PSU
User Manual
Your user manual

Please be sure to carefully read this manual before using this product. This ensures that you are getting the most out of your product.
Please scan the QR Code to access the multilingual user manual via the product web page.

text_image
QR code image containing encoded data, no visible human-readable textFor user instructions in your language, please visit www.rega.co.uk and go to the download section of your chosen product page.
CAUTION Risk of electric shock do not open.
The lightning flash with the arrowhead symbol within an equilateral triangle is intended to alert the user to the presence of un-insulated 'dangerous voltage' within the product's enclosure that may be of sufficient magnitude to constitute a risk of electric shock to persons.

The exclamation point within an equilateral triangle is intended to alert the user to the presence of important operating and maintenance instructions in the service literature relevant to this appliance.
Important information
English
Service
With the unit disconnected from the mains, clean only with a micro fibre cloth (lightly damp if necessary). Do not remove any coverings; there are no user serviceable parts inside. If the unit performs erratically or emits smoke or odour, disconnect from the power supply and take it to a qualified service technician.
Lifetime Limited Warranty
Every product we make is designed and assembled in the UK to the highest possible standard. This warranty covers confirmed manufacturing defects. This warranty does not cover wear and tear, or parts that are considered consumable. Any unauthorised modifications or failure to follow the Rega recommended guidelines in the product manual may invalidate the warranty. Due to local laws, warranties may vary by country in which units are sold. Please contact your Rega retailer or distributor for warranty details. Your statutory rights are not affected.
Please do not dispose of the product packaging. The original packaging must be used if returning a product to your dealer or distributor for inspection or repair.
Please visit the homepage of www.rega.co.uk for further warranty details.
Safety Instructions
Do not use this unit near liquids or expose to moisture. Do not use near sources of heat such as radiators, vents, stoves, or candles. Ensure adequate ventilation around the product, at least 10cm in all directions, and avoid placing the unit on soft surfaces such as long carpet and fabric. Do not open the product enclosure or force objects into openings in the unit. Place the unit on a fixed level surface where it will not fall or tip. The unit should only be used in moderate climates between 5°C (41°F) and 35°C (95°F). Keep packaging material and small pieces out of reach of children. Unplug the power supply if the unit is unused for extended periods of time.
Français
Service
This symbol indicates that the electronic equipment bearing it should not be disposed of as general household waste at the end of its life. The equipment should be disposed of at a collection point for waste electrical and electronic equipment in accordance with national legislation and Directive 2012/19/EU. For more information about how to dispose of your waste electronic equipment, please contact your local authority or retailer where you purchased the product. In the UK, please return your product to the retailer.
Français
This symbol indicates that this product complies with the relevant European Directives.
UKCA Mark
This symbol indicates that this product complies with the UK conformity safety requirements.
Eurasian Conformity Mark (EAC)
This product meets Russia, Byelorussia and Kazakhstan electronic safety approvals.
Regulatory Compliance Mark (RCM)
This symbol indicates that this product meets Australia, New Zealand Safety, EMC and Radio Communications requirements.
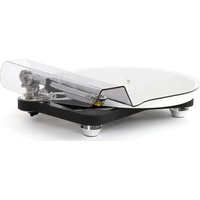
Thank you for purchasing the Rega Naia turntable. A product developed directly from the handmade 'Naiad' test bed turntable (costing £30,000, of which parts for only fifty were ever ordered). The Naia takes the best of this technology and transfers it into a production ready version without compromise. The Naia is packed with groundbreaking features, materials and technology developed by Rega over many years to deliver the ultimate in vinyl replay.
The Naia takes our pioneering low mass high rigidity plinth technology to the next level by using a Graphene impregnated carbon fibre skeletal plinth with Tancast 8 foam core. This ultra rigid structure is then strengthened further using ceramic aluminium oxide braces, the same material used to create the redesigned, resonance controlled ceramic platter with improved flywheel effect and complex profile.
Our unique 24V low noise motor is driven by our reference power supply which provides ultimate control over speed and vibration. The motor drive is transferred via three Reference EBLT drive belts which rotate a custom aluminium sub-platter with a spindle made from ZTA Zirconium toughened alumina (ceramic), the exact same material as the central bearing itself. A world first.
The RB Titanium tonearm is the most advanced and accurate production tonearm we have every released. The entire tonearm structure is designed to have the minimum of mechanical joints whilst using the stiffest materials in all critical areas. The RB-Titanium achieves near frictionless movement horizontally and vertically whilst having no measurable free play in the bearing assemblies. The RB-Titanium uses a new one-piece titanium vertical bearing and titanium vertical spindle assembly. The recommended Rega Aphelion 2 MC (optional) will be mounted upon our unique hand-polished aluminium single piece arm tube to keep mass as low as possible. The design is completed with a Tungsten balance weight shaft and balance weight.
We hope you enjoy this very special turntable as much as we enjoyed creating it.
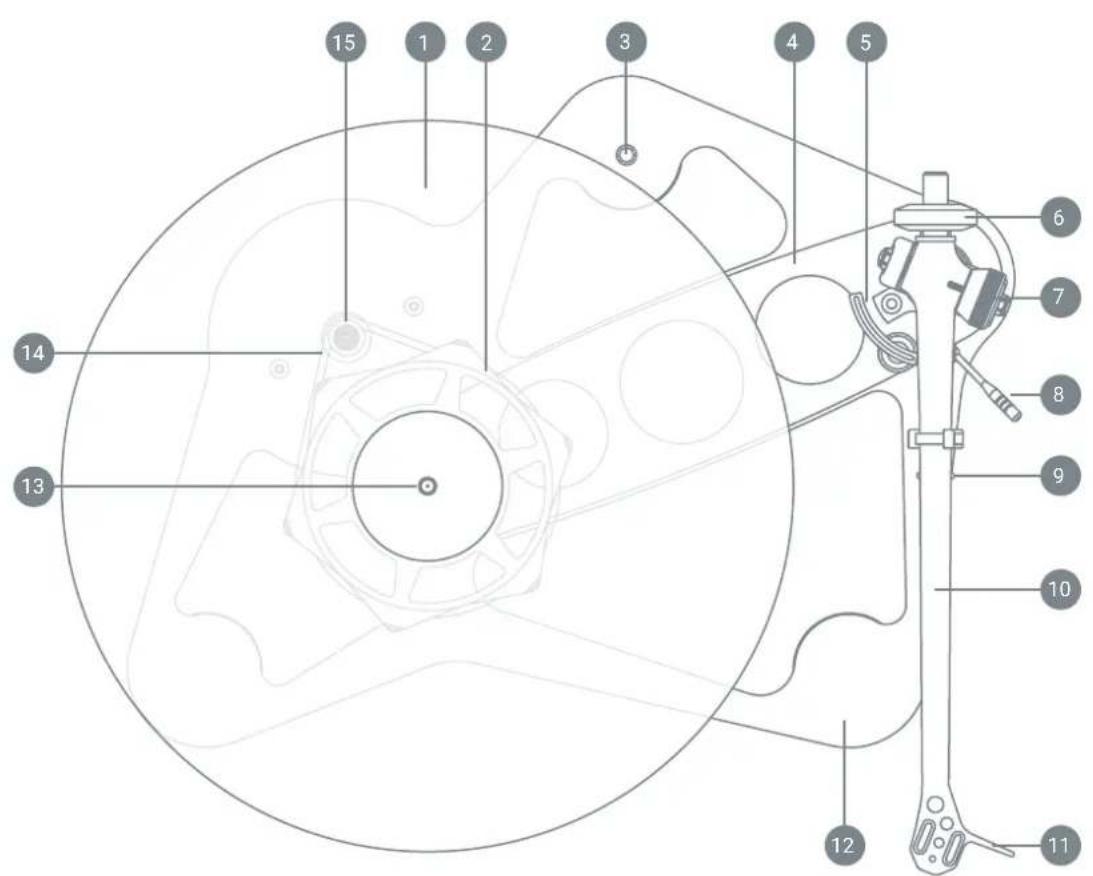
text_image
Technical diagram of a mechanical device with numbered components for identification- Ceramic Platter
- Sub Platter
- Pin Locator
- Ceramic Brace
- Cueing Platform
- Tungsten Balance Weight
- Tracking Force Dial
- Cueing Platform Lift Lower
- Bias Adjustment Slider
- RB-Titanium Tonearm
- Finger Lift
- Carbon Fibre Skeletal Plinth
- Ceramic Spindle
- Drive Belt (x2)
- Pulley
Setup and connections (make all connections before powering up)
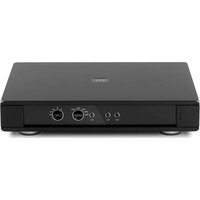
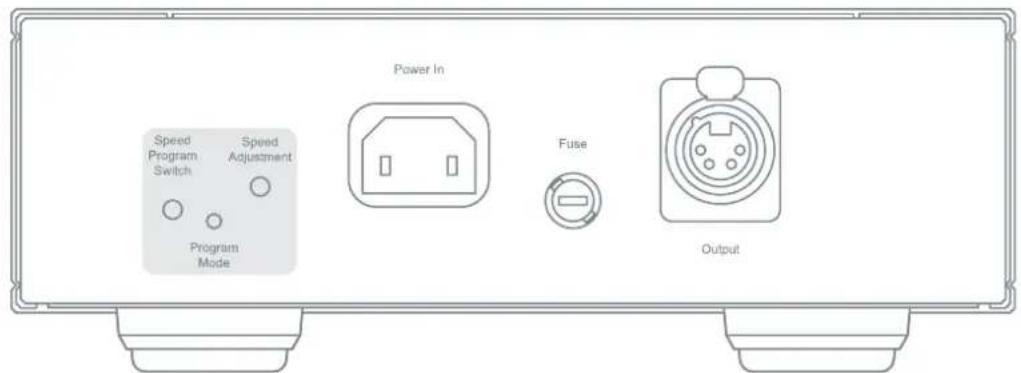
Connect the supplied mains power lead to the socket marked 'Power In' on the rear of the NAIA PSU.
Connect the XLR interconnect from the rear of the turntable to the socket marked 'Output' on the rear of the NAIA PSU. To minimise the risk of hum pick up by the cartridge, the power supply should be situated as far from the turntable as the interconnect cable will allow.
Connecting to the amplifier
The tonearm external phono leads must be connected to a suitable phono stage. Depending on the type of cartridge you have chosen, you will require the appropriate moving magnet (MM) or moving coil (MC) stage. If your amplifier does not have an integrated phono stage, you will require an external stage (sold separately).
Connect as follows: Red = Right channel / Black = Left channel
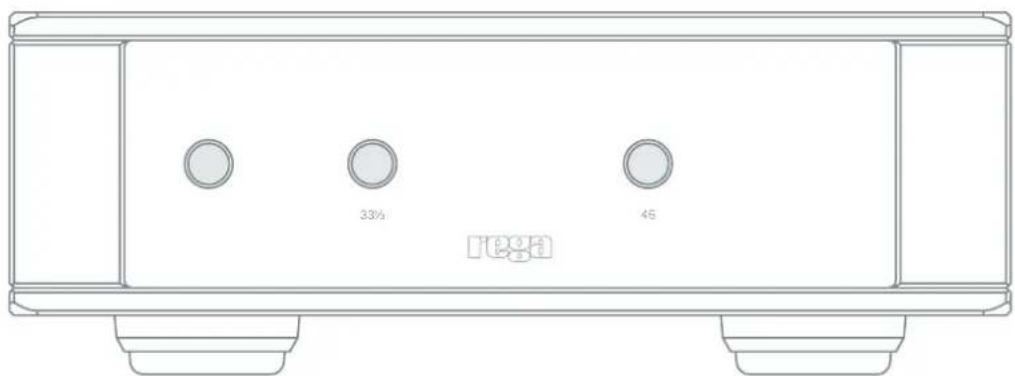
Push the power button on the front panel to turn the NAIA PSU on. When the power supply is switched on, the Rega logo will illuminate RED.
Press the 33^1/3 rpm button to activate 33^1/3 rpm or 45 rpm to activate 45 rpm from the front panel.
Cartridge mounting and setting up the RB-TITANIUM tonearm
Firstly, ensure the cartridge fixings are orientated correctly according to the cartridge makers specification. Use the cartridge alignment protractor (supplied) to accurately set the position of the cartridge.
Note: When using any Rega cartridge featuring a three-point mounting system, overhang is automatically set.
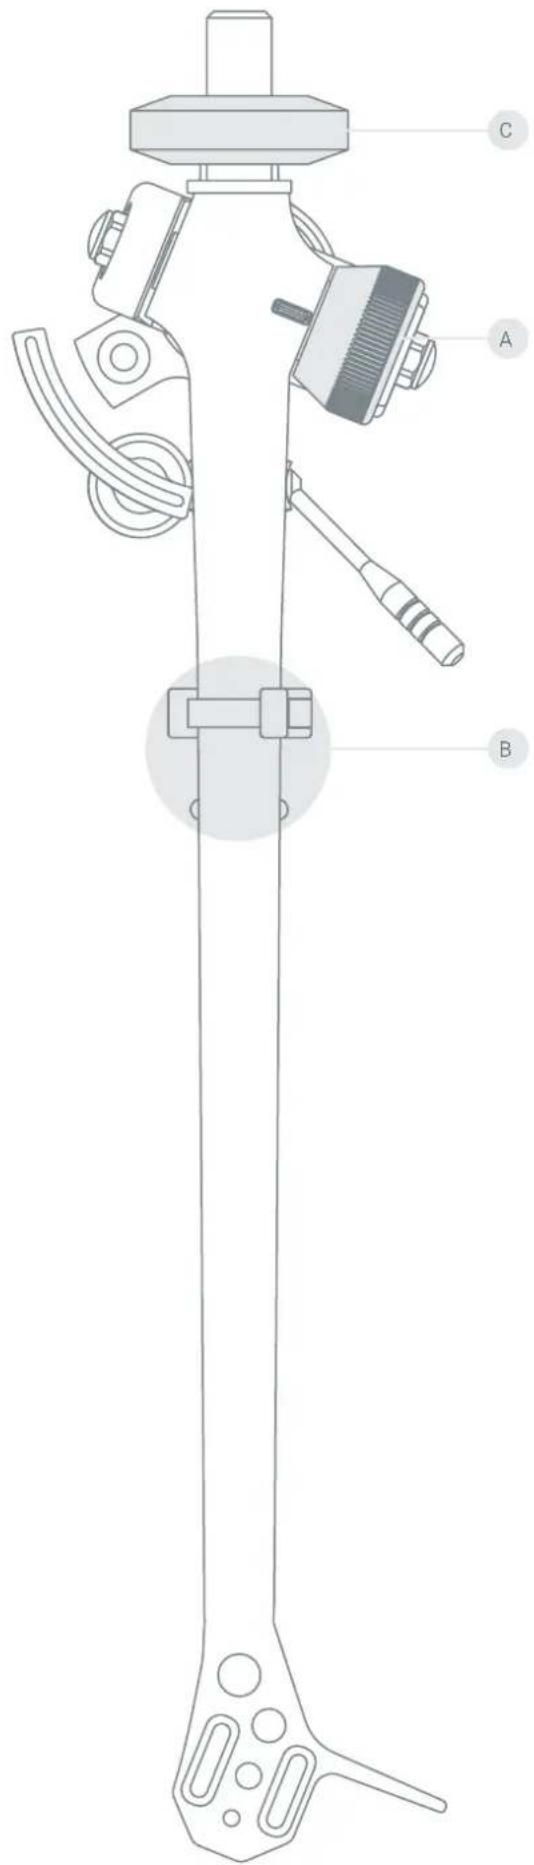
With the cartridge correctly mounted and with the stylus guard removed, ensure that the tracking force dial (A) and bias adjustment (B) are set to zero. Adjust the balance weight (C) until the arm is "floating" with the stylus approximately 1mm clear of the record.
Note: It is normal for the arm to swing back towards the arm clip position even with the bias set at zero. Therefore, it is advisable to gently hold the arm bearing carrier (just below the tracking dial) thus preventing horizontal movement during the balancing procedure.
Once the arm is balanced, rotate the tracking force adjustment dial to the required tracking force. Numbers '0' to '3' are marked on the dial. If in doubt, it is advisable to use a tracking force that corresponds with the upper limits of the cartridge manufacturer's range.
Set the bias adjustment slider to the same figure as the cartridge tracking force pressure quoted by your cartridge manufacturer.
Note: This is not critical and a figure between 1.0 & 1.5 will normally be suitable for moving magnet cartridges and 1.5 & 2.0 for most moving coil cartridges.
Simply push the bias adjustment slider into the required setting, using the dotted line as your reference (see next page).
Your arm is now balanced, setup and ready to use. If you have any doubts regarding installation or setup, please contact your official Rega dealer who will be able to carry out the work for you. Thank you for purchasing this Rega product and we wish you many hours of musical enjoyment.
RB-TITANIUM
text_image
Technical diagram of a mechanical device with labeled parts A, B, and C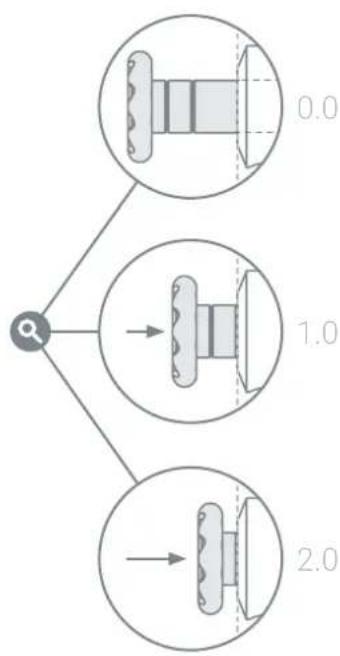
flowchart
graph TD
    A["●"] --> B["0.0"]
    A --> C["1.0"]
    A --> D["2.0"]
Introduction - NAIA PSU
The NAIA PSU gives you total control over your turntable. It includes an advanced anti-vibration circuit (fine-tuned by our engineers), electronic user adjustable fine speed control and the convenience of electronic speed change at the touch of a button.
Speed adjustment (factory set - only adjust if necessary)
The speed control functions are sited on the back panel of the NAIA PSU.
- Speed Program Switch – This enables the set speed mode.
- Program Mode LED – This indicates the two modes of operation: Factory default mode and speed adjustment mode.
• Speed Adjustment – This encoder is used to adjust the speed. The step size of the speed control is 0.01 rpm.
Returning the NAIA PSU to factory settings
This process is recommended when fitting new drive belts to your turntable or after a service, to help optimise the range of adjustment available to you.
- Select 33 ^1/3 rpm.
- Press and hold down the 'Speed Program Switch' until the 'Program Mode' LED flashes every few seconds. Keep the button pressed until a solid LED is illuminated.
- Whilst illuminated, press the 'Speed Program Switch' button once again to fully factory reset and return to 'run mode'.
Note: We recommend changing Rega drive belts every five years to guarantee optimum performance. Using the NAIA PSU with old worn belts may result in lower performance and minor variations in speed stability.
Warnings
• Do not unplug the NAIA PSU from the turntable whilst the unit is on - turn off the power supply before unplugging.
- Do not operate the power supply without the turntable connected.
- Never expose the unit to rain or moisture.
- Do not open the case covers. There are no user serviceable parts inside.
text_image
Speed Program Switch Speed Adjustment Program Mode Power In Fuse Output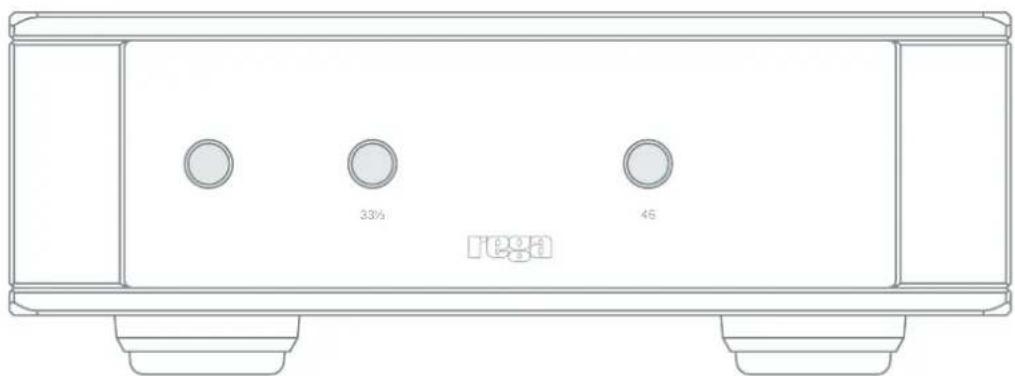
natural_image
Line drawing of a rectangular electronic device with three circular buttons and base plates (no text or symbols)Use of mobile phone apps to check and adjust the speed
Rega, along with a London mastering studio, have used the iPhone 'RPM' app (available on the App Store) developed by Philip Broder to check and adjust the speed of a turntable using the Neo, with positive results. We have verified the basic accuracy of the 'RPM' app using Rega's in-house speed measuring equipment, but as this is a third-party app we cannot guarantee the readings because of uncertainties, which could be caused by the age, condition, and operating system of the phone the app is installed on. If you are in any doubt, you should check the calibration of the 'RPM' app using a suitable reference.
Rega Strobe and stroboscopic disc (sold separately)
The best way to adjust the speed of your turntable is to use the Rega Strobe kit. A stroboscopic disc is an optical instrument used to measure the speed of the turntable by freezing the bars on the disc. The bars are illuminated by an accurate quartz locked LED pulsing at 100Hz.
Using the Strobe kit
Simply place the strobe disc on the turntable platter. Switch on the 100Hz LED and hold it approximately 2cm above the rotating strobe. If the bars do not appear to move and are stationary, the speed is 33^1/3 rpm. If they move clockwise, the turntable is running fast, and conversely, if they move anti-clockwise, the turntable is running slow.
If over one minute the bars appear to move by one bar to the left or one bar to the right, the speed is 0.016% fast or slow respectively. Using the speed control on the PSU, it is possible to achieve ±0.05% or ±1.3 rpm.
Note: If over one minute the bars appear to move by two bars to the left or by two bars to the right, the speed is 0.01 rpm fast or slow respectively. Using the speed control on the PSU, it is possible to achieve ±0.01 rpm, which is one step of the speed adjustment.
Warning: Because of the nature of the stroboscopic effect of the disc and the LED light, we strongly recommend anyone with photo-induced epilepsy not to use this device. Although this condition is very rare, we must make the user aware of this condition. Ask your dealer for assistance if required.
PSU specifications
| Mains voltage | 230V 50/60Hz, 220V 50/60Hz, 115V 50/60Hz, 100V 50/60Hz | |
| Power consumption | 17W | |
| Fuse rating | T250mA L (230V/220V), T500mA L (115V/100V) | |
| Output to motor | 24V AC bi-phase ~ 350mA | |
| Speed control step size | 0.01 rpm | |
Introduction
text_image
Technical diagram of a mechanical device with numbered components for identificationtext_image
Technical diagram of a mechanical device with labeled parts A, B, and C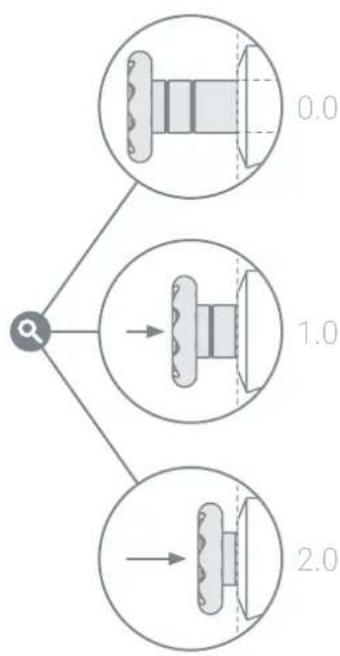
flowchart
graph TD
    A["●"] --> B["0.0"]
    A --> C["1.0"]
    A --> D["2.0"]
Introduction - NAIA
text_image
Speed Program Switch Speed Adjustment Program Mode Power In Fuse Output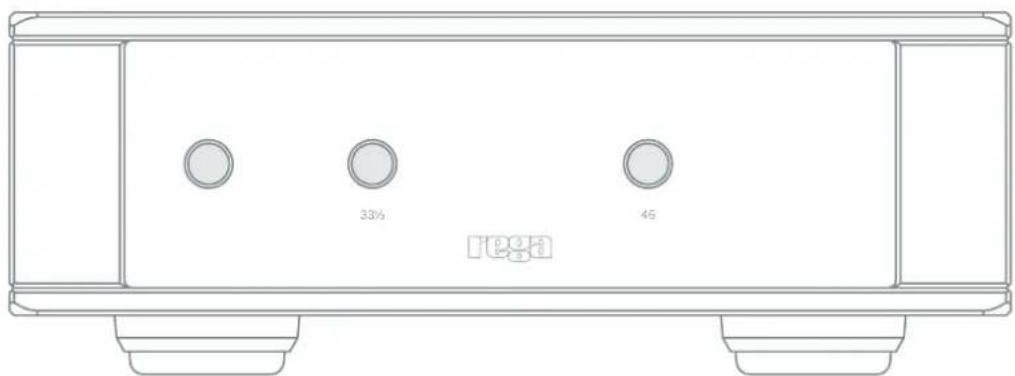
natural_image
Line drawing of a cabinet with three circular buttons and base plates (no text or symbols)text_image
Technical diagram of a mechanical device with numbered components for identificationtext_image
Technical diagram of a mechanical device with labeled parts A, B, and C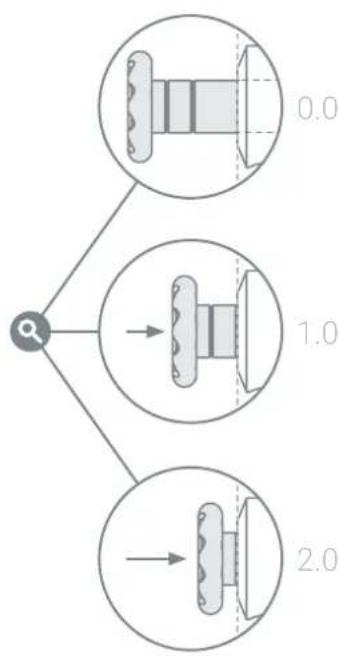
flowchart
graph TD
    A["●"] --> B["0.0"]
    A --> C["1.0"]
    A --> D["2.0"]
text_image
Speed Program Switch Speed Adjustment Program Mode Power In Fuse Output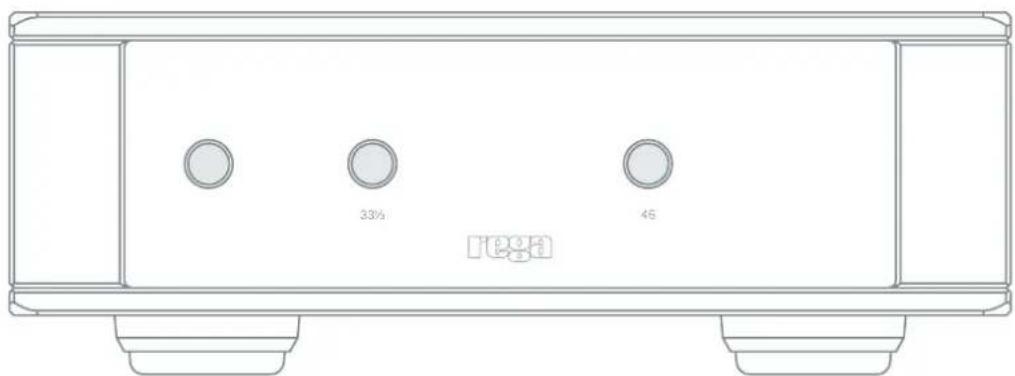
natural_image
Line drawing of a rectangular electronic device with three circular buttons and base plates (no text or symbols)text_image
Technical diagram of a mechanical device with numbered components for identificationtext_image
Technical diagram of a mechanical device with labeled parts A, B, and C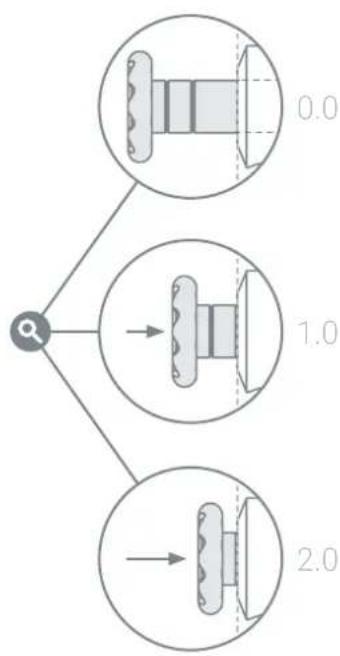
flowchart
graph TD
    A["●"] --> B["0.0"]
    A --> C["1.0"]
    A --> D["2.0"]
text_image
Speed Program Switch Speed Adjustment Program Mode Power In Fuse Output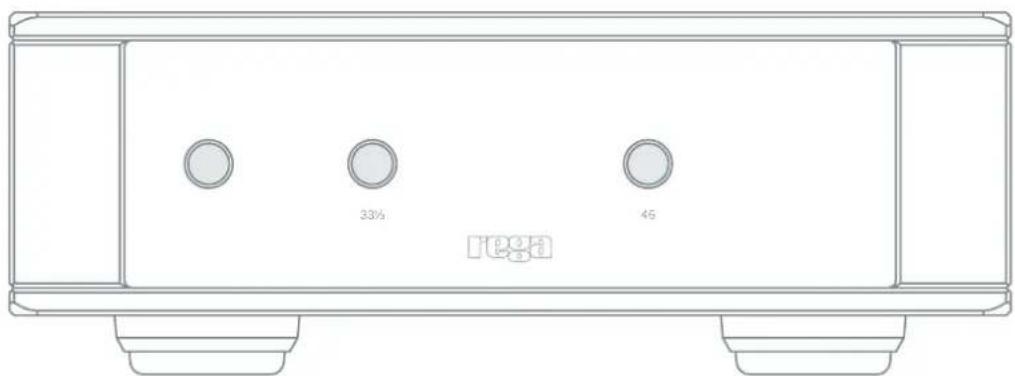
text_image
33½ 45text_image
Technical diagram of a mechanical device with numbered components for identificationtext_image
Technical diagram of a mechanical device with labeled parts A, B, and C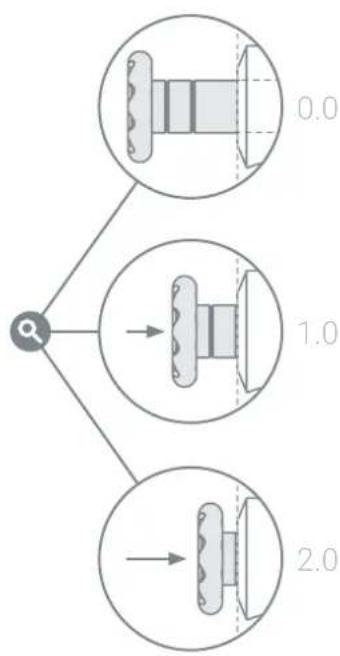
flowchart
graph TD
    A["●"] --> B["0.0"]
    A --> C["1.0"]
    A --> D["2.0"]
text_image
Speed Program Switch Speed Adjustment Program Mode Power In Fuse Output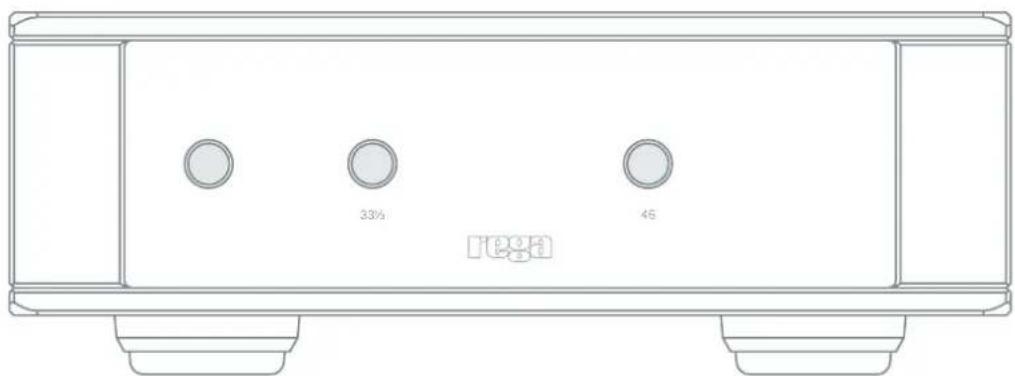
natural_image
Line drawing of a rectangular electronic device with three circular buttons and base plates (no text or symbols)text_image
Technical diagram of a mechanical device with numbered components for identificationtext_image
Technical diagram of a mechanical device with labeled parts A, B, and C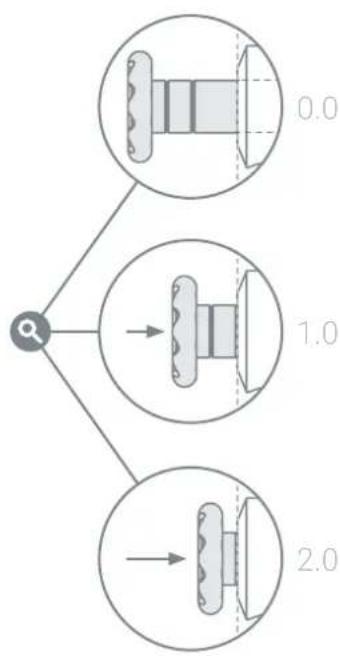
flowchart
graph TD
    A["●"] --> B["0.0"]
    A --> C["1.0"]
    A --> D["2.0"]
text_image
Technical diagram of a mechanical device with numbered components for identificationtext_image
Technical diagram of a mechanical device with labeled parts A, B, and C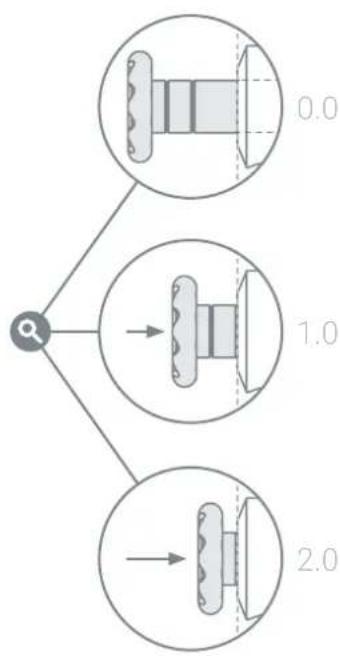
flowchart
graph TD
    A["●"] --> B["0.0"]
    A --> C["1.0"]
    A --> D["2.0"]
Inleiding - NAIA PSU
text_image
Speed Program Switch Speed Adjustment Program Mode Power In Fuse Output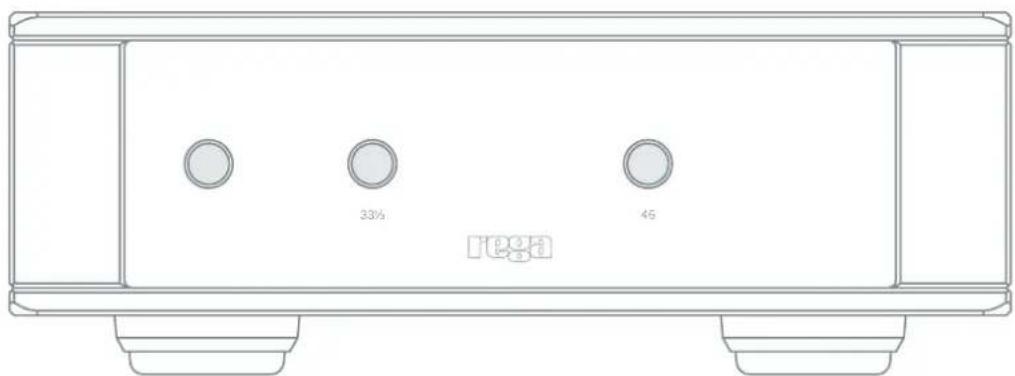
text_image
33½ 45text_image
Technical diagram of a car brake system with numbered components for identificationtext_image
Technical diagram of a mechanical device with labeled parts A, B, and C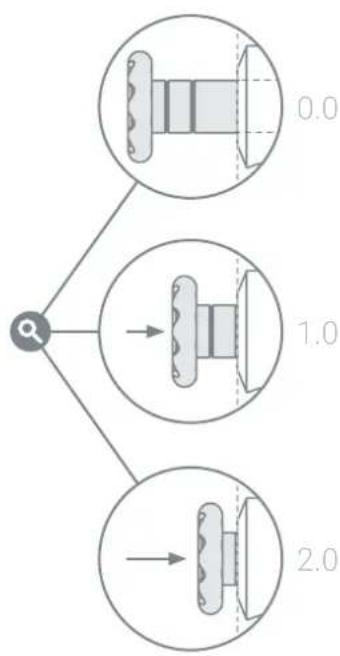
flowchart
graph TD
    A["●"] --> B["0.0"]
    A --> C["1.0"]
    A --> D["2.0"]
Introduktion - NAIA PSU
text_image
Speed Program Switch Speed Adjustment Program Mode Power In Fuse Output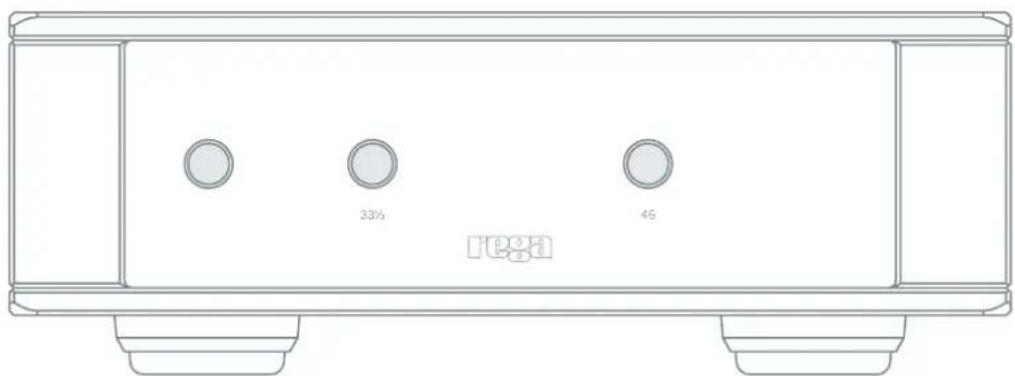
text_image
33½ 45 Fesatext_image
Technical diagram of a mechanical device with numbered components for identificationtext_image
Technical diagram of a mechanical device with labeled parts A, B, and C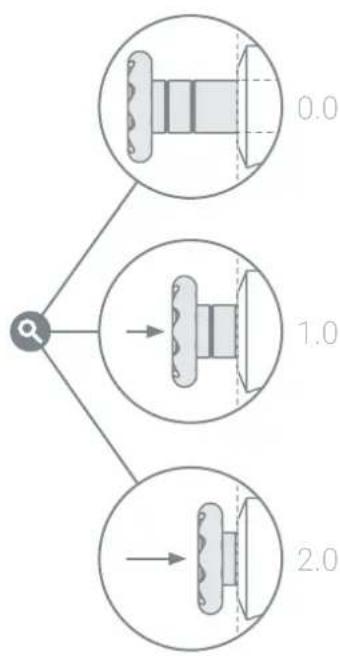
flowchart
graph TD
    A["●"] --> B["0.0"]
    A --> C["1.0"]
    A --> D["2.0"]
Introduktion - NAIA PSU
text_image
Speed Program Switch Speed Adjustment Program Mode Power In Fuse Output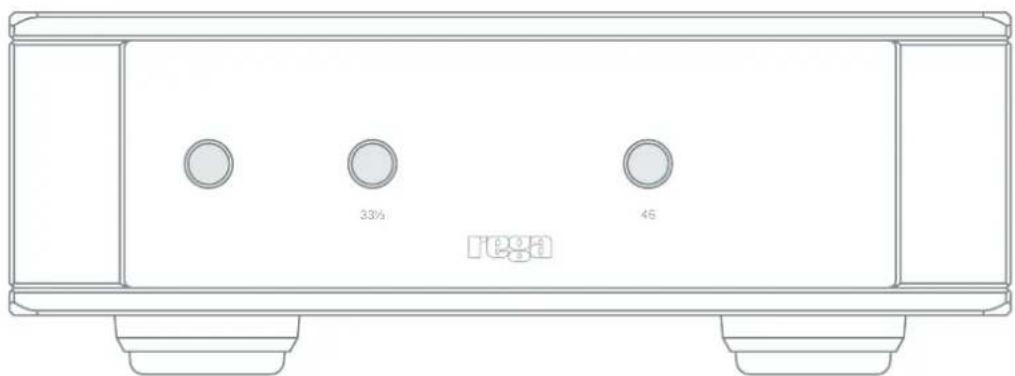
natural_image
Line drawing of a rectangular electronic device with three circular buttons and base plates (no text or symbols)text_image
Technical diagram of a car brake system with numbered components for identificationtext_image
Technical diagram of a mechanical device with labeled parts A, B, and C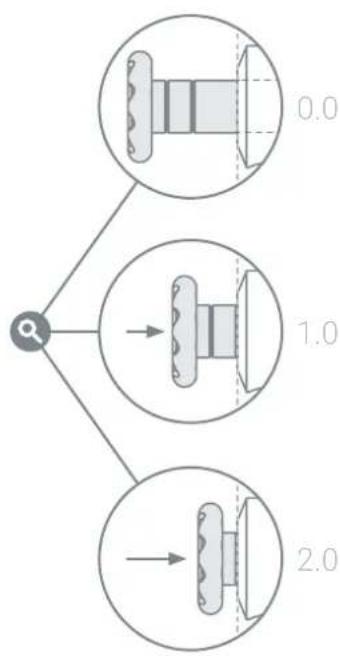
flowchart
graph TD
    A["●"] --> B["0.0"]
    A --> C["1.0"]
    A --> D["2.0"]
text_image
Speed Program Switch Speed Adjustment Program Mode Power In Fuse Output