IQ-XL - Lighting Busch + Müller - Free user manual and instructions
Find the device manual for free IQ-XL Busch + Müller in PDF.


User questions about IQ-XL Busch + Müller
0 question about this device. Answer the ones you know or ask your own.
Ask a new question about this device
Download the instructions for your Lighting in PDF format for free! Find your manual IQ-XL - Busch + Müller and take your electronic device back in hand. On this page are published all the documents necessary for the use of your device. IQ-XL by Busch + Müller.
USER MANUAL IQ-XL Busch + Müller
text_image
Diagram of a smartwatch with labeled parts 3 and 4, showing internal components and wiring connections.-
General Information Page 18
-
Packaging contents Page 19
-
Safety information Page 19
-
Legal regulations Page 20
-
Technical specification Page 20
-
Assembly Page 21
6.1. General assembly instructions Page 21
6.2. Headlight alignment
6.3. IQ-XL connection and rear light
6.4. Mounting handlebar button with attachment band
- Operation
7.1. Standlight (coming / leaving home function)
7.2.SENSO operation
7.3. High beam
-
Further information
-
Liability
Page 22
Page 23
Page 24
Page 25
Page 25
Page 26
Page 27
Page 28
Page 29
text_image
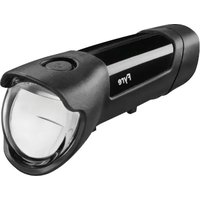
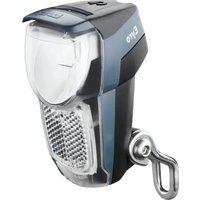
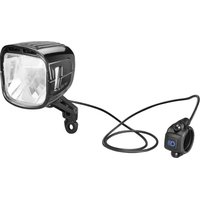
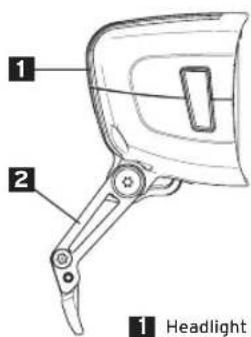
1 2 1 Headlight2 Bracket
text_image
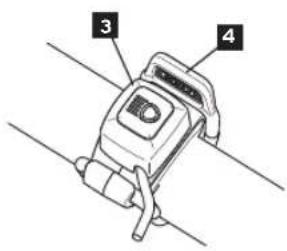
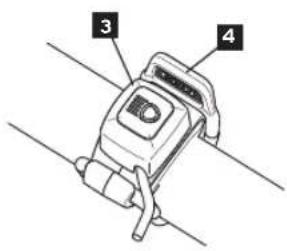
Diagram of a smartwatch with labeled parts 3 and 4, showing internal components and wiring connections.3 Handlebar Switch
4 Attachment band
Assembly and Instruction Manual for Busch+Müller Dynamo Headlight 169 IQ-XL with 2 brightness levels, high beam, daylight, und standlight function for bicycles with hub dynamo
1. General information
These instructions are directed at persons with knowledge and experience in the assembly of bicycle components. Specialist tools may be required. Should you not have such experience or the required tools please enlist the service of a cycle specialist to ensure that this assembly is carried out correctly. Improper assembly may result in a fall or crash resulting in serious injury. Please read these instructions thoroughly and retain them for future reference, follow all the steps described and keep it in a safe place.
Busch+Müller produce an extensive product range of bicycle components. Not every component is suitable for each application or every terrain. Should you be unsure about which type of light component you require for your intended use, you may either contact our service-hotline under +49 2354 915 7111, or by E-mail to service@bumm.de or request advice from a specialist retailer.
2. Packaging contents
Headlight IQ-XL | Busch+Müller bracket | Busch+Müller handlebar switch with cable and attachment band | Assembly and Instruction Manual
3. Safety information
These instructions implement signal words to highlight potential dangers or important information. The meaning of the signal words is listed below:
WARNING Describes a hazardous situation which, if not avoided, could result in a fatal accident or serious injury.
NOTICE Indicates information considered important, but not hazard-related (e.g. information related to property damage).
The ! symbol is used to provide other useful information about your new bicycle component.
NOTICE Bicycle components from Busch-Müller are suited to riding conditions on a firm riding terrain. Avoid use under extreme circumstances and never ride down steps or stairs. Do not use B+M components while performing jumps, stunts, tricks, hops or fast descents on uneven terrain
4. Legal regulations
Before you operate your vehicle in public traffic, you are obliged to ensure that your vehicle complies with national and local laws and regulations, and you, as a traffic participant must abide by the traffic regulations that apply. These can be found in the Highway Code or national equivalent, and depending on the country, also at other sources.
In Germany, the prescribed mounting height for headlights 1 is between 40 and 120 cm. For details, consult your national Road Traffic Regulations or contact a local bicycle specialist retailer. Always make sure the headlight is mounted and aligned in a way to ensure that oncoming traffic is not blinded.
Make sure the headlight is not covered under any circumstances. Also, take care that the headlight has been mounted and aligned as prescribed.
5. Technical specification
Headlight dimensions: width: 71 mm | height: 65 mm | depth: 62 mm | Weight without bracket: 233 g | Low beam brightness in low-power-mode: 200 Lux, in high-power-mode: 300 Lux | high beam brightness: 250 Lux
Requirement: 6 V AC / 3 W (hub dynamo operation)
6. Assembly
6.1. General assembly instructions
Headlights and cabling - in particular the cable connecting handlebar switch to the headlight - must all be securely fastened to the bicycle so that they do not obstruct the ride or pose a hazard. Cables or headlights getting caught in the wheel spokes pose a risk of injuries or fatal accidents. Securely fasten the headlight to the bicycle using the enclosed Busch-Müller bracket on the fork crown so that it does not move inadvertently, and its position on the bicycle cannot change. This setting must be checked before first use. If other brackets are used, no guarantee can be given for secure attachment.
WARNING To avoid falls, accidents and severe injuries, always use the enclosed Busch+Müller assembly bracket 2. If unsuitable or improperly positioned brackets are used, the headlight may loosen and change position, slide down and, in the worst case, get caught in the wheel spokes.
NOTICE Never mount brackets on conical components! Make sure to tighten all screws just sufficiently to ensure the headlight 1 cannot move inadvertently. This is particularly important when travelling on uneven terrain.
6.2. Headlight alignment
Align the bicycle headlight 1 in a way to ensure that oncoming traffic is not blinded. On a completely flat road, the horizontal light edge (cut-off line) must always be visible on the road!
Attention: Ensure a non-blinding orientation of the beam pattern

text_image
Beam cut lineImage: correct beam orientation with light switched on
WARNING Do not use the bicycle if the light beam of your headlight 1 is misaligned or the headlight 1 is too loose. Blinding oncoming traffic can cause accidents. Before aligning the bicycle headlight 1, loosen the bracket retaining screw first. Make sure to retighten this screw again afterwards.
WARNING Never look directly into the light of the bicycle headlight when switched on. 22 23
WARNING Never adjust the light range of your headlight 1 while cycling! This may result in serious falls and injuries.
No inverted mounting: Mounting the headlight in an inverted orientation will turn the beam pattern upside down. The light emitted will therefore be in violation of the traffic regulations and oncoming traffic is likely to be blinded. In addition, this may lead to damage caused by excessive water ingress, the consequences of which are excluded from our warranty.
6.3. IQ-XL connection and rear light
Headlight IQ-XL:
Two 2-core cables of different lengths are fitted in the headlight ^1 . The long cable should be connected to the hub dynamo (shorten if necessary).
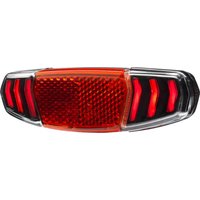
For best contact, twist the cable ends before insertion into the hub dynamo connector. Connect the short cable (with faston connectors) to the rear light using the cable fitted on the bike. If the rear light cable is not used, the plugs must be insulated to prevent malfunctions.
NOTICE Cables on the headlight must never be cut off completely. The IQ-XL headlight is only suitable for operation with hub dynamos. Connection to a DC voltage source is not permitted.
NOTICE Always ensure correct polarity:
connect the headlight to the hub dynamo with the longer hard-wired 2-core cable; black cable = power (+); black/white cable = earth (-)
Connect the rear light to the short 2-core cable (with faston connectors) of the headlight:
black cable = power (+); black/white cable = earth (-)
This enables both lights to be switched on and off simultaneously.
Never cut the connection cables completely, just shorten them to the required length.
The short handlebar switch cable with Hligo plug is intended for connecting the handlebar switch. Do not cut this cable under any circumstances!
Rear light:
The connection must be made using a 2-core or duplex cable without earth (without contact to the bicycle frame).
Always be sure to disconnect any earth wire from the rear light to the frame and replace with connection to a 2-core or duplex cable directly from the headlight.
6.4. Mounting handlebar button with attachment band
Suitable for handlebars with a ∅ of 22 to 32 mm.
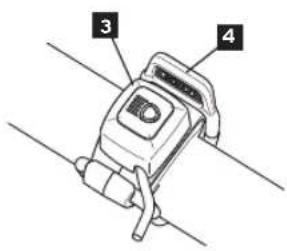
Attach the handlebar button 3 for operating the headlight 1 and the high beam function securely and easily accessible to the handlebars using the enclosed attachment band 4. Connect the cable from the headlight 1 and handlebar button 3 together.
24 25
7. Operation
The headlight and any rear light connected to the headlight are switched on by pressing the handlebar switch.
To switch on the lights, press the handlebar switch for approx. 1.5 seconds.
To switch off the lights, press the handlebar switch for approx. 3 seconds.
To switch to low power mode, press the handlebar switch for approx. 1.5 seconds while the headlight is on.
High-power: Full brightness with up to 300 lux.
Low-power: Light reduction to 200 lux with significantly less effort when pedalling. Indication of Low-beam or DRL function: when the headlight is switched on, the green LED in the handlebar switch lights up if the DRL function is switched on during the day or if the low beam is in high-power mode. The LED does not light up in low-power mode.
7.1. Standlight (coming / leaving home function)
While cycling, a small amount of the energy supplied by the dynamo is stored in a capacitor. After approx. 5 minutes of cycling, the capacitor is fully charged. When stationary, this stored energy supplies a driving light LED of the headlight with power, so that the LED continues to provide light for appr. 5 minutes. The standlight function is always ready for operation, completely maintenance-free and works without batteries or rechargeable batteries.
The standlight can be turned off with a long push on the handlebar switch 3. This will retain the charge in the capacitor, and a repeated long push on the handlebar switch 3 will re-activate the standlight for appr 30 seconds. This can assist in short term orientation in the dark. The headlight will extinguish as soon as the charged energy is dissipated.
7.2. SENSO operation
When switched on, the headlight is always in the SENS0 mode. (The pre-requisite for a functioning SENS0 mode is a constantly running hub dynamo). Even if the headlight has been switched off while cycling, it is switched back on in the SENS0 mode when you continue your ride after an extended stop. In bright light, the headlight operates in the daytime running light (DRL) function. The low beam of the headlamp is dimmed. The additional daytime running LEDs light up at full brightness for maximum visibility to oncoming traffic! At dusk and in the dark, the headlight automatically switches to the night mode. The headlight shines brightly onto the road. The additional daytime running LEDs are dimmed but still clearly visible to ensure maximum visibility on the road.
The headlight's light/dark sensor has a switchover delay of approx. 8 seconds from the night to the day mode. This provides additional safety. Consequently, the mode does not temporarily switch to the daytime running light due to the headlights of passing cars, and provides greater safety thanks to constant illumination of the road.
Overvoltage protection: This function is effective even without a rear light connected. If one LED breaks down, the entire function fails.
26 27
NOTICE If a function LED breaks down, the respective function fails completely and the headlight switches to low beam. If a driving light (low beam) LED fails, the headlight can no longer be switched on again.
7.3. High beam
When the headlights are on (low beam), the high beam function is switched on or off with a short press of the handlebar switch. If the daytime running light function is on due to sufficient ambient brightness, the headlight lights up briefly in a headlight flash when briefly pressing the handlebar switch. When the high beam function is switched on, the LED in the handlebar switch lights up blue.
The high beam function can be switched on at speeds of 8-12 km/h and above. If the speed drops considerably, the high beam function is automatically deactivated or cannot be switched on. The operation of the high beam function is governed by the provisions of the road traffic regulations. The high beam function must not be activated in built-up areas or on roads with adequate road illumination throughout. The high beam function must not be used in cases where other road users could be dazzled. Remember to dip your headlights well in advance. The high beam function can be used as a headlight flasher by briefly pressing the handlebar switch twice. This use is only permitted in situations where another road user should be made aware that they are endangering themselves or others.
NOTICE Use the high beam only if it does not dazzle anyone else!
8. Further information
Cleaning: Protect your headlight against exposure to water under high pressure.
For example, never point a water hose or high-pressure cleaner directly at the headlight.
Transport: If you transport your bike on your car in the rain, cover the headlight, with a plastic bag, for example, to prevent moisture penetration.
Radio speedometers: The electronics of radio speedometers and LED headlights may interfere with each other. Interference can be reduced by maximising the distance between the LED headlight and the radio speedometer and minimising the distance between the transmitter and receiver of the radio speedometer.
Disposal: Electronic components must not be handled as household waste but are to be disposed of as hazardous waste.
Repairs: In case of defects, please contact your specialist bicycle dealer or our service department at service@bumm.de oder +492354 915-7111.
9. Liability
We do not assume liability for any and all damage caused by improper handling (e.g. dropping the headlight, inadequate safety of assembly and its consequences, immersion in water or other liquids etc.).
Have fun with your new headlight and enjoy safe cycling!
For spare parts please visit our spare part shop at www.bumm-shop.de
Technical modifications reserved.
Busch+Müller KG • 58540 Meinerzhagen, Germany • Tel. +49 2354 915-7111 • service@bumm.de • www.bumm.de
text_image
Diagram of a smartwatch with labeled parts 3 and 4, showing internal components and wiring connections.text_image
1 2 1 Koplamp
(1) 本次股东大会的召开方式
text_image
Diagram of a device with numbered parts labeled 3 and 4, likely indicating parts of a device or device.
Stuur-bedieningsknop

Bevestigingsrubber
text_image
1 2 1 Foco2 Soporte