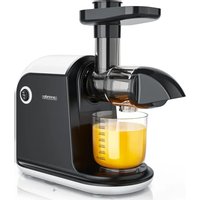
303154 - Juicer Arendo - Free user manual and instructions
Find the device manual for free 303154 Arendo in PDF.


| Product type | Juice extractor |
| Brand | Arendo |
| Model | 303154 |
| Dimensions (L x W x H) | 51 cm x 16 cm x 20 cm |
| Weight | 4.1 kg |
| Power supply | 220-240 V, 50/60 Hz |
| Power consumption | 200 W |
| Mixing bowl capacity | 450 ml |
| Jug capacity | 1 L |
| Main functions | Juice extraction, sorbet (ice cream) making |
| Special features | Auger press, safety switch, anti-slip supports |
| Package contents | Juice extractor, instruction manual, 2 containers, pusher, cleaning brush |
| Care and cleaning | Removable parts are dishwasher safe or washable with soapy water; base and motor unit wiped with a damp cloth |
| Safety | Safety switch prevents operation without container; automatic shut-off in case of overheating |
| Operation | On/Off and reverse rotation (R); use in cycles of 20 min with 10 min cooling |
| Material | Stainless steel and ABS plastic (estimate) |
| Warranty | Manufacturer's warranty (according to legal conditions) |
Frequently Asked Questions - 303154 Arendo
User questions about 303154 Arendo
0 question about this device. Answer the ones you know or ask your own.
Ask a new question about this device
Download the instructions for your Juicer in PDF format for free! Find your manual 303154 - Arendo and take your electronic device back in hand. On this page are published all the documents necessary for the use of your device. 303154 by Arendo.
USER MANUAL 303154 Arendo
ENG: Latest information, drivers, user manuals and data sheets can be found at www.ganzeinfach.de in our download area.
natural_image
Simple line drawing of a cylindrical tank with a small human figure beside it (no text or symbols)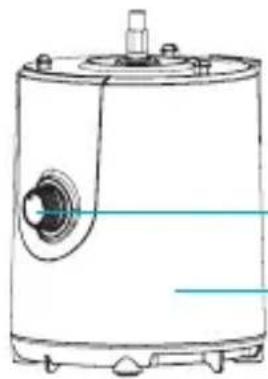
natural_image
Technical line drawing of a cylindrical mechanical component with mounting holes and a central circular feature (no text or symbols)EIN/AUS-Schalter
Basiseinheit
Stopfer
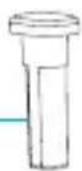
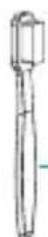
Reinigungsbürste
Restbehälter
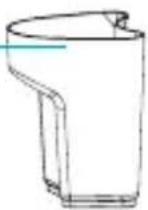
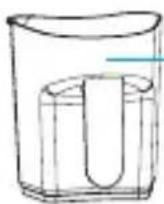
Saftbehälter
8 Deutsch
6. Montage
natural_image
Four-panel line drawing showing a mechanical assembly with clamps, no text or symbols presentMontage des Gerätes
flowchart
graph TD
    A["Step 1: Step 1"] --> B["Step 2: Step 2"]
    B --> C["Step 3: Step 3"]
    C --> D["Step 4: Step 4"]
    D --> E["Step 5: Step 5"]
    E --> F["Step 6: Step 6"]
    F --> G["End"]
natural_image
Technical line drawing of a mechanical component with no visible text or symbols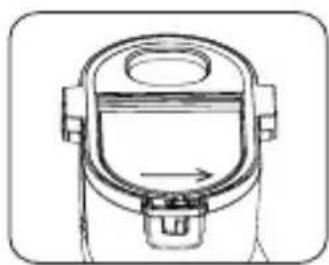
natural_image
Technical line drawing of a mechanical device with no visible text or symbolsEntsaften
natural_image
Simple line drawing of a hand holding an apple next to a container with a handle (no text or symbols)natural_image
Simple line drawing of a wine glass with a fork (no text or symbols)Important safety guidelines for this appliance
- Check the appliance for damage every time before use. Do not operate the appliance if the cable, the plug or the appliance show any visible signs of damage.
- Use the appliance only for the functions described in the manual.
- Do not modify or repair the appliance.
- Do not put your finger into the opening of the appliance!
- Connect the product only to a properly installed power socket.
- Never leave the appliance unattended and choose a location so that the appliance is out of the reach of pets or children.
- Press down fruit with the pusher tool only. Do not use any other objects and never use your fingers.
• Children should not be allowed to use the appliance as a toy.
• This appliance should not be operated
by persons (including children) with restricted physical, sensory or mental abilities. This also applies to inexperienced persons if they are not supervised or properly instructed about the operation of the appliance by a responsible person.
- Always keep the juicer out of reach of children.
- Switch off the appliance and disconnect it from the power supply before changing the accessories or replacing other parts that are being used.
- Please disconnect the appliance from the power supply if you leave it unattended, or intend to assemble/dismantle or clean it.
- Keep it on an appropriate surface so that it does not tip over.
- Do not place the product next to heat sources (e.g., electric stove).
- Disconnect the power plug from the mains socket when the appliance is not being used or for cleaning.
- Do not move the appliance when it is being operated.
- Ensure that the power cable does not touch any hot surfaces.
- If you want to remove the plug from the socket, then pull the plug and not the cable.
- Never touch the plug with wet hands.
- The product should not be used by children. Keep the appliance and the power plug out of the reach of children.
- Switch off the appliance and disconnect the power plug when you want to replace any accessories or to move the appliance to another location.
- Switch the appliance off and disconnect it from the mains socket after use, if it is not being used or for cleaning the appliance.
- If the power cord is damaged and to prevent any damage, it should no longer be used until it is replaced by an appropriately qualified person.
Thank you for choosing an Arendo product. Please read the following user manual carefully so as to be able to get the most from the product you have purchased.
1. Scope of delivery
- Juicer
- User manual
- 2 reservoirs
- Pusher tool
- Cleaning brush
2 Technical data
| Power supply 220-240V, 50Hz | |
| Power consumption 200W | |
| Dimensions (H x W x D) approx. 51cm x 16cm x 20cm | |
| Weight 4100g | |
| Capacity (blender jar) • ca. 450ml (Mixing bowl)• ca. 1L (Juice container) | |
| Features • Non-slip base | • Safety switch |
3. Initial use
Take the device out of the package and remove all the packaging material. Clean the juicer and containers. You can clean the containers in the dishwasher or in soapy water. The other parts can be wiped using a slightly damp cloth. Do not use any aggressive or strong cleaning agents. Close the residue removal and the juice outlet and add about 500 ml of water into the inlet opening. Allow the appliance to run for about 30 seconds.
4. Safety switch
The appliance can be operated only if the container is fixed securely. Make sure the container is properly fixed. The appliance can now be operated.
5. Product details
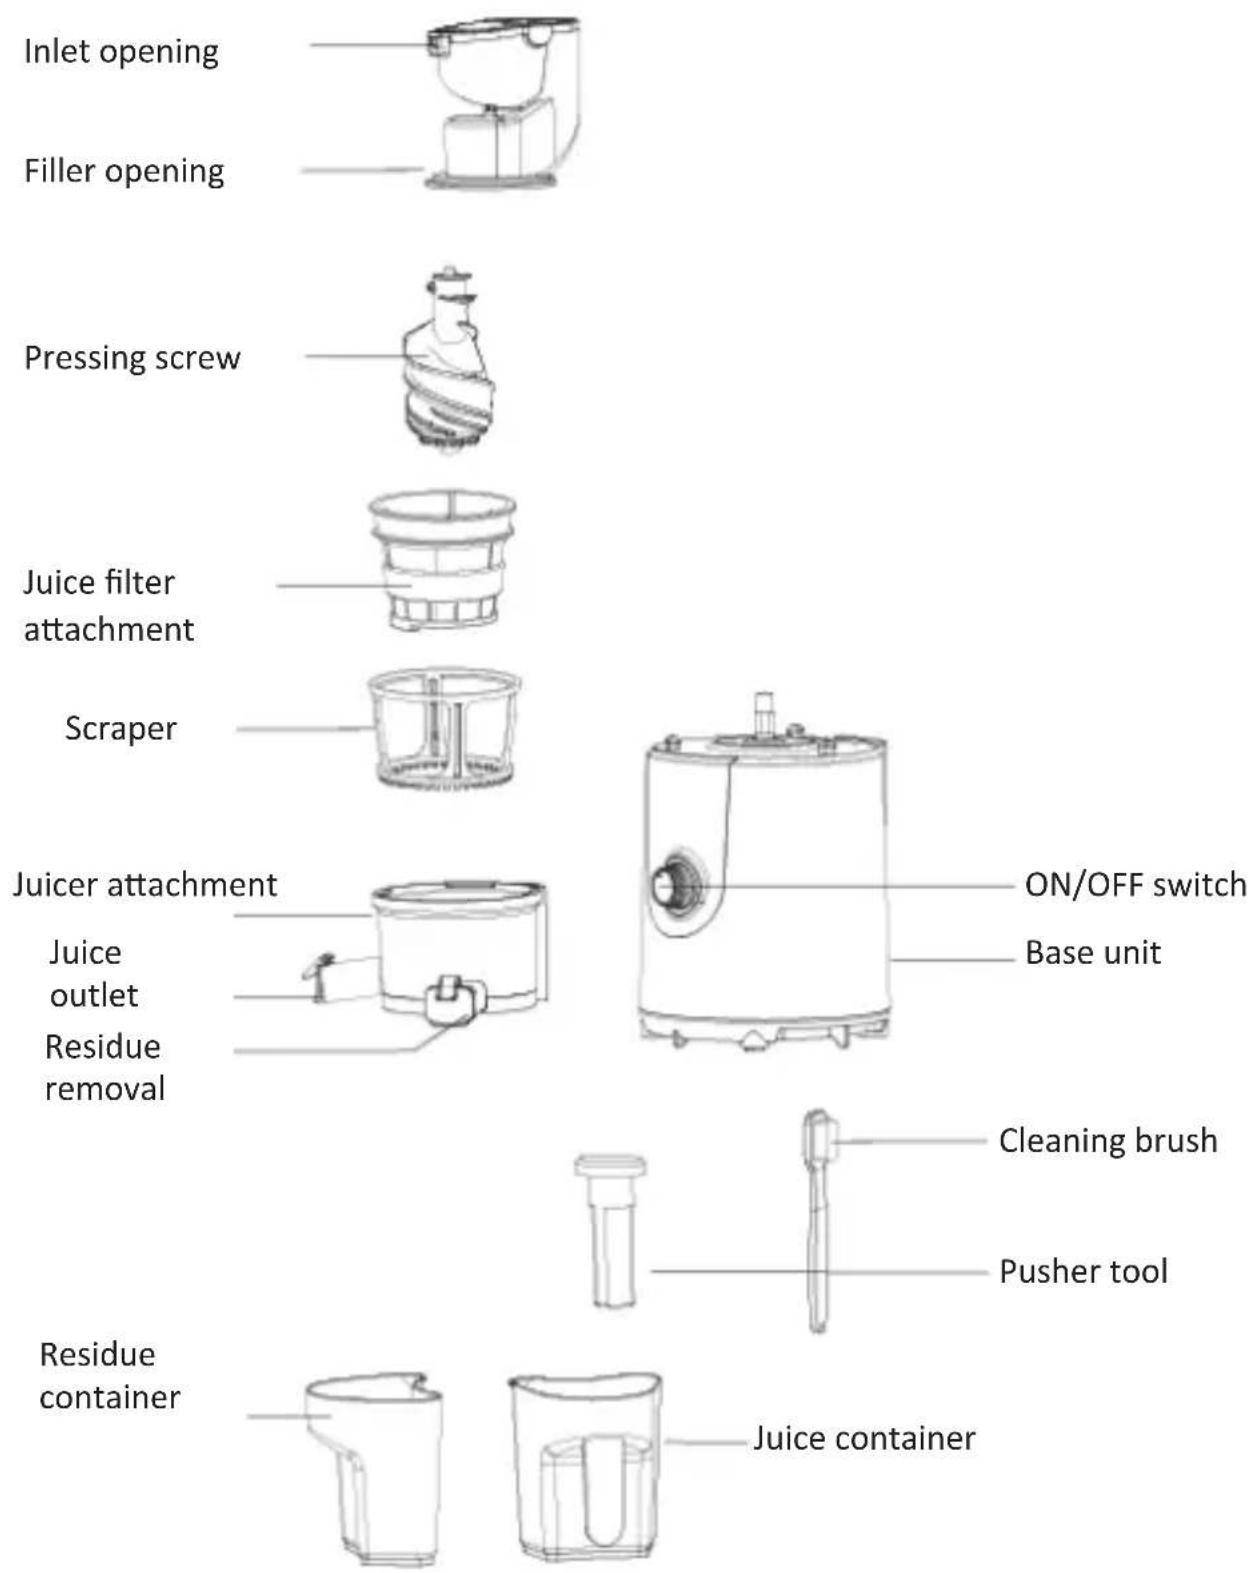
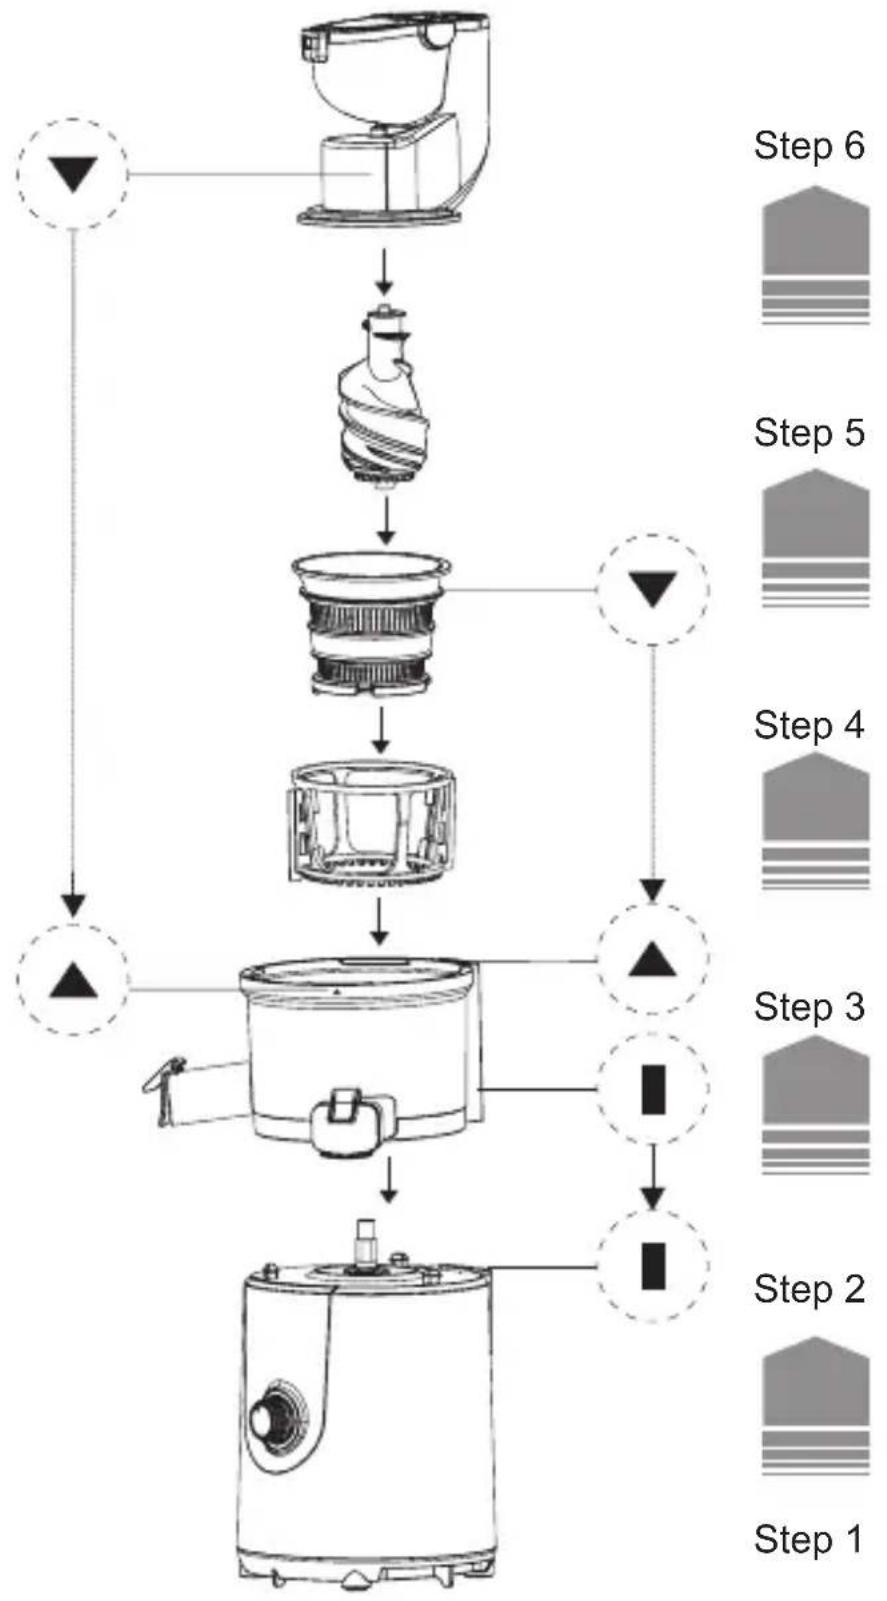
6. Assembly
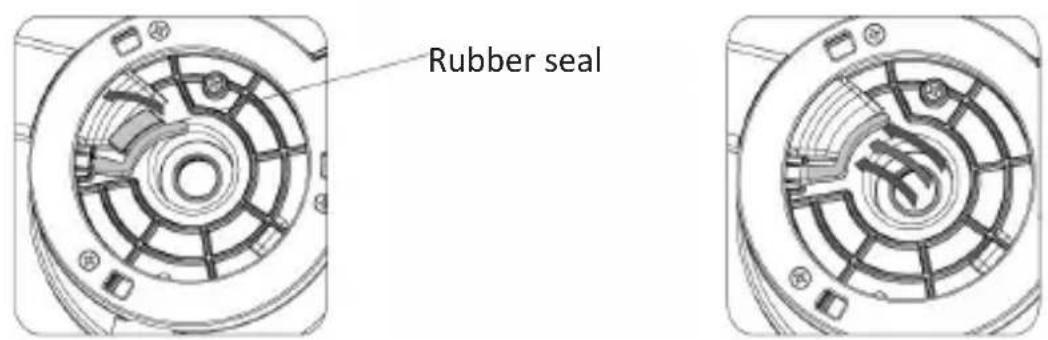
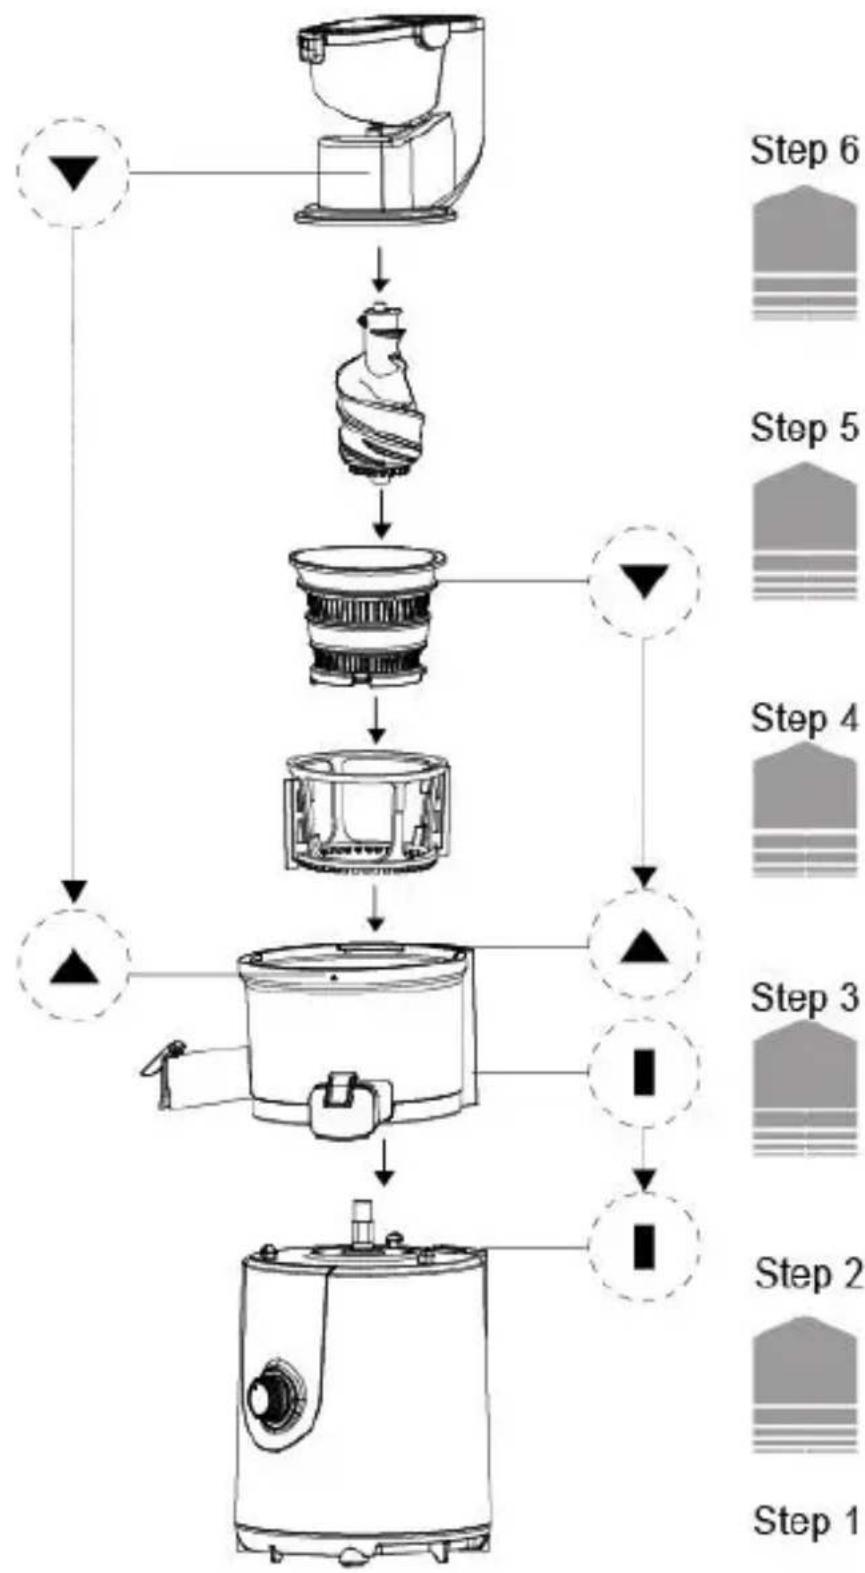
- Before installing the juice container, check whether the rubber seal of the juicer attachment is properly installed.
Mount the rubber seal of the outlet in the rectangular slot. Adjust the seal of the outlet. Note: The rubber seal has to be installed correctly, otherwise the liquid may leak.
- The lid of the juice outlet and that of residue removal is packed separately during the packaging process. Mount the bayonet of the juice outlet lid with the fixed column before use.
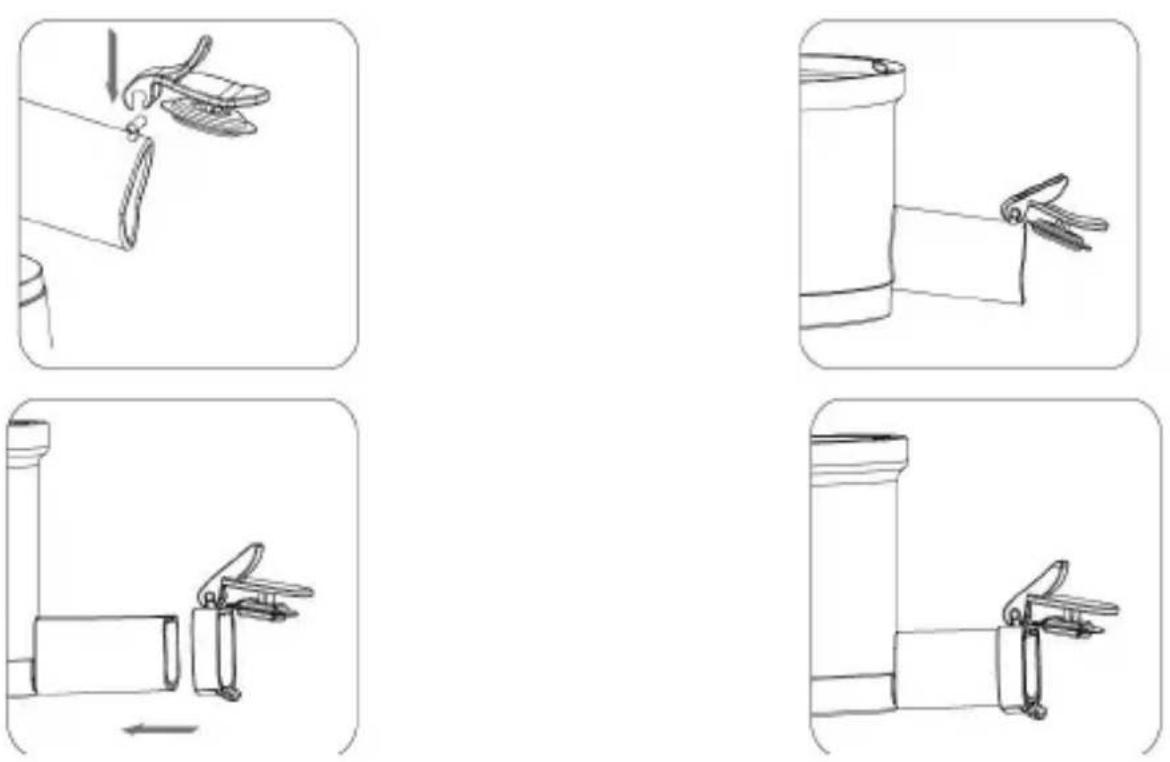
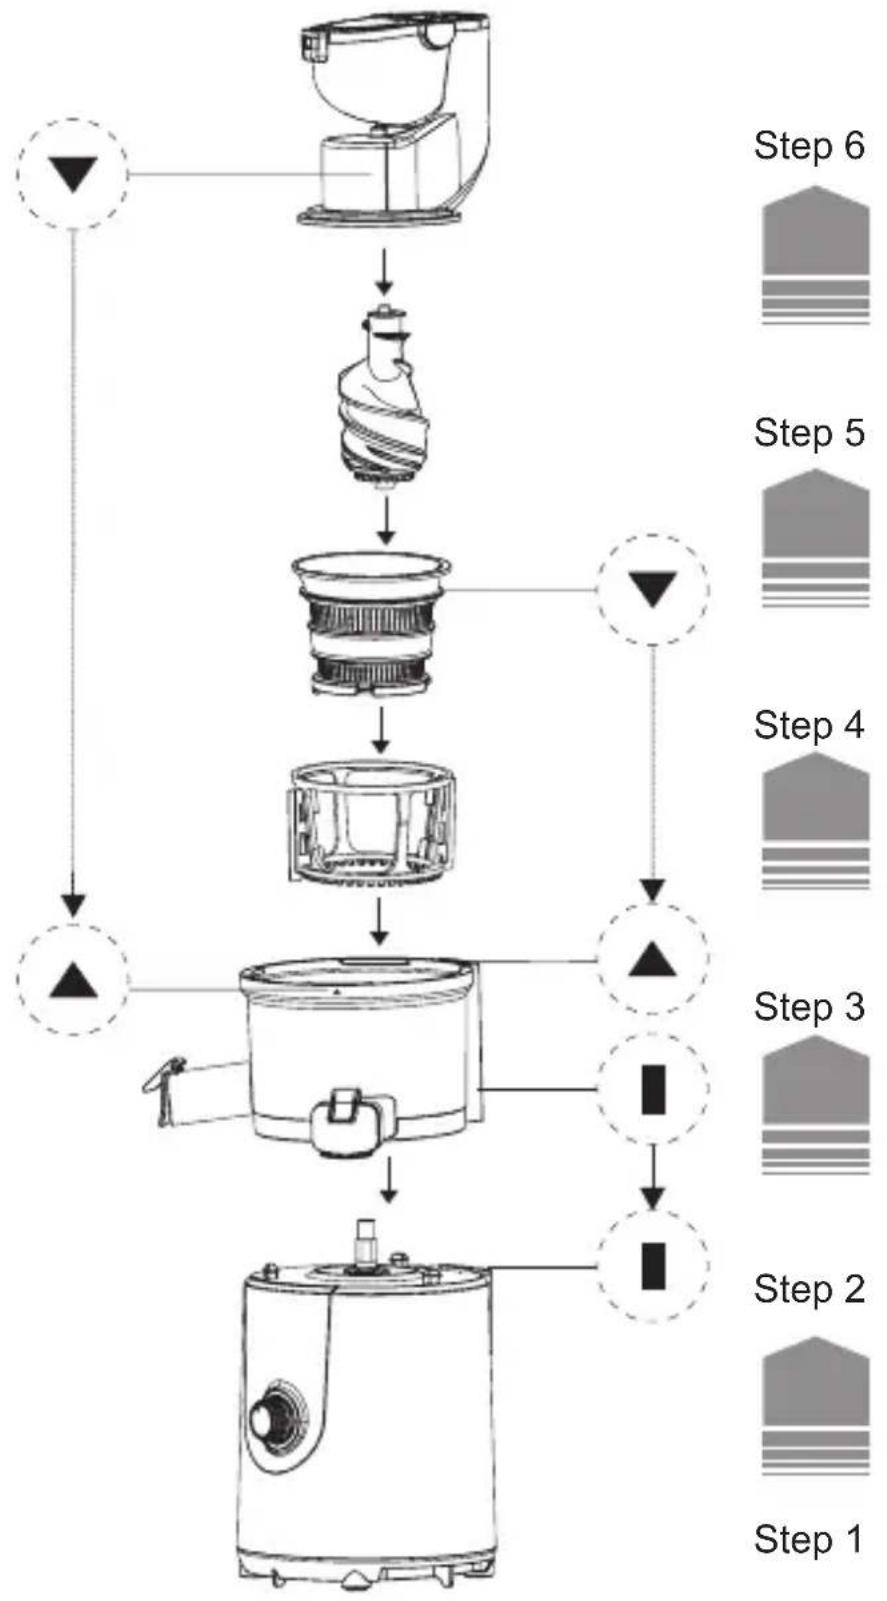
Assembling the appliance
flowchart
graph TD
    A["Step 1: Plate 1"] --> B["Step 2: Plate 2"]
    B --> C["Step 3: Plate 3"]
    C --> D["Step 4: Plate 4"]
    D --> E["Step 5: Plate 5"]
    E --> F["Step 6: Plate 6"]
Assemble the appliance, as shown in the diagram above, and ensure that it is properly assembled. Pay attention to the assembly markings of the various components to ensure proper assembly.
7. Usage

Rotate the switch in the direction of "ON" to turn on the appliance. The juicer switches off if you rotate in the direction of "O". "R" in this context implies that the appliance is pressing in the reverse direction.
Using the lid
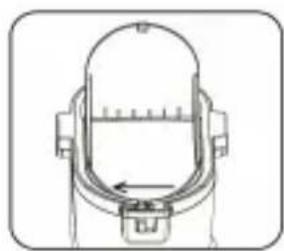
Slide the knob on the lid of the appliance to the left to open the lid. Push the lid down and slide the knob to the right again to close it securely.
natural_image
Technical line drawing of a mechanical component with no visible text or symbols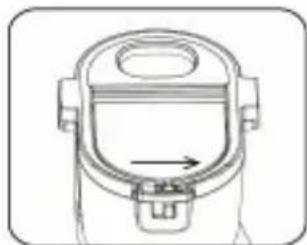
natural_image
Technical line drawing of a mechanical component with an arrow indicating direction (no text or symbols)Extracting the juice
natural_image
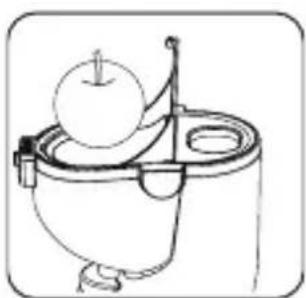
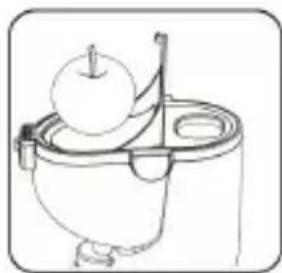
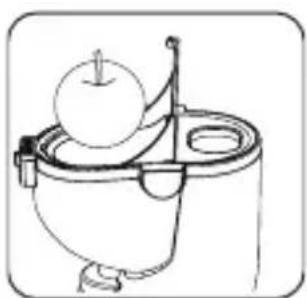
Simple line drawing of a bowl containing an apple, with a handle and lid (no text or symbols)To extract juice from large fruits, use the large opening of the appliance. If you want to extract juice from small and slim items such as carrots, you can use the small opening at the rear.
Insert the appropriate fruit into the opening and gently press it with the pusher tool.
22 English
Note: Please use only fresh fruits and vegetables for the juice. If necessary, ensure that you remove any seeds beforehand.
When you finish extracting the juice, turn off the appliance using the on/off switch and disconnect the power plug from the mains socket.
8. Making Ice cream
Choose soft fruits and make sure they are not too wet.
Clean the fruits you want to use and remove cores as well as the shell. Cut the fruit in roughly 4cm long and 2cm thick pieces. Then spread the cut pieces onto a plate and place it in the freezer for 4-6 hours. Make sure that the individual pieces do not touch each other. Use frozen milk for ice cream.
Before starting to make ice, remove the ingredients from the freezer and let them thaw about 10-15 minutes. Now use a fork to test the frozen ingredients. If you can stick with the fork into the ingredients, these are suitable to make ice cream. If this is not the case, let the ingredients still thaw for a while.
Now replace the juice filter with the sorbé attachment and install it properly. Then start the device and fill in the ingredients little by little. Now the device is ready for making ice cream.
9. Brief operation
The appliance is designed only for brief periods of operation. You can use it continuously for 20 minutes. After this, you have to allow the motor to cool down sufficiently (10 minutes) before reusing the juicer.
10. Additional Information about usage
- The items should be added slowly and one after another into the juicer. Wait until the previous piece is processed before adding something new.
-
Cut hard items or items with strong fibres into small pieces to ensure faster and more effective juice extraction.
-
The quantity of juice will be very small if the items are not fresh, but dry. Use only fresh items.
- Some items, such as sugar cane, cannot be used to extract juice.
11. Cleaning and care
Unplug the power cord from the mains outlet. Clean the base using a slightly dampened soft cloth. Please note! Do not clean the motor unit and the power connections with liquids. Do not use any aggressive, strong or abrasive cleaning agents. You can clean the containers, the lid and the blade unit in soap water. Thoroughly clean any residue of the cleaning agent after cleaning.
Use the cleaning brush provided. Allow all parts of the appliance to dry completely!

natural_image
Simple black line drawing of a wine glass with a fork (no text or symbols)12. Safety instructions and liability disclaimer
Never try to open the device to carry out repairs or conversions. Avoid contact with mains voltages. Do not short-circuit the product. The device is not certified for use in the open air; only use it in dry conditions. Protect it from high humidity, water and snow. Keep it away from high temperatures. Do not subject the device to sudden changes in temperature or heavy vibration as this might damage electronic components. Examine the device for damage before using it. The unit should not be used if it has received an impact or has been damaged in any other way. Please observe national regulations and restrictions. Do not use the device for purposes other than those described in the instructions. This product is not a toy. Keep it out of the reach of children or mentally impaired persons. Any repair or alteration to the device not carried out by the original supplier, will invalidate the warranty or guarantee.
The product may only be used by persons who have read and understood these instructions. The device specifications may change without any separate prior notice to this effect.
The device fulfils the requirements of the German Food and Feed Code (LFGB), the Regulation on Commodities (BedGgstV), the EU regulation No. 10/2011 as well as the EU regulation No. 1935/2004 in the currently valid editions. When used properly, the device does not present a health hazard or other unreasonable hazard.
13. Disposal instructions
Electrical and electronic devices may only be disposed of in accordance with the European WEEE Directive and not with household rubbish. Components must be disposed of or recycled separately as dangerous, toxic elements can inflict sustained damage on the environment if they are disposed of incorrectly. As a consumer, you are bound by the Electrical and Electronic Devices Act (ElektroG) to return electrical and electronic goods free of charge at the end of their useful life to the manufacturer, the place of purchase or to specially set up, public collection points. The details in each case are governed by national law. The symbol on the product, the operating instructions and/or the packaging refers to these regulations. By separating materials in this way, recycling and disposing of old devices, you are making an important contribution towards protecting our environment.


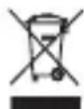
WEEE guideline: 2012/19/EU
WEEE register number: DE 67896761
WD Plus GmbH, herewith declares that this product 303154 conforms to the principle requirements and other relevant stipulations. The complete Declaration of Conformity can be obtained from: WD Plus GmbH, Wohlenbergstraße 16, 30179 Hanover

natural_image
Four-panel line drawing showing a mechanical assembly with clamps, no text or symbols presentnatural_image
Technical line drawing of a mechanical device with no visible text or symbols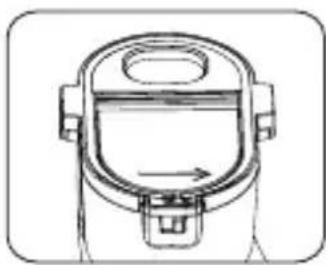
natural_image
Technical line drawing of a mechanical component with no visible text or symbolsExtraire des jus

natural_image
Line drawing of a toilet with an apple on top and a handle, no text or symbols presentnatural_image
Simple line drawing of a wine glass with a fork (no text or symbols)natural_image
Technical line drawing of a circular mechanical component with internal grid structure (no text or symbols)natural_image
Two-step diagram showing a mechanical device with a handle and a separate view of its base (no text or symbols)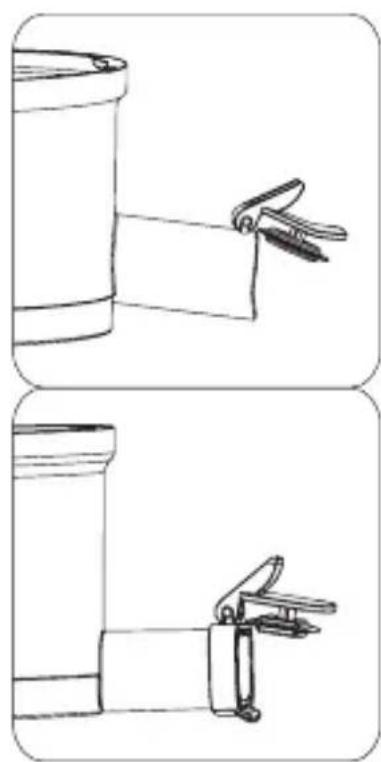
natural_image
Two-step line drawings of a cylindrical container being held by two different tools, showing mechanical assembly (no text or symbols)natural_image
Technical line drawing of a mechanical dial indicator (no text or symbols)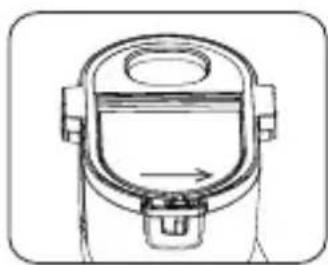
natural_image
Technical line drawing of a mechanical device with no visible text or symbolsEstrazione succo
natural_image
Simple line drawing of a hand holding an apple next to a container with a handle (no text or symbols)natural_image
Simple line drawing of a wine glass with a fork (no text or symbols)natural_image
Two-step line drawing showing a mechanical assembly with clamps and a handle, no text or symbols present.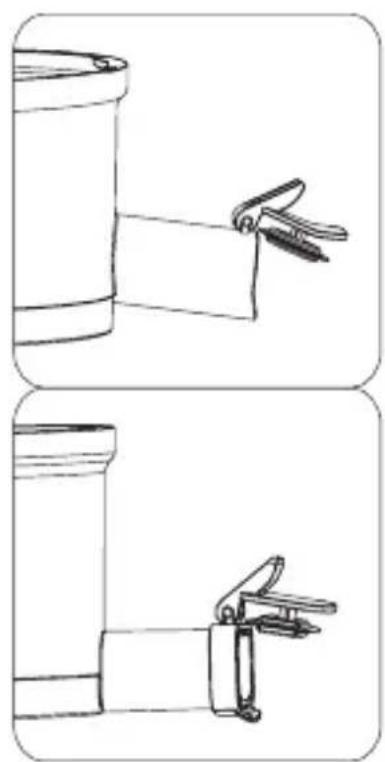
natural_image
Two-step line drawing showing a cylindrical container being held by two clamps, no text or symbols present.Montaje del aparato
flowchart
graph TD
    A["Step 1: Step 1"] --> B["Step 2: Step 2"]
    B --> C["Step 3: Step 3"]
    C --> D["Step 4: Step 4"]
    D --> E["Step 5: Step 5"]
    E --> F["Step 6: Step 6"]
    F --> G["End"]
natural_image
Technical line drawing of a mechanical device with no visible text or symbols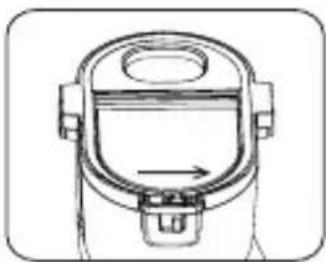
natural_image
Technical line drawing of a mechanical component with no visible text or symbols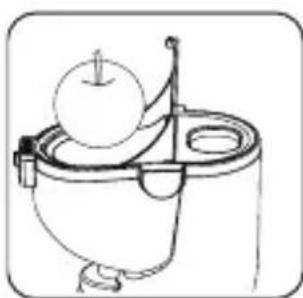
natural_image
Simple line drawing of a mechanical device with an apple and lever (no text or symbols)Exprimir
natural_image
Simple line drawing of a cup and fork (no text or symbols)


- Deutsch
- Montage
- Entsaften
- Important safety guidelines for this appliance
- Scope of delivery
- Technical data
- Initial use
- Safety switch
- Product details
- Assembly
- Usage
- Using the lid
- Extracting the juice
- English
- Making Ice cream
- Brief operation
- Additional Information about usage
- Cleaning and care
- Safety instructions and liability disclaimer
- Disposal instructions
- Extraire des jus
- Estrazione succo
- Exprimir
Brand : Arendo
Model : 303154
Category : Juicer