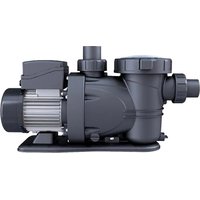
PP202 - Water pump GRE - Free user manual and instructions
Find the device manual for free PP202 GRE in PDF.


| Product type | Swimming pool water pump, centrifugal, self-priming |
| Brand | GRE |
| Model | PP202 |
| Intended use | Filtration and recirculation of swimming pool water |
| Permissible water temperature | 5 °C to 35 °C |
| Power supply | Alternating current, voltage according to nameplate (e.g., 230 V) |
| Required electrical protection | Residual current device (RCD) 30 mA max |
| Applicable standards | IEC/HD 60364-7-702 |
| Electrical installation | By a qualified professional |
| Mounting | Horizontal, fixed with screws on support |
| Prohibited installation zones | Zone 0 and Zone 1 (according to diagram) |
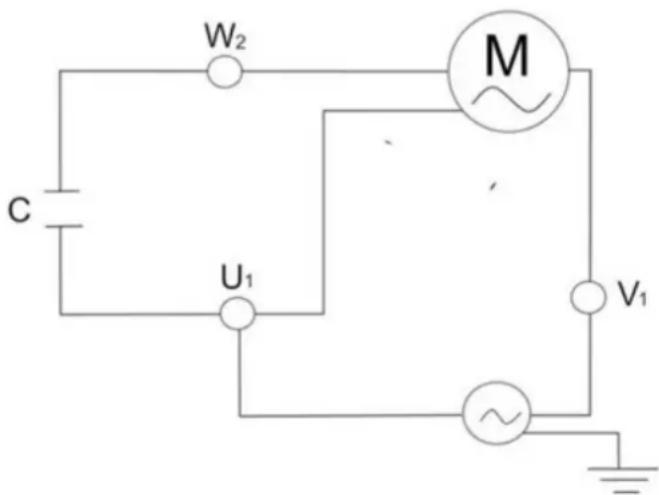
| Connection type | Y connection on power cable |
| Priming | Fill with water before first start |
| Routine maintenance | Regular cleaning of the basket and filter |
| Preventive maintenance | Check fastenings, connections, vibrations, motor temperature |
| Thermal protection | Built-in (automatic shutdown in case of overheating) |
| Warranty | 2 years |
| Repairability | Original spare parts recommended; intervention by a qualified person |
| Disposal | Selective collection via retailer or recycling center (crossed-out wheeled bin symbol) |
Frequently Asked Questions - PP202 GRE
User questions about PP202 GRE
0 question about this device. Answer the ones you know or ask your own.
Ask a new question about this device
Download the instructions for your Water pump in PDF format for free! Find your manual PP202 - GRE and take your electronic device back in hand. On this page are published all the documents necessary for the use of your device. PP202 by GRE.
USER MANUAL PP202 GRE
natural_image
Circular logo with stylized white 'Gre' and swoosh design on black background (no text or symbols beyond logo)www.grepool.com
Instruction Manual - Manual de Instrucciones
natural_image
3D rendering of a black industrial pump with internal components and mounting base (no text or symbols visible)Ref. PP077H (0,75 CV) / PP102 (1 CV) / PP152 (1,5 CV) / PP202 (2 CV)
SAFETY INSTRUCTIONS. READ CAREFULLY


- Our pumps may only be assembled and installed in pools compliant with standards IEC/HD 60364-7-702 and required national rules.
- The installation should follow standard IEC/HD 60364-7-702 and required national rules for swimming pools. Consult your local dealer for more information.
- The pump can not be installed in Zone 0 (Z0) or Zone 1 (Z1). To see drawings refer to pages 61, 62 and 63.
- The electrical installation should be performed by professional staff qualified in electrical installations.
• The apparatus must not be on while the pool is being used.
- Do not operate the apparatus unless it is properly primed.
- NEVER touch the apparatus when it is operating if you are wet or have wet hands.
- When handling the pump, DISCONNECT the power supply.
• Make sure that the ground is dry before touching the electrical equipment.
- Do not install the apparatus where it could become wet, as it may cause electrocution.
- This appliance is not intended for use by persons (including children) with reduced physical, sensory or mental capabilities, or lack of experience and knowledge, unless they have been given supervision or instruction concerning use of the appliance by a person responsible for their safety. Children should be supervised to ensure that they do not play with the appliance.
- This appliance can be used by children aged from 8 years and above and persons with reduced physical, sensory or mental capabilities or lack of experience and knowledge if they have been given supervision or instruction concerning use of the appliance in a safe way and understand the hazards involved. Children shall not play with the appliance. Cleaning and user maintenance shall not be made by children without supervision.
- If the supply flex of the apparatus is damaged, it should be replaced. Read the instructions carefully to replace it. If in doubt, contact the technical service.
This mode allows making a correct installation with optimal results of your swimming pool pump. Carefully read this instruction manual.
Your new pump is a one-stage self-priming, centrifugal pump, designed for use with a swimming-pool filtering system. It is designed to be used with clean water for temperatures between 5 °C and 35 °C. It is manufactured from high quality materials subject to strict hydraulic and electrical tests. A correct installation of this pump is assured by following the instructions from this manual. We decline all responsibility for damages caused by use different to that explained in this instruction manual.
IMPORTANT
This manual contains basic information on the safety measures to be adopted during installation and start-up. The fitter and the user must therefore read the instructions before installation and start-up.
GENERAL SAFETY REGULATIONS
- The machines indicated in this Manual are especially designed for the pre-filtering and recirculation of water in swimming pools
- Install them in line with the specific instructions for each installation
- All modifications to the pump require prior authorisation from the manufacturer. Original spare parts and accessories authorised by the manufacturer ensure greater safety. The pump manufacturer is exempt from all liability regarding any damage caused by
unauthorised spare parts or accessories.
- When working on each machine or on the units linked to them, disconnect the unit from the power supply and the startup devices, as the electrical parts of the pump are live during operation.
- All assembly and maintenance work must be carried out by qualified and authorised personnel who have carefully read the installation and service instructions.
- To guarantee safety when operating the machine, you must comply with that set out in the installation and service instructions.
- In the event of defective operation or faults, contact your supplier or nearest representative.
- If the power supply cable is damaged, the manufacturer, its after-sales service of qualified technicians, should replace it in order to avoid hazards.
- The device should be connected to electricity outlet with earth connection, protected by a Residual Current circuit breaker that does not exceed 30 mA.
- Make sure that water is unable to enter the motor or the live electrical parts.
- Avoid contact at all times - even accidentally - with moving machine parts while the machine is running and/or before it comes to a complete standstill
- Wait for the machine to come to a halt before handling it.
- Before any electrical or mechanical maintenance operation, disconnect the unit from the power supply and block the start-up devices.
• To reduce risk of injury, children should not use this product.
- Do not bury the electric cable. Lay the cable so it cannot be damaged by machinery, like mowing machines, etc.
- Do not start the pump before it is correctly connected to the swimming pool.
- To reduce risk of electric shock, change the electric cable immediately when damaged.
- To reduce risks of electric shock, do not use extension cables to connect the p mp to a power supply. Connect it to a correctly installed electricity outlet.
- Do not use the pump without water!
INSTALLATION
- Only authorised and qualified personnel should install the pump and its cabling, respecting the current legislation.
- The pump should be installed horizontally, screwing it to the support, to avoid vibration and unwanted noise.
- The pump should be installed far from any corrosive or flammable products.
- The pump should have sufficient drainage to avoid risk of flooding and should be protected from excessive humidity.
- Install independent water inlet and outlet valves.
- Allow for sufficient access space for pump maintenance and make sure that the technical plate of the pump is visible.
- During the installation of the pump, position it so there is 1 meter of free space around it.
ELECTRICAL INSTALLATION
- Place the motor on the floor before connecting it to the mains. Otherwise, the motor could cause a serious and even mortal electric shock. Do not place it on the floor over a gas pipe.
• To avoid a dangerous or mortal electric shock, disconnect the power supply of the
motor before working on the electrical connections.
- If it short-circuits, this will indicate there is an electricity problem. If it short-circuits and cannot be restarted, ask a qualified electrician to verify and repair the electrical system.
•The unit should be connected to an alternating current supply (see data on the pump's plate) with an earth connection, protected by a residual current device (RCD) with a rated residual operating current that does not exceed 30 mA.
- Unsuitable mains connections involve the risk of electrocution.
- The power supply should exactly correspond to the voltage indicated on the plate of the motor. Incorrect voltage could provoke a fire and/or damage the motor, and would cancel the guarantee. In case of doubt, check with an electrician.
- The electric cable is included and comes with a "Y" connection. If it is necessary to replace the electricity cable, the new cable should also be of the appropriate type.
The guarantee will be cancelled in the case of any unauthorised modification of the components.
• The electrical installation has to be according to current legislation.
- If the electrical cable is damaged, the manufacturer, its agent, or any other qualified person should replace it to avoid any damage.
- The pump is equipped with complete thermal protection. Follow the assembly diagram below for correct electrical installation.
• The electrical installation should be done by someone qualified in working with electrical equipment. This device is not designed to be used by children, by physically disabled persons or those with reduced sensorial or psychological ability or by persons without experience or knowledge of the device, unless a person responsible for safety is in charge of their care and provides them with previous instructions for handling the device.
Do not permit children nor adults to sit or lean on the equipment. Children should be supervised to ensure that they do not play with the equipment.
- Adjust the value of the thermal relay appropriately depending on the pump current.
- Unsuitable mains connections involve the risk of electrocution
Assembly of pipes
- The pipes should be assembled before and after the pump and should have diameters equal of above those of the pump inlet.
• The suction and expulsion pipes should never stay connected to the pump. - Well seal all the connections and the cover of the pump to avoid possible water leaks into the motor, which could damage it.
Tests before starting the pump
Carry out the following operations before starting the pump:
- Check that the power supply as well its frequency correspond to the information of pump specification plate.
- Before starting the pump, fill it with water for self-priming of the pump.
- Check that the mains voltage and frequency correspond with those indicated on the pump characteristics plate
• The pump can continuously work.
Starting the pump
Start the pump only when the suction and expulsion tubes are connected to the inlet and outlet of the pump. Check there are no obstacles in the pipes.
Maintenance and cleaning
- Your new pump does not need any specific or programmed maintenance. In the case that the pump is not used during some time, we recommend dismantling it and cleaning it to be kept in a dry and well-aired place.
- If the electrical cable is damaged, the manufacturer, its agent, or any other qualified person to avoid any danger should replace it to avoid any dangers.
- Regularly clean your pump, removing any dirt from the filer so the inlet pipe is not blocked or the pump damaged.
- Pump components that, due to their normal use, suffer wear and/or tear must be regularly replaced to ensure good pump performance.
• For regular control: - Check that the mechanical parts are tightly secured and check the condition of the screws supporting the machine.
- Check that the power conductors and isolating parts are in their correct position, are secure and in a good state of repair.
Check the temperature of the machine and the electric motor. In the event of a fault, stop the machine immediately and contact the nearest Technical Assistance Service. - Check for machine vibrations. In the event of a fault, stop the machine immediately and contact the nearest Technical Assistance.
| Symptoms Causes Solution | ||
| The pump does not work | There is no power supply | Use another device that works to check the electricity outlet and check the short-circuit switches |
| It has short-circuited | Check the short-circuit switches and replace them if necessary | |
| The automatic thermal cut-out of the pump has activated to protect it. | Cut the power supply and leave to cool before re- starting the pump. Make sure the pump and motor have sufficient ventilation space. Make sure that the pump is not obstructed by dirt and the motor can turn freely | |
| The motor has burnt out due to a power supply overload or flooding | You may have to change the motor. | |
| The pump works with reduced or no flow | The pump is blocked (check if the motor turns freely) | Blockage in the pump or in the basket |
| The valves are closed | Check the system to make sure that the valves are in the correct position for filtering, including the inlet and outlet valves of the pump. | |
| The filter is full of dirt Clean the filter | ||
| Air in the system | Start the pump (see starting procedure). Check to see there are no suction air leaks in the pipes or in the connections. Make sure that the lid of the basket is well closed and hermetically sealed. Check there are no leaks under the pump. | |
| Lack of water | Make sure that the water level is at least at the height of the skimmer. | |
| Dirt in the pump or in the skimmer. (Note: Do not make the pump work without the pump or skimmer basket correctly assembled. | Make sure the pump or skimmer baskets are not full of dirt. Make sure there is no blockage at the inlet or outlet of the pump or make sure there are no foreign objects in the pump. | |
| Leak between the casing of the pump and the motor. | The screws of the casing are not tightened. The watertight or metallic gasket is worn. | Cut-out the pump and loosen the screws, check the alignment and the condition of the water-tight gaskets before tightening the screws, replace the gaskets if necessary. |
| Pre-filter cover The cover is not cor | rectly closed | Make sure the lid correctly compresses the O-ring seal. |
INDICACIONES DE SEGURIDAD, LÉALAS ATENTAMENTE
MONTAJE DE LAS MANGUERAS
Montaż rur
ELEKTRICKÁ INSTALACE
- In an area susceptible to rainfall and splashing.
- Near a heat source or source of inflammable gas.
- In an area that cannot be cleaned or kept free of leaves, dry vegetation and other inflammable items.
- In Zone 0 (Z0) and Zone 1 (Z1) (FIGURE 3).
(ES) LA BOMBA NO DEBE INSTALARSE
(PL) NIE WOLNO INSTALOWAĆ POMPY:
FIGURE 3 - ZONES IN THE INSTALLATION
TECHNICAL CARACTERISTICS CARACTERÍSTICAS TÉCNICAS RENSEIGNEMENTS TECHNIQUES TECHNISCHE ANGABEN DATI TECHNICI TECHNISCHE GEGEVENS CARACTERISTICAS TÉCNICAS DANE TECHNICZNE TECHNICKÉ CHARAKTERISTIKY TECHNICKÉ VLASTNOSTI
| PP077H | PP102 PP15 | PP202 | ||
| Hmax 10 14 15 17 | ||||
| Hmin 4 4 2,5 2900 | ||||
| Voltage (V) | 220-240 220 | -240 220-2 | 40 220-240 | |
| Input Power (W) | 600 | 900 | 1100 | 1600 |
| Current (A) | 3 | 4,1 | 5 | 7,3 |
| Rpm | 2900 | 2900 | 2900 | 2900 |
| Q max (m3/h) | 17 | 20 22 27 | ||
| Q nom (m3/h) | 9 | 12 | 17 21 | |
| IP Level | IPX5 | IPX5 | IPX5 | IPX5 |
| Frequency | 50 Hz | 50 Hz | 50 Hz | 50 Hz |
| Water temp | 0-35 °C | 0-35 °C | 0-35 °C | 0-35 °C |
| Noise level | 73 dB | 78 dB | 82 dB | 71 dB |
PP202 / PP152 / PP102 / PP077H
natural_image
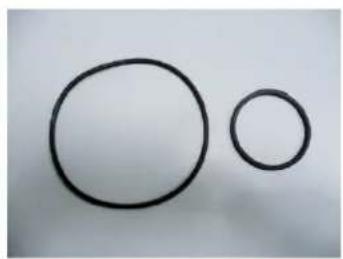
Two simple black circles of different sizes on a plain white background (no text or symbols)PP01P
natural_image
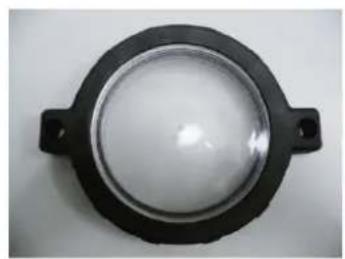
Circular mechanical component with a central transparent dome and two side handles (no text or symbols visible)PP02P
natural_image
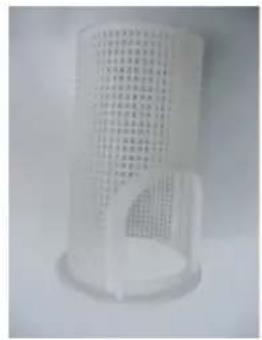
White cylindrical object with a grid pattern, possibly a filter or mesh structure (no text or symbols visible)PP03P
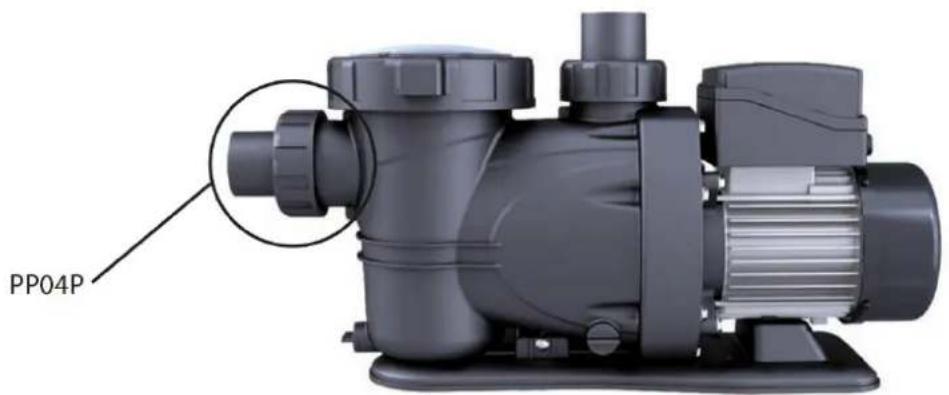
Self-priming SWIMMING POOL PUMP BOMBA DE PISCINA autocebante POMPE DE PISCINE auto-amorçante Selbstansaugende SCHWIMMBADPUMPE POMPA DI PISCINA auto-aspirante Zelfaanzuigende ZWEMBADPOMP BOMBA PISCINA autocomeçando SAMOZASYSAJĄCA POMPA DO BASENU Samo-plnící BAZÉNOVÉ ČERPADLO Samonasávacie BAZÉNOVÉ ČERPADLO POMPA PISCINA cu auto-amorsare
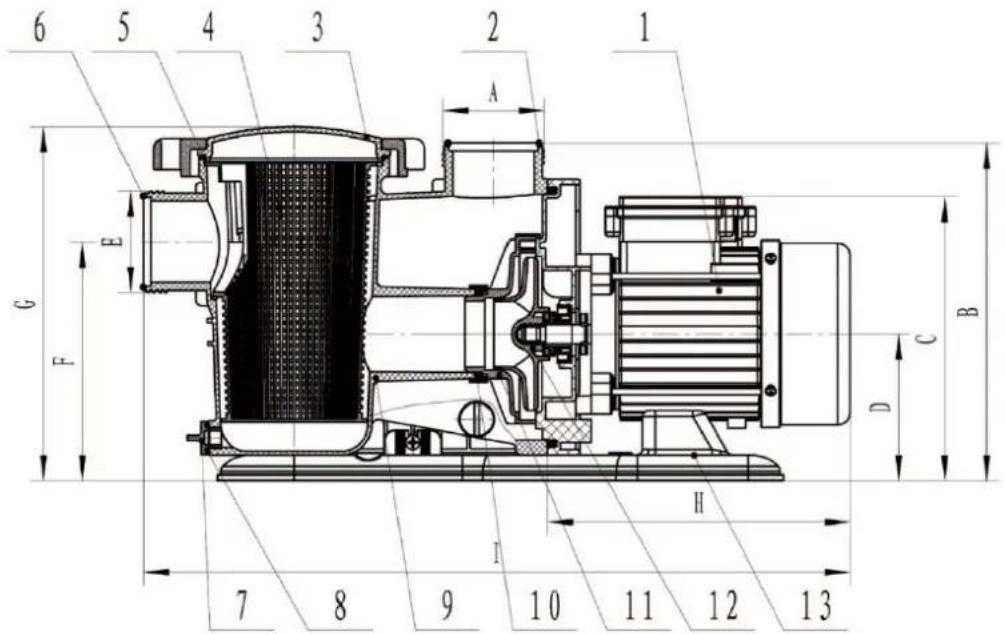
| EN ES FR DE IT NL PT | |||||||
| 1 | Motor Motor | Moteur Motor | Motore Motor | Motor | |||
| 2 | O-ring seal for drive | Junta tórica impulsión | Joint thori-que refoule-ment | O-Ring des Antriebs | Guarnizione impulso | O-ring im-puls | Tampão impulso |
| 3 | Pre-filter cover | Tapa de preíltro | Buse | Vorílterdec-kel | Coperchio preíltro | Deksel van de voorílter | Tampa pre-íltro |
| 4 | Pre-#lter basket | Cesto del preíltro | Panier du préíltre | Vorílterkorb | Canestro preíltro | Korf van de voorílter | Cesto pre-íl-tro |
| 5 | O-ring seal for pre-filter | Junta tórica del preíltro | Joint tho-rique de la buse | O-Ring für Vorílter | Guarnizione preíltro | O-ring voor voorílter | Junta pre-íl-tro |
| 6 | O-ring seal for suction | Junta tórica aspiración | Joint thori-que aspira-tion | O-Ring für den Sauger | Guarnizione aspirazione | O-ring voor aanzuiging | Tampão aspiração |
| 7 | Purging plug | Tapón de purga | Bouchon de vindage | Abflussdec-kel | Tappo di scario | Aftapplug | Tampão desaguamento |
| 8 | Purging plug seal | Junta tapón de purga | Joint du bouchon de vinfage | Dichtung des Abfluss-deckels | Guarnizio-ne tappo di scarico | Dichting aftapplug | Junta tam-pão des-aguamento |
| 9 | Casing Carcasa Enveloppe Gehäuse | Corpo pom-pa | Behuizing | Corpo bom-ba | |||
| 10 | O-ring seal Junta tórica | Joint thori-que | O-Ring Guarnizione O-ring Tampão | ||||
| 11 | Difuser | Difusor | Diffuseur | Diffusor | Diffusore | Diffusor | Difusor |
| 12 | Air-screw | Helice | Hélice | Helix | Turbina | Schroef | Turbina |
| 13 | Motor assembly plate | Placa de montaje del motor | Plaque de montage du moteur | Montageabdeckung des Motors | Targa d'assemblagio di motore | Monteer-basis voor motor | Placa da montagem do motor |
| PL CS SK RO | ||||
| 1 | Silnik Motor motor | Garnitură etanșare unitate motoare | ||
| 2 | Uszczelka pierșceinna dla panelu ste- rowania | O-kroužek těsnění po- honu | Tesnenie O-krúžkom pre pohon | Nit pre-filtru |
| 3 | Pokrywa filtra | Kryt před-fil- tru | Kryt predfiltra Carcasă | pre-filtru |
| 4 | Koszyk filtra | Koš před-fil- tru | Kôš predfiltra Pre-filtru coș | |
| 5 | Uszczelka pierșcienna dla filtra | O-kroužek těsnění před-filtru | Tesnenie O-krúžkom pre predfilter | Garnitură etanșare pre-filtru |
| 6 | Uszczelka pierșcienna dla części ssającej | O-kroužek těsnění sání | Tesnenie O-krúžkom pre sanie | Garnitură etanșare pentru suctiune |
| 7 | Korek odpowietr- zają | Čistící otvor Čistíaca zátka Priză de purjare | ||
| 8 | Uszczelka do korka odpowietr- zające go | Uzávěr čistí- cího otvoru | Čistenie tesnenia zátky | Garnitură priză purjare |
| 9 | Obudowa Pouzdro Plášt Carcasă | |||
| 10 | Uszczelka | Těsnící o-kroužek | Tesnenie O-krúžka Garnitură O-ring | |
| 11 | Dyfuzor Difuzor Difúzor | Difuzor | ||
| 12 | Śruba odpowietr- zajça | Vzduchový šroub | Vzduchová skrutka | Elice |
| 13 | Płyta do montażu silnika | Montážní deska mo- toru | Montážna doska motora | Placă asamblare motor |
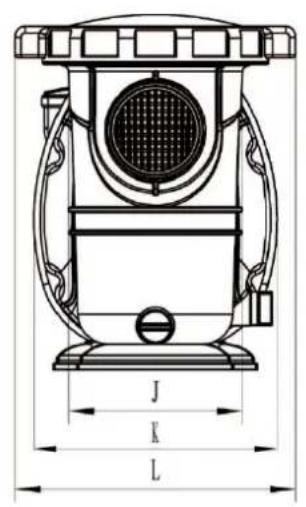
| A(mm) | B(mm) | C(mm) | D(mm) | E(mm) | F(mm) | G(mm) | H(mm) | I(mm) | J(mm) | K(mm) | L(mm) |
| 79 | 264 | 222 | 115 | 79 | 187 | 278 | 237 | 553 | 136 | 190 | 220 |
GENERAL TERMS
- In accordance with these provisions, the seller guarantees that the product corresponding to this guarantee ("the Product") is in perfect condition at the time of delivery.
· The Guarantee Term for the Product is two (2) years from the time it is delivered to the purchaser.
· In the event of any defect in the Product that is notified by the purchaser to the seller during the Guarantee Term, the seller will be obliged to repair or replace the Product, at his own cost and wherever he deems suitable, unless this is impossible or unreasonable. - If it is not possible to repair or replace the Product, the purchaser may ask for a proportional reduction in the price or, if the defect is sufficiently significant, the termination of the sales contract.
- The replaced or repaired parts under this guarantee, will not extend the guarantee period of the original Product, but will have a separate guarantee.
- In order for this guarantee to come into effect, the purchaser must provide proof of the date of purchase and delivery of the Product.
- If, after six months from the delivery of the Product to the purchaser, he notifies a defect in the Product, the purchaser must provide proof of the origin and existence of the alleged defect.
· This Guarantee Certificate is issued without prejudice to the rights corresponding to consumers under national regulations.
INDIVIDUAL TERMS
· This guarantee covers the products referred to in this manual.
· This Guarantee Certificate will only be applicable in European Union countries.
- For this guarantee to be effective, the purchaser must strictly follow the Manufacturer's instructions included in the documentation provided with the Product, in cases where it is applicable according to the range and model of the Product.
- When a time schedule is specified for the replacement, maintenance or cleaning of certain parts or components of the Product, the guarantee will only be valid if this time schedule has been followed.
LIMITATIONS
- This guarantee will only be applicable to sales made to consumers, understanding by “consumer”, a person who purchases the Product for purposes not related to his professional activities.
- The normal wear resulting from using the product is not guaranteed. With respect to expendable or consumable parts, components and/or materials, such as batteries, light bulbs, etc. the stipulations in the documentation provided with the Product, will apply.
The guarantee does not cover those cases when the Product; (I) has been handled incorrectly; (II) has been repaired, serviced or handled by non- authorised people or (III) has been repaired or serviced not using original parts. In cases where the defect of the Product is a result of incorrect installation or start-up, this guarantee will only apply when said installation or start-up is included in the sales contract of the Product and has been conducted by the seller or under his responsibility.
CROSSED-OUT WASTE CONTAINER
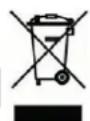
· In order to reduce the amount of waste of electric and electronic apparatus, to reduce the danger of components, to encourage the reuse of apparatus, to assess waste and to set up a suitable waste treatment system, with the aim of improving the efficiency of environmental protection, a set of rules has been established applicable to the manufacture of the product and other rules regarding the correct environmental treatment when these products become waste.
- It is also intended to improve the environmental practices of all agents involved in electrical and electronic goods, including manufacturers, distributors, users and particularly those directly involved in the treatment of waste derived from these apparatus.
- From 13th August 2005, there are two ways of disposing of this apparatus:
- If you purchase a new equivalent apparatus or which has the same functions as the one you wish to dispose of, you can hand it over, free of charge, to the distributor when making your purchase.
- You can take it to local collection points.
· We shall cover waste treatment costs.
- The apparatus are labelled with a symbol of a "crossed-out waste container". This symbol means that the apparatus is subject to selected waste collection, different from general waste collection.
- Our products are designed and manufactured with top-quality, environmental-friendly materials and components, which can be reused and recycled. In spite of this, several parts of this product are not biodegradable and therefore it should not be left in the environment. For the correct recycling of this product, please completely detach the electrical motor from the rest of the filtration equipment.
ESERTIFICADO DE GARANTÍA
ASPECTOS GENERALES
INDIVIDUÁLNÍ PODMÍNKY
MANUFACTURAS GRE, S.A.
ARITZ BIDEA N° 57 BELAKO INDUSTRIALDEA, APARTADO 69
48100 MUNGUIA (VIZCAYA) ESPAÑA
N° Reg. Ind. 48-06762
- We reserve the right to change all or part of the articles or contents of this document, without prior notice
- Nos reservamos el derecho de cambiar total o parcialmente las características de nuestros artículos o el contenido de este documento sin previo aviso
- Nous nous réservons le droit de modier totalement où en partie les caractéristiques de nos articles ou le contenu de ce document sans préavis
- Wir behalten uns das Recht vor, die technischen Daten unserer Artikel oder den Inhalt dieses Dokumentes ohne vorherigen Hinweis ganz oder teilweise zu ändern
- Ci riserviamo il diritto di cambiare totalmente o parzialmente le caratteristiche tecniche dei nostri prodotti ed il contenuto di questo documento senza nessun preavviso
- Wij behouden ons het recht voor geheel of gedeeltelijk de kenmerken van onze artikelen of de inhoud van deze handleiding zonder voorafgaand bericht te wijzigen
- Reservamo-nos o direito de alterar, total ou parcialmente, as características dos nossos artigos ou o conteúdo deste documento sem aviso prévio.
- Zastrzegamy sobie prawo do zmiany w całości lub części niniejszej instrukcji bez uprzedniej informacji
- Vyhrazujeme si právo na změnu součástí nebo prvků výrobku nebo obsahu tohoto dokumentu bez oznámení.
- Vyhradzujeme si právo na zmenu všetkých článkov alebo ich častí alebo obsahu tohto dokumentu bez predchádzajúceho upozornenia.
- Ne rezervăm să schimbăm total sau partial articolele sau conținutul acestui document, fără notificare prealabilă.
- Vi förbehåller oss rätten att ändra hela eller delar av funktionerna i artiklarna eller innehållet i detta dokument utan föregående meddelande.
- Vi forbeholder os retten til at ændre hele eller dele af artiklerne eller indholdet af dette dokument, uden forudgående varsel.
- Vi forbeholder oss retten til å endre hele eller deler av artiklene eller innholdet i dette dokumentet, uten forvarsel.
- Pidätämme oikeuden muuttaa tämän asiakirjan artikkeleita tai sisältöä kokonaan tai osittain
- Me jätame endale õiguse muuta kõiki või osa selle dokumendi artikleid või sisu ette teatamata.

EVIDENCE OF CONFORMITY DECLARACIÓN DE CONFORMIDAD DÉCLARATION DE CONFORMITÉ EU-KONFORMITÄTSERKLÄRUNG DICHIARAZIONE DI CONFOMITÀ OVEREENSTEMMIGGSVERK LARING DECLARAÇAU DE CONFORMIDADE DEKLARACJA ZGODNOŚCI UE EVROPSKÉ PROHLÁŠENÍ O SHODĚ VYHLÁSENIE O ZHODE EÚ DECLARAȚIA DE CONFORMITATE

natural_image
Circular logo with stylized white 'Gre' and swoosh design on black background (no text or symbols beyond logo)www.grepool.com
DISTRIBUTED BY - DISTRIBUIDO POR - DISTRIBUÉ PAR- VERTRIEB DURCH - DISTRIBUITO DA - GEDISTRIBUEERD DOOR - DISTRIBUÍDO POR - WYPRODUKOWANY PRZEZ - DISTRIBUTOR - DISTRIBÚTOR - DISTRIBUIT DE - DISTRIBUERAD AV:
MANUFACTURAS GRE S.A. - ARITZ BIDEA N° 57 BELAKO INDUSTRIALDEA - APARTADO 69 - 48100 MUNGUIA (VIZCAYA) ESPAÑA N° REG. IND.: 48-06762
MADE IN CHINA - FABRICADO EN CHINA - FABRIQUÉ AU CHINE - HERGESTELLT IN CHINA - PRODOTTO IN CHINA - GEPRODUCEERD IN CHINA - FABRICADO NA RPC - WYPRODUKOWANO W CHINACH - VYROBENO V ČÍNĚ - VYROBENÉ V ČÍNE - FABRICAT ÍN CHINA - TILLVERKAD I KINA

- IMPORTANT
- GENERAL SAFETY REGULATIONS
- INSTALLATION
- ELECTRICAL INSTALLATION
- Assembly of pipes
- Tests before starting the pump
- Maintenance and cleaning
- INDICACIONES DE SEGURIDAD, LÉALAS ATENTAMENTE
- MONTAJE DE LAS MANGUERAS
- Montaż rur
- ELEKTRICKÁ INSTALACE
- (ES) LA BOMBA NO DEBE INSTALARSE
- (PL) NIE WOLNO INSTALOWAĆ POMPY:
- GENERAL TERMS
- INDIVIDUAL TERMS
- LIMITATIONS
- CROSSED-OUT WASTE CONTAINER
- ESERTIFICADO DE GARANTÍA
- ASPECTOS GENERALES
- INDIVIDUÁLNÍ PODMÍNKY
Brand : GRE
Model : PP202
Category : Water pump