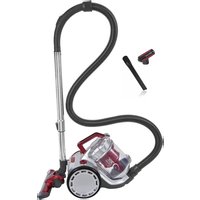
BP 6401 si - Vacuum Cleaner Exquisit - Free user manual and instructions
Find the device manual for free BP 6401 si Exquisit in PDF.


| Brand | Exquisit |
| Model | BP 6401 si |
| Product type | Cordless stick vacuum |
| Suction type | Bagless cyclonic |
| Power supply | Rechargeable battery 25 V, 4400 mAh |
| Power adapter | Included, 25 V |
| Charging time | 4 to 5 hours |
| Battery indicator | LED (4 blue LEDs, red when low) |
| Power levels | 2 (normal and high) |
| Motor filter | Washable with cold water |
| HEPA filter | Yes |
| Included accessories | Floor/carpet brush, crevice tool, upholstery brush, flexible hose |
| Floor/carpet brush | With pedal to lower/raise bristle crown |
| Airflow regulator | Manual |
| Dust container | Transparent, bagless, bottom emptying |
| Use | Indoor, household use only |
| Warranty | 2 years (24 months) |
| After-sales service | www.ggv-service.de |
| CE marking | Yes |
| Approval | CE |
Frequently Asked Questions - BP 6401 si Exquisit
User questions about BP 6401 si Exquisit
0 question about this device. Answer the ones you know or ask your own.
Ask a new question about this device
Download the instructions for your Vacuum Cleaner in PDF format for free! Find your manual BP 6401 si - Exquisit and take your electronic device back in hand. On this page are published all the documents necessary for the use of your device. BP 6401 si by Exquisit.
USER MANUAL BP 6401 si Exquisit
natural_image
Red and silver vacuum cleaner with black handle and red internal panel (no visible text or symbols)
24753
DE
natural_image
Technical line drawing of a mechanical component with no visible text or symbolsnatural_image
Technical line drawing of a mechanical component with no visible text or symbolsnatural_image
Illustration of a hand holding a finger with a finger pressing a button, showing motion arrows (no text or symbols)natural_image
Line drawing of a mechanical device with no visible text or symbols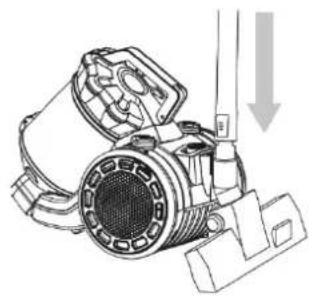
natural_image
Technical line drawing of a mechanical component with no visible text or symbolsnatural_image
Technical line drawing of a mechanical device with directional arrows indicating motion or force (no text or symbols)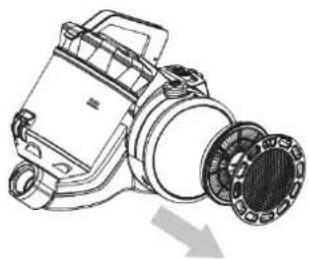
natural_image
Technical line drawing of a mechanical device with no visible text or symbolsnatural_image
Illustration of a hand holding a cylindrical tool with a pointed tip, showing motion (no text or symbols)SCOPE OF SUPPLY / APPLIANCE PARTS
Description of the appliance
1 Handle
4 ON/OFF button
7 Rotatomg Carpet/hard floor nozzle
10 Flexible hose
13 nozzle
16
2 Power level indicator
5 Accessory holder
8 Release button for the telescoping suction tube
11 Dust container
14 upholstery nozzle
17 Level indicator
3 Battery status LED
6 Release button for the flexible hose
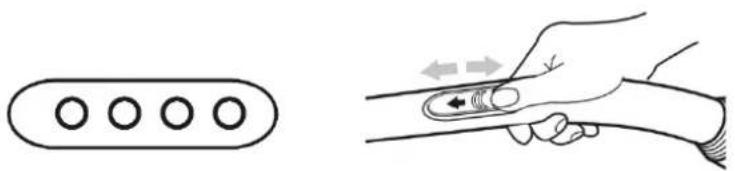
9 Manual air flow regulator
12 Release button for the filter
15 Charging cable
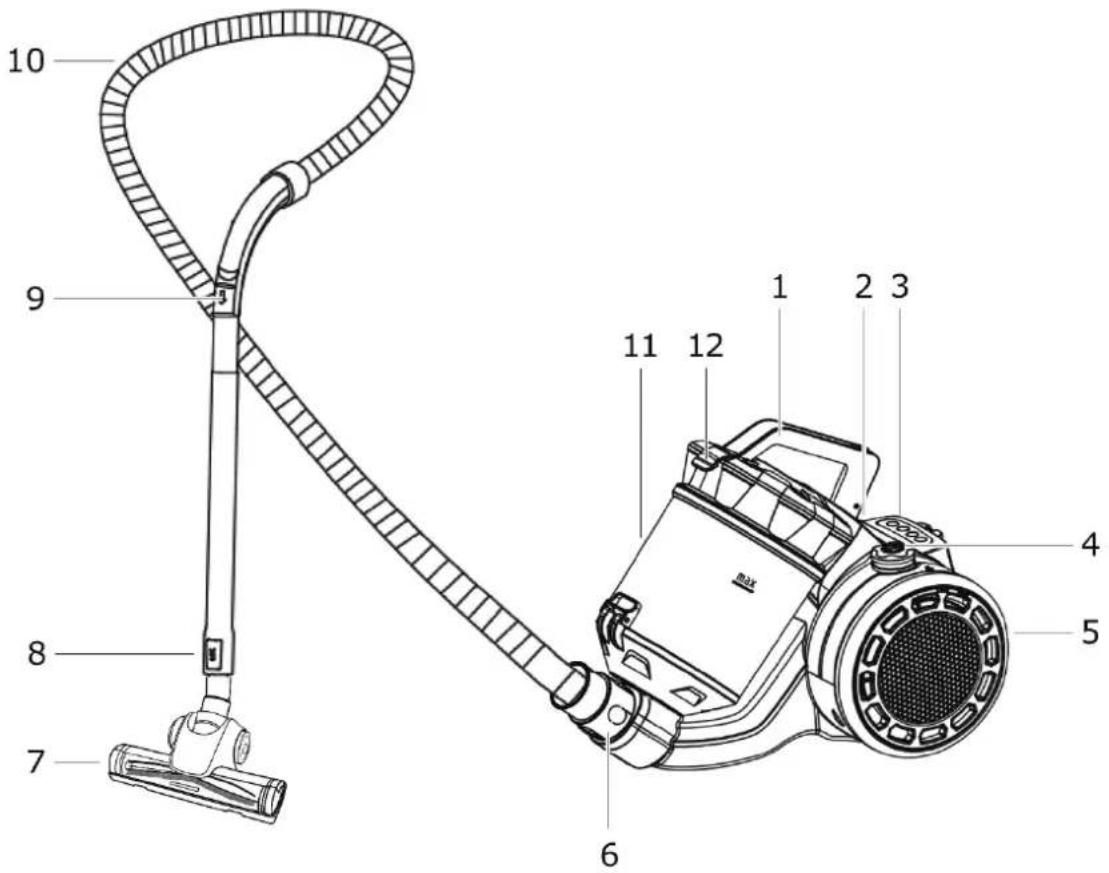
Figure 1 Appliance description 1-0
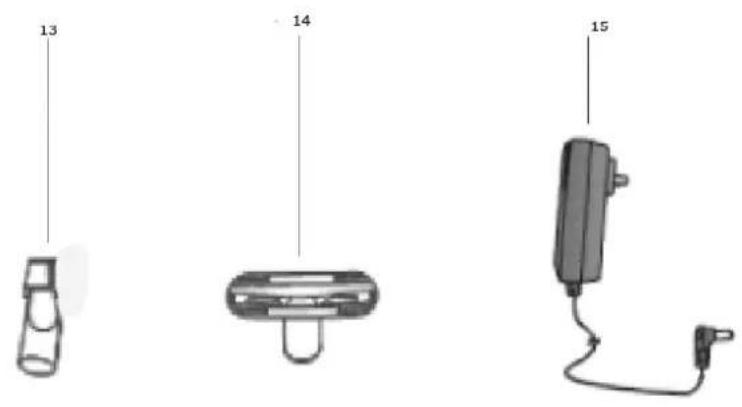
Figure 2 Appliance description 1-1
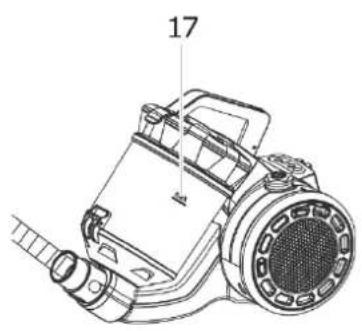
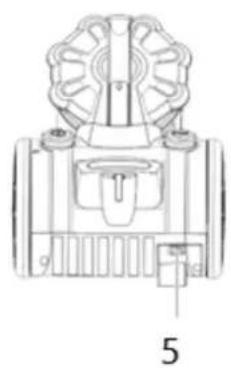
natural_image
Technical line drawing of a mechanical component with no visible text or symbolsFigure 4 Appliance description 1-3
Figure 3 Appliance description 1-2

natural_image
Technical line drawing of a mechanical component with no visible text or symbolsFigure 5 Hard floor nozzle
natural_image
Illustration showing a button-like device and a hand holding a finger with arrows indicating motion (no text or symbols)Figure 7 Air flow regulator Figure 6 Battery status LED
EN
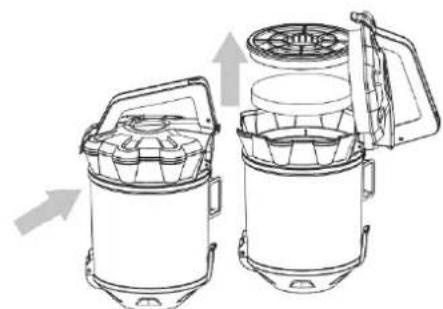
Motor filter
natural_image
Line drawing of two portable kitchen units with arrows indicating motion, no text or symbols presentFigure 8 Motor filter
natural_image
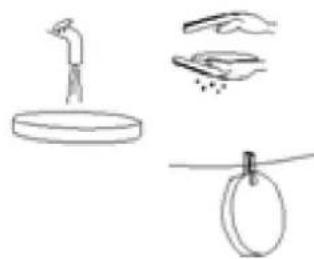
Simple line drawings of four abstract objects: a stick figure, a circular object with a handle, a droplet with liquid, and a hanging ring (no text or symbols)Figure 9 Cleaning the filter
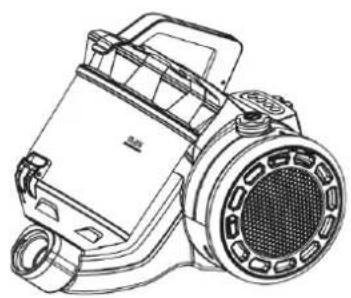
Assembling the appliance
natural_image
Line drawing of a mechanical device with no visible text or symbols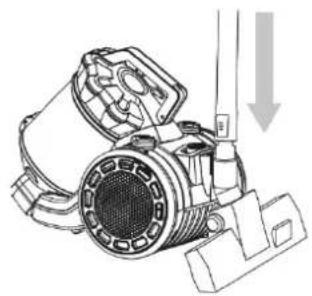
natural_image
Technical line drawing of a mechanical component with no visible text or symbolsFigure 11 Attaching accessories
natural_image
Technical line drawing of a mechanical device with directional arrows indicating motion or force (no text or symbols)Hepa-Filter change
natural_image
Technical line drawing of a mechanical device with a circular component and a downward arrow indicating motion (no text or symbols present)Figure 12 Hepa-Filter
natural_image
Illustration of a hand holding a cylindrical tool with a pointed tip, showing motion (no text or symbols)Figure 5 Appliance installation
9 CE mark
At the time of its placement on the market, this product conforms to the requirements laid down in the Council directives on the approximation of the laws of the Member States relating to electromagnetic compatibility, Directive 2014/30/EU, of electrical equipment designed for use within certain voltage limits (2014/35/EU). This product is identified with the CE mark and is supplied with a declaration of conformity for examination by the market supervisory authority.
*Subject to modifications*
10 Disposal of old appliances

This product is marked in accordance with the European Waste Electrical and Electronic Equipment (WEEE) Directive 2012/19/EU. This directive lays down the regulations for proper disposal of the product.
Environmentally friendly disposal prevents possible negative impacts on health that could be caused by improper disposal. The symbol on the product or packaging indicates that this product must not be disposed of with the normal domestic waste. The user must return the product to a collection point for the recycling of electrical and electronic waste.
The prevailing local regulations must be observed for disposal. For further information, please contact your local authority.
11 Safety instructions
Explanation of the safety instructions
All safety instructions in this manual are marked with a warning symbol. They warn of potential hazards in good time. It is essential to read and follow these instructions.
Explanation of the safety instructions The following symbols and warnings are used in these operating instructions, on the vacuum cleaner or on the packaging.

WARNING
Indicates a hazardous situation which may result in serious injury or even death!

ATTENTION
Indicates a hazardous situation which may result in minor or moderate injury.
IMPORTANT
Describes a situation that can cause significant damage to property or the environment.
General safety instructions
- Avoid injuries and damage by transporting the appliance only in its packaging.
- Assemble and operate the appliance only in accordance with the instructions in this manual.

ELECTRIC
SHOCK DANGER!
- Hold the plug firmly when disconnecting the mains power cable. Do not pull the mains power cable.
- Remove the plug before starting cleaning or maintenance work.
- A damaged mains power cable must be replaced immediately by the supplier, dealer or After Sales Service. Do not use the appliance if the mains power cable or plug is damaged.
- Do not make any changes to the appliance other than the cleaning and maintenance work specified in these operating instructions.
- Always unplug the appliance before leaving it unattended and before installing, removing or cleaning any accessories (nozzles, brushes, hoses, filters, etc.) or the appliance itself.
Special safety instructions
EN
Safety instructions for children and persons with limited capabilities.

WARNING
After removing the packaging, check that all appliance parts and accessories have been delivered. If in doubt, do not use the appliance and contact a qualified technician. Keep the packaging materials (plastic bags, polystyrene, metal clips, etc.) out of the reach of children as they pose potential sources of danger and must be disposed of in accordance with the applicable regulations.

WARNING
The appliance must be stored out of the reach of pets, children or persons who are unable to use it. Do not leave the appliance unattended when it is connected to a power source.
• Take the necessary precautions to prevent children from playing with the appliance.
- The appliance may be used by children over the age of eight and by persons whose physical, mental or emotional abilities are limited or impaired or who lack the necessary experience or knowledge only if they are supervised after they have received instructions on the safe use of the appliance and understand the associated hazards.
• Children must not be allowed to play with the appliance.
- Cleaning and maintenance to be carried out by the user must not be carried out by children unless they are supervised.
- This appliance may be used by children over eight years of age and by persons with physical, sensory or mental impairments or who lack the necessary experience or knowledge if they are properly supervised or have received instructions on the safe use of the appliance and understand the associated hazards. Children must not be allowed to play with the appliance. Cleaning and maintenance should not be carried out by children unless they are older than 8 years and are supervised.
12 Intended use
The appliance is intended exclusively for vacuuming indoors. It is intended exclusively for use in private households and is not suitable for commercial use. Do not use the floor vacuum cleaner to pick up water.
Use the floor vacuum cleaner only as described in these operating instructions. Any other form of use does not constitute an intended use and can result in material damage or even personal injury.
The manufacturer or dealer accepts no liability for damage or injury resulting from improper use or use for other than the intended purpose.
Electrical connection
Adapter 25 V 4400mAh Charging time: 4-5 hours
13 Using for the first time
Before using the appliance for the first time, charge it using the adapter supplied for approx. 4-5 hours.
- Do not open the housing
- Keep the floor vacuum cleaner away from naked flames and hot surfaces.
- Switch off the vacuum cleaner when it is not in use, when changing accessories, cleaning the vacuum cleaner or if a fault occurs.

WARNING
Danger for children and persons with reduced physical, sensory or mental abilities (e.g. partially disabled persons, elderly persons with reduced physical and mental abilities) or lack of experience and knowledge (e.g. older children).

ATTENTION
Risk of injury! Improper use of the vacuum cleaner can lead to injuries.
- Do not vacuum people or animals with the vacuum cleaner.
- Keep suction nozzles away from the head or hair when vacuuming.
- Risk of crushing: The vacuum cleaner contains moving parts. Pay attention to your fingers and hands during assembly, daily use and cleaning.
NOTE
Risk of damage!
Improper use of the vacuum cleaner can result in damage to the appliance.
- Place the vacuum cleaner on an easily accessible, level, dry, heat-resistant and sufficiently stable work surface. Do not place the vacuum cleaner on the edge of the work surface.
- Do not expose the vacuum cleaner to high temperatures (radiators, etc.) or the weather (rain, etc.).
- Do not use the vacuum cleaner if the plastic components are cracked, split or deformed.
- Do not use the vacuum cleaner to pick up burning or glowing objects such as cigarettes or apparently extinguished ashes.
- Do not use the vacuum cleaner to pick up liquids or damp dirt. Allow damp cleaned or shampooed carpets to dry before vacuuming.
- Do not use the vacuum cleaner to pick up toner dust from printers or photocopiers. The filter system cannot completely filter out the toner dust. The toner dust could possibly get back into the room via the fan.
- Do not use the vacuum cleaner to pick up easily flammable or explosive substances or gases.
- Do not use the vacuum cleaner to pick up sharp, heavy or hard objects. The vacuum cleaner would be blocked.
- Do not sit or stand on the vacuum cleaner.
Assembling the vacuum cleaner
NOTE
There are four attachments to choose from, depending on what you want to vacuum:
- For a dusty carpet or hard floor, use the hard floor nozzle.
- We recommend the crevice nozzle for corners that are difficult to reach.

WARNING
Do not use electrical appliances within the food storage compartments of the appliance unless they are of the type recommended by the manufacturer.
Nozzle attachments
(Crevice nozzle and hard floor nozzle)
- The nozzle attachments can be fitted both directly to the connection on the appliance and to the already connected suction tube.
- To remove the nozzle attachments, pull them off with a slight twist.
Hard floor nozzle
- The hard floor nozzle is equipped with rollers for easier guidance.
- You can clean smooth surfaces and carpets using the hard floor nozzle.
Crevice nozzle
The crevice nozzle can be used to clean in corners and slits.
Brush nozzle
The brush nozzle is particularly suitable for vacuuming upholstery, curtains or books.
Operating instructions
NOTE
Use the appliance only when all the device if all parts are complete and correctly fitted.
If in doubt, have it checked and assembled by specialist personnel. Before every use, ensure that the appliance is in good condition. If faults are discovered, they must be remedied by the manufacturer, the After Sales Service centre or by someone with similar qualifications to avoid any risks.
EN
14 Operation
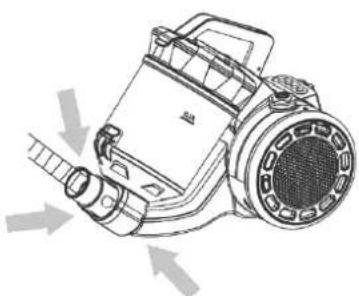
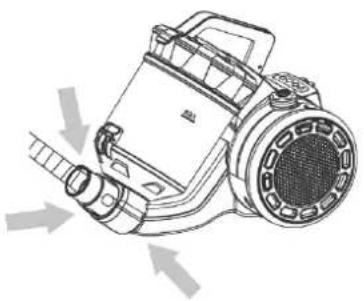
Fitting the suction tube, see figure
- Push the suction tube with the thicker end onto the connection on the appliance.
- Connect the other end of the suction tube to the nozzle.
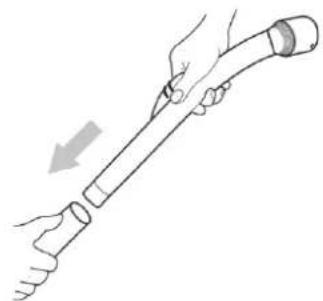
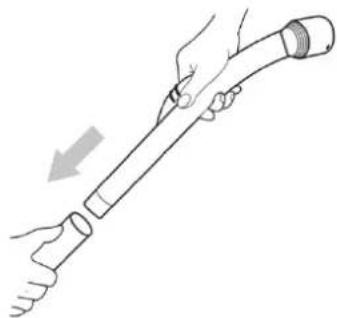
To disconnect the suction pipe:
- Press the release button (top and bottom 6/8)
- Pull out the suction tube.
Note
- Make sure that the battery is charged before using the appliance.
- The appliance does not function efficiently with a weak battery.
Charging the appliance
- Charge the appliance with the supplied adapter (16).
- The 4 LEDs blinking blue during charging.
The 4 LEDs light up blue as soon as the appliance is charged.
Charging time approx. 4-5 hours. If the LEDs light up red, the suction power is weak and the battery is almost empty. Recharge the appliance.
Use of the appliance
- Switch the appliance on at the ON/OFF (4) button.
- Adjust the suction power from normal to strong with knob (2).
Note
- Make sure that the battery is charged before using the appliance.
- The appliance does not function efficiently with a weak battery.
Emptying the dust container
- Disconnect the dust container from the appliance.
- Hold the dust container over a waste bin.
- Empty the contents of the dust container into the waste bin. To do so, push the opener of the dust container downwards to open the base plate.
- Close the base plate again. The lock on the dust container must
engage audibly.
15 Cleaning and service
The filter system
Your appliance has 2 filters (motor filter and air filter).
- The conventional dust bag system has been replaced with a transparent dust container
- in which coarse dirt and very small suspended particles are removed from the intaken air
- by the high flow velocity.
- The purchase of dust bags is therefore no longer necessary.
- Clean the filters at regular intervals.
•
ATTENTION
- Never wash the filters in the washing machine.
- Do not use a hair dryer for drying.
- Put the appliance into operation again only when all the
- filters are completely dry and correctly installed.
Cleaning the motor
(See Figure 8/9 12)
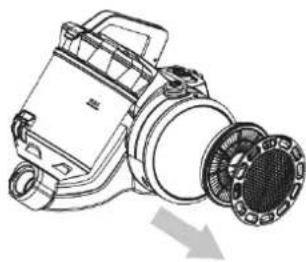
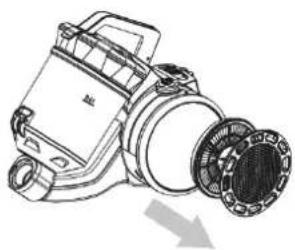
- Press the release button and at the same time pull out the container using the handle (1).
- Tip the dust out of the container by opening the cover with the release button.
- Remove the central plastic filter from the bracket by turning it in anti-clockwise direction. If you wash the plastic filter, allow it to dry thoroughly before installing it again.
- Remove the motor filter and wash it by hand with cold water.
- Allow it to dry completely at room temperature.
- Install the motor filter again.

ATTENTION
- Improper use of the vacuum cleaner can lead to injuries.
- Always switch off the vacuum cleaner before cleaning or maintenance.
- For complete cleaning of the dust container, it has to be completely dismantled after every use.
IMPORTANT
- Do not immerse the motor unit in water or any other liquid (clean only with a dry cloth).
- Clean the brushes and nozzles at regular intervals. Use water and a sponge with a little liquid
detergent, then rinse thoroughly and dry. Do not use steel wool or abrasive products.
- If the appliance is no longer to be used, take it out of service.
16 Troubleshooting
| Fault | Possible cause | Remedy |
| The vacuum cleaner does not work. | The appliance is not switched on. | Switch on the appliance. |
| The electric plug is defective. | Contact a qualified technician. | |
| If the vacuum cleaner has no suction power. | An accessory: Hose or tube, nozzles or brushes are blocked. | Remove whatever is causing the lockage. |
| If the vacuum cleaner does not function as it should or if there are unusual noises and/or whistling: | An accessory: Hose or tube, nozzles or brushes are blocked. | Remove whatever is causing the blockage. |
| The dust container is full. | Empty and clean it. | |
| The container cover is not positioned correctly. | Close the cover correctly. | |
| The dust container is not positioned correctly. | Position it correctly. | |
| The manual air flow regulator is open. | Close it. | |
| Low suction power. | The dust container is full.The filters are clogged. | Empty the dust container.Clean the filters as described under "Cleaning and care". |
If in doubt, consult a qualified expert.
EN
17 General warranty terms
The following terms describing the preconditions for and scope of our warranty, do not infringe the warranty rights of the ultimate buyer.
Our warranty for this appliance is granted under the following terms:
As buyer of a Exquisit appliance, you have a manufacturer's warranty for a period of 2 years from the date of purchase.
During this warranty period, you can make your warranty claims directly on the manufacturer's Service platform at
www.ggv-service.de.
If an additional warranty is concluded between you and your dealer, all claims against the manufacturer will become void after the end of the 24-month manufacturer's warranty. In this case, please contact your dealer directly.
Warranty period
The warranty period is 24 months from the date of purchase (proof of purchase must be presented). During the first 6 months, defects in the appliance are remedied free of charge on condition that the appliance is accessible for repairs without any great effort. During the following 18 months, the buyer is obliged to prove that the defect already existed at the time of delivery.
In the case of commercial use (e.g. in hotels, canteens) or joint use by several households, the warranty period is 12 months from the date of purchase (proof of purchase must be presented).
During the first 6 months, defects in the appliance are remedied free of charge on condition that the appliance is accessible for repairs without any great effort. During the following 6 months, the buyer is obliged to prove that the defect already existed at the time of delivery.
The claim under warranty does not prolong the warranty period for either the appliance or for newly installed parts.
Scope of the defect remedy
Within the periods indicated, we will remedy all defects in the appliance that are demonstrably attributable to poor workmanship or material flaws. Replaced parts become our property.
The warranty does not cover:
Normal wear, deliberate or negligent damage, damage resulting from a failure to observe the operating instructions, improper installation and set-up or connection to the wrong mains power supply, damage caused by chemical or electrothermal effects or other abnormal environmental conditions, glass, paintwork or enamel damage and possible differences in colour as well as defective bulbs. Defects in the appliance resulting from transport damage are also not covered. We are also not obliged to perform defect remedies, if – without our express written authorisation – work is carried out on the Exquisit appliance by unauthorised persons or third-party parts have been used.
This limitation shall not apply to faultless work carried out by a qualified person using our original parts to adapt the appliance to the technical safety regulations of another EU member state.
Scope
Our warranty applies to appliances purchased in an EU member state and operated in the Federal Republic of Germany or Austria.
For appliances purchased in one EU member state and moved to another EU member state, defect remedies will be carried out within the framework of the national warranty terms. The obligation to provide services under warranty shall apply only as long as the appliance satisfies the technical regulation of the country in which the warranty claim is made.
For repairs outside the warranty period:
If an appliance is repaired, the repair invoices are payable immediately without deduction.
If an appliance is inspected or a started repair is not completed, flat-rate travelling expenses and labour costs will be invoiced. Advice from our After Sales Service centre is free of charge
CONTENU DE LA LIVRAISON / PIÈCES DE L'APPAREIL
natural_image
Technical line drawing of a mechanical component with no visible text or symbolsnatural_image
Technical line drawing of a mechanical component with no visible text or symbolsIllustration 5 Brosse de sol
natural_image
Illustration of a hand holding a finger with a finger pointing to a circular object, no text or symbols presentnatural_image
Line drawing of two portable kitchen units with heat sinks and lid, showing internal compartments and exterior doors (no text or symbols)natural_image
Simple line drawings of a person standing on a circular platform, with three abstract shapes and one hanging from a ring (no text or symbols)natural_image
Technical line drawing of a mechanical device with no visible text or symbols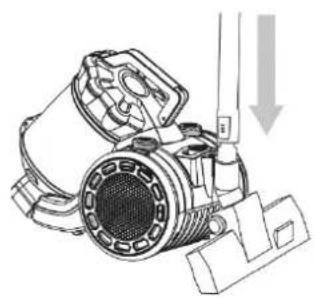
natural_image
Technical line drawing of a mechanical device with no visible text or symbolsIllustration 11 Fixer les accessoires
Hepa-Filtr
natural_image
Technical line drawing of a mechanical device with directional arrows indicating motion (no text or symbols)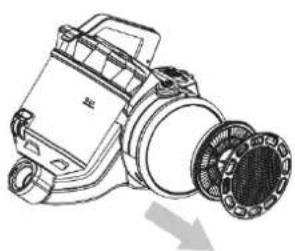
natural_image
Technical line drawing of a mechanical device with a circular component and a curved arrow indicating direction (no text or symbols)Illustration 12 Hepa-Filtre
natural_image
Line drawing of a hand holding a cylindrical object with a pointed tip, showing motion (no text or symbols)natural_image
Technical line drawing of a mechanical component with no visible text or symbolsnatural_image
Technical line drawing of a mechanical component with no visible text or symbols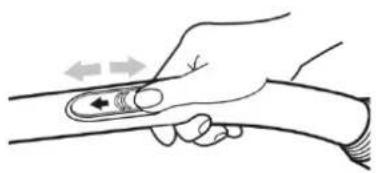
natural_image
Illustration of a hand holding a finger with two arrows indicating movement or force (no text or symbols)natural_image
Line drawing of a mechanical device with no visible text or symbols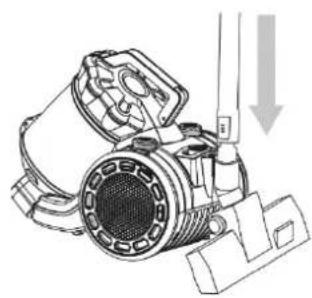
natural_image
Technical line drawing of a mechanical device with no visible text or symbolsnatural_image
Technical line drawing of a mechanical device with directional arrows indicating motion (no text or symbols)Hepafilter
natural_image
Technical line drawing of a mechanical device with no visible text or symbolsnatural_image
Illustration of a hand holding a cylindrical tool with a pointed tip, showing motion (no text or symbols)GGV HANDELGES. MBH & CO. KG
AUGUST-THYSSEN-STR.8
D-41564 KAARST
DUITSLAND
BP6401si_5010149_IM_Mulit_E1-0_2019-10.docx
www.exquisit.de


- DE
- SCOPE OF SUPPLY / APPLIANCE PARTS
- Description of the appliance
- EN
- Motor filter
- Assembling the appliance
- Hepa-Filter change
- CE mark
- Disposal of old appliances
- Safety instructions
- Explanation of the safety instructions
- WARNING
- ATTENTION
- IMPORTANT
- General safety instructions
- ELECTRIC
- SHOCK DANGER!
- Intended use
- Electrical connection
- Using for the first time
- NOTE
- Risk of damage!
- Assembling the vacuum cleaner
- Nozzle attachments
- Hard floor nozzle
- Crevice nozzle
- Brush nozzle
- Operating instructions
- Operation
- Fitting the suction tube, see figure
- Charging the appliance
- Use of the appliance
- Emptying the dust container
- Cleaning and service
- The filter system
- Cleaning the motor
- (See Figure 8/9 12)
- General warranty terms
- Warranty period
- The warranty does not cover:
- Scope
- CONTENU DE LA LIVRAISON / PIÈCES DE L'APPAREIL
- Hepa-Filtr
- Hepafilter
Brand : Exquisit
Model : BP 6401 si
Category : Vacuum Cleaner