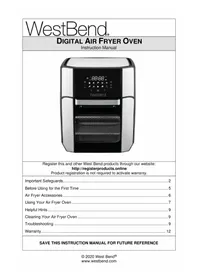
AFWB26BK13 - Deep fryer WestBend - Free user manual and instructions
Find the device manual for free AFWB26BK13 WestBend in PDF.


User questions about AFWB26BK13 WestBend
0 question about this device. Answer the ones you know or ask your own.
Ask a new question about this device
Download the instructions for your Deep fryer in PDF format for free! Find your manual AFWB26BK13 - WestBend and take your electronic device back in hand. On this page are published all the documents necessary for the use of your device. AFWB26BK13 by WestBend.
USER MANUAL AFWB26BK13 WestBend
natural_image
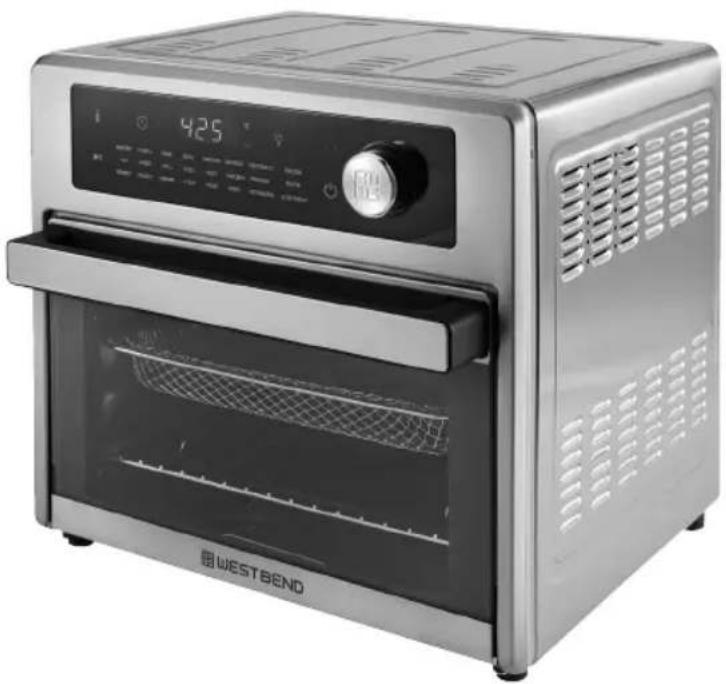
Exterior view of a modern kitchen appliance with digital display and control panel (no visible text or symbols)Register this and other West Bend products through our website: http://registerproducts.online
Product registration is not required to activate warranty.
Important Safeguards 2-3
Grounded Plug....3
Product Diagram....4
Before Use....4
Preset Guide....5
Using Your Air Fryer Oven 6-9
Cleaning Your Air Fryer Oven 9
Warranty ....10
SAVE THIS INSTRUCTION MANUAL FOR FUTURE REFERENCE
IMPORTANT SAFEGUARDS
When using electrical appliances, basic safety precautions should always be followed, including the following:
- Read all instructions, product labels and warnings before using your Precision Air Fry Countertop Oven.
- This appliance generates heat during use. Do not touch hot surfaces. Use handles or knobs. Always protect your hands with non-slip oven mitts or similar.
- To protect against electric shock, do not place or immerse cord, plugs, or appliance in water or other liquid.
- This appliance is not to be used by children or by persons with reduced physical, sensory or mental capabilities.
- Close supervision is necessary when any appliance is used near children. Children should not play with the appliance.
- Unplug from outlet when not in use, before putting on or taking off parts and before cleaning. Allow to cool before putting on or taking off parts, and before cleaning. To disconnect, turn any control to OFF, then unplug power cord from outlet. Do not disconnect by pulling on cord. Always grasp the plug and pull to disconnect.
- Do not operate any appliance with a damaged cord or plug or after the appliance malfunctions, or has been damaged in any manner. Do not attempt to replace or splice a damaged cord. Return appliance to the manufacturer (see warranty) for examination, repair or adjustment.
- The use of accessory attachments not recommended by the appliance manufacturer may cause injuries.
- Do not use outdoors or for commercial purposes.
- Do not let cord hang over edge of table or counter or touch hot surfaces.
- Do not place on or near wet surfaces, or heat sources such as a hot gas or electric burner, or in a heated oven.
- Extreme caution must be used when moving an appliance or removing a pan, containing hot oil or other hot liquids. Always protect your hands with non-slip oven mitts or similar.
- Do not use appliance for other than intended use. Misuse can cause injuries. Intended for household countertop use only. Keep 6 inches (152 mm) clear from the wall and on all sides. Always use appliance on a dry, stable, level surface.
- Oversize foods or metal utensils must not be inserted in the countertop oven as they may create a fire or risk of electric shock.
- A fire may occur if the countertop oven is covered, touching or near flammable materials, including curtains, draperies, towels, walls, and the like, when in operation. Do not store any item on top of the appliance when in operation.
- Do not clean with metal scouring pads. Pieces can break off the pad and touch electrical parts, creating a risk of electric shock.
- Extreme caution should be exercised when using containers constructed of materials other than metal or glass.
- Do not store any materials, other than manufacturers recommended accessories, in this oven when not in use.
- Do not place any of the following materials in the oven: paper, cardboard, plastic, or any materials that may catch fire or melt.
- Do not cover crumb tray or any part of the oven with metal foil. This will cause overheating of the oven.
- Empty the crumb tray after each use.
- The glass door is made of tempered glass. Always inspect the glass door for chips, cracks or any other damage. Do not use the countertop oven if the glass door is damaged, as the glass
may shatter during use.
- If your toaster oven is equipped with a STAY-ON feature, toaster oven will stay ON if knob is turned counterclockwise past zero. Exercise caution when using this feature and do not operate unattended for long periods.
- Do not use with a programmer, timer, wireless plug adapter or outlet that allows control remotely, or connect to a circuit that is regularly switched on and off by the utility.
SAVE THESE INSTRUCTIONS HOUSEHOLD USE ONLY
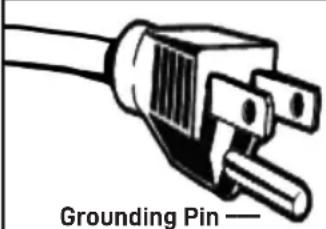
GROUNDED PLUG
North American models with grounded plugs:
text_image
Grounding Pin —GROUNDED PLUG
To reduce the risk of electric shock, this appliance has a grounding type cord and plug that has a third grounding pin (3-prong plug). The plug must be plugged into an outlet that is properly installed and grounded in accordance with all local codes and ordinances. If the plug does not fit into the outlet or if in doubt as
to whether the outlet is properly grounded, contact a qualified electrician to install the proper outlet. Do not alter the plug in any way.
POWER CORD INSTRUCTIONS:
A short power-supply cord or detachable power-supply cord is provided to reduce risks resulting from becoming entangled in or tripping over a longer cord. Longer detachable power-supply cords or extension cords are available and may be used if care is exercised in their use. If a long detachable power-supply cord or extension cord is used:
a. The marked electrical rating of the cord set or extension cord should be at least as great as the electrical rating of the appliance;
b. The cord should be arranged so that it will not drape over the countertop or tabletop where it can be pulled on by children or tripped over unintentionally; and
c. If the appliance is of the grounded type, the cord set or extension cord should be a grounding type 3-wire cord.
Do not pull, twist or otherwise abuse the power cord.
NOTICES
- Some countertop and table surfaces are not designed to withstand the prolonged heat generated by certain appliances. Do not set the heated unit on a finished wood table. We recommend placing a hot pad or trivet under your air fryer oven to prevent possible damage to the surface.
- During initial use of this appliance, some slight smoke and/or odor may be detected. This is normal with many heating appliances and will not recur after a few uses.
Congratulations on your purchase of a West Bend Air Fryer Oven!
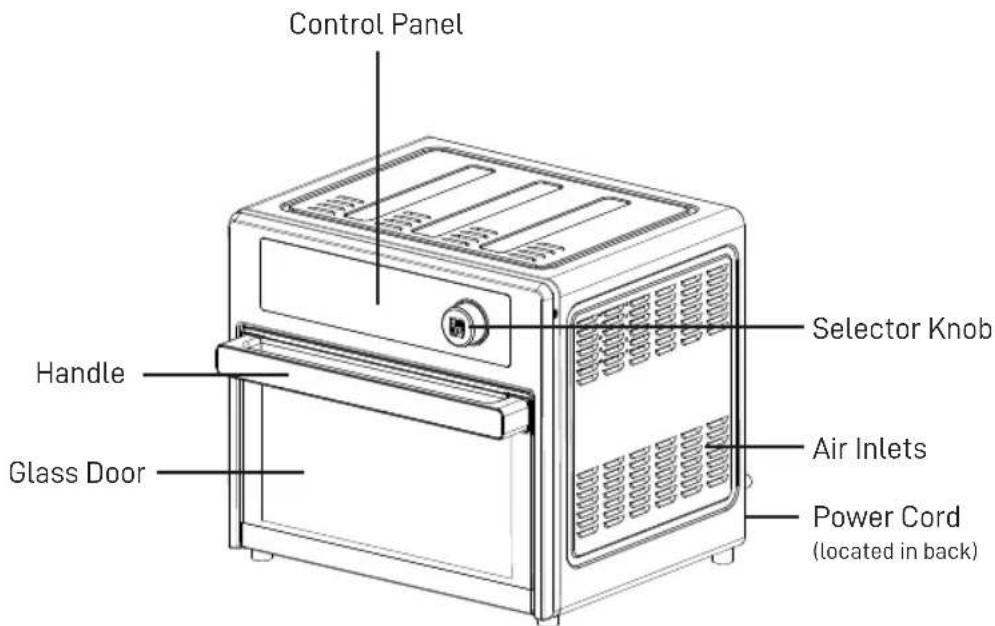
PRODUCT DIAGRAM
text_image
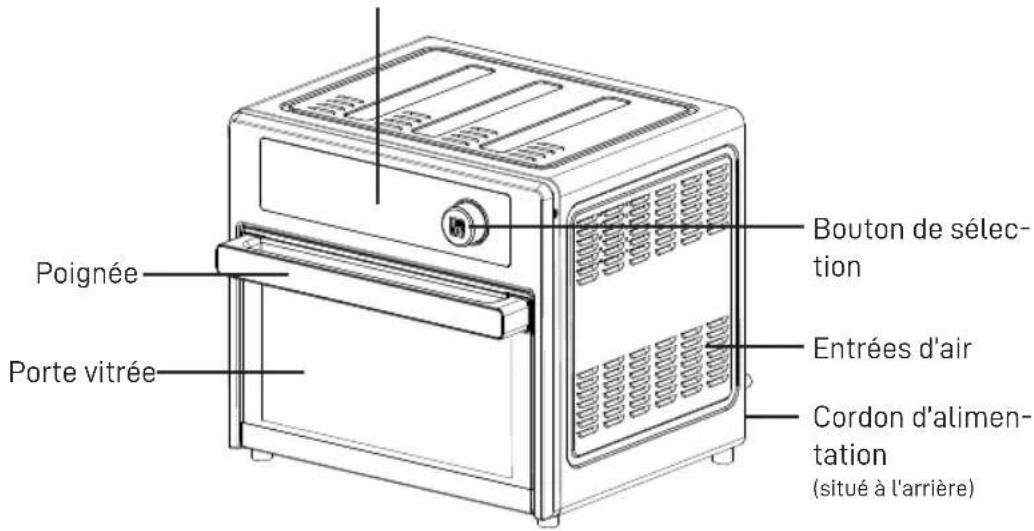
Control Panel Handle Glass Door Selector Knob Air Inlets Power Cord (located in back)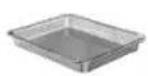
Air Fry Basket
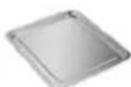
Bake Pan
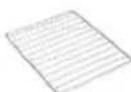
Wire
Rack
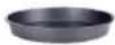
Pizza
Pan

Rotisserie
Spit
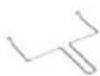
Removal Handle
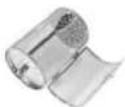
Rotating
Drum
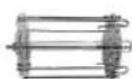
Skewer Rack
Drip Tray
BEFORE USE
Before using your new appliance, follow these instructions:
- Remove all packaging material.
- Remove any stickers or labels from the appliance – other than the rating label.
- Wash all accessories in hot soapy water with a non-abrasive sponge.
- Rinse and dry thoroughly.
- Place the appliance on a stable, horizontal and level surface that is also heat resistant.
- Place the drip tray and any other accessory needed back in the air fryer oven.
- Plug the power cord into wall outlet. The appliance will beep, the power light will illuminate, and the oven will go on standby mode.
Note: When using the air fryer oven for the first time, a little smoke or odor may be emitted. If this happens, ensure there is sufficient ventilation around the appliance.
-
Press the power button ⏻ to turn on the oven.
-
Turn the function selector knob to Bake. Press the Start button ▶II to run a baking cycle in a well-ventilated area for 15-30 minutes to remove the odor.
PRESET GUIDE
text_image
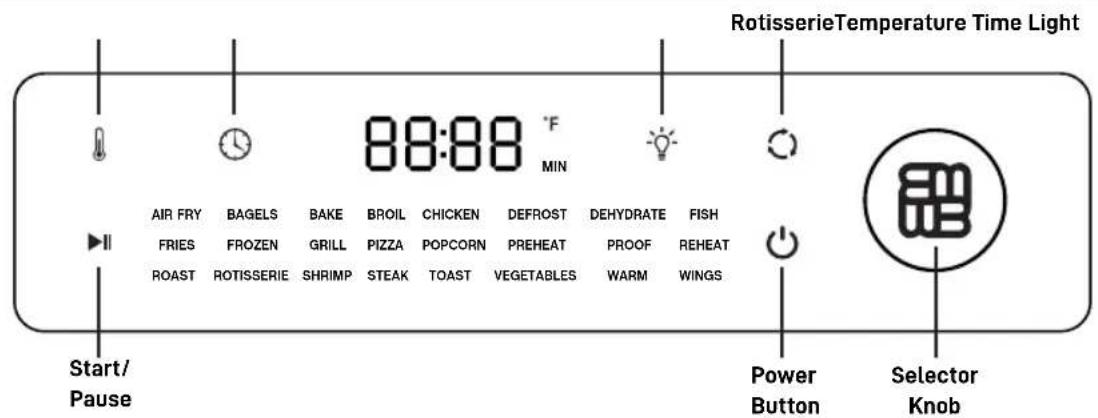
RotisserieTemperature Time Light 88:88 °F MIN AIR FRY BAGELS BAKE BROIL CHICKEN DEFROST DEHYDRATE FISH FRIES FROZEN GRILL PIZZA POPCORN PREHEAT PROOF REHEAT ROAST ROTISSERIE SHRIMP STEAK TOAST VEGETABLES WARM WINGS Start/ Pause Power Button Selector Knob| PRESETS | DEFAULT TEMPERATURE (°F) | DEFAULT TIME (MIN) |
| Air fry | 425 20 | |
| Bagel | 320 25 | |
| Bake | 400 25 | |
| Broil | 450 15 | |
| Chicken | 360 40 | |
| Defrost | 125 40 | |
| Dehydrate | 85 | 2 |
| Fish | 375 10 | |
| Fries | 450 15 | |
| Frozen | 425 20 | |
| Grill | 450 15 | |
| Pizza | 400 20 | |
| Popcorn | 450 15 | |
| Preheat | 425 5 | |
| Proof | 100 60 | |
| Reheat | 180 15 | |
| Roast | 425 35 | |
| Rotisserie | 360 40 | |
| Shrimp | 375 10 | |
| Steak | 450 13 | |
| Toast | 400 7 | |
| Vegetables | 400 10 | |
| Warm | 160 30 | |
| Wings | 450 15 |
USING YOUR AIR FRYER
We recommend preheating the oven before cooking.
To preheat:
- Turn the knob to select the Preheat function. The default time is 5 minutes.
- Press Start/Pause button ▶II to begin preheating.
- Once preheating is complete, the oven will beep three times before turning off.
Note: We recommend setting desired cooking function, time and temperature before oven cools off.
Bagel and Toast
- Once plugged, the oven will default to the Air Fry function, time, and temperature.
Note: The default time and temperature can be adjusted. - Turn the knob to select the Bagel or Toast function. If using the default temperature and time to fry, simply press the Pause/Start button ▶II to start your frying. Press the knob, the time displayed will flash allowing for you to adjust the time if needed.
- To adjust the time, turn the knob clockwise to increase and counterclockwise to decrease the time. Once the desired cooking time has been set, press the knob, the temperature displayed will flash allowing for you to adjust the temperature if needed.
- To adjust the temperature, turn the knob clockwise to increase and counterclockwise to decrease the temperature. Once the desired cooking temperature has been set, press the knob.
- Place the food on the wire rack.
- Open the oven door, and slide in the wire rack in the middle rack position, then close the oven door.
- To begin cooking, press Start/Pause button ▶II .
- Once cooking is complete, the oven will beep three times.
- To add additional cooking time, you can either restart to cook more time after cooking is complete, or during cooking, press Start/Pause button ▶II, use the function knob to add more cooking time.
Air Fry, Bake, Chicken, Fish, Fries, Pizza, Roast, Reheat, Shrimp, Steak, Vegetables, Warm, and Wings
- Once plugged, the oven will default to the Air Fry function, time, and temperature.
Note: The default time and temperature can be adjusted. - Turn the knob to select your desired function. If using the default temperature and time to air fry, simply press the Pause/Start button ▶II to start your air frying. Press the knob, the time displayed will flash allowing for you to adjust the time if needed.
- To adjust the temperature, press temperature icon 🔍, the temperature displayed will flash allowing you time to set the desired temperature. Turn the knob clockwise to increase and counterclockwise to decrease the temperature.
- To adjust the time, press the time icon ⏱ . The time displayed will flash allowing for you to adjust the time if needed. Turn the knob clockwise to increase and counterclockwise to decrease the time.
- Place the food on the air fry basket in a single layer.
- Open the oven door, and slide in the air fry basket in the middle rack position, then close the oven door.
Note: We recommend placing the drip tray on the bottom rack position to collect excess grease.
- To begin cooking, press Start/Pause button ▶II.
- Once cooking is complete, the oven will beep three times.
- To add additional cooking time, you can either restart to cook more time after cooking is complete, or during cooking, press Start/Pause button ▶II, use the function knob to add more cooking time.
Broil
-
Turn the knob to select the Broil function. If you use the default time to broil, just press the Pause/Start button to start your broiling. Press knob once and the time displayed will flash allowing you to adjust the time if needed.
-
To adjust the time, press the time icon ⏻. The time displayed will flash allowing for you to adjust the time if needed. Turn the knob clockwise to increase and counterclockwise to decrease the time.
-
The temperature is automatically set at 450°F.
-
Place the food on the air fry basket or baking pan in a single layer.
-
Open the oven door, and slide in the air fry basket or baking pan in the top rack position, then close the oven door.
Note: If using the Air fry basket, we recommend placing the drip tray on the bottom rack position to collect excess grease. Place rack or pan at higher position for better browning results on the top surface
-
To begin cooking, press Start/Pause button ▶II.
-
Once cooking is complete, the air fryer oven will beep three times.
-
To add additional cooking time during simply press the time icon ⏱, then turn the function knob to add more cooking time.
-
To change the temperature during cooking, press the temperature icon ⏻ then turn the function knob to the desired temperature.
Defrost
-
Turn the knob to select the Defrost function. The time displayed will flash allowing for you to adjust the time if needed.
-
To adjust the temperature, press temperature icon ⚙, the temperature displayed will flash allowing you time to set the desired temp. Turn the knob clockwise to increase and counterclockwise to decrease the temperature.
-
To adjust the time, press the time icon. The time displayed will flash allowing for you to adjust the time if needed. Turn the knob clockwise to increase and counterclockwise to decrease the time.
-
Place the food on the air fry basket or baking pan in a single layer.
-
Open the oven door, and slide in the air fry basket or baking pan in the top rack position, then close the oven door.
-
To begin defrosting, press Start/Pause button ▶II.
-
Once defrost is complete, the oven will beep three times.
-
To add additional defrost time, you can either restart to defrost more time after defrosting is complete, or during defrost, press Start/Pause button ▶II, use the function knob to add more defrosting time.
Dehydrate
Your oven can also be used to dehydrate food.
-
Turn the knob to select the Dehydrate function. Press the knob once. The time displayed will flash allowing for you to adjust the time if needed.
-
To adjust the temperature, press temperature icon ⚙, the temperature displayed will flash allowing you time to set the desired temp. Turn the knob clockwise to increase and counterclockwise to decrease the temperature.
-
To adjust the time, press the time icon. The time displayed will flash allowing for you to adjust the time if needed. Turn the knob clockwise to increase and counterclockwise to decrease the time.
-
Place the food on the air fry basket in a single layer.
-
Open the oven door, and slide in the air fry basket in the middle rack position, then close the oven door.
-
To begin drying process, press Start/Pause button▶II.
-
Once drying is complete, the oven will beep three times
-
To add additional dehydrating time, you can either restart to dehydrate more time after dehydrating is complete, or during dehydrating, press Start/Pause button ▶II, use the function knob to add more dehydrating time.
Popcorn
You can also make pop corn in your air fryer oven.
-
Turn the knob to select the Popcorn function. The time displayed will flash allowing for you to adjust the time if needed.
-
To adjust the temperature, press temperature icon 🔊, the temperature displayed will flash allowing you time to set the desired temp. Turn the knob clockwise to increase and counterclockwise to decrease the temperature.
-
To adjust the time, press the time icon ⏱. The time displayed will flash allowing for you to adjust the time if needed. Turn the knob clockwise to increase and counterclockwise to decrease the time.
-
Place the kernels in the Rotating Drum.
-
Open the oven door, and slide place the rotating drum inside the oven using the removal handle.
-
To begin, press Start/Pause button ▶II.
-
Once popping is complete, the oven will beep three times.
Rotisserie
-
Turn the knob to select the Rotisserie function. The time displayed will flash allowing for you to adjust the time if needed.
-
To adjust the temperature, press temperature icon ⚙, the temperature displayed will flash allowing you time to set the desired temp. Turn the knob clockwise to increase and counterclockwise to decrease the temperature.
-
To adjust the time, press the time icon ⏻The time displayed will flash allowing for you to adjust the time if needed. Turn the knob clockwise to increase and counterclockwise to decrease the time.
-
Open the oven door, and slide in the baking pan in the lower rack position. We recommend placing the drip tray on the bottom rack position to collect excess grease.
-
Tie meat and large pieces of meat tightly with food safe string to prevent the meat from hitting the baking pan.
-
Insert rotisserie rod into center of meat. Place rotisserie forks on rod with forks inserted into bottom side of meat. Center meat lengthwise on rod. Tighten screws on rotisserie forks then install the spit onto the rotary shaft in the oven cavity by using the Removal Handle. Close the oven door.
Note: You can use the Skewer Rack, Rotating Drum, and Rotisserie Spit with the Rotisserie function.
- To begin cooking, press Start/Pause button ▶II.
Notes: Your food will begin to turn. To stop turning, simply press the Rotisserie function.
-
Once cooking is complete, the oven will beep three times.
-
To add additional cooking time, you can either restart to cook more time after cooking is complete, or during cooking, press Start/Pause button▶, use the function knob to add more cooking time.
-
Remove the Rotisserie Spit with the Removal Handle by placing under the rotisserie shaft and then gently lift.
Rotating Drum
Great for fries, roasted nuts, popcorn, and other snacks.
-
Use one of the included screws to secure the Rotating Drum to the rotisserie stick at the indentation point on the rotisserie stick.
-
Twist the screw to secure the Rotating Drum to the rotisserie stick.
Note:
- The ingredients inside may increase in size during the cooking process, ensure that the heated volume of food will not touch the inside walls of the air fryer.
- The air fryer oven will operate once the door is fully closed.
Skewer Rack
- Place the skewer rack discs onto the shaft, ensuring the flat faces of the discs face inwards.
- Thread food onto the each skewers.
- Place the skewers onto the skewer rack by slotting the sharp end of the skewer into the narrow slot and the hooked end of the skewer into the shaped slots. Squeeze and tilt the hook downwards to lock it into place.
- Open the door and place the rack into the oven. Insert the shaft end into the holder on the each side of the oven walls and push it into the holder as far as it will go.
- Make sure the skewer rack is securely inserted before begin cooking.
6.Once cooking is complete, the oven will beep three times.
CAUTION: Wear oven gloves or heat-proof silicone oven mitts to remove the rack and the grilled items. - To remove the rack, squeeze and tilt the hook upwards from the rack.
Proof
Proofing is a method used in baking bread. During this time, dough undergoes fermentation and it takes on its final rise before being baked.
- Using the Proof pre-set option, the warm temperature can increase the activity of the yeast, resulting in faster dough rise.
- The low temperature of 80^ is ideal to achieve this. The time can be adjusted between 1 minute - 90 minutes.
- After proofing, the bread can be baked.
CLEANING YOUR AIR FRYER
- Unplug the unit from the wall outlet
- Let the unit cool down.
- Remove the all accessories, immerse them in hot soapy water and clean them thoroughly. Do not use abrasive cleaning tools to wash the baking pan and air fry baskets to prevent the non-stick coating and electroplating layer on their surface from deteriorating.
- Clean the inner cavity of the oven regularly. Gently wipe off the oil stain with a warm cotton cloth and then dry it with a dry cloth.
- Clean the oven glass door with a hot cloth soaked with detergent.
- Do not immerse the whole appliance into water or any other liquid for cleaning purposes.
- Do not use a brush for cleaning.
- Do not clean the oven with any metal objects to prevent damaging the paint on the surface.
This appliance has no user serviceable parts. Any servicing beyond that described in the Cleaning Section should be performed by an Authorized Service Representative only. See warranty available online.
PRODUCT WARRANTY
Appliance 1 Year Limited Warranty
West Bend ^® ("the Company") warrants this appliance from failures in the material and workmanship for one (1) year from the date of original purchase with proof of purchase, provided that the appliance is operated and maintained in conformity with the Instruction Manual. Any failed part of the appliance will be repaired or replaced without charge at the Company's discretion. This warranty applies to indoor household use only.
This warranty does not cover any damage, including discoloration, to any non-stick surface of the appliance. This warranty is null and void, as determined solely by the Company, if the appliance is damaged through accident, misuse, abuse, negligence, scratching, or if the appliance is altered in any way.
THIS WARRANTY IS IN LIEU OF ALL IMPLIED WARRANTIES, INCLUDING WARRANTIES OF MERCHANTABILITY, FITNESS FOR A PARTICULAR PURPOSE, PERFORMANCE, OR OTHERWISE, WHICH ARE HEREBY EXCLUDED. IN NO EVENT SHALL THE COMPANY BE LIABLE FOR ANY DAMAGES, WHETHER DIRECT, INDIRECT, INCIDENTAL, FORESEEABLE, CONSEQUENTIAL, OR SPECIAL ARISING OUT OF OR IN CONNECTION WITH THIS APPLIANCE.
If you think the appliance has failed or requires service within its warranty period, please contact the Customer Care Department through our website at www.westbend.com
"Support" – > "Contact Us". A receipt proving the original purchase date will be required for all warranty claims, hand written receipts are not accepted. You may also be required to return the appliance for inspection and evaluation. Return shipping costs are not refundable. The Company is not responsible for returns lost in transit.
Valid only in USA and Canada
REPLACEMENT PARTS
Replacement parts, if available, may be ordered online at www.westbend.com.
This manual contains important and helpful information regarding the safe use and care of your product. For future reference, attach dated sales receipt for warranty proof of purchase and record the following information:
Date purchased or received as gift: ____
Where purchased and price, if known: ____
Item number and Date Code (shown bottom/back of product): ____
WEST BEND®
26 QT. FRITEUSE À AIR XL
Manuel pratique
natural_image
Exterior view of a modern kitchen appliance with digital display and control panel (no visible text or symbols)DIAGRAMME DU PRODUIT
Panneau de commande
natural_image
Exterior view of a modern kitchen appliance with digital display and control panel (no visible text or symbols)DIAGRAMA DEL PRODUCTO

Prop. 65 Warning for California Residents

WARNING: CANCER AND REPRODUCTIVE HARM - www.P65Warnings.ca.gov