
PC-VL 3089 LB - Fan ProfiCare - Free user manual and instructions
Find the device manual for free PC-VL 3089 LB ProfiCare in PDF.

| Product type | Pedestal fan with humidifier |
| Model | PC-VL 3089 LB |
| Brand | ProfiCare |
| Power supply | 220-240 V~, 50/60 Hz |
| Power consumption | 70 W |
| Net weight | 7.2 kg |
| Recommended room area | 60-70 m² |
| Speeds | 3 levels (low, medium, high) |
| Oscillation | 90° |
| Timer | Up to 9 hours (in 1-hour increments) |
| Airflow modes | Normal, Nature, Sleep |
| Control | Touch panel + remote control |
| Connectivity | Wi-Fi 2.4 GHz (802.11 b/g/n) via Smart Life - Smart Living app |
| Humidifier | Ultrasonic, removable water tank |
| Remote control batteries | 2 x AAA (1.5 V) not included |
| Protection class | II |
| Cleaning | Dry cloth, descaling with white vinegar |
| Safety | Protective grille, automatic shut-off in case of tipping over (not specified) |
| Warranty | 2 years (according to legislation) |
| Included accessories | Front/rear grille, fan blade, base, casters, remote control, water tank, hose |
Frequently Asked Questions - PC-VL 3089 LB ProfiCare
User questions about PC-VL 3089 LB ProfiCare
0 question about this device. Answer the ones you know or ask your own.
Ask a new question about this device
Download the instructions for your Fan in PDF format for free! Find your manual PC-VL 3089 LB - ProfiCare and take your electronic device back in hand. On this page are published all the documents necessary for the use of your device. PC-VL 3089 LB by ProfiCare.
USER MANUAL PC-VL 3089 LB ProfiCare
natural_image
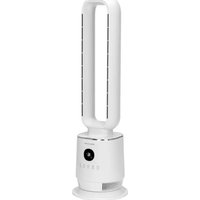
Black outdoor fan with a digital display stand, no visible text or symbols on the fan or background.Standventilator PC-VL 3089 LB
(Piles non fournies)
Chiavi Wi-Fi supportate:......WPA / WPA2
Thank you for choosing our product. We hope you will enjoy using the appliance.
Symbols in this Instruction Manual
Important information for your safety is specially marked. It is essential to comply with these instructions in order to avoid accidents and prevent damage to the appliance:

WARNING:
This warns you of dangers to your health and indicates possible injury risks.

CAUTION:
This refers to possible hazards to the appliance or other objects.

NOTE:
This highlights tips and information.
Contents
Overview of the Components....3
Assembly Overview....4
General Notes......51
Special Safety Precautions for this Appliance....52
Handling of Batteries....54
Unpacking the Appliance....54
Overview of the Components/Scope of Delivery......54
Notes for Use....54
Location....55
Electrical Connection 55
Fitting Batteries into the Remote Control....55
Remote Control Range 55
Assembly Instructions....55
Base Unit (Fig. a-c) 55
Fan (Fig. d)....55
Humidifier 55
Information on the App "Smart Life - Smart Living" ....55
Information on How to Use the App....56
System Requirement for Use of the App ....56
Commissioning via the App 56
Disconnecting the Wi-Fi....56
Initial Operation....56
Fill with Water....56
Operation....56
Basic Settings 56
Switch On/Off 57
Speed....57
Oscillation....57
Wind Change Functions....57
Time-delayed Switch-off....57
Humidifier....57
Refill Water....57
Shutting Off 57
Cleaning 58
Housing 58
Water Tank 58
Humidifier Base....58
Decalcification....58
Troubleshooting....58
Technical Data....59
Notice of Directive Conformity....59
Disposal 59
Battery Disposal 59
Meaning of the "Dustbin" Symbol ....59
General Notes
Read the operating instructions carefully before putting the appliance into operation and keep the instructions including the warranty, the receipt and, if possible, the box with the internal packing. If you give this appliance to other people, please also pass on the operating instructions.
- The appliance is designed exclusively for private use and for the envisaged purpose. This appliance is not fit for
- Do not use it outdoors. Keep it away from sources of heat, direct sunlight, humidity (never dip it into any liquid) and sharp edges. Do not use the appliance with wet hands. If the appliance is humid or wet, unplug it immediately.
- When cleaning or putting it away, switch off the appliance and always pull out the plug from the socket (pull the plug itself, not the lead) if the appliance is not being used and remove the attached accessories.
- The appliance and the mains lead have to be checked regularly for signs of damage. If damage is found the appliance must not be used.
- Use only original spare parts.
- In order to ensure your children's safety, please keep all packaging (plastic bags, boxes, polystyrene etc.) out of their reach.

WARNING:
Do not allow small children to play with the plastic foil.
There is a danger of suffocation!
Special Safety Precautions for this Appliance

WARNING:
Disconnect the appliance from the mains supply when refilling with water or during cleaning.

CAUTION:
- The integrated humidifier works by ultrasound. This sound may be disturbing to pets.
- Do not place the appliance directly next to heating appliances or electrical appliances.
-
Do not scratch the ultrasound probe.
-
Do not leave the appliance unattended for hours at a time. Do not leave your home whilst the appliance is in operation.
- Never stick fingers or other objects through the protection grid.
- Watch out for long hair! It can be caught in the fan owing to the air turbulence!
- Use the appliance only with the protection grids on!
- If you need to remove the fan guard, first switch off the appliance and disconnect the mains plug.
- Select a stable base to avoid the tipping of the fan during use!
- Do not place the appliance immediately next to stoves or other sources of heat.
- Note that high air humidity can encourage the growth of biological organisms in the environment.
- The area in which the appliance is situated must not be permitted to become damp or wet. Output must be reduced if dampness is discovered. If the output cannot be reduced, then the appliance should only be used periodically. Absorbent materials such as
carpeting, curtains, drapes or tablecloths must not be permitted to become damp.
- Microorganisms which may be present in the water or in the environment where the appliance is being stored or used can grow in the water tank and be blown into the air, which can lead to serious health problems if the water is not changed and the water tank is not properly cleaned every 3 days.
- The water tank must be emptied and re-filled every 3 days. The tank must be cleaned with fresh water before filling. All deposits, residues and layers of dirt which have formed on the surfaces of the water tank or on the inner surface must be removed. All surfaces must be wiped dry.
- The appliance must be cleaned prior to emptying and storing as well as prior to the next use.
- Do not repair the appliance by yourself. Always contact an authorized technician. If the supply cord is damaged, it must be replaced by the manufacturer, its service agent or similarly qualified persons in order to avoid a hazard.
- This appliance can be used by children aged from 8 years and above and persons with reduced physical, sensory or mental capabilities or lack of experience and knowledge if they have been given supervision or instruction concerning use of the appliance in a safe way and understand the hazards involved.
• Children shall not play with the appliance. - Cleaning and user maintenance shall not be made by children without supervision.

CAUTION:
Do not immerse the appliance into water for cleaning. Please follow the instructions as stipulated in the chapter "Cleaning".
Handling of Batteries
Do not charge!
Do not disassemble!
Insert correctly!
Keep away from children!

Danger of explosion!
Do not expose batteries to intense heat, such as sunlight, fire or similar.
Do not short circuit!
- Batteries can leak battery acid. If the appliance is not in use for a long period of time, remove the batteries.
- In case of battery leakage, make sure not to rub the liquid into your eyes or mucous membranes. In case of contact, wash your hands and rinse your eyes with clear water. Seek medical attention if any discomfort persists.
- Different battery types or new and used batteries must not be used together.
- Batteries are not to be disposed of together with domestic wastes. Dispose of the used batteries at the relevant collection bin or at your dealer's.
Unpacking the Appliance
- Remove the appliance from the package.
- Remove all packaging material such as films, filler, cable holders and cardboard.
- Check the delivery contents for completeness.
- Should the package contents be incomplete or damages be found, do not take the appliance into operation. Take it immediately back to the dealer.

NOTE:
Dust or production residues can be located on the appliance. We recommend to clean the appliance as described under "Cleaning".
Overview of the Components / Scope of Delivery
Page 3
1 Hook
2 Fixing ring
3 Protection grid
4 Carrying handle
5 Propeller
6 Fastening hooks
7 Engine unit
8 Remote control
9 Storage compartment for remote control
10 Switch housing
11 Water tank cover with internal water tank
12 Foot
13 Rollers
14 Hose connection at switch housing
15 Fastening screw for protective grid
16 Hose
17 Hose connection at ventilator
Control Panel
18 Indicator lamp (Active air humidifier)
19 Indicator lamp (Natural mode)
20 Indicator lamp (Sleep mode)
21 Indicator lamp (Water tank empty)
22 button (Wind change functions)
23 button (Time-delayed switch-off)
24 button (Humidifier)
25 Display
26 button (Oscillation)
27 Button (Speed)
28 button (Switch on / off)
29 Indicator lamp (Active timer)
30 Indicator lamp (Wi-Fi)
Page 4: Assembly Overview
31 Fastening nut for switch housing
32 TA5*20 screw for switch housing (4 ×)
33 Washer for switch housing (4 ×)
34 TM5*14 fastening screw with washer for engine unit (1 ×)
35 Rear protection grid
36 Nut for rear protection grid
37 Attachment screw for propeller
38 Front protection grid
Notes for Use
The appliance is designed for rooms with dimensions of up to 60 - 70 m². This depends on ceiling height, climate etc. You can use this appliance to increase the air humidity in a dry environment. This offers the following benefits:
- It ensures a healthy room climate and thus your well-being.
- A relative humidity ranging from 45 % to 65 % can provide for pleasant air humidity.
- We recommend using this air humidifier at temperatures between 5 °C and 40 °C and low humidity.
- It prevents the raising of dust and is therefore ideally suited for allergy sufferers.
- Your skin is supplied with moisture.
- It protects your furniture from drying out and prevents a forming of gaps in parquet or wood floors.
• Electrostatic charge in the air is suppressed.
Location
- A suitable location is a non-slip, even surface.
- Press the locking brake for the rollers downward.
- Do not place the appliance onto wood, to avoid deformation due to moisture.
- Watch out for electrical devices close by. They must not get wet.
- Keep a distance of 2 meters from electrical equipment and delicate furniture to protect these from moisture.
- The appliance works more effectively if you have the windows and doors closed during operation.

NOTE:
Do not forget to air on a regular basis.
Electrical Connection
Before inserting the plug into the socket. Make sure that the mains voltage to be used matches that of the appliance. You can find this information on the nameplate.
Fitting Batteries into the Remote Control
(Batteries not supplied)
- Open the lid of the battery compartment on the rear of the remote control.
- Insert 2 MICRO batteries of type R03 "AAA" 1.5 V. Please ensure the correct polarity. Details can be found in the battery compartment.
- Close the battery compartment.
Remote Control Range
The range of the remote control is limited. If this range becomes shorter, the batteries must be changed.
- To use the remote control, point it at the sensor on the front of the switch housing.
- Make sure there are no obstacles between the remote control and the sensor.
- The angle of the remote control to the remote control sensor should not exceed 90^ to the right, left, up, and down.
Assembly Instructions
The appliance must be fully assembled before use! We recommend that you refer to the figures "Overview of the Components" and "Assembly Overview" when assembling.
Base Unit (Fig. a - c)
- Lay out a covering, such as a blanket or something similar, on the floor.
- Loosen the screws (32) and the washers (33) from the switch housing (10). Place the switch housing in the foot (12). Insert the fastening screw (31) into the switch housing from below. Fasten both parts using the four washers and screws.
- Loosen the screws (32) on the upper surface of the switch housing (11). Insert the engine unit (7) into the switch housing and tighten the screws again.
Fan (Fig. d)
- Remove the preinstalled nut (36) from the motor (7). Keep it close to hand.
- Align the rear protection grid (35) with the motor recesses (7).
- Tighten the nut (36) for the rear protection grid clockwise.
- Attach the propeller (5). When doing so, use the guide pin on the motor shaft.
- Tighten the screw (37) for the propeller anti-clockwise.
- Remove the pre-installed fastening screw (15) from the forward protective grid (38). Put it someplace where you can reach it easily.
- Open the attachment hooks (6) on the forward protective grid.
- Attach the front protection grid by engaging the groove of the hook (1) with the rear protection grid.
- Make sure that the fixing ring (2) is securely placed between the two grids. Close the attachment hooks (6).
- Secure the protective grid using the fixing screw (15).
Humidifier
- Fasten the hose (16). Insert one end into the hose connection (17) for the protective grid. Insert the other end into the hose connection for the switch housing (14).
Information on the App "Smart Life - Smart Living"
The Smart Life - Smart Living app is available for android and iOS. Scan the corresponding QR code to get directly to the download.

NOTE:
Depending on the provider, there may be costs involved in downloading the app.

Google Play App Store

Information on How to Use the App
This appliance allows you to operate the appliance via your home network. A prerequisite is a permanent Wi-Fi connection to your router and the free app "Smart Life - Smart Living".
You can easily access all functions of the appliance via the app. Since the app constantly improved, we cannot provide a more detailed description here.
We recommend disconnecting the appliance from the power supply when you are away from home to prevent unintentional switching on while you are on the road!
System Requirement for Use of the App
- iOS 10.0 or higher
- Android 5.0 or higher
Commissioning via the App
- Install the "Smart Life - Smart Living" app. Create a user account.
- Activate the Wi-Fi function in the settings of your appliance.
- Place the appliance within 5 meters of your router.
- Press and hold the button for about 2 seconds.
- The control lamp will flash rapidly.
- Launch the app and select "+".
- Select the "Ventilator" menu and follow the instructions on the display.
- After the appliance has been successfully connected, the control lamp will glow constantly. Now you can operate the appliance using the app.
i NOTE:
The appliance can only be operated with 2.4 GHz routers. 5 GHz routers are not supported.
Disconnecting the Wi-Fi
i NOTE:
This is only possible using the button on the appliance and not using the remote control.
If you want to disconnect the existing Wi-Fi connection (control lamp is lit), proceed as follows:
- Press and hold the button for about 2 seconds.
- The Wi-Fi connection will be disconnected and the appliance is removed from the app at the same time. The control lamp 📋 will start flashing rapidly again.
i NOTE:
If you want to re-establish the Wi-Fi connection, proceed as described in the paragraph "Commissioning via the App".
Initial Operation
Fill with Water
CAUTION:
Do not fill the water tank with water from clothes dryers and water with additives (such as scented oils, perfume, softeners, or other chemicals). Doing so may damage the appliance.
i NOTE:
- Only use distilled or boiled, cold tap water without additives.
- Replace the water every 3 days, even if it has not yet been used.
-
If the appliance has not used for long periods, remove the water from the water tank and from the base of the humidifier.
-
Flip the water tank cover open toward the left.
- Remove the water tank from the base of the air humidifier by gently lifting it upward and tilting it forward. Turn the water tank over. The filling hole is located on the bottom of the tank.
- Unscrew the screw cap and fill the tank with water. Pay attention to the MIN and MAX labels.
- Close the cap again and place the tank back onto the base. Insert the water tank so that the dial is facing forward.
i NOTE:
It is normal for water to leak out from the water tank into the base of the air humidifier.
- Close the water tank cover.
- Connect the appliance to a duly installed protective contact socket. The control lamp will flash rapidly.
Operation
Basic Settings
Set the blower inclination angle before starting the appliance. You can adjust the inclination angle by tipping the blower casing with both hands.
i NOTE:
The inclination angle is approximately 10 degrees in 3 rest positions.
You can operate the appliance using the remote control as well as the buttons on the switch housing. The functions are identical.
i NOTE:
- The buttons on the appliance are sensor touch buttons. In order to perform the corresponding function gently touch the buttons. Whenever a button is pressed, it will be confirmed by a beep sound.
- If no button is pressed for 30 seconds, then the display light will go out in order to save energy.
Switch On/Off
Use the Ⓐ button to switch the appliance on or off.
i NOTE:
- The first time you turn the appliance on, after you have connected the power plug with the socket, the fan will operate in normal operating mode at speed level.
- After switching off and on again using the button, the appliance continues working in the last set mode.
Speed
Press the ⏻ button to select one of the three different speeds:
low
2 medium
3 high
Oscillation
- If you select the function the appliance oscillates automatically through a range of approx. 90 degrees.
- In order to switch the function of, press the button again.
Wind Change Functions
The appliance has the two special functions: Nature and Sleep. The speed of the fan buries between the functions.
Press the ⏻ button to switch these functions on.
Nature ➕ Natural Mode
- If the (high speed) setting is selected, the speed alternates between high – medium – low – off.
- If you have selected (medium speed), the speed alternates between medium – low – off.
- In the (low speed) setting, the speed alternates between low-off.
Sleep Sleep Mode
- If speed is set: The fan works in the first 30 minutes as in "Natural Mode" at the 3speed setting. In the subsequent 30 minutes the fan works as in "Natural Mode" at the set 2speed. For the remaining time the fan works as in "Natural Mode" at the speed setting !
- If speed is set: The fan works for the first 30 minutes as in "Natural Mode" at the speed setting For the remaining time the fan works as in "Natural Mode" at the speed setting
- If speed is set: Switching between low speed and shut-off of the fan as in "Natural Mode".
Normal
- Normal operation will commence if the control lamps and are not on.
Time-delayed Switch-off
If you want the timer to switch the appliance off, press the ⏻ button. The control lamp ⏻ will light up if the timer is activated.
i NOTE:
Each time your press the Ⓐ button, the operating time will be extended by one hour. Maximum shut-off time: 9 hours.
Humidifier
The humidifier can be switched on and off regardless of the fan mode.
Press the Ⓞ button to select the intensity of the mist. The control lamp ⬇ will light up if the humidifier is switched on.
≡ high
= medium
- low
To deactivate the function, press the ⏻ button again.
Refill Water
If the control lamp is flashing, this means the water tank is empty. Refill water:
- Switch off the appliance.
- Disconnect the plug from the mains.
- If necessary, pour the remaining water out of the tank.
- Proceed as described under "Fill with Water".
Shutting Off
- Switch off the appliance.
- Disconnect the plug from the mains.
- Empty the water tank and the base of the humidifier if you do not plan to use the appliance for a lengthy period.
Cleaning

WARNING:
• Always remove the mains plug before cleaning the appliance.
- If you need to remove the protection grid: Always switch the appliance of and remove the mains plug.
- Under no circumstances should you immerse the appliance in water for cleaning purposes. Otherwise this might result in an electric shock or fire.

CAUTION:
- Do not use a wire brush or any abrasive items.
- Do not use any acidic or abrasive detergents.
Housing
- Clean the outside of the appliance with a dry cloth without any additives.
- If the appliance is very dirty wet a cloth with water and then wipe the appliance dry once you have finished.
Water Tank
- Rinse the tank with clean water.
- Allow the tank to dry before closing it again.
Humidifier Base
- The area where the water tank is set up should be cleaned every 3 days.
- Wipe the area with a damp cloth.
- If necessary, use a few drops of white vinegar and let it act for approx. 5 minutes.
- Then wipe the area clean again.
Decalcification
The frequency of the decalcifying operation depends on the hardness of the water and on how often the appliance is used.
- If the tank is very dirty, add approx. 100ml of white vinegar to the cleaning water.
- Leave the solution in the tank for approx. 10 minutes.
- Rinse out the water tank with clean water.
Troubleshooting
| Problem Possible Cause Solution | ||
| Appliance does not work. No power supply. | Apply. Check the mains outlet. | |
| Defective electronics. Seek advice from a dealer or service centre. | ||
| There is no fog or mist but the control lamp 📁s on. | The water tank is empty. The control lamp 📁s on. | Fill the water tank. |
| Not enough mist is being produced. The humidifier is dirty. Clean the humidifier. | ||
| There is a bad smell. | The water is too old or dirty. | Change the water and clean the humidifier. |
Technical Data
Model: PC-VL 3089 LB
Power supply: 220 - 240 V\~, 50 / 60 Hz
Power consumption: 70 W
Protection class:....II
Networked standby power consumption: 0.8 W
Net weight: approx. 7.2 kg
WLAN
Supported network: 802.11 b/g/n
Maximum radio-frequency power transmitted:....100 mW
Frequency range: 2.4 GHz
Channels: 1 - 13
Supported Wi-Fi keys:......WPA / WPA2
The right to make technical and design modifications in the course of continuous product development remains reserved.
Notice of Directive Conformity
Hereby, Clatronic International GmbH declares that the radio equipment type PC-VL 3089 LB is in compliance with Directive 2014 / 53 / EU.
Furthermore, the appliance is in compliance with the requirements of the RoHS directive 2011 / 65 / EC & (EU) 2015 / 863.
The full text of the EU declaration of conformity is available at the following internet address: www.sli24.de
In the "Download" area, please enter the model name PC-VL 3089 LB.
Tested for operation in Great Britain.
Disposal
Battery Disposal
As a consumer you are obliged by law to return old batteries / accumulators.
Remove the batteries from the remote control before disposing of the appliance.
Return the batteries to a collection facility for the collection of old batteries or hazardous waste. Contact your local authority for more information.
Meaning of the "Dustbin" Symbol
Protect our environment: do not dispose of electrical equipment in the domestic waste.
Please return any electrical equipment that you will no longer use to the collection points provided for their disposal.
This helps avoid the potential effects of incorrect disposal on the environment and human health.
This will contribute to the recycling and other forms of re-utilisation of electrical and electronic equipment.
Information concerning where the equipment can be disposed of can be obtained from your local authority.
Instrukcja obsługi
Wentylator (Rys. d) 64
Nawilżacz 65
CTC Clatronic Sp. z o.o
Ul. Brzeska 1
45-960 Opole
Usuwanie
Usuwanie baterii

- Standventilator PC-VL 3089 LB
- Symbols in this Instruction Manual
- WARNING:
- CAUTION:
- NOTE:
- Contents
- General Notes
- Special Safety Precautions for this Appliance
- Handling of Batteries
- Danger of explosion!
- Unpacking the Appliance
- Overview of the Components / Scope of Delivery
- Page 3
- Control Panel
- Page 4: Assembly Overview
- Notes for Use
- Location
- Electrical Connection
- Fitting Batteries into the Remote Control
- Remote Control Range
- Assembly Instructions
- Base Unit (Fig. a - c)
- Fan (Fig. d)
- Humidifier
- Information on the App "Smart Life - Smart Living"
- Information on How to Use the App
- System Requirement for Use of the App
- Commissioning via the App
- i NOTE:
- Disconnecting the Wi-Fi
- Initial Operation
- Fill with Water
- Operation
- Basic Settings
- Switch On/Off
- Speed
- Oscillation
- Wind Change Functions
- Normal
- Time-delayed Switch-off
- Refill Water
- Shutting Off
- Cleaning
- Housing
- Water Tank
- Humidifier Base
- Decalcification
- Technical Data
- WLAN
- Notice of Directive Conformity
- Disposal
- Battery Disposal
- Meaning of the "Dustbin" Symbol
- Instrukcja obsługi
- Usuwanie
- Usuwanie baterii
Brand : ProfiCare
Model : PC-VL 3089 LB
Category : Fan