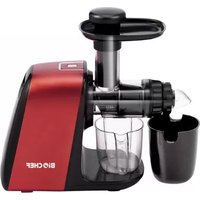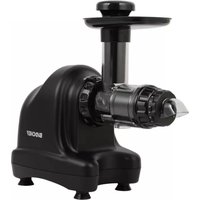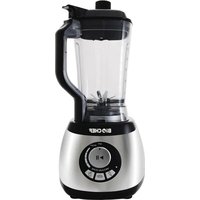
AirFree - Blender BioChef - Free user manual and instructions
Find the device manual for free AirFree BioChef in PDF.


User questions about AirFree BioChef
0 question about this device. Answer the ones you know or ask your own.
Ask a new question about this device
Download the instructions for your Blender in PDF format for free! Find your manual AirFree - BioChef and take your electronic device back in hand. On this page are published all the documents necessary for the use of your device. AirFree by BioChef.
USER MANUAL AirFree BioChef
text_image
AirFree Vacuum Blender Bio CHEF OFF BEET VACUM ZONE COCONUTY OLYNEUSER MANUAL AND RECIPES
text_image
EN ENGLISH 3 FR FRANÇAIS 19 DE DEUTSCH 37 ES ESPAÑOL 55The information in this manual is intended to help you to get the best results from your BioChef AirFree Vacuum Blender. Please read and follow these instructions and safeguards prior to use.
Please keep your manual handy for future reference, warranty information and support details
Contents
Safety Precautions 4
Parts and Accessories 5
Assembly Instructions 6
Operating Instructions 7
Troubleshooting 10
Cleaning 10
Vacuum Blending 11
Recipes 12
Warranty 17
Safety Precautions
! Read all instructions.
! To protect against risk of electrical shock, do not put the body (motor) in water or any other liquid.
! Close supervision is necessary when any appliance is used by children.
! Unplug from electrical outlet when not in use and before disassembly for cleaning.
! Avoid contact with moving parts.
! Do not let cord hang over edge of counter.
! Keep hands and utensils out of the jug container. A rubber scraper or spatula may be used but only when the blender is not running.
! Always operate with the lid firmly in place.
! If in the event the motor overheats, the temperature monitoring system will trigger and the motor will stop. Switch off and unplug the appliance and let the motor cool down. The motor temperature monitoring system resets after the blender is unplugged from wall socket for 45 minutes.
! Blades are sharp. Use caution when handling the blade. Do not attempt to disassemble blade and blade assembly.
! To prevent overheating, never allow the blender to run for more than two minutes at a time, as it can cause permanent damage to the motor.
Parts and Accessories
EN
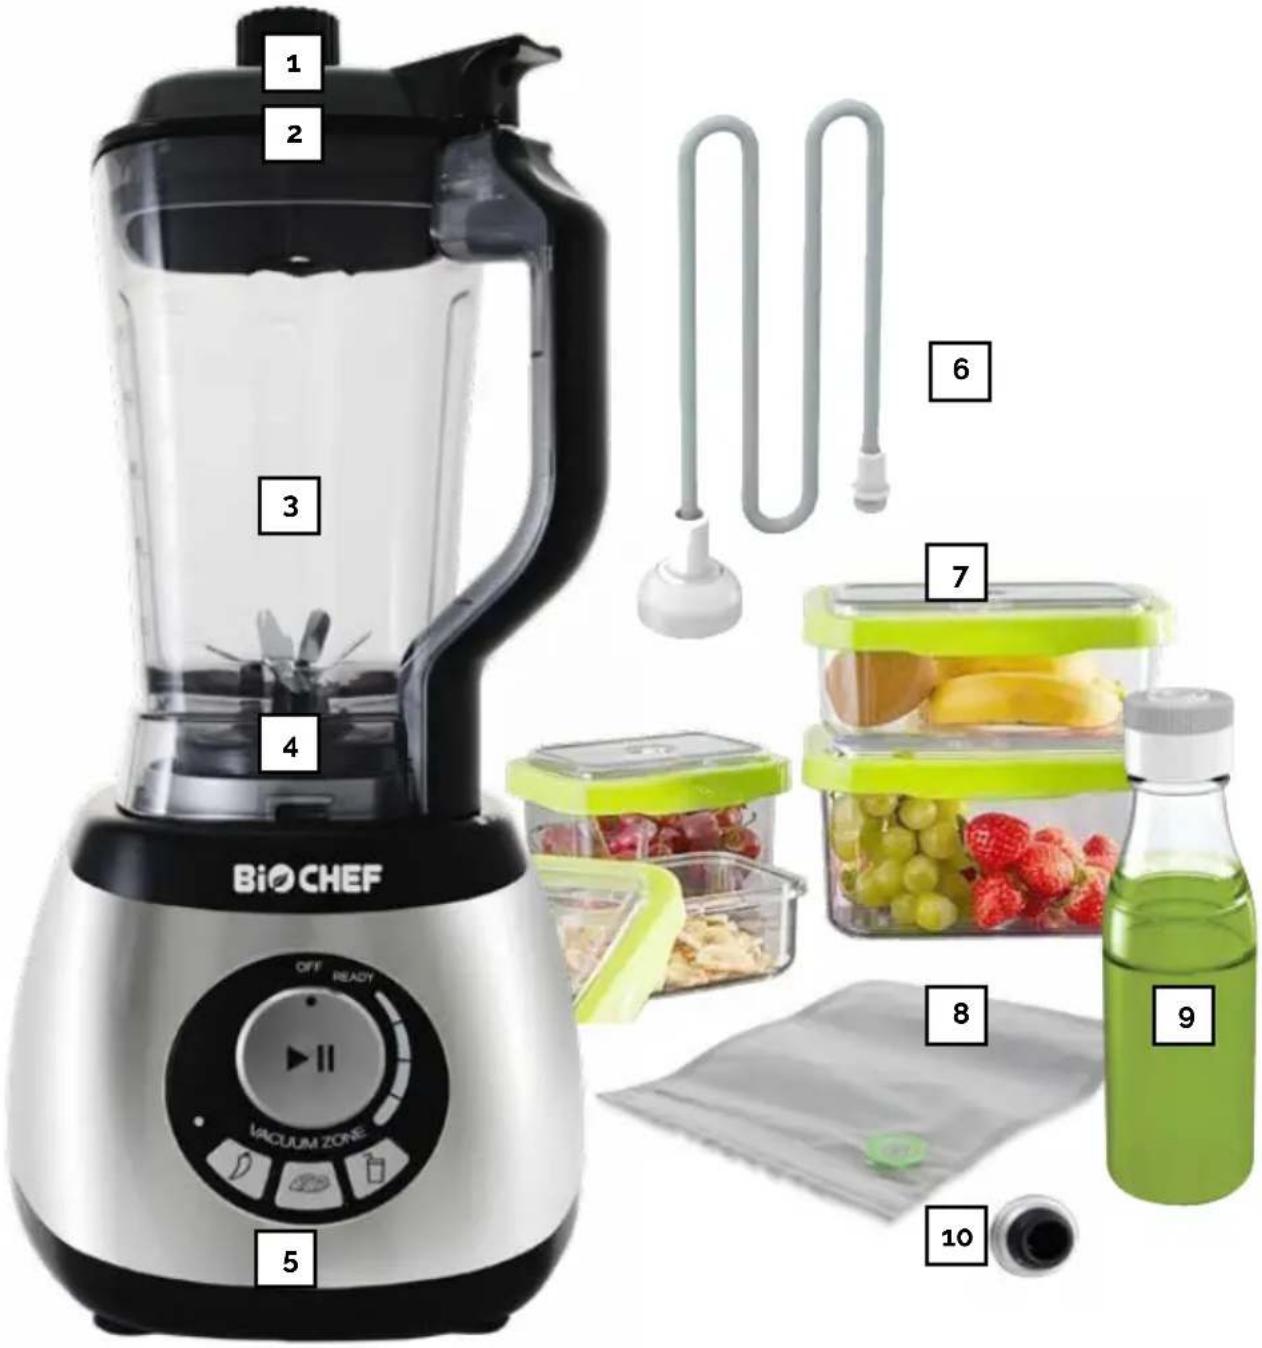
text_image
1 2 3 4 5 BIO CHEF OFF READY VACUUM ZONE 6 7 8 9 101 Vacuum valve
2 Jug lid
3 1.5L BPA Free Tritan™ Jug
4 Japanese stainless steel blades
5 Motor base
6 Vacuum hose
7 Storage containers
8 Reusable vacuum bags
9 Tumbler
10 Wine stopper
Assembly Instructions
natural_image
Close-up of a black plastic container with a red arrow indicating a circular feature, no visible text or symbols.
natural_image
Close-up of a kitchen blender with black lid and red circular annotations (no text or symbols)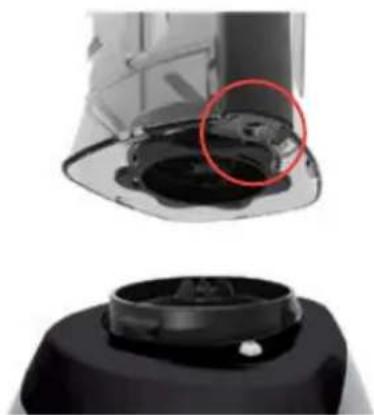
natural_image
Close-up of a mechanical component with a highlighted red circle, showing internal structure (no text or symbols visible)Step 1
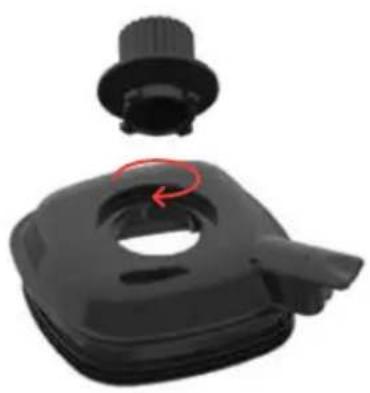
Lock the vacuum valve into the lid by turning it clockwise.
Step 2
After adding your ingredients, place jug lid onto jug making sure the vacuum connections are aligned and pressed together.
Step 3
At the bottom of the jug handle, you will find an air suction hole which will activate once the vacuum mode is turned on.
natural_image
Close-up of a kitchen blender with a red arrow pointing to the blade (no text or symbols visible)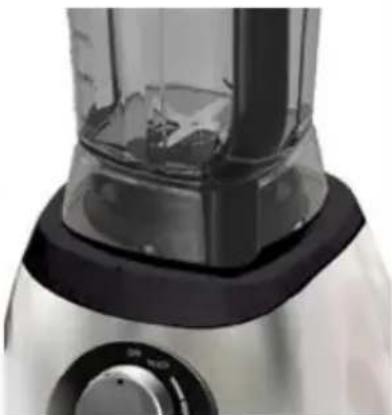
natural_image
Close-up of a kitchen blender with black and white casing (no visible text or symbols)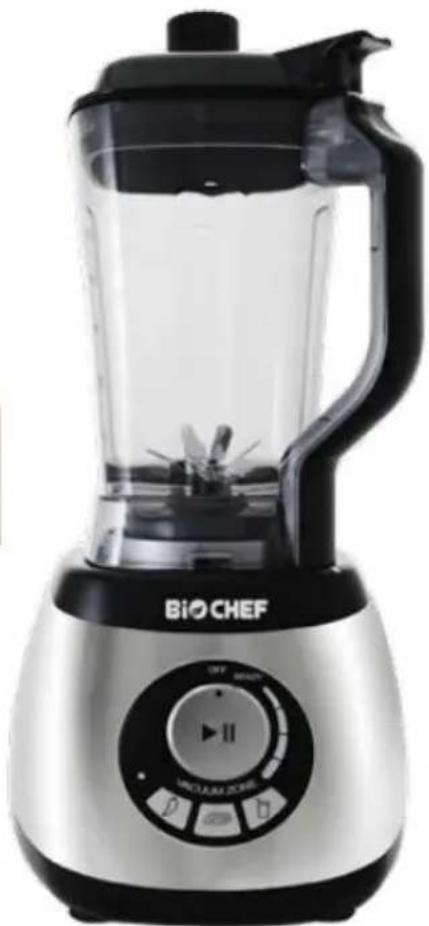
natural_image
Bio Chef blender with black handle and control panel (no visible text or symbols on device body)Step 4
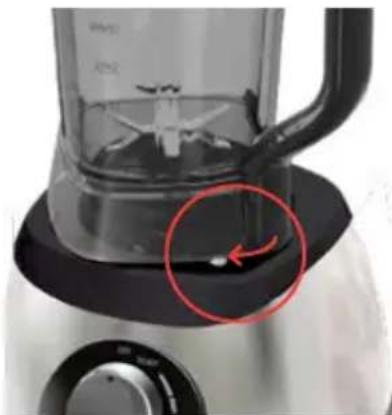
Lock the jug into the base by turning it clockwise until the handle covers the vacuum outlet.
Note:
If the jug and the air suction hole are not connected correctly, the vacuum function will not work.
Operating Instructions
- Connect with power supply.
- If the jug is assembled on the body correctly, the blender is ready to use.
- Select function / mode
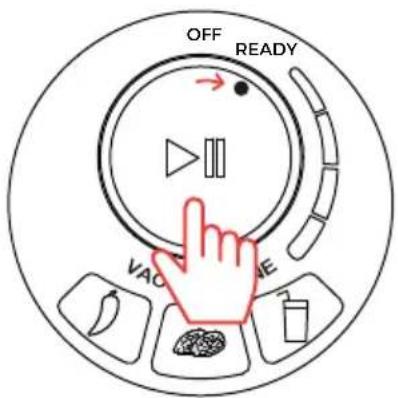
text_image
OFF READY VAC VACON/OFF AND PULSE FUNCTION
- Turn the dial knob to READY and push dial in to pulse.
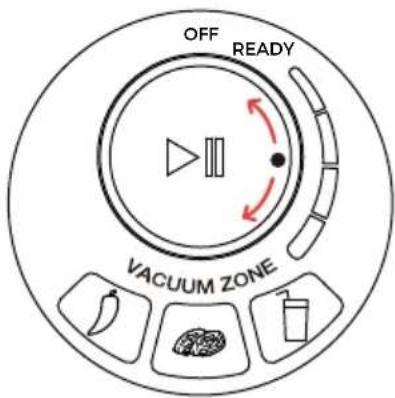
text_image
OFF READY VACUUM ZONENORMAL BLENDING
- Use the dial to select your desired blending speed and time by rotating it clockwise past READY.
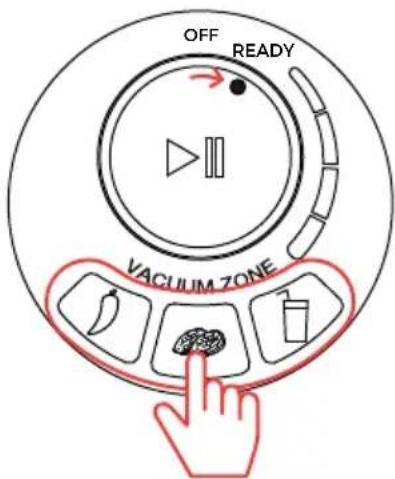
text_image
OFF READY VACUUM ZONEVACUUM BLENDING FUNCTION
- Turn the dial knob to READY and press the desired blending mode.
• Vacuum cycle will start followed by blending cycle. Length of vacuum cycle will vary depending on the ingredients. (see overleaf)
MODE BUTTON PROGRAM OPERATION TIME
Vegetable
(whole vegetable drinks, whole fruit drinks, soup blends)

- Vacuum
52.5 sec (except for vacuuming time)
Nut
(nut milks, nut butters, sauces, dips, dressings)

- Vacuum
• 1 cycle: blend for 5 sec, stop for 3 sec (repeat 3 times)
• 2 cycle: blend for 5 sec, stop for 3 sec (repeat 10 times)
87.5 sec (except for vacuuming time)
Smoothie

- Vacuum
- Blend 0.3 sec, stop for 3 sec (repeat 20 times)
71 sec (except for vacuuming time)
VACUUM FUNCTION
NOTE: If the blue light is flashing, then you have turned the dial too far past READY and vacuum mode will not activate.
STORAGE CONTAINERS
- Connect thin end of vacuum hose to air suction tube outlet.
- Select your desired container and place the larger end of the vacuum hose over the container lid valve.
- Turn control panel dial to READY and select the VEGETABLE mode. The vacuum function will continue until optimal air removal is detected.
• To open container, pull up the white valve in the centre of the lid.
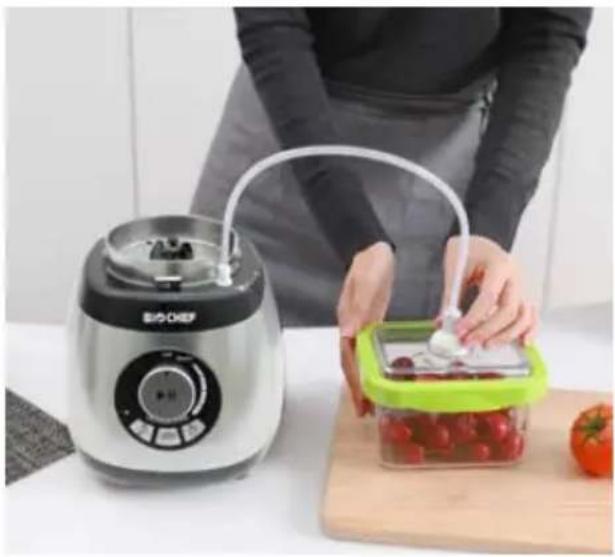
natural_image
Person using a Bunschoe microwave on a cutting board with fresh tomatoes, no visible text or symbols.REUSABLE BAGS
- Connect thin end of vacuum hose to air suction tube outlet.
- Select your desired vacuum bag and place the larger end of the vacuum hose over the bag valve.
- Turn control panel dial to READY and select the VEGETABLE mode. The vacuum function will continue until optimal air removal is detected.
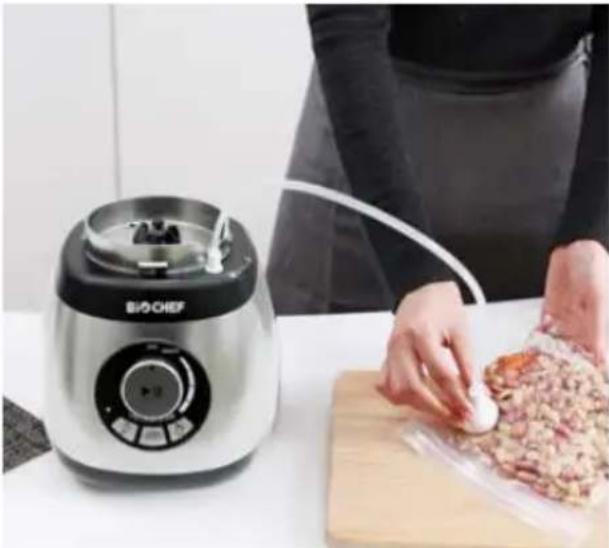
natural_image
Person preparing food using a BioChef air fryer on a cutting board (no visible text or symbols)TUMBLER
- Connect thin end of vacuum hose to air suction tube outlet.
- Select your desired tumbler and place the larger end of the vacuum hose onto the lid of the tumbler.
- Turn control panel dial to READY and select the VEGETABLE mode. The vacuum function will continue until optimal air removal is detected.
- Turn lid of tumbler anti-clockwise to lock the lid (keep turning until it stops).
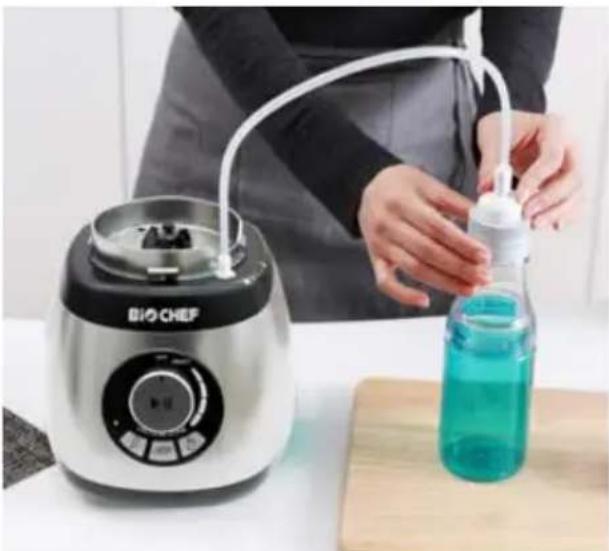
natural_image
Person using a BioCHEF blender with a blue liquid bottle nearby (no visible text or symbols on the device)
Troubleshooting
When the jug is on the base and the control panel does not light up.
- Not plugged into electricity. Replug cord into power outlet.
- Electricity not turned on. Check switch is turned to ON position.
Ingredients are difficult to blend
Too many solid ingredients. Add more liquid
Motor stops suddenly during operation.
- Too much food may cause motor to cut out. Turn off. Remove some of the food and try again.
- Long durations of operating or adding too much hard food may trigger the protection mechanism. Rest the blender for 20–45 minutes then restart.
- Voltage shortage. The power voltage is unmatched or insufficient for the blender. Make sure the power supply is correct.
- Adding too much food takes the working current beyond the preset maximum. Rest the blender for 20 – 45 minutes and restart it.
Cleaning
After finishing your blending session, you can clean the jug in various ways depending on the ingredients you have used.
- For thick or oily ingredients, add warm water to the jug with a few drops of detergent and blend for 30 seconds. Remove the jug and rinse with clean water. Wipe the main unit with a wet or dry cloth.
- Rinse the jug and lid directly under the tap and use a clean cloth to wipe up the residual water.
- Always place jug in upright position when leaving to dry. Try not to have liquid contacting the underside of the drive shaft.
Vacuum Blending
Vacuum blenders have been developed for people who are looking to maximize nutrition and reduce spoilage. A characteristic of a normal household blender is that the high speed blades immediately whisk lots of air into whatever ingredients you are blending. The process of blending smashes ingredients into tiny particles, giving the biggest possible surface area of contact between your food and oxygen.
Practically every molecule of the ingredients in a traditional blender is swimming in an oxygen rich bath, and your blended food immediately starts to lose its nutritional value and flavours as a result. This is why we always recommend that a fresh smoothie is best consumed immediately.
A Vacuum Blender is a fantastic solution to this problem. The first thing you will notice about a smoothie made in a vacuum blender will be the colour.
Think about how quickly the brown discoloration occurs when you peel a carrot for example. This is exactly what happens when you blend and these millions of parts of surface area are exposed to the air. The colour of the blended ingredients will start to darken and deteriorate with exposure to oxygen.
With a Vacuum Blender, with the touch of a button, the air is removed from the blending jug, reducing the exposure to oxygen and creating a vibrant coloured smoothie. Secondly, the air in a normal blender will create lots of bubbles or froth. When using a Vacuum Blender, this froth is avoided and results in a more full-bodied smoothie which tastes rich and fresh.
Use the Vacuum Function with the storage accessories to remove air from dips, sauces, baby food, leftover wine and more to prolong freshness.
natural_image
Top-down view of several green tea cups filled with clear liquids, accompanied by fresh leaves (no text or symbols visible)
natural_image
Top-down view of two pink creamy pastries with green seeds, surrounded by small bowls of beans and spoons (no text or symbols visible)Recipes
View our complete recipe collection online
www.biochef.kitchen/recipes
Banana Protein Smoothie
- 4 bananas (frozen for thicker/creamier consistency)
- 1 serving of protein of your choice (whey, hemp, rice, pea etc)
- 2 pitted dates
• 1 tsp. chia - 1 tsp. flax seeds
• 2 cups of nut milk
Place all ingredients in the jug and select Smoothie mode.
Green Chia Smoothie
- 1 cup of greens (spinach, kale, lettuce)
- 2 bananas (frozen for thicker/creamier consistency)
- 12 cup blueberries (frozen or fresh)
- 2 dates
• 1 tsp. chia - 1 tsp. spirulina power
• 2 cups of nut milk
Place all ingredients in the jug and select Smoothie mode.
Pink Flower Smoothie
- 5 ripe frozen bananas
• 1 cup frozen raspberries - 1 tsp. rosewater
• 1 cup almond milk
• 1 tsp. chia - Berries and edible flowers for garnish
Place all ingredients in the jug and select Smoothie mode.
Vanilla Green Smoothie
- 1 handful of spinach or your choice of greens
• 1 handful of peppermint
• 2 ripe frozen bananas
• 1 cup coconut milk
• 1 vanilla bean or essence - Squeeze of lemon
Place all ingredients in the jug and select Smoothie mode.
Raspberry & Strawberry Smoothie Bowl
- 12 cup of frozen raspberries
• 12 cup of frozen strawberries - 2 frozen bananas
• 1 tbsp. honey or agave
• 2 cups of nut milk
Place all ingredients in the jug and blend using Smoothie mode until desired consistency.
Chocolate Peanut Smoothie Bowl
- 2 bananas
• 4 dates
• 1 tbsp. of peanut butter
• 2 tbsp. of cocoa powder
Place all ingredients in the jug and blend using Smoothie mode until desired consistency.
Açai Bowl
• 1 tbsp. acai powder
- 1 frozen banana
- 12 cup frozen raspberries
- 12 cup frozen blueberries
- 12 cup coconut water
- toppings of your choice
Place all ingredients in the jug and blend using Smoothie mode until desired consistency.
Pour into a bowl and decorate with toppings.
Tropical Smoothie
- 1 cup ripe mango
- 1 small orange
- 1 banana sliced
- 12 cup yogurt or milk
- 1 tsp. honey
- 5 ice-cubes (optional)
Place all ingredients in the jug and blend using Smoothie mode until desired consistency.
Piña Colada Iceblocks
- 12 cup pineapple
- 12 cup rockmelon
- 12 banana
- 3/4 cup reduced-fat coconut milk
- 14 cup water
- 14 tsp. vanilla extract
Place all ingredients in the jug and select Smoothie blend mode. Pour into iceblock molds and freeze.
Gluten, Dairy & Sugar Free Pancakes
- 2 ripe bananas
- 2 eggs
• 1 cup oat flour (grounded oats)
• 1 tbsp. baking powder
• 1 tbsp. vanilla essence
• 1 tbsp. maple syrup or honey - 1 splash of oatmilk, almond milk, coconut milk or soy milk
Place all ingredients in the jug and blend using Nut mode until desired consistency.
Cook pancakes in frying pan and add your desired toppings.
Ava's Favourite Babyfood
- 12 clove garlic
- 12 tsp turmeric
- small piece of ginger
- 12 cup potato
- 12 cup sweet potato
- 1 tbsp. pesto
- dash coconut water / water
Parboil potato and sweet potato. Place all ingredients in the jug and blend using Nut mode until desired consistency.
Raw Tomato Soup
- 1 cup tomatoes
- 1 clove garlic
• 1 cup chicken / vege stock / water - 14 cup cashews or avocado (optional)
- salt & pepper to taste
- chilli if desired
- fresh herbs to serve
Place all ingredients in the jug and select Vegetable blend mode.
Remove from jug and heat over stove if desired.
Cashew Nut Milk
• 2 cups filtered water
• 1 cup raw cashews (soak 8 hrs)
• 1 tsp. agave nectar / honey
• 1 tsp. vanilla bean
• 1 tsp. ground cinnamon
Soak cashews for 8 hours, drain and rinse well. Blend using Nut mode until desired consistency. Adjust the consistency of the milk by adding or removing water.
Mint Chocolate Ice Cream
- 3 frozen bananas
• 3 to 5 drops of mint extract - 12 cup coconut cream or raw cashews
• 2-3 tbsp. chocolate chips - pinch of salt
- optional pinch spirulina
Place all ingredients in the jug and blend using Nut mode until desired consistency.
Vegan Pineapple Coconut Ice Cream
• 1 cup full fat coconut milk
• 1 tbsp. coconut oil (melted)
- 12 cup chopped, pitted dates
• 4 cups of frozen pineapple
Place all ingredients in the jug and blend using Nut mode until desired consistency.
BIOCHEF AIRFREE VACUUM BLENDER WARRANTY
WARRANTY PERIOD: 2 YEARS
VITALITY 4 LIFE IS THE GLOBAL DISTRIBUTOR AND WARRANTY PROVIDER OF BIOCHEF. WARRANTY REGISTRATION AND CLAIMS ARE HANDLED BY YOUR LOCAL VITALITY 4 LIFE SUPPORT CENTRE, DETAILS ON INSIDE BACK COVER.
PLEASE REGISTER YOUR WARRANTY ONLINE AT WARRANTY.VITALITY4LIFE.COM WITHIN 30 DAYS OF PURCHASE.
LODGING A WARRANTY CLAIM
Should you experience any issues with your product, please follow these steps to lodge a warranty claim:
- Contact your local Vitality 4 Life Service Centre with the following details:
- Your warranty details including name, email and phone number
– Product name and model number
– Product serial number, found on the rating label of the product
– Explanation of how the damage occurred -
Photos of the damage or issue is highly beneficial to expediting your claim
-
Vitality 4 Life will assess your claim and respond within 24-48 hours.
-
In the event the product is required to be sent to the Service Centre, the customer is liable for all packing, freight and insurance costs for transit of the product to Vitality 4 Life. Subject to the applicable consumer laws in your jurisdiction.
-
If the product, or one of its parts, qualifies for replacement or service within the 30-Day period after date of purchase, Vitality 4 Life will arrange the shipping at no cost to you.
-
Any product sent to a Vitality 4 Life Service Centre must include a Return Authorization Form. Failure to include this form may result in the product being rejected from our warehouse or a delayed service time.
-
Vitality 4 Life will contact you with a quote prior to undertaking any service work outside of the warranty coverage.
-
Typical turn-around times to address warranty claims can be between 10-14 business days, plus shipping, depending on location and type of damage or warranty claim.
TERMS OF PRODUCT WARRANTY COVERAGE
Vitality 4 Life provides the Product Warranty coverage as further described below and limited to the terms and conditions hereof:
-
If the Product exhibits a defect while in normal domestic use, within the warranty period; we will, at our option, either repair or replace the Product or defective part free of charge. The product must be delivered by insured mail, in proper packaging to your Service Centre as indicated on the back of the manual as a condition to any warranty service obligation.
-
In the event that the warranty period for a product has expired, or if a Product does not qualify for warranty service, repair or replacement, consumers may still buy replacement parts or have products repaired by one of
Vitality 4 Life's Service Centres. Please contact Vitality 4 Life for further information.
- Do not send the product back to the Service Centre without a Return Authorization Form.
- In no event shall our liability exceed the retail value of the product. We make no warranty with respect to parts, from a source other than Vitality 4 Life.
- In the event that warranty parts or products are provided, the customer must cover the related shipping costs to receive goods.
- All exchanged or substitute parts and products replaced under warranty service will become the property of Vitality 4 Life. Repaired or replaced products or parts thereof will be warranted by Vitality 4 Life for the balance of the original warranty period.
- (Australia only) Our goods come with guarantees that cannot be excluded under the Australian Consumer Law. You are entitled to a replacement or refund for a major failure and compensation for any other reasonably foreseeable loss or damage. You are also entitled to have the goods repaired or replaced if the goods fail to be of acceptable quality and the failure does not amount to a major failure.
WARRANTY DOES NOT COVER
- Damage, accidental or otherwise, to the Product, not caused by direct defect in factory workmanship or materials.
- Damage due to abuse, mishandling, alteration, misuse, commercial service, tampering, accident, failure to follow care, operating and handling provisions indicated in the instructions.
- Damage caused by parts or service not authorized or performed by Vitality 4 Life.
- 'Normal' wear and tear that naturally and inevitably occurs as a result of normal use or aging.
- Some states do not allow the exclusion or limitation of incidental or consequential damages. Therefore, the above limitations may not apply to you in the case of damage in shipment. If the Product was damaged in shipment: Immediately report this type of damage to the parcel carrier and have them file an inspection report to contact the distributor from whom you purchased the Product for further instructions.
- You have rights and benefits under the consumer laws in your jurisdiction. Without detracting from these rights or benefits, Vitality 4 Life excludes all liability in respect of this product for any other loss which is not reasonably foreseeable from a failure of this product, which may include liability for negligence, loss of expenditure associated with the product and loss of enjoyment.
text_image
AirFree Blender Sous Vide BioCHEF OFF BEANS MEDIUM ZONE COULUM ZONE COULUM ZONE COULUM ZONE COULUM ZONEMANUEL D'UTILISATION ET RECETTES
natural_image
Close-up of a black plastic mechanical component with a red arrow indicating a circular feature (no text or symbols visible)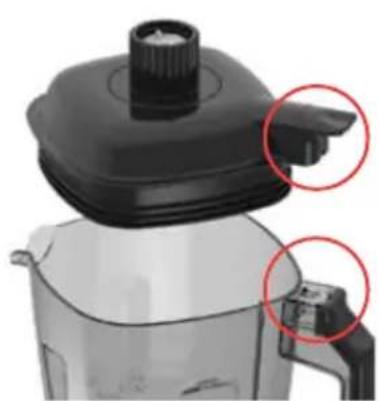
natural_image
Close-up of a kitchen blender with black lid and red circular annotations (no text or symbols)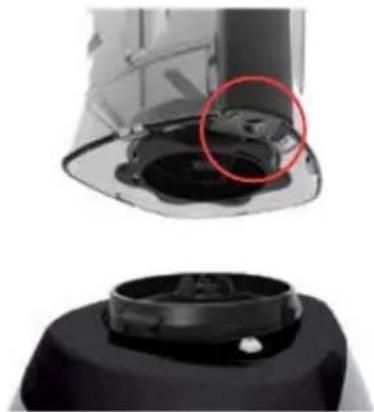
natural_image
Close-up of a device's internal components, showing a highlighted red circle and a black base (no text or symbols visible)1er Étape
natural_image
Close-up of a kitchen blender with a red arrow pointing to the blade (no text or symbols visible)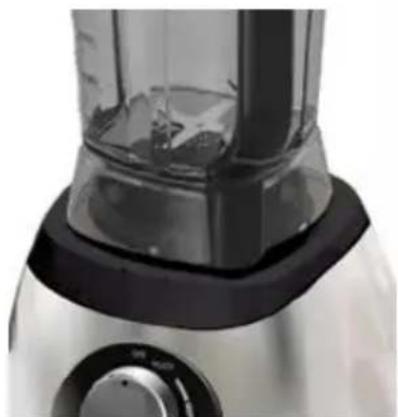
natural_image
Close-up of a kitchen blender with clear glass and black casing (no visible text or symbols)4ème Étape
natural_image
Bio Chef blender with black handle and control panel (no visible text or symbols on body)natural_image
Person using a microwave blender to clean tomatoes in a glass container (no visible text or symbols)natural_image
Person preparing food using a Ello Chef air fryer on a cutting board (no visible text or symbols)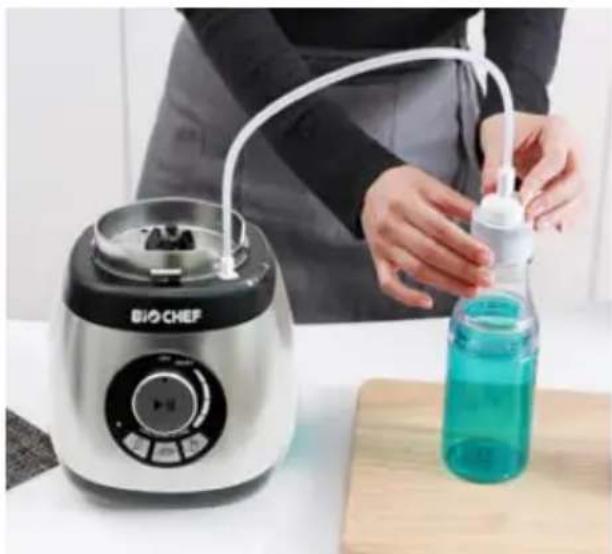
natural_image
Person using a BioCHEF blender with a blue liquid bottle nearby (no visible text or symbols on the device or background)
natural_image
Top-down view of several green tea cups with leaf spines, arranged on a white background (no text or symbols visible)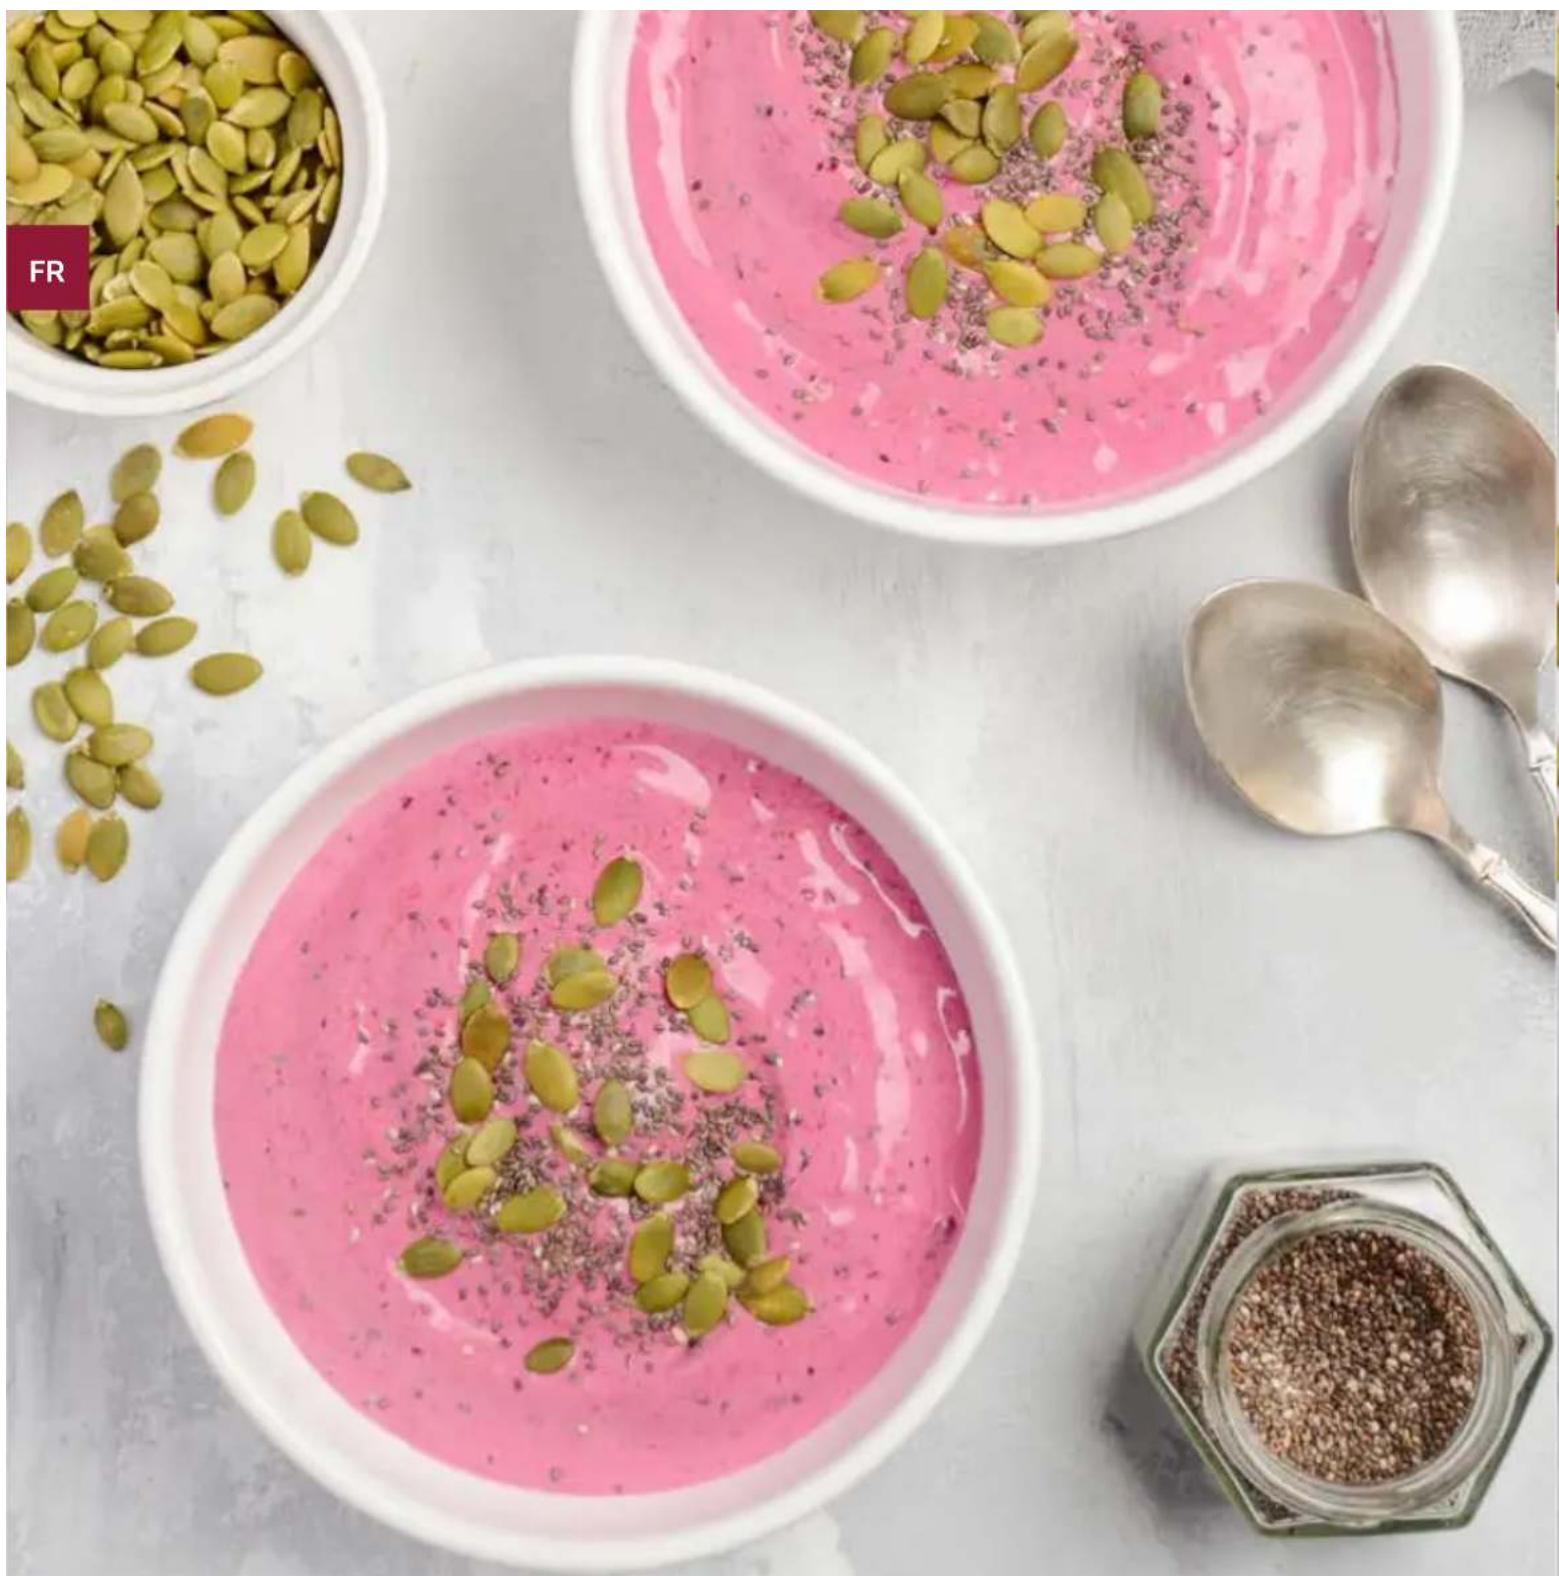
natural_image
Top-down view of two pink creamy pastries with green seeds, surrounded by small bowls of yellow seeds and spoons (no text or symbols visible)Recettes
Smoothie Bowl Fraises/Framboises
LA GARANTIE NE COUVRE PAS
natural_image
Close-up of a black plastic mechanical component with a red arrow indicating a circular feature (no text or symbols visible)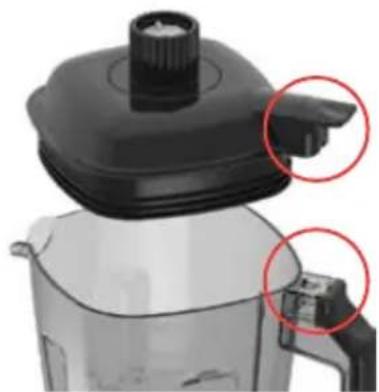
natural_image
Close-up of a kitchen blender with black lid and red circular annotations highlighting the top and side ports (no text or symbols present)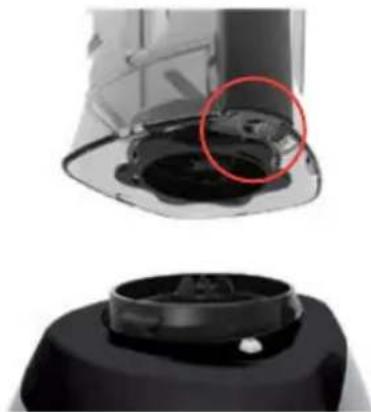
natural_image
Close-up of a kitchen appliance with a red circle highlighting a component, showing interior and exterior views (no text or symbols)Schritt 1
natural_image
Close-up of a kitchen blender with a red arrow pointing to the interior area (no text or symbols visible)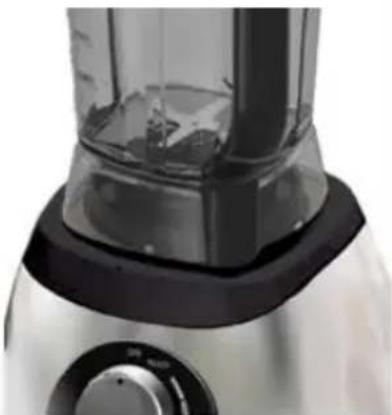
natural_image
Close-up of a kitchen blender with black handle and white interior (no visible text or symbols)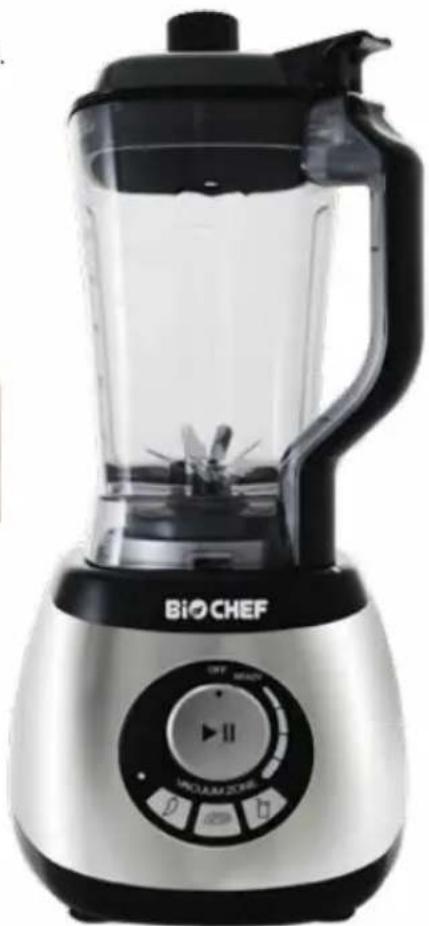
natural_image
Bio Chef blender with black handle and control panel (no visible text or symbols on device body)Schritt 4
natural_image
Person using a portable blender with a green plastic container filled with red tomatoes, placed on a wooden cutting board (no visible text or symbols)natural_image
Person preparing food using a BioChef blender on a cutting board (no visible text or symbols)VAKUUMFLASCHE
natural_image
Person using a BioCHEF blender with a blue liquid bottle on a wooden table (no text or symbols visible)Fehlerbehebung

natural_image
Top-down view of multiple green tea cups with leafy leaves, arranged on a white background (no text or symbols visible)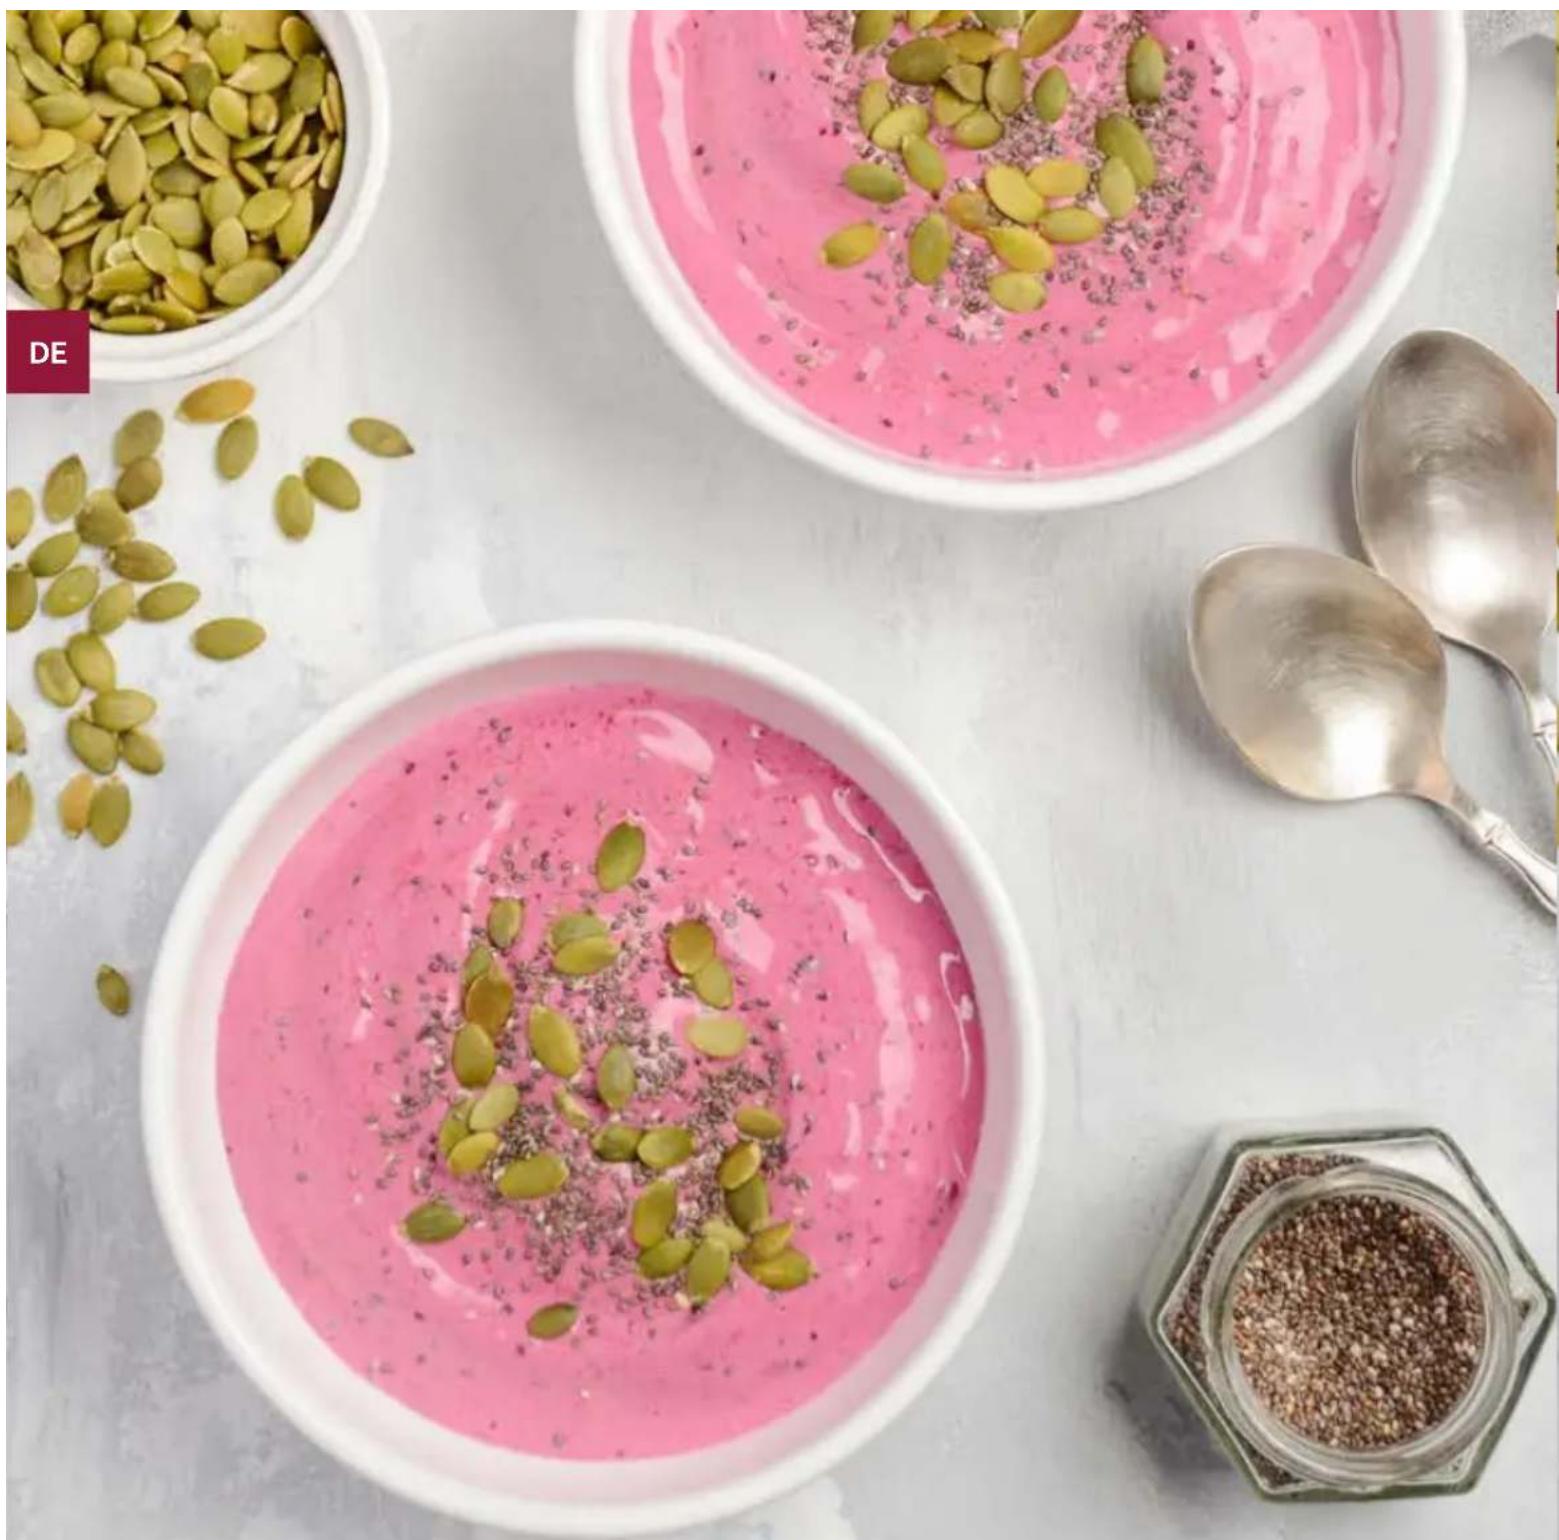
natural_image
Top-down view of two pink creamy pastries with green seeds, accompanied by scattered yellow seeds and a spoon on a white surface (no text or symbols)Rezepte
natural_image
Close-up of a black plastic mechanical component with a red arrow indicating a circular feature (no text or symbols visible)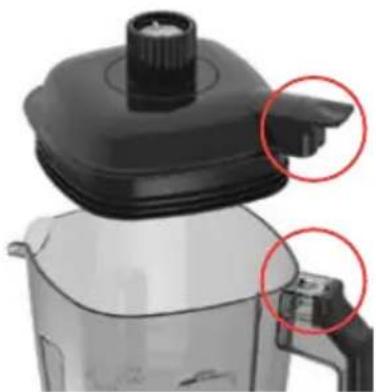
natural_image
Close-up of a kitchen blender with black lid and red circular annotations highlighting the top and side ports (no text or symbols present)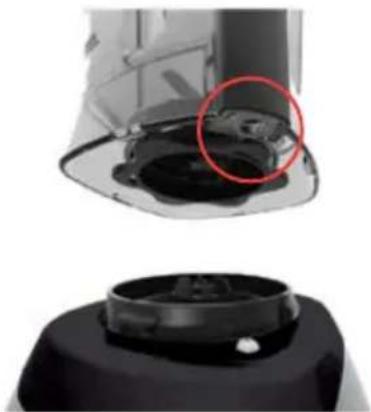
natural_image
Close-up of a kitchen appliance showing a lid and base, with a red circle highlighting the interior area (no text or symbols visible)Paso 1
natural_image
Close-up of a kitchen blender with a red arrow pointing to the blade (no text or symbols visible)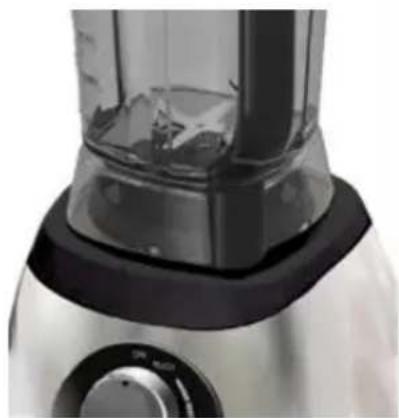
natural_image
Close-up of a kitchen blender with black handle and plastic casing (no visible text or symbols)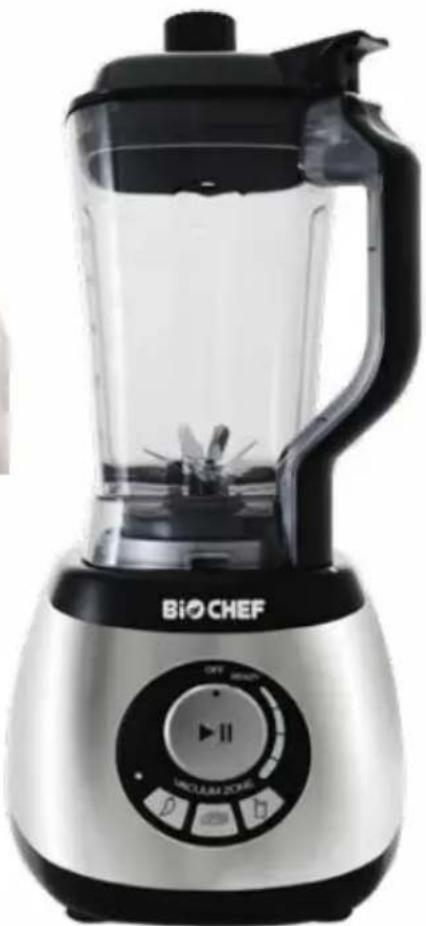
natural_image
Bio Chef blender with black handle and digital control panel (no visible text or symbols on device body)Paso 4
natural_image
Person using a blender with a plastic container filled with red tomatoes, placed on a wooden cutting board (no visible text or symbols)natural_image
Person preparing food using a BINGCHEF air fryer on a cutting board (no visible text or symbols)BOTELLAS
natural_image
Person using a BioChef blender with a blue liquid bottle on a wooden table (no text or symbols visible)natural_image
Top-down view of two pink creamy pastries with green seeds, accompanied by small bowls of yellow seeds and a spoon on a white surface (no text or symbols visible)Recetas
Support & Service Centres
Contact your local distributor for warranty & service
Vitality 4 Life – Australia & New Zealand
Email: support@vitality4life.com
Website: www.vitality4life.com.au
Vitality 4 Life – United Kingdom
Email: support@vitality4life.co.uk
Website: www.vitality4life.co.uk
Vitality 4 Life - United States
Email: support@vitality4life.com
Website: www.vitality4life.com
Vitality 4 Life – France
Email: support@vitality4life.fr
Website: www.vitality4life.fr
Website: www.vitality4life.it
Vitality 4 Life – España
Email: atencioncliente@vitality4life.es
Website: www.vitality4life.es
Vitality 4 Life – Netherlands
Email: info@vitality4life.co.nl
Website: www.vitality4life.co.nl
Be inspired...
biochef.kitchen/recipes