
Caswell Plus - Vacuum Cleaner Klarstein - Free user manual and instructions
Find the device manual for free Caswell Plus Klarstein in PDF.

| Product type | Stick vacuum with washing function |
| Brand | Klarstein |
| Model | Caswell Plus |
| Dimensions (L x W x H) | 1150 x 270 x 250 mm |
| Net weight | 3.9 kg |
| Battery voltage | 22.2 V DC |
| Battery capacity | 5000 mAh |
| Charging time | 6 hours |
| Runtime in ECO mode | 40 minutes |
| Runtime in MAX mode | 35 minutes |
| Rated power | 150 W |
| Noise level | 70 dB |
| Pure water tank capacity | 700 ml |
| Dirty water tank capacity | 550 ml |
| Power adapter | Input 100-240 V ~ 50/60 Hz, output 27 V DC 0.8 A |
| Functions | Vacuuming, washing, ECO/MAX modes, water spraying, self-cleaning, voice control (depending on version) |
| Included accessories | Roller brush, HEPA filter, cleaning tool, charging station |
| Maintenance | Regular cleaning of tanks, HEPA filter, roller brush, and sensors |
| Replaceable parts | HEPA filter (every 3-6 months), roller brush (every 3-6 months) |
| Disposal | Do not dispose with household waste; batteries must be recycled separately |
Frequently Asked Questions - Caswell Plus Klarstein
User questions about Caswell Plus Klarstein
0 question about this device. Answer the ones you know or ask your own.
Ask a new question about this device
Download the instructions for your Vacuum Cleaner in PDF format for free! Find your manual Caswell Plus - Klarstein and take your electronic device back in hand. On this page are published all the documents necessary for the use of your device. Caswell Plus by Klarstein.
USER MANUAL Caswell Plus Klarstein
Wet/dry vacuum cleaner
CLEANINGCI LEANINGLE ANINGLE NINGLE GCLEANINGCI CLEANINGLE ANINGLE CLEAN

KLARSTEIN
www.klarstein.com

bar
| Category | Value | |---|---| | Category 1 | 100 | | Category 2 | 100 | | Category 3 | 100 | | Category 4 | 100 | | Category 5 | 100 | | Category 6 | 100 | | Category 7 | 100 | | Category 8 | 100 | | Category 9 | 100 | | Category 10 | 100 | | Category 11 | 100 | | Category 12 | 100 | | Category 13 | 100 | | Category 14 | 100 | | Category 15 | 100 | | Category 16 | 100 | | Category 17 | 100 | | Category 18 | 100 | | Category 19 | 100 | | Category 20 | 100 | | Category 21 | 100 | | Category 22 | 100 | | Category 23 | 100 | | Category 24 | 100 | | Category 25 | 100 | | Category 26 | 100 | | Category 27 | 100 | | Category 28 | 100 | | Category 29 | 100 | | Category 30 | 100 | | Category 31 | 100 | | Category 32 | 100 | | Category 33 | 100 | | Category 34 | 100 | | Category 35 | 100 | | Category 36 | 100 | | Category 37 | 100 | | Category 38 | 100 | | Category 39 | 100 | | Category 40 | 100 | | Category 41 | 100 | | Category 42 | 100 | | Category 43 | 100 | | Category 44 | 100 | | Category 45 | 100 | | Category 46 | 100 | | Category 47 | 100 | | Category 48 | 100 | | Category 49 | 100 | | Category 50 | 100 | | Category 51 | 100 | | Category 52 | 100 | | Category 53 | 100 | | Category 54 | 100 | | Category 55 | 100 | | Category 56 | 100 | | Category 57 | 100 | | Category 58 | 100 | | Category 59 | 100 | | Category 60 | 100 | | Category 61 | 100 | | Category 62 | 100 | | Category 63 | 100 | | Category 64 | 100 | | Category 65 | 100 | | Category 66 | 100 | | Category 67 | 100 | | Category 68 | 100 | | Category 69 | 100 | | Category 70 | 100 | | Category 71 | 100 | | Category 72 | 100 | | Category 73 | 100 | | Category 74 | 100 | | Category 75 | 100 | | Category 76 | 100 | | Category 77 | 100 | | Category 78 | 100 | | Category 79 | 100 | | Category 80 | 100 | | Category 81 | 100 | | Category 82 | 100 | | Category 83 | 100 | | Category 84 | 100 | | Category 85 | 100 | | Category 86 | 100 | | Category 87 | 100 | | Category 88 | 100 | | Category 89 | 100 | | Category 90 | 100 | | Category 91 | 100 | | Category 92 | 100 | | Category 93 | 100 | | Category 94 | 100 | | Category 95 | 100 | | Category 96 | 100 | | Category 97 | 100 | | Category 98 | 100 | | Category 99 | 100 | | Total (Total) = [sum of bars] / [values] * (sum of bars + bars) * (sum of bars + bars) * (sum of bars + bars) * (sum of bars + bars) * (sum of bars + bars) * (sum of bars + bars) * (sum of bars + bars) * (sum of bars + bars) * (sum of bars + bars) * (sum of bars + bars) * (sum of bars + bars) * (sum of bars + bars) * (sum of bars + bars) * (sum in brackets) * (sum in brackets) * (sum in brackets) * (sum in brackets) * (sum in brackets) * (sum in brackets) * (sum in brackets) * (sum in brackets) * (sum in brackets) * (sum in brackets) * (sum in brackets) * (sum in brackets) * (sum in brackets) * (sum in brackets) * (sum in brackets) * (sum in brackets) * (sum in brackets) * (total).* (sum in brackets) * (sum in brackets) * (sum in brackets) * (sum in brackets) * (sum in brackets) * (sum in brackets) * (sum in brackets) * (sum in brackets) * (sum in brackets) * (sum in brackets) * (sum in brackets) * (sum in brackets) * (total).* (sum in brackets) * (sum in brackets) * (sum in brackets) * (sum in brackets)INHALTSVERZEICHNIS
Technische Daten 4
natural_image
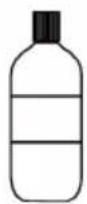
Line drawing of a vacuum cleaner (no text or symbols)Hauptgerät x 1
natural_image
Technical line drawing of a mechanical component with no visible text or symbolsHauptgerät x 1
Hauptgerät x 2
natural_image
Technical line drawing of a cylindrical mechanical component (no text or symbols)Rollenbürste x 1

natural_image
Line drawing of a mechanical device with wires and a cylindrical component (no text or symbols)Hauptgerät x 1
HEPA Bürste
natural_image
Line drawings of two different vacuum cleaner designs labeled 3.1 and 3.2 (no text or symbols on the device itself)natural_image
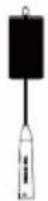
Line drawing of a handheld electronic device with a cable and connector (no text or symbols)BEDIENUNG
Laden
natural_image
Line drawing of a vacuum cleaner assembly (no text or symbols)Selbstreinigung
natural_image
Line drawing of a vacuum cleaner with handle and control panel (no text or symbols)natural_image
Line drawings of two different vacuum cleaner designs (no text or symbols)natural_image
Technical line drawing of a mechanical device with an open lid and internal components (no text or symbols)Reiningungsintervalle
Member of Berlin Brands Group
Handwerkerstr. 11
15366 Dahlwitz-Hoppegarten
Deutschland
natural_image
Symbol of a trash bin crossed with a diagonal line, representing no waste or discharge (no text or labels)Berlin Brands Group UK Ltd
PO Box 1145
Oxford, OX1 9UW
United Kingdom
Dear customer,
Congratulations on your purchase. Please read the following instructions carefully and follow them to prevent potential damage. We accept no liability for damage caused by disregarding the instructions or improper use. Please scan the QR code to access the latest operating instructions and for further information about the product.

CONTENTS
Technical Data 24
Safety Instructions 25
Scope of delivery 26
Device overview 27
Getting Started 29
Operation 32
Cleaning and care 34
Troubleshooting 36
Disposal Considerations 39
Manufacturer & Importer (UK) 39
TECHNICAL DATA
| Model 10041383 | |
| Dimensions 1150 x 270 x 250 mm | |
| Operating voltage 22.2 V DC | |
| Noise level 70 dB | |
| Rated voltage 150 W | |
| Adapter input power 100 - 240 V ~ 50/60 | Hz |
| Battery capacity 5000 mAh | |
| Adapter output power DC 27 V 0.8 A | |
| Clean water tank capacity 700 ml | |
| Loading time 6 h | |
| Dirty water tank capacity 550 ml | |
| Operating time | ECO mode: 40 min |
| MAX mode: 35 min | |
| Net weight 3.9 kg |
SAFETY INSTRUCTIONS
- Read all instructions carefully before use and keep the user manual in a safe place for future reference.
- Do not leave the device unattended when it is in operation.
- Do not use the device in rooms where there are flammable materials or explosive substances.
- Always disconnect the plug before removing the tank cover.
- Make sure that children do not play with the device. Please ensure that you supervise children when using this device.
- Use the device exactly as described in the instructions. Only use equipment that is expressly recommended by the manufacturer.
- Do not use the device if the power cord, plug or other parts of the device are damaged.
- Servicing is required when the device has been damaged in any way, such as when the power supply cord or plug is damaged, liquid has been spilled or objects have fallen into the device, the device has been exposed to rain or moisture, or does not operate normally.
- Sparks inside the engine can ignite flammable vapours or dust. To reduce the risk of fire or explosion, do not use the device near flammable liquids, gases, dusts, petrol or other fuels, volatile liquids, cleaning agents, oil varnishes, natural gas, coal dust, magnesium dust or aluminium dust.
- Do not pull or carry the unit by the cable. Do not close doors through which the cable passes and do not lay the cable along sharp edges.
- Do not pull the plug out of the socket by the cable; instead, hold it securely with your hand while unplugging it.
- Do not touch the device or the plug with wet hands.
- Do not insert any objects into the ventilation holes. Do not use the device if the ventilation openings are blocked. Keep the openings free of dirt, hair or similar.
- Keep your hair, clothes, fingers and other body parts away from the device while it is in operation.
- Switch off the unit before pulling the plug from the socket.
- Be careful when cleaning stairs.
- Do not vacuum any flammable or explosive liquids,
- Do not vacuum hot objects such as cigarettes or hot ashes.
- Do not use the device without a filter.
- Unplug from outlet before installing or changing hoses, nozzles, or accessories.
- Store the unit in a dry place. Stow it away after each cleaning so that no one falls over it.
- Children from the age of 8 years and mentally, sensory and physically impaired persons may only use the device if they have been informed in detail about the functions and safety precautions by a supervisor responsible for them beforehand and understand the associated risks.
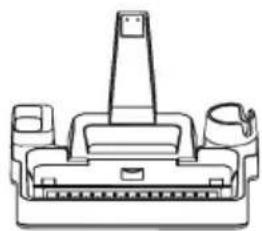
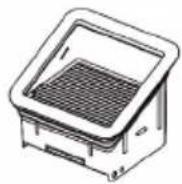
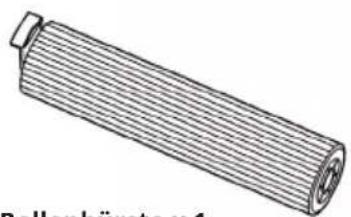
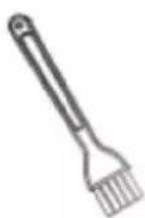
SCOPE OF DELIVERY

natural_image
Line drawing of a vacuum cleaner (no text or symbols present)Main unit x 1

natural_image
Technical line drawing of a mechanical component with no visible text or symbolsMain unit x 1
Main unit x 2
natural_image
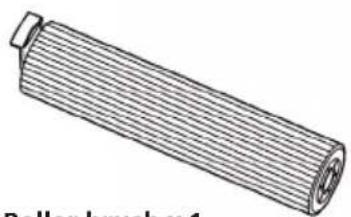
Illustration of a roller brush with a flat blade and central hub (no text or symbols)Roller brush x 1
natural_image
Line drawing of a mechanical device with wires and a cylindrical component (no text or symbols)Main unit x 1
HEPA brush
Floor cleaner (optional); suitable for cleaning all stains on the floor
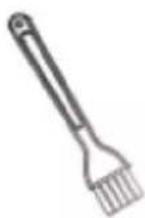
Cleaning tool (suitable for cleaning dirty water tank and knotted hairs in the roller brush)

Digital screen
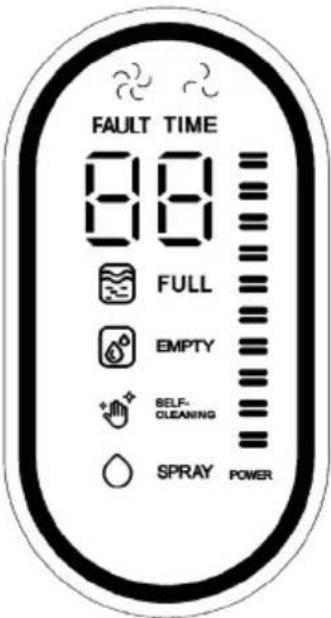 | The light indicator lights up white when the unit is in ECO mode. | |
| The light indicator lights up white when the unit is in MAX mode. | ||
| 88 | During normal cleaning, the operating time from switching on to the current time is displayed.When the unit is in self-cleaning mode, the self-cleaning countdown is displayed from "59" to "0".If the unit has a problem, the corresponding error code is displayed to identify the problem. | |
| The indicator light flashes red slowly when the dirty water tank is full. Empty the dirty water tank in good time. | ||
| The indicator light flashes red slowly when the water tank needs to be refilled. Fill it up with clean water. | ||
| The light indicator lights up white when the unit is in self-cleaning mode. | ||
| The battery light flashes white slowly during charging. The indicator stops flashing when the unit is fully charged. | ||
| When you spray water, the indicator light lights up white. |
GETTING STARTED
1. Dismantling handle and installation
| 1.1 1.2 | |
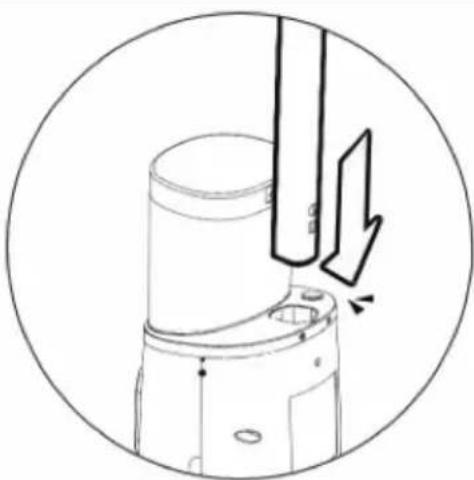 | 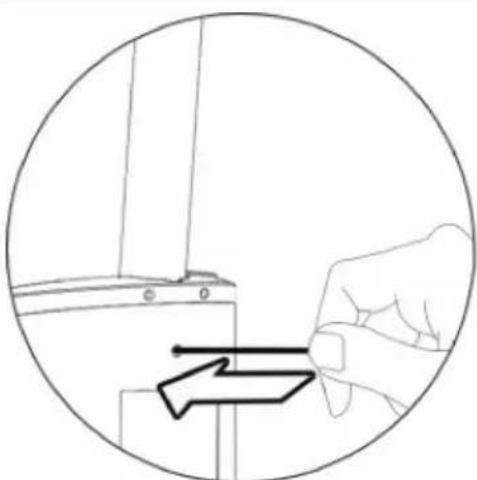 |
| InstallationInstallation: Insert the handle connection tube into the opening on the unit housing. If a clicking sound is heard, the installation has been done correctly. | DisassemblyUse a suitable screwdriver or Allen key, insert it into the small hole at the back of the unit and push in while removing the handle. |
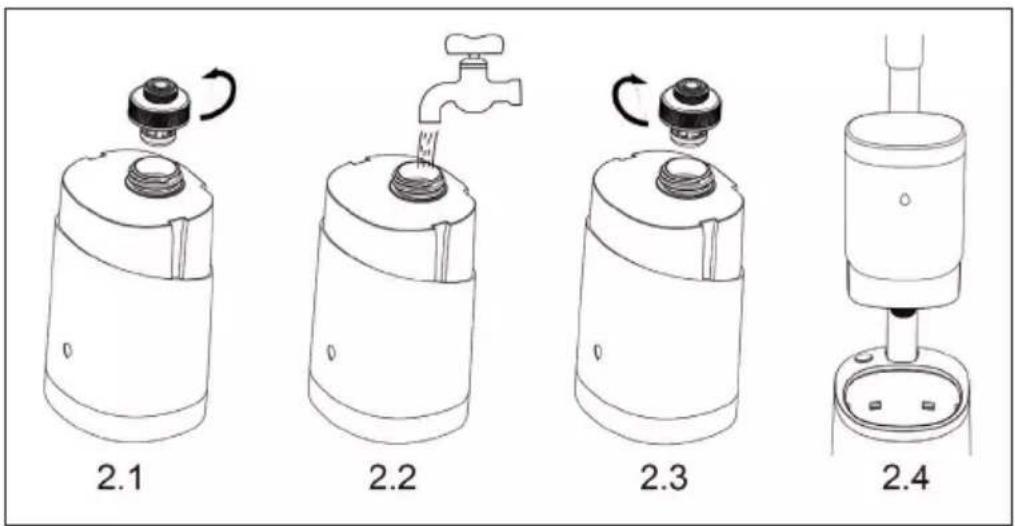
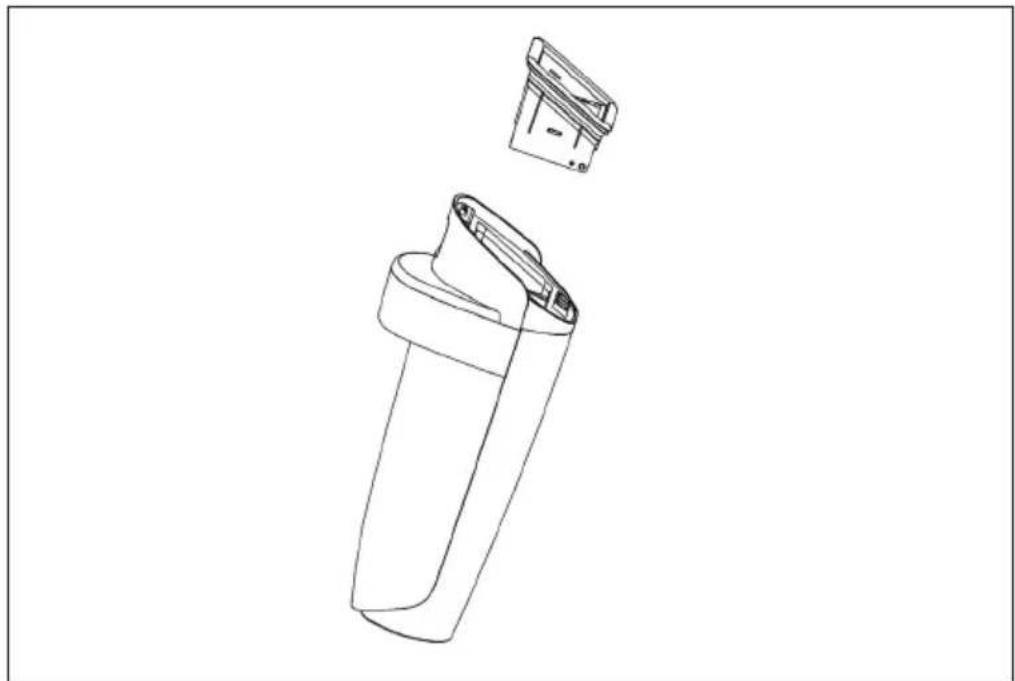
2. Installation of the clean water tank
Unscrew the water tank cover (see figure 2.1). Fill the water tank with clean water. Screw the water tank cover clockwise (see figure 2.3) and put the water tank back into the device (see figure 2.4). As soon as you hear a clicking sound, the water tank is correctly inserted.
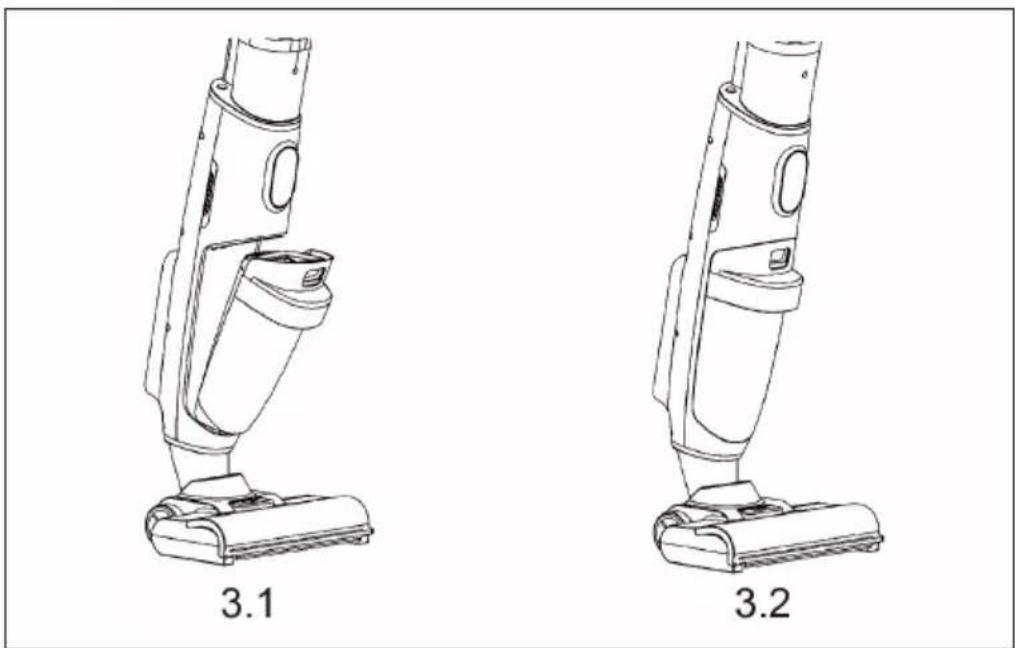
3. Installation of the dirty water tank
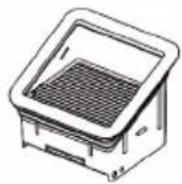
The underside of the dirty water tank is located at the opening of the housing (see figure 3.1). If you press it inwards and you hear a clicking sound, the dirty water tank has been installed correctly.
natural_image
Line drawings of two different vacuum cleaner designs labeled 3.1 and 3.2 (no text or symbols on the device itself)4. Installing the roller brush
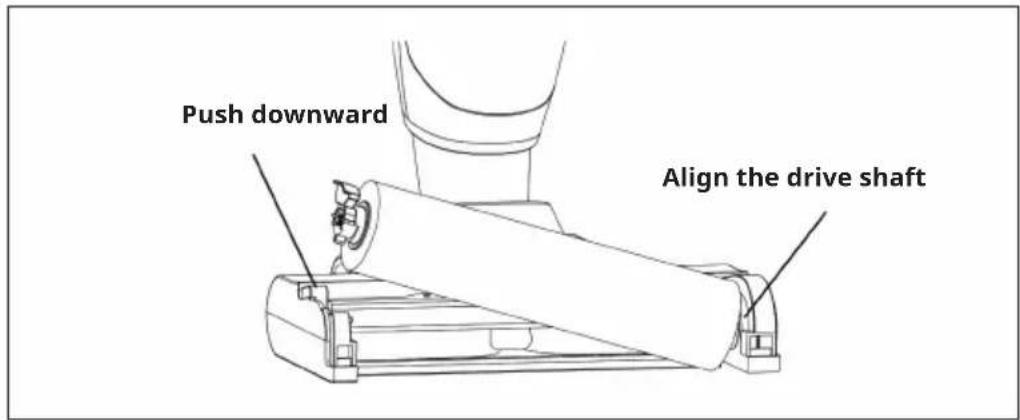
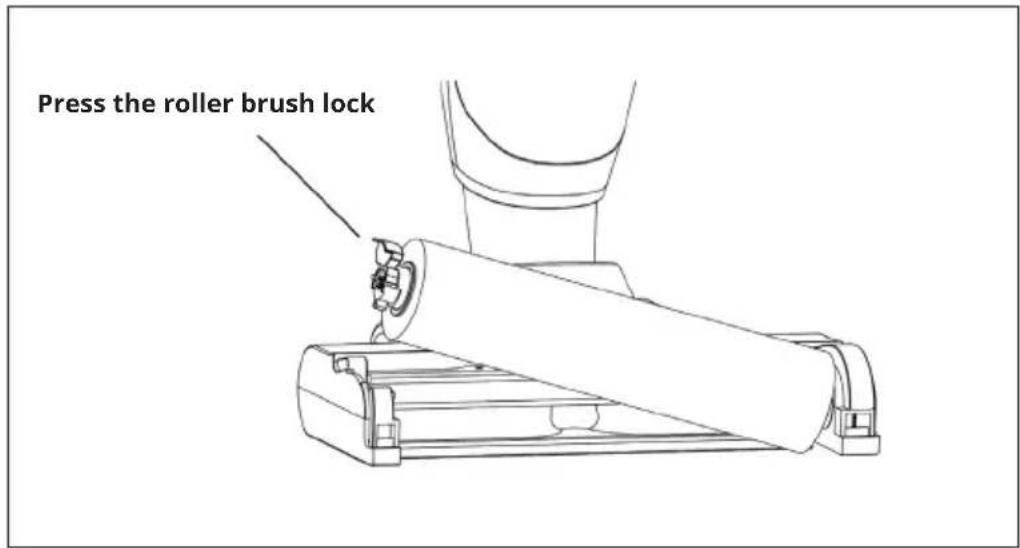
Align the groove on the right side of the brush with the drive shaft and push down the roller brush on the left side until it is installed.
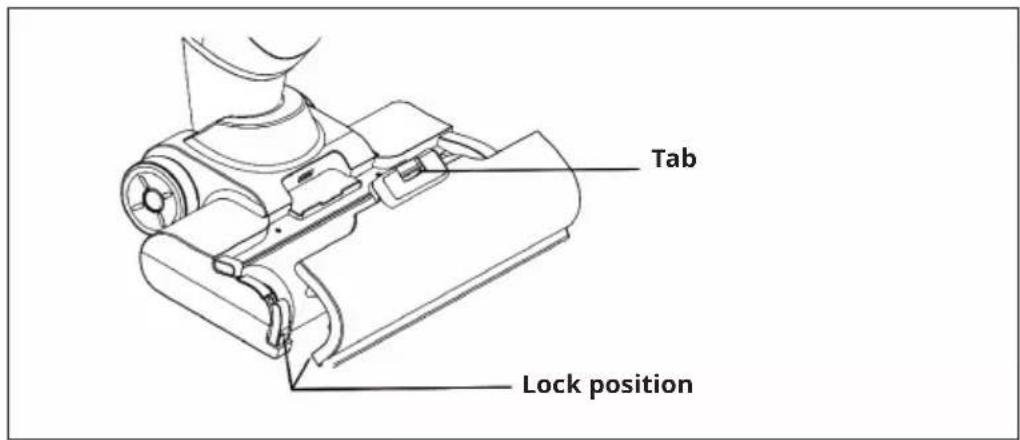
5. Installing the viewing window on the roller brush
As shown in the illustration below, the viewing window must be attached to the tab of the brush. If you hear a clicking sound, the installation has been successful.
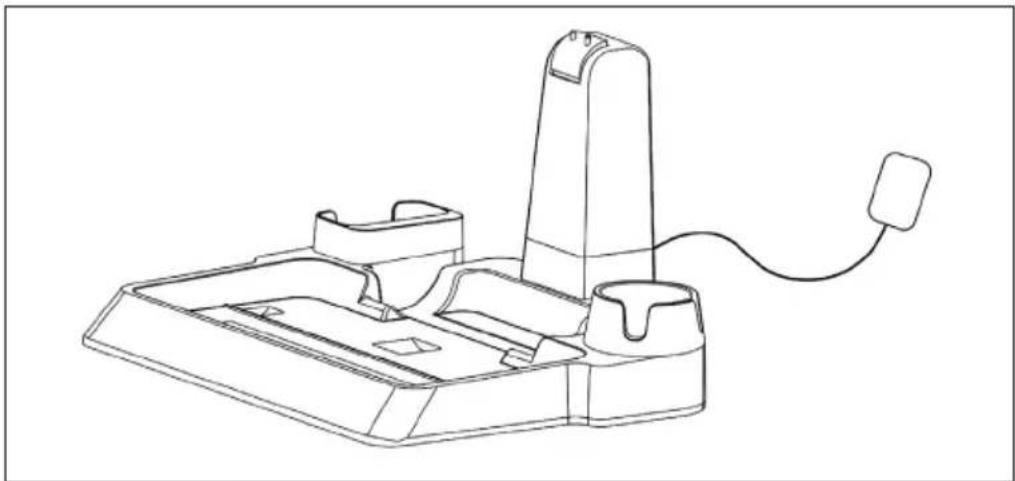
6. Installing the self-cleaning and charging station
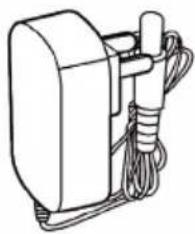
Insert the charging connector into the corresponding position on the charging station and the mains plug into the socket.
natural_image
Line drawing of a handheld electronic device with a cable and connector (no text or symbols)OPERATION
Shop
Align the unit with the charging station. As soon as the batteries come into contact with the charging station, the unit starts charging.

natural_image
Line drawing of a vacuum cleaner assembly (no text or symbols)Self-cleaning
When the machine is charging in the charging station, press the self-cleaning button to activate the self-cleaning mode. Make sure that there is water in the clean water tank during use.
Use
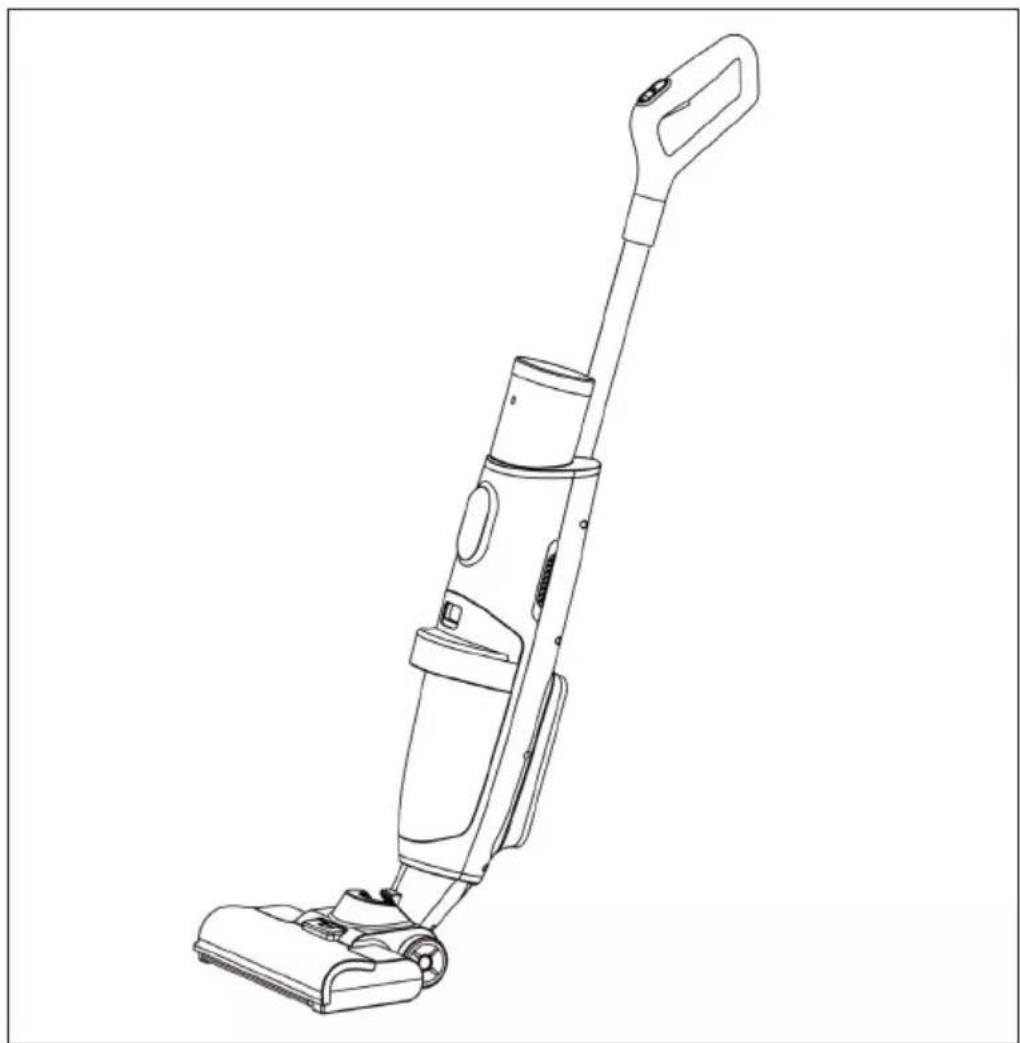
Tilt the unit to the correct angle and press the on/off button to start operation.
natural_image
Line drawing of a vacuum cleaner with extended handle and base (no text or symbols)Important notes on operation
- If there is a large amount of foam in the dirty water tank during operation, clean the dirty water tank in good time to prevent the water from flowing into the fan motor.
• To prevent water from flowing into the fan motor, avoid rapid pushing and pulling during operation - Watch out for dirt in the dirty water tank while working so as not to block the detector and affect full water detection.
• Before charging the device, switch it off.
CLEANING AND CARE
Note: Unplug the device, switch off the device and remove the battery before servicing and maintaining the device.
Water tank maintenance
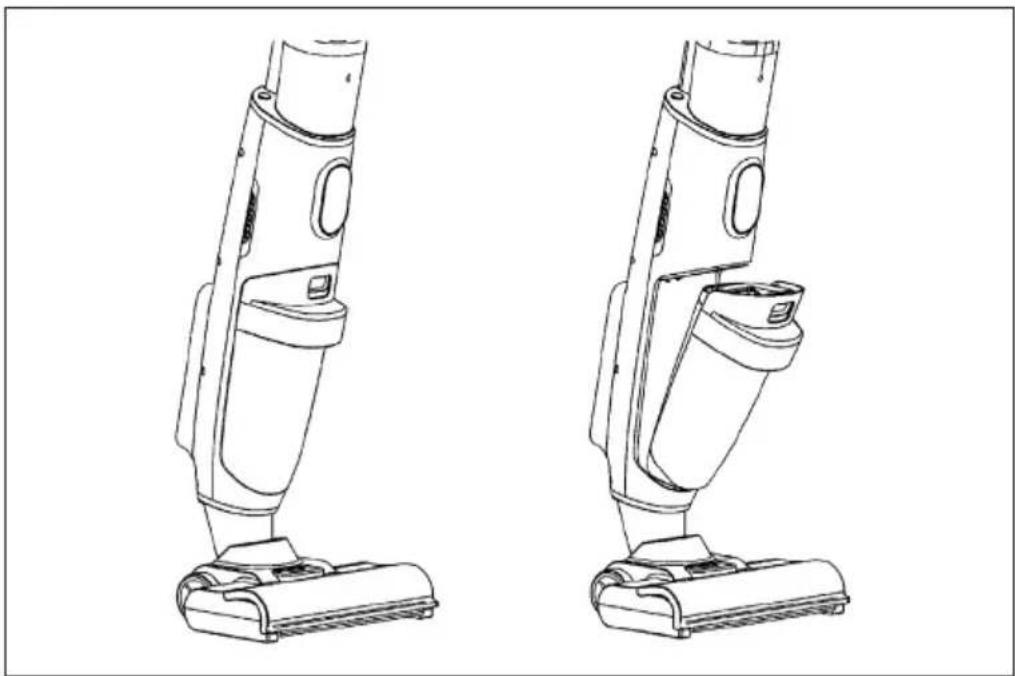
Clean the dirty water tank and its housing after each use to prevent odours from forming. Hold the water tank handle with your hand, press the safety catch down with your thumb and carefully pull out the dirty water tank.
natural_image
Line drawings of two different vacuum cleaner designs (no text or symbols)Maintenance of the roller brush
Use the self-cleaning function after each use. If the roller brush is too dirty, remove the roller brush and clean it by hand.
HEPA filter maintenance
Remove the HEPA filter from the dirty water tank and allow it to dry.
natural_image
Technical line drawing of a mechanical device with an open lid and internal structure (no text or symbols)Cleaning intervals
| Accessories Cleaning/replacement | recommended frequency |
| Clean water tank Clean after each use | |
| Dirty water tank Clean after each use | |
| HEPA filter Clean after each use, replace every 3 - 6 months | |
| Floater Clean after each use | |
| Brush cover Clean after each use | |
| Infrared sensor Clean after each use | |
| Roller brush Clean after each use, replace every 3 - 6 months |
Note: The time periods recommended above for replacing the accessories are only recommendations. The actual cleaning/replacement frequency should depend on the actual frequency of use.
TROUBLESHOOTING
| Problem Possible cause Solution | ||
| The unit cannot be charged. The | power supply unit is not connected correctly. | Check the connection of the power supply unit. |
| The unit is not properly connected to the charging station. | Put the cleaner back on the charging station. | |
| The handle control does not work. | The dirty water tank is full. Empty | the dirty water tank. |
| The dirty water tank is not installed. | Check and install the dirty water tank. | |
| The roller brush is not installed. | Check and install the roller brush. | |
| The display of the clean water tank is not correct. | Not calibrated. Remove the dirty water tank,start cleaning and spraying,switch off the cleaner until the pipe is empty. Then press the "Switch" button and the "ECO/MAX" button for 5 seconds until the screen flashes twice, then check again. | |
| The suction power is decreasing. | The HEPA filter is blocked Check and clean the HEPA filter. | |
| The HEPA filter is wet. First dry the HEPA filter. | ||
| The clean water tank is leaking. | The clean water quantity is higher than the shut-off valve. | Pour out water until the volume is below the shut-off valve. |
| The clean water tank is not properly installed. | Insert the water tank properly. | |
| The cover is not properly screwed on. | Screw the cover on tightly. | |
| No water comes out when spraying. | The clean water tank is empty. Fill up the clean water tank | |
| The clean water tank is not properly installed. | Insert the water tank properly. | |
| The voice control does not work. | The voice function is switched off. | Activate the voice function. |
| The model does not feature voice control. | Contact Customer Service to find out if voice control is available for your device. | |
| The unit does not work in self-cleaning mode. | The dirty water tank is full. Empty the dirty water tank. | |
| Too little water. Fill up the clean water tank | ||
| Problem Possible cause Solution | ||
| There are drops of water at the air outlet. | The HEPA filter is not installed. | Check and install the HEPA filters. |
| The HEPA filter is not dry. Dry the | HEPA filters before use. | |
| The vacuum has been tilted heavily. | Use the unit correctly. | |
| The cleaner absorbs the foam liquid. | Empty the dirty water tank in good time. | |
| The unit is difficult to move. The roller brush is not installed properly. | Check the roller brush and replace it. | |
| The indicator light shows that the dirty water tank is full, although it is not. | The cleaner absorbs too much foam liquid. | Remove the foam liquid immediately. |
DISPOSAL CONSIDERATIONS
natural_image
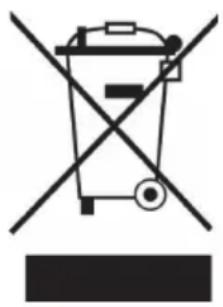
Symbol of a trash bin crossed with a diagonal line, representing no waste or discharge (no text or labels)If there is a legal regulation in your country regarding the disposal of electrical and electronic equipment, this symbol on the product or on the packaging indicates that this product must not be disposed of with household waste. Instead, it must be taken to a collection point for the recycling of electrical and electronic equipment. By disposing of this product in accordance with the regulations, you protect the environment and the health of those around you from negative consequences. For information on recycling and disposal of this product, contact your local government or household waste disposal service.
This product contains batteries. If there is a legal regulation in your country regarding the disposal of batteries, the batteries must not be disposed of in household waste. Consult your local regulations for the disposal of batteries. By disposing of this product in accordance with the regulations, you protect the environment and the health of those around you from negative consequences.
MANUFACTURER & IMPORTER (UK)
Manufacturer:
Chal-Tec GmbH, Wallstraße 16, 10179 Berlin, Germany.
Importer for Great Britain:
Berlin Brands Group UK Ltd
PO Box 1145
Oxford, OX1 9UW
United Kingdom
Estimado cliente:
ÍNDICE
Datos técnicos 42
natural_image
Line drawing of a vacuum cleaner (no text or symbols)natural_image
Technical line drawing of a mechanical component with no visible text or symbolsnatural_image
Technical line drawing of a cylindrical mechanical component (no text or symbols)Cepillo rodillo x 1

natural_image
Line drawing of a mechanical device with wires and a cylindrical component (no text or symbols)natural_image
Line drawings of two different vacuum cleaner designs labeled 3.1 and 3.2 (no text or symbols on the device itself)natural_image
Line drawing of a handheld electronic device with a cable and connector (no text or symbols)FUNCIONAMIENTO
Carga
natural_image
Line drawing of a vacuum cleaner assembly (no text or symbols)Autolimpieza
natural_image
Line drawing of a vacuum cleaner with handle and control panel (no text or symbols)natural_image
Line drawings of two different vacuum cleaner designs (no text or symbols)natural_image
Technical line drawing of a mechanical device with two views: top view showing internal components and bottom view (no text or symbols)natural_image
Symbol of a trash bin crossed with a diagonal line, representing no waste or discharge (no text or labels)Berlin Brands Group UK Ltd
PO Box 1145
Oxford, OX1 9UW
Reino Unido
Cher client, chère cliente,
SOMMAIRE
Fiche technique 60
natural_image
Line drawing of a vacuum cleaner (no text or symbols)natural_image
Technical line drawing of a mechanical component with no visible text or symbolsnatural_image
Technical line drawing of a cylindrical mechanical component (no text or symbols)natural_image
Line drawing of a mechanical device with wires and a cylindrical component (no text or symbols)natural_image
Line drawings of two different vacuum cleaner designs labeled 3.1 and 3.2 (no text or symbols on the device itself)natural_image
Line drawing of a handheld electronic device with a cable and connector (no text or symbols)UTILISATION
Chargement
natural_image
Line drawing of a vacuum cleaner assembly (no text or symbols)Auto-nettoyage
natural_image
Line drawing of a vacuum cleaner with handle and control panel (no text or symbols)natural_image
Line drawings of two different vacuum cleaner designs (no text or symbols)natural_image
Technical line drawing of a mechanical device with two views: top view showing internal components and bottom view (no text or symbols)Intervalles de nettoyage
natural_image
Symbol of a trash bin crossed with a diagonal line, representing no waste or discharge (no text or labels)Berlin Brands Group UK Ltd
PO Box 1145
Oxford, OX1 9UW
United Kingdom
Gentile cliente,
INDICE
Dati tecnici 78
natural_image
Line drawing of a vacuum cleaner (no text or symbols present)natural_image
Technical line drawing of a mechanical component with no visible text or symbolsnatural_image
Line drawing of a cylindrical object with ribbed texture, no text or symbols presentSpazzola a rullo x 1
natural_image
Line drawing of a mechanical device with wires and a cylindrical component (no text or symbols)natural_image
Technical line drawings of two vacuum cleaner components labeled 3.1 and 3.2 (no text or symbols on the device itself)natural_image
Line drawing of a handheld electronic device with a cable and connector (no text or symbols)UTILIZZO
Caricare
natural_image
Line drawing of a vacuum cleaner assembly (no text or symbols)Autopulizia
natural_image
Line drawing of a single vacuum cleaner with handle and base (no text or symbols)natural_image
Line drawing of a vacuum cleaner (no text or symbols)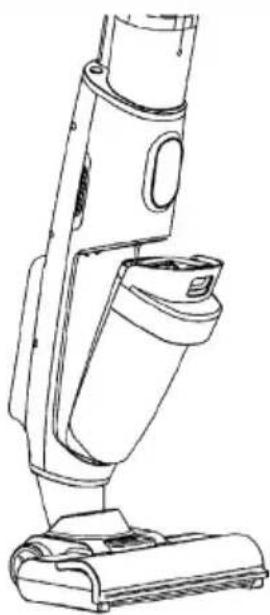
natural_image
Line drawing of a vacuum cleaner device with handle and base (no text or symbols)natural_image
Technical line drawing of a mechanical device with two views: top view showing internal components and bottom view (no text or symbols)natural_image
Symbol of a trash bin crossed with a diagonal line, representing no waste or discharge (no text or labels)PRODUTTORE E IMPORTATORE (UK)
Produttore:
Chal-Tec GmbH, Wallstraße 16, 10179 Berlino, Germania.
Berlin Brands Group UK Ltd
PO Box 1145
Oxford, OX1 9UW
United Kingdom

KLARSTEIN

- INHALTSVERZEICHNIS
- BEDIENUNG
- Laden
- Selbstreinigung
- Member of Berlin Brands Group
- Dahlwitz-Hoppegarten
- Dear customer,
- CONTENTS
- SAFETY INSTRUCTIONS
- SCOPE OF DELIVERY
- GETTING STARTED
- Dismantling handle and installation
- Installation of the clean water tank
- Installation of the dirty water tank
- Installing the roller brush
- Installing the viewing window on the roller brush
- Installing the self-cleaning and charging station
- OPERATION
- Shop
- Self-cleaning
- Use
- Important notes on operation
- CLEANING AND CARE
- Water tank maintenance
- Maintenance of the roller brush
- HEPA filter maintenance
- DISPOSAL CONSIDERATIONS
- MANUFACTURER & IMPORTER (UK)
- Manufacturer:
- Importer for Great Britain:
- Estimado cliente:
- ÍNDICE
- FUNCIONAMIENTO
- Carga
- Autolimpieza
- SOMMAIRE
- UTILISATION
- Chargement
- Auto-nettoyage
- Gentile cliente,
- INDICE
- UTILIZZO
- Caricare
- Autopulizia
- PRODUTTORE E IMPORTATORE (UK)
- Produttore:
- KLARSTEIN
Brand : Klarstein
Model : Caswell Plus
Category : Vacuum Cleaner