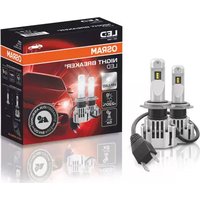
NIGHT BREAKER H7-LED - Lamp Osram - Free user manual and instructions
Find the device manual for free NIGHT BREAKER H7-LED Osram in PDF.


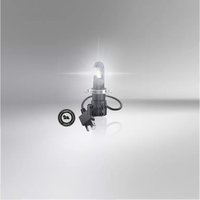
| Product type | LED vehicle lamp |
| Model | NIGHT BREAKER H7-LED |
| Brand | Osram |
| Nominal voltage | 12 V |
| Dimensions (L x W) | Approx. 110 x 13.8 mm |
| Weight | Approx. 50 g (estimate) |
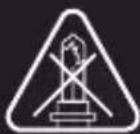
| Bulb type | H7 LED |
| Lighting functions | Low beam and high beam |
| Approval | Approved for road use according to compatibility list |
| Included accessories | OSRAM stickers, adapters according to vehicle |
| Installation | Option 1: spring, Option 2: steel spring or clamp, Option 3: adapter |
| Replacement | Always replace lamps in pairs |
| Adjustment | Requires headlight adjustment by a qualified workshop after replacement |
| Cooling | Cooling element at the rear – heats up during operation |
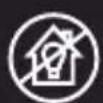
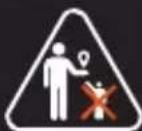
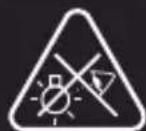
| Safety | Do not look directly at the lit light source |
| De-icing / Demisting | Behavior may change when switching from halogen to LED |
| Spare parts | Not available separately – replace the entire unit |
| Repairability | Not repairable – replace with a new product |
| Maintenance | Periodically check proper operation and sealing |
| Technical contact | automotive-service@osram.com |
| Website | www.osram.com/nb-led |
Frequently Asked Questions - NIGHT BREAKER H7-LED Osram
User questions about NIGHT BREAKER H7-LED Osram
0 question about this device. Answer the ones you know or ask your own.
Ask a new question about this device
Download the instructions for your Lamp in PDF format for free! Find your manual NIGHT BREAKER H7-LED - Osram and take your electronic device back in hand. On this page are published all the documents necessary for the use of your device. NIGHT BREAKER H7-LED by Osram.
USER MANUAL NIGHT BREAKER H7-LED Osram
*
Applies only to vehicle models and light functions on the current compatibility list and in the respective country. For more details see www.osram.com/nb-led ^1)
APPROVAL DOCUMENT
text_image
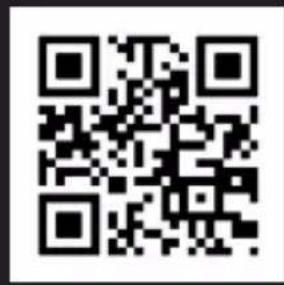
QR code image containing encoded data, no visible human-readable textwww.osram.com/nb-led
Check approved vehicle model, required accessories and installation advice.2)
natural_image
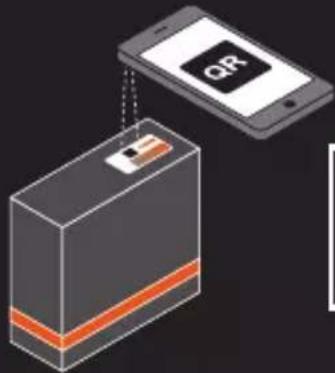
Illustration of a battery connected to a smartphone displaying 'OP' (no text or symbols on the battery or phone)
text_image
www.osram.com/ trust
If required in your country: ^3)
text_image
Approval DOCUMENT

text_image
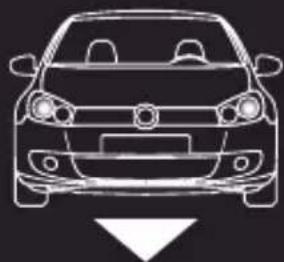
APPROVAL DOCUMENT
natural_image
Front view line drawing of a car (no text or symbols)
text_image
STREET LEGAL*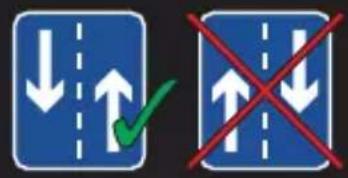
text_image
Traffic sign indicating lane directions with arrows and a green checkmark, alongside a red cross symbol on blue road signs.This replacement lamp is only approved for the respective traffic (e.g., left-hand traffic). Before traveling to a country with another traffic (e.g., right-hand traffic), a re-fitting to a halogen lamp is necessary. Further details and the compatibility list can be found at: www.osram.com/nb-led ^4)
natural_image
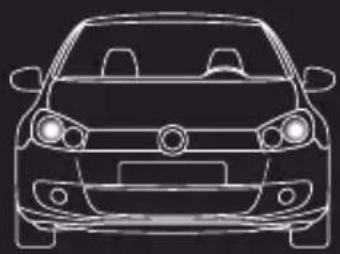
Front view line drawing of a car (no text or symbols)Always replace lamps in pairs!
The product inclusive the cables and accessories must be installed in a way that no damages occurs. Please make sure that all parts are fixed properly to avoid interference with any moving part or function of the car. The change of the headlamp requires the readjustment of the headlamp setting by a qualified workshop. ^5)
natural_image
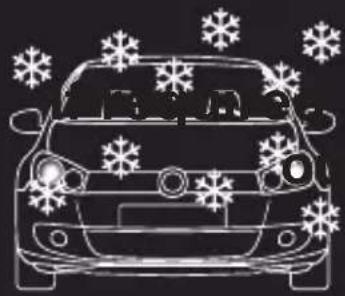
Front view of a car with snowflake patterns around the windshield (no text or symbols)The deicing and defogging behavior can change when switching from halogen to LED. ^6)
text_image
OSRAM OSRAMPlease attach the provided OSRAM stickers to the back of each headlamp housing. ^7)
text_image
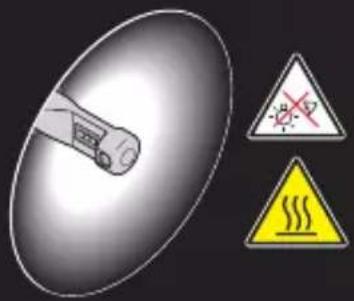
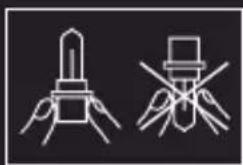
Safety warning symbols including a hand holding a device, a warning sign with crossed-out lines, and a yellow warning triangle with steam.Do not stare at the operating light source. ^8)
Caution!
The cooling element on the back will heat when the headlamp is in operation. ^9)
text_image
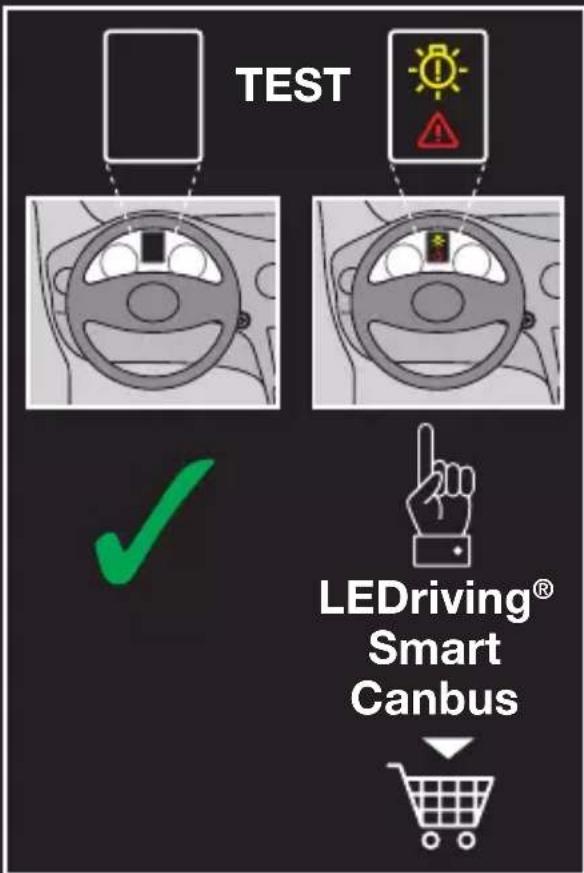
TEST LEDriving® Smart Canbus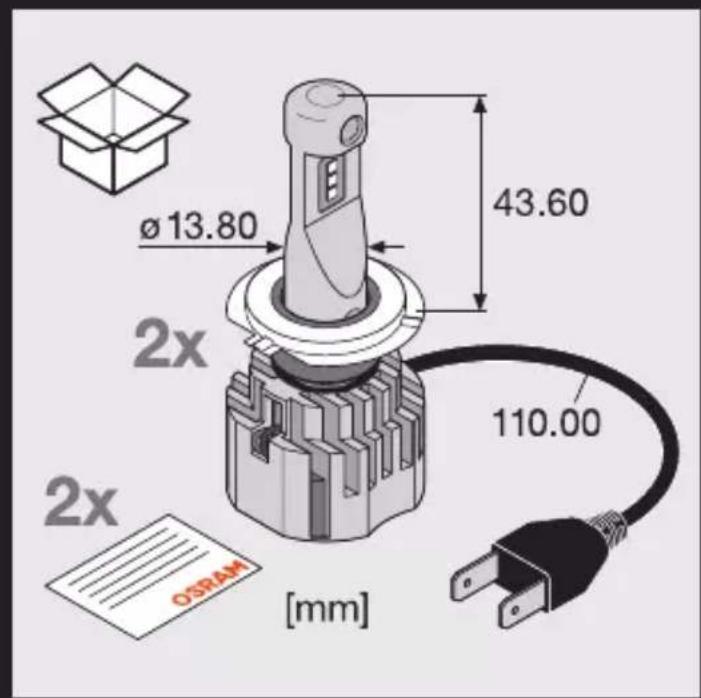
text_image
Ø13.80 43.60 2x 110.00 2x [mm] OSRAM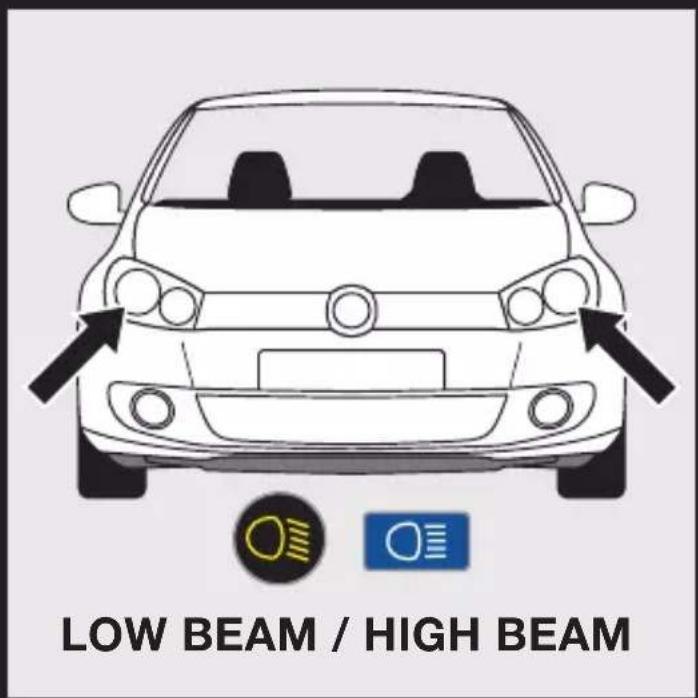
text_image
LOW BEAM / HIGH BEAM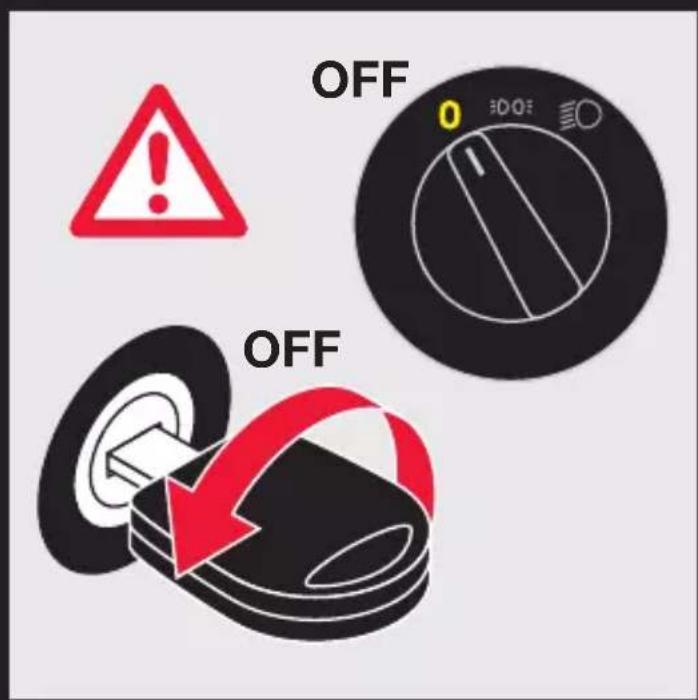
text_image
OFF OFF
natural_image
Front view of a car with a curved arrow indicating clockwise motion (no text or symbols)Option 1: Spring
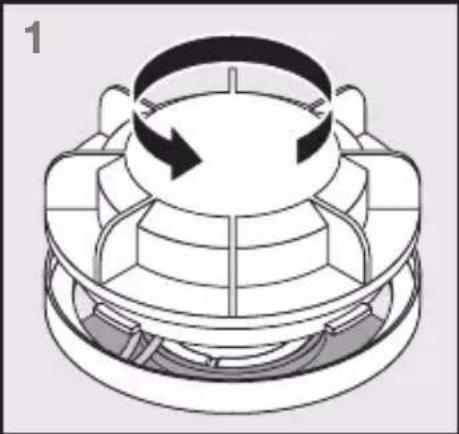
natural_image
Technical line drawing of a mechanical component with circular arrows indicating rotation or cycle (no text or symbols)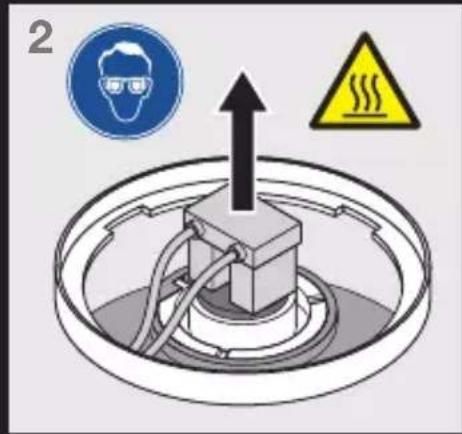
text_image
2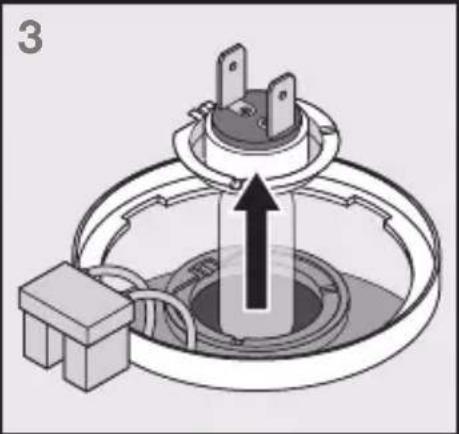
natural_image
Mechanical diagram showing a rotating component with a central hub and upward arrow, no text or symbols present
natural_image
Diagram showing a plug inserted into a circular socket with internal wiring, no text or symbols present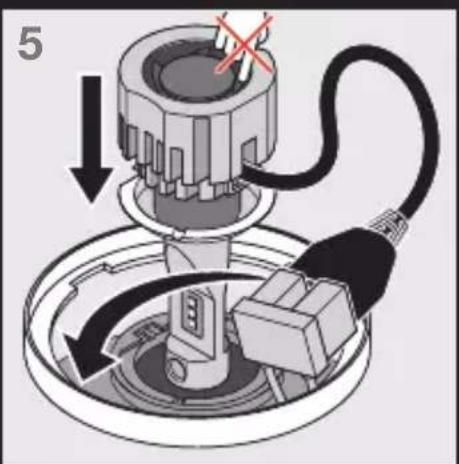
text_image
5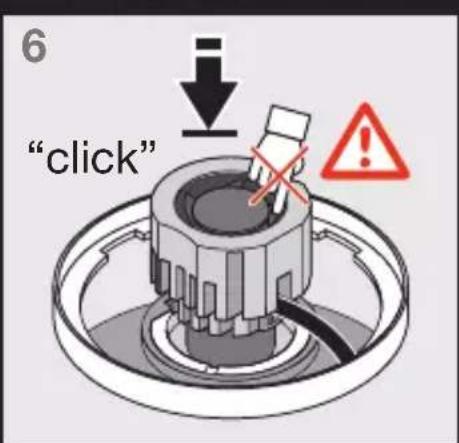
text_image
6 "click"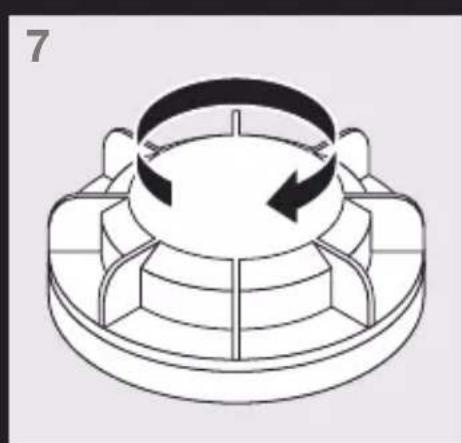
natural_image
Technical line drawing of a mechanical component with circular base and curved internal structure (no text or symbols)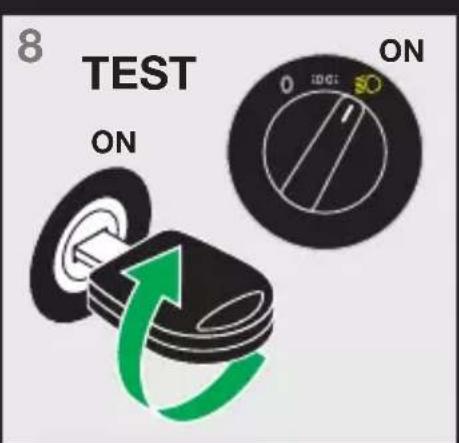
text_image
8 TEST ON ONOption 2: Steel spring or clamp
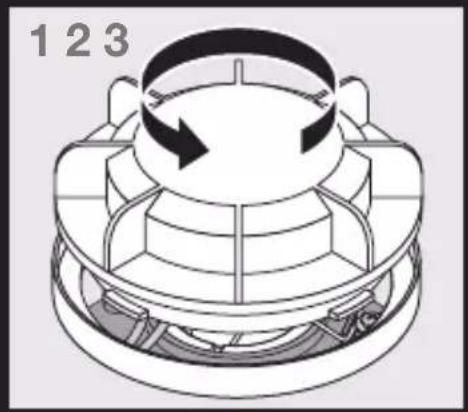
natural_image
Technical diagram of a mechanical component with circular arrows indicating rotation or cycle (no text or symbols)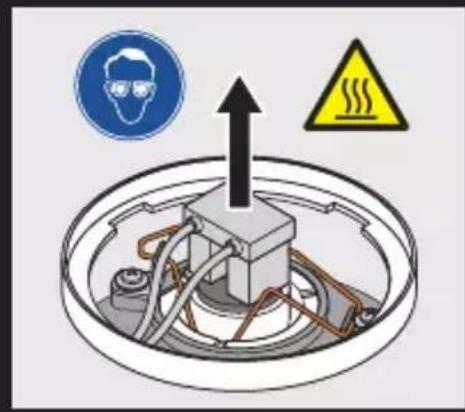
text_image
Diagram illustrating safety hazard with warning symbol, warning sign, and warning triangle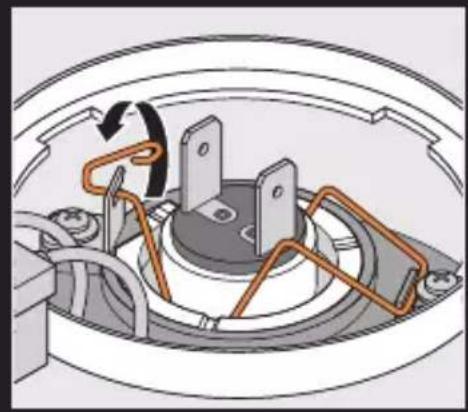
natural_image
Mechanical assembly diagram showing a rotating component with orange and black arrows indicating motion (no text or symbols)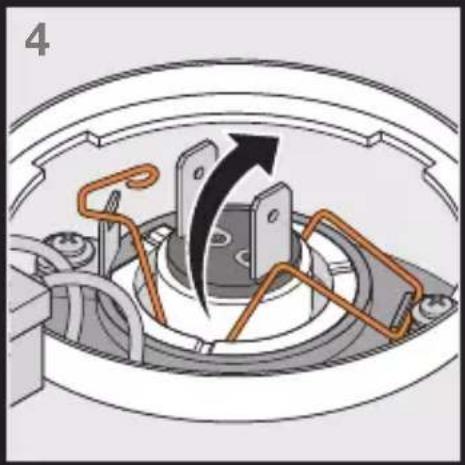
natural_image
Mechanical assembly diagram showing a rotating component with orange and black arrows indicating motion (no text or symbols)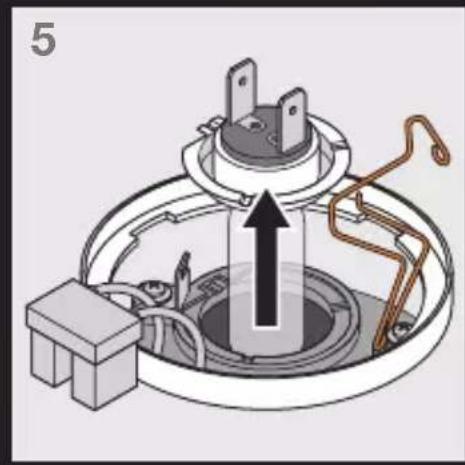
natural_image
Diagram of a mechanical or electrical component with a central housing and internal wiring, no visible text or symbols.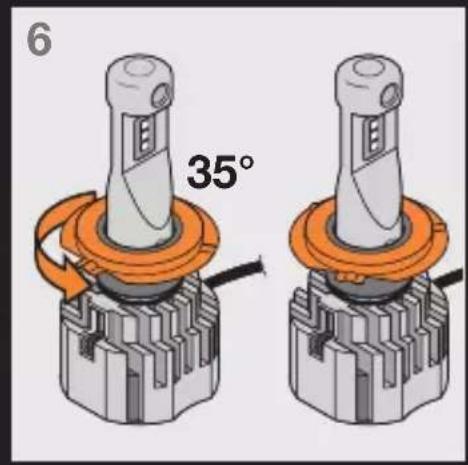
text_image
6 35°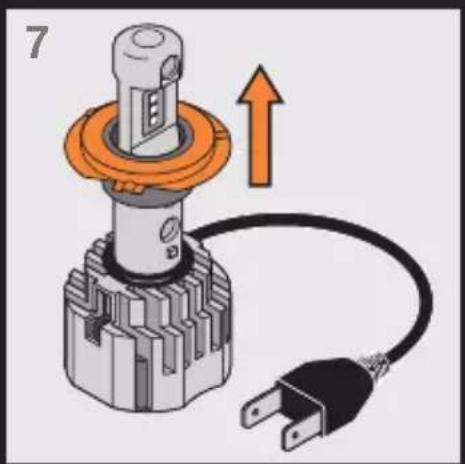
natural_image
Illustration of a right-handler switch with an orange arrow indicating upward motion (no text or symbols)
natural_image
Illustration of a handheld device with a black cable and two terminal blocks, labeled '8' in the top-left corner (no text or symbols on the device itself)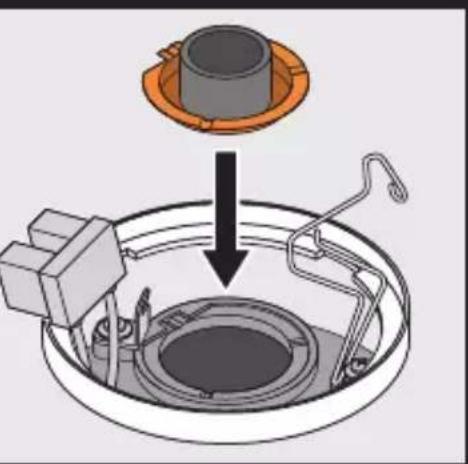
natural_image
Diagram of a mechanical assembly with a cylindrical component and a circular base, showing internal components and a downward arrow (no text or symbols)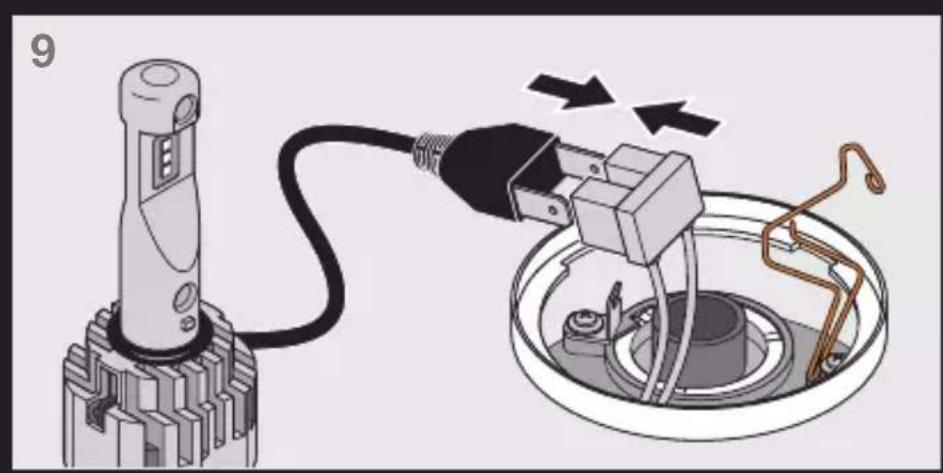
natural_image
Diagram showing a plug inserted into a socket with wiring, no text or symbols present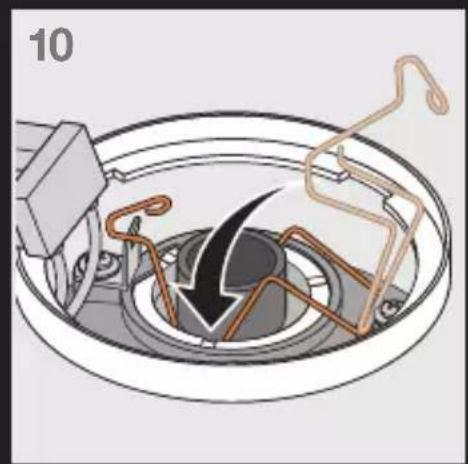
natural_image
Diagram of a mechanical assembly with a central rotating component and surrounding wires (no text or symbols)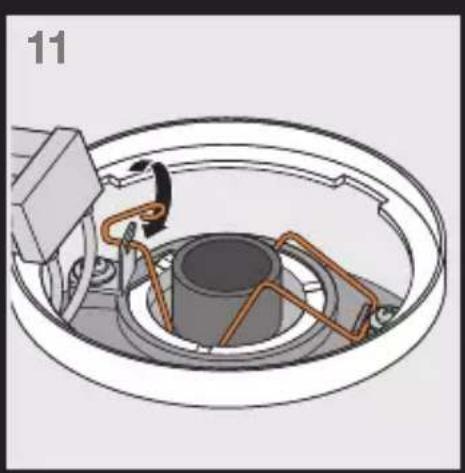
natural_image
Technical diagram of a mechanical assembly with orange connectors and a central component (no text or symbols)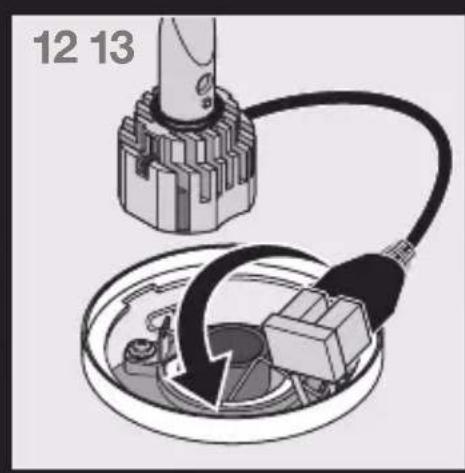
natural_image
Diagram of a mechanical assembly with a pipe and plug, no text or symbols present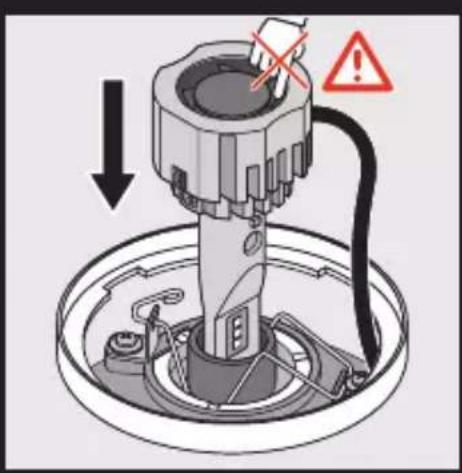
natural_image
Mechanical assembly diagram showing a valve or connector with warning symbol (no text labels)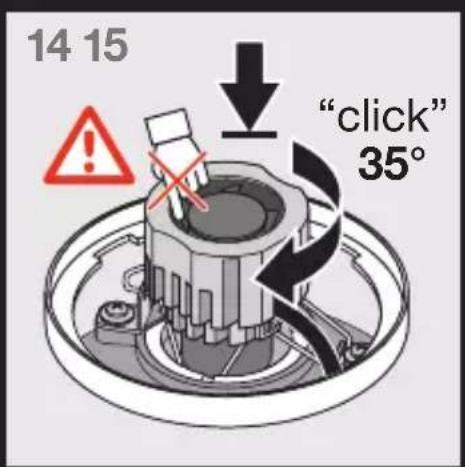
text_image
14 15 "click" 35°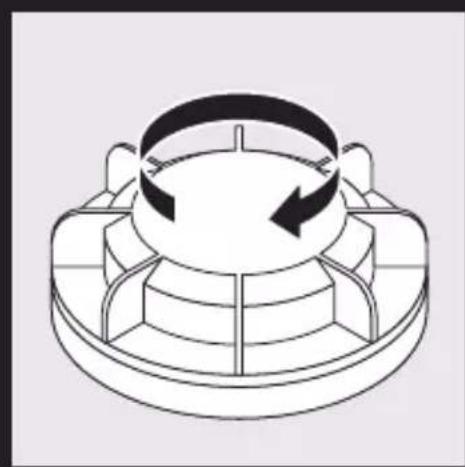
natural_image
Technical line drawing of a mechanical component with circular and radial features (no text or symbols)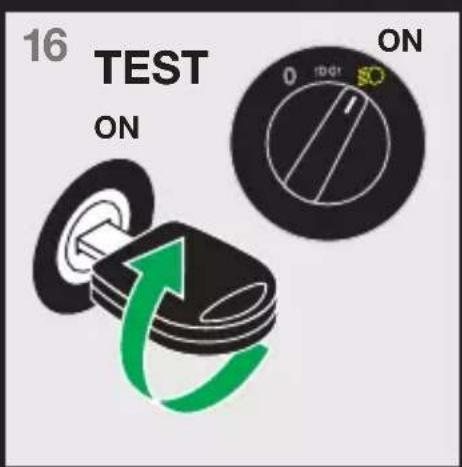
text_image
16 TEST ON ON 0 10G1 5DOption 3: Adapter

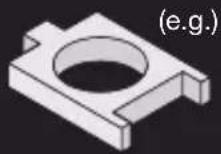
Refer to the specific installation instructions of the adapter for detailed information. ^10)
| Vehicle Adapter | |
| Vehicle A 642 | 0DA** |
| Vehicle B | - |
| ... | - |
| ... | - |
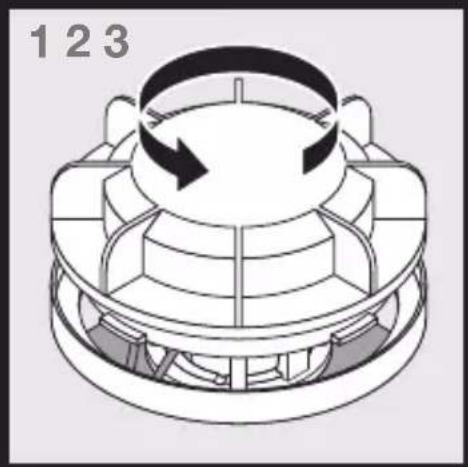
natural_image
Technical line drawing of a mechanical component with circular arrows indicating rotation (no text or symbols)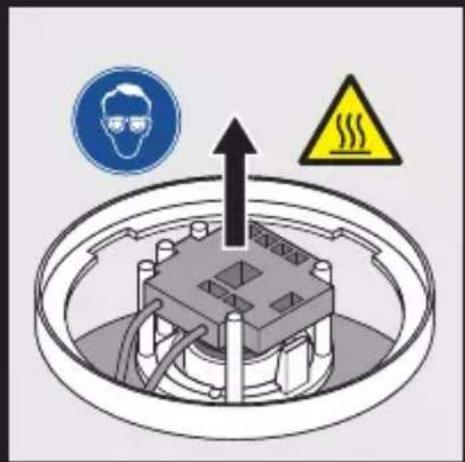
text_image
Diagram showing a device with warning symbols: a blue circular icon labeled '照明' (lightbulb), an upward arrow, and a yellow warning sign with 'SWE' (sweating).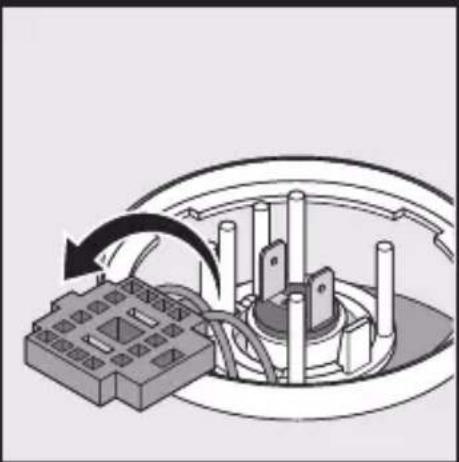
natural_image
Diagram of a mechanical assembly with rotating components and a base block (no text or symbols)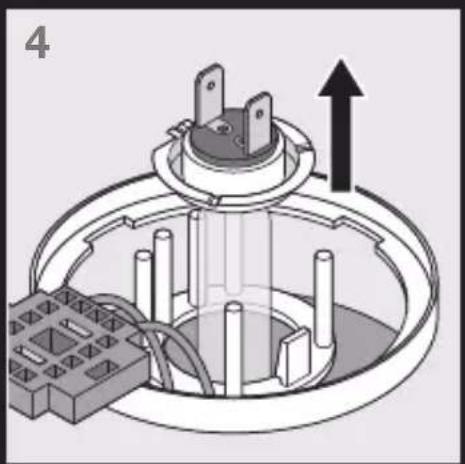
natural_image
Diagram of a mechanical or electrical component with a central hub and surrounding wiring, showing an upward arrow (no text or symbols present)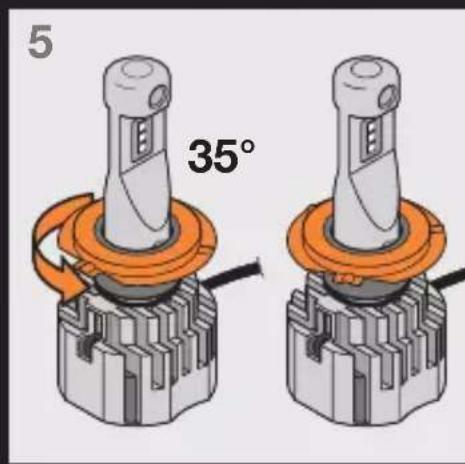
text_image
5 35°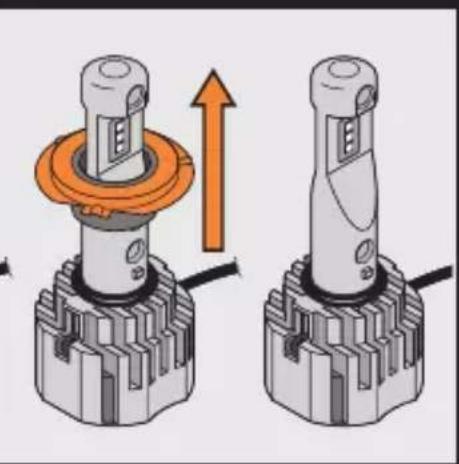
natural_image
Mechanical assembly diagram showing two views of a gear-like component with an orange arrow indicating upward motion (no text or symbols)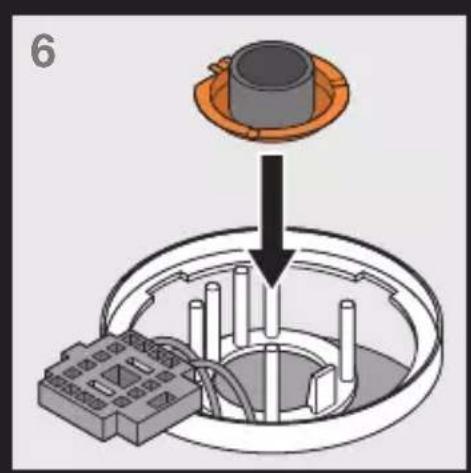
natural_image
Diagram showing a mechanical assembly with a component being inserted into a circular housing, no text or symbols present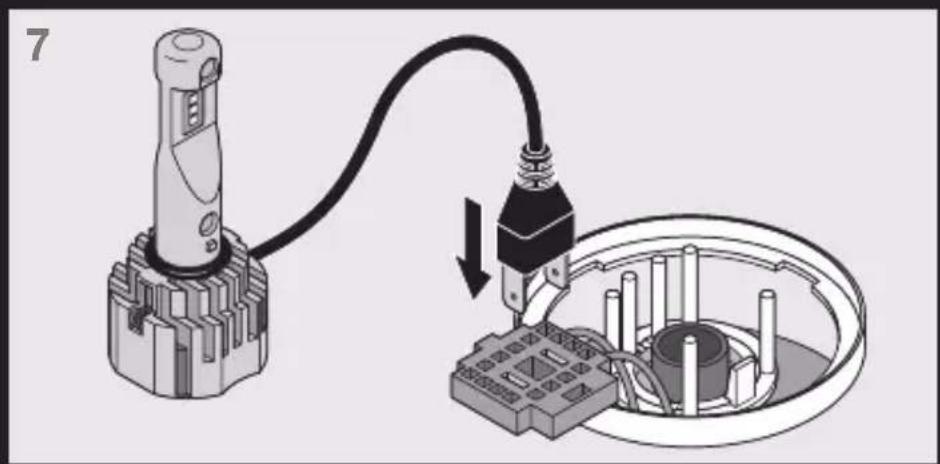
natural_image
Diagram showing a mechanical assembly with a connector and a plug inserted into a circular component (no text or symbols)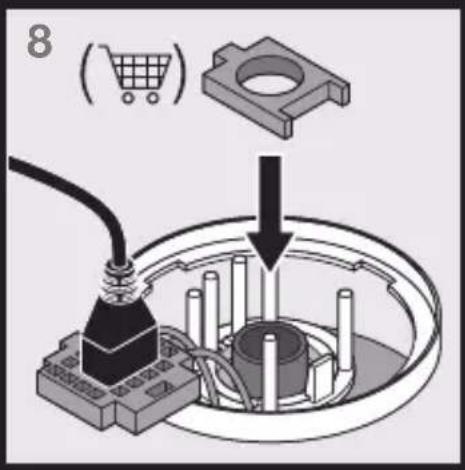
text_image
8 ( shopping )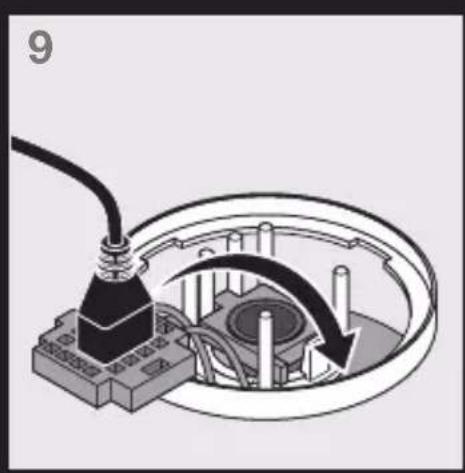
natural_image
Diagram of a mechanical assembly with a black component and circular housing, showing internal components and a curved arrow indicating motion (no text or symbols)
text_image
10 ↓ × !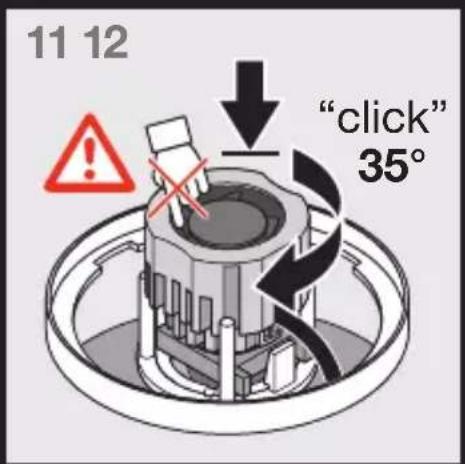
text_image
11 12 "click" 35°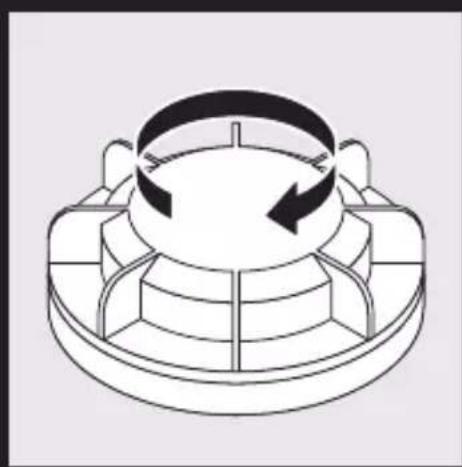
natural_image
Technical line drawing of a mechanical component with a circular top and curved internal structure (no text or symbols)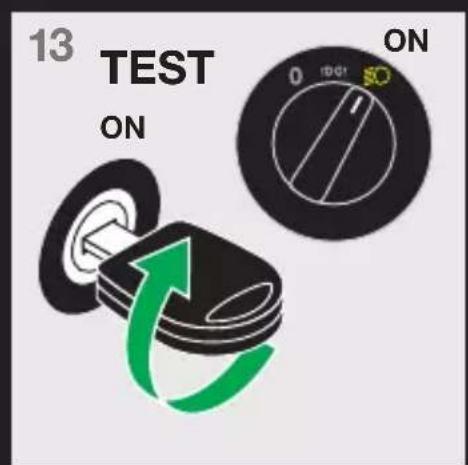
text_image
13 TEST ON ON 0 1001 50D 1) Anwendbar nur für Fahrzeugmodelle und Lichtfunktionen auf der aktuellen Kompatibilitätsliste und im jeweiligen Land. Weitere Informationen finden Sie auf www.osram.com/nb-led. 2) Bitte prüfen Sie das zulässige Fahrzeugmodell, das erforderliche Zubehör und beachten Sie die Einbauhinweise. 4) Diese Ersatzlampe ist nur für den jeweiligen Verkehr (z. B. Linksverkehr) zugelassen. Vor der Reise in ein Land mit anderem Verkehr (z.B. Rechtsverkehr) ist eine Rückrüstung auf eine Halogenlampe erforderlich. Weitere Einzelheiten und die Kompatibilitätsliste finden Sie unter: www.osram.com/nb-led; 5) Lampen immer paarweise austauschen! Das Produkt einschließlich der Kabel und des Zubehörs muss so installiert werden, dass keine Beschädigungen auftreten. Achten Sie darauf, dass alle Teile ordnungsgemäß befestigt sind, damit keine beweglichen Teile oder Funktionen des Fahrzeugs beeinträchtigt werden. Der Wechsel des Scheinwerfers erfordert die Nachjustierung der Scheinwerfereinstellung durch eine qualifizierte Fachwerkstatt. 6) Das Enteisungs- und Beschlagsverhalten kann sich beim Wechsel von Halogen auf LED ändern. 7) Bitte bringen Sie die mitgelieferten OSRAM-Aufkleber jeweils an der Rückseite des Scheinwerfergehäuses an. 8) Nicht direkt in die Lichtquelle sehen. 9) Achtung! Das Kühlelement auf der Rückseite erhitzt sich, wenn der Scheinwerfer in Betrieb ist. 10) Detaillierte Informationen finden Sie in der entsprechenden Installationsanleitung des Adapters. 11) Wenden Sie sich bei Fragen zur Wartung oder bei technischen Problemen bitte an den OSRAM Kundendienst, den Sie unter automotive-service@osram.com erreichen.
1) S'applique uniquement aux modèles de véhicules et aux éclairages inclus dans la liste de compatibilité actuelle et dans le pays concerné. Pour en savoir plus, rendez-vous sur www.osram.com/nb-led. 2) Vérifiez le modèle du véhicule homologué, les accessoires requis et les conseils d'installation. 3) Si exigé dans votre pays. 4) Cette lampe de remplacement est uniquement autorisée pour la circulation appropriée (par ex. circulation à gauche). Avant de voyager dans un pays avec un autre type de circulation (par ex. circulation à droite), il est nécessaire de réinstaller une lampe halogène. Vous trouverez de plus amples informations ainsi que la liste de compatibilité sur www.osram.com/nb-led; 5) Toujours remplacer les lampes par paire ! Le produit ainsi que les câbles et accessoires doivent être installés afin de ne pas engendrer de dégâts. Vérifier que tous les éléments sont fixés correctement pour éviter toute interférence avec des pièces mobiles ou fonctions de la voiture. Le remplacement des phares nécessite un réglage de la lampe par un atelier qualifié. 6) Le passage de l'halogène au LED est susceptible d'altérer le dégivrage et le désembuage. 7) Coller les étiquettes OSRAM fournies à l'arrière de chaque boîtier de phare. 8) Ne pas regarder la source lumineuse allumée. 9) Attention ! L'élément de refroidissement à l'arrière se réchauffe lorsque le phare est en marche. 10) Pour des informations plus détaillées, veuillez vous référer aux instructions d'installation de l'adaptateur. 11) Pour toute question relative à l'entretien du produit ou tout problème technique, veuillez contacter le service clients OSRAM en écrivant à automotive-service@osram.com
1) Si applica solo a modelli di veicoli e funzioni per luce inclusi nella lista di compatibilità attuale e nei rispettivi Paesi. Per informazioni dettagliate si prega di visitare il sito www.osram.com/nb-led. 2) Controllare il modello di veicolo approvato, gli accessori necessari e i consigli per l'installazione. 3) Se richiesto nel tuo paese 4) Questa lampada sostitutiva è approvata unicamente per l'utilizzo nel tipo di circolazione appropriato (ad es. circolazione a sinistra). Prima di viaggiare in Paesi con un altro tipo di circolazione (ad es. a destra), è necessaria la re-installazione delle lampade alogene. Ulteriori dettagli e la lista di compatibilità sono disponibili sul sito www.osram.com/nb-led; 5) Sostituire sempre le lampade a coppie! Il prodotto, compresi cavi e accessori, deve essere installato in modo da evitare danneggiamenti. Assicurarsi che tutte le parti siano fissate in modo corretto per evitare interferenze con altre eventuali parti in movimento o in funzione della macchina. La sostituzione della lampada del faro richiede una regolazione delle impostazioni di fabbrica presso un'officina autorizzata. 6) Il meccanismo di sbrinamento e di disappannamento può modificarsi quando si passa da alogena a LED. 7) Applicare gli adesivi forniti da OSRAM sul retro dell'alloggiamento di ciascun faro. 9) Attenzione! L'elemento di raffreddamento sul retro si riscalda quando la lampada è in funzione. 10) Per informazioni dettagliate fare riferimento alle istruzioni di installazione specifiche dell'adattatore. 11) Per domande sulla manutenzione o problemi tecnici contattare il servizio clienti OSRAM all'indirizzo automotive-service@osram.com
1) Se aplica solo a los modelos de vehículos y las funciones de luz en la lista de compatibilidad actual y en cada país. Para obtener más información, consulte www.osram.com/nb-led. 2) Compruebe el modelo de vehículo aprobado, los accesorios necesarios y los consejos de instalación. 3) Si procede en su país 4) Esta lámpara de recambio solo está homologada para el tráfico correspondiente (por ejemplo, circulación por la izquierda). Antes de viajar a un país con otro tipo de tráfico (por ejemplo, circulación por la derecha), es necesario volver a instalar una lámpara halógena. Encontrará más información y la lista de compatibilidad en: www.osram.com/nb-led; 5) Sustituya siempre las lámparas por parejas. El producto, incluidos cables y accesorios, debe instalarse evitando producir daños. Asegúrese de que todas las piezas estén bien fijadas para evitar interferencias con cualquier pieza móvil o función del coche. El cambio del faro requiere el reajuste de la configuración del faro por un taller cualificado. 6) El comportamiento de deshielo y desempañado puede variar al cambiar de halógeno a LED. 7) Pegue los adhesivos OSRAM suministrados en la parte posterior de cada carcasa de los faros. 8) No mire fijamente a la luz de trabajo. 9) ¡Precaución! El elemento de refrigeración situado en la parte posterior se calienta cuando el faro está encendido. 10) Para obtener información detallada, consulte las instrucciones de instalación específicas del adaptador. 11) Para preguntas relacionadas con el mantenimiento o problemas técnicos, contacte con el servicio de atención al cliente de OSRAM a través de automotive-service@osram.com
P 1) Aplica-se apenas a modelos de veículos e funções de luminosidade que constam na lista de compatibilidade atual e no respetivo país. Para mais detalhes ver www.osram.com/nb-led. 2) Verifique o modelo de veículo aprovado, acessórios necessários e recomendações de instalação.3) Se necessário no seu país 4) Esta lâmpada de substituição é aprovada apenas para o respetivo tráfego (por exemplo, tráfego à esquerda). Antes de viajar para um país com outro tráfego (por exemplo, tráfego à direita), é necessário reequipar para uma lâmpada de halogéneo. Verificar mais detalhes e a lista de compatibilidade em: www.osram.com/nb-led; 5) Substitua sempre as lâmpadas aos pares! O produto, os cabos e acessórios devem ser instalados de forma que não ocorram danos. Certifique-se de que todas as peças estão fixadas corretamente para evitar interferências com qualquer peça móvel ou função do automóvel. A substituição dos faróis requer uma correção do ajuste por uma oficina autorizada. 6) O comportamento do degelo e desembaçamento pode se alterar quando se muda de halogéneo para LED. 7) Fixe os autocolantes OSRAM fornecidos na parte de trás de cada compartimento do farol. 8) Não olhe diretamente para a fonte de luz ligada. 9) Cuidado! O elemento de arrefecimento na parte posterior se aquece quando a lâmpada do farol está ligada. 10) Consulte as instruções de instalação específicas do adaptador para Informações detalhadas. 11) Em caso de questões relacionadas com a manutenção ou problemas técnicos, entre em contacto com a assistência técnica OSRAM, automotive-service@osram.com
GR 1) Ισχύει μόνο για μοντέλα οχημάτων και λειτουργίες φωτισμού που περιλαμβάνονται στον τρέχοντα κατάλογο συμβατότητας και στην αντίστοιχη χώρα. Για περισσότερες πληροφορίες, ανατρέξτε στη διεύθυνση www.osram.com/nb-led. 2) Παρακαλώ να επιβεβαιώσετε το εγκεκριμένο μοντέλο οχήματος, τα απαραίτητα εξαρτήματα και την οδηγία εγκατάστασης. 3) Εάν απαιτείται στη χώρα σας 4) Άυτός ο φανός αντικατάστασης εγκρίνεται μόνο για την αντίστοιχη κυκλοφορία (π.χ. αριστερόστροφη κυκλοφορία). Πριν ταξιδέψετε σε χώρα με άλλη κυκλοφορία (π.χ. δεξιόστροφη κυκλοφορία), είναι απαραίτητη η επανατοποθέτηση σε λαμπτήρα αλογόνου. Περισσότερες λειτπομέρειες και τον κατάλογο συμβατότητας μπορείτε να βρείτε στη διεύθυνση: www.osram.com/nb-led; 5) Αντικαθιστάτε πάντοτε τους λαμπτήρες ανά ζεύγη! Το προϊόν που περιλαμβάνει τα καλώδια και τα εξαρτήματα πρέπει να είναι εγκατεστημένα με τρόπο που να μην προκαλούνται ζημιές. Παρακαλώ βεβαιωθείτε ότι όλα τα ανταλλακτικά είναι κατάλληλα στερεωμένα ώστε να αποφύγετε παρεμβολές σε οποιοδήποτε κινούμενο μέρος ή τη λειτουργία του αυτοκινήτου. Η αλλαγή του προβολέα απαιτεί την αναπροσαρμογή της ρύθμισης του προβολέα από ένα εξειδικευμένο συνεργείο. 6) Η συμπεριφορά αποσυμπίεσης και απομόνωσης μπορεί να αλλάξει κατά τη μετάβαση από αλογόνο σε LED. 7) Παρακαλώ συνδέστε το παρεχόμενο αυτοκόλλητο OSRAM στο πίσω μέρος του κελύφους κάθε προβολέα. 8) Μην κοιτάτε την πηγή φωτός που βρίσκεται σε λει- τουργία και μην την αγγίζετε. 9) Προσοχή! Το στοιχείο ψύξης στο πίσω μέρος θερμαινεται όταν λειτουργεί ο προβολέας. 10) Για λεππομερείς πληροφορίες, ανατρέξτε στις ειδικές οδηγίες εγκατάστασης του προσαρμογέα. 11) Για ερωτήσεις σχετικά με τη συντήρηση και για τεχνικά προβλήματα, επικοινωνήστε με την εξυπηρέτηση πελατών της OSRAM στη διεύθυνση automotive-service@osram.com
NL 1) Geldt alleen voor voertuigmodellen en verlichting op de huidige compatibiliteitslijst en in het betreffende land. Ga voor meer informatie naar www.osram.com/nb-led. 2) Controleer het goedgekeurde voertuigmodel en de vereiste accessoires, en raadpleeg het installatieadvies. 3) Indien vereist in uw land 4) Deze vervangingslamp is uitsluitend goedgekeurd voor gebruik in het betreffende verkeer (bijv. linksrijdend verkeer). Voordat u naar een land reist waar aan de andere kant wordt gereden (rechtsrijdend verkeer), moet de halogeenlamp opnieuw geïnstalleerd worden. Meer informatie en de compatibiliteitslijst vindt u op: www.osram.com/nb-led; 5) Vervang lampen altijd per paar! Het product, inclusief de kabels en accessoires, moet op zo'n manier worden geïnstalleerd dat er geen schade ontstaat. Zorg ervoor dat alle onderdelen goed zijn bevestigd om interferentie met bewegende delen of de werking van de auto te voorkomen. Als de koplamp wordt vervangen, moet deze opnieuw worden afgesteld door een gekwalificeerde monteur. 6) Het gedrag ten aanzien van ontdooien en ontwasemen kan veranderen als er van halogeen wordt overgegaan op led. 7) Plak de meegeleverde OSRAM-stickers op de achterkant van elke koplampbehuizing. 8) Staar niet in de werkende lichtbron. 9) Opgelet! Het koelelement aan de achterzijde wordt warm wanneer de hoofdlamp in werking is. 10) Bekijk de specifieke instructies voor installatie van de adapter voor gedetailleerde informatie. 11) Voor vragen over onderhoud of technische problemen kunt u contact opnemen met de klantenservice van OSRAM via automotive-service@osram.com
S 1) Gäller endast för fordonsmodeller och ljusfunktioner i den aktuella kompatibilitetslistan och i respektive land. För ytterligare detaljer se www.osram.com/nb-led. 2) Kontrollera godkänd fordonsmodell, nödvändiga tillbehör och installationsråd. 3) Vid behov i ditt land 4) Denna ersättningslampa är endast godkänd för respektive trafik (dvs. vänstertrafik). Innan du reser till ett land med en annan trafik, (t.ex. högertrafik) krävs en omplacering av halogenlamporna. Mer information och kompatibilitetslistan finns på www.osram.com/nb-led; 5) Byt alltid ut lamporna i par! Produkten inklusive kablarna och tillbehören måste installeras på ett sätt som inte leder till skador.Se till att alla delar sitter ordentligt fast för att undvika störningar i bilens rörliga delar eller funktion. Bytet av framlyktan kräver att strålkastarinställningen justeras av en kvalificerad verkstad. 6) Avfrostnings- och avimningsbeteendet kan ändras när du växlar från halogen till LED. 7) Vänligen fäst de medföljande OSRAM-dekalerna på baksidan av varje strålkastarhus. 8) Titta inte direkt in i den aktiva ljuskällan. 9) Var försiktig! Kylelementet på baksidan värms upp när framlyktan är i drift. 10) Mer information finns i adapterns specifika installationsanvisningar. 11) Om du har frågor om underhåll eller tekniska problem kontaktar du OSRAM:s kundtjänst via automotive-service@osram.com
FIN 1) Koskee vain ajoneuvomalleja ja valotoimintoja, jotka sisältyvät nykyiseen yhteensopivuusluetteloon, ja maakohtaisesti. Lisätietoja varten katso www.osram.com/nb-led. 2) Tarkista hyväksytty ajoneuvomalli, tarvittavat lisätarvikkeet ja asennusohje. 3) Jos maassasi tarvitaan. 4) Tämä vaihtolamppu on hyväksytty käytettäväksi vain kulloisessakin liikenteessä (esim. vasemmanpuoleinen liikenne). Ennen kuin matkustat eripuolisen liikenteen (esim. oikeanpuolein liikenne) maahan on halogeenilamppu asennettava uudelleen. Löydät lisätietoja ja yhteensopivuusluettelon osoitteesta: www.osram.com/nb-led; 5) Vaihda lamput aina pareittain! Tuote, johon sisältyvät myös kaapelit ja lisävarusteet, on asennettava siten, ettei vaurioita pääse syntymään.Varmista, että kaikki osat on kiinnitetty oikein, jotta ne eivät häiritse auton liikkuvia osia tai toimintaa. Ajovalon vaihto edellyttää ajovalon säätöä pätevällä korjaamolla. 6) Jään- ja huurteenpoisto-ominaisuudet saattavat muuttua vaihdettaessa halogeenista LEDiin. 7) Kiinnitä mukana toimitetut OSRAM-tarrat jokaisen ajovalon kotelon takaosaan. 8) Älä tuijota toiminnassa olevaa valonlähdettä. 9) Huomio! Takana oleva jäähdytyselementti kuumenee, kun ajovalo on toiminnassa. 10) Katso yksityiskohtaiset tiedot sovitimen asennusohjeista. 11) Kunnossapitoa tai teknisiä ongelmia koskevat kysymykset voi osoittaa OSRAM-asiakaspalveluun osoitteeseen automotive-service@osram.com
N 1) Gjelder kun kjøretøymodeller og lysfunksjoner som er inkludert på den gjeldende kompatibilitetslisten og i det respektive landet. For flere detaljer kan du se www.osram.com/nb-led. 2) Sjekk godkjent kjøretøymodell, nødvendig tilbehør og monteringsråd. 3) Kun om det er nødvendig i ditt land. 4) Denne reservepæren er kun godkjent for bruk til aktuell kjøring (f.eks. venstrekjøring). Før du reiser til et land med annen kjøring (f.eks. høyrekjøring), må du montere halogenpærene på nytt. Du finner mer informasjon og kompatibilitetslisten på www.osram.com/nb-led; 5) Skift alltid ut pærene parvis! Produktet, inkludert kabler og tilbehør, må monteres slik at det ikke oppstår skader. Kontroller at alle delene er riktig festet for å unngå interferens med andre bevegelige deler eller funksjoner i bilen. Endring av frontlyset krever at et kvalifisert verksted stiller om frontly-sinnstillingene. 6) Avising og avdugging kan foregå annerledes når du bytter fra halogen til LED. 7) Fest det medfølgende OSRAM-klistremerkene på baksiden av hvert frontlykthus. 8) Ikke stirr på lyskilden når lyset er på. 9) Forsiktig! Kjøleelementet på baksiden varmes opp når frontlyset er på. 10) Se adapterens spesifikke monteringsinstruksjoner for detaljert informasjon. 11) Hvis du har spørsmål angående vedlikehold eller tekniske problemer, kan du kontakte OSRAMs kundeservice på automotive-service@osram.com
For questions regarding maintenance or technical problems, please contact OSRAM customer service via automotive-service@osram.com ^11
text_image
QR code image containing encoded data, no visible human-readable textCE
natural_image
Two identical line drawings of a stylus or object with handles, one upright and one horizontal, against a dark background (no text or symbols)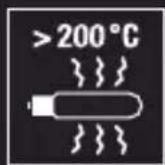
UK CA
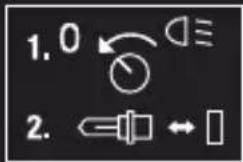
text_image
1. 0 2. ← ≡ ↔ □
OSRAM Prosperity Co. Ltd
Room 4007-4009 Office Tower
Convention Plaza
1 Harbour Road
Wanchai, Hong Kong
www.osram.com/am-guarantee
C15099127
G15120345
03.03.23
OSRAM GmbH
Nonnendammallee 44
13629 Berlin
Germany
www.osram.com