Pure Sine Wave 12V DC 2000W RCD - Battery Osram - Free user manual and instructions
Find the device manual for free Pure Sine Wave 12V DC 2000W RCD Osram in PDF.


User questions about Pure Sine Wave 12V DC 2000W RCD Osram
0 question about this device. Answer the ones you know or ask your own.
Ask a new question about this device
Download the instructions for your Battery in PDF format for free! Find your manual Pure Sine Wave 12V DC 2000W RCD - Osram and take your electronic device back in hand. On this page are published all the documents necessary for the use of your device. Pure Sine Wave 12V DC 2000W RCD by Osram.
USER MANUAL Pure Sine Wave 12V DC 2000W RCD Osram
WARNING! Modern vehicles contain extensive electronic systems. You are required to check with the vehicle manufacturer, for any specific instructions regarding the use of this type of equipment on each vehicle.
Charge in a well-ventilated area.
DO NOT operate near flammable liquids or gases.
DO NOT touch the clamps together or allow to touch the chassis.
DO NOT connect the clamps via another metallic object.
DO NOT cross connect power leads from charger to battery. Ensure positive (+/RED) is connected to positive and negative (-/BLACK) is connected to negative.
DO NOT pull the cables or clamps from the battery terminals.
DO NOT pull or carry the charger by the power cable.
DO NOT pull the plug from the socket by the cable.
DO NOT use worn or damaged cables, plugs or clamps. Any faulty item should be immediately repaired or replaced by a qualified technician.
DO NOT use the charger for a task for which it is not designed.
DO NOT cover or obstruct the charger ventilation louvres or fan.
DO NOT at the same time charge batteries of different capacities or discharge levels.
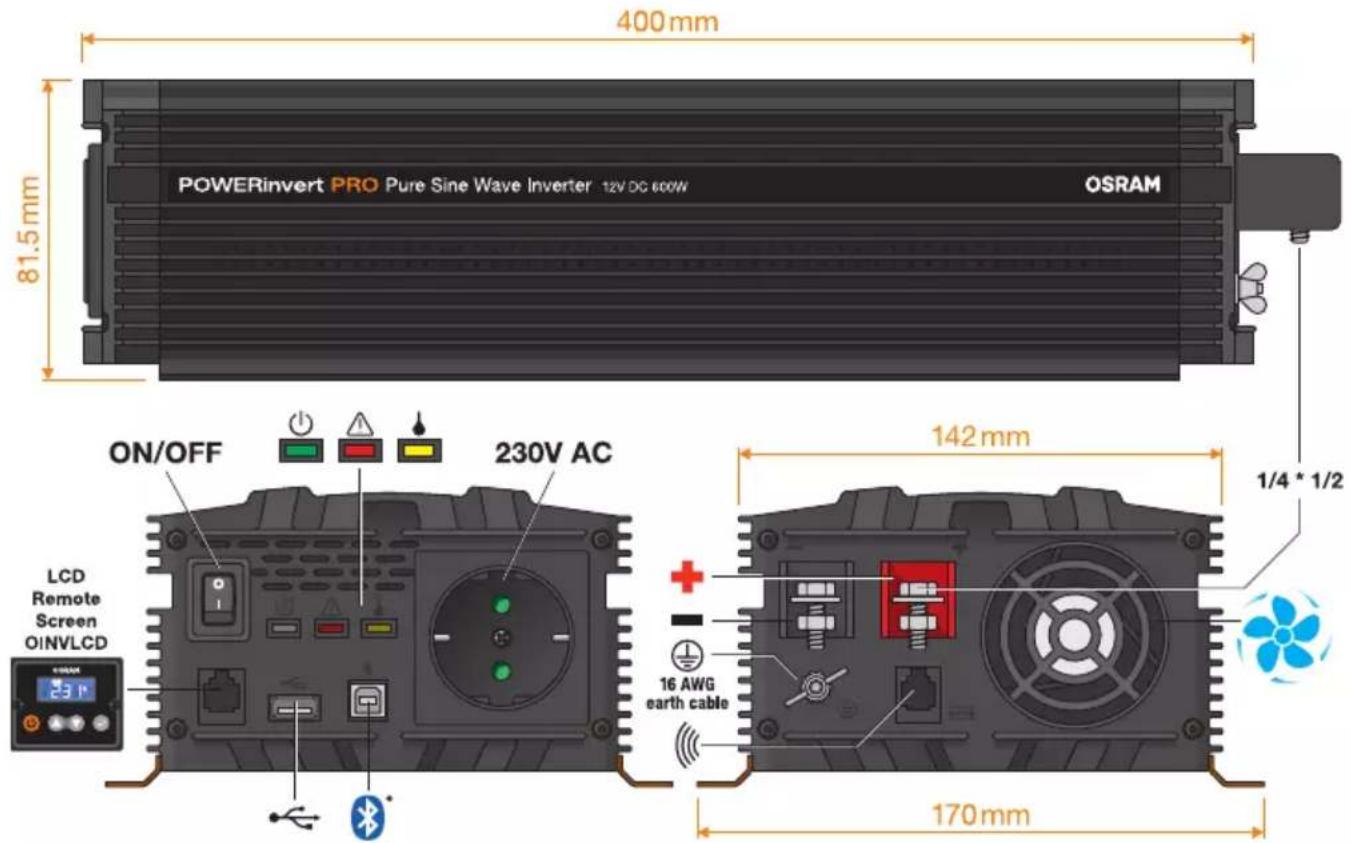
OEINVPAR6 Pure Sine Wave Inverter 12V DC 600W
text_image
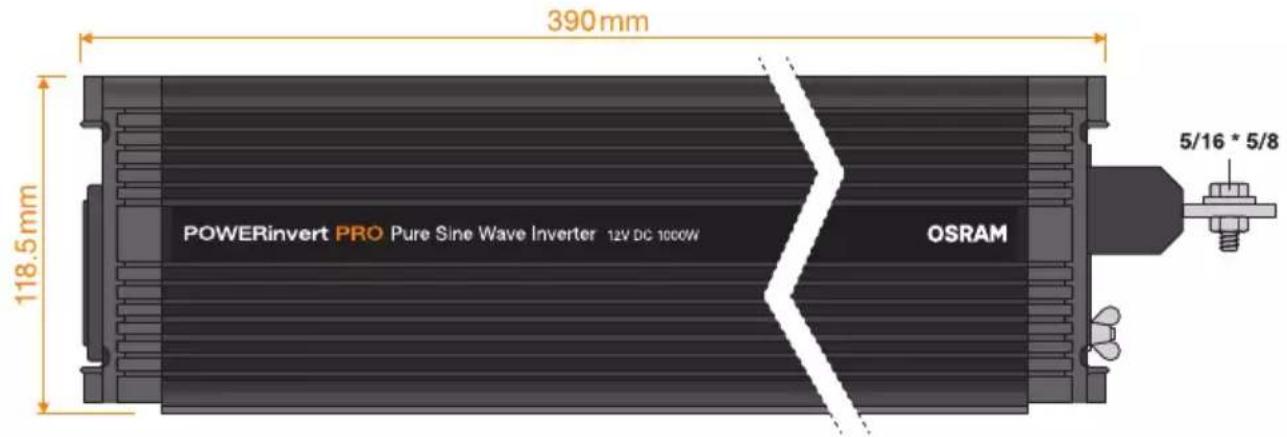
POWERinvert PRO Pure Sine Wave Inverter 12V DC 600W OSRAM 400mm 81.5mm ON/OFF 230V AC LCD Remote Screen OINVLCD 142mm 1/4 * 1/2 170mmOEINVPAR10 Pure Sine Wave Inverter 12V DC 1000W
text_image
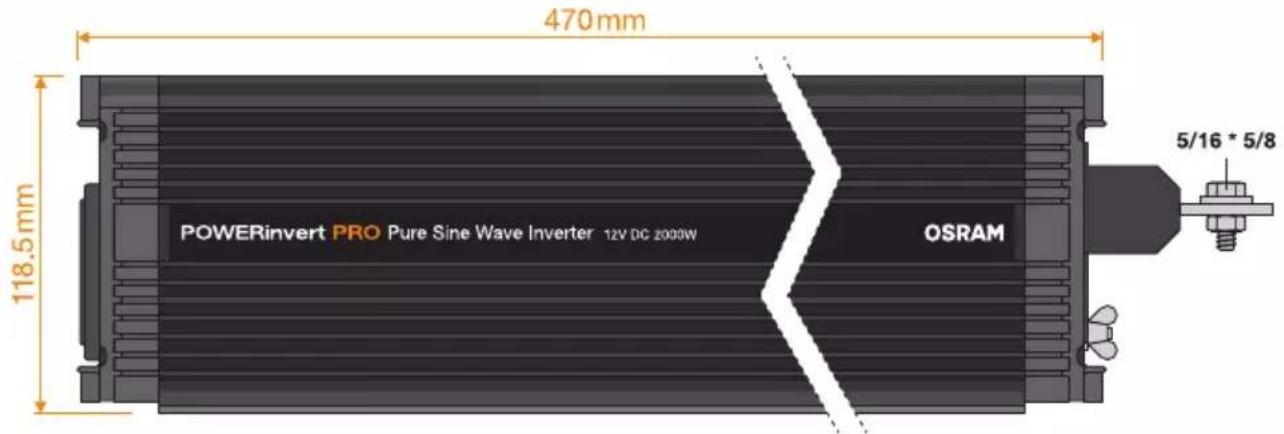
390mm 118.5mm POWERinvert PRO Pure Sine Wave Inverter 12V DC 1000W OSRAM 5/16 * 5/8OEINVPAR20 Pure Sine Wave Inverter 12V DC 2000W
text_image
470mm 118.5mm POWERinvert PRO Pure Sine Wave Inverter 12V DC 2000W OSRAM 5/16 * 5/8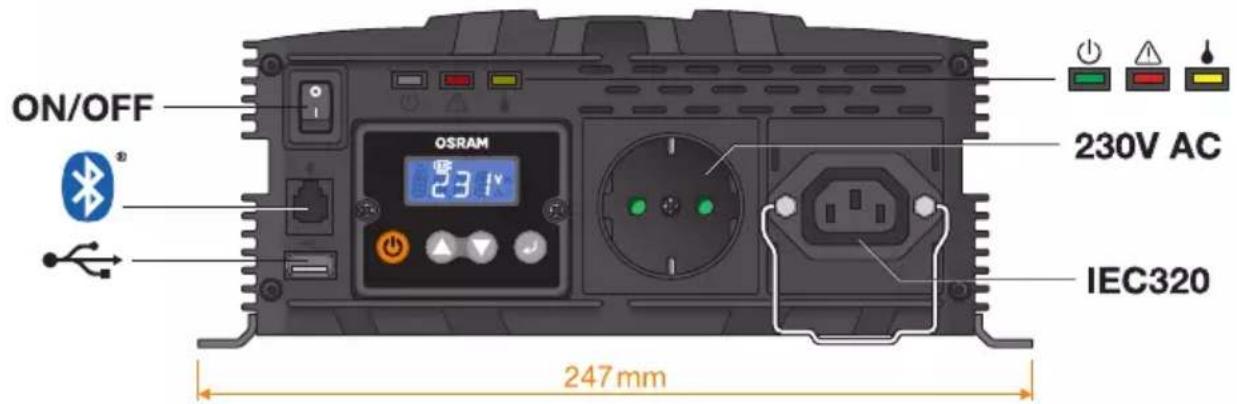
text_image
ON/OFF OSRAM 23.1V 230V AC IEC320 247 mm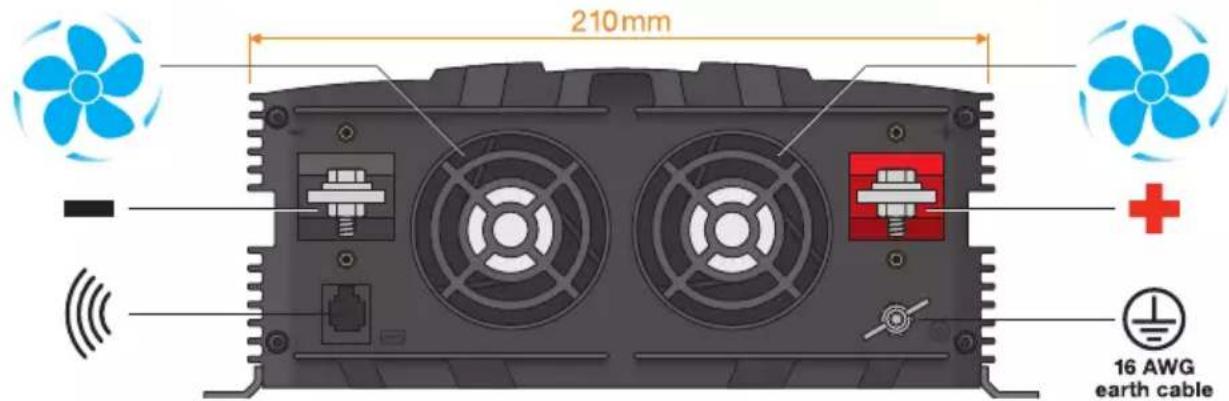
text_image
210mm 16 AWG earth cableOEINVPB20 Pure Sine Wave Inverter 24V DC 2000W
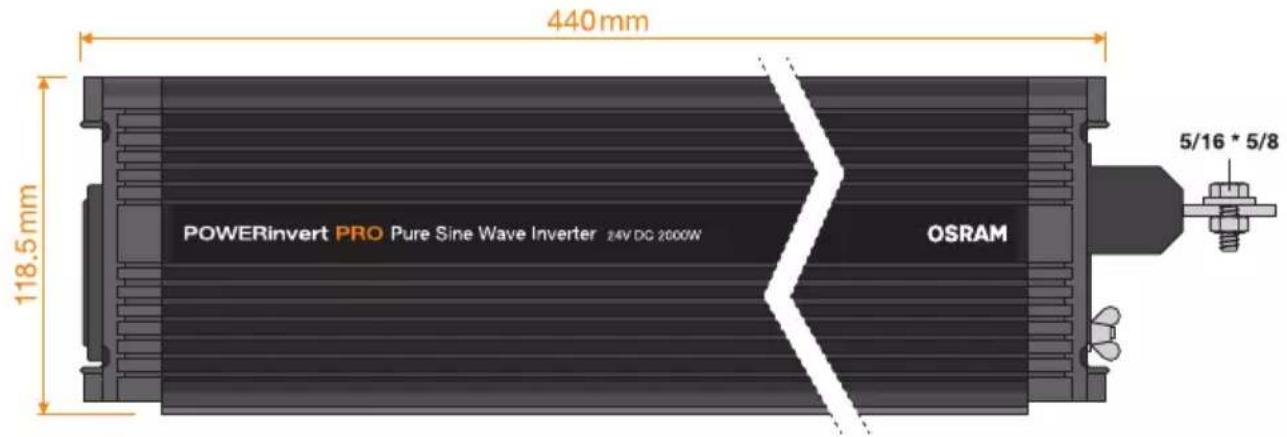
text_image
440 mm 118.5 mm POWERinvert PRO Pure Sine Wave Inverter 24V DC 2000W OSRAM 5/16 * 5/8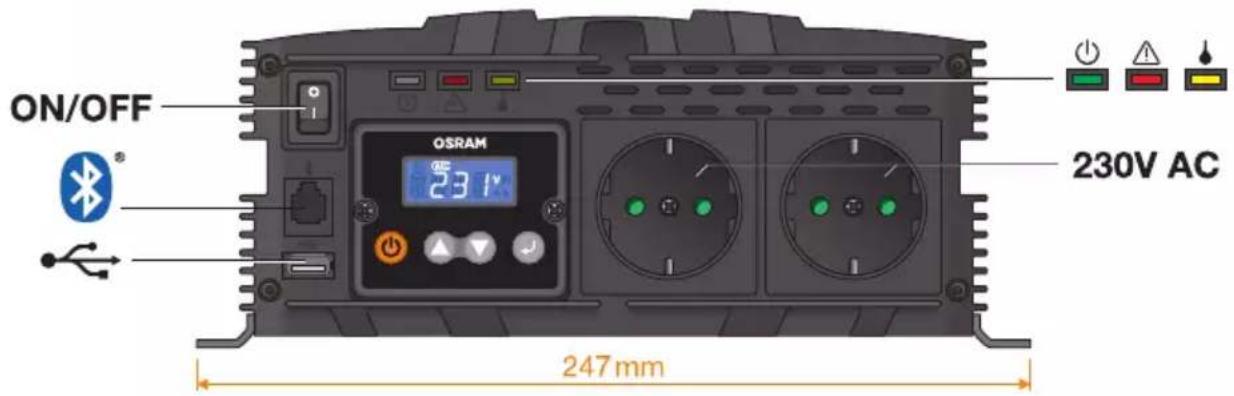
text_image
ON/OFF OSRAM 231V 230V AC 247 mm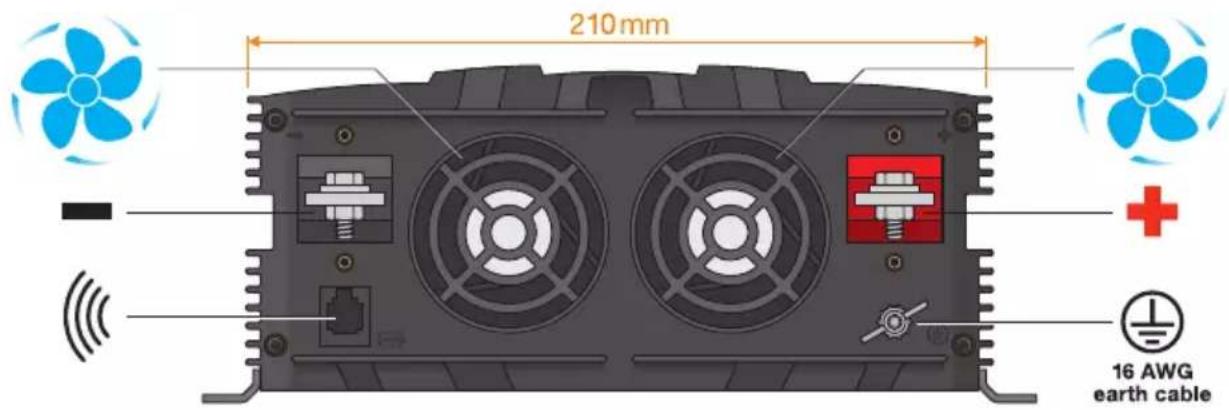
text_image
210 mm 16 AWG earth cable• OEINVPAR6
• OEINVPAR10
• OEINVPAR20
• OEINVPB20
natural_image
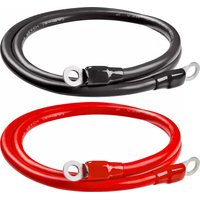
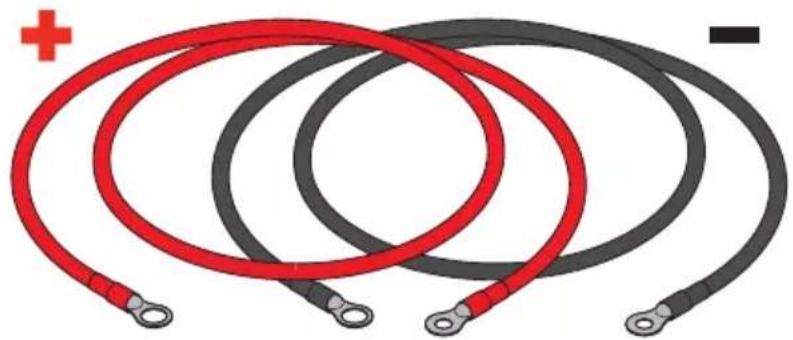
Illustration of three red and black electrical cables with terminal terminals, no text or symbols presentPOWERinvert PRO | Pure Sine Wave Inverter
• OEINVPAR10
• OEINVPAR20
• OEINVPB20
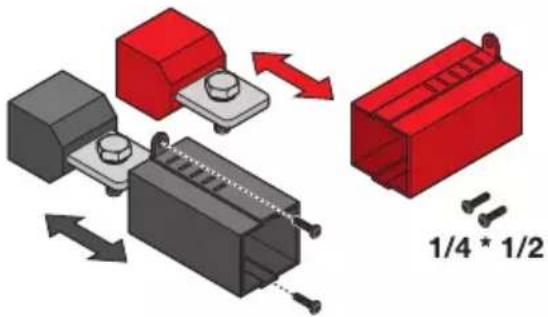
text_image
1/4 * 1/2natural_image
Coiled electrical plug with IEC320 label (no additional text or symbols)• OEINVPAR6
OINVLCD
EAN 4052899631113
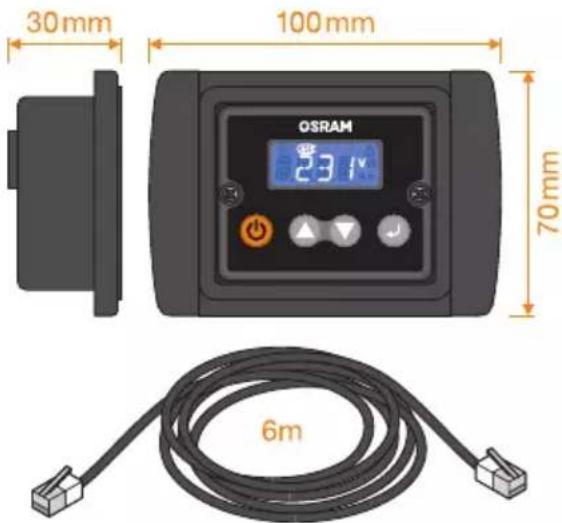
text_image
30mm 100mm OSRAM 23.1" 70mm 6m• OEINVPAR10
• OEINVPAR20
• OEINVPB20
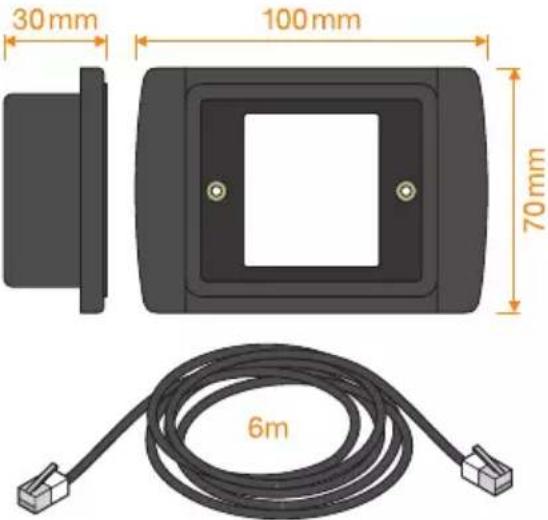
text_image
30 mm 100 mm 70 mm 6mThe Pure Sine Wave inverter provides a 230V supply which closely replicates the domestic mains supply. This makes it ideal for powering more sensitive equipment which may not be compatible with traditional Modified Sine Wave (MSW) inverters.
Safety
This manual contains important information about the operation of this product. Failure to comply with the instructions can cause electric shock, fire or serious injury. Responsibility will not be accepted for damage to persons or property caused by failure to follow the operating instructions.
- Installation should be carried out by a qualified electrician.
- Do not expose the unit to moisture or flammable materials.
- Do not remove the unit cover, dangerous voltages are present.
Installation & Setup
Location
This inverter is for indoor use only and should be installed in a well ventilated, cool, dry environment.
- To prevent overheating, do not install where ventilation openings may be obstructed.
- Allow 10cm all around the inverter casing to ensure adequate ventilation.
- Do not install near fuel tanks or within battery compartments.
Battery Connections
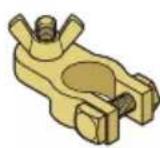
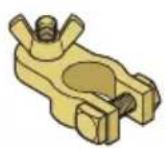
Connect the inverter to the battery using the supplied battery cables and terminals.
- Ensure that the inverter power on/off switch is in the OFF (O) position.
- To protect inverter terminals against short circuit, protective covers should be fitted where provided.
- Attach the black (-) cable to the black (-) terminal on the rear face of the inverter and to the black (-) terminal on the battery.
- Attach the red (+) cable to the red (+) terminal on the rear face of the inverter and to the red (+) terminal on the battery.
- To further protect against short circuit, it is recommended an in-line fuse (F1) be fitted near the positive battery post.
CAUTION:
There may be sparks produced when making battery connections, ensure no flammable materials are present. Incorrect connection of cables to the battery (reverse polarity) may damage the unit and is not covered by the warranty.
Earth Connection
Ensure the inverter is earthed by connecting a cable from the inverter earthing bolt ⏻ to a suitable earth within the installation (normally the vehicle chassis).
CAUTION:
Do not operate the inverter without connecting it to ground, otherwise a fault condition may present an electric shock hazard.
Remote Mounting LCD Display (1000/2000W Models)
For installations where the inverter may be inaccessible, the LCD display can be removed from the inverter and mounted remotely using the optional LCD Frame Kit (RINVFRM).
- Ensure that the inverter power on/off switch is in the OFF position
- Remove 2 x screws holding LCD in position
- Pull LCD forwards and unclip data connector from circuit board
- Connect 6 metre extension lead to circuit board
- Fit blanking plate and fix with 2 x screws, a slot is provided for cable to exit
- Fix LCD into mounting frame using 2 x screws
- Fit frame where display is required and attach 6 metre cable to rear
- Snap fit endplates to cover screw fixings
- Turn the power on/off switch to the ON position
- Inverter can now be controlled remotely from the LCD display
Adding an LCD Display (600W Model)
An LCD display can also be added to models without this function by using the optional LCD Display & Frame Kit (OEINVLCD).
-
Connect 6 metre extension lead to display port on inverter
-
Fit frame where display is required and attach 6 metre cable to rear
-
Snap fit endplates to cover screw fixings
-
Turn the power on/off switch to the ON position
-
Inverter can now be controlled remotely from the LCD display
Loads Requiring Surge Power
The power rating shown on most electrical appliances is a continuous rating but some appliances require up to five times this power for a brief period in order to start operating. This needs to be considered when rating the inverter to avoid overloading it.
When using a microwave oven it should also be noted that the electrical power required from the supply is around 50% higher than the actual cooking power of the microwave.
POWERinvert PRO | Pure Sine Wave Inverter
Operation
Switching On
- Ensure that the inverter power on/off switch is in the OFF (0) position.
- Plug the appliance into the AC output socket on the inverter, ensuring it does not exceed the maximum output power of the inverter.
- Turn the power on/off switch to the ON (I) position.
- The Power indicator will illuminate green and mains power will be available from the AC output socket(s).
On models fitted with a display the LCD screen will also illuminate.
LCD-Display and Indicators
Where fitted the LCD display provides additional information to help monitor and manage power from the inverter.
Information Mode
Various information modes are available by pressing buttons to move forward or backwards through the screens.

text_image
DC V 12.8V DC A** 00.6A AC V 230V W 0 W h*** 3.5 NDC Voltage: Input voltage available from the battery supply.
DC Current: Input current being used from the battery supply in order to power the load.
**The optional Current Sensor must be fitted to enable measurement of input current.
AC Voltage: Output voltage available from the AC outlets.
Output Wattage: Output power being consumed by the connected loads.
Hours Remaining: An estimate of time remaining before the battery will be depleted based on the current load.
***The optional Current Sensor must be fitted to enable measurement of hours remaining.
Setup Mode
The inverter can be configured by entering the setup mode.
- To enter Setup Mode press & hold key.
- Press ▲▼ keys to select item then press ↕, chosen setting will then flash.
- Adjust setting using ▲▼ then press ← to set.
- Press and hold key to exit back to Information Mode.
Output Voltage: Sets the AC output voltage. Only change if the application requires a different voltage for optimum performance.
Last Error Code: Allows the last error code to be viewed.
Battery Size: Sets the Ah rating of the battery supplying the inverter.
The value is used when calculating input current and hours remaining in conjunction with the Current Sensor.
| Setting1 | Default2 | |
| Output Voltage3 | 200/220/230/240V 230V | |
| RCD Test4 | N/A N/A | |
| Last Error Code5 | N/A N/A | |
| Battery Size6 | 90 – 540Ah (in 30Ah in steps7) 90Ah | |
| Power saving Mode8 | ON/OFF ON | |
| Low Voltage Cut-off9 | 9-5 – 11.0V (in 0.5V in steps) 10.0V | |
| Output Frequency10 | 50/60Hz 50Hz |
Indicator and Error Modes
Power: Illuminates green to show the unit is switched on and power is available from the AC output socket(s).
Overload: Illuminates red if the units has been overloaded due to excessive current or a short circuit.
Over Temperature: Illuminates yellow if the unit has overheated.
Audible Alarm: An alarm sound will be heard if the unit has switched off due to a fault.
| Error code11 | Description12 | LEDs | Inverter Status13 | Action14 |
| --- | Normal operation15 | ON | --- | |
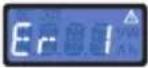 | Battery low voltage warning16 | ON | Check for low battery voltage. Check cable connections are not loose. Reduce load to extend battery life.17 | |
 | Battery low voltage shutdown18 | OFF | Switch inverter off, recharge battery then switch back on.19 | |
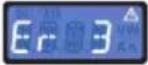 | Battery high voltage shutdown20 | OFF | Check battery voltage is correct for inverter model e.g. 24volt battery for a 24volt inverter.21 | |
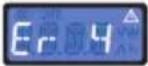 | Overload shutdown22 | OFF | Total load exceeded continuous rating. Startup current exceeded surge rating. Appliance short circuit fault.23 | |
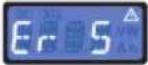 | Over temperature shutdown24 | OFF | Check for adequate ventilation around inverter. Check inverter cooling fans are working.25 | |
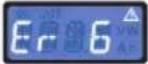 | RCD tripped26 | OFF | Check for adequate ventilation around inverter. Check inverter cooling fans are working.27 | |
| --- | Power Saving Mode28 | STANDBY | --- |
| OEINVPAR6 OEINVPAR10 OEINVPAR20 OEINVPB20 | ||||
| Voltage^29 | 12V 12V 12V 24V | |||
| Cont Power Rating (up to 12 hrs) ^30 | 600W 1000W | 2000W 2000W | ||
| Peak Power Rating (up to 200ms) ^31 | 1200W 2000W | 4000W 4000W | ||
| Output Voltage^32 | 200/220/230/240V AC ± 10% | |||
| Output Frequency^33 | 50/60Hz ± 0.05% | |||
| Output Waveform^34 | Pure Sine Wave^35 | |||
| Input Voltage Range^36 | 9.5V - 16.5V(12 V nom) | 9.5V - 16.5V(12 V nom) | 9.5V - 16.5V(12 V nom) | 19V - 33V(24 V nom) |
| Input Current^37 | ≤59A≤98A≤196A≤98A | |||
| Efficiency @ 75% load (max) ^38 | 90% | |||
| No Load Current^39 | ≤1.5A≤1.6A≤2.0A≤1.5A | |||
| Power Saving Mode Current^40 | ≤0.2A | |||
| RCD Tripping Current^41 | 30mA | |||
| Low Battery Alarm^42 | 10.0V-11.5V± 0.5 Volt | 10.0V-11.5V± 0.5 Volt | 10.0V-11.5V± 0.5 Volt | 20.0V-23.0V± 0.5 Volt |
| Low Battery Shutdown^43 | 9.5V-11.0V± 0.5 Volt | 9.5V-11.0V± 0.5 Volt | 9.5V-11.0V± 0.5 Volt | 19.0V-22.0V± 0.5 Volt |
| Thermal Protection^44 | 60 ± 10°C | |||
| USB Port^45 | 2.1A | |||
| Weight^46 | 2.8 kg 4.3 kg 5.9 kg 8.0 kg | |||
| Fuse^47 | 32V, 40A x 2 pcs(F1~F2) | 32V, 40A x 4 pcs(F1~F4) | 32V, 40A x 6 pcs(F1~F3,F5~F7) | 32V, 20A x 6 pcs(F1~F3, F5~F7) |

text_image
DC V 12.8V DC A** 00.6A AC V 230V W 0 W h*** 3.5GB This appliance is not intended for use by persons (including children) with reduced physical, sensory or mental capabilities, or lack of experience and knowledge, unless they have been given supervision or instruction concerning use of the appliance by a person responsible for their safety. Children should be supervised to ensure that they do not play with the appliance. For indoor use only. Charging only rechargeable Batteries. Disconnect the supply before making or breaking the connections to the battery. WARNING: Explosive gases. Prevent flames and sparks. WARNING: Use of unauthorized parts or failure to follow maintenance Instructions may create a risk of electric shock or injury. Store the manual in a safe place.
Risk of electric shock
Stromschlaggefahr. Risque de choc électrique. Rischio di eletrocuzione. Riesgo de descarga eléctrica. Risco de choque elétrico. Kivduvoç ηλεκτροπληξίας. Risico op een elektrische schok. Risk för elektriska stötar. Sähköiskun vaara. Fare for elektrisk stot. Risiko for elektrisk stod. Nebezpeči úrazu elektrickým proudem. Elektromos áramütés veszélye. Ryzyko porażenia prądem elektrycznym. Riziko zásahu elektrickým prúdom. Nevarnost električnega udara. Elektrik çarpma riski. Rizik od električnog udara. Risc de electrocutare. Rísk ot електрически удар. Elektrilöögi oht. Elektros smügio pavojus. Elektrotrieciena risks. Rizik od električnog udara.

Risk of hazardous materials
Risiko von gefährlichen Materialien. Risque de matières dangereuses. Rischio di materiali pericolosi. Riesgo de materiales peligrosos. Risco proveniente de materiais perigosos. Kívůvouc etnikívůuvuv uškův. Risiko van gevaarlijke materialen. Risk för farliga material. Vaarallisten materiaalien vaara. Risiko for farlige materialer. Risiko for farlige materialer. Nebezpeči nebezpečných materiálů. Fennáll a veszélyes anyagok jelentette veszély. Ryzyko związane ze stosowaniem materialów niebezpiecznych. Riziko nebezpečných materiálov. Tveganje nevarnih materialov. Tehlikeli malzeme riski. Rizik od opasnih materijala. Risc de material periculos. Pisk ot opasni materiali. Materjalid võivad olla ohtlikud. Pavojingų medžiagų rizika. Bistamu materiālu risks. Rizik od štetnih materijala.
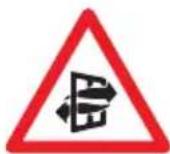
Use in a well ventilated area
In gut belüfteter Umgebung verwenden. Utiliser dans un endroit bien ventilé. Utilizzare in un'area ben ventilata. Usar en un área bien ventilada. Utilize em área bem ventilada. Хрөншүмөпөліте се калá асөріζόμενο χύρο. Gebruik in een goed geventileerde ruimte. Använd i ett välventilerat område. Käytä alueella, jossa on hyvä ilmanvaihto. Bruk i et godt ventilert område. Bruges på et sted med god udluftning. Použivejte na dobře větraném mistě. Jól szellőző környezetben használja. Stosować w dobrze wentylowanych miejscach. Použivajte na dobre vetranom priestore. Uporabljajte na dobro prezračevanem območju. Iyi havalandirlan bir ortamda kullanin. Koristite u dobro prozračenom području. A se utiliza intr-o zonă bine ventilată. Да се използва на добре проветриво място. Kasutage hästi ventileeritud kohas. Naudokite gerai védinamoje vietoje. Lietot teritorija ar labu ventilaciju. Koristite u dobro provetrenom okruženju.
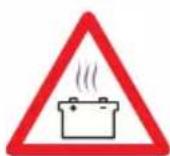
Battery may emit fumes
① Batterie könnte Dämpfe freisetzen. ② La batterie peut dégager de la fumée. ③ La batteria può emettere fumi. ④ La batería puede emitir gases. ⑤ A bateria pode emitir gases. ⑥ H μπαταρία ενδέχεται να εκπέμπει αναθυμιάσεις. ⑦ Batterij kan dampen afgeven. ⑧ Batteriet kan avge ångor. ⑨ Akusta voi vapautua höyryjä. ⑩ Batteriet kan avgi gasser. ⑪ Batteriet kan afgive dampe. ⑫ Z baterie mohou vycházet výpary. ⑬ Az akkumulátor gázokat bocsáthat ki. ⑭ Z akumulatora mogą wydostawać się wyziewy. ⑮ Z batérie možu vychádzat výpary. ⑯ Baterija lahko sprošča dim. ⑰ Aküden duman çıkabilir. ⑱ Akumulator može ispuštati isparavanja. ⑲ Bateria poate emana fum. ⑳ Akumylatorpъt можe да отделя пари. ㉑ Akust vöib tulla suitsu. ㉒ Akumuliatorius gali skleisti garus. ㉓ Akumulators var dümot. ㉔ Akumulator može da ispušta dim.
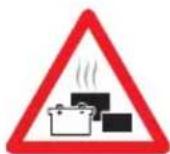
Surrounding items may emit fumes
Umliegende Elemente könnten Dämpfe freisetzen. Les éléments environnants peuvent émettre de la fumée. Gli oggetti circostanti possono emettere fumi. Los objetos circumdantes pueden emitir gases. Os objetos que se encontram nas imediações podem emitir gases. Ta περιβάλλοντα αντικείμενα ενδέχεται να εκπέμπουν αναθυμιάσεις. Omliggende items kunnen dampen afgeven. Omgivande föremål kan avge ångor. Ympäröivistä esineistä voi vapautua hõyryjä. Omkringliggende gjenstander kan avgi gasser. Omgivende genstande kan afgive dampe. Z okolních předmětů mohou vycházet výpary. A környező elemek gázokat bocsáthatnak ki. Z elementów otaczających mogą wydostawać się wyziewy. Z predmetov v bezprostrednej blízkosti môžu vychádzať výpary. Elementi v okolici lahko sproščajo dim. Etraftaki parçalardan duman çıkabilir. Okolni elementi mogu ispuštati isparavanja. Articolele din jur pot emana fum. Okolnite предмети може да отделят пари. Ümbritsevatest esemetest vöib tulla suitsu. Aplinkiniai objektai gali skleisti garus. Apkārtējie priekšmeti var dümot. Okolni elementi mogu da ispuštaju dim.
www.osram.com/am-guarantee

Refer to instructions

Class 2 Insulated Appliance

EU
Conformity
mark

WEEE (Waste Electrical and Electronic Equipment Directive)
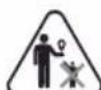
Not for use by children
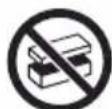
Do not open

Do not cover
C10238696
G15114294
05.07.22
Imported and manufactured by
OSRAM GmbH
Nonnendammallee 44
13629 Berlin
Germany
www.osram.com