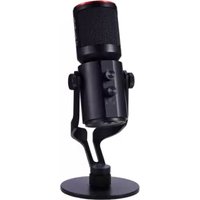
Live Streamer MIC 350 - Microphone AVERMEDIA - Free user manual and instructions
Find the device manual for free Live Streamer MIC 350 AVERMEDIA in PDF.


| Product type | USB condenser microphone |
| Brand | AVerMedia |
| Model | Live Streamer MIC 350 |
| Polar pattern | Cardioid |
| Frequency response | 20 Hz – 20 kHz |
| Sampling rate | 48 kHz |
| Bit depth | 16-bit |
| Connectivity | USB-C (cable included) |
| Compatibility | PC, Mac, PS4, PS5, Nintendo Switch |
| Power | Via USB (bus-powered) |
| Weight | Approximately 450 g |
| Dimensions (L × W × H) | 160 × 100 × 80 mm |
| Included accessories | USB-C cable, table stand, anti-vibration mount |
| Care and cleaning | Dust with a soft dry cloth. Do not use harsh chemicals. |
| Safety | Do not expose to moisture or extreme temperatures. Unplug during cleaning. |
| Spare parts and repairability | Parts are not available separately. Contact AVerMedia support for repairs. |
| Warranty | 1 year |
Frequently Asked Questions - Live Streamer MIC 350 AVERMEDIA
User questions about Live Streamer MIC 350 AVERMEDIA
0 question about this device. Answer the ones you know or ask your own.
Ask a new question about this device
Download the instructions for your Microphone in PDF format for free! Find your manual Live Streamer MIC 350 - AVERMEDIA and take your electronic device back in hand. On this page are published all the documents necessary for the use of your device. Live Streamer MIC 350 by AVERMEDIA.
USER MANUAL Live Streamer MIC 350 AVERMEDIA
European Community Compliance Statement

Class B
This product is herewith conrmed to comply with the requirements set out in the Council Directes on the approximation of the laws of the Member States relang to Electromagnec Compatibility Directive (EMC) 2004/108/EC, Low Voltage Directive (LVD) 2006/95/EC and Energy-related Products Directive (ErP) 2009/125/EC.
Responsible manufacturer:
AVerMedia Technologies, Inc.
No. 135, Jian 1st Rd., Zhonghe Dist., New Taipei City 23585, Taiwan
TEL: +886-2-2226-3630
European Community contact:
AVerMedia Technologies Europe B.V.
Kwartsweg 50, 2665 NN, Bleiswijk, The Netherlands
Technical Support: hp://www.avermedia.com/avertv/Support/
FCC Compliance Statement (United States)

FCC NOTICE
This device complies with Part 15 of the FCC Rules. Operaon is subject to the following two conditions: (1) this device may not cause harmful interference, and (2) this device must accept any interference received, including interference that may cause undesired operaon.
Federal Communicaons Commission Statement
NOTE- This equipment has been tested and found to comply with the limits for a Class B digital device, pursuant to Part 15 of the FCC Rules. These limits are designed to provide reasonable protecon against harmful interference in a residential installaon. This equipment generates uses and can radiate radio frequency energy and, if not installed and used in accordance with the instrucons, may cause harmful interference to radio communicaons. However, there is no guarantee that interference will not occur in a parcular installaon. If this equipment does cause harmful interference to radio or television recepon, which can be determined by tuning the equipment o and on, the user is encouraged to try to correct the interference by one or more of the following measures:
Reorient or relocate the receiving antenna.
Increase the separaon between the equipment and receiver.
Connect the equipment into an outlet on a circuit dierent from that to which the receiver is connected.
Consult the dealer or an experienced radio/television technician for help.
CAUTION ON MODIFICATIONS
To comply with the limits for the Class B digital device, pursuant to Part 15 of the FCC Rules, this device must be installed in computer equipment cered to comply with the Class B limits. All cables used to connect the computer and peripherals must be shielded and grounded. Operaon with non-certified computers or non-shielded cables may result in interference to radio or television reception.
Changes and modicaons not expressly approved by the manufacturer or registrant of the equipment can void your authority to operate the equipment under Federal Communicaons Commission rules.
Responsible manufacturer:
AVerMedia Technologies, Inc.
No. 135, Jian 1st Rd., Zhonghe Dist., New Taipei City 23585, Taiwan
TEL: +886-2-2226-3630
USA Oce contact:
AVerMedia Technologies U.S.A.
47358 Fremont Blvd., Fremont, CA 94538
Technical Support: hp://www.avermedia.com/avertv/Support/
WASTE ELECTRICAL AND ELECTRONIC EQUIPMENT (WEEE)
The mark of Crossed-out wheeled bin indicates that this product must not be disposed of with your other household waste. Instead, you need to dispose of the waste equipment by handing it over to a designated collecon point for the recycling of waste electrical and electronic equipment. For more informaon about where to drop o your waste equipment for recycling, please contact your household waste disposal service or the shop where you purchased the product.

Baery Safety Informaon
● Use of carbon-zinc baery for remote control is strongly recommended.
- Use of other types of baeries, such as alkaline or rechargeable (nickel-cadmium), may cause baery current overload or baery leakage and corrosion which can damage the remote control.
● Store the baeries in a cool dry place.
- Do not dispose of used baeries in domesc waste. Dispose of baeries at special collecon points or return to point of sale if applies.
- Remove the baeries during long periods of non-use. Always remove exhausted baeries from the remote control. Baery leakage and corrosion can damage this remote control, dispose of baeries safely.
- Do not mix old and new baeries.
● Do not mix dierent types of baeries: alkaline, standard (carbon-zinc) or rechargeable (nickel-cadmium).
- Do not dispose of baeries in a re. The baeries may explode or leak.
● Never short circuit the baery terminals.
ICES-003 (Canada)
CES-003 Issue 5 Class B: C285
GOST-R Cercaon (Russia)

AΓ98
No POCC TW. AΓ98.B06472
Срок действия с
© 2013 by AVerMedia Technologies, Inc. All rights reserved. No part of this document may be reproduced or transmied in any form, or by any means (Electronic, mechanical, photocopy, recording, or otherwise) without prior written permission of AVerMedia Technologies, Inc. Informaon in this document is subject to change without noce. AVerMedia Technologies, Inc. reserves the right to modify, change, improve or enhance its products and to make changes in the content without obligaon to nofy any person or organizaon of such changes. Please visit avermedia.com to get the updates of the operaon and use of AVerMedia products.
"AVerMedia" is trademark and logo of AVerMedia Technologies, Inc. Apple, the Apple logo, iPod, iPhone, iPad and Apple TV are trademarks and/or registered trademark of Apple Inc., registered in the U.S. and other countries. Other trademarks used herein for descripon purpose only belong to each of their companies.
Picture shown may vary from actual product.
This product uses Arphic Font.
This soware uses libraries from the Libav project under the LGPLv2.1.
Internaonal Headquarter Oce
Address No.135, Jian 1st Rd., Zhonghe Dist., New Taipei City 23585, Taiwan (R.O.C.)
Website www.avermedia.com/
Tel +886-2-2226-3630
Specicaons
Product Name Capture Box
Model No. C285
Input Rang 12V 1.5A
Power Consumpon < 7W (power consumpon of hard drive not included)
Standby Power Consumpon < 0.5W (Without Pass Through)
Adapter Rang Input: 100-240V\~, 50-60Hz 0.5A Max. Output: 12V 1.5A
Size 190 mm(W) x33.5 mm (H)x 152.5 mm (D)
Weight 421 g
Operang Temperature 0\~40°C
System Requirements
TV/monitor with component video (YPrPb) input
TV/monitor with 720p or 1080p resolution (recommended)
Game console/video device with component video (YPrPb) output
NTFS-formaed hard drive with capacity greater than 500 GB is recommended (The supported maximum storage capacity of the hard drive is 2TB.)
Hard drive is highly preferred over ash drive to minimize the risk of recording failure
Table of Content
Chapter 1 Package Contents....2
1.1 Other Items You Need 4
Chapter 2 The Unit Parts....5
2.1 Front Panel 5
2.2 Infrared Sensor 5
2.3 LED Indicator 6
2.4 Connection Ports 7
2.4.1 Front View 7
2.4.2 Rear View 8
Chapter 3 The Remote Control....9
Chapter 4 Installation & First Time Setup 12
4.1 Supported Resolutions 12
4.2 Hardware Installation....14
4.3 Storage Device Installation 20
4.3.1 USB Storage Device Insertion 20
4.3.2 HDD Installation and Removal 20
4.4 Setup Wizard 25
4.5 Video Output Settings for Game Consoles 28
4.5.1 Video Output Settings for PlayStation 3 ____ 28
4.5.2 Video Output Settings for Xbox 360. ____ 29
Chapter 5 Basic Operation....31
Thank you for purchasing the Capture Box. Please read this user manual carefully to ensure proper use of this product. We recommend you to keep it for future reference.
Introduction
The Capture Box, a stand-alone video capture box specially designed for TV gamers, allows you to capture HD content up to 1080p from various video game consoles, such as PlayStation ^® 3, Xbox 360 and Wii U.
The Capture Box records HD gameplays directly to your hard disk drive (HDD) for later viewing and further editing, eschewing the hassle of setting up a PC nearby your TV set.
Most attractively, the one-press capture button allows you to instantly grab high score screen and record your exciting gameplay footage with nearly no effort. The Capture Box can record from either HDMI (without HDCP protection) or Component Video at up to 1080p.
Other than that, the Capture Box can pair up with the dedicated app GameMate, which turns your smartphone into a second screen remote controller. You can view capture and uploading status on the screen of your smartphone.
Chapter 1 Package Contents
Please confirm that the package contains the following items. If any of the package contents are missing or damaged, please contact the distributor immediately.
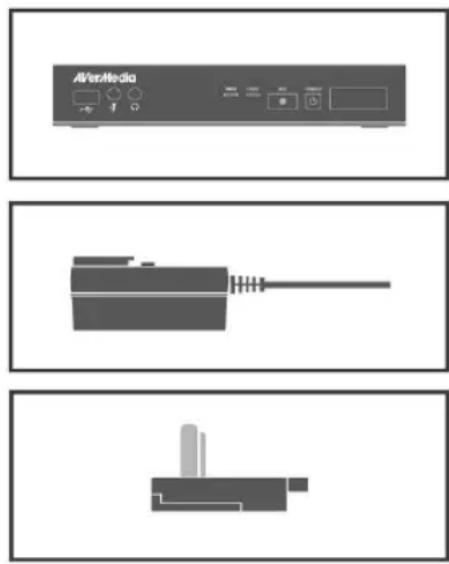
Game Capture HD II
Power Adapter
Power Adapter Outlet Module
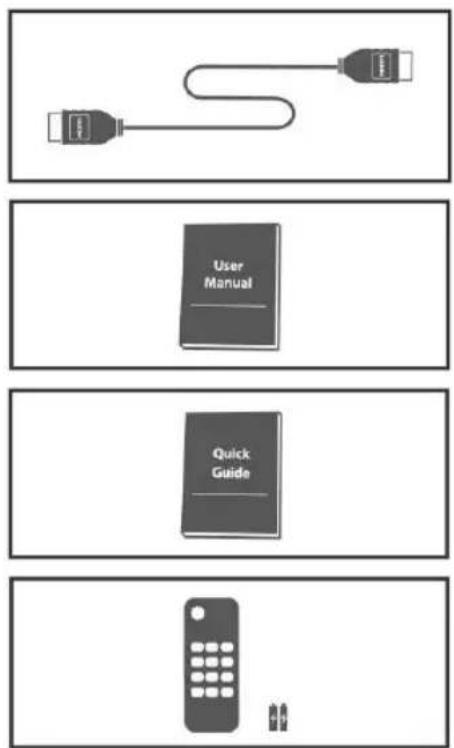
HDMI Cable
User Manual
Quick Guide
Remote Control (Batteries Included)
● The accessories that come with the package may slightly vary depending on different sales regions.
- The Capture Box is made for record and capture media materials that are legally owned or licensed by the user only. Any violation of copyrights or other intellectual property rights is not allowed.
- AVerMedia regularly releases the latest version of firmware for the Capture Box. Having the latest firmware enhances the functionality of the Capture Box. To download the latest firmware file, please go to /www.avermedia.com and then enter the model name in Product Search field. Firmware file is available on the product information page (See Chapter 6 for details).
- If problems are encountered, refer to FAQ section at www.avermedia.com for further troubleshooting.

1.1 Other Items You Need
In order to fully enjoy the recording, the capturing functions of the Capture Box and the dedicated iPhone application, you will need to have the following items prepared:
| Item | You need the item to... | |
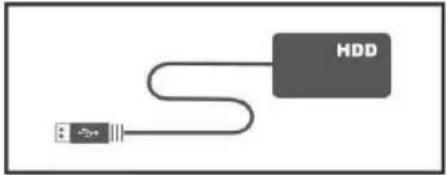 | Storage Device | Save recordings and snapshots. |
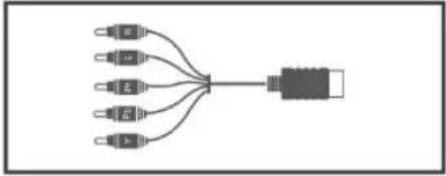 | Play Station 3 AV Component Cable | Connect with PS3 console. |
 | Router (DHCP IP Network Recommended) | Pair up with GameMate. |
 | iPhone 4/5, 4s | Use GameMate. |
 | Headset / Microphone | Record live commentary. |
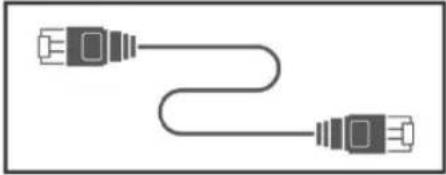 | RJ45 Cable | To upload captured content |

● Other than iPhone, 4, iPhone 4s, iPhone 5, GameMate also supports iPad and iPod touch.
- For further smartphone support, refer to www.avermedia.com for latest update.
Chapter 2 The Unit Parts
2.1 Front Panel
The button panel found on the front of the unit provides quick access to commonly used functions.
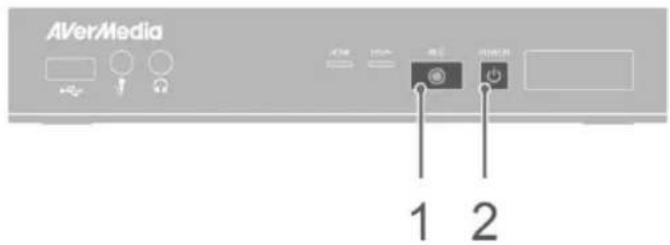
# Buttons
1

2

Descriptions
Record
Press to start / stop recording.
Hold down the button for 4 seconds to force shut down the Capture Box
Power
Press to turn the unit on
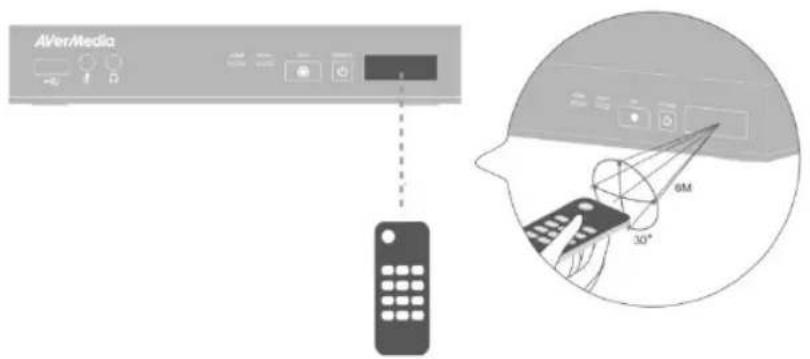
2.2 Infrared Sensor
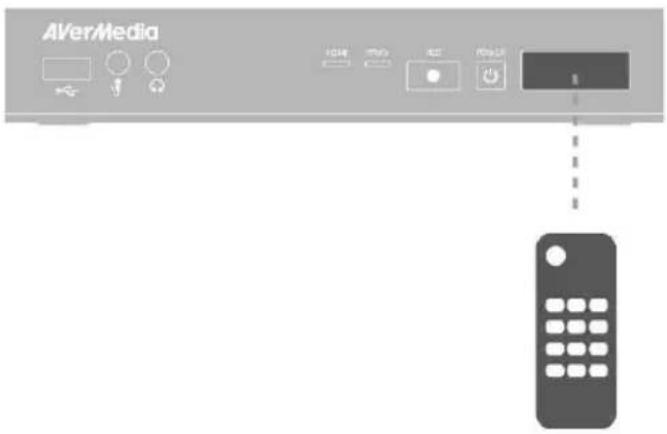
When using the remote control, aim it at the infrared (IR) sensor located at the front panel of the unit. The remote control must be held at an angle within 30 degrees perpendicular to the IR sensor to function correctly. The distance between the remote control and the sensor should not exceed 6 meters (20 feet).
English-5
The LED indicators on the front of the unit show the device's status.
1 HDMI source LED indicator
2 YPbPr source LED indicator
3 Record status LED indicator
4 Power status LED indicator
| Condition | Source | Record | Power |
| Powered on | Glows solid green | ||
| Ready to record/snapshot | Solid green | Solid green | |
| Recording | Solid green | Breathing | Solid green |
| Take a snapshot | Flashes red once | Flashes red once | Flashes red once |
| Unable to record/snapshot | Solid green | Flashes green continuously | |
| No source | Flashes green continuously | ||
| Source is available | Glows solid green | ||
| Power off in progress | Solid green | Flashes green continuously | |
| Pass through ON When powering off | Solid orange | ||
| Pause recording | Solid red | Solid red | Solid red |
| Record finish in progress | Solid green | Flashes red continuously | Solid green |
AVerMedia
| Condition | Source | Record | Power |
| Storage space is low | Solid green | Glows at a slowly pace | Solid green |
| Device is not ready | Flashes green continuously | ||
| Problems like no storage/ no signal/protected content | Flashes green continuously | ||
| Accepting a remote control command | Flashes green once |
Press F1 to obtain LED light indicator status
2.4 Connection Ports
2.4.1 Front View
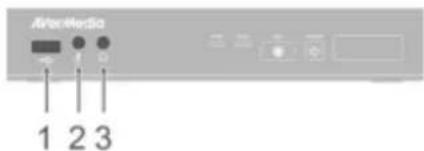
AVerMedia
2.4.2 Rear View
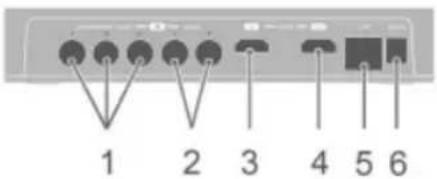
1 Component video input
4 HDMI output
2 Audio L/R input
5 LAN port
3 HDMI input
6 DC-IN
AVerMedia
Chapter 3 The Remote Control
The descriptions below show the deployment of the keys on the remote control.
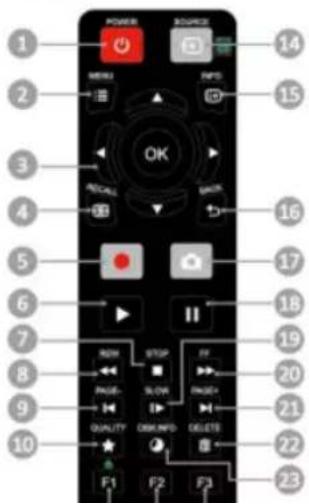
| # | Buttons | Descriptions |
| 1 |  | Press to turn the unit on / into stand-by mode. |
| 2 |  | Press to access the main menu. Press again to exit. |
| 3 |  | Press the navigation keys to move among options.Press OK to confirm a selection.Press OK to mark/ unmark segment in post- editing. |
| 4 |  | Press to play the latest recorded file or view the last captured image. |
| 5 |  | Press to start / stop recording. |
| 6 |  | Press to start playing the selected file.Press to play the file at normal (1x) speed when slow motion, rewind, or fast-forward is active. |
| 7 |  | Press to stop the playback.Press to stop the recording. |
| 8 | REW | Press to rewind (2x, 4x, 8x, 16x, 32x). |
| 9 |  | Press to return to the previous page. |
| 10 | QUALITY | Press to display the video/snapshot quality adjustment screen. Press again to exit. |
| 11 |  | Press to safely remove external hard disk in Menu(Follow the on-screen instruction) |
| 12 |  | (Follow the on-screen instruction) |
| 13 |  | (Follow the on-screen instruction) |
| 14 | [SOURCE] | Press to switch between Component and HDMI sources. |
| 15 |  | Press to display the on-screen information, including mode, source and audio sources. |
| 16 |  | Press to exit the current page and return to the previous page. |
| 17 |  | Press to take a snapshot during gameplay or video playback. |
| 18 |  | Press to pause the playback. Press OK or ▶ to resume playback. Press to pause the recording. |
| 19 |  | Press to play the video in slow motion (1/2x). Press again to enter frame- by- frame mode (See Chapter 5 for details). |
| 20 |  | Press to fast-forward (2x, 4x, 8x, 16x, 32x). |
| 21 |  | Press to go to the next page. |
| 22 |  | Press to delete the selected files. |
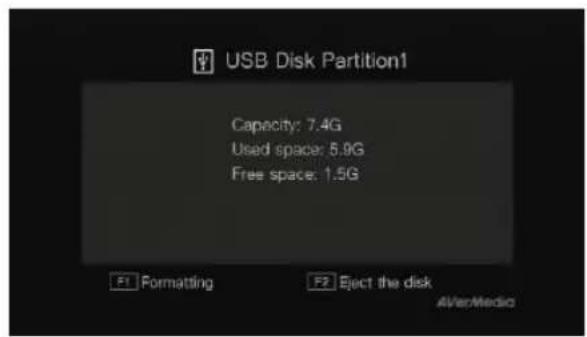
| 23 |  | Press to display the disk information. Press again to hide it. |
AVerMedia
Chapter 4 Installation & First Time Setup
4.1 Supported Resolutions
The Game Capture HD II supports Component (YPbPr) and HDMI input resolution as follows:
HDMI / Component (YPbPr)
| 480i/576i |
| 480p/576p |
| 720p (50 & 60Hz) |
| 1080i (50 & 60Hz) |
| 1080p (50 & 60Hz) |
The Game Capture HD II records the exact display resolution under most circumstances. Exceptions can only be found when the input resolution is set as 1080p:
| Source Resolution | Display Resolution | Recorded Resolution |
| 1080p (60fps) | 1080i (60fps) | 1080p (30fps) |
| 1080p (50fps) | 1080i (50fps) | 1080p (25fps) |

Estimated recording duration for different video quality settings :
HD 1080p
| Storage Capacity\Video Quality | Optimal(20 Mbps) | Good(18 Mbps) | Maximum RecordingLength (15 Mbps) |
| 1TB | 100 hrs | 110 hrs | 125 hrs |
| 2TB | 200 hrs | 220hrs | 250hrs |
HD 720P
| Storage Capacity\Video Quality | Optimal(20 Mbps) | Good(15 Mbps) | Maximum RecordingLength (10 Mbps) |
| 1TB | 100 hrs | 125hrs | 200 hrs |
| 2TB | 200 hrs | 250 hrs | 400hrs |
HD 1080i
| Storage Capacity\Video Quality | Optimal(15 Mbps) | Good(12 Mbps) | Maximum RecordingLength (10 Mbps) |
| 1TB | 125 hrs | 150 hrs | 200 hrs |
| 2TB | 250 hrs | 300 hrs | 400 hrs |
SD 480i(576i)/480P(576P)
| Storage Capacity\Video Quality | Optimal(7.5 Mbps) | Good(5 Mbps) | Maximum RecordingLength (3 Mbps) |
| 1TB | 250 hrs | 400 hrs | 650 hrs |
| 2TB | 500 hrs | 800 hrs | 1300 hrs |
*Recording with higher video quality takes up more disk space.
4.2 Hardware Installation
Please follow the steps below to properly connect the Capture Box and your TV/video game consoles.

- If you would like to install internal hard drive, install it before turning on the Capture Box.
- Make sure that the cables are firmly connected and that neither of the cables is loose. If any of the cables are loose or disconnected, there may be a loss of signal or screen color problems.
Step 1
Check the Connection of Your Game Consoles and TV
Make sure all cables connecting the Capture Box to your game consoles and TV are well-connected. Doing so will save you a lot of time from locating problems later. First, please check the connection of your game consoles. Second, make sure that the connection to TV is good.
Step 2
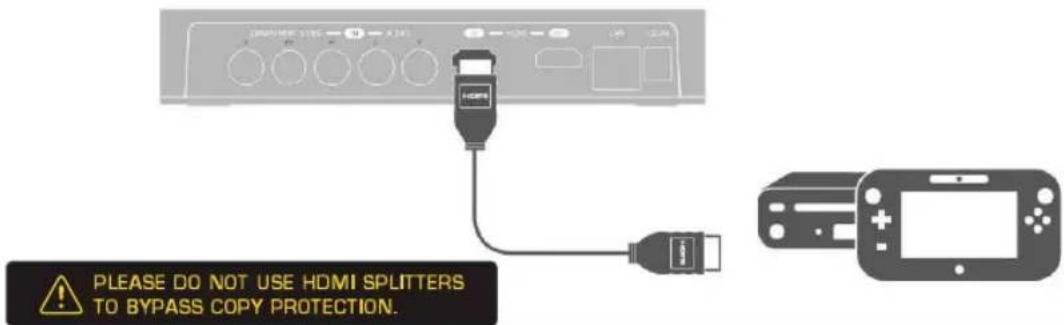
Connect the Device to Your Wii U / Xbox 360 Using HDMI Cable
Connect one end of the HDMI cable to the HDMI IN port on the rear of the device and the other end to the HDMI OUT port on your Xbox 360/ Wii U.
Connect the Device to Your PlayStation 3 / Wii Using Component AV Cable
Plug the green, blue, red connectors into the COMPONENT VIDEO IN port and white and red connectors into the AUDIO IN port on the rear of the device. Then, plug the other end to your game console.
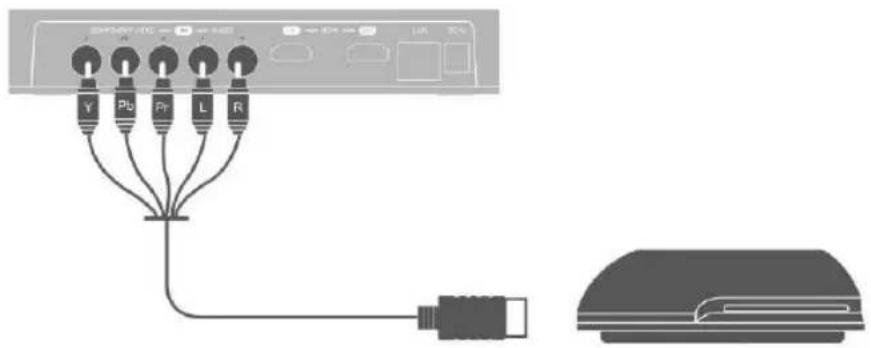

- "PlayStation 3 Component AV Cable" and Wii Component Cable is NOT Included. Please purchase separately if needed.

Step 3
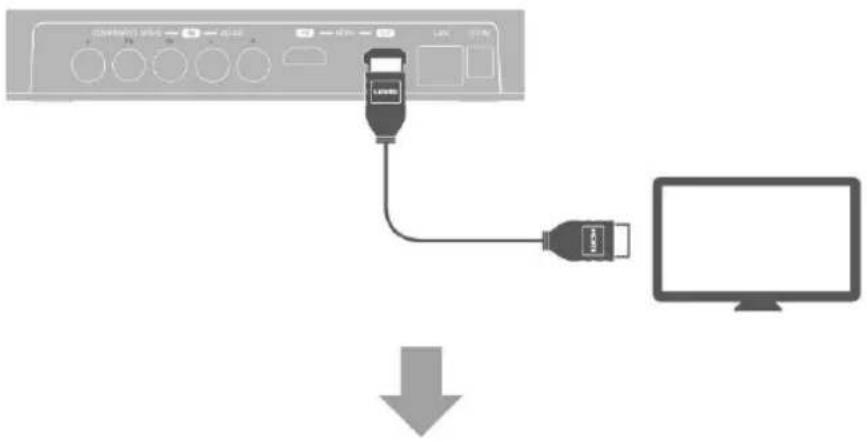
Connecting the Device to Your TV Using HDMI Cable
Connect one end of the HDMI cable to the HDMI OUT port on the rear of the device and the other end to the HDMI IN port on your TV.
Step 4
Power on Your Game Console
Turn on your game console.

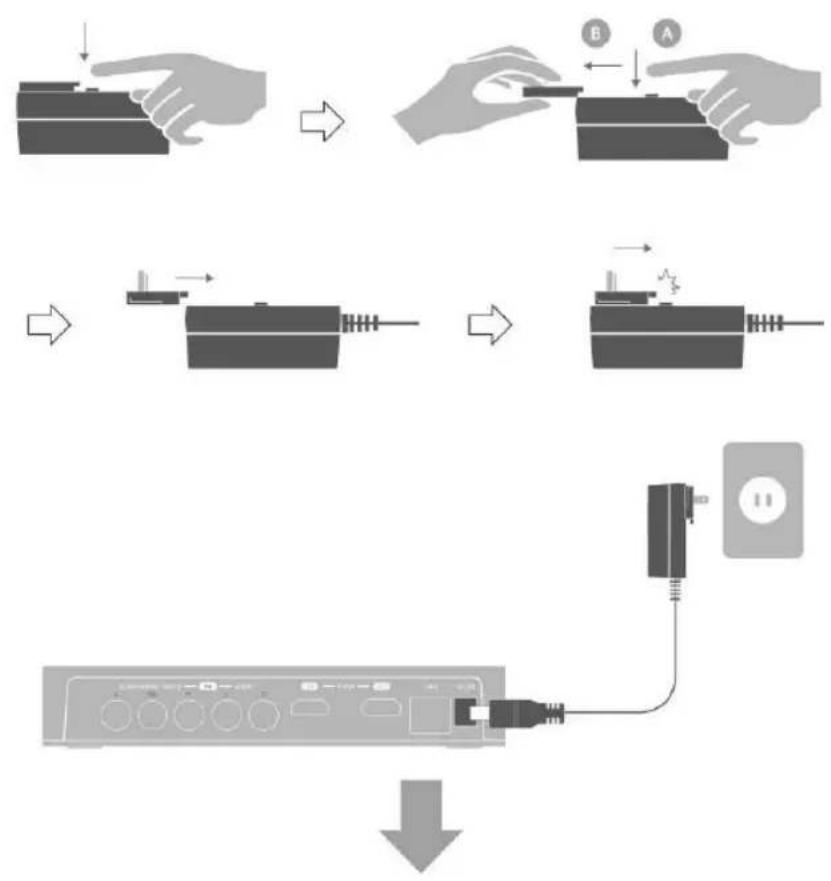
Step 5 Install and Connecting the Power Adapter
Slide the Power Adapter Outlet Module into the groove on the Power Adapter. Connect the Power Adapter connector to the DC-IN port on the rear of the device. Then plug the power adapter to a wall outlet.
flowchart
graph TD
    A["Device Input"] --> B["Switch"]
    B --> C["Device Switch with Battery"]
    C --> D["Switch with Battery"]
    D --> E["Power Supply"]
    E --> F["Device Output"]
Step 6
Connecting to the Network
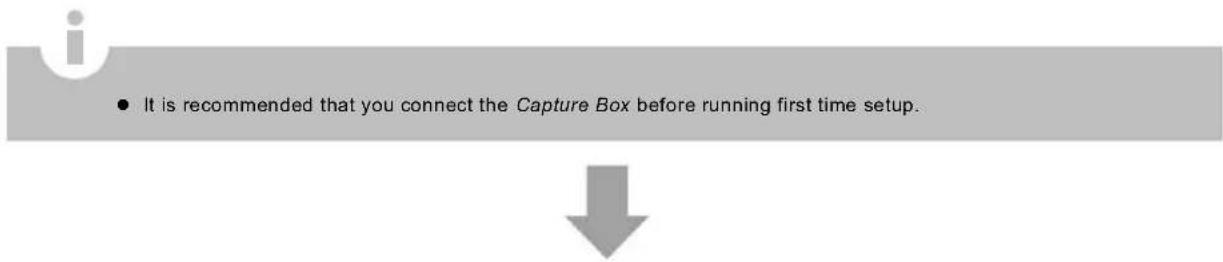
To automatically obtain time and other information, you need to connect the Capture Box to an Ethernet LAN. Make sure the LAN wire is well-connected before you continue to the next step. Meanwhile, a router which supports DHCP IP network is recommended for you to pair up the Game Capture HD II with your iPhone.
Step 7
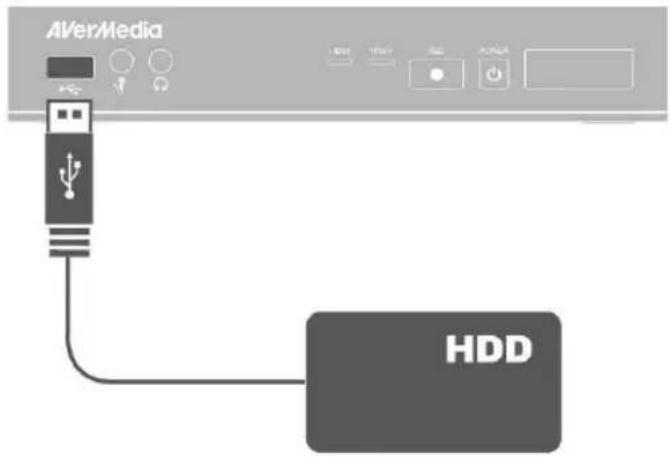
Plug in USB Hard Drive/ HDD
Connect your portable USB hard drive or hard disk drive (HDD) to the USB port on the front of the Capture Box. Please make sure you use an NTFS format USB hard drive or hard disk drive (HDD). Under the condition that no hard drive is connected to the device, the power light will continue to flash. Therefore, it is advised that you plug in USB hard drive or hard disk drive (HDD). Please see Chapter 4.3.2 for further details about installing an internal hard drive.
English-17
Step 8
Power on the Capture Box
Press the power button on the front panel of the device.
Or
Use the power button on the remote control.
The POWER LED indicator lights up green, when that the device is power-on.

- It is important that you power on/off the Capture Box following suggested procedure. Fail to do so may lead to damage of the Capture Box or data loss

Step 9
Check Video on TV screen
Make sure that there is game console video content displayed on TV screen.

If your TV is not displaying video properly, please check the followings:
- Supported resolutions vary depending on the TV in use. For details, please refer to the documentation that comes with your TV.
● Power off Capture Box and then make sure that the device is connected properly and with the proper cables. - If there is still no video signal on TV, refer to FAQ section at www.avermedia.com for further troubleshooting.
Connecting the Device to Your Microphone and Headset
Plug in the microphone connector into the MIC Input port on the front panel of the device. Same as microphone, plug in the headset connectors into the headphone and microphone ports on the front panel of the device. This procedure is only needed when you intend to add commentary to your gameplay video. Please refer to Chapter 6 for details.
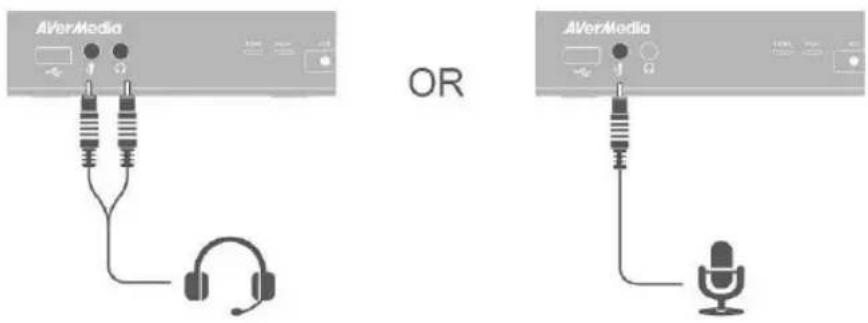

- When headphone is connected to the Capture Box, the gameplay will be muted as sound will come out from the headphone.
- Hereafter a headset refers to the device you use to record while headphone refers to the headphone port on the front panel of the Capture Box.
4.3 Storage Device Installation
The Capture Box supports 2.5 inch internal hard drive and external USB storage device. You can save the recorded files and snapshots either to the internal HDD or external one.
4.3.1 USB Storage Device Insertion
Connect your portable USB hard drive to the USB port on the front of the Capture Box
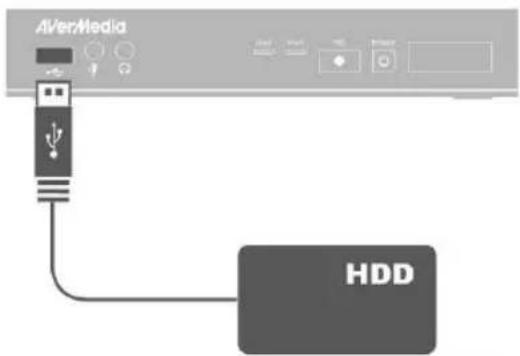
- It is highly recommended to use a NTFS format hard drive instead of a flash drive to minimize the risk of recording failure.
- To avoid any possible data loss, go to main menu and press [F1] of your remote control to safely remove the external storage disk before unplugging it from the Capture Box.
4.3.2 HDD Installation and Removal

- It is highly recommended to use a new unformatted hard drive or a hard drive formatted as NTFS file system. The maximum supported storage capacity of the hard drive is 2TB.
- Before installing or removing the internal HDD, please disconnect the power supply from the Capture Box to avoid data loss.
- Removing internal HDD immediately after powering-off may cause personal injury due to heat. Please wait until the HDD cools down completely (it takes approximately 10 minutes) before any attempt to remove it.
To install the internal HDD:
Step 1
Remove the HDD Lid
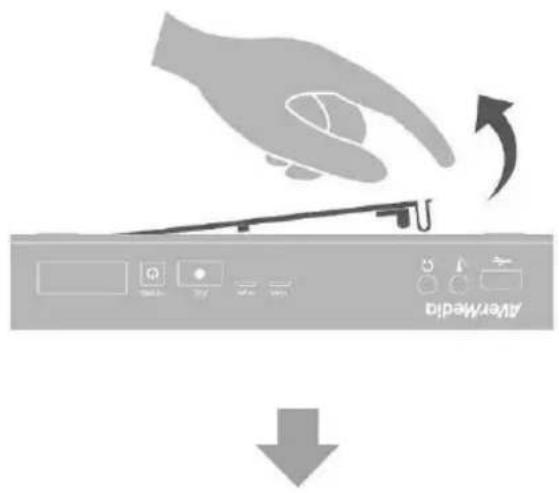
Open the HDD lid on the bottom of the Capture Box.
Step 2
Before Installing Internal HDD
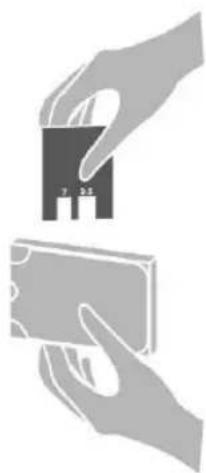
Use the measuring card to measure the height of your HDD (7mm or 9.5mm).

- Please refer to the Appendix C for the measuring card.
natural_image
Illustration of two hands holding a card and a banknote, with no visible text or symbolsEnglish-21
Adjust the rotary knob attached to the inner side of the lid to fit the height of your HDD.
The default position of the rotary knob fits HDD with 9.5mm height. If you use HDD with 7mm/9.5mm height, rotate the rotary knob to the other direction.
Using a 9.5mm HDD:

flowchart
graph TD
    A["Initial Setup"] --> B["Intermediate Processing"]
    B --> C["Final Output"]
Using a 7mm HDD:
Step 3 Inserting the HDD
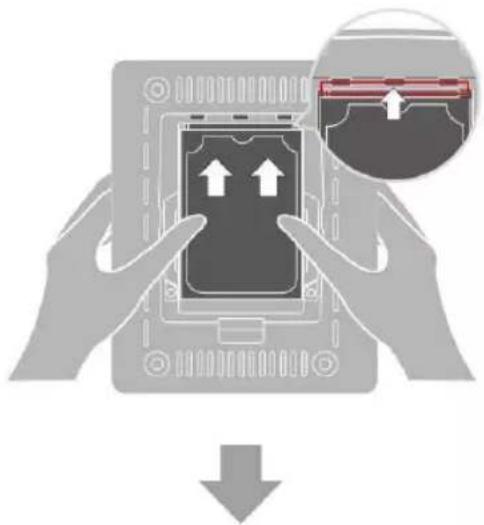
Place the HDD on the slot with the sticker-side facing up and the HDD connector end facing to the left.

natural_image
Illustration of a hand pressing a button on a device (no text or symbols visible)Align and insert the HDD connectors all the way into the SATA connector. Push in firmly to secure them.
natural_image
Illustration of hands holding a computer monitor with an inset showing a close-up of the screen (no text or symbols)Step 4
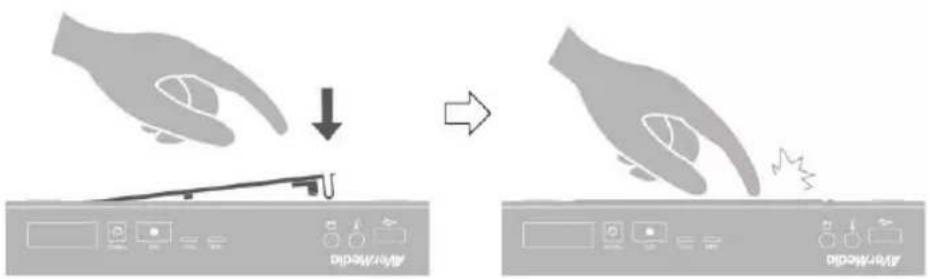
Replace the HDD Lid
Place the HDD lid back and snap it into place.
To remove the internal HDD:
Step 1
Remove the HDD Lid

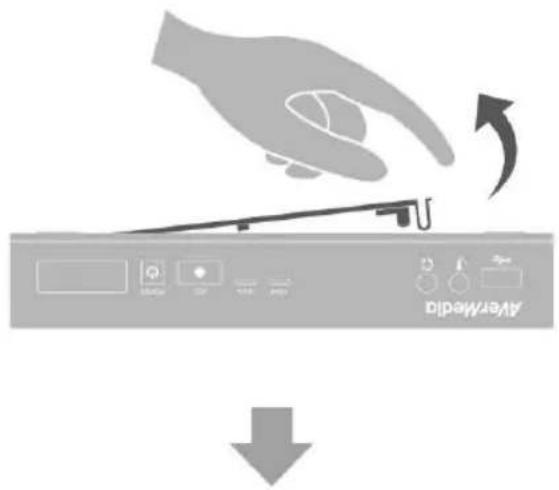
Please wait until the HDD cools down completely (it takes approximately 10 minutes) before any attempt to remove it.
Use your fingertip to flip open the HDD lid, located on the bottom of the Capture Box.
Lift off the lid and set it aside.
Step 2 Removing the HDD
Pull the HDD out in the direction of the arrow. Then lift the HDD out of the slot.
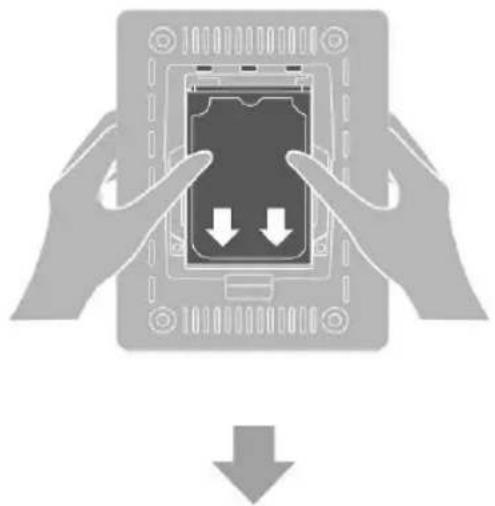
natural_image
Illustration of two hands holding a device with a downward arrow indicating compression or disassembly (no text or symbols)Step 3 Replacing the HDD Lid
Place the HDD lid back and snap it into place.
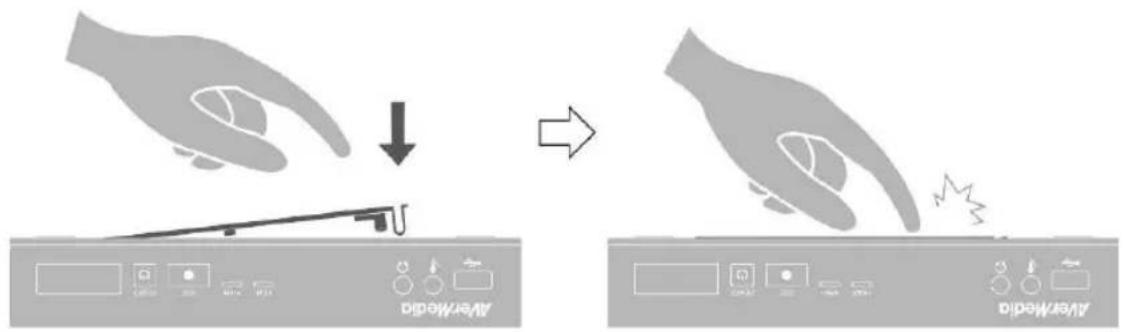

- It is typical that after a hard drive is formatted, the actual disk space of the drive would be slightly less than its unformatted capacity.
4.4 Setup Wizard
When the first time you power on the Capture Box unit, the setup wizard appears. The following steps guide you through the initial configuration process.

● Make sure to install a hard drive (internal or external) and to connect to the internet beforehand.
- For the first-time initialization, a short duration of black screen (approximately 20 seconds) is followed by AVerMedia logo. The blinking green status light indicates that the Game Capture HD II is starting up. Please wait until the welcome screen appears.
Step 1 Setting up Language
When the welcome page appears, use ▲/▼ to select your preferred language. Press OK to confirm.
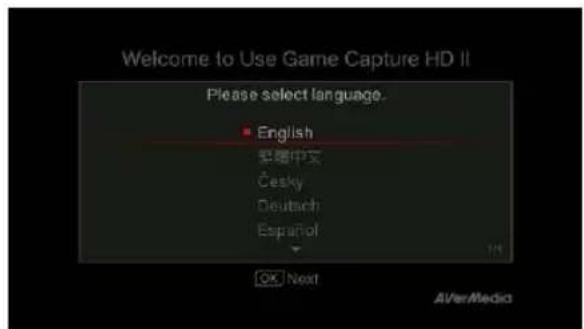

English-25
Step 2
A/V Pass Thru.
It is suggested that A/V Pass Through to be turned ON.
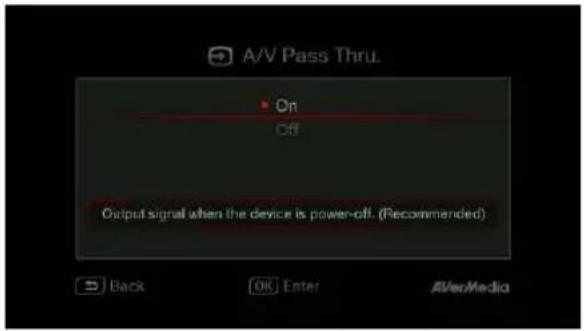
Step 3 (1)
Reminder
Make sure a NTFS-formatted hard drive is connected or installed to the device. (For details, see Chapter 4.2)
Check the connection of network.
Press OK to start setup.
A router which supports DHCP IP network is recommended. Also, refer to Ch. 6.2 for Manual connection setup.
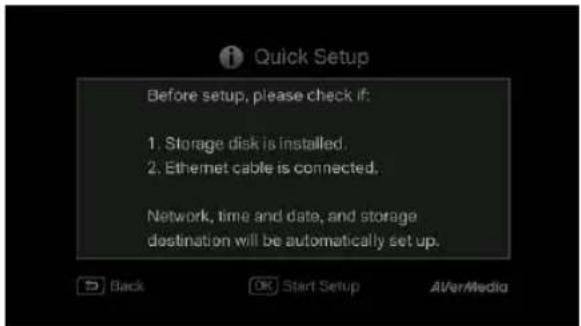
Step 3 (2)
Network Connection Failure
If you have not connected to a valid network, a short result of failed network connection will be shown.
Press OK to continue.
BACK
Press to go back to the previous page.

Step 4 (1)
No Hard Drive Detected
If you have not yet installed any storage device, install it before continuing the setup process.
BACK
Then press to go to the previous screen and press OK to run disk checking process.
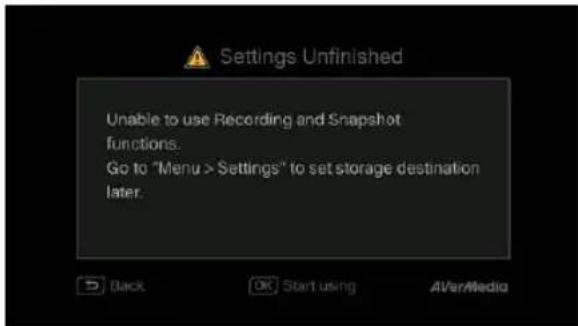
Step 4 (2)
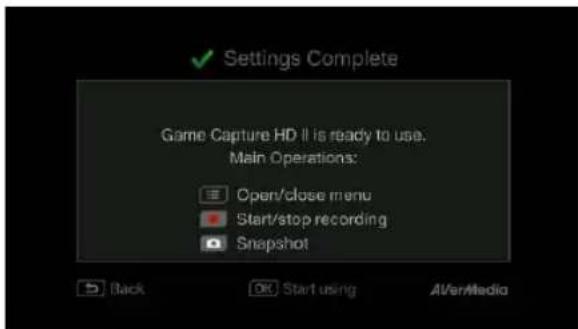
Finishing Setup Wizard
Once a NTFS-formatted hard drive is connected, a Settings Complete notice will be shown.
You can start to record and take snapshot right away. Press OK to exit the wizard and start using Capture Box. The game screen then appears.

- Unplug the Capture Box from the power supply before installing an internal HDD.
- Sometimes the connection test in Wizard will appear to be failed even though you have connected the RJ45 cable to the Capture Box. Go to Menu> Network> Network Settings> Manually Setup to set the network manually.
4.5 Video Output Settings for Game Consoles
The Capture Box supports YPbPr / HDMI input resolution up to 1080p.
4.5.1 Video Output Settings for PlayStation 3
Step 1
Power on your PlayStation 3 console.
On your console, go to Settings > Display Settings > Video Output Settings.
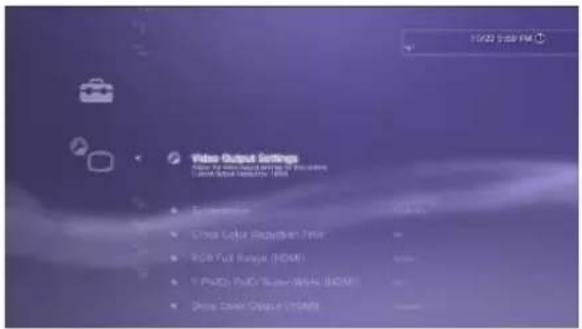

Step 2
Select Component/D-terminal and confirm the selection. Then your TV screen goes blank immediately.
Now use your TV remote to switch the TV input source to Component (YPbPr). The screen then comes back on again.
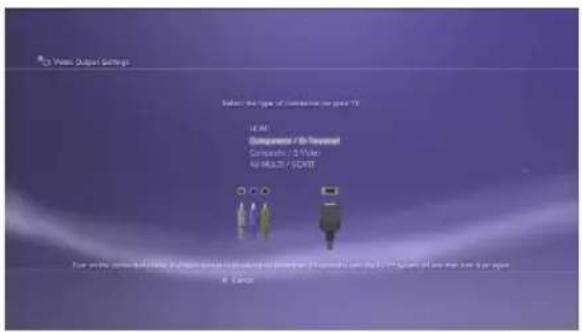

Step 3
Check ALL the resolutions.
Confirm the setting.


Step 4
Select Set Audio Output Settings.
Select Audio Input Connector/SCART/
AV MULTI as audio output.
Confirm the setting.
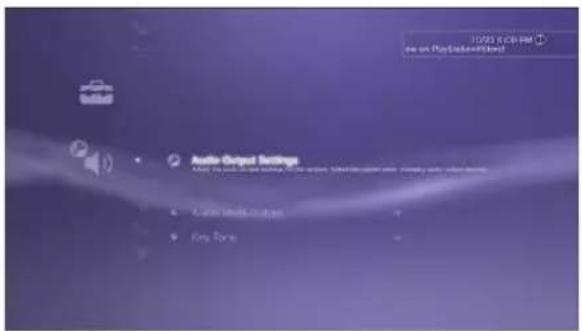
4.5.2 Video Output Settings for Xbox 360

- Before resetting video output for XBox 360, make sure to properly connect the Capture Box with your Xbox 360.
● Make sure to power off both the Capture Box and your Xbox beforehand. - Supported resolutions vary depending on the TV in use. For details, please refer to the documentation that comes with your TV.
Power on your Xbox console.
On your console, go to My Xbox on the dashboard and scroll all the way to the right to System Settings.
Then select Console Settings > Display > HDTV Settings.
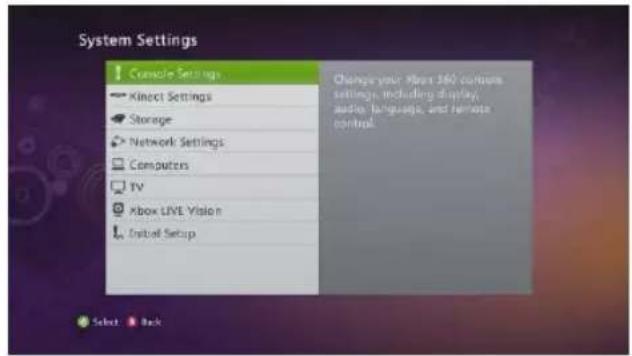

- Please set the audio output of all game consoles as auto.
- Although the Capture Box do not support DOLBY 5.1 and 24p resolution video/ audio format, you can still pass through these format while the Capture Box is off.
Chapter 5 Basic Operation
This chapter guides you to record gameplay, capture images, add voice commentary to videos, and instantly play files.

- All the recorded files or snapshots will be saved to the default hard drive destination automatically. Please see Chapter 6 for details.
5.1 Record and Capture
The Capture Box lets you record, capture and adds voice commentary to the videos. Instructions are given as follows.

The Capture Box displays gameplay in real-time and standard mode. You can change the default real-time mode to standard mode. Go to Menu> Settings> Display Mode. (Refer to Chapter 6.2 for details.)
OSD Menu
natural_image
Silhouette of a futuristic robot-like figure in motion against a cityscape background (no visible text or symbols)Descriptions
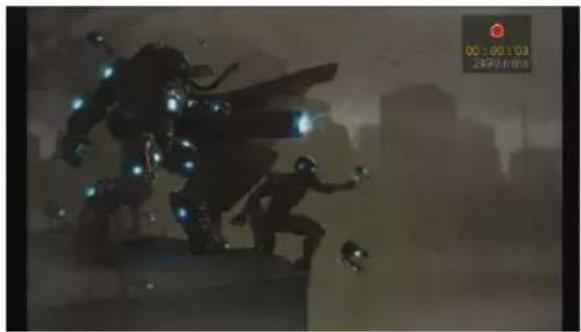
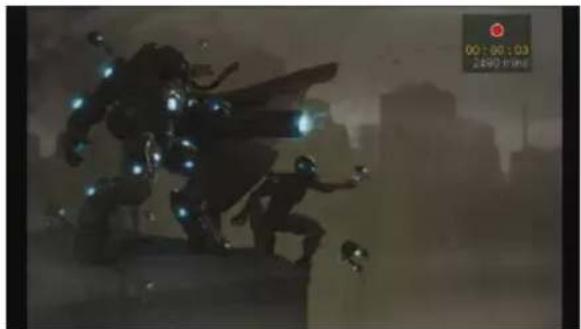
Instant Recording During Gameplay
Press

to activate instant recording.
Press

again or □ to stop recording.
natural_image
Silhouette of a dynamic battle scene with glowing elements and a digital timer (no readable text or symbols)Pause and resume recording
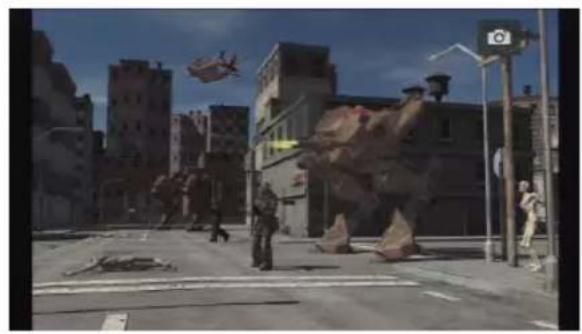
You can skip unwanted footages and resume recording. Only the footages you recorded will be saved and those skipped clips will be deleted automatically.
Press

to pause recording.
Press

or to continue recording.
natural_image
Street scene with debris, a helicopter flying, and urban buildings under a clear sky (no visible text or symbols)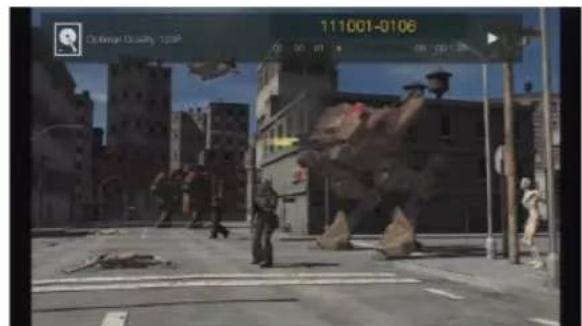
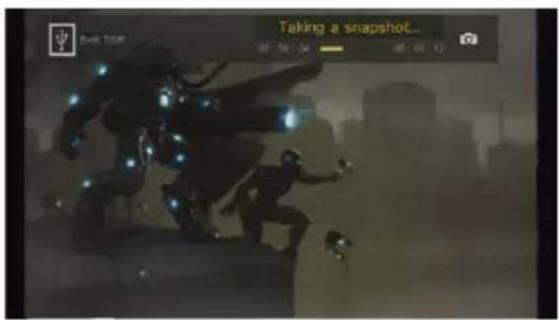
Quick Snapshot During Gameplay
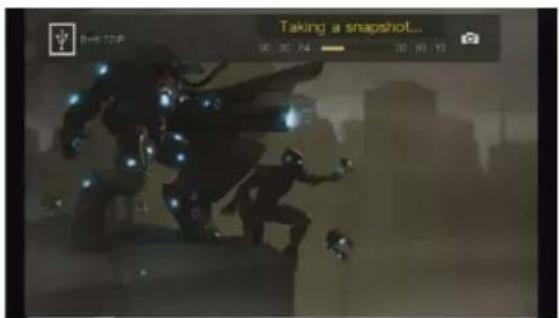
Press to capture current image.
Long Press to activate continuous capture mode. The Capture Box will take 5 snapshots at one time.
Instant Playback
RECALL
Press to play the latest recorded file or
view the last captured image.
Press □ to stop the playback.
Press ▶ to skip forward 30 seconds.
Press ◀ to skip backward 10 seconds.
Image Capture During Video Playback
Way 1:
Press 📄 to capture current image.
Way 2:
Step 1:
Press play the video in slow motion (1/2x). Press gain to view the video frame by frame.
or
Press 📄 to pause the playback. Press 📄 to go to previous frame; press 📄 go to next frame.
Step 2:
Press 📄 to capture your desired image.
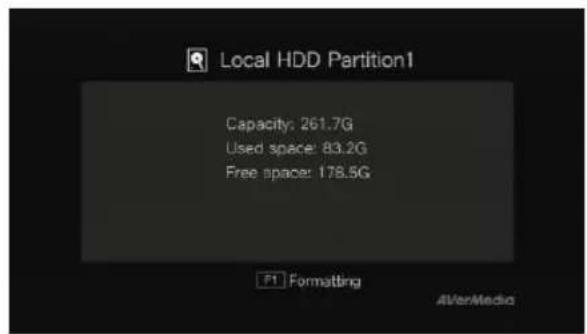
Disk Information
Press 📄 en press OK to display the disk information. Press again to hide it.
5.2 Adding Commentary
This section shows you how voice commentary is added to your video recording.
Requirements for headset/microphone:
Headset
Connector: 3.5mm jack
Microphone
Frequency Response : 20-16kHz
Impedance: 2.0 KΩ
Working Voltage: 3V
Connector: 3.5mm jack
OSD Menu
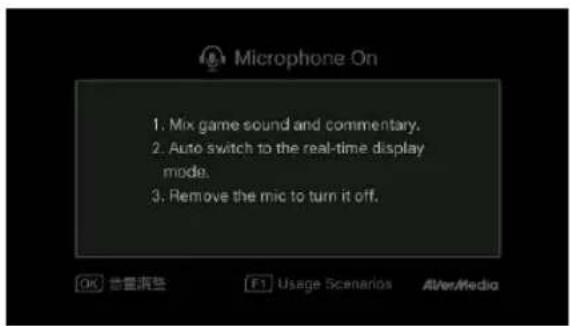
Descriptions
Microphone On
An OSD will be shown if you connected microphone/ to the Capture Box. Your commentary will only be recorded when you press .
Press to record your gameplay with
commentary.
Press or to stop recording.

- If headset or microphone is plugged in during the Wizard Setup, the sound can only be heard from your headphone and instructions on voice commentary will not be displayed. Therefore, plug in headset or microphone after you complete Wizard setup so as to follow the headphone/ microphone instructions.
- All commentary added will be mixed with the gameplay sound. Also, as long as the headphone is connected to the device, all your commentary and background sound will be recorded. Therefore, remember to stop recording and remove the headphone when no commentary is needed.
- If the microphone is disconnected/ connected to the Capture Box during recording, the sound will also be recorded. To make sure the Please avoid plugging off the microphone during recording process.
- The volume you hear in the commentary test may be slightly different from the actual recording. It is recommended that you run an mock test beforehand to be familiar with the recorded volume.
- It is normal to hear your own voice when recording with HDMI input source.
- No OSD will be shown when you connect only the headphone to the Capture Box.
Chapter 6 OSD Menu
Under the menu, you can check and manage both your recorded files and snapshots, and customize your preferences.
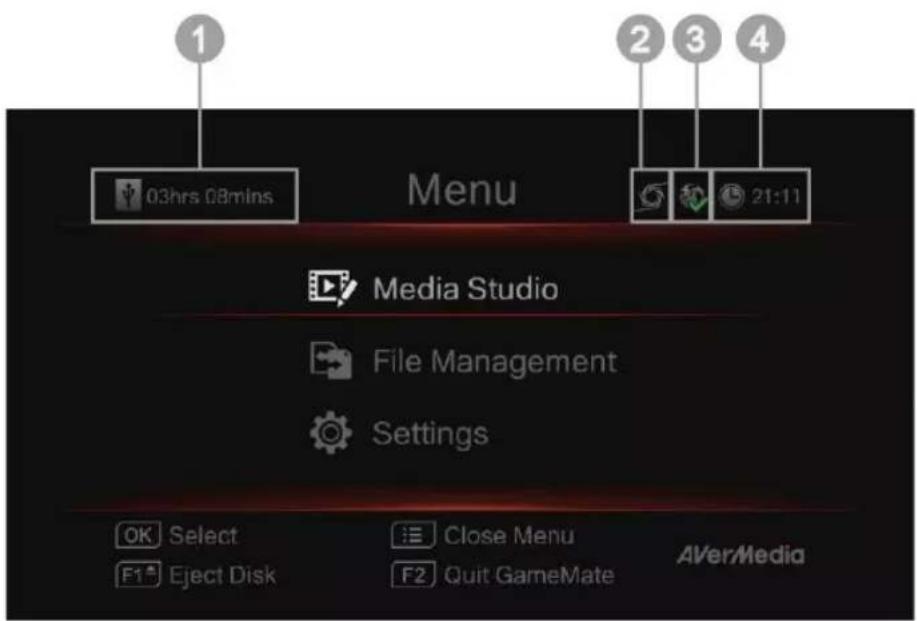
1 Remaining Time for Recording
2 Connecting to GameMate
OSD Menu
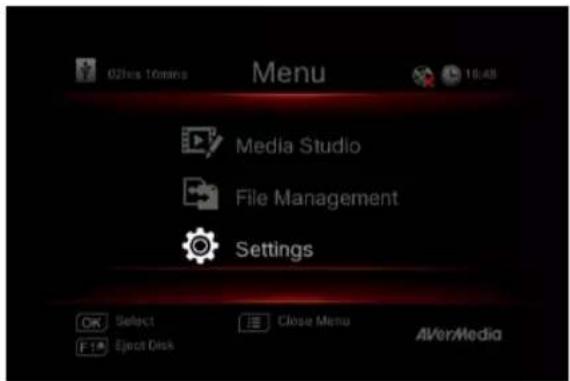
3 Network Connection
4 Current Time
Descriptions
Basic Operation
Press MENU to bring up the menu. Press MENU BACK to return to the game
screen.
Use ▲/▼ to make selection on the menu and OK to enter a submenu.
In the submenu, use ▲/▼ to make selection and OK to confirm. Press BACK to return to the previous page.
Press F1 to safely remove the storage device..
*The upper left corner shows your current default storage device and available remaining recording
6.1 Media Studio
You can check both recordings and snapshots captured by the Capture Box in "Media Studio".
Capture Format:
Video
MP4 (Codec: H.264 format with AAC audio)
Image
JPEG

- It is recommended that you view only videos and snapshots that are recorded by the Capture Box. Attempt to open files taken by other equipment (such as a camera) on the Capture Box is very likely to fail.
OSD Menu
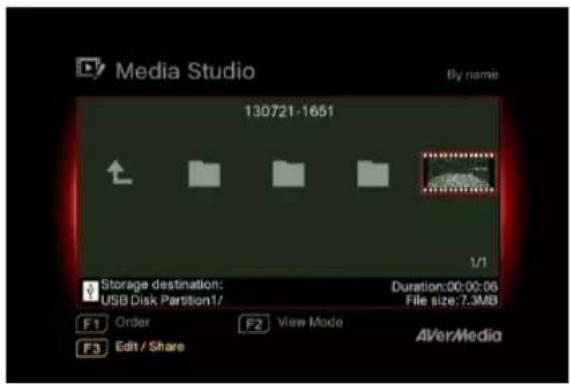
Descriptions
Navigating
Use the navigation keys ◀/▶/▲/▼ to select among items.
Press F1 to sort the files by file name, file size, or file format.
Press F2 to switch between list mode and thumbnail mode.
Press F3 to rename, edit, share the highlighted file.
Press PAGE go to the next page.
Press return to the previous page.
Press MENU to directly access the main menu.
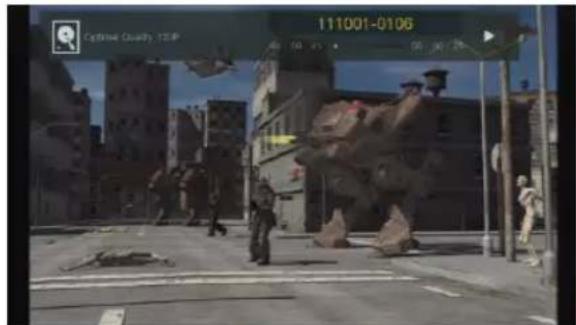
Video Playback
Press ▶ or OK to start playing the selected video.
Press ■ or OK to pause the playback. Press
or OK to resume playback.
Press play the video in slow motion
(1/2x).
Press 🖼️ to rewind at 2x, 4x, 8x, 16x, 32x speed. Press 🖼️ to fast forward at 2x, 4x, 8x, 16x, 32x speed.
Press play the file at normal (1x) speed when slow motion, rewind, or fast-forward is active.
Press stop the playback.
Press INFO to display the playback
information, including storage disk, recording resolution, duration, elapsed and remaining time, and file name.
* Only video files captured by the Capture Box are supported.
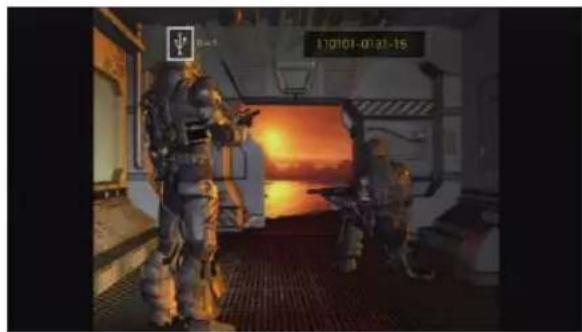
natural_image
Interior of a futuristic spacecraft or space station with two astronauts observing a glowing orange sunset screen (no visible text or symbols)Snapshots Viewing
Press ▶ or OK to view the selected image. Press "STOP" BACK to return.
* Only image files captured by the Capture Box are supported.
6.1.1 Post- Edit Capture Box Recorded Videos
This section shows you how to cut, recombine and share videos on YouTube recorded by the Capture Box.
OSD Menu
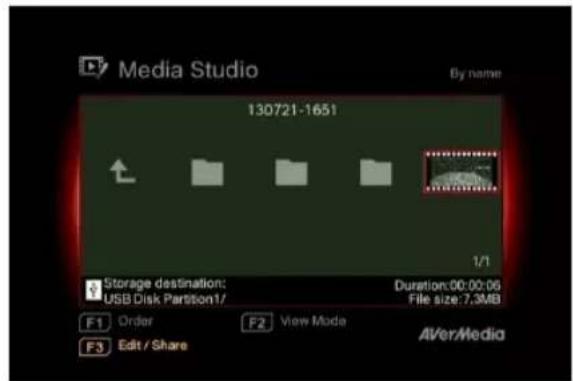
Descriptions
Select a Video
Select the file you would like to edit by using the navigation keys ◀/▶/▲/▼.
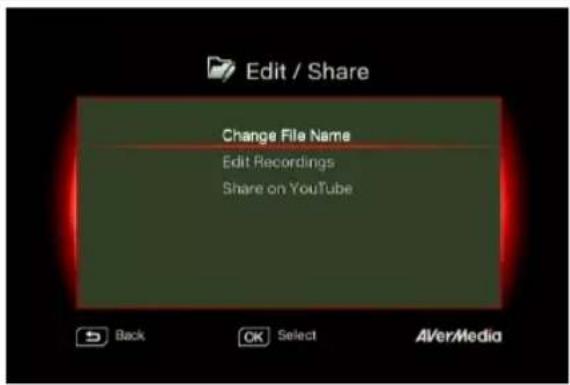
Edit/ Share
Press F3 to edit or share the selected video.
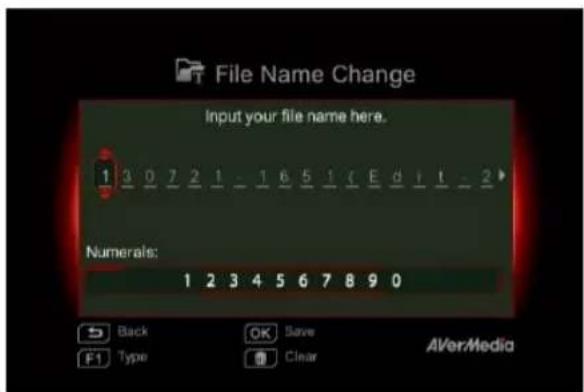
Change File Name
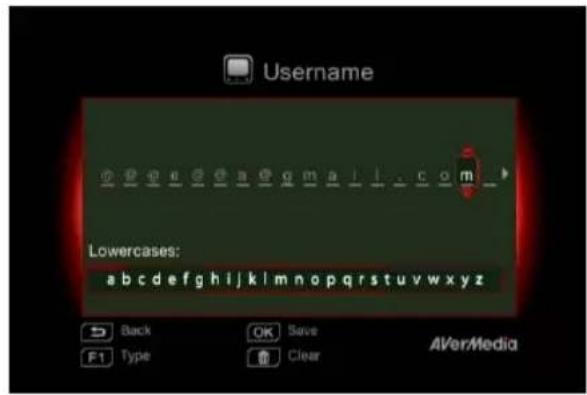
Input your file name by using the navigation keys ▲/▼ to select characters, numerals or symbols. Use the navigations keys ◀/► to go to the next/ last character.
Press F1 to switch between characters, numerals and symbols.
Press BACK to go back to cancel the change you made.
Press OK to save the edited file name. Press 58ear all.
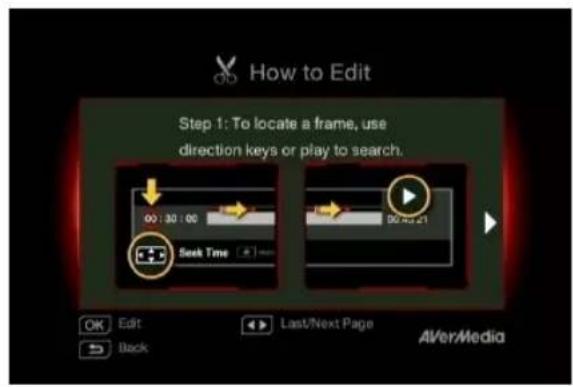
How to Edit
An instruction on how to edit a video will be displayed, press OK to start editing.
Edit Mode
You can cut and recombine your selected video in Edit Mode.
To cut the video, you will need to create one or more segments within the video.
Step 1:
To locate a scene, use direction keys or search the scene.

You can also use navigation keys ▲/▼ to search scene by specific hour, minute, and second on the left hand side of the screen.
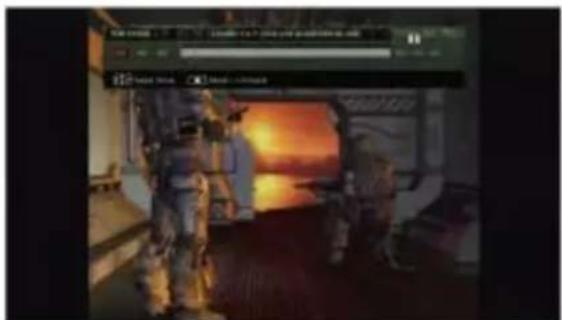
Press OK to mark or unmark the scene.
Step 2:
Repeat Step 1 so as to create a segment.
Press OK to keep or delete the segment.
Press F1 to switch between Search Scene and Segment search.
Press F2 to clear all marks you made on the video.
Press F3 to export the video.
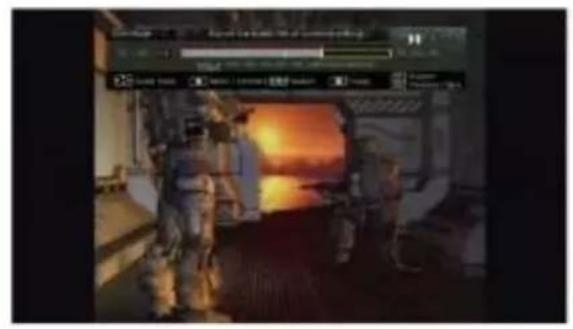
natural_image
Interior view of a spacecraft with astronauts observing a glowing orange glow (no visible text or symbols)![Export Please confirm the video and press [OK] to export it. Or go back to continue editing. Edited File: 130721-1651(Edit-1) Total Length: 00 : 00 : 04 Estimated time: Within 1 min.](/content/2026/04/662603/images/8eb83807bcd91543f56a37bc9316b44e83528661b357ca939006badc2af26fd4.jpg)
OSD Menu
Preview
The Capture Box automatically recombines the segments you choose to keep during editing.
Export
The estimated time varies by different storage disks. Refer export time to the actual use of your storage disk.
Press OK to export the video.
BACK
Press to continue editing.
Descriptions
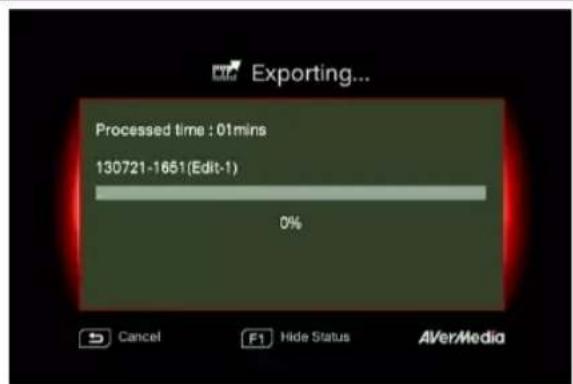
Exporting...
The bar in the middle shows the progress of video exporting and estimated time.
Click on to cancel exporting.
Click on to hide the exporting information.
![Export Complete Press [OK] to close the window. 130721-1651(Edit-1) 100% OK Exit F1 Edit AVer/Media](/content/2026/04/662603/images/8e9757e76f08c19a63c2f856754a8cac96c1af56b7dc8a8d5bc145fdc8ee4fd7.jpg)
OSD Menu
Exit
Press OK to exit from the editing mode.
BACK
Press to exit
Press F1 to continue editing.
Descriptions
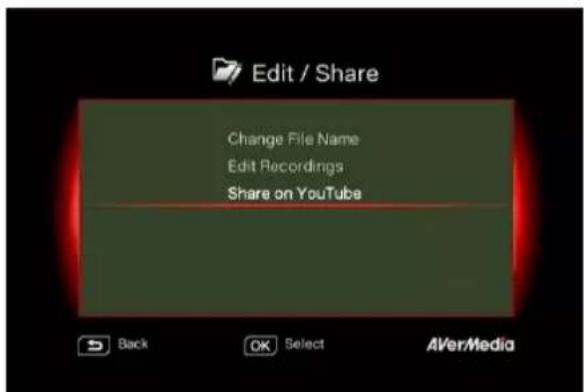
Share Videos on YouTube
Use ▲/▼ to select the task you would like to undergo. Select 'Share on YouTube' to share your videos.
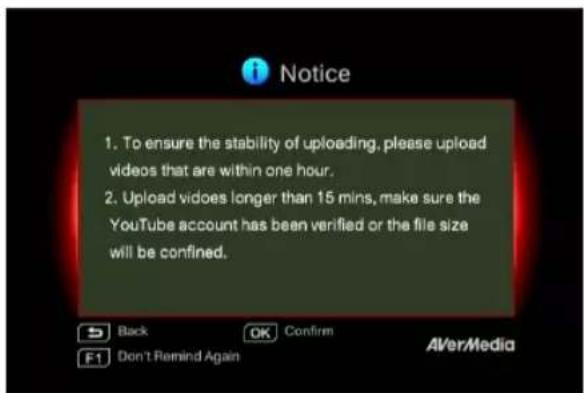
Share On YouTube
Before you share your recorded videos on YouTube, make sure you:
- Built a YouTube account and also a personal channel.
- Have your PC/ NB next to you if you activate two-step verification of your YouTube account.
To ensure the stability of uploading, upload videos that are within one hour.
Make sure the YouTube account is verified to upload videos that are longer than 15 minutes.
BACK
Press to continue editing.
Press OK to continue uploading.
Press F1 to skip this reminder afterwards.
Account Setup
Use ▲/▼ to select the task you would like to undergo.
Press BACK to go back to last level.
Press OK to edit your email or password.
Press F1 to save the change you made.
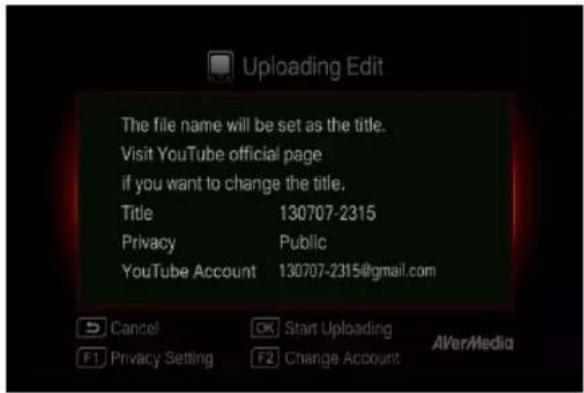
Edit Before Uploading
Press o return to the last page.
Press OK to start uploading.
Press F1 to set the privacy.
Press F2 to change account.
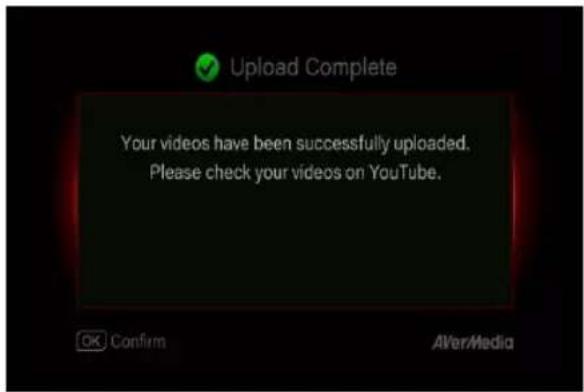
Uploading Complete
You have successfully upload the video.
You can edit your video title on YouTube.
Press OK to confirm.

● The recommended length of each video should be less than 1 hour.
- The Capture Box is made for record and capture media materials that are legally owned or licensed by the user only. Uploading videos that are protected by copyright and other laws is not allowed. YouTube may shut down the account for copyright protection reason.
- YouTube account verification is required when you upload video that are longer than 15 minutes. Refer to YouTube website for further details.
- Occasionally, it takes two to three days for your videos to be shown on YouTube. Please wait for a few days if you did not see the uploaded videos online.
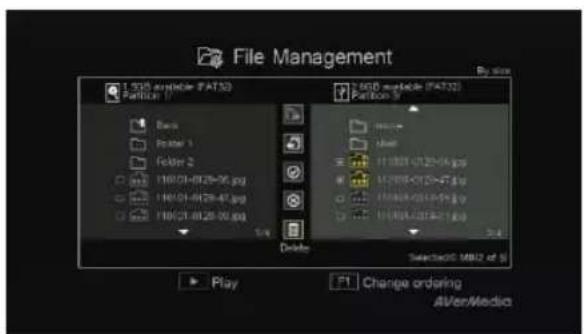
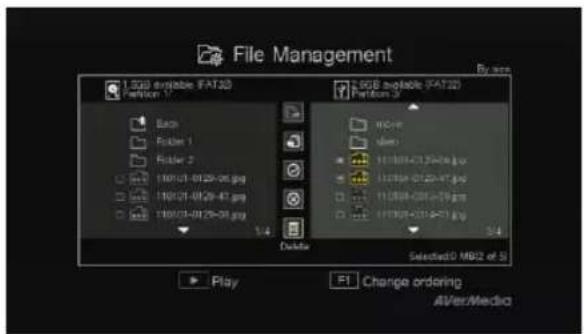
6.2 File Management
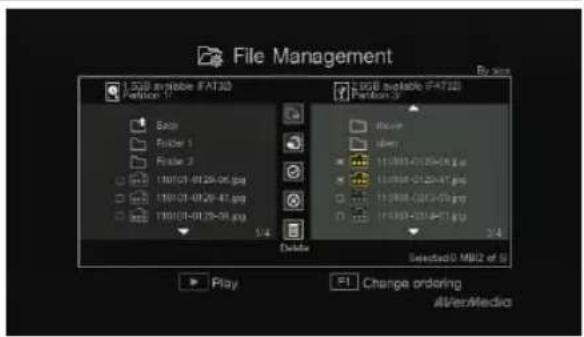
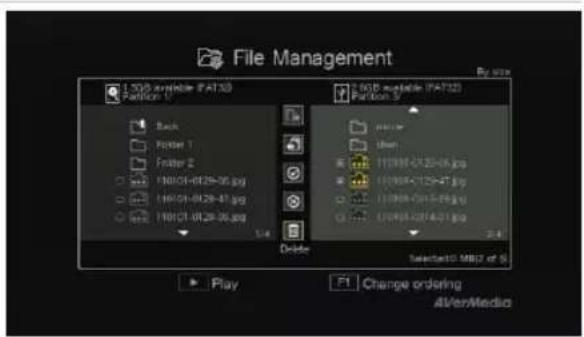
"File Management" lets you manage videos and snapshots captured by the Capture Box. You can copy files between internal hard drive and external USB storage device, and delete unwanted files. Before entering this submenu, insert your storage device first (USB 2.0/3.0 storage device / 2.5" HDD in NTFS format).
OSD Menu
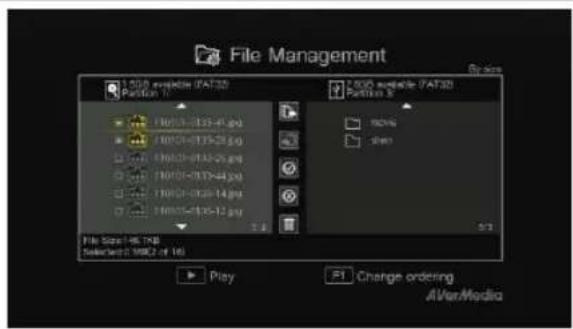
Descriptions
Select Partition
Use the navigation keys ◀/▶/▲/▼ to select the partition.
Press ▶ playback the video.
Press F1 to change the file sorting rule.
File Management User Interface:
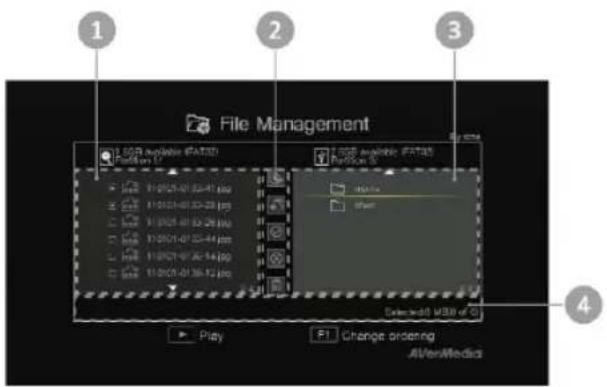
1 A list displaying files located on the internal hard disk
2 A set of editing tools
3 A list displaying files located on the USB disk
4 Information display area
Descriptions on Editing Tools:
| # Buttons | Descriptions | |
| 1 |  | Copy files to USB disk |
| 2 |  | Copy files to internal hard disk |
| 3 |  | Select all |
| 4 |  | Deselect all |
| 5 |  | Delete |
OSD Menu
Descriptions
![File Copied Press [OK] to close the window. OK Close AIVerMedia](/content/2026/04/662603/images/ff0ea7c1614f25c6d915eb572cad7b70e571a0005ac0026971c4608f7961334a.jpg)
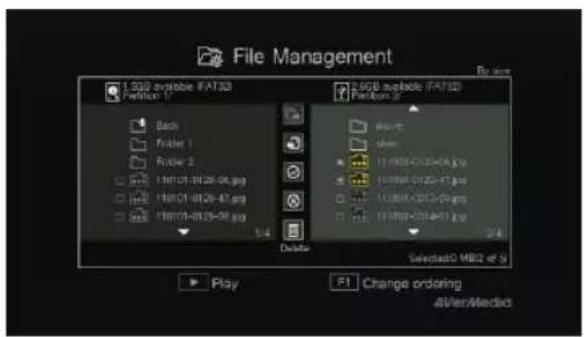
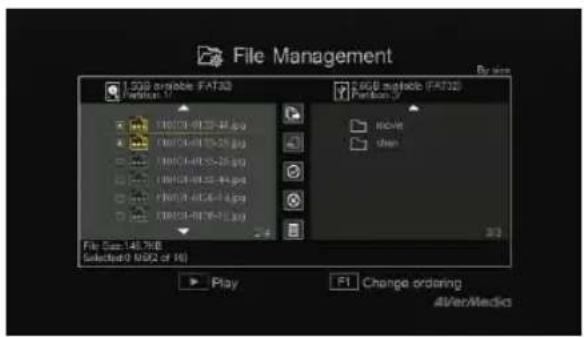
Copying Files from Internal HDD to USB Disk
Step 1:
On the left-side list, use ▲/▼ to highlight the file that you want to copy to USB disk. Press OK to select / unselect an item.
Select √ and press OK to select all files. Select ✗ and press OK to deselect all files.
Step 2:
Select 📄 and press OK to copy selected file(s) to USB disk.
Press BACK to cancel copying the files in a progress.
Step 3:
Press OK.
Copying Files from USB Disk to Internal HDD works in the opposite way as above mentioned.
*If the file is comparably large, press F1 to hide the copying or deleting status.
Deleting Files
Step 1:
Use ▲/▼ to highlight the file(s) that you want to delete. Press OK to select/unselect an item.
Select √ and press OK to select all files. Select ✗ and press OK to deselect all files.
Step 2:
Select and press OK to remove the file from the list.
![File Deleted Press [OK] to close the window. OK Close AlienMedia](/content/2026/04/662603/images/d6795bf1b6aebcd1c700ca177f06f8c5a7380df56bb904c1100f5c470139753c.jpg)
or
Press or the remote and then press OK to remove the file from the list.
Press BACK to cancel deleting the files in a progress.
Step 3:
Press OK.
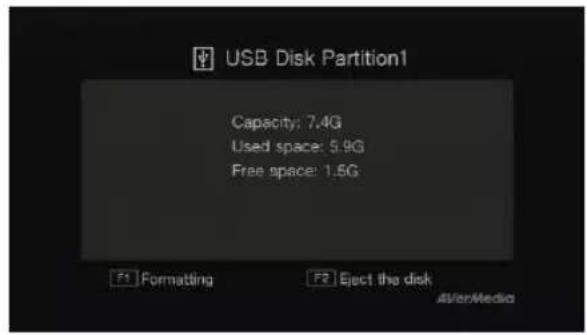
USB Storage Device Removal
In order to avoid data loss, it is highly recommended to safely remove your external storage device. Please follow the steps below:
Step 1:
Press DESRINFO the remote control.
Step 2:
Press F2 to remove it.
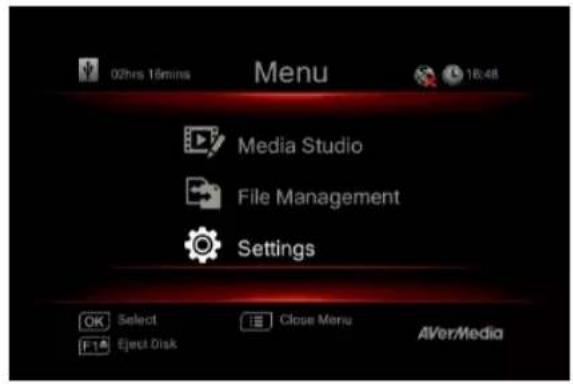
6.3 Settings
You can customize your preferences in "Settings".
OSD Menu
Descriptions
Basic Operation
Use ▲/▼ to select a preferred category. Press OK to make a selection.
BACK
Press ↩ to return to the previous page.
MENU
Press directly access the main menu.
Press F1 to safely remove the storage device.
OSD Menu
Descriptions
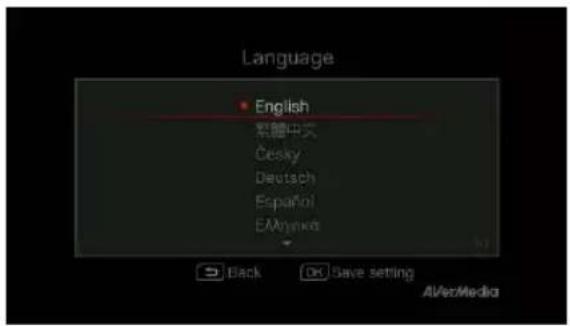
Language
Use ▲/▼ to select your preferred language. Press OK to confirm.
OSD Menu
Descriptions
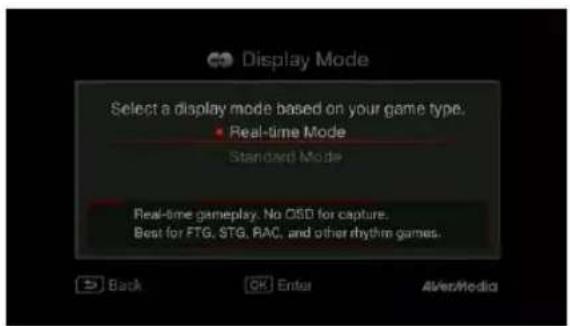
Display Mode
The default mode is set as real-time mode.
Use ▲/▼ to switch between real-time and standard mode.
natural_image
Illustration of a futuristic robot-like figure in motion against a cityscape background (no text or symbols visible)Real-Time Mode
Real-time mode lets you play games with zero delay. And it is best for FTG, STG, RAC, and other rhythm games. No recording or snapshot status will be shown on screen. All capture work will run in the background.
However, if any problem occurs during the capturing process, OSD will automatically jumps out.
MENU Press to check OSD and track capture status.
natural_image
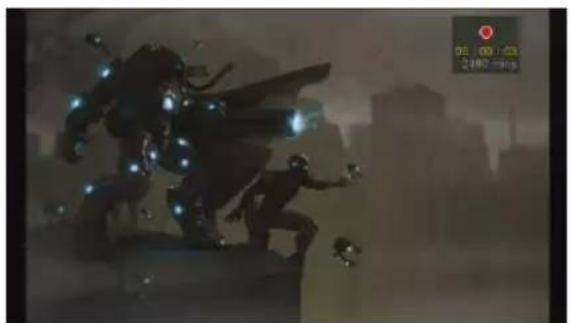
Silhouette of a winged figure with glowing elements against a cityscape background (no visible text or symbols)Standard Mode
In standard mode, on-going recordings will be shown in the upper right corner of the screen. As there will be slight delay in game, standard mode is recommended for ACT, RPG, and SLG games.

- Black screen may occur when calling for Menu in real-time mode. And the pause varies by TV type.
OSD Menu
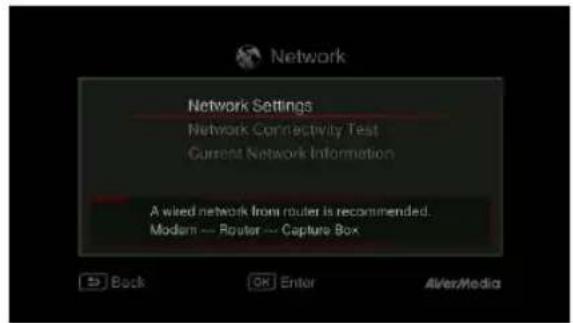
Descriptions
Network Settings
Use ▲/▼ to move among options. Press OK to confirm. Before setup, please make sure the Ethernet cable is well connected.
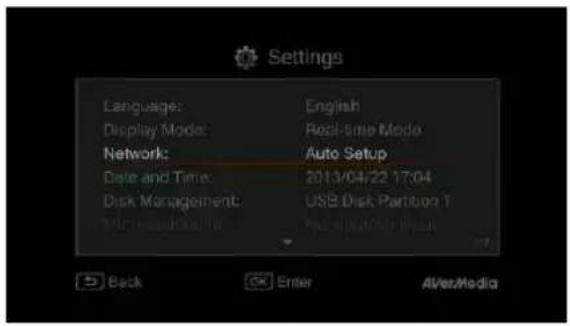
Auto Setup (Recommended):
It is recommended to use Auto Setup to automatically obtain IP and DNS addresses.
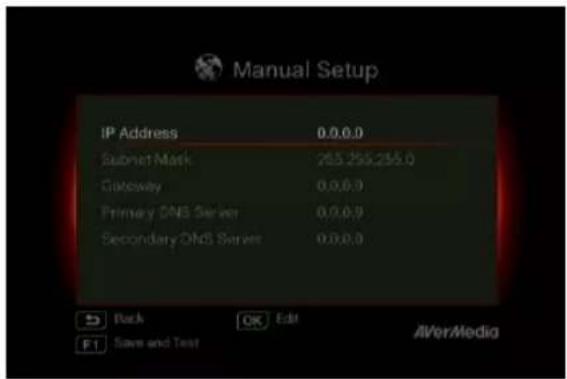
Manual Setup :
Use Manual Setup to manually configure IP and DNS addresses.
STEP 1:
Use ▲/▼ to select an item for configuration. Press OK to confirm.
STEP 2:
Use ◀/▶ to move among options and ▲/▼ to select a number. Press OK to confirm.
Press OK to save the setting.
Press BACK to cancel and return to the previous page.
STEP 3:
Press F1 to save the settings and test the network connectivity.

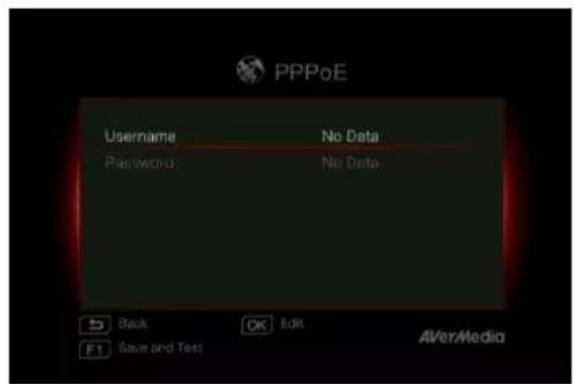
PPPoE :
Use username and password provided by ISP for connection.
STEP 1:
Use ▲/▼ to select an item for configuration. Press OK to confirm.
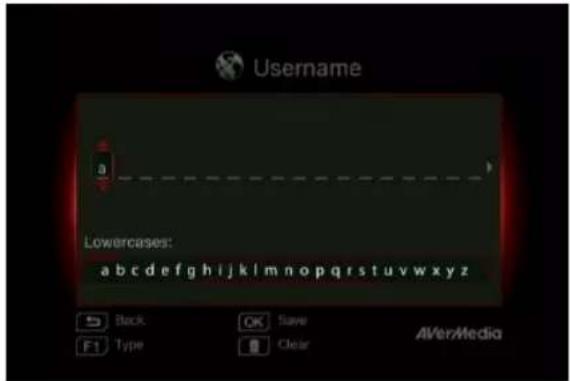
STEP 2:
Use ◀/▶ to move among options and ▲/▼ to select a character.
Press F1 to switch among capital letters, lower cases, numbers, or signs.
Press OK to save the setting.
Press BACK to cancel and return to the previous page.
Press delete selected characters and the character to the right.
STEP 3:
Press F1 to save the settings and test the network connectivity.
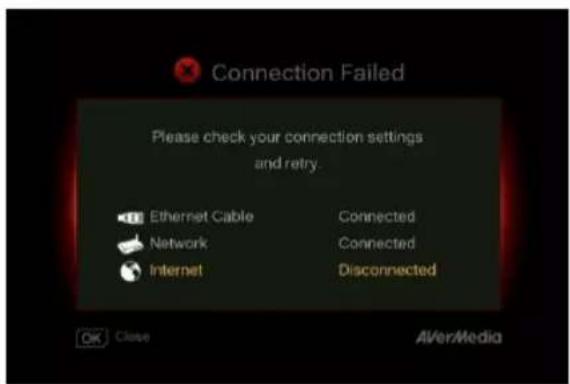
Network Connectivity Test
Select to test your network connectivity.
Please check the result and fix the problem indicated.
Press OK to confirm.
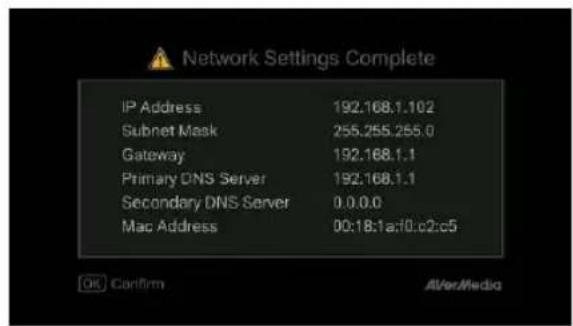
Network Connectivity Test
Once network setting is completed, a list of connection details will be displayed.
Press OK to confirm.
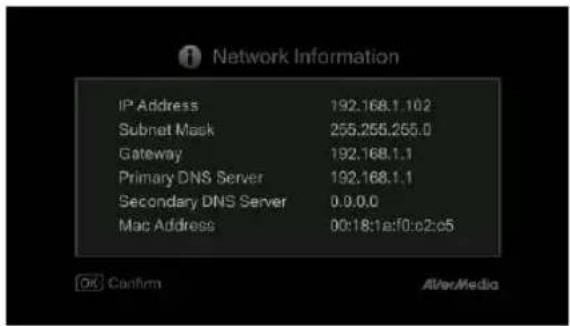
Current Network Information
This page displays the current status of your network connection.

- If network is temporarily inaccessible, manually set up the time zone settings so that the videos and snapshots is named correctly.
OSD Menu
Descriptions
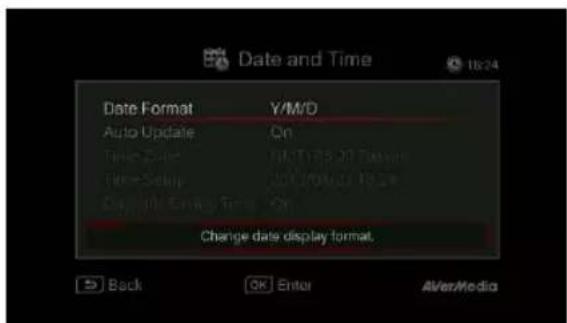
Date and Time
Use ▲/▼ to select an item for configuration. Press OK to confirm.
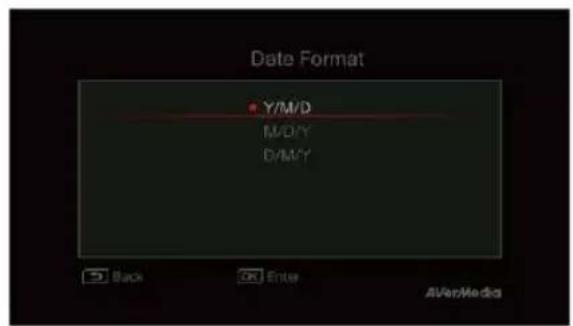

Date Format :
Use ▲/▼ to select a preferred date format. Press OK to confirm.
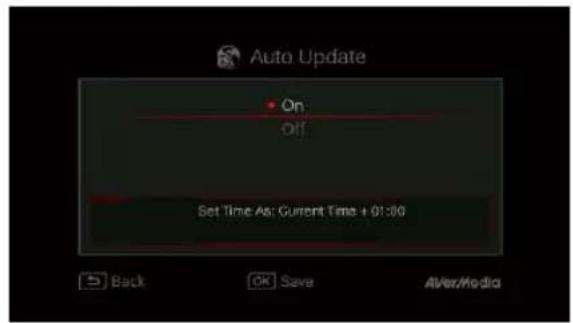
Auto Update :
Use ▲/▼ to enable/disable automatic date and time update. Press OK to confirm.
*To use this function, a network connection is required.
Time Zone :
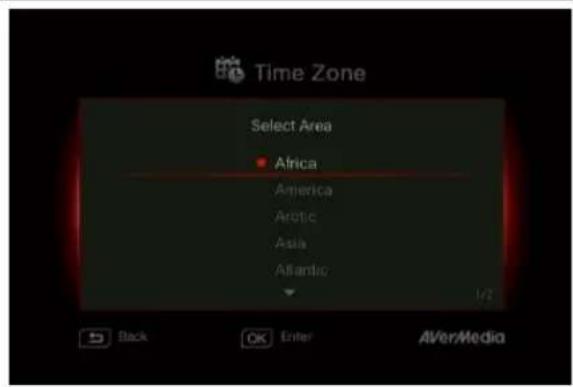
STEP 1:
Use ▲/▼ to move among options and select your area. Press OK to confirm.
STEP 2:
Use ▲/▼ to move among options and select your time zone. Press OK to confirm.
Time Setup :
Use ◀/▶ to move among options and ▲/▼ to adjust date and time. Press OK to confirm.
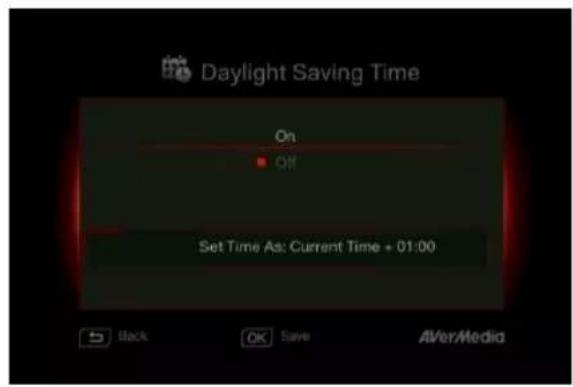
Daylight Saving Time :
Use ▲/▼ to enable/disable Daylight Saving Time. Press OK to confirm.
*To use this function, a network connection is required.
OSD Menu

Descriptions
Disk Management
Storage Destination
Step 1:
Select and press OK to change your current desired default storage device for both recorded files and snapshots.

indicates normal write speed of selected partition;

indicates low write speed of selected partition. To
make sure recording functions properly, be sure to select partition with normal write speed.
Step 2:
Use ▲/▼ to select the preferred default storage device.
Step 3:
Use ▲/▼ to select a folder and press OK to confirm.
Step 4:
Press F1 to save the setting.
OSD Menu

Descriptions
A. 17. 20
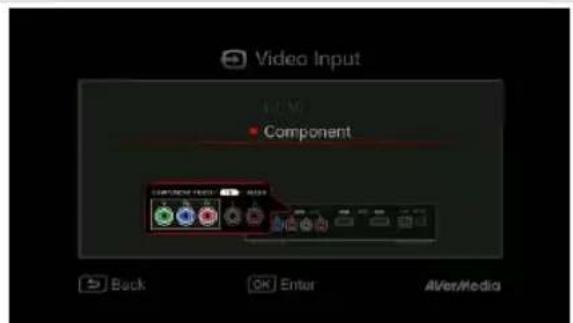
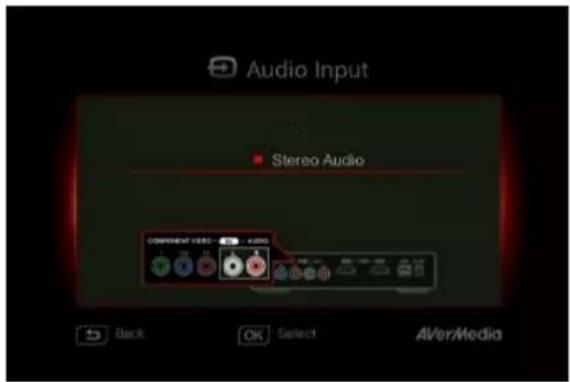
Use ▲/▼ to move among options. Press OK to confirm.
Press 📋 to switch from component and HDMI input sources.
Video Input
Use ▲/▼ to toggle between various video input source options (Component / HDMI).
Press OK to confirm.
Audio Input
Use ▲/▼ to toggle between various audio input source options (Stereo Audio/ HDMI).
Press OK to confirm.
OSD Menu
Descriptions
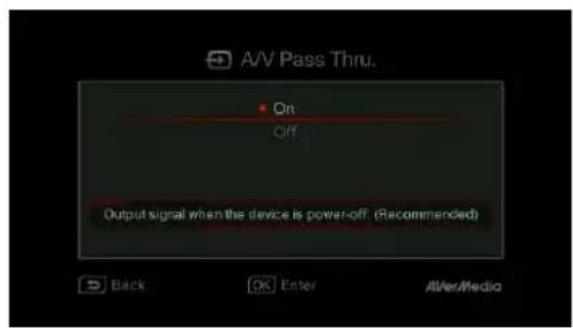
A/V Pass Through:
Use ▲/▼ to enable/disable A/V Pass Through. Press OK to confirm.
*The default setting is set Off to yield to the power-saving regulation. If this function is enabled, Capture Box still output signal when the Capture Box is off. If this function is disabled, Capture Box does not output signal when the Capture Box is off.
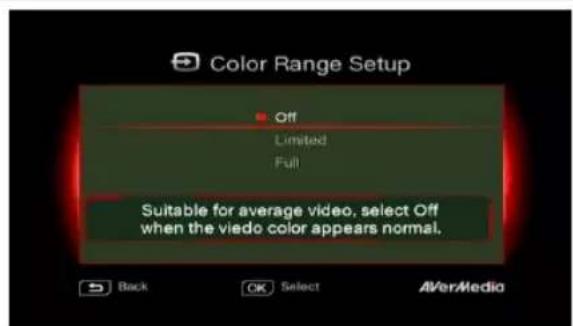
Color Range Setup
Use ▲/▼ to toggle between off, limited, and full. Press OK to confirm.
OSD Menu
Descriptions
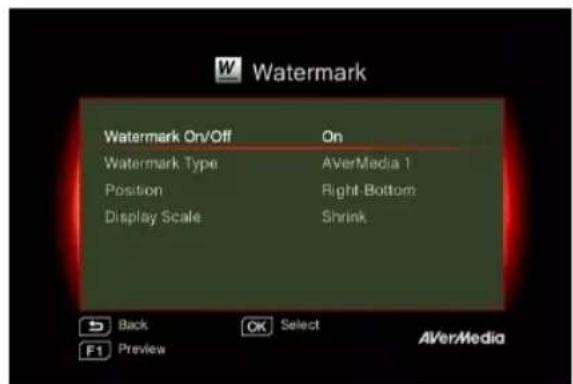
Watermark
Add your selected watermark to your videos. You can customize the display of the watermark by setting up the type, position and also scale.
BACK
Press to go back to last level.
Press OK to enter the next level.
Press F1 to preview the display.
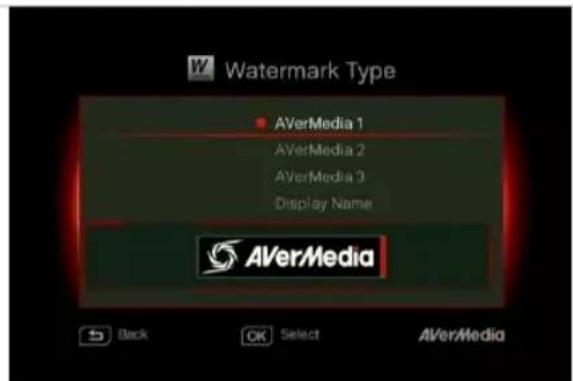
Watermark Type:
Use to ▲/▼ select from the listed watermark types.
Press OK to save the change.
BACK
Press to go back to last level.
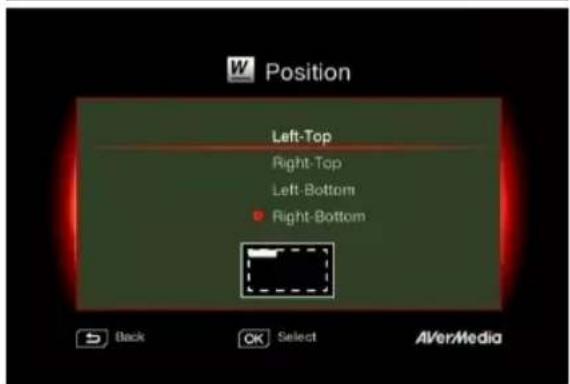
Position:
Use ▲/▼ to select from the listed watermark positions.
Press OK to save the change.
BACK
Press to go back to last level.
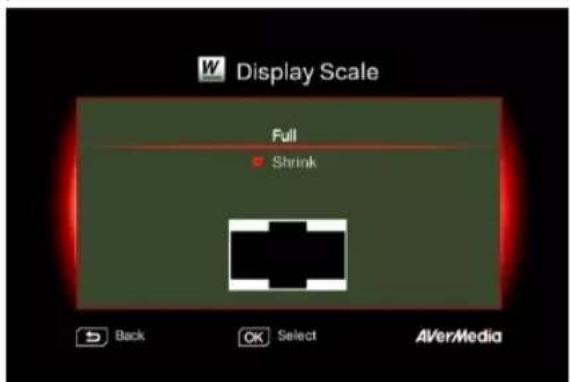
Display Scale:
Use ▲/▼ to select the display scale.
Press OK to save the change.
BACK
Press to go back to last level.
OSD Menu
Descriptions
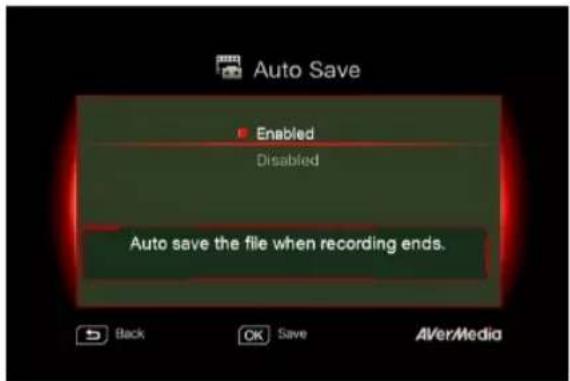
Auto Save
Use ▲/▼ to switch from enable or disable the Auto Save function.
Recording/ Snapshot
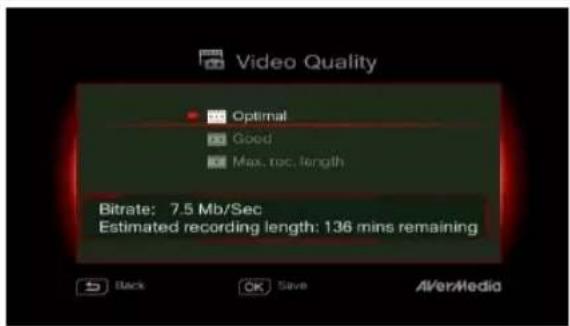
Video Quality:
Use ▲/▼ to toggle among various video quality options (Optimal/ Good/ Maximum recording length). Press OK to confirm.
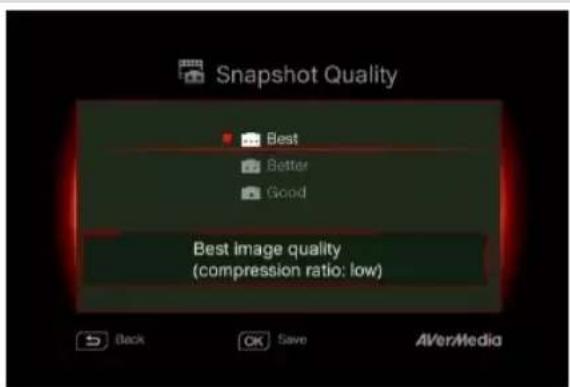
Snapshot Quality:
Use ▲/▼ to toggle among various snapshot quality options (Best/Better/Good). Press OK to confirm.
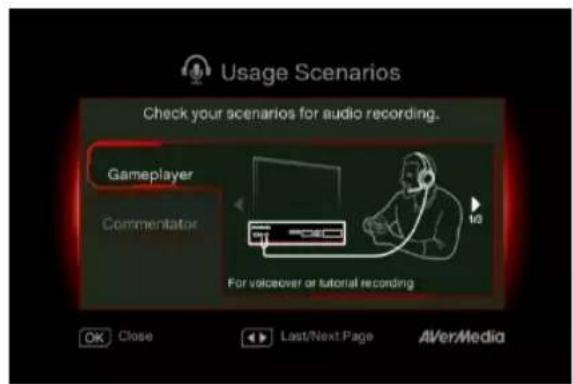

Live Commentary
A short demonstration will be played in this section.
Press OK to continue.
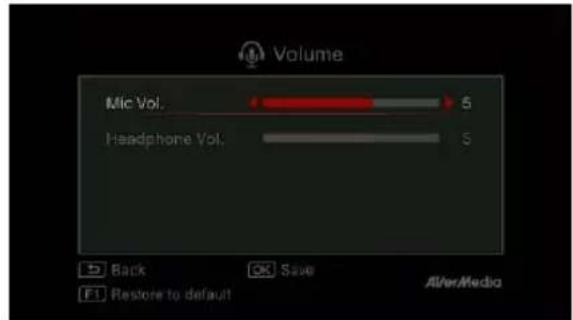
Volume:
Use ▲/▼ to move among options and ◀/► to adjust the volume.
Press OK to save the setting.
Press F1 to restore to the default setting.
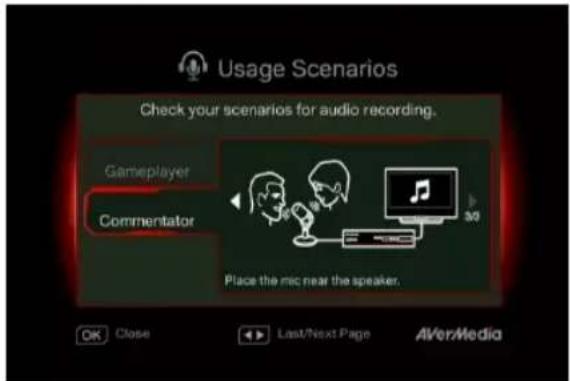
Sound Mode
Use ▲/▼ to select a preferred mode for mic recording. Press OK to confirm.
Gameplayer Mode will automatically switch game sound output to your headphone.
To ensure the optimal quality, please use both microphone and headphone for voice commentary recording.
Commentator Mode will record both game sound and voice commentary or voice chat from microphone during gameplay.
It is recommended to use an omni-directional or high-sensitive microphone.
OSD Menu
![Firmware Upgrade Firmware Version:0.0.9 Firmware upgrade via USB storage device: 1. Copy the latest FW (downloaded from Product Section of www.avermedia.com) to USB root. 2. Connect USB storage device. 3. Press [F1] to start upgrading. Back FT Upgrade AVerMedia](/content/2026/04/662603/images/ad49d83390e42e8c692ed3ac56998577c6002095e789b8cd0a84982aa57fdd22.jpg)
Descriptions
Firmware Upgrade
Follow the steps below to upgrade the firmware via USB storage device:
Step 1:
To download the latest firmware binary package, please go to www.avermedia.com, and then enter the model name in Product Search field. Firmware file is available on the product information page.
Step 2:
Extract the files by unzipping the package.
Copy the firmware files to the root directory of your USB storage device, and then connect it to the Capture Box.
Step 3:
Press F1 to start the firmware upgrade BACK
process. Press to abort the operation and return to the previous page.
Step 4:
The Capture Box automatically detects whether a different version of firmware is available for upgrade or rollback. Once the firmware upgrade process has completed, press OK to restart the Capture Box.

● The firmware upgrade process takes up approximately 10-14 minutes.
● Firmware upgrade requires at least 256MB free space of the storage device (USB/HDD).
- If problems encountered during firmware upgrade, please clear all the data stored on your USB storage device and repeat the process above.
- NEVER power off the device or unplug the power supply or remove the USB storage device during the firmware upgrade process. If the firmware upgrade is interrupted for any reason, the device may crash.
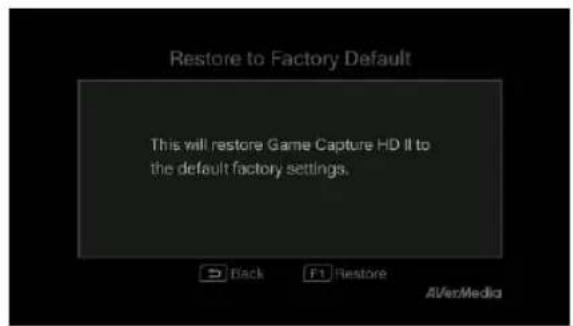
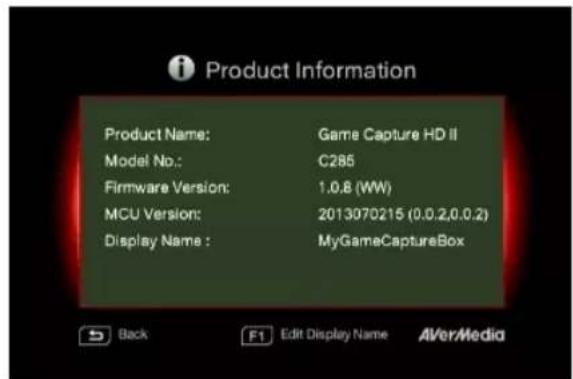
OSD
Restore to Factory Settings
Press F1 to restore to original factory settings. Press to abort the operation and return to the previous page.
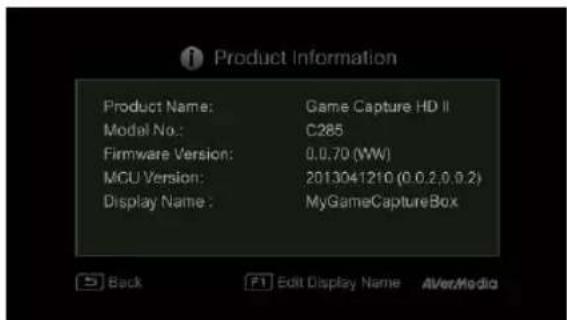
Product Information
This page provides information about this product, including product name, model no., and firmware version.
Press F1 to edit the display name.
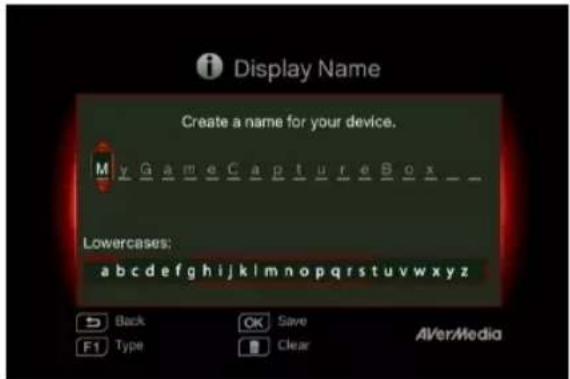
Descriptions
Name your own Capture Box.
Press navigation keys select characters.

Up and Down to
Press navigation keys shift to the former or la

Left and Right to
Press

vitch to the next input menu.
DELETE
Press

to delete the character.
Press OK to save the name.
To change product name, go to Menu >Product Name.
* The display name will not only show up when you enable watermark function but also on the pair up list with GameMate by AVerMedia.
Chapter 7 Pairing Capture Box and GameMate by AVerMedia
GameMate by AVerMedia is the dedicated app for smart phones. It allows you to use your smart phone as remote control. You are only a few steps from pairing up the Capture Box with GameMate.

Please download GameMate by AVerMedia from app store first.
To pair up successfully, make sure the Capture Box and GameMate share the same network. To do so, you will also need a wireless access point for GameMate. Make sure the LAN is well -connected and you are ready to pair up!
OSD
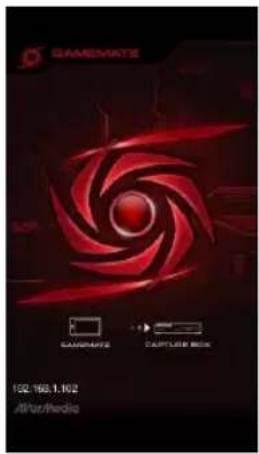
Descriptions
It is recommended that the Capture Box and GameMate share a wireless AP. After downloading the GameMate; tap on GameMate on your smartphone. You will see that GameMate is searching available device.
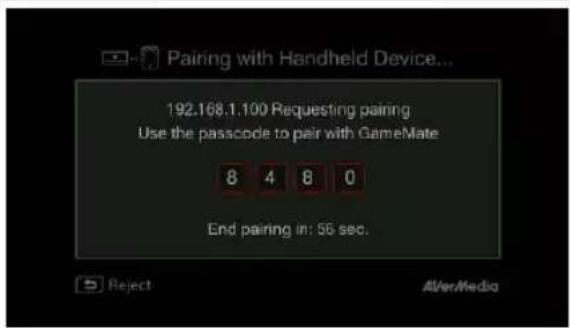
A set of pairing number will be shown on TV screen.
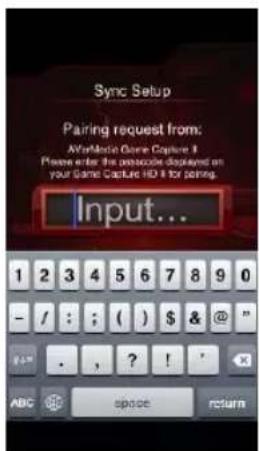
Tap to input the provided four-digit pairing number correctly.
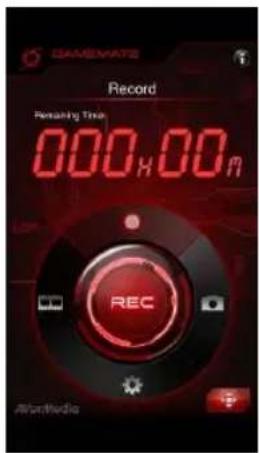
You will see GameMate as shown left hand side when it successfully pairs up with Capture Box.
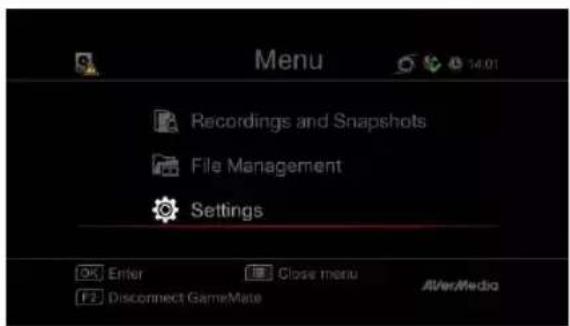
You can also check the connection of GameMate from the Menu. You will see sign on the upper level of the Menu.

- If the connection is lost, please restart the wireless AP or the Capture Box and try again.
Appendix A How to Set Your Gameplay Snapshot as PS3 Wallpaper
Start to give your PS3 menu screen a fresh and personalized look to show how cool you are! Please follow the steps below to set the image captured by the Capture Box as your PS3 background wallpaper.
Step 1
Remove your USB storage device from the Capture Box, and then plug it into your PS3 console via USB port.
Power on your PS3 console.

Step 2
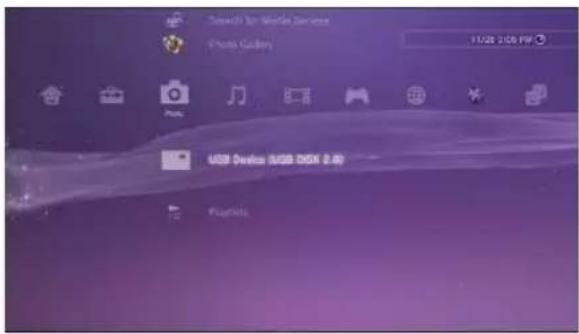
On your console, go to Photo > USB Device.
Press the triangle button on your PS3 controller and select "Display All".

Step 3
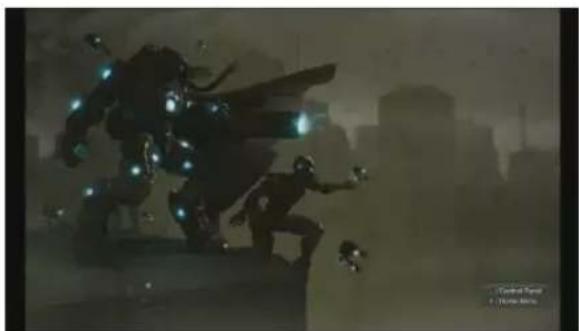
Select the image that you wish to use.
Press the Triangle button on your PS3 controller to bring up control panel.
Then scroll to the right and select "Set as Wallpaper".
natural_image
Silhouette of a futuristic robot in motion against a city skyline, no visible text or symbols
Step 4
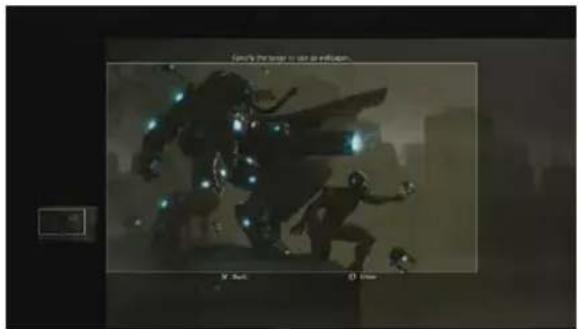
Use the right joystick to zoom in/out and left joystick to frame the image. When it is the proper size, press ○ (Enter).
Confirm with ○(Enter) if you are prompted to overwrite your current wallpaper.

Step 5
Done! The snapshot that you have chosen is now set as your PS3 wallpaper.
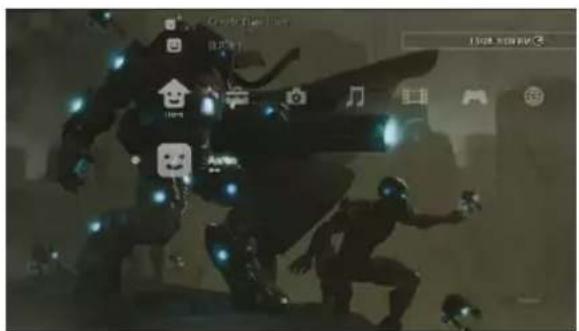

On your PS3 console, you can go to Settings > Theme Settings > Background to turn wallpaper on or off.
Appendix B Troubleshooting
To download the latest firmware for the Capture Box:
1
Go to www.avermedia.com.
2
Enter the model no. (C285) in Product Search field.
3
The latest firmware file is available on the "AP & Driver" section on the product information page.
Hard Drive Problem
Hard drive not detected
Unknown files are found on my hard disk after connecting to the Capture Box
Video Display Problems
"No input signal" message appears on screen
Actions
Make sure that the storage destination is properly set up.
Go to Menu → Settings → Disk Management → Storage Destination to set storage destination.
Make sure the hard drive is connected / installed and restart the Capture Box.
Make sure the Capture Box has stable power supply while recording or the recording mail fail. Failure of recording may stop the Capture Box from detecting hard disk.
Format current drive to NTFS file system. It is likely that the hard drive is not set to NTFS format. You can check the hard drive and reformat it by downloading HP USB Disk Storage Format Tool.
The Capture Box will automatically generate files that help boost the operation. Files that have file name extension like
'.avm_chk_tmp',
'.avm_speed_test', '.hd_keepalive' aim at preserving hard disk speed as well as other crucial record. Please don't remove them.
Actions
Make sure that all the cables are firmly connected.
Power off the Capture Box and then make
AVerMedia
| sure that the device is connected with the proper cables (See 3.1 Hardware Installation in user manual for details). | |
| Screen color appears abnormal using component input | Green screen color with buzzing noise:Make sure that the red and blue connectors do not come loose.Mono screen color:Make sure that the red and blue connectors do not come loose. |
| Unsuccessful recording of HDMI-input-videos | The Capture Box supports all HDMI input except those in HDCP (protected video) form. |
| Blacken screen using HDMI input | If screen is blacken when using HDMI input, please try:1. Reconnect the HDMI cable from the input source device and also the Capture Box. Also, connect to HDMI port 1 of your TV at all times.2. Change HDMI cable and try again. |
| The recording is fast-forwarded or stopped when recording complicated gameplay frames in HD resolution (720p or above)? | When recording gameplay in HD resolution (720p or above), fast-forward may be found due to the complicated video content.Follow the tips below to ensure good recording quality:1. Install a format tool. It is recommended that you format hard disk into NTFS format using HP USB Disk Storage Format Tool. Please find the link:http://download.cnet.com/HP-USB-Storage-Tool/3000-2094_4-1Be sure to backup your data before start formatting. All data will be erased once the formatting process begins.2. Lower gameplay output resolution. Details can be found in C285 user manual. Please refer to PS3/ Xbox 360 video output setting.3. Lower C285 video quality at Menu>Settings> Edit/ Share4. Use another high- performance storage disk (For example, another NTFS hard disk). |
| Playback Problems | Actions |
| Poor quality of captured video | Check video output settings of your game console.For PS3, set 1080p, 1080i and 720p as video output resolutions. If you only select 1080i, the screen resolution automatically goes to 480i when you play a game that supports 720p.(See 3.5 Video Output Settings for Game Consoles in user manual for details). |
| Jittery/Jerky video playback on PC | Enable the “De-interlace” function of your media player before playback.Some media players cannot process the interlaced video (1080i / 576i /480i) well.This problem does not persist after video uploaded to YouTube. |
| Stuttering local video playback | Try recording video again using another NTFS-formatted hard drive.When this problem occurs, it is recommended to play the videos on PC. Alternatively, you can record at a lower bit rate to solve this problem.This problem does not persist after video uploaded to YouTube. |
| Microphone volume not loud enough | Turn on Microphone volume via Menu.Turn down game console input volume.Adjust volume via in-game setting.Gain Microphone amplifier. |
| No A/V Pass Through when game console and TV ON | Make sure that your TV supports 1080p.Turn on A/V Pass through via Setting. |
| File Management Problems | Actions |
| Difficulty in locating files | All files are named after the date and time they are recorded. In the file management, you can sort files out by its name, the time recorded, and the file size. Make sure the time zone is set correctly or manually setup to obtain correct file name.For example, a video which recorded at 9:30 a.m., 15 of April, 2013 will be named as: |
130415-0930
A recorded videos with commentary will be called:
130415-0930 (Mic)
An edited recorded video will be named as :
130415-0930 (Edit-1)
A videos that has been edited for the second time will be named as :
130415-0930 (Edit-2)
An edited video with commentary will be named as :
130415-0930 (Mic-Edit-1)
Difficulty in locating the folder on your PC/laptop
The Game Capture HD II detects all kinds of folder that built in your hard drive; as a result, it is likely that the destination is set to a non-standard folder, for example, a hidden folder.
If you cannot locate the folder that saves the recordings and snapshots, please check if:
-
You have set the destination of recordings and snapshots to a standard folder, making sure that it is not hidden, locked, etc..
-
You load the folder with a Microsoft Windows system. A Linux system does not read non-standard folder like a hidden folder.
Other Problems
Firmware upgrade turns out unsuccessful
Actions
Solutions are as follows:
A. Power off the Capture Box if an internal storage disk is installed. Remove internal storage disk and power on the Capture Box. Connect the USB to your Capture Box to undergo FW upgrade. (*If you are using a SATA storage disk or the temperature of the hard disk appears high; please wait for 10 minutes for the hard disk to cool down.)
B. Save the unzipped firmware file to the file root of your USB.
C. To enable firmware upgrade, make sure a minimum space of 256MB on your USB.
D. The detection of firmware file may be disrupted by other files on your USB. It is recommended that you wipe the USB or reformat it to NTFS format.
Reformat your USB by using HP USB Storage Format Tool:
- Disconnect your USB from the Capture Box. Connect it to a computer.
- Download HP USB Storage Format Tool at the following link:
http://download.cnet.com/HP-USB-Disk-Storage-Format-Tool/3000-2094_4-10974082.html
- Undergo HP USB Storage Format Tool. Select your USB and format it to NTFS format.
Save the firmware file into the NTFS USB and reconnect it to the Capture Box to upgrade firmware.
If the problem still persists, refer to FAQ at www.avermedia.com for further troubleshooting.
Appendix C Measuring Your HDD Height Before Installation

Make sure to adjust rotary knob before HDD installation.
(For details, please refer to the User Manual.)
1
Measure HDD height.
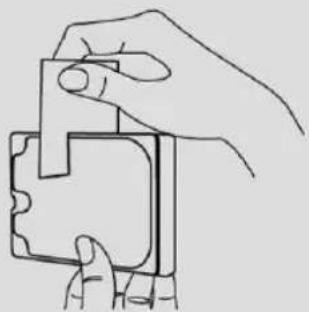
natural_image
Line drawing of two hands holding a small object, no text or symbols presentMeasuring Openings
7
9.5
2
Adjust the rotary knob to the corresponding position.
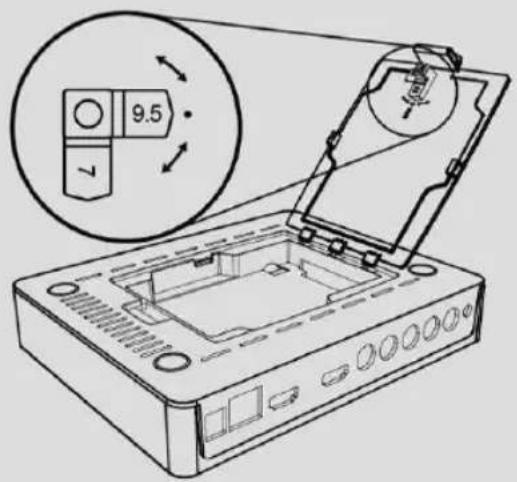
Open Source Code Notice
The following GPL executables and LGPL, MPL libraries used in this product are subject to the BSD/FreeBSD/ GPL/GPLv2/GPLv2+/GPLv3 with GCC/ RLE/jpeg/LGPLv2/LGPLv2.1/LGPLv2.1/ GPLv2/LGPLv2.1+/LGPLv2+/libpng/MIT/NewBSD/OPENSSL/PD/zlib License Agreements:
BSD
cppstub/db/libpcre0/JSONKit
FreeBSD
thttpd
GPL
madedevs
GPLv2
busybox/dbus/dbus-x11/devmem2/dosfstools/fbset/i2c-tools/iproute2/libblkid1/libdbus-1-3/libfreetype6/libpam/libuuid1/linux-kernel/module-init-tools/module-init-tools-depmod/mtd-utils/netbase/u-boot/update-modules/usbutils/util-linux-ng
GPLv2+
iptables/sysvinit/tinylogin/udev/update-rc.d
GPLv3 with GCC RLE
libgcc1/libstdc++6
jpeg
libjpeg8/libjpeg-tools
LGPLv2
Libjson/libts-1.0-0/tslib
LGPLv2.1
libav/libmicrohttpd/libusb-1.0-0
LGPLv2.1/GPLv2
alsa
LGPLv2.1+
Idd/libc6/libthread-db1
LGPLv2+
libglib-2.0-0
libpng
libpng12-0
MIT
cocos2d-x/curl/e2fsprogs/fbset-modes/graphmagic/libcom-err2/libcurl4/libe2p2/libexpat1/libext2fs2/libformw/
libmenuw/libpanelw5/libss2/libtic5/libtinfo5/libxml2/ncurses/pointercal
New BSD
iperf
OPENSSL
openssl
PD
AVerMedia Technologies Inc. offers to provide source code to you for a charge covering the cost of performing such distribution, such as the cost of media, shipping and handling upon e-mail request to AVerMedia Technologies Inc. at http://www.avermedia.com
For more information, please visit our website:
http://www.avermedia.com
Table des matières
Alimentation (Power)
Etape 4
natural_image
Silhouette of a futuristic armored figure in motion against a city skyline, with a digital display showing time and duration (no readable text or symbols)Descriptions
natural_image
Silhouette of a futuristic armored figure with glowing elements, set against a cityscape background (no readable text or symbols)natural_image
Street scene with debris, a helicopter flying, and urban buildings under a clear sky (no visible text or symbols)Descriptions
Microphone ouvert (Microphone On)
Format d'acquisition:
Lecture vidéo
natural_image
Interior of a futuristic spacecraft or space station with two armored personnel, one illuminated by a camera (no visible text or symbols)Comment modifier (How to Edit)
Aperçu
Export
Descriptions
Exportation... (Exporting...)
Quitter (Exit)
Envoi complet
Description
natural_image
Silhouette of a futuristic armored figure in motion against a cityscape background (no visible text or symbols)Beschreibungen
natural_image
Silhouette of a futuristic robot in a cityscape with buildings and a digital timer (no readable text or symbols)natural_image
Street scene with debris, a helicopter flying, and urban buildings under a clear sky (no visible text or symbols)Sofortige Wiedergabe
Beschreibungen
Mikrofon aktivieren (Microphone On)
natural_image
Two armored personnel in a futuristic room with glowing orange sky and smoke, no visible text or symbolsnatural_image
Interior view of a dimly lit industrial facility with glowing material and workers (no visible text or symbols)natural_image
Interior view of a spacecraft or spacecraft with a glowing orange glow in the center (no visible text or symbols)Vorschau
Exportieren (Export)
Beschreibungen
Exportiere...(Exporting...)
Verlassen (Exit)
Auf YouTube teilen (Share on YouTube)
Beschreibungen
Dateien löschen
Schritt 1:
natural_image
Silhouette of a futuristic armored figure with glowing elements, set against a city skyline (no visible text or symbols)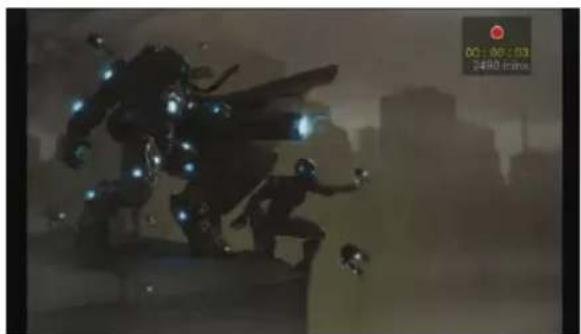
natural_image
Silhouette of a futuristic armored figure with glowing elements, set against a cityscape background (no readable text or symbols)Descrizioni
natural_image
Street scene with debris, a helicopter flying, and urban buildings under a clear sky (no visible text or symbols)Descrizioni
natural_image
Interior view of a spacecraft with two armored personnel near a glowing orange sky (no visible text or symbols)Descrizioni
Modifica/ Condividi (Edit/ Share)
Come modificare (How to Edit)
natural_image
Interior view of a spacecraft with two astronauts operating a large illuminated pipeline (no visible text or symbols)Anteprima
Esporta (Export)
Descrizioni
Esci (Exit)
Descrizioni
Condividi su YouTube (Share on Youtube)
5.2 Gestione file (File Management)
Descrizioni
N° Botones
Descripciones
Grabar
natural_image
Silhouette of a futuristic armored figure in motion against a city skyline, with no visible text or symbols.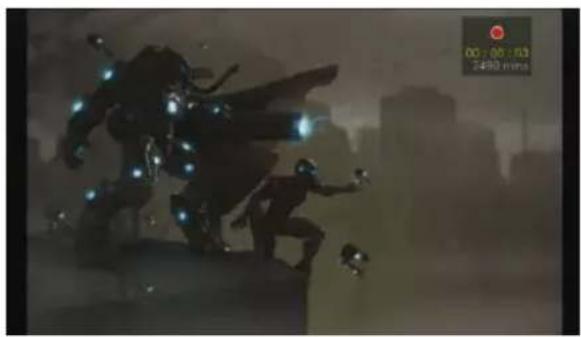
natural_image
Silhouette of a futuristic armored figure in motion against a cityscape background (no visible text or symbols)Descripciones
natural_image
Street scene with debris, a helicopter, and buildings under a clear sky (no visible text or symbols)Descripciones
natural_image
Interior of a spacecraft or prison-like facility with two armored personnel, one standing and one seated, under a bright sky (no visible text or symbols)Editar/Compartir (Edit/Share)
Cómo editar (How to Edit)
natural_image
Interior view of a spacecraft with crew in spaces, showing illuminated components and no visible text or symbolsVista previa
Exportar (Export)
Descripciones
Exportando...(Exporting...)
Salir (Exit)
Compartir en YouTube (Share on YouTube)
Carga completada
Descripciones
Paso 2:
natural_image
Silhouette of a futuristic armored figure with glowing elements, set against a cityscape background (no readable text or symbols)Descrições
natural_image
Silhouette of a dynamic human figure in motion against a cityscape background (no visible text or symbols)natural_image
Street scene with debris, a helicopter, and urban buildings under a clear sky (no visible text or symbols)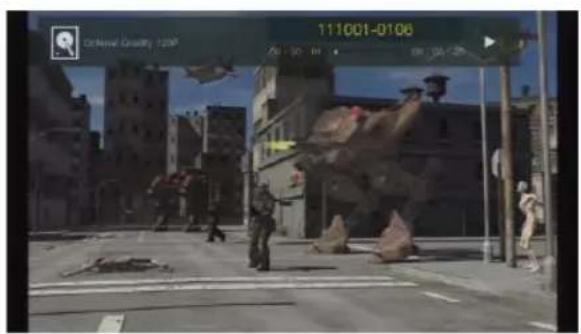
Descrições
Microfone ligado (Mircophone On)
natural_image
Interior of a spacecraft or space station with two astronauts in protective gear, one looking out a glowing orange sunset window (no visible text or symbols)Editar/Compartilhar (Edit/ Share)
Como Editar (How to Edit)
natural_image
Interior view of a spacecraft with crew members operating equipment near a glowing orange sky (no visible text or symbols)Etapa 2:
natural_image
Interior view of a spacecraft with crew in protective gear operating equipment near a glowing solar panel (no visible text or symbols)Visualização
Exportar (Export)
Descrições
Exportando... (Exporting...)
Sair (Exit)
Compartilhar no YouTube (Share on Youtube)
Descrições
Etapa 2:


- European Community Compliance Statement
- FCC Compliance Statement (United States)
- FCC NOTICE
- Federal Communicaons Commission Statement
- CAUTION ON MODIFICATIONS
- WASTE ELECTRICAL AND ELECTRONIC EQUIPMENT (WEEE)
- Baery Safety Informaon
- ICES-003 (Canada)
- GOST-R Cercaon (Russia)
- Internaonal Headquarter Oce
- Specicaons
- System Requirements
- Table of Content
- Introduction
- Chapter 1 Package Contents
- Other Items You Need
- Chapter 2 The Unit Parts
- Front Panel
- # Buttons
- Descriptions
- Record
- Power
- Infrared Sensor
- AVerMedia
- Connection Ports
- Front View
- Rear View
- Chapter 3 The Remote Control
- Chapter 4 Installation & First Time Setup
- Supported Resolutions
- Hardware Installation
- Step 1
- Check the Connection of Your Game Consoles and TV
- Step 2
- Connect the Device to Your Wii U / Xbox 360 Using HDMI Cable
- Connect the Device to Your PlayStation 3 / Wii Using Component AV Cable
- Step 3
- Connecting the Device to Your TV Using HDMI Cable
- Step 4
- Power on Your Game Console
- Step 5 Install and Connecting the Power Adapter
- Step 6
- Connecting to the Network
- Step 7
- Plug in USB Hard Drive/ HDD
- Step 8
- Power on the Capture Box
- Step 9
- Check Video on TV screen
- Connecting the Device to Your Microphone and Headset
- Storage Device Installation
- USB Storage Device Insertion
- HDD Installation and Removal
- To install the internal HDD:
- Remove the HDD Lid
- Before Installing Internal HDD
- Step 3 Inserting the HDD
- Replace the HDD Lid
- To remove the internal HDD:
- Step 2 Removing the HDD
- Step 3 Replacing the HDD Lid
- Setup Wizard
- Step 1 Setting up Language
- A/V Pass Thru.
- Step 3 (1)
- Reminder
- Step 3 (2)
- Network Connection Failure
- Step 4 (1)
- No Hard Drive Detected
- Step 4 (2)
- Finishing Setup Wizard
- Video Output Settings for Game Consoles
- Video Output Settings for PlayStation 3
- Video Output Settings for Xbox 360
- Chapter 5 Basic Operation
- Record and Capture
- Instant Recording During Gameplay
- Pause and resume recording
- Quick Snapshot During Gameplay
- Instant Playback
- Image Capture During Video Playback
- Disk Information
- Adding Commentary
- Microphone On
- Chapter 6 OSD Menu
- Basic Operation
- Media Studio
- Navigating
- Video Playback
- Snapshots Viewing
- Post- Edit Capture Box Recorded Videos
- Select a Video
- Edit/ Share
- Change File Name
- How to Edit
- Edit Mode
- Step 1:
- Step 2:
- Preview
- Export
- Exporting...
- Exit
- Share Videos on YouTube
- Share On YouTube
- Account Setup
- Edit Before Uploading
- Uploading Complete
- File Management
- Select Partition
- Copying Files from Internal HDD to USB Disk
- Deleting Files
- USB Storage Device Removal
- Settings
- Language
- Display Mode
- Real-Time Mode
- Standard Mode
- Network Settings
- Auto Setup (Recommended):
- Manual Setup :
- STEP 3:
- PPPoE :
- Network Connectivity Test
- Current Network Information
- Date and Time
- Date Format :
- Auto Update :
- Time Zone :
- Time Setup :
- Daylight Saving Time :
- Disk Management
- Storage Destination
- Video Input
- Audio Input
- A/V Pass Through:
- Color Range Setup
- Watermark
- Watermark Type:
- Position:
- Display Scale:
- Auto Save
- Recording/ Snapshot
- Video Quality:
- Snapshot Quality:
- Live Commentary
- Volume:
- Sound Mode
- OSD Menu
- Firmware Upgrade
- Step 4:
- Restore to Factory Settings
- Product Information
- Chapter 7 Pairing Capture Box and GameMate by AVerMedia
- Appendix A How to Set Your Gameplay Snapshot as PS3 Wallpaper
- Step 5
- Appendix B Troubleshooting
- Hard Drive Problem
- Video Display Problems
- Actions
- Other Problems
- Firmware upgrade turns out unsuccessful
- Solutions are as follows:
- Appendix C Measuring Your HDD Height Before Installation
- Open Source Code Notice
- BSD
- FreeBSD
- GPL
- GPLv2
- GPLv2+
- GPLv3 with GCC RLE
- jpeg
- LGPLv2
- LGPLv2.1
- LGPLv2.1/GPLv2
- Table des matières
- Alimentation (Power)
- Etape 4
- Microphone ouvert (Microphone On)
- Lecture vidéo
- Comment modifier (How to Edit)
- Aperçu
- Exportation... (Exporting...)
- Quitter (Exit)
- Envoi complet
- Description
- Beschreibungen
- Sofortige Wiedergabe
- Mikrofon aktivieren (Microphone On)
- Vorschau
- Exportieren (Export)
- Exportiere...(Exporting...)
- Verlassen (Exit)
- Auf YouTube teilen (Share on YouTube)
- Dateien löschen
- Descrizioni
- Modifica/ Condividi (Edit/ Share)
- Come modificare (How to Edit)
- Anteprima
- Esporta (Export)
- Esci (Exit)
- Condividi su YouTube (Share on Youtube)
- Gestione file (File Management)
- N° Botones
- Descripciones
- Grabar
- Editar/Compartir (Edit/Share)
- Cómo editar (How to Edit)
- Vista previa
- Exportar (Export)
- Exportando...(Exporting...)
- Salir (Exit)
- Compartir en YouTube (Share on YouTube)
- Carga completada
- Paso 2:
- Descrições
- Microfone ligado (Mircophone On)
- Editar/Compartilhar (Edit/ Share)
- Como Editar (How to Edit)
- Etapa 2:
- Visualização
- Exportando... (Exporting...)
- Sair (Exit)
- Compartilhar no YouTube (Share on Youtube)
Brand : AVERMEDIA
Model : Live Streamer MIC 350
Category : Microphone