WRLYM-1EU - Uncategorized FireAngel - Free user manual and instructions
Find the device manual for free WRLYM-1EU FireAngel in PDF.

User questions about WRLYM-1EU FireAngel
0 question about this device. Answer the ones you know or ask your own.
Ask a new question about this device
Download the instructions for your Uncategorized in PDF format for free! Find your manual WRLYM-1EU - FireAngel and take your electronic device back in hand. On this page are published all the documents necessary for the use of your device. WRLYM-1EU by FireAngel.
USER MANUAL WRLYM-1EU FireAngel
(WRLYM-1 ONLY) ... 11 CONTENTS Note: This user manual is also available in large text and other formats. Please e-mail support@reangel.eu for further information. The original English version of the manual, from which this translation was taken, has been independently approved. In case of discrepancy with translated parts, Sprue Safety Products Ltd. conrms that the English guide is true and correct. 230 V AC 50 - 60 Hz mains powered. Non replaceable 6V battery back-up. The normal operating temperature range for this product is 0 °C to 40 °C. WARNING: Wiring should be installed by a qualied electrician in accordance with BS7671. We advise you to follow the new harmonized cable colour coding as specied in BS7671. Please ensure to leave this manual with the end user as contains important information regarding the maintenance of this product. Please keep this user manual in a safe place.
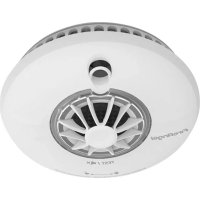
INTRODUCTION The FireAngel RLYM-1 (Hardwired interconnect) and WRLYM-1 (Hardwired with Wireless interlink) relays can be used to connect FireAngel mains powered alarms (and battery powered alarms where appropriate) to suitable other systems such as Fire Panels, Telecare Systems, Auto Diallers, Security Systems and more. The RLYM-1 (Hardwired with interconnect) and WRLYM-1 (Hardwired with Wireless interlink) relays have two NO/NC output contacts that are triggered by a connected FireAngel Alarm System. The RLYM-1 (Hardwired interconnect) relay is also capable of differentiating between smoke/heat and CO alarm signals which can be particularly useful in some installations. RLYM-1 works with: SM-SN-1, SM-F-1EU, HM-SN-1, HM-F-1EU, WSM-SN-1, WSM-F-1EU, WHM-SN-1, WHM-F-1EU. WRLYM-1 works with: WSM-SN-1, WSM-F-1EU, WHM-SN-1, WHM-F-1EU, WST-630, WHT-630, W2-CO-10X, WCOB-SN-1 or any other FireAngel alarm equipped with Wi-Safe 2 technology
In the event of a re or carbon monoxide alarm the detecting unit will signal the relay which can trigger an external device via a wired connection or additional radio frequency transmitter. RLYM-1 & WRLYM-1 Hardwired Output External Panel / Device*External Panel / Device**For connection to External Devices see Manufacturer’s instructions
Relay ARelay B RLYM-1 & WRLYM-1 Wireless Output External Panel /Device**For connection to External Devices see Manufacturer’s instructions
INSTALLATION The FireAngel alarm relay units should be securely mounted to a at surface using the 4 xing locations provided. The unit should be located in an area where it will not be subjected to any excesses in temperature or humidity. The relay unit is designed to be permanently mounted, using its own terminals to connect to the mains. The unit can screw directly to the wall or ceiling. IMPORTANT: The circuit used to power the relay must be a 24 hour voltage circuit that cannot be turned off by a switch.
- If trunking is required, snap the optional break-out tab away from the base prior to connection.
- The wiring must be connected to the terminal as follows: Live (L) - Connect to Live in the house wiring. Neutral (N) - Connect to Neutral in the house wiring.6
Interconnect (I) - If desired, join the Interconnect wire from the alarm network (RLYM-1 only, see ‘Hardwire Interconnect’ below). Use the Earth Terminal to safely terminate any copper Earth or green / yellow cable. Note: Wiring must be installed in compliance with local regulations and by qualied/competent personnel. Disconnection Device (for permanently connected equipment) A readily accessible disconnect device (such as a separate fused spur or MCB) can be incorporated externally to the equipment to disconnect the device from the mains power. LED AC Mains 230V DC Power in 12V (WRLYM-1 Only) Trigger input 12-24V External input TST Test Button LRN Learn Button (WRLYM-1 Only) DIP Switches Relay B Relay A Screw holes 4 x 1.5V AA Batteries LED DC Power in 12V Trigger input 12-24V External input TST Test Button LRN Learn Button (WiSafe 2 Only) DIP Switches Relay B Relay A Screw holes AC Mains 230V YT2 Trunking YT2 Trunking WARNING - Ensure to isolate the power prior to operation of the dip switches. WARNING - Ensure to isolate the power prior to operation of the dip switches. Please note: The battery back-up switch (5) must be switched to the “on” position prior to nalising the installation of the relay unit and tting the cover.7
HARDWIRE INTERCONNECT (RLYM-1 ONLY) For joining the relay to an existing alarm circuit, use a ‘three core and earth’ style cable between the relay and the alarms to be interconnected together. Connect the interconnect ‘I’ cable between each terminal as indicated. The interconnect wire (minimum
cable) must be treated as Live, it should be insulated and sheathed. DO NOT:
- Exceed the maximum of 30 interconnected devices on a network.
- Exceed 250 m of connecting wire per circuit.
- Connect to any other models produced by another manufacturer. Relay unitSmoke / Heat AlarmMains 230V ACPower Supply WIRING KEY = Neutral= Live= Hardwire Interconnect= Earth (I)
WARNING: Mixing the Live and Neutral connections when hardwire interconnecting relay to alarm networks will cause
damage to both relays and alarms. DO NOT use the Earth wire for the interconnect connection.8
WIRELESS INTERLINK (WRLYM-1 ONLY) The WRLYM-1 is designed to be wirelessly interlinked with up to 50 products within the Wi-Safe 2 product range. It is not designed to communicate with wireless devices from other ranges or manufacturers. These devices need to be ‘learned-in’ or interlinked in order to communicate with each other. Wi-Safe 2 eliminates the need for interconnecting wires around a property making future system modications easy and cost effective. The WRLYM-1 relay will still need a mains supply at the point of installation (see ‘Installation’ section). IMPORTANT: Obstructions such as steel reinforcement in concrete could block or impede the wireless signal. While the wireless range is over 200 m in clear air / clear line of sight, the effective range may be reduced by walls and other obstructions in the building. It is recommended not to exceed 35 m as the maximum distance between devices in a network. Relay unitSmoke / Heat Alarm Mains 230V AC Power Supply Mains 230V AC Power Supply WIRING KEY = Neutral = Live = Earth9
- Exceed the maximum of 50 alarms/devices interlinked in a network.
- Connect FireAngel alarms to any models produced by another manufacturer. WIRELESS SET-UP How to ‘learn-in’ a wireless device to the relay: Install relay unit as described earlier (see ‘Installation’). Install the smoke, heat or CO alarm in its appropriate location.
Using a ballpoint pen briey push and release the ‘learn button’ marked “LRN” on the front section of the relay. The ‘learn’ LED will illuminate “Blue” once for 5 seconds.
2. While the LED is on, briey press the test button
on any alarm to wirelessly interlink the two. The alarm will give an audible sound consisting of two cycles of three loud beeps.
3. The “Blue” ‘learn’ LED of the relay unit will ash
repeatedly to indicate that it has been ‘learned-in’ successfully. If the test button is not pressed quickly enough, the ‘learn-in’ process will fail. If this happens, repeat the process. Your relay unit counts as one unit within the network. The network cannot exceed 50 units in size including the relay unit. To complete the installation, t the relay unit cover using the screws provided.10
Unlearning the relay from the network: NOTE: Ensure to disconnect mains power prior to removing lid and unscrewing the unit from its installation position.
1. To remove a relay from the network you will need
to perform a button press sequence consisting of a short press followed by a long press.
2. Using a ballpoint pen, on the button on the back of
the relay, briey push and release and then push and hold (for 5 seconds) the button, then release.
3. After the button has been released, the “Blue” LED will
ash 2 long ashes, followed by a further single ash to illustrate that the relay has successfully been ‘un-learned’ from the network. If the unlearn button is not pressed correctly the “unlearn process” will fail. If you do not see the correct ash sequence, repeat the process.
MIXED SYSTEM COMPATIBILITY
Both relays are capable of mixed system operation. This means both hardwired and wireless alarms can be installed onto a single network which is then linked with an appropriate relay. Ensure there is only one wireless connection into each alarm network. For example if you have a hardwired network upstairs and a wireless network downstairs, only one of the hardwired alarms should be connected with a wireless alarm (upstairs) and linked into the wireless network (downstairs), connecting both systems. The relay can then link into any one of the alarms on the network as follows. For RLYM-1 – Hardwire interconnect required into any hardwired alarm on the network For WRLYM-1 – Wireless interlink required into any wireless alarm on the network See diagram for wiring option using surface trunking and knockout segments on the side of the unit. YT2 trunking11
Once mains power has been turned on, the LED on the front of the relay will illuminate a constant green light. BATTERY BACK-UP Both RLYM-1 and WRLYM-1 mains powered relays have a built in, sealed for life lithium battery (back-up); designed to power the relay in the event of a mains failure. Please note – the battery back-up switch (5) must be switched to the “on” position prior to nalising the installation of the relay unit and tting the cover.
WARNING: Ensure to isolate the power prior to
operation of the dip switches. If in the event of a mains failure, the dedicated battery back-up will activate. The LED light will ash Green every 60 seconds to indicate powered by battery back-up.
When the mains has been restored the green LED will change to a constant green. If in the event of a low battery, both RLYM-1 and WRLYM-1 relays are equipped with a low battery buzzer which will sound once every 60 seconds, selectable by a separate dipswitch (2), the red LED will also ash. Both relays will fail-safe in the event of a low battery condition and activate their contacts accordingly.
- Can be powered by a 12V external power source (not supplied).
- Ensure to locate relay next to the DC external source.
- Locate the auxiliary power output in the DC external source and wire it to the DC Power Input connector on the relay.
- Check that the polarity of the auxiliary power supply has been wired correctly and the power LED is on. Please note: The maximum length of the lead for the 12V DC supply should be no greater than 25m. 12–24V
EXTERNAL TRIGGER INPUT
(RLYM-1 and WRLYM-1) Both RLYM-1 and WRLYM-1 relays are capable of receiving an external trigger input from elsewhere in a property such as an external control panel. The external trigger input voltage is optional and can be triggered by a 12-24V DC power supply.
CONTACTS AND OPERATION
Both RLYM-1 and WRLYM-1 models are equipped with 2 x NO/NC contacts rated at 250V AC - 5A / 30V DC - 5A Each contact has both pulse and continuous modes of operation, determined via dipswitch selection at the point of install (3 & 4). ON ON
The Pulse output will switch back the relay contacts to their original state after 5 seconds. The Continuous output will continue to send a signal for as long as the alarms are sounding on the network. The RLYM-1 (only) has the additional option to turn Relay B into a contact reporting only CO events, selectable by a separate dipswitch (1). When this mode has been activated, an alarm from any smoke and heat alarm on the network will activate Relay A only, however an alert from any CO alarm on the network will activate Relay B only.
When this function is not selected, both contacts (Relay A and Relay B) will activate in the event of any alarm on the network.
DIPSWITCH RELAY OPERATION
(ACTIVATION) Dipswitch 1=on WRLYM-1: N/A RLYM-1: Relay contact B reporting only CO events Dipswitch 2=on Buzzer enabled Dipswitch 3=off Dipswitch 4=off Relay A latching continuously Relay B latching continuously Dipswitch 3=on Dipswitch 4=off Relay A latching for 5 seconds Relay B latching continuously Dipswitch 3=off Dipswitch 4=on Relay A latching continuously Relay B latching for 5 seconds Dipswitch 3=on Dipswitch 4=on Relay A latching for 5 seconds Relay B latching for 5 seconds Dipswitch 5=on Battery back-up activated
WARNING: Ensure to isolate the power prior to
operation of the dip switches. PLEASE NOTE: When connecting to both output relay contacts (A & B), it is advisable to install products (to be switched upon activation of alarm) of the same power type and not mix between high and low voltages. This is because the resulting higher voltage may exceed the dened SELV safe level. IEC voltage range AC RMS voltage (V) DC voltage (V) Dening risk Low voltage 50 to 300 120 to 300 Electrical shock Extra-low voltage < 50 < 120 Low risk TESTING Relays should be tested by the installer at the point of installation to ensure correct operation. Both relays incorporate a separate test button function (as indicated - see ‘Installation’ section). Pressing the test button will activate both relay contacts accordingly. Please note due to the unique nature of the network, pressing the test button on a smoke, heat or CO alarm14
will sound all connected alarms, however will not enable the relay to switch its contacts. It is advised that alarms are tested in accordance with the respective instruction manuals. Frequent testing of the relays is advised to ensure its continued and safe operation. Guidelines and best practices for testing are as follows:
1. After the system is installed.
2. After prolonged absence from the dwelling (e.g. after
3. After repair or servicing of any of the system’s
elements or household electrical works. ALARM In the event of an alarm (from a local network or from an external source) the local network will sound a full alarm and the red LED on the relay will activate continuously. Smoke / heat and CO alarms, properly installed and maintained, are an essential part of a good home safety programme. Please refer to individual alarm manuals for more information. TROUBLESHOOTING The relay unit Power LED is not illuminated on the Relay Unit. Check that the battery back-up switch is on. The green unit power LED should be illuminated. The green LED ashes every 60 seconds. There is no mains power to the relay unit. It is powered by the battery. The red LED ashes and a buzzer sounds every 60 seconds. The battery back-up is low and the relay unit needs replacing. The red LED is continuously showing. The network is in alarm. Respond immediately.15
TECHNICAL SPECIFICATION Power Required: Mains 230V AC or 12V DC (WRLYM-1 only) RF Range: 35 meters in free space (WRLYM-1 only) RF Visual Indicator: Internally on module Power Indicator: Full Green light indicates mains power connected Green light ash every 60seconds indicates battery back-up Alarm Indicator: Full Red light for Fire / CO events Low battery: Red light ash every 60 seconds Buzzer every 60 seconds indicates low battery RF Frequency: 868.3 MHz (WRLYM-1 only) Mounting: Can be easily mounted onto a wall or ceiling Warranty: 5 Years Outputs: Fire Alarm Relay (NO/NC) CO Alarm Relay (NO/NC) (RLYM-1 only) Relay Contacts: All relays are rated 250VAC @ 5 Amp. Resistive Normal Operating and Storage Temperature Range: 0 – 40ºC Normal Operating and Storage Humidity Range: 15% to 95% Relative Humidity – non condensing Dimensions: 84mm x 198mm x 44mm DISPOSAL In accordance with the WEEE Directive 2012/19/EU, waste electrical products should not be disposed of with regular household waste. The relay should be disposed of in line with local regulations.
WARNING: Do not open the relay. Do not burn.
WARRANTY Sprue Safety Products Ltd. warrants to the original purchaser that its enclosed Relay unit be free from defects in materials and workmanship under normal residential use and service for a period of 5 years from the date of purchase. Provided it is returned with postage prepaid and proof of purchase date, Sprue Safety Products Ltd. hereby warrants that during the 5 year period commencing from the date of purchase Sprue Safety Products Ltd., at its discretion, agrees to replace the unit free of charge. The warranty on any replacement RLYM-1 & WRLYM-1, will last for the remainder of the period of the original warranty in respect of the unit originally purchased – that is from the date of original purchase16
and not from the date of receipt of the replacement product. Sprue Safety Products Ltd. reserves the right to offer an alternative product similar to that being replaced if the original model is no longer available or in stock. This warranty applies to the original retail purchaser from the date of original retail purchase and is not transferable. Proof of purchase is required. This warranty does not cover damage resulting from accident, misuse, disassembly, abuse or lack of reasonable care of the product, or applications not in accordance with the user guide. It does not cover events and conditions outside of Sprue Safety Products Ltd.’s control, such as Acts of God (re, severe weather etc.). It does not apply to retail stores, service centres or any distributors or agents. Sprue Safety Products Ltd. will not recognise any changes to this warranty by third parties. Sprue Safety Products Ltd. shall not be liable for any incidental or consequential damages caused by the breach of any expressed or implied warranty. Except to the extent prohibited by applicable law, any implied warranty of merchantability or tness for a particular purpose is limited in duration for 5 years. This warranty does not affect your statutory rights. Except for death or personal injury, Sprue Safety Products Ltd. shall not be liable for any loss of use, damage, cost or expense relating to this product or for any indirect or consequential loss, damages or costs incurred by you or any other user of this product.17