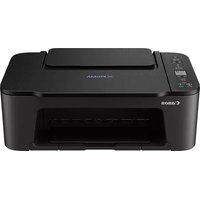
PIXMA E3440 - Printer CANON - Free user manual and instructions
Find the device manual for free PIXMA E3440 CANON in PDF.



User questions about PIXMA E3440 CANON
0 question about this device. Answer the ones you know or ask your own.
Ask a new question about this device
Download the instructions for your Printer in PDF format for free! Find your manual PIXMA E3440 - CANON and take your electronic device back in hand. On this page are published all the documents necessary for the use of your device. PIXMA E3440 by CANON.
USER MANUAL PIXMA E3440 CANON
Read Safety and Important Information (addendum) first.
natural_image
Icon showing a printer with a paper airplane and a document, symbolizing file transfer or sync (no text present)Installing the Printer......page 1
natural_image
Two white icons: a laptop and a smartphone, on a solid red background (no text or symbols)Connecting to a Computer, Smartphone or Tablet......page 4
natural_image
Line drawing of a printer with hands holding the lid (no text or symbols)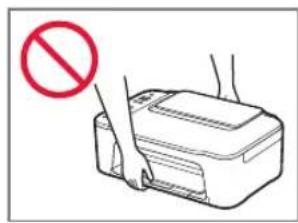
text_image
Diagram showing a printer with a prohibition symbol, indicating no usage or prohibition of the printer.Setting Up the Printer

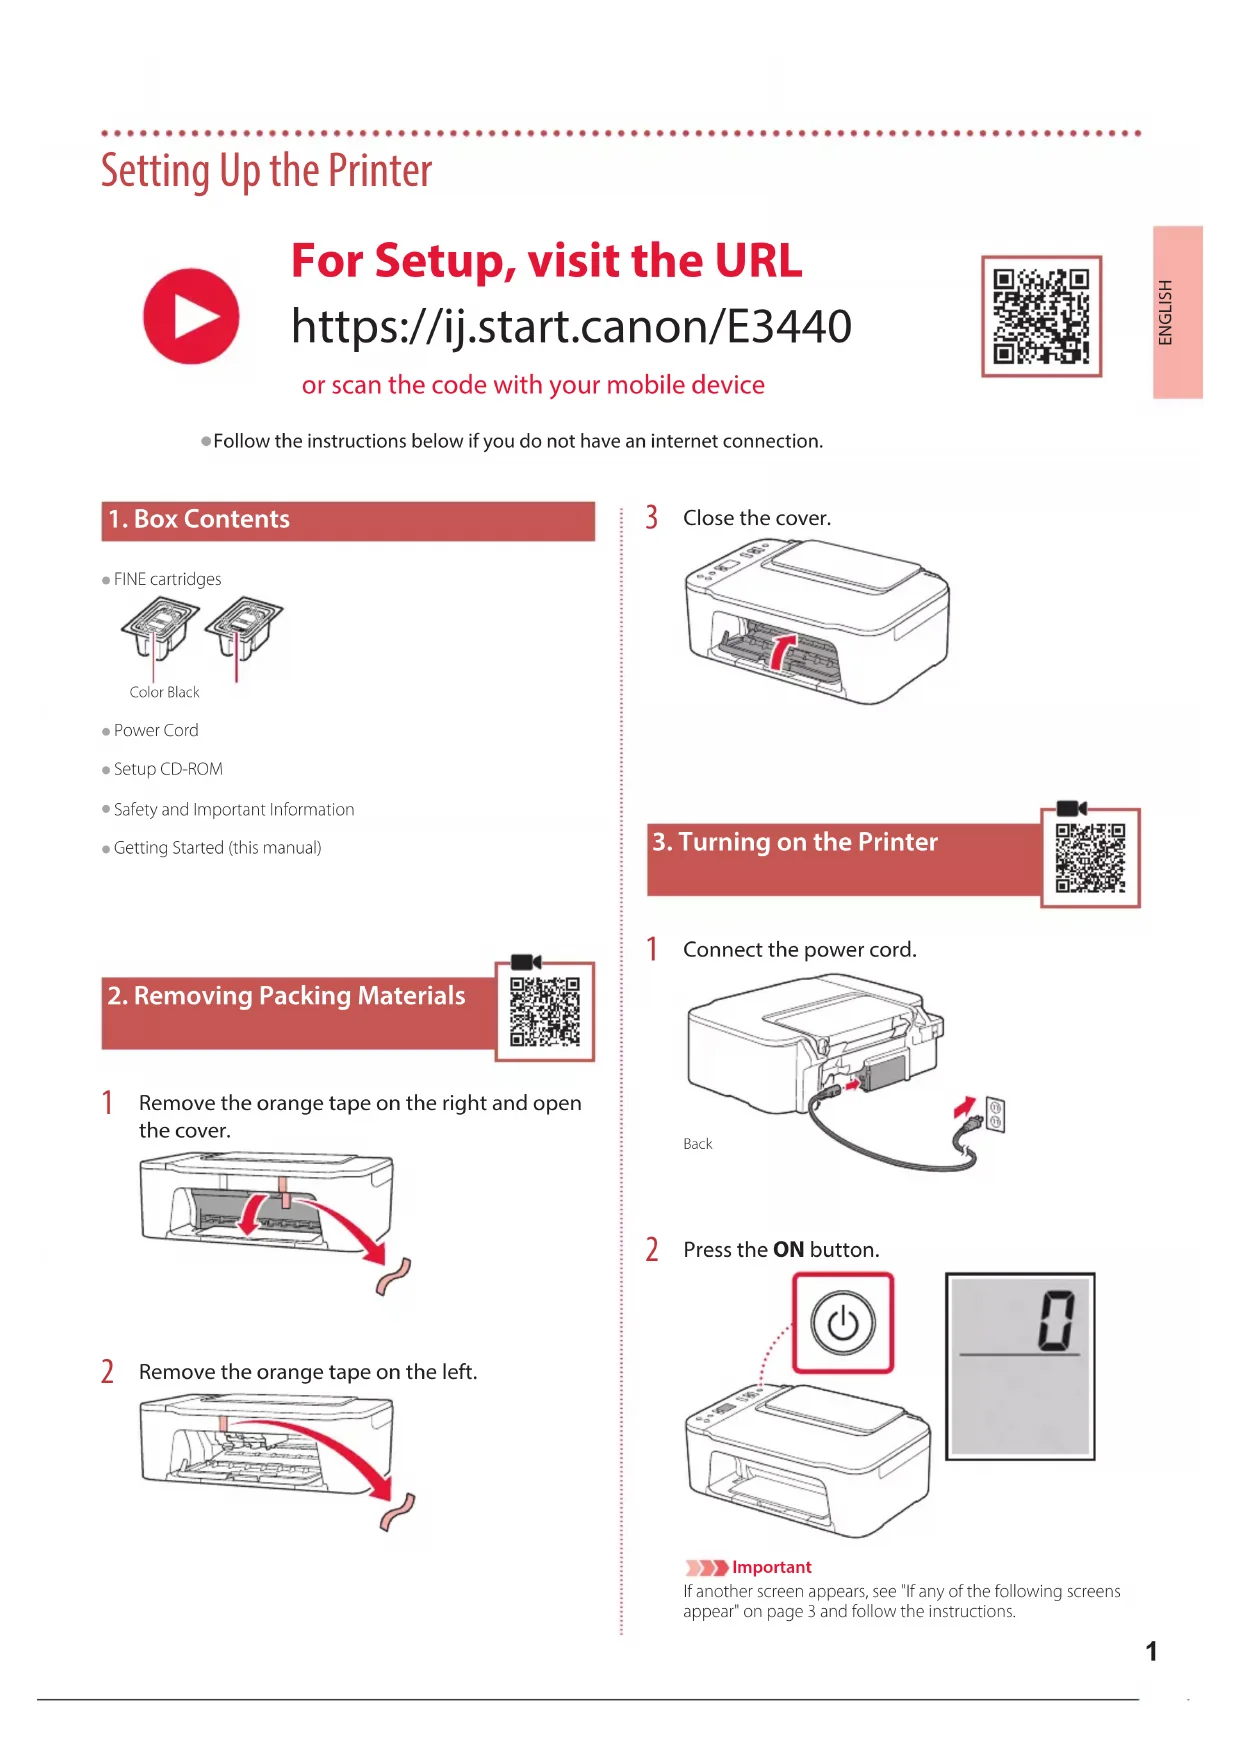
For Setup, visit the URL
https://ij.start.canon/E3440
or scan the code with your mobile device

- Follow the instructions below if you do not have an internet connection.
1. Box Contents
• FINE cartridges
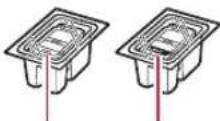
Color Black
Power Cord
- Setup CD-ROM
• Safety and Important Information
- Getting Started (this manual)
2. Removing Packing Materials
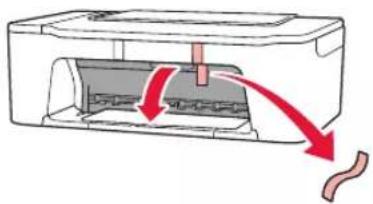
1 Remove the orange tape on the right and open the cover.
natural_image
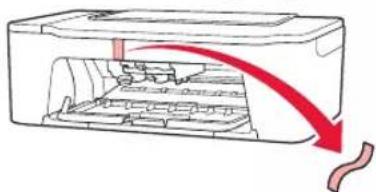
Diagram of a printer with red arrows indicating process flow (no text or symbols)2 Remove the orange tape on the left.
natural_image
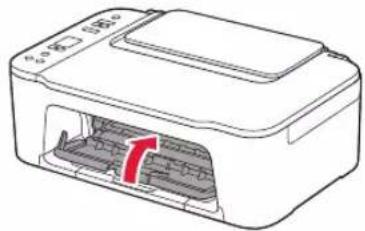
Diagram of a printer internal structure with red arrows indicating flow direction (no text or symbols)3 Close the cover.
natural_image
Diagram of a printer with internal structure and red arrow indicating rotation (no text or symbols)3. Turning on the Printer
1 Connect the power cord.
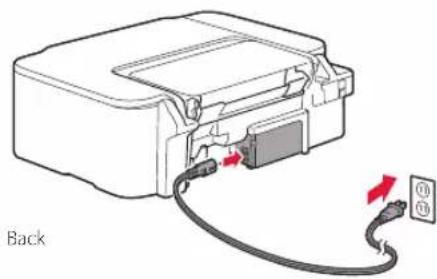
natural_image
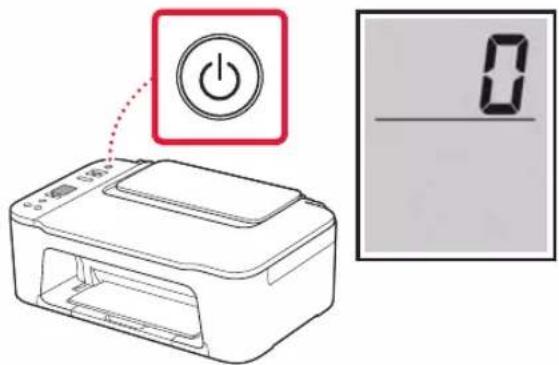
Diagram of a device with cable and connector, showing connection to a wall-mounted power outlet (no text or symbols)2 Press the ON button.
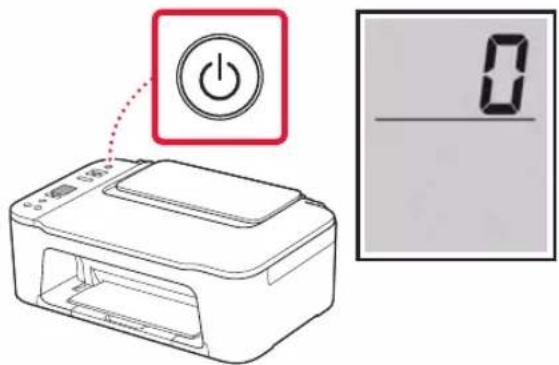
text_image
Diagram showing a printer with a power button and a 0-segment display, likely illustrating a digital status or status change.Important
If another screen appears, see "If any of the following screens appear" on page 3 and follow the instructions.
Setting Up the Printer
4. Installing the FINE Cartridges
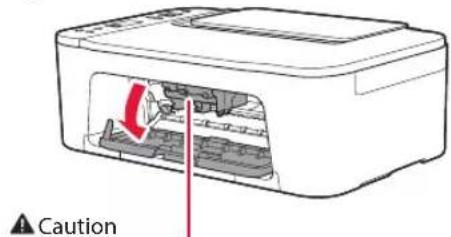
1 Open the cover.
text_image
CautionDo not touch the FINE cartridge holder until it stops moving.
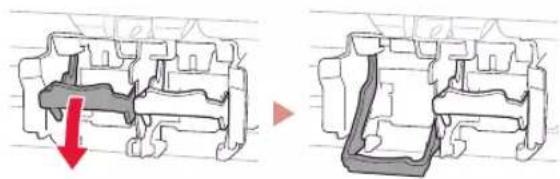
2 Lower the ink cartridge lock lever on the left-hand side.
natural_image
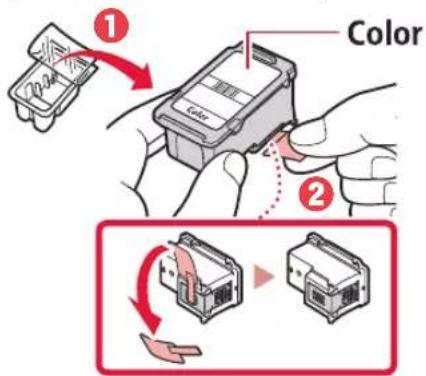
Diagram showing a mechanical component before and after assembly, with no visible text or symbols3 Remove the Color FINE cartridge from the package and remove the protective tape.
text_image
① Color ②Important
- Do not touch the ink on the protective tape. It could stain your hands or surrounding objects.
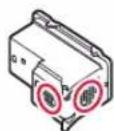
- Do not touch the areas shown in the figure. Otherwise, the printer may not print correctly.
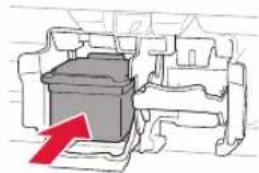
4 Insert the Color FINE cartridge in the FINE cartridge holder.
natural_image
Diagram of a mechanical component with a red arrow indicating direction (no text or symbols)Important
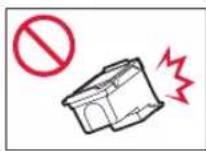
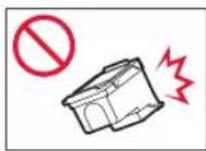
Do not bump the FINE cartridge. Doing so may cause a malfunction.
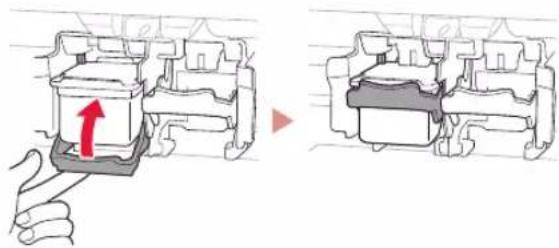
5 Raise the ink cartridge lock lever.
text_image
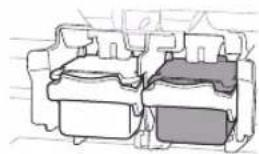
Diagram showing a hand pressing a component with a red arrow indicating direction, alongside a close-up of the component's internal structure.6 Repeat steps 2 to 5 and install the Black FINE cartridge on the right-hand side.
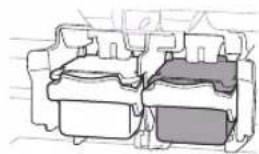
natural_image
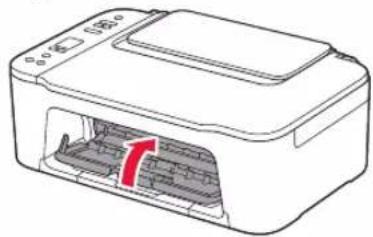
Technical line drawing of a mechanical component with no visible text or symbols7 Close the cover.
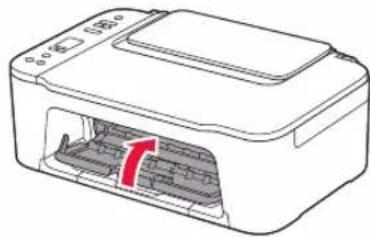
natural_image
Line drawing of a printer with internal structure and red arrow indicating rotation (no text or symbols)8 Check that the following screen appears.
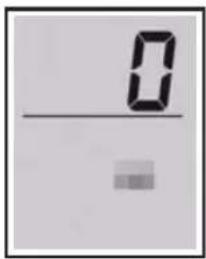
text_image
0 —Important
If E > 0 > 4 appears on the screen, see "If any of the following screens appear" on page 3 and follow the instructions.
Select the connection method that best matches how you will use the printer.
• To use the printer without connecting to any other devices
→ Setup is now complete.
• To use the printer connecting to a computer or smartphone
→ Proceed to the next page.

If any of the following screens appear
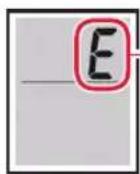
Numbers or letters
Check the screen, and then follow the corresponding instructions below.

Install the FINE cartridges.
→ "4. Installing the FINE Cartridges" on page 2

Protective material remaining.
→ "2. Removing Packing Materials" on page 1

FINE cartridges are not installed correctly.
→ "4. Installing the FINE Cartridges" on page 2
For all other cases, refer to the Online Manual.
Setting Up the Printer
What device are you connecting?

Computer Smartphone

Computer and smartphone

5-a
Connecting to a Computer
If you are using multiple computers, perform these steps on each computer.
1 Access the Canon website from your computer.

https://ij.start.canon
2 Select Set Up.
3 Enter your printer's model name and click Go.
4 Click Start.
5 Click (B) Connecting to a Computer/Smartphone.
• The following steps are for Windows users.
6 Click Download.
7 Run the downloaded file.
• Follow the on-screen instructions.
• These operations may take some time.
- To connect to a smartphone as well, see "5-b. Connecting to a Smartphone" on page 5.

Using the Setup CD-ROM
Double click EasySetup.exe in the CD-ROM, and then continue from step 3. If you do not have an internet connection, open the win folder in the CD-ROM and double click SETUP.exe. This will install the printer driver.
5-b
Connecting to a Smartphone
If you are using multiple smartphones, perform these steps on each smartphone.
1 Install the "Canon PRINT Inkjet/SELPHY" app on your smartphone.
• Search for "Canon PRINT" in App Store, or Google Play.
- Access the Canon website to download the app.
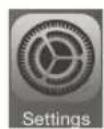
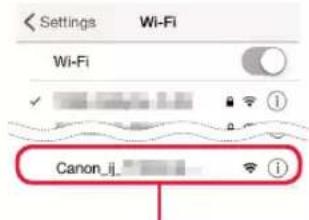
2 Open your smartphone's Wi-Fi settings. Check that the network name (SSID) that starts with "Canon_ij_" appears.
(Example of iOS screen)
text_image
Settings Wi-Fi Wi-Fi Canon_ijThe network name (SSID) that starts with "Canon_ij_"
- If "Canon_ij_" appears - Proceed to step 3.
- If "Canon_ij_" does not appear - Proceed to step
3 Tap the network name (SSID) that starts with "Canon_ij_".
4 Open the installed app, and follow the on-screen instructions in the app to add your printer.
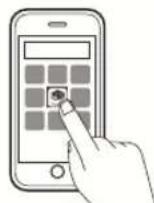
Once you have added your printer, you can print from your smartphone.
To print photos, see "Loading Paper" on page 6.
Loading Paper
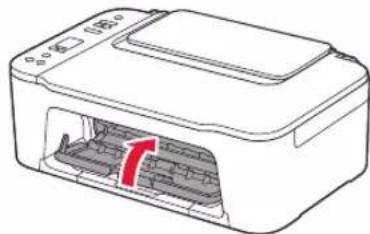
1 Open the paper support.
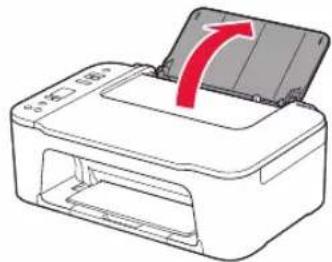
natural_image
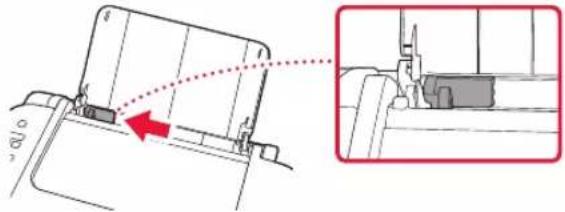
Illustration of a printer with a red arrow indicating the process (no text or symbols present)2 Slide the paper guide to the left.
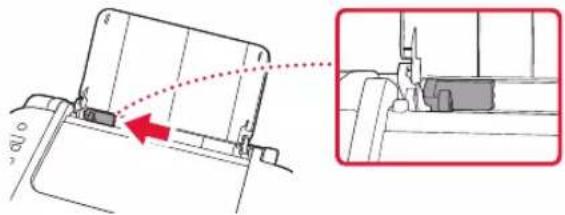
natural_image
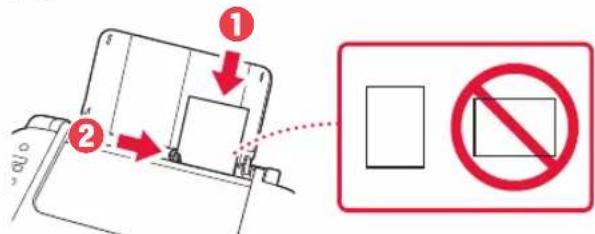
Technical diagram showing a mechanical component with an arrow indicating direction, alongside a close-up view of a device (no text or symbols present)3 Load several sheets of paper against the right edge with the print side facing up and align the paper guide to the width of the paper.
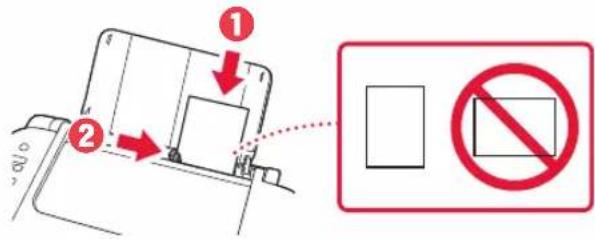
text_image
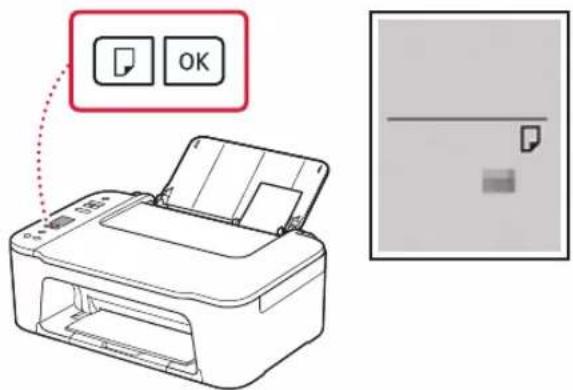
Diagram showing two labeled components (① and ②) with arrows indicating movement, alongside a prohibition symbol.4 Press the Paper Select button, select a paper size, and then press the OK button.
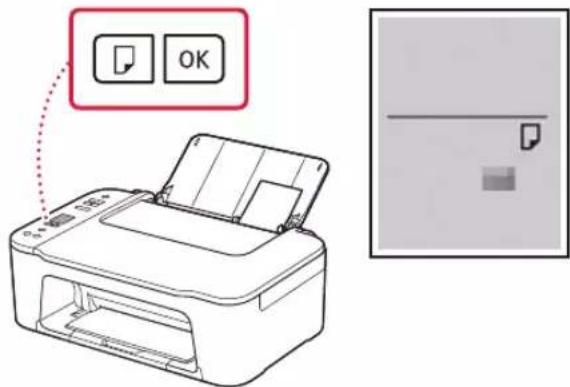
text_image
Diagram showing printer operation with 'OK' button and blank sheet, alongside a separate image of a printer.5 Extend the paper output tray, and open the output tray extension.
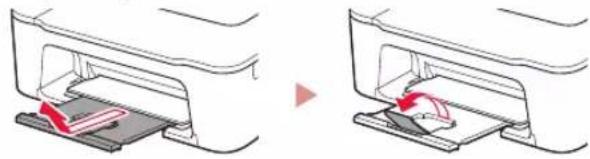
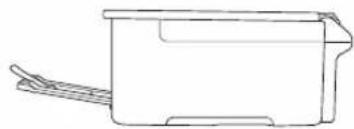
natural_image
Two-step diagram showing a printer's internal structure before and after processing, with no text or symbols present.- Look at it from the side to confirm it looks like the diagram.
natural_image
Line drawing of a mechanical component or housing with handle and base (no text or symbols)If Print Results Are Unsatisfactory
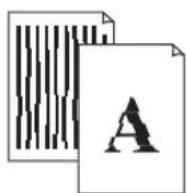
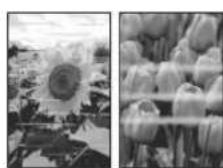
Perform Print Head Alignment if straight lines are crooked or colors are inconsistent, or print results are otherwise not what you expected.
For details, click Maintenance on the Online Manual and refer to If Printing Is Faint or Uneven > Aligning the Print Head. Refer to the back cover for how to access the Online Manual.
■ Lines Are Misaligned
■ Uneven or Streaked Colors
Configuration de l'imprimante

https://ij.start.canon/E3440
natural_image
Diagram of a printer with red arrows indicating process flow (no text or symbols)natural_image
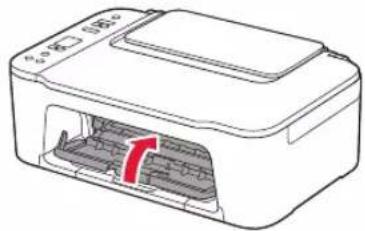
Diagram of a printer internal structure with red arrows indicating flow direction (no text or symbols)3 Fermez le capot.
natural_image
Diagram of a printer with internal structure and red arrow indicating rotation (no text or symbols)text_image
Diagram showing a printer with a power button and a 0-segment display, likely illustrating a digital status or control interface.Important
text_image
Attentionnatural_image
Diagram showing a mechanical component before and after assembly, with a red arrow indicating a downward motion (no text or symbols present)text_image
① Color ②Important
natural_image
Diagram of a mechanical component with a red arrow indicating direction (no text or symbols present)Important
text_image
Diagram showing a hand pressing a component with a red arrow indicating direction, alongside a close-up of the component's internal structure.natural_image
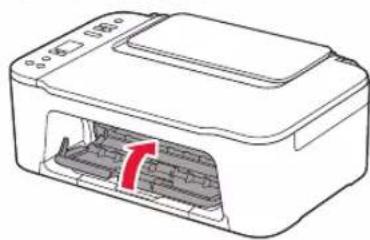
Cross-sectional diagram of a mechanical component with layered sections (no text or symbols)7 Fermez le capot.
natural_image
Line drawing of a printer with internal structure and red arrow indicating rotation (no text or symbols)natural_image
Illustration of a printer with an open lid and red arrow indicating rotation (no text or symbols)natural_image
Technical diagram showing a mechanical assembly with a red arrow indicating direction, no visible text or symbolstext_image
Diagram showing a device with two labeled arrows and a prohibition symbol, indicating no movement or restriction.text_image
Diagram showing printer operation with OK button and blank sheet, alongside a separate image of a printer's paper sheet.natural_image
Diagram showing two steps of a printer or printer device with a red arrow indicating rotation, no text or symbols present.natural_image
Line drawing of a rectangular container with side handles (no text or symbols)https://ij.start.canon/E3440
natural_image
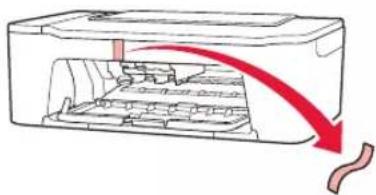
Diagram of a printer with red arrows indicating compression or disassembly process (no text or symbols)2 Odstranite oranžni trak na levi strani.
natural_image
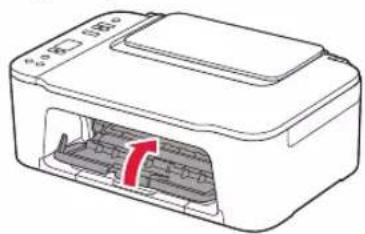
Diagram of a printer's internal structure with a red arrow indicating compression or disassembly (no text or symbols present)3 Zaprite pokrov.
natural_image
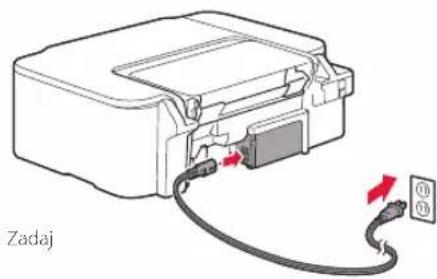
Diagram of a printer with internal structure and red arrow indicating a component (no text or symbols)3. Vklop tiskalnika
1 Priključite napajalni kabel.
text_image
Zadaj2 Pritisnite gumb VKLOP (ON).
text_image
Diagram showing a printer with a power button and a 0-segment display, likely illustrating a digital status or control interface.Pomembno
natural_image
Diagram showing a mechanical component before and after disassembly, with no visible text or symbolstext_image
① Color ②Pomembno
natural_image
Diagram of a mechanical component with a red arrow indicating direction (no text or symbols)Pomembno
Pazite, da s kartušo FINE ne udarite ob kaj. V nasprotnem primeru lahko pride do okvare.
text_image
Diagram showing a hand pressing a component with a red arrow indicating direction, alongside a close-up of the component's internal structure.6 Ponovite korake od 2 do 5 in namestite črno kartušo FINE na desno stran.
natural_image
Technical line drawing of a mechanical component with three stacked parts (no text or symbols)7 Zaprite pokrov.
natural_image
Line drawing of a printer with internal structure and red arrow indicating rotation (no text or symbols)natural_image
Illustration of a printer with an open lid and red arrow indicating rotation (no text or symbols)2 Vodilo za papir pomaknite v levo.
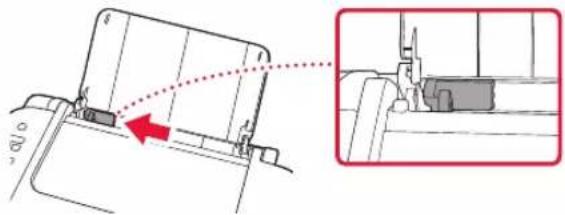
natural_image
Technical diagram showing a mechanical component with an arrow indicating direction, alongside a magnified inset of a device (no text or symbols present)text_image
Diagram showing two labeled components (① and ②) with arrows indicating movement, alongside a prohibition symbol.4 Pritisnite gumb Izbira papirja (Paper Select), izberite velikost papirja, nato pa pritisnite gumb OK.
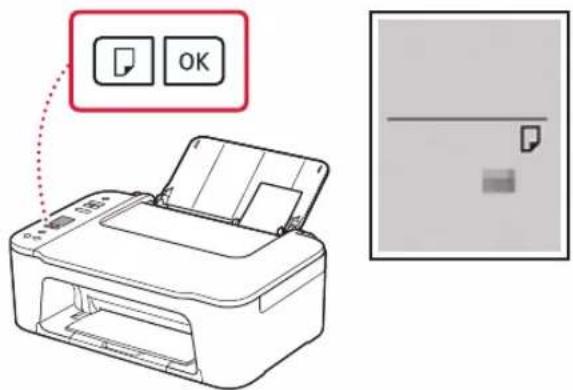
text_image
Diagram showing printer operation with OK button and file icon, alongside a blank document previewnatural_image
Diagram showing two steps of a printer or printer device with red arrows indicating motion, no text or symbols present.natural_image
Line drawing of a rectangular container with side handles (no text or symbols)Če rezultati tiskanja niso zadovoljivi
Če so ravne črte natisnjene ukrivljeno, barve neskladne ali so rezultati tiskanja kako drugače nepričakovani, opravite postopek Poravnava tiskalne glave (Print Head Alignment).
https://ij.start.canon/E3440
natural_image
Diagram of a printer with red arrows indicating compression or disassembly process (no text or symbols)natural_image
Diagram of a device interior with a red arrow indicating flow or movement, showing internal structure without any text or symbols.natural_image
Diagram of a printer with internal structure and red arrow indicating a component (no text or symbols)3. Pornirea imprimantei

text_image
Diagram showing a printer with a power button and a 0-segment display, likely illustrating a digital control or status.Important
natural_image
Diagram showing a mechanical component before and after assembly, with a red arrow indicating a downward motion (no text or symbols present)text_image
① Color ②Important
natural_image
Diagram of a mechanical component with a red arrow pointing to a specific part (no text or symbols present)Important
text_image
Diagram showing a hand pressing a component with a red arrow indicating direction, alongside a close-up of the component's internal structure.natural_image
Cross-sectional diagram of a mechanical component with layered sections (no text or symbols)natural_image
Line drawing of a printer with internal structure and a red arrow indicating a component (no text or symbols)natural_image
Illustration of a printer with an open lid and red arrow indicating rotation (no text or symbols)natural_image
Mechanical assembly diagram showing a component with a red arrow indicating direction, alongside a magnified inset of a mechanical assembly (no text or symbols)text_image
Diagram showing two labeled components (① and ②) with arrows indicating movement, alongside a prohibition symbol.text_image
Diagram showing printer operation with 'OK' button and file icon, alongside a blank image panelnatural_image
Diagram showing two steps of a printer or printer attachment process, with no visible text or symbols.natural_image
Line drawing of a rectangular container with side handles (no text or symbols)https://ij.start.canon/E3440
natural_image
Diagram of a printer with internal structure and red arrows indicating motion (no text or symbols)natural_image
Diagram of a printer or printer casing with internal structure and red arrow indicating flow direction (no text or symbols)3 Затворете капака.
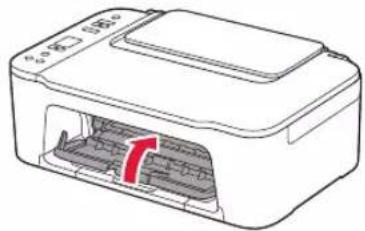
natural_image
Diagram of a printer with internal structure and paperclip, showing no text or symbolstext_image
Diagram showing a printer with a power button and a digital display showing 0
natural_image
Diagram showing a mechanical component before and after disassembly, with no visible text or symbols.text_image
① Color ②Важно
natural_image
Diagram of a mechanical component with a red arrow indicating direction (no text or symbols present)Важно
text_image
Diagram showing a hand pressing a component with a red arrow indicating direction, alongside a close-up of the component's internal structure.natural_image
Technical line drawing of a mechanical component with no visible text or symbols7 Затворете капака.
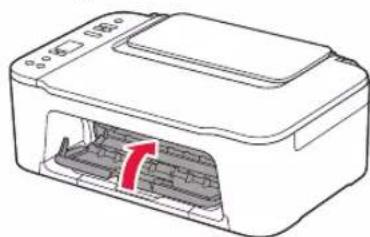
natural_image
Line drawing of a printer with internal structure and red arrow indicating rotation (no text or symbols)natural_image
Diagram of a printer with an open lid and red arrow indicating rotation (no text or symbols)natural_image
Technical diagram of a mechanical assembly with a red arrow indicating a specific component (no text or symbols present)text_image
Diagram showing a device with labeled components and a prohibition sign, indicating no restrictions on the device.text_image
Diagram showing a printer with two icons labeled 'OK' and a blank page with a horizontal line, alongside a separate image of a printer.natural_image
Diagram showing two views of a printer's internal structure before and after assembly, with no visible text or symbols.natural_image
Line drawing of a rectangular container with side handles (no text or symbols)https://ij.start.canon/E3440
natural_image
Diagram of a printer with red arrows indicating process flow (no text or symbols)natural_image
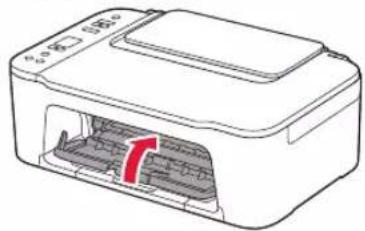
Diagram of a printer with internal structure and red arrow indicating motion (no text or symbols)3 Kapağı kapatın.
natural_image
Diagram of a printer with internal structure and paperclip, showing no text or symbols3. Yazıcıyı Açma

natural_image
Diagram of a device with cable and connector, showing connection to a power outlet (no text or symbols)text_image
Diagram showing a printer with a power button and a 0-segment display, likely illustrating a digital control or status.Önemli
natural_image
Diagram showing two mechanical component cross-sections with a red arrow indicating a downward motion (no text or symbols present)text_image
① Color ②Önemli
natural_image
Diagram of a mechanical component with a red arrow indicating direction (no text or symbols present)
Önemli
text_image
Diagram showing a hand pressing a component with a red arrow indicating direction, alongside a close-up of the component's internal structure.natural_image
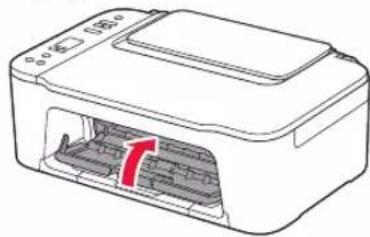
Technical line drawing of a mechanical component with three stacked parts (no text or symbols)7 Kapağı kapatın.
natural_image
Line drawing of a printer with internal structure and red arrow indicating rotation (no text or symbols)natural_image
Diagram of a printer with an open lid and red arrow indicating rotation (no text or symbols)natural_image
Mechanical assembly diagram showing a component being inserted into a housing, with an inset close-up highlighting the detail (no text or symbols present)text_image
Diagram showing a device with labeled components and a prohibition symbol indicating no restrictions.text_image
Diagram showing a printer with two icons labeled 'OK' and a blank page with a horizontal line, alongside a separate image of a printer.natural_image
Two-step diagram showing a printer's internal structure before and after assembly, with no visible text or symbols.natural_image
Line drawing of a rectangular container with side handles (no text or symbols)https://ij.start.canon/E3440
natural_image
Diagram of a printer with red arrows indicating process flow (no text or symbols)natural_image
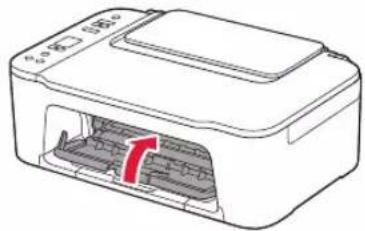
Diagram of a printer internal structure with red arrows indicating flow direction (no text or symbols)3 Zatvorite poklopac.
natural_image
Diagram of a printer with internal structure and red arrow indicating rotation (no text or symbols)text_image
Diagram showing a printer with a power button and a digital display showing 0
natural_image
Diagram showing a mechanical component before and after disassembly, with no visible text or symbolstext_image
① Color ②Važno
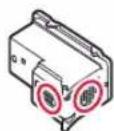
- Ne dirajte boju na zaštitnoj traci. Može vam zaprljati ruke ili druge predmete koji se nalaze u blizini.
- Ne dirajte područja prikazana na slici. Inače pisač možda neće ispravo ispisivati.
4 Umetnite uložak FINE u boji u držač uloška FINE.
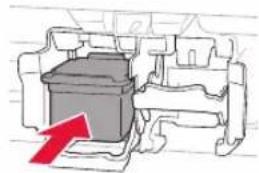
natural_image
Diagram of a mechanical component with a red arrow indicating direction (no text or symbols present)Važno
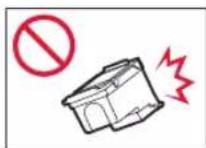
Nemojte udarati uložak FINE. To može uzrokovati kvar.
5 Podignite ručicu za zaključavanje uloška tinte.
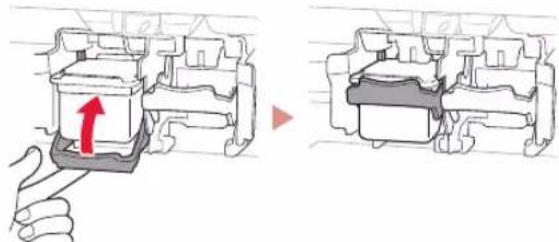
text_image
Diagram showing a hand pressing a component with a red arrow indicating the direction, alongside a close-up of the component's internal structure.6 Ponovite korake od 2 do 5 i umetnite crni uložak FINE s desne strane.
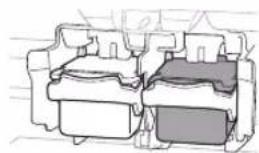
natural_image
Cross-sectional diagram of a mechanical component with layered sections (no text or symbols)7 Zatvorite poklopac.
natural_image
Line drawing of a printer with internal circuitry and a red arrow indicating a component (no text or symbols)natural_image
Illustration of a printer with a red arrow indicating the paper's edge, showing no text or symbols on the device itself.2 Povucite vodilicu papira ulijevo.
natural_image
Mechanical assembly diagram showing a component being inserted into a housing, with a red arrow indicating the direction of movement (no text or symbols present)3 Nekoliko listova papira postavite uz desni rub tako da im strana za ispis bude okrenuta prema gore, a vodilicu papira poravnajte sa širinom papira.
text_image
Diagram showing a device with two labeled arrows and a prohibition symbol, indicating no movement or restriction.4 Pritisnite gumb Odabir papira (Paper Select), odaberite veličinu papira i zatim pritisnite gumb U redu (OK).
text_image
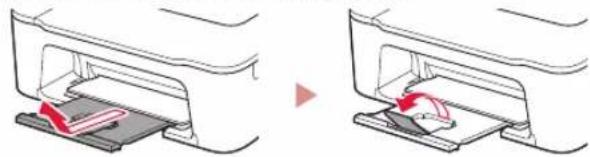
Diagram showing printer operation with OK button and blank sheet, alongside a separate image of a printer's paper sheet.5 Izvucite ladicu za izlaz papira i otvorite produžetak ladice za izlaz papira.
natural_image
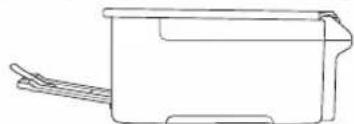
Two-step diagram showing a printer's internal structure before and after assembly, with no visible text or symbols.- Pogledajte s bočne strane izgleda li kao slika.
natural_image
Line drawing of a rectangular container with a side handle and top rim (no text or symbols)Ako rezultati ispisa nisu zadovoljavajući
• Windows is a trademark or registered trademark of Microsoft Corporation in the U.S. and/or other countries.
- App Store is a trademark of Apple Inc., registered in the U.S. and other countries.
• Google Play is a registered trademark of Google LLC.