
MusicFly Blue - Bluetooth Receiver dnt - Free user manual and instructions
Find the device manual for free MusicFly Blue dnt in PDF.
| Product Type | Bluetooth Car Receiver |
| Brand | dnt |
| Model | MusicFly Blue |
| Dimensions | 94 x 47 x 65 mm |
| Weight | 65 g |
| Power Supply | 12 V (cigarette lighter socket) |
| Bluetooth Version | v2.0 Class II with A2DP |
| FM Frequencies | 87.6 – 107.0 MHz |
| Transmission Power | 50 nW |
| USB Port | 5 V, 200 mA, up to 32 GB (FAT32) |
| Supported Audio Formats | MP3, WMA (except DRM) |
| SD Card Playback | Yes (SD slot) |
| Remote Control | Included |
| Hands-free Function | Yes (external microphone included) |
| RDS Display | Yes (title and artist if compatible) |
| Folder Management | Up to 10 subfolders, 50 files per folder |
| Cleaning | Soft dry cloth |
| Safety Instructions | Do not expose to humidity, heat >60°C, or drop |
| Warranty | In accordance with legal provisions, repair or replacement |
| Recycling | Do not dispose of with household waste (WEEE) |
Frequently Asked Questions - MusicFly Blue dnt
User questions about MusicFly Blue dnt
0 question about this device. Answer the ones you know or ask your own.
Ask a new question about this device
Download the instructions for your Bluetooth Receiver in PDF format for free! Find your manual MusicFly Blue - dnt and take your electronic device back in hand. On this page are published all the documents necessary for the use of your device. MusicFly Blue by dnt.
USER MANUAL MusicFly Blue dnt
Declaration of Conformity

text_image
IS FN N S EST LT GB NL B D PL F CH A BIH MK I P E GRHereby, dnt GmbH, declares that this MusicFly Blue is in compliance with the essential requirements and other relevant provisions of Directive 1999/5/EC.
Declaration of Conformity
Por medio de la presente dnt GmbH declara que el MusicFly Blue cumple con los requisitos esenciales y cualesquiera otras disposiciones aplicables o exigibles de la Directiva 1999/5/CE.
Hierbij verklaart dnt GmbH dat het toestel MusicFly Blue in overeenstemming is met de essentiële eisen en de andere relevante bepalingen van richtlijn 1999/5/EG.
Härmed intygar dnt GmbH att denna MusicFly Blue står I överensstämmelse med de väsentliga egenskapskrav och övriga relevanta bestämmelser som framgår av direktiv 1999/5/EG.
Undertegnede dnt GmbH erklærer herved, at følgende udstyr MusicFly Blue overholder de væsentlige krav og øvrige relevante krav i direktiv 1999/5/EF.
Niniejszym dnt GmbH oświadcza, że MusicFly Blue jest zgodne z zasadniczymi wymaganiami oraz innymi stosownymi postanowieniami Dyrektywy 1999/5/WE
Käesolevaga kinnitab dnt GmbH seadme MusicFly Blue vastavust direktiivi 1999/5/EÜ põhinõuetele ja nimetatud direktiivist tulenevatele teistele asjakohastele sätetele.
Šiuo dnt GmbH deklaruoja, kad šis MusicFly Blue atitinka esminius reikalavimus ir kitas 1999/5/EB Direktyvos nuostatas.
dnt GmbH declara que este MusicFly Blue está conforme com os requisitos essenciais e outras disposições da Directiva 1999/5/CE.
dnt GmbH vakuuttaa täten että MusicFly Blue tyyppinen laite on direktiivin 1999/5/EY oleellisten vaatimusten ja sitä koskevien direktiivin muiden ehtojen mukainen.
Hér með lýsir dnt GmbH yfir pví að MusicFly Blue er í samræmi við grunnkröfur og aðrar kröfur, sem gerðar eru í tilskipun 1999/5/EC.
dnt GmbH erklærer herved at utstyret MusicFly Blue er i samsvar med de grunnleggende krav og øvrige relevante krav i direktiv 1999/5/EF.
Makes your music fly by wireless transmission to your car radio. It allows to enjoy the music of portable audio devices via car audio system without the need for earphones or headsets.
dnt
Contents
Preface 21
Security instructions 22
Appliance description 24
Bluetooth characteristics and
Getting started 25
Operation....28
Remote control 31
FAQs....32
Service information.... 34
Specifications 34
Disposal of old electronic equipment 34
Declaration of conformity 19
Warranty regulations 67
Security Instructions

Please read this information carefully before you use the appliance for the first time.
General instructions
- Never place the appliance on an uneven surface. People may be injured if it falls down.
- Keep the appliance out of the reach of small children.
- If you connect the appliance to other electronic equipment, read the safety information and the owner's guides for this equipment as well.
- If you have any questions regarding the appliance, how it works, safety or correct connections, please contact our technical support service or ask any specialist.
- The seller does not assume liability for damage caused when the appliance is used or for claims by third parties.
- Never apply external voltage to the appliance unless this is provided directly for operations and is necessary.
Environmental conditions
- Keep the appliance away from heavy mechanical loads. Protect it from vibrations and severe impacts, and do not drop or shake it.
- Do not expose the appliance to high temperatures (above 60°C) and severe temperature fl ectuations. Protect it from direct sunlight and keep it away from sources of heat.
- Protect the appliance from damp.
- Do not use the appliance in dusty places and protect it from dust.
- Parts of the appliance or accessories may contain so-called softeners, which may damage sensitive furniture and plastic surfaces. Avoid direct contact with sensitive surfaces.
Technical problems
- In case any foreign material or liquid gets into the product, please immediately remove it from the car cigarette lighter power adaptor. Before you use it again, ask your authorised dealer to check the product carefully.
Security Instructions
- Please do not hesitate to contact our service center.
Packaging material
- Please don't keep any packaging material within reach of small children. It can become a dangerous toy.
Cleaning and maintenance
- For cleaning use dry and soft cloth.

This product can be used only with 12V cigarette lighter jack power.
Delivery content
MusicFly Blue / stereo cable / jack adaptor/ additional fuse / user manual
Description & Functions
Appliance description
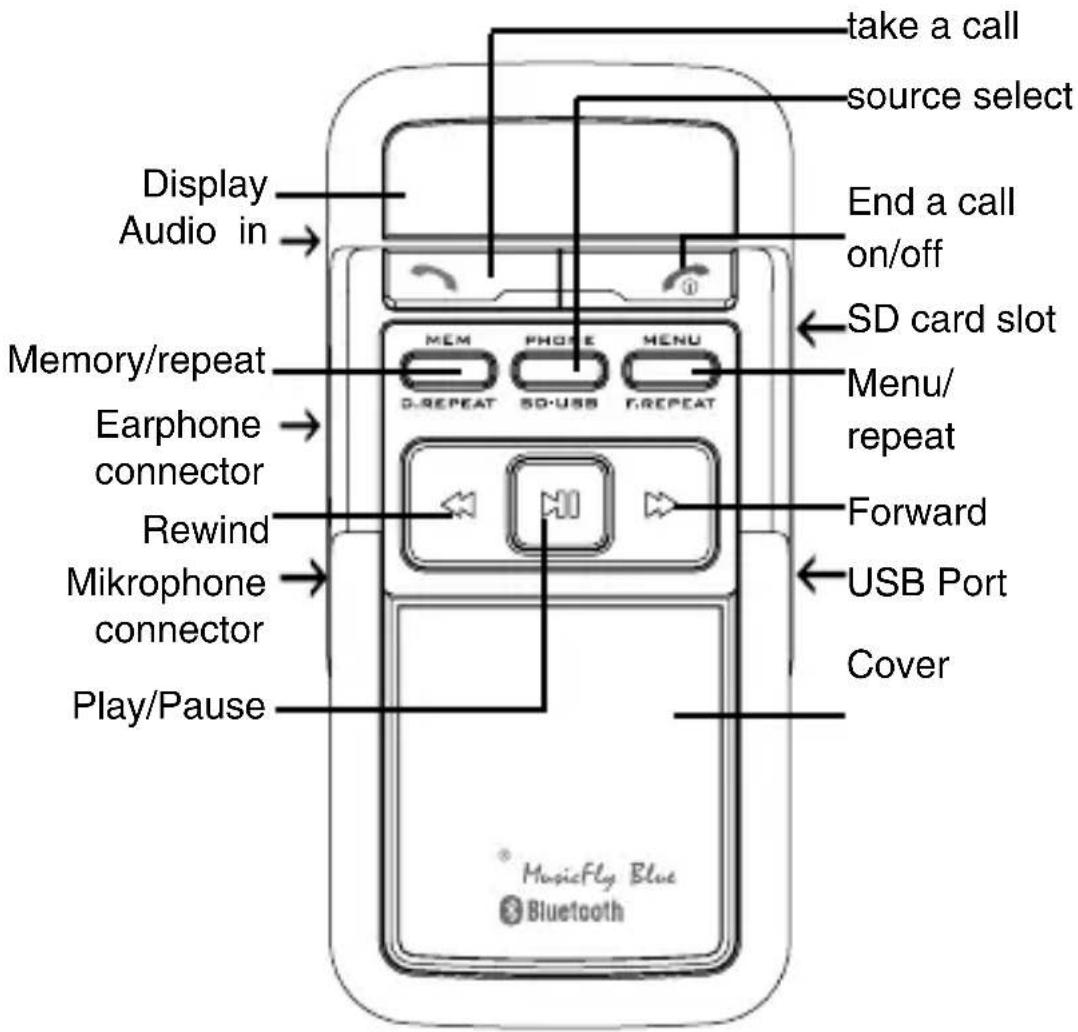
text_image
take a call source select Display Audio in End a call on/off Memory/repeat Earphone connector Rewind Mikrophone connector Play/Pause SD card slot Menu/ repeat Forward USB Port Cover MusicFly Blue BluetoothGetting started
Place the MusicFly Blue into the 12V cigarette lighter socket. Adjust the device, that it can be operated comfortably. The display appears immediately. The equipment is ready for use. The MusicFly Blue checks, if it was already a link with a mobil phone and tries to establish a connection.

Then it checks whether a device is attached to the USB port or a SD card is in the card slot and starts to playback the music.
Switch on from standby mode
Press and hold the - button for 2 seconds to turn the unit on. The display first indicates on. After that it checks whether it is already paired with the mobilphone und establishes a connection.
on
bto
During this procedure the display indicates bto The previous display settings appear. The MusicFly Blue checks whether a device is attached to the USB port or a SD card is in the card slot and starts to playback the music.
Switch off
The unit switches off automatically after 60 minutes when no music is played. Alternatively the unit can be switched off with the button
Standby Mode
If no audio device is connected to the USB port, SD card slot or audio in or the device is in PAUSE mode, the device turns off after 1 Minute. A noise is heard in the radio. If the audio device is connected to the MusicFly Blue in the next 60 Minutes, the device turns itself on automatically, otherwise turn the device on with the button.

If the menu for the settings is active, then a LED below the MENU/F.REPEAT button appears.
Pairing

Refer to the specific instructions supplied with your phone for details on pairing Bluetooth devices.
To use the MusicFly Blue with a mobil phone both devices have to make a pairing. Turn the Bluetooth in your mobil phone on. After that initiate a search for new Bluetooth devices.
PRO
bto
Press the 📁 button for 2 seconds to enter pairing mode. The display shows PAo. When devices are linked the display shows bto. Look to the messages in the display of your mobil phone. The MusicFly Blue will be indicated as MusicFly Blue in your mobil phones display. If the phone requests for a passkey enter „0000“ or „8888“. Thus the pairing is successfully fi nished. To cancel the paring press
Getting started
the button.

Now you should mount the microphone delivered with the product onto a suitable place. From now on all telephone calls are led to the MusicFly Blue.
Delete the pairing with the mobil phone
Press the button for 2 seconds to enter pairing mode. The display shows bto.
Take a call
During an incoming call the music playback is paused. The display shows Ino and the phone number of the incoming call. The display of the car radio shows REC CALL and then the number of the incoming call. Press briefly the button.
During the call the display shows Ono. If the call is finished the device starts playback at the position where it was paused.
Make a call
Dial the desired telephone number at your mobil phone. The display of the MusicFly Blue shows bto. The microphone should have been connected. During the call the display shows Ono. To refuse the call press briefly the button.
Audio pass route function
During the telephone call you can switch between the external audio device (MusicFly Blue) and the internal speaker/microphone of the mobil phone.
Press briefly the button. Press button again to activate the external audio device.
Redial

- Press briefly the button to redial the recently dialed telefon number. The display shows CAo.
Buttons

Buttons are both blinking: The device tries to link to the last connected device.
Getting started

Buttons are illuminated: The device is paired with a mobil phone.

Buttons are not illuminate: Bluetooth is not activated.

To continue operation, slide the cover downwards.
Additional Bluetooth settings
Automatic pairing
- Press 5 times briefly the MENU/F.REPEAT button
Rto
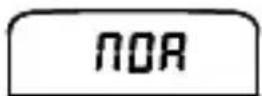
- Select Ato or NOR with the ▶/◀◀buttons.
NOR
● Ato: The MusicFly tries to link to the last connected device.
- NOR: The MusicFly doesn't establish a link.

If the menu for the settings is active, then a LED below the MENU/F.REPEAT button appears.
Setup frequency
- Press the MENU/F.REPEAT-button.
- Adjust the frequency with the ▶/◀◀ -buttons.
- Press the MENU/F.REPEAT-button once again.
Source select
- Press repeatedly the PHONE/SD-USB button.
5d
SD card
USb
USB host connector
Sto
MP3 from mobil phone
Playback
PLY
- Press the ▶button for playback or pause.
三P三
Operation


- Press briefly the ▶/◀buttons, to select the next or previous track.
- Press and hold the ▶/◀ button to select the next/previous folder.
● After the playback is started, the display shows the remaining playback time or the frequency depending on the display mode.
Volume

This function is available, if an audio device is connected to the usb port or a SD card is in the slot.
- Press the MENU/F.REPEAT-button briefly twice.
- The display shows a bar with the current volume setting.
- Adjust the required volume with the ▶ button.
RDS display mode

This function is available, if an audio device is connected to the usb port or a SD card is in the slot.
- Press the MENU/F.REPEAT-button briefly 3 times.
- Select the RDS display mode:
● The display of the car radio shows 8 characters in the user selected time.

● The RDS information scrolls through the display every second.
- Press the MENU/REPEAT button once again
RDS Interval

This function is available, if an audio device is connected to the usb port or a SD card is in the slot.
- Press the MENU/F.REPEAT-button briefl y 4 times.
E04
- Adjust the display intervall time with the ▶/◀buttons (2-6 seconds).
- Press the MENU/F.REPEAT button once again.
Display mode

This function is available, if an audio device is connected to the usb port or a SD card is in the slot.
- Press and hold ▶ button during playback for 2 seconds to switch the display mode.
96.0
...
358
no.0
:Frequency
:Audio
level
:remai
ning
Repeat

This function is available, if an audio device is connected to the usb port or a SD card is in the slot.
The MusicFly Blue has a repeat function. If the repeat function is on, the tracks are played repeatedly.
- Press the MENU/F.REPEAT-button during playback for 2 seconds.
• The display shows in order:
FRP
NOR
repeat the current track
normal
- Press the MEM/D.REPEAT-button during playback for 2 seconds.
● The display shows in order:
dRP
NOR
repeat the current folder
normal
Storing frequencies
- Select the desired frequency
Operation
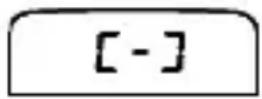
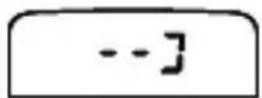
- Press briefly the MEM SD-USB-button. The display shows [-].
- Select a memory (1-7) with the ▶▶buttons
- Press the MENU/REPEAT button once again.
Select memory
- Press repeatedly the MEM SD-USB-button until the desired frequency appears in the display.
- With every keystroke on the MEM SD-USB-button the next memory is selected.
Adjust audio input level (Audio in)
In order to have the best signal quality, it is necessary to adjust the volume of the connected audio device. Follow the below guideline:
Start playback of the audio device. Adjust the volume to a low level. Now increase the level until the noise disappears. Keep the level in mind. Increase the level until a distortion is heard in the radio. Keep also this level in mind. Now adjust the volume level to the middle of these 2 values, which you have determined.
Folders and Files

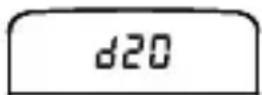
The device can manage up to 1999 fi les. You can create folders in the main directory to manage fi les easier. The folders will be played in the same order as they are copied onto the memory device. The MusicFly Select fi nds up to 20 folders. These folders are shown briefl y in the display as d1-d20. If no folder is selected the tracks are played in order.
Feature of supporting fi le index
MusicFly Select has a fi le index feature, that lets you set the play list as you want. If you use a 3-digit number at the head of fi le names of each folder, MusicFly Select plays the fi les in
Remote Control
order. If there are fi les with given numbers and fi les without numbers in one folder, MusicFly Select plays the fi les that have numbers fi rst and then plays the other fi les.
Remote Control
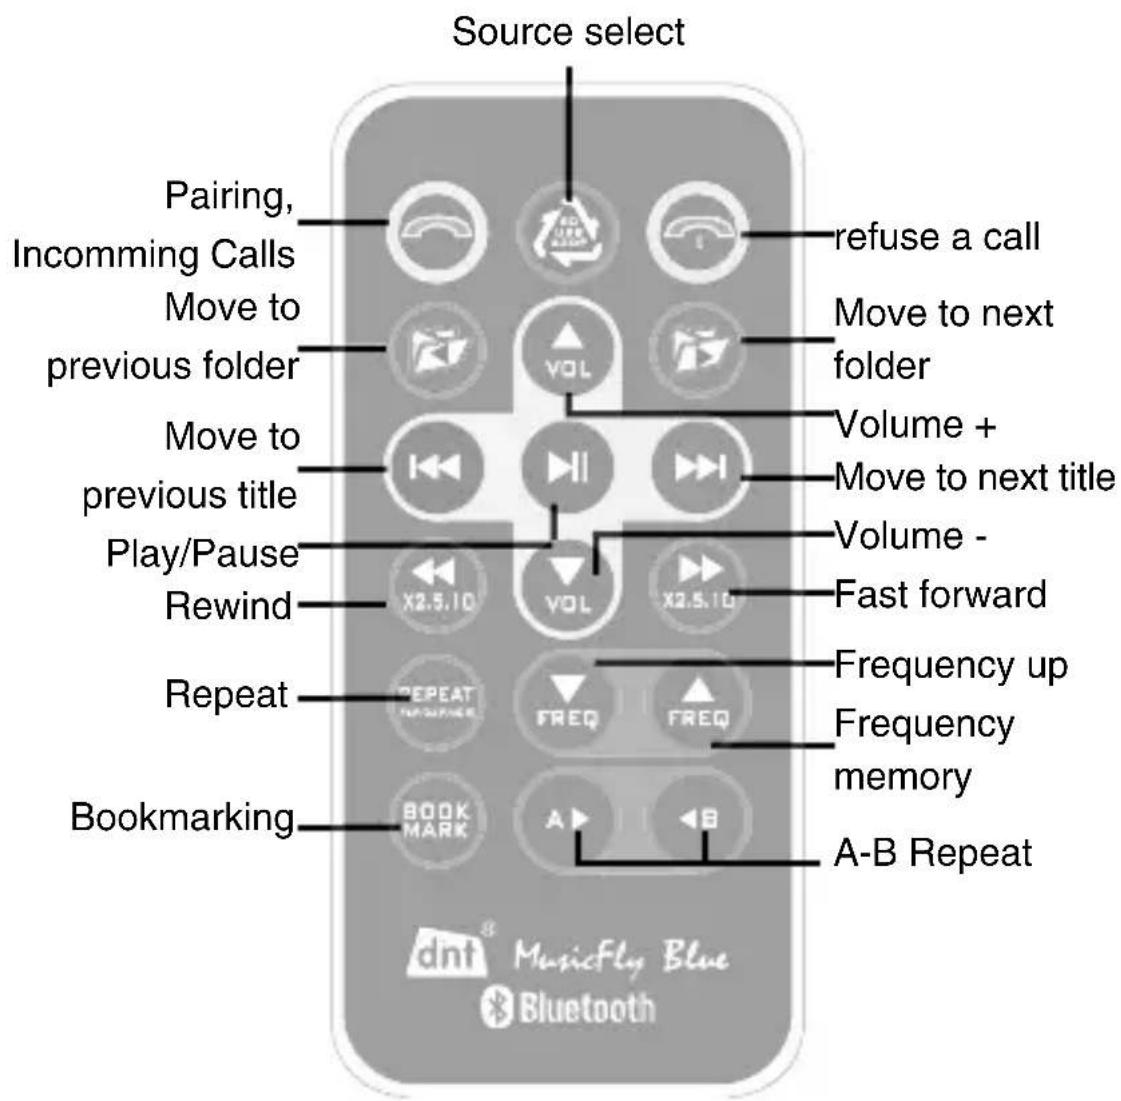
text_image
Source select Pairing, Incoming Calls Move to previous folder Move to previous title Play/Pause Rewind Repeat Bookmarking refuse a call Move to next folder Volume + Move to next title Volume - Fast forward Frequency up Frequency memory A-B Repeat BOOK MARK A B dnt MusicFly Blue BluetoothPlease use the remote control after having removed the protection sticker.
Pairing, answer the phone, redialing

end a call, stop MP3 playback from mobile phone

Press the button and choose the mode between mobile phone, SD card & USB mode.
Repeat Press REPEAT button, the song you are listening to is played repeatedly. Press repeat button again to stop
Remote Control
the repeat function.


less the buttons to move to previous folder, first song of the folder is played.

button to move to next song.

buttons fastforward or rewind 2x, 5x, 10x.
Less the buttons to adjust the frequency in 0,1 MHz intervals. Hold the buttons longer than 2 seconds, the frequency is adjusted in 1 MHz intervals.

Selective replay of a part of a track. Press button to mark the starting. The playback of the song continues. Press ◀ to mark the ending. To cancel press ◀ once again.

You can use this feature in case the playing time is long such as lecture fi le & language fi le. Before you shut the device off, press BOOK MAX button to store the point of time. When you turn the device on again, the device plays from the point you memorized.
Setup MusicFly Blue
Place the MusicFly Blue nearby the radio or the antenna.

The quality of the reception in the car can differ. It can be necessary to test different places in the car to get the best result.
The best reception is obtained in the car if the MusicFly operates with the enclosed cigarette lighter adaptor.

Since the radio stations differ regionally, the frequency details are an example.
FM radio with auto-scan:
Select a frequency that is not being used for broadcasting purposes.
- Select a readiostation in the car radio p.e. 93,6 MHz
- Remember the adjusted frequency and then start the scan-
ning.
- When the scan stops p.e. 94,4 MHz, read the frequency in the display of the car radio.
- Turn the MusicFly Blue on and adjust a frequency between the two values (p.e. 94,0 MHz).

The minimum distance to the next radio station is 0.2 MHz.
- Connect the MusicFly Blue to the audio unit.
- Turn on the audio unit and start playback.
- Start the scan once again and find the music of your audio unit.
FM radio with manual tuning:
Select a frequency that is not being used for broadcasting purposes. Turn the MusicFly Blue on and find the frequency adjusted in the FM radio.
- Connect the MusicFly to the audio unit.
- Turn on the audio unit and start playback.
FM without display or with scale
Find free frequency range where noise is heared.
- Connect the MusicFly Blue to the audio unit.
- Turn on the audio unit and start playback.
● Find your music with UP-/Down button.

The exact procedure can differ and depends on the FM radio.
Service information
Service information
In case of complaints your device shows a defect, please consult your dealer or contact the service department of dnt to agree a servicing.
Service time: Monday until Thursday from 8.00-17.00h
Friday from 8.00-16.00h
Hotline/service: +49 6074 3714 31
E-mail: support@dnt.de
Please do not send your device to our address without request by our service team. The expense and the risk of the loss are for debits of the sender. We reserve to refuse the unrequested shipment or return corresponding goods to the sender at buyer's risk and expense.
Specification
Bluetooth Standard v2.0 (Class II) with A2DP
Product Dimension 94 x 47 x 65mm
Weight of the product 65g
Frequency range 87.6 \~ 107.9MHz
Input Voltage 12V
Output power Conformity with FCC, CE, MIC
Modulation FM(F3E)
USB Rated output power 5V 200mA
Disposal of old electrical & electronic equipment
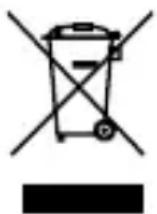
This symbol on the product indicates that this product shall not be treated as household waste. Instead it shall be handed over to the applicable collection point for recycling of electrical and electronic equipment. For more detailed information about recycling of this product, please contact your local city office or your household waste disposal service.
Warranty regulations
- In general the European warranty regulations are valid. Warranty starts with receipt of unit. In a warranty case, please submit the unit together with invoice, unit pass and error description. Without these documentary evidence we are not obliged to a warranty performance.
- During warranty period we repair all constructional or material defects which are caused by a manufacturing fault. It is in the decision of the manufacturer to change or replace defective parts/units. Further claims are excluded. Changed parts will automatically go over into our property. We will not be held responsible for future damages.
- Manipulation on the unit through non-authorized companies/persons automatically leads to an end of warranty period.
- Excluded of warranty claims are damages due to improper treatment, not following the manual, oxidation of batteries, permanent usage.
- The initial warranty period is not extended because of repair or replacement of parts.
- These warranty regulations are valid in the Federal Republik of Germany.
Application de la garantie
Email Support support@dnt.de
Serien Nr.
Serial no.
Kaufdatum:
Date of purchases