
LMS-1221SS - Built-in oven LG - Free user manual and instructions
Find the device manual for free LMS-1221SS LG in PDF.
| Product Type | Built-in Microwave Oven |
| Brand | LG |
| Model | LMS-1221SS |
| External Dimensions (W x H x D) | 20 1/8 in x 11 7/8 in x 15 5/8 in |
| Cavity Dimensions (W x H x D) | 14 5/16 in x 9 3/8 in x 14 15/16 in |
| Capacity | 1.2 cu.ft |
| Power Supply | 120 V AC, 60 Hz |
| Power Consumption | 1500 W |
| Output Power (Microwave) | 1100 W (IEC 60705) |
| Frequency | 2450 MHz |
| Main Functions | Auto Cooking (6 categories), Auto Defrost (3 categories), Ez Quick Defrost, Sensor Cooking (6 categories), Sensor Reheat (3 categories), Timer, Multi-stage Cooking, Child Lock |
| Control Panel | Touch with Digital Display |
| Supplied Accessories | Glass Turntable, Rotating Ring, User Manual |
| Power Levels | 10 levels (0-100%) |
| Timer Function | Up to 99 min 99 s |
| Safety System | Door Lock, Safety Interlock, Automatic Shut-off in case of Overheat |
| Maintenance and Cleaning | Clean with a soft cloth and mild detergent; turntable and ring are hand-washable |
| Spare Parts and Repairability | Call a qualified technician; turntable and ring are replaceable |
| Installation Location | Flat surface, free space of at least 4 in around for ventilation |
| General Information | Weight: approx. 15 kg; recommended circuit: 15-20 A dedicated |
Frequently Asked Questions - LMS-1221SS LG
User questions about LMS-1221SS LG
0 question about this device. Answer the ones you know or ask your own.
Ask a new question about this device
Download the instructions for your Built-in oven in PDF format for free! Find your manual LMS-1221SS - LG and take your electronic device back in hand. On this page are published all the documents necessary for the use of your device. LMS-1221SS by LG.
USER MANUAL LMS-1221SS LG
OWNER'S MANUAL & COOKING GUIDE
PLEASE READ THIS OWNER'S MANUAL THOROUGHLY BEFORE OPERATING.
LMS-1221SS
TABLE OF CONTENTS
SAFETY 3-4
Precautions to Avoid Possible Exposure
To Excessive Microwave Energy 3
Grounding Instructions 3
Important Safety Instructions 4
UNDERSTANDING YOUR
MICROWAVE OVEN 5-9
Specifications 5
Installation 5
Parts and Accessories 6
Control Panel 6
Cookware Guide 7
Tips for Microwave Cooking 8
Precautions 9
Cleaning 9
Using your microwave oven ....10-21
Setting the Clock 10
Custom Set 10
Child Lock 10
Timer 11
Ez On 11
Timed Cooking 11
Multi-Stage Cooking 12
Microwave Power Levels 12
Auto Defrost 13
Auto Defrost Table 13-14
Ez Defrost 14
Auto Cook 15
Auto Cook Chart 15
Sensor Touch Operation Instruction....16
Sensor Touch Table 17
Sensor Reheat 17
Sensor Reheat Table 17
Cooking Tips 18-19
HEATING OR REHEATING GUIDE ......20
FRESH VEGETABLE CHART 21
TROUBLESHOOTING 22-24
Questions and Answers 22-23
Before Calling for Service 24
SERVICE CENTERS LISTING 25-28
The serial number is found on the back of this unit. This number is unique to this unit and not available to others. You should record requested information here and retain this guide as a permanent record of your purchase.
Date of Purchase:
Dealer Purchase From:
Dealer Address:
Dealer Phone No.:
Model No.:
Serial No.:
Important Notes:
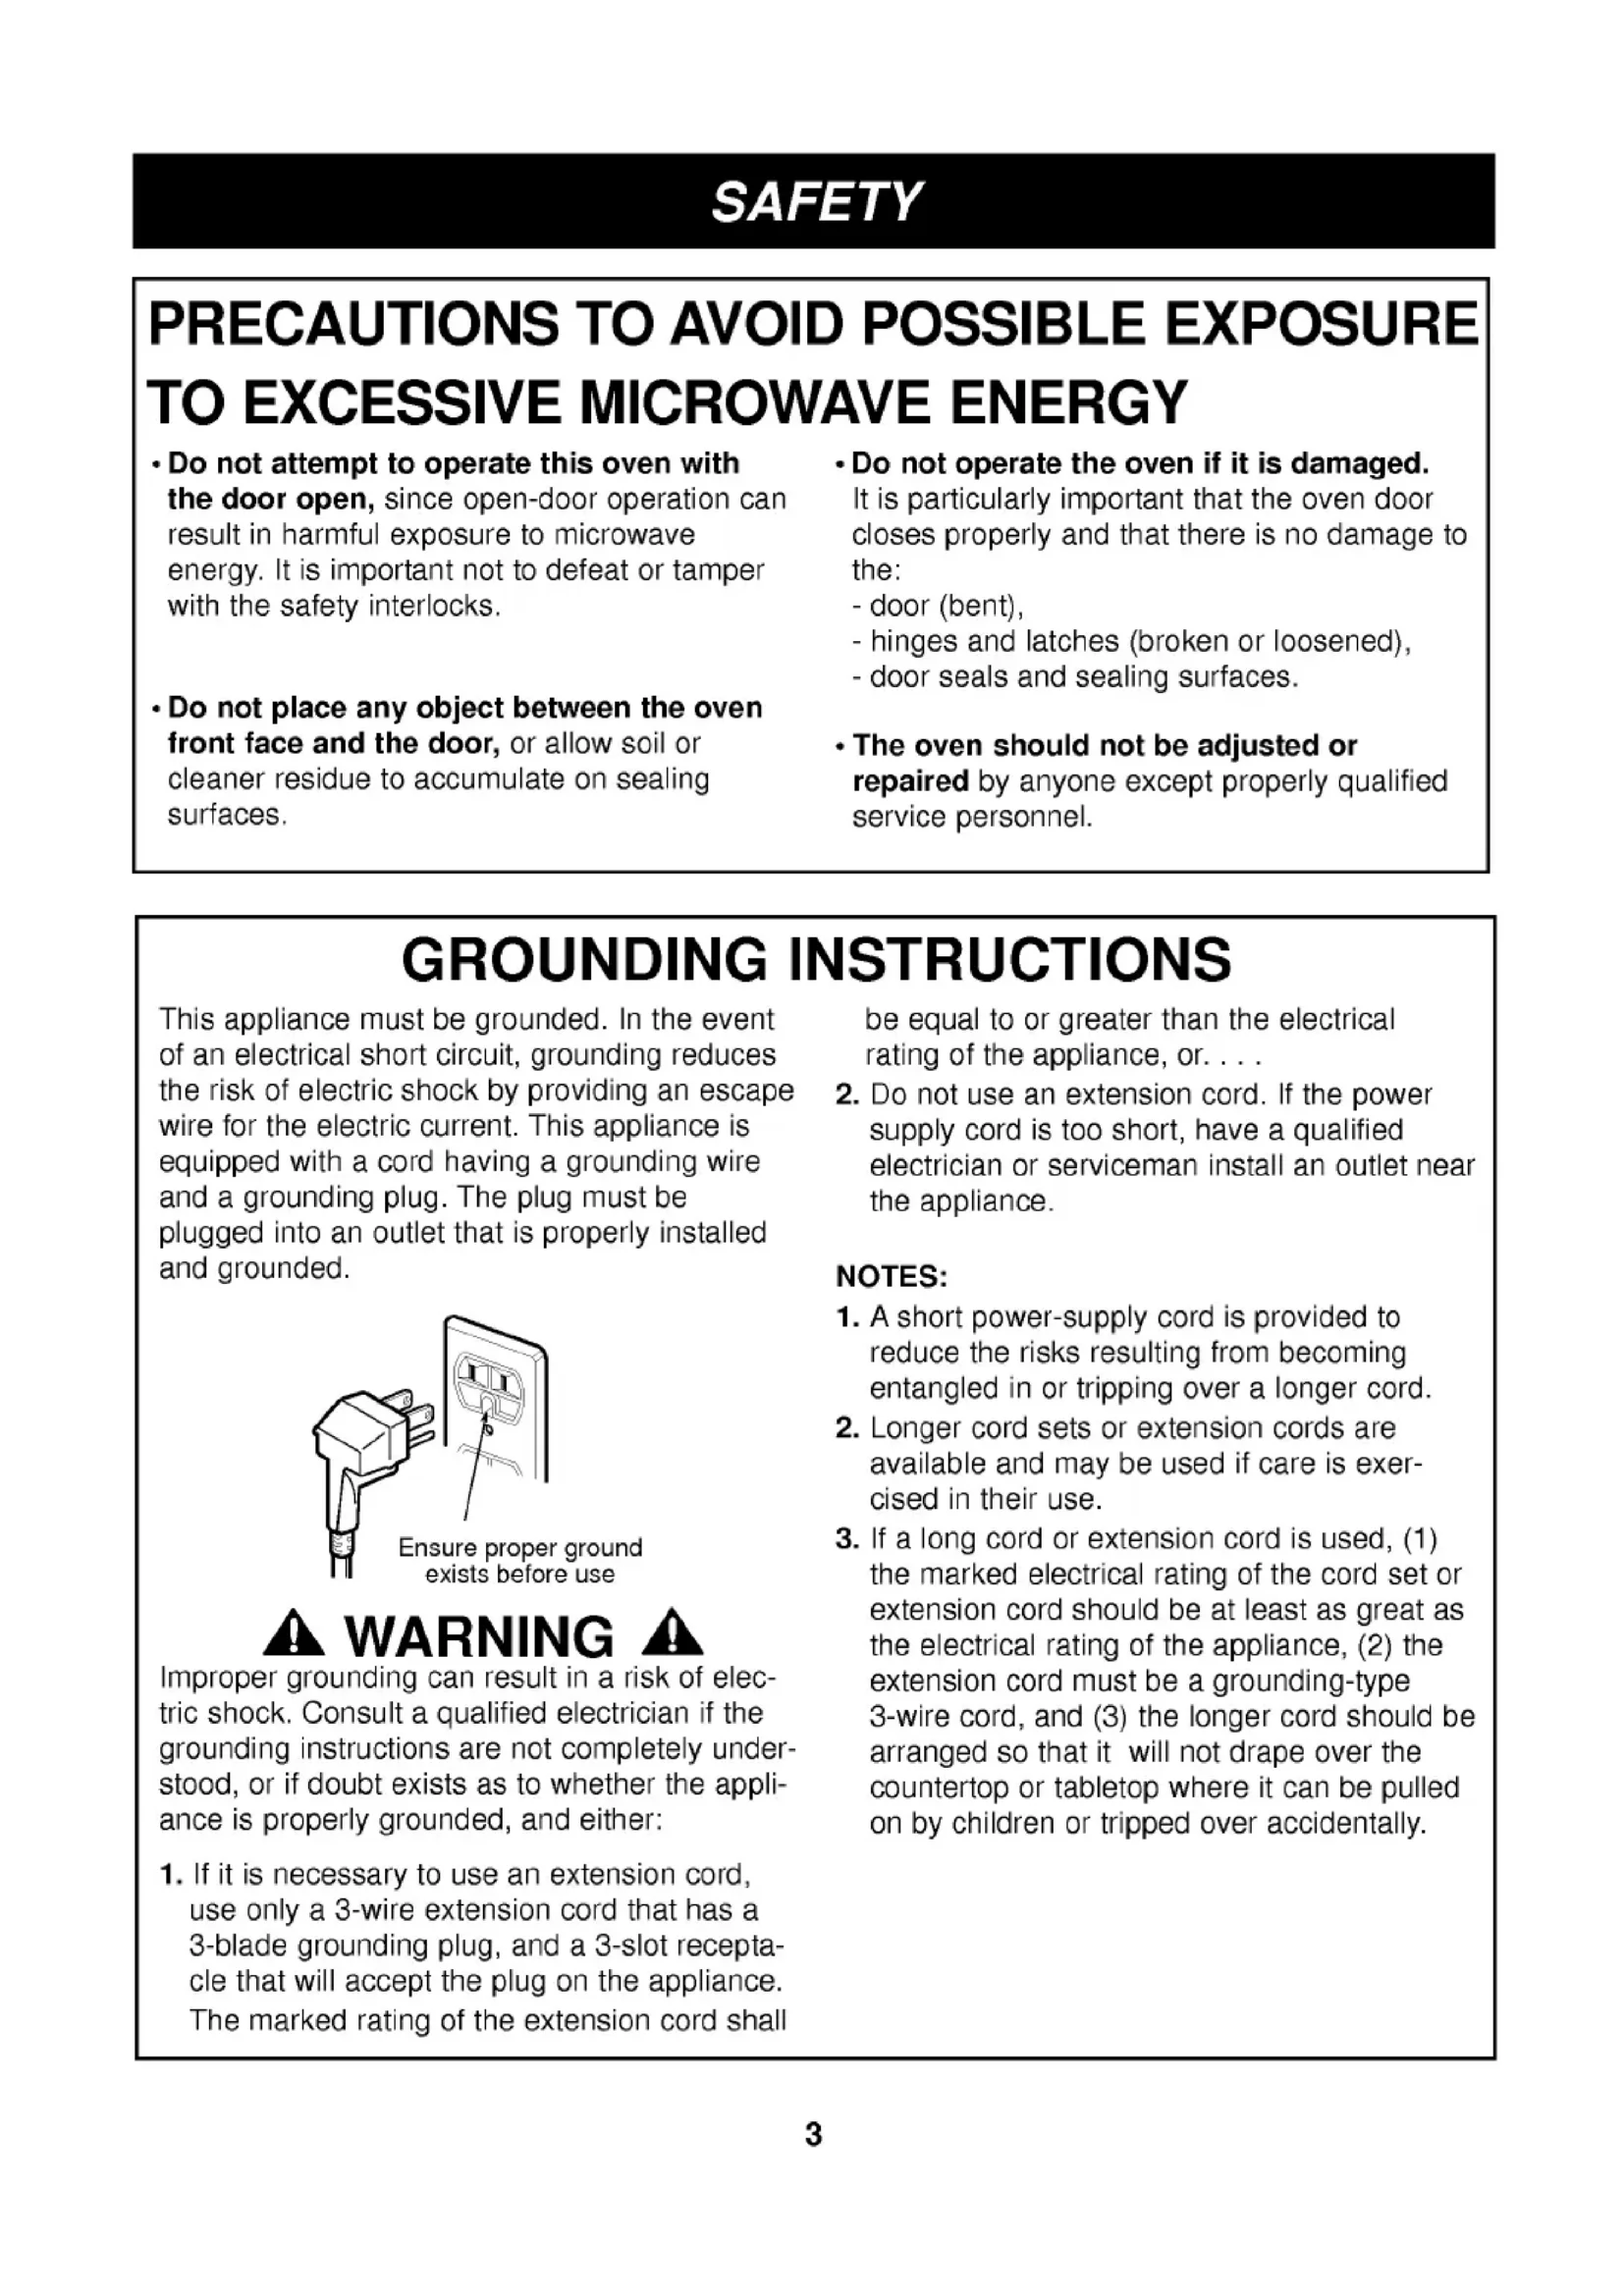
DO NOT remove wave guide cover inside the oven.
natural_image
Line drawing of a microwave oven with lid and vent (no text or symbols)The wave guide cover
TABLE DES MATIÈRES
SÉCURITÉ 3-4
natural_image
Line drawing of a microwave oven with open door and lid (no text or symbols)-
STOP/CLEAR
-
SENSOR REHEAT
-
3
- Do not attempt to operate this oven with the door open, since open-door operation can result in harmful exposure to microwave energy. It is important not to defeat or tamper with the safety interlocks.
- Do not place any object between the oven front face and the door, or allow soil or cleaner residue to accumulate on sealing surfaces.
- Do not operate the oven if it is damaged. It is particularly important that the oven door closes properly and that there is no damage to the:
- door (bent),
- hinges and latches (broken or loosened),
- door seals and sealing surfaces.
- The oven should not be adjusted or repaired by anyone except properly qualified service personnel.
GROUNDING INSTRUCTIONS
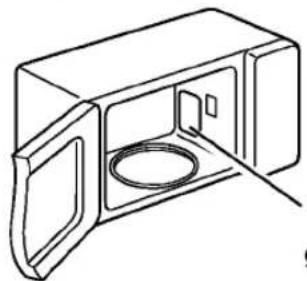
This appliance must be grounded. In the event of an electrical short circuit, grounding reduces the risk of electric shock by providing an escape wire for the electric current. This appliance is equipped with a cord having a grounding wire and a grounding plug. The plug must be plugged into an outlet that is properly installed and grounded.
WARNING
Improper grounding can result in a risk of electric shock. Consult a qualified electrician if the grounding instructions are not completely understood, or if doubt exists as to whether the appliance is properly grounded, and either:
- If it is necessary to use an extension cord, use only a 3-wire extension cord that has a 3-blade grounding plug, and a 3-slot receptacle that will accept the plug on the appliance. The marked rating of the extension cord shall
be equal to or greater than the electrical rating of the appliance, or....
- Do not use an extension cord. If the power supply cord is too short, have a qualified electrician or serviceman install an outlet near the appliance.
NOTES:
- A short power-supply cord is provided to reduce the risks resulting from becoming entangled in or tripping over a longer cord.
- Longer cord sets or extension cords are available and may be used if care is exercised in their use.
- If a long cord or extension cord is used, (1) the marked electrical rating of the cord set or extension cord should be at least as great as the electrical rating of the appliance, (2) the extension cord must be a grounding-type 3-wire cord, and (3) the longer cord should be arranged so that it will not drape over the countertop or tabletop where it can be pulled on by children or tripped over accidentally.
SAFETY
IMPORTANT SAFETY INSTRUCTIONS
The safety instructions below will tell you how to use your oven to avoid harm to yourself or damage to your oven.
WARNING
■ To reduce the risk of burns, electric shock, fire, injury to persons, or exposure to excessive microwave energy:
- Read all instructions before using the appliance.
- Read and follow the specific PRECAUTIONS TO AVOID POSSIBLE EXPOSURE TO EXCESSIVE MICROWAVE ENERGY found on page 3 of this manual.
- This appliance must be grounded. Connect only to properly grounded outlet. See GROUNDING INSTRUCTIONS found on page 3 of this manual.
- Install or locate this appliance only in accordance with the provided installation instructions.
- Some products, such as whole eggs and sealed containers – for example, closed glass jars – may explode and should not be heated in this oven.
- Use this appliance only for its intended use as described in the manual. Do not use corrosive chemicals or vapors in this appliance. This type of oven is specifically designed to heat, cook, or dry food. It is not designed for industrial or laboratory use.
- As with any appliance, close supervision is necessary when used by children.
- Do not operate this appliance if it has a damaged cord or plug, if it is not working properly, or if it has been damaged or dropped.
- This appliance should be serviced only by qualified service personnel. Contact the nearest authorized service facility for examination, repair, or adjustment.
- Do not cover or block any openings on the appliance.
- Do not store this appliance outdoors. Do not use this product near water – for example, near a kitchen sink, in a wet basement, or near a swimming pool, and the like.
- Do not immerse cord or plug in water.
- Keep cord away from heated surfaces.
- Do not let cord hang over the edge of a table or counter.
- When cleaning surfaces of door and oven that come together on closing the door, use only mild, nonabrasive soaps or detergents applied with a sponge or soft cloth.
- To reduce the risk of fire in the oven cavity:
a. Do not overcook food. Carefully attend appliance if paper, plastic, or other combustible materials are placed inside the oven to facilitate cooking.
b. Remove wire twist-ties from paper or plastic bags before placing bag in oven.
c. If materials inside the oven should ignite, KEEP OVEN DOOR CLOSED, turn oven off, and disconnect the power cord or shut off power at the fuse or circuit breaker panel.
d. Do not use the cavity for storage purposes. Do not leave paper products, cooking utensils, or food in the cavity when not in use. - Do not heat any type of baby bottles or baby food. Uneven heating may occur and could cause personal injury.
- Avoid heating small-necked containers such as syrup bottles.
- Avoid using corrosive and vapors, such as sulfide and chloride.
- Liquids heated in certain shaped containers (especially cylindrical-shaped containers) may become overheated. The liquid may splash out with a loud noise during or after heating or when adding ingredients (instant coffee, etc.), resulting in harm to the oven and possible injury. In all containers, for best results, stir the liquid several times before heating. Always stir liquid several times between reheatings.
SAVE THESE INSTRUCTIONS
| MODEL | LMS-1221SS |
| Power Supply | 120 V AC, 60 Hz |
| Rated Power Consumption | 1500 W |
| Microwave Output | *1100 W |
| Frequency | 2450 MHz |
| Overall Dimensions (WxHxD) | 20^1/8" × 11^7/8" × 15^5/8" |
| Oven Cavity Dimensions (WxHxD) | 14^5/16" × 9^3/8" × 14^15/16" |
| Capacity of Oven Cavity | 1.2 Cu.ft. |
*IEC 60705 RATING STANDARD
Specifications subject to change without prior notice.
INSTALLATION
A. Circuits
For safety purposes this oven must be plugged into a 15 or 20 Amp circuit. No other electrical appliances or lighting circuits should be on this line. If in doubt, consult a licensed electrician.
B. Voltage Warning
The voltage used at the wall receptacle must be the same as specified on the oven name plate located on the back or on the side of the control panel of the oven. Use of a higher voltage is dangerous and may result in a fire or other type of accident causing oven damage. Low voltage will cause slow cooking. In case your microwave oven does not perform normally in spite of proper voltage, remove and reinsert the plug.
C. Placement of the Oven
Your microwave oven can be placed easily in your kitchen, family room, or anywhere else in your home. Place the oven on a flat surface such as a kitchen countertop or a specially designed microwave oven cart. Do not place oven above a gas or electric range. Free air flow around the oven is important. Allow at least 4 inches of space at the top, sides, and back of the oven for proper ventilation.
D. Do not block the air vents
All air vents should be kept clear during cooking. If air vents are covered during oven operation the oven may overheat. In this case, a sensitive thermal safety device automatically turns the oven off. The oven will be inoperable until it has cooled sufficiently.
E. Radio interference
- Microwave oven operation may interfere with TV or radio reception.
- When there is interference, it may be reduced or eliminated by taking the following measures:
a. Clean the door and the sealing surfaces of the oven.
b. Reorient the receiving antenna of radio or television.
c. Relocate the microwave oven in relation to the TV or radio.
d. Move the microwave oven away from the receiver.
e. Plug the microwave oven into a different outlet so that microwave oven and receiver are on different branch circuits.
PARTS AND ACCESSORIES
Your oven comes with the following accessories:
1 Use and Care Manual
1 Glass Turntable
1 Rotating Ring

NOTE: This microwave oven is designed for household use only. It is not recommended for commercial use.
CONTROL PANEL

NOTE: A beep sounds when a pad on the control panel is touched, to indicate setting has been entered.
Most heat-resistant, non-metallic cookware is safe for use in your microwave oven. However, to test cookware before using, follow these steps:
- Place the empty cookware in the microwave oven.
- Measure 1 cup of water in a glass measuring cup and place it in the oven beside the cookware.
- Microwave on 100% power for 1 minute. If the dish is warm, it should not be used for microwave cooking.
| USE | DO NOT USE |
| Ovenproof GlassGlass treated for use in high-intensity heat includes utility dishes, bread dishes, pie plates, cake plates, liquid measuring cups, casseroles, and bowls without metallic trim. | Metal UtensilMetal shields food from microwave energy and produces uneven cooking. Avoid metal skewers, thermometers, or foil trays.Metal utensils can cause arcing, which is a discharge of electric current. Arcing can damage your microwave oven. |
| ChinaBowls, cups, serving plates, and platters without metallic trim can be used in your oven. | Metal DecorationDo not use metal-trimmed or metal-banded dinnerware, casserole dishes, etc. |
| PlasticWhen using plastic wrap as a cover, make sure that the dish is deep enough so the plastic wrap does not touch the food. As the food heats, it may melt the plastic wrap wherever the wrap touches the food.Place plastic wrap loosely over the top of the dish and secure it by pressing the wrap to the sides of the dish.Vent by turning back one corner of the plastic wrap. This will allow excess steam to escape.Use plastic dishes, cups, semi-rigid freezer containers, and plastic bags only for short time cooking. Use these with care because the plastic may soften from the heat of the food. | CenturaTM TablewareThe Corning Company recommends that you do not use Centura tableware and some CorelleTM closed-handle cups for microwave cooking.Aluminum FoilAvoid large sheets of aluminum foil because they hinder cooking and may cause arcing.Use small pieces of foil to shield poultry legs and wings.Keep all aluminum foil at least 1 inch from the walls and door of the oven. |
| PaperMicrowave-safe paper towels, waxed paper, paper napkins, and paper plates with no metallic trim or design can be used in your oven.Refer to the manufacturer's label for use of any paper product in the microwave oven. | WoodWooden bowls, boards, and baskets will dry out and may split or crack when you use them in the microwave oven.Tightly Closed ContainersTightly closed cookware can explode. Be sure to leave an opening for steam to escape from covered cookware.Brown PaperAvoid using brown paper bags. They absorb heat and could burn.Metal Twist TiesAlways remove metal twist ties as they can become hot and cause a fire. |
Meat and poultry with high fat content that are cooked for 10 or 15 minutes or longer will brown lightly. Foods cooked a shorter time can be brushed with a browning agent, such as Worcestershire sauce, soy sauce, or barbecue sauce.
COVERING
A cover traps heat and steam and causes the food to cook more quickly. Use a lid or microwave-safe plastic wrap with one corner folded back to vent the excess steam. Lids on glass casseroles can become hot during cooking. Handle carefully. Waxed paper will prevent the food from splattering in the oven and help retain heat. When warming bread items, use waxed paper, napkins, or paper towels. To absorb extra moisture, wrap sandwiches and fatty foods in paper towels.
SPACING
Arrange individual foods, such as baked potatoes, cupcakes, and hors d'oeuvres in a circle and at least 1 inch apart. This will help the food cook more evenly.
STIRRING
Stirring blends flavors and redistributes the heat in foods. Always stir from the outside toward the center of the dish. Food at the outside of the dish heats first.
TURNING
Large foods, such as roasts and whole poultry, should be turned so that the top and bottom cook evenly. Also turn over chicken pieces and chops.
ARRANGEMENT
Do not stack food. Arrange in a single layer in the dish for more even cooking. Because dense foods cook more slowly, place thicker portions of meat, poultry, fish, and vegetables toward the outside of the dish.
TESTING FOR DONENESS
Because foods cook quickly in a microwave oven, you need to test frequently for doneness.
STANDING TIME
Food often needs to stand from 2 to 15 minutes after you remove it from the oven. Usually, you need to cover food during standing time to retain heat. Remove most foods when they are slightly undercooked and they will finish cooking during standing time. The internal temperature of food will rise about 10 °F during standing time.
SHIELDING
To prevent some portions of rectangular or square dishes from overcooking, you may need to shield them with small strips of aluminum foil to block the microwaves. You can also cover poultry legs and wing tips with foil to keep them from overcooking.
Always keep foil at least 1 inch from oven walls to prevent arcing.
PIERCING
Pierce the shell, skin, or membrane of foods before cooking to prevent them from bursting. Foods that require piercing include yolks and whites of eggs, hot dogs, clams, oysters, and whole vegetables, such as potatoes and squash.
- Place the front surface of the door three inches or more from the countertop edge to avoid accidental tipping of the microwave oven during normal use.
- To program the oven, make sure you touch the center of each pad firmly since the areas between the pads will not activate the oven. A tone will sound each time a pad is touched correctly. Don't touch several pads at once.
- Do not strike the control panel with silverware, utensils, etc. Breakage may occur.
• Always use caution when taking the cooking utensils out of the oven. Some dishes absorb heat from the cooked food and may be hot. See Cookware Guide earlier in this section for more information. - Do not rinse cooking utensils by placing them in water immediately after cooking. This may cause breakage. Also, always allow the turntable to cool before removing it from the oven.
- Never operate the oven when it is empty. Food or water should always be in the oven during operation to absorb the microwave energy.
- Do not use the oven to dry newspapers or clothes. They may catch fire.
CLEANING
NOTE: Before cleaning the oven, unplug the power cord. If this is impossible, open the oven door to prevent an accidental oven start.
INTERIOR
Wipe the oven inside and outside with a soft cloth and a mild detergent solution. Then rinse and wipe dry. This should be done weekly or more often, if needed. Never use cleaning powders or rough pads.
Excessive oil splatters on the inside top will be difficult to remove if left for many days. Wipe splatters with a wet paper towel, especially after cooking chicken or bacon.
REMOVABLE PARTS
The turntable and rotating ring are removable. They should be hand-washed in warm (not hot) water with a mild detergent and a soft cloth. Once they are clean, rinse well and dry with a soft cloth. Never use cleaning powders, steel wool, or rough pads.
-
The turntable may be cleaned at the sink. Be careful not to chip or scratch the edges as this may cause the turntable to break during use.
• The rotating ring should be cleaned regularly. -
Use thermometers that have been approved for microwave oven cooking.
• The turntable must always be in place when you operate the oven. - Do not use your microwave oven to cook eggs in the shell. Pressure can build up inside the shell, causing it to burst.
• There are several precautions to follow when microwaving popcorn:
— Do not pop popcorn, except in a microwave-safe container or commercial packages designed for microwave ovens.
— Never try to pop popcorn in a paper bag that is not microwave-approved.
— Overcooking may result in smoke and fire.
— Do not repop unpopped kernels.
— Do not reuse popcorn bags.
— Listen while corn pops. Stop oven when popping slows to 2-3 seconds between pops.
— Do not leave microwave unattended while popping corn.
— Follow directions on bag.
DOOR
For best performance and safety, the inner door panel and the oven front frame should be free of food or grease buildup. Wipe often with a mild detergent; then rinse and wipe dry. Never use cleaning powders or rough pads.
After cleaning the control panel, touch STOP/CLEAR to clear any entries that might have been entered accidentally while cleaning the panel. Also make sure that the turntable and rotating ring are in the right position.
When your oven is plugged in or after a power interruption, PLEASE SET TIME OF DAY will scroll on the display.
Example: To set the clock for 11:11.
Touch:
Display Shows:
1.
STOP/CLEAR
once.
:
2.
CLOCK
once.
AM ENTER TIME OF DAY
3.
1
four times.
11:11
TOUCH START
4.
●
to start the clock.
11:11
CUSTOM SET
Note that when you first plug in the oven the default settings are used.
Example: To set the units.
Touch:
Display Shows:
1.
STOP/CLEAR
once.
:
2.
CUSTOM SET
once.
The four modes dis- play repeatedly.
3.
4
press
CUSTOM SET FUNCTION TABLE
| Number | Function | Choices | Default |
| 1 | sound | on, off | on |
| 2 | clock | on, off | on |
| 3 | scroll speed | slow, normal, fast | normal |
| 4 | lbs. / kg. | lbs., kg. | lbs. |
CHILD LOCK
You can use this safety feature to lock the control panel so that children cannot use the oven when you do not want them to use and when you are cleaning the oven.
To set CHILD LOCK:
Touch:
Display Shows:
1.
STOP/CLEAR
once.
:
2.

Touch and hold until LOCKED appears in the display.
LOCKED

To cancel CHILD LOCK:
Touch:
Display Shows:

or
Touch and hold 4 seconds until LOCKED disappears from the display.
:

0
Your microwave oven can be used as a kitchen timer. You can set up to 99 minutes, 99 seconds.
Example: To set 3 minutes.
Touch:
Display Shows:
1.
STOP/CLEAR
once.
:
2.
TIMER
once.
ENTER TIME IN MIN AND SEC
3.
3
0
0
3:00
TOUCH START
4.

3:00
Time counting down.
5.
Beeps sound at the end
END
EZ ON
A time-saving pad, this simplified control lets you quickly set and start microwave cooking without the need to touch START.
Example: To set Ez On cooking 2 minutes.
Touch:
Display Shows:
1.
STOP/ CLEAR
once.
:
2.
Ez On
4 times
2:00
Time counting down.
3.
Beeps sound at the end.
END
NOTE: If you touch Ez On, it will add 30 seconds up to 3 minutes; after 3 minutes, every touch will add 1 minute up to 99 min 59 seconds.
TIMED COOKING
This feature lets you program a specific cook time and power. For best results, there are 10 power level settings in addition to HIGH power (100%). Refer to the "Microwave Power Level Table" on page 12 for more information.
NOTE: If you do not select a power level, the oven will automatically cook at HIGH (100%) power.
Example: To cook for 5 minutes, 30 seconds at 80% power.
Touch:
Display Shows:
1.
STOP/ CLEAR
once.
:
2.
TIME
once.
ENTER COOKING TIME
3.
5
3 0
to set a cook time of 5 minutes, 30 seconds.
4.
POWER
once.
ENTER POWER LEVEL I TO DO
5.
8
to set a cook power of 80%.
P-80 TOUCH START
6.

to start oven.
5:30
7.
Beeps sound at the end
END
For best results, some recipes call for different cook powers during different stages of a cook cycle. You can program your oven to switch from one power level to another for up to 2 stages.
Example: To set a 2-stage cook cycle.
Touch:
Display Shows:
1.
STOP/CLEAR
once.
:
2.
TIME
once.
ENTER COOKING TIME
3.
3
0
0
to set a 3 minute cook time for the first stage.
3:00 TOUCH
START OR POWER
4.
POWER
once.
ENTER POWER LEVEL I TO I O
5.
8
to set an 80% cook power for the first stage.
P-80
TOUCH START
6.
TIME
once.
ENTER COOKING TIME
7.
7
0
0
to set a 7 minute cook time for second stage.
7:00 TOUCH
START OR POWER
8.
POWER
once.
ENTER POWER LEVEL I TO I O
9.
5
to set an 50% cook power for the first stage.
P-50
TOUCH START
10.

to start the oven.
3:00
-
When the first stage is over, you will hear two short tones as the oven begins the second cook stage.
-
Beeps sound at the end END
Your microwave oven has 10 cook power levels to let you cook or heat a wide variety of foods. Refer to the table below for suggestions:
Microwave Power Level Table
| Power Level | Use |
| 10 (High) | ·Boiling water.·Making candy.·Cooking poultry pieces, fish, & vegetables.·Cooking tender cuts of meat.·Whole poultry. |
| 9 | ·Reheating rice, pasta, & vegetables. |
| 8 | ·Reheating prepared foods quickly.·Reheating sandwiches. |
| 7 | ·Cooking egg, milk, & cheese dishes.·Cooking cakes, breads.·Melting chocolate. |
| 6 | ·Cooking veal.·Cooking whole fish.·Cooking puddings & custard. |
| 5 | ·Cooking ham, whole poultry, & lamb.·Cooking rib roast, sirloin tip. |
| 4 | ·Thawing meat, poultry, & seafood. |
| 3 | ·Cooking less tender cuts of meat.·Cooking pork chops, roast. |
| 2 | ·Taking chill out of fruit.·Softening butter. |
| 1 | ·Keeping casseroles & main dishes warm.·Softening butter & cream cheese. |
| 0 | ·Standing time. |
AUTO DEFROST thaws frozen food without entering a cook time or cook power. Three defrost categories are preset in your oven: Ground Meat, Poultry, and Steaks/Chops. See the Auto Defrost Chart below.
NOTES:
- For added convenience, AUTO DEFROST has a built-in reminder tone to tell you when to check, turn over, separate, or rearrange food. The oven will sound a tone during the defrost cycle. At each tone, open the door and turn, separate, or rearrange food. Remove any portions that have thawed. Return frozen portion to the oven and touch START to resume the defrost cycle.
- You can defrost foods that weigh 0.1 to 6.0 lbs (0.1-4.0 kgs).
For best results:
- Remove fish, shellfish, meat, and poultry from its original closed paper or plastic package (wrapper). Otherwise, the wrap will hold steam and juice close to the foods, which can cause the outer surface of the foods to cook.
- Shape ground meat into the form of a doughnut before freezing. When defrosting, remove thawed meat when the reminder tone sounds and continue defrosting.
- Place foods in a shallow container or on a microwave roasting rack to catch drippings.
- Food should still be somewhat icy in the center when removed from the oven.
Example: To defrost 1.2 lbs. of ground beef.
Touch:
Display Shows:


| Category | Touch keypad | Food to be Defrosted | At Reminder Tone | Standing Time |
| GROUND MEAT | 1 time | BeefGround beefCubes for stewHamburger pattiesPot roastRib roast, Rump roast, Chuck roastPorkBacon, Hot dogsSausage linksSausage pattiesRibs, RoastLambRibsRoasts | Turn over. Remove thawed portions and break apart. Return remainder to oven.Turn over. Remove thawed portions with fork.Turn over.Turn over. Cover warm areas with aluminum foil.Same as above.Turn over.Turn over.Turn over. Cover warm areas with aluminum foil.Turn over. Cover warm areas with aluminum foil.Same as above. | 5 min.5 min.5 min.10-20 min.10-20 min.10-20 min.2 min.5 min.5 min.10-20 min.10-20 min.10-20 min. |
Continued on next page
| Category | Touch keypad | Food to be Defrosted | At Reminder Tone | Standing Time |
| POULTRY | 2 times | PoultryWhole ChickenChicken PiecesCornish Hens: Whole, SplitTurkeyBreast (under 6 lbs.) | Turn over. Finish defrosting breast-side down. Cover warm areas with aluminum foil.Separate pieces and rearrange.Turn over. Cover warm areas with aluminum foil.Turn over and arrange. | 10-20 min.Rinse under cold running water.5-10 min.10-20 min.Rinse under cold running water.10-20 min.Rinse under cold running water. |
| STEAKS/CHOPS | 3 times | Beef SteaksPork ChopsLamp ChopsFishSteaks, whole fish filletsShellfishCrabmeat, Shrimp Lobster tailsScallops | Turn over. Cover warm areas with aluminum foil.Same as above.Same as above.Turn over and rearrange. Cover head and tail with foil.Turn over. Separate fillets when partially thawed if possible.Rearrange and break apart.Turn over and rearrange.Turn over and rearrange. | 10-20 min.10-20 min.10-20 min.5 min.5 min. Rinse with cold water to separate.5 min.5 min.5 min. |
Ez DEFROST
| Ez defrost sequences are preset in the oven. The Ez Defrost feature provides you with the quick defrosting method for 1.0 pound frozen foods. The oven automatically sets the defrosting time.NOTES: When five tones sound, Open the door and then turn, separate or rearrange food. | Touch:1. STOP/CLEAR once.2. once.3. The oven will start automatically. | Display Shows: :2:00Time counting down. |
This feature allows to cook foods that you select by touching AUTO COOK pad. It has 6 food categories.
Example: To cook four slices of bacon.
Touch:

Display Shows:

SELECT MENU I TO 6 --SEE COOKING GUIDE BEHIND DOOR
3.

once.
BACON TOUCH 2 TO 6 SLICES
4.

once.
4 SLICES
5.
The oven will start automatically.
AUTO COOK CHART
- First, touch AUTO COOK pad, then select food and amount.
| Code | Category | Direction | Amount |
| 1 | Bacon | Place bacon strips on microwave bacon rack for best results. (Use diner plate lined with paper towels if none available.) | 2-6 slices |
| 2 | Frozen Roll/Muffin | Remove from display package and place on plate. (If muffins are over 3 oz. each, count as two when keying quantity.) | 1-6 pieces. (2-3 ounces each) |
| 3 | Fresh Roll/Muffin | Remove from display package and place on plate. (If muffins are over 3 oz. each, count as two when keying quantity.) | 1-6 pieces. (2-3 ounces each) |
| 4 | Beverage | Remove from display package and place on plate. (Be careful! The beverage will be very hot! Sometimes liquids heated in cylindrical containers will splash out when the cup is moved.) | 1-2 cups |
| 5 | Chicken Pieces | Place th chicken pieces in an appropriately sized microwavable container, cover with plastic wrap, and vent. | ^1/_2 -2.0 lbs |
| 6 | Hot Cereal | Prepare as directed on package and cook. Stir and allow standing time before eating. Use only instant hot cereal. | 1-6 servings |
If you open the door or press STOP during cooking, the process will be canceled.
Sensor touch cooking provides exciting new features to make microwaving easier. Sensor menu with all the popular food choices, helps you to cook perfectly because it has been pre-programmed and can tell how long to cook or reheat food items.
Categories:
Reheat, Potato, Rice
Popcorn, Fresh Vegetable
Frozen Vegetable, Frozen Entree
For most Sensor Touch Cooking programs, a table with specific food examples and cooking instructions is provided in the next a few pages.
- The Sensor Touch system works by detecting a build-up of vapor.
• Make sure the door remains closed. - Once the vapor is detected, two beeps will sound.
- Opening the door or touching the STOP/CLEAR pad before the vapor is detected will abort the process. The oven will stop.
- Before using Sensor Touch, make sure the exterior of the reheating container and the interior of the oven are dry, to assure the best results.
POTATO (EXAMPLE)
SENSOR TOUCH allows you to cook most of your favorite foods without having to select cooking times and power levels. This oven automatically determines required cooking times for each food item.
Example: To cook potato
Touch:
Display Shows:
1.

once.
:
2.

POTATO
| CATEGORY | DIRECTION | AMOUNT |
| Potato | Pierce each potato with a fork and place on the oven tray around the edge, at least one inch apart. | 1 - 4 medium approx.8 - 10 oz. each |
| Rice | Place rice and twice as much liquid (water or chicken or vegetable stock) in a 2-quart microwavable dish. Cover with plastic wrap. When cooking is complete, allow 10 minutes standing time. Stir for fluffier rice. | 1 - 2 cupsUse medium or long grain rice. Cook instant rice according to directions on the package. |
| Popcorn | Place only bag of prepackaged microwave popcorn on the center of turntable | Regular sizeUse one fresh bag of popcorn |
| Fresh Vegetable | Prepare as desired, wash, and leave residual water on the vegetables. Place in an appropriately-sized microwave container, cover with plastic wrap and vent. | 1 - 4 cups |
| Frozen Vegetable | Remove from package, rinse off frost under running water. Place in an appropriately-sized microwave container, cover with plastic wrap and vent. | 1 - 4 cups |
| Frozen Entrée | Remove from outer display package. Slit cover. If not in microwave safe container, place on plate, cover with plastic wrap and vent. | 10 - 21 oz. |
NOTE: If you open the door or press STOP during sensing, the process will be canceled.
SENSOR REHEAT
This feature allows you to reheat precooked room-temperature or refrigerated foods without selecting cooking times and power levels. This feature has 3 categories: dinner plate, soup/sauce, casserole.
Example : To reheat casserole.
Touch:
Display Shows:
1.
STOP/CLEAR
once.
:
2.
SENSOR REHEAT
once.
SELECT MENU TO 3 - -SEE COOKING GUIDE BEHIND DOOR
3.
3
once.
CASSEROLE
The oven will reheat food automatically by sensor system.
SENSOR REHEAT TABLE
| Code | Category | Direction | Amount |
| 1 | Dinner plate | Place foods to be heated on dinner plate or similar dish. Cover with plastic wrap. | Approx. 0.5 -1 pound. |
| 2 | Soup/ Sauce | Place foods to be heated in an appropriately sized microwave container. Cover with plastic wrap. | 1-4 cups |
| 3 | Casserole | Cover dish containing the casserole with plastic wrap. | 1-4 cups |
WARNING: Do not use aluminum foil during cooking cycle.
COOKING TIPS
Meat
- No special techniques are required. Meat should be prepared as with conventional cooking. Season if desired. Always thoroughly defrost meat before cooking.
- Place the meat on a microwave roasting rack or microwave-proof plate and place on the turntable.
- Cook according to the Meat Cooking Chart (below). Use the longer time for large meats and the shorter time for smaller meats. For thicker chops, use the longer time.
- Turn the meat once halfway through the cooking time.
- Let stand for 5-10 minutes wrapped in foil after cooking. The standing time is very important as it completes the cooking process.
- Make sure meat, especially pork, is thoroughly cooked before eating.
Meat Cooking Chart
| Meat | Microwave Power | Cooking Time Per Pound |
| BEEFStanding/Rolled Rib– Rare– Medium– Well-doneGround Beef (to brown for casserole)Hamburgers,Fresh or defrosted(4 oz. each)– 2 patties– 4 patties | 8888HIGH(100%) | 8 to 10 minutes9 to 11 minutes10 to 13 minutes 5^1/2 - 8^1/2 minutes2 to 4 minutes3 to 5 minutes |
| PORKLoin, Leg Bacon– 4 slices– 6 slices | 8HIGH(100%)HIGH(100%) | 12 to 16 minutes2 to 3 minutes4 to 5 minutes |
NOTE: The times listed above are only a guide. Allow for difference in individual tastes and preferences. The times may also vary due to the shape, cut, and composition of the food.
Poultry
- No special techniques are required. Poultry should be prepared as with conventional cooking. Season if desired.
- Poultry should be thoroughly defrosted. Remove giblets and any metal clamps.
- Prick the skin and brush lightly with vegetable oil unless the poultry is self-basting.
- All poultry should be placed on a microwave roasting rack or a microwave-proof plate and placed on the turntable.
- Cook according to the instructions in the Poultry Cooking Chart below. Turn over halfway through the cooking time. Because of its shape, poultry has a tendency to cook unevenly, especially in very bony parts. Turning during roasting helps to cook these areas evenly.
- Let stand for 5-10 minutes wrapped in foil after cooking before carving. The standing time is very important, as it completes the cooking process.
- Make sure poultry is thoroughly cooked before eating. Whole poultry is completely cooked when the juices run clear from the inside thigh when it is pierced with a sharp knife. Poultry pieces should be pierced with a sharp knife through the thickest part to ensure that the juices are clear and the flesh is firm.
Poultry Cooking Chart
| Poultry | Microwave Power | Cooking Time Per Pound |
| CHICKENWholeBreast (boned)Portions | 888 | 10 to 14 minutes9 to 13 minutes10 to 16 minutes |
| TURKEYWhole | 8 | 10 to 14 minutes |
NOTES:
- The times listed above are only a guide. Allow for difference in individual tastes and preferences. The times may also vary due to the shape, cut, and composition of the food.
- If whole poultry is stuffed, the weight of the stuffed bird should be used when calculating the cooking time.
COOKING TIPS (continued)
Fish
- Arrange fish in a large shallow non-metallic dish or casserole.
- Cover with pierced microwave plastic wrap or casserole lid.
- Place the dish on the turntable.
- Cook according to the instructions in the Fresh Fish Cooking Chart below. Flakes of butter can be added to the fish if desired.
- Let stand as directed in the Cooking Chart before serving.
- After standing time, check to see that the fish is thoroughly cooked. The fish should be opaque and flake easily.
Fresh Fish Cooking Chart
| Fish | Microwave Power | Cooking Time Per Pound | Butter | Standing Time |
| Fish Fillets | HIGH | 4 to 7 minutes | Add 15 to 30 ml (1 to 2 tbsp.) | 2 to 3 minutes |
| Whole Mackerel, Cleaned and Prepared | HIGH | 4 to 7 minutes | - | 3 to 4 minutes |
| Whole Trout, Cleaned and Prepared | HIGH | 5 to 8 minutes | - | 3 to 4 minutes |
| Salmon Steaks | HIGH | 5 to 7 minutes | Add 15 to 30 ml (1 to 2 tbsp.) | 3 to 4 minutes |
HEATING OR REHEATING GUIDE
To heat or reheat successfully in the microwave, it is important to follow several guidelines. Measure the amount of food in order to determine the time needed to reheat. Arrange the food in a circular pattern for best results. Room temperature food will heat faster than refrigerated food. Canned foods should be taken out of the can and placed in a microwavable container. The food will be heated more evenly if covered with a microwavable lid or plastic wrap and vented. Remove cover carefully to prevent steam burns. Use the following chart as a guide for reheating cooked food.
| Items | Cook time (at HIGH) | Special Instructions |
| Sliced meat3 slices ( 1/4 -inch thick) | 1-2 minutes | Place sliced meat on microwavable plate.Cover with plastic wrap and vent.*Note: Gravy or sauce helps to keep meat juicy. |
| Chicken pieces1 breast1 leg and thigh | 2-312 minutes 112-3 minutes | Place chicken pieces on microwavable plate. Cover with plastic wrap and vent. |
| Fish fillet(6-8 oz.) | 2-4 minutes | Place fish on microwavable plate. Cover with plastic wrap and vent. |
| Lasagna1 serving ( 1012 oz.) | 5-7 minutes | Place lasagna on microwavable plate. Cover with plastic wrap and vent. |
| Casserole1 cup4 cups | 1-312 minutes5-8 minutes | COOK covered in microwavable casserole. Stir once halfway through cooking. |
| Casserole – cream or cheese1 cup4 cups | 112-3 minutes 312-512 minutes | COOK covered in microwavable casserole. Stir once halfway through cooking. |
| Sloppy Joe or Barbecued beef1 sandwich( 1/2 cup meat filling) without bun | 1-212 minutes | Reheat filling and bun separately.Cook filling covered in microwavable casserole. Stir once. Heat bun as directed in chart below. |
| Mashed potatoes1 cup4 cups | 1-3 minutes5-8 minutes | COOK covered in microwavable casserole. Stir once halfway through cooking. |
| Baked beans1 cup | 112-3 minutes | COOK covered in microwavable casserole. Stir once halfway through cooking. |
| Ravioli or pasta in sauce1 cup4 cups | 212-4 minutes 712-11 minutes | COOK covered in microwavable casserole. Stir once halfway through cooking. |
| Rice1 cup4 cups | 112-312 minutes 4-612 minutes | COOK covered in microwavable casserole. Stir once halfway through cooking. |
| Sandwich roll or bun1 roll | 15-30 seconds | Wrap in paper towel and place on glass microwavable rack |
| Vegetables1 cup4 cups | 112-212 minutes4-6 minutes | COOK covered in microwavable casserole. Stir once halfway through cooking. |
| Soup1 serving (8 oz.) | 112-212 minutes | COOK covered in microwavable casserole. Stir once halfway through cooking. |
FRESH VEGETABLE CHART
| Vegetable | Amount | Cook time at HIGH | Instructions | Standing Time |
| Artichokes (8oz. each) | 2 medium4 medium | 5-810-13 | Trim. Add 2 tsp water and 2 tsp juice. Cover. | 2-3 minutes |
| Asparagus, Fresh, Spears | 1lb. | 3-6 | Add 1/2 cup water. Cover. | 2-3 minutes |
| Beans, Green & Wax | 1 lb. | 7-11 | Add 1/2 cup water in 112 qt. casserole. Stir halfway through cooking. | 2-3 minutes |
| Beets, Fresh | 1 lb. | 12-16 | Add 1/2 cup water in 112 qt. covered casserole. Rearrange halfway through cooking. | 2-3 minutes |
| Broccoli, Fresh, Spears | 1lb. | 4-8 | Place broccoli in baking dish. Add 1/2 cup water. | 2-3 minutes |
| Cabbage, Fresh, Chopped | 1lb. | 4-7 | Add 1/2 cup water in 112 qt. covered casserole. Stir halfway through cooking. | 2-3 minutes |
| Carrots, Fresh, Sliced | 2 cups | 2-4 | Add 1/4 cup water in 1 qt. covered casserole. Stir halfway through cooking. | 2-3 minutes |
| Cauliflower, Fresh, Whole | 1lb. | 7-11 | Trim. Add 1/4 cup water in 1 qt. covered casserole. Stir halfway through cooking. | 2-3 minutes |
| Flowerettes, Fresh Celery, Fresh, Sliced | 2 cups4 cups | 2^1/2-4^1/2 6-8 | Slice. Add 1/2 cup water in 112 qt. covered casserole. Stir halfway through cooking. | 2-3 minutes |
| Corn, Fresh | 2 ears | 5-9 | Husk. Add 2 tbsp water in 112 qt. baking dish. Cover. | 2-3 minutes |
| Mushrooms, Fresh, Sliced | 1/2 lb. | 2-3^1/2 | Place mushrooms in 112 qt. covered casserole. Stir halfway through cooking. | 2-3 minutes |
| Parsnips, Fresh, Sliced | 1lb. | 4-8 | Add 1/2 cup water in 112 qt. covered casserole. Stir halfway through cooking. | 2-3 minutes |
| Peas, Green, Fresh | 4 cups | 7-10 | Add 1/2 cup water in 112 qt. covered casserole. Stir halfway through cooking. | 2-3 minutes |
| Sweet Potatoes Whole Baking (6-8 oz. each) | 2 medium4 medium | 5-107-13 | Pierce potatoes several times with fork. Place on 2 paper towels. Turn over halfway through cooking. | 2-3 minutes2-3 minutes |
| White Potatoes, Whole Baking (6-8 oz. each) | 2 potatoes4 potatoes | 5-810-14 | Pierce potatoes several times with fork. Place on 2 paper towels. Turn over halfway through cooking. | 2-3 minutes2-3 minutes |
| Spinach, Fresh, Leaf | 1lb. | 4-7 | Add 1/2 cup water in 2 qt. covered casserole. | 2-3 minutes |
| Squash, Acorn or Butternut, Fresh | 1 medium | 6-8 | Cut squash in half. Remove seeds. Place in 8 x 8-inch baking dish. Cover. | 2-3 minutes |
| Zucchini, Fresh, Sliced | 1lb. | 4^1/2-7^1/2 | Add 1/2 cup water in 112 qt. covered casserole. Stir halfway through cooking. | 2-3 minutes |
| Zucchini, Fresh, Whole | 1lb. | 6-9 | Pierce. Place on 2 paper towels. Turn zucchini over and rearrange halfway through cooking. | 2-3 minutes |
TROUBLESHOOTING
Questions and Answers
Operation
| Question | Answer |
| Why is the oven light not on during cooking? | There may be several reasons why the oven light is not on.Have you:Set a cooking time?Touched START?Checked the light bulb? |
| Why does steam come out of the air exhaust vent? | Steam is normally produced during cooking. The microwave oven has been designed to vent this steam. |
| Will the microwave oven be damaged if it operates empty? | Yes. Never operate the oven empty or without the glass turntable. |
| Does microwave energy pass through the viewing screen in the door? | No. The metal screen bounces the energy back to the oven cavity.The holes (or ports) allow only light to pass through. They do not let microwave energy pass through. |
| Why does a tone sound when a pad on the control panel is touched? | The tone tells you that the setting has been entered. |
| Can my microwave oven be damaged if food is cooked for too long? | Like any other cooking appliance, it is possible to overcook food to the point that the food creates smoke and even possibly fire, and damage to the inside of the oven. It is always best to be near the oven while you are cooking. |
| When the oven is plugged into wall outlet for the first time, it might not work properly.What is wrong? | The microcomputer controlling your oven may temporarily become scrambled and fail to function as programmed when you plug in for the first time or when power resumes after a power interruption. Unplug the oven from the 120 volt household outlet and then plug it back in to reset the microcomputer. |
| Why do I see light reflection around the outer case? | This light is from the oven light which is located between the oven cavity and the outer wall of the oven. |
| What are the various sounds I hear when the microwave oven is operating? | The clicking sound is caused by a mechanical switch turning the microwave oven's magnetron ON and OFF.The heavy hum and clunk is from the change in power the magnetron draws as it is turned ON and OFF by a mechanical switch.The change in blower speed is from the change in line voltage caused by the magnetron being turned ON and OFF. |
Food
| Question | Answer |
| What is wrong when baked foods have a hard, dry, brown spot? | A hard, dry, brown spot indicates overcooking. Shorten the cooking or reheating time. |
| Why do eggs sometimes pop? | When baking, frying, or poaching eggs, the yolk may pop due to steam build-up inside the yolk membrane. To prevent this, simply pierce the yolk with a wooden toothpick before cooking.CAUTION: Never microwave eggs in the shell. |
TROUBLESHOOTING
Questions and Answers (continued)
Food
| Question | Answer |
| Why are scrambled eggs sometimes a little dry after cooking? | Eggs will dry out when they are overcooked, even if the same recipe is used each time. The cooking time may need to be varied for one of these reasons:• Eggs vary in size.• Eggs are at room temperature one time and at refrigerator temperature another time.• Eggs continue cooking during standing time. |
| Is it possible to pop popcorn in a microwave oven? | Yes, if using one of the two methods described below:(1) microwave-popping devices designed specifically for microwave cooking(2) prepackaged commercial microwave popcorn that is made for specific times and power output neededFollow exact directions given by each manufacturer for its popcorn popping product and do not leave the oven unattended while the corn is being popped. If corn fails to pop after the suggested time, discontinue cooking. Overcooking could result in an oven fire.CAUTION:• Never use a brown paper bag for popping corn or attempt to pop leftover kernels.• Do not pop prepackaged commercial microwave popcorn directly on the glass turntable. To avoid excessive heating of the glass turntable, place the popcorn bag on a plate.• Listen while corn pops. Stop oven when popping slows to 2-3 seconds between pops.• Do not leave microwave unattended while popping corn.• Follow directions on bag. |
| Why do baked apples sometimes burst during cooking? | The peel has not been removed from the top half of each apple to allow for expansion of the interior of the apple during cooking. As in conventional cooking methods, the interior of the apple expands during the cooking process. |
| Why do baked potatoes sometimes burn during cooking? | If the cooking time is too long, fire could result. At the end of the recommended cooking time, potatoes should be slightly firm.CAUTION: Do not overcook. |
| Why is a standing time recommended after microwave cooking time is over? | Standing time allows foods to continue cooking evenly for a few minutes after the actual microwave oven cooking cycle. The amount of standing time depends upon the density of the foods. |
| Why is additional time required for cooking food stored in the refrigerator? | As in conventional cooking, the initial temperature of food affects total cooking time. You need more time to cook food taken out of a refrigerator than for food at room temperature. |
TROUBLESHOOTING
Before Calling for Service
You can often correct operating problems yourself. If your microwave oven fails to work properly, locate the operating problem in the list below and try the solutions listed for each problem.
If the microwave oven still does not work properly, contact the nearest GoldStar Authorized Service Center.
GoldStar Authorized Service Centers are fully equipped to handle your service requirements.
| Problem | Possible Causes |
| Oven does not start | • Is the power cord plugged in?• Is the door closed?• Is the cooking time set? |
| Arcing or Sparking | • Are you using approved cookware?• Is the oven empty? |
| Incorrect time of day | • Have you tried to reset the time of day? |
| Unevenly Cooked Foods | • Are you using approved cookware?• Is the glass turntable in the oven?• Did you turn or stir the food while it was cooking?• Were the foods completely defrosted?• Was the time/cooking power level correct? |
| Overcooked Foods | • Was the time/cooking power level correct? |
| Undercooked Foods | • Are you using approved cookware?• Were the foods completely defrosted?• Was the time/cooking power level correct?• Are the ventilation ports clear? |
| Improper Defrosting | • Are you using approved cookware?• Was the time/cooking power level correct?• Did you turn or stir the food during the defrosting cycle? |
LG ELECTRONICS CANADA INC.
AUTHORIZED SERVICE CENTERS LISTING
PROVINCE: ALTA
| LOCATION | SERVICER | ADDRESS | TELEPHONE | CODE |
| CALGARY | MICROTECH | 2735 - 39 AVE. N.E. #100 | 403 250 7041 | IS |
| CALGARY | NATIONAL ELECT. SERVICE ASC 2 | 4-6115 - 4TH STREET S.E. | 403 252 6988 | IS |
| CALGARY | THORNCLIFFE RADIO & TV LTD. | 4519 -1ST ST. SOUTH EAST | 403 243 0925 | IS |
| EDMONTON | AMBASSADOR ELECTRONICS LTD. | 15902 - 100A AVE. | 403 484 5877 | IS |
| EDMONTON | ELECTRONIC ANALYST | 9006 - 51 AVE. | 403 466 0662 | IS |
| EDMONTON | NATIONAL ELECT. SERVICE ASC | 10577 - 109 STREET | 403 428 0248 | IS |
| EDMONTON | STERLING T.V. AND VIDEO | 15608 - 116 AVE. | 403 455 8725 | IS |
| EDMONTON | WOODWARDS CUSTOMER SERVICE (1) | 3850 - 98TH STREET | 403 463 2751 | SSD |
| GRANDE PRAIRIE | T.V. KORNER | 9827 - 97TH AVE. | 403 539 6073 | SD |
| LETHBRIDGE | FAITH ELECTRONICS LTD. | 929 - 2 AVE. A NORTH | 403 327 2977 | SD |
| LETHBRIDGE | PRO TELEVISION SALES | 1815 - 2ND AVENUE SOUTH | 403 328 4977 | IS |
| LLOYDMINSTER | BURRTRONICS LTD. | 5905 - 44TH STREET | 403 875 8884 | IS |
| MEDICINE HAT | TEL-RAY TELEVISION | 683 SOUTH RAILWAY STREET | 403 526 4588 | IS |
| RED DEER | R.D. CENTRAL TV LTD. | 5130-47TH ST. | 403 346 2101 | SSD |
| RED DEER | TOWN & COUNTRY RADIO & TV | 4A 4999-76 STREET | 403 347 4388 | IS |
| WESTLOCK | KYETECH INC. | BOX 2760 | 403 349 3933 | IS |
| WETASKIWIN | IMPERIAL T/V & STEREO CENTER | 5210 - 50TH AVENUE | 403 352 5975 | IS |
PROVINCE: BC
| LOCATION | SERVICER | ADDRESS | TELEPHONE | CODE |
| 150 MILE HOUSE | TRIAC SYSTEM LTD. | BOX 470 | 604 296 4575 | SD |
| BURNABY | AUDIO VIDEO ELECTRONICS | 5097 CANADA WAY | 604 524 4224 | IS |
| BURANBY | CHROMA INDUSTRIES LTD. | 5607 HASTINGS STREET | 604 291 2242 | IS |
| CAMPBELL RIVER | BILL & EDS TV | 590 11TH AVENUE | 604 287 9208 | SD |
| CLEARBROOK | SYNTREX ELECTRONICS | #1-2826 LANGDON STREET | 604 859 5712 | IS |
| CRANBROOK | DANNYS HOME ENTERTAINMENT | 37 - 9TH AVENUE SOUTH | 604 426 7413 | IS |
| KAMLOOPS | GIDDENS SERVICES LTD. | 2345 TRANS CANADA HWY | 604 372 8842 | IS |
| KAMLOOPS | JOHNS ELECTRIC REPAIR CENTER | 773 VICTORIA STREET | 604 374 0388 | IS |
| KELOWNA | TELTRONICS | 1546 HARVEY AVENUE | 604 860 9888 | IS |
| KELOWNA | VALLET DIGITRONICS SERVICE LTD. | 2453 HIGHWAY 97 NORTH | 604 763 8366 | IS |
| LANGLEY | FRASER VALLEY VIDEO REPAIR | 21271- 40TH STREET | 604 530 6094 | IS |
| MAPLE RIDGE | HANEY TV & SOUND SERVICE | 11969-224 STREET | 604 467 4955 | SD |
| NANAIMO | ELECTRONIC CLINIC LTD. | 1609A BOWEN ROAD | 604 754 6335 | IS |
| NEW WESTMINSTER | WOODWARDS CUSTOMER SERVICE (2) | 109 BRAID STREET | 604 520 5811 | SSD |
| PORT ALBERNI | QUALITY ELECTRONICS | 3561 3RD AVE. | 604 724 3422 | IS |
| PORT MOODY | VILLAGE ELECTRONIC LTD. | 3006A SPRING STREET | 604 461 1313 | IS |
| PRINCE GEORGE | ABC TV & STEREO | 1-1839 1ST AVENUE | 604 564 9081 | IS |
| RICHMOND | MASTER TV SERVICE LTD. | 5431 MINORU BLVD. | 604 273 7247 | IS |
| SARDIS | STARDUST AMUSEMENTS LTD. | 7484 VEDDER ROAD | 604 858 4622 | IS |
| SURREY | A.A.A. TV SERVICE | #19 9316 194TH STREET | 604 888 7777 | IS |
| TERRACE | PRO TECH ELECTRONICS | 4519 LAKELSE AVE. | 604 635 5134 | IS |
| VANCOUVER | NATIONAL ELECT. SERVICE ASC | 1775 WEST 4TH AVE. | 604 734 7606 | IS |
| VERNON | JOHNSON' S TV SALES & SERVICE | 2808A 48 AVE. | 604 542 0311 | SD |
| VERNON | WRIGHT & THORNBURN RADIO LTD. | 3213 - 31ST AVENUE | 604 545 1737 | IS |
| VICTORIA | BC SOUND & RADIO SERVICE | 931 FORT STREET | 604 383 4731 | IS |
| VICTORIA | Q-TEL SERVICE | 627 DUNEDIN STREET | 604 388 9333 | IS |
| VICTORIA | RAC ELECTRONICS LTD | 3385 TENNYSOW AVE. | 604 382 8141 | IS |
| WILLIAMS LAKE | NYTECH ELECTRONIC SERVICE | BOX 4329 | 604 398 8146 | IS |
PROVINCE: MAN
| LOCATION | SERVICER | ADDRESS | TELEPHONE | CODE |
| BRANDON | PEMBINA ELECTRONICS | 1433 PRINCESS AVE. | 204 728 8318 | IS |
| PORTAGE LA PRAIRIE | REEVES SERVICES | 446 TUPPER STREET NORTH | 204 857 7223 | IS |
| WINNIPEG | ADVANCE ELECTRONICS | 575 WALL STREET | 204 786 5533 | SSD |
| WINNIPEG | AUTEK LAB LTD. | 488 ST. ANNES ROAO | 204 256 4048 | IS |
| WINNIPEG | JAPAN AUDIO | 1037 ERIN STREET | 204 775 0494 | IS |
| WINNIPEG | MM ELECTRONICS SYSTEMS LTD. | 9-2166 NOTRE DAME AVE | 204 632 4483 | IS |
| WINNIPEG | NATIONAL ELECT. SERVICE ASC 1 | 1580 ERIN STREET | 204 783 6185 | IS |
| WINNIPEG | RVW ELECTRONICS SERVICE | 1245 INKSTER BLVD. | 204 633 3772 | IS |
| WINNIPEG | THE VIDEO RE-FIT SHOP | 931 ST. MARYS RD. | 204 257 7555 | IS |
PROVINCE: NB
| LOCATION | SERVICER | ADDRESS | TELEPHONE | CODE |
| BATHURST | NORTHCOAST ELECTRONICS | 2045 ST. PETER AVE. | 506 546 2336 | SSD |
| EDMUNSTDN | DATA ELECTRONICS | 25 HILL STREET | 506 735 4073 | IS |
| FREDERICTDN | LYNNCO SOUND LTD. | 108 PROSPECT STREET | 506 452 6776 | SSD |
| MONCTON | B.J.W. ELECTRONICS LTD. | 10 LESLIE STREET | 506 857 2118 | IS |
| MONCTON | CHAMPLAIN ELECTRONICS LTD. | 47 SHEDIAC ROAD | 506 854 6665 | IS |
| MONCTON | SOUNDS FANTASTIC | 48 RUE BONACCORD STREET | 506 857 0000 | SSD |
| SACKVILLE | TANTRAMAR ELECTRONICS | 72 WEST MAIN STREET | 506 536 3953 | IS |
| ST. JOHN | COX RADIO & TV | 843 FAIRVILLE BLVD. | 506 635 6207 | SSD |
| ST. GEORGE | BALDWIN ELECTRONICS | 700 OLD ST. ANDREW ROAD | 506 755 6166 | IS |
| WOODSTOCK | MACMILLAN TV & SATELLITE | PO. BOX 1793 | 506 328 8021 | SSD |
PROVINCE: NFLD
| LOCATION | SERVICER | ADDRESS | TELEPHONE | CODE |
| BAY ROBERTS | COHENS FURNITURE LTD. | P.O. BOX 350 | 709 489 6431 | IS |
| CORNERBROOK | A-1 ELECTRONICS | 98 WEST STREET | 709 634 1581 | IS |
| GOOSE BAY | LABRADOR BARGAIN STORE | 167 HAMILTON RIVER ROAD | 709 896 5525 | SSD |
| ST. JOHNS | KELLYS (DOUGS STEREO LTD) | 470 TOPSAIL ROAD | 709 363 7737 | SD |
| ST. JOHNS | SMITHS ELECTRONICS | P.O. BOX 8141 | 709 726 0709 | IS |
PROVINCE: NS
| LOCATION | SERVICER | ADDRESS | TELEPHONE | CODE |
| DARTMOUTH (HALIFAX) | C A. MUNRO LTD. | 10 MORRIS DRIVE SUITE 19 | 902 465 4991 | IS |
| FLORENCE | FLORENCE TV SERVICE | BOX 9 | 902 736 8751 | SSD |
| HALIFAX | ARGYLE TV SALES & SERVICE | 2063 GOTTI NGEN STREET | 902 422 5930 | SSD |
| LUNENBURG COUNTY | CALVINS TV SALES AND SERVICE | RR #1 CHESTER BASIN | 902 275 4366 | SD |
| LUNENBURY | EDDY'S T.V. | RR #1 ITALY CROSS | 902 543 8772 | 1S |
| NEW MINAS | VIDEO W. | 1009 KENTUCKY COURT | 902 678 7577 | SSD |
| NEW WATERFORD | BURKES TV & APPLIANCES | 487 HEELAN STREET | 902 862 6416 | IS |
| PICTOU | BESTWAY TV | RR #2 SCOTSBURN | 902 485 6655 | IS |
| SHUBENACADIE | F. W. PREISS & SON LTD. | P.O. BOX 122 | 902 758 2922 | SSD |
| TRURO | ALPHA ELECTRONICS LTD. | 1298A EAST PRINCE STREET | 902 895 9254 | IS |
| TRURO | SCHNEIDER ENT LTD. | 914-920 PRINCE STREET | 902 895 0588 | SSD |
PROVINCE: ONT
| LOCATION | SERVICER | ADDRESS | TELEPHONE | CODE |
| AJAX | DUNBARTON RADIO & TV LTD. | 29 HARWOOD AVE. SOUTH #3 | 416 683 5880 | IS |
| BARRIE | SPECTRONICS AND VIDED LOGIC | 44 WOODORST RD. | 705 722 0440 | SD |
| BARRIE | TRIPLE D ELECTRONICS | 376 YONGE STREET | 705 737 3256 | SD |
| BELLEVILLE | HOME ENTERTAINMENT SERVICE | 256 COLEWN STREET | 613 968 6791 | IS |
| BELLEVILLE | MILLER ELECTRONICS SERVICING | P.O. BO X 750 | 613 968 7687 | IS |
| BRAMF'TON | ACCURATE ELECTRONICS | 42 REGM RODA #4 | 416 840 1722 | IS |
| BRAMPTON | BRAMPTON COLOUR & SOUND | 160 MAIN STREET SOUTH | 416 453 4455 | SD |
| BRANTFORD | BRANT STEREO | 44 MARKET STREET | 519 752 1783 | SSD |
| BRANTFORD | PARSONS RADIO ELECTRIC | 230 COLBORN STREET | 519 752 4329 | SD |
| CAMBRIDGE | CAMBRIDGE TV | 415 HEDPETER ROAD | 519 622 1621 | IS |
| COBOURG | UNITED TELEVISION COBOURG LTD. | 66 KING STREET EAST | 416 372 6832 | SSD |
| CORNWALL | GLOBE TV | 410 PITT STREET | 613 938 8736 | IS |
| DON MILLS | SK AUDIO | 9 CLINTWOOD GATE | 416 447 9391 | SD |
| ELLIOT LAKE | KOOB ELECTRONICS | 80 DIEPPE AVE | 705 848 2366 | IS |
| ETOBICOKE | THE ELECTRONICS & TV SERVICE | 110 MIMICO AVE. | 416 251 1214 | IS |
| GEORGETOWN | MILLIERE TV | 14 WESLEYAN STREET | 416 877 3405 | SSD |
| GUELPH | ALLTEK RADIO AND TV | 84 NORFOLK | 519 767 2331 | SD |
| GUELPH | SHORTREED TV LTD. | 82 NORFOLK STREET | 519 837 1061 | SD |
| HAMILTON | BRANKOS AUDIO & VIDEO | 1384 BARTON AVE. | 416 545 8952 | IS |
| HAMILTON | IRWIN ALLEN | 1365 MAIN STREET EAST | 416 528 8531 | SSD |
| HAMILTON | MOBIUS AUDIO SYSTEMS | 119 JOHN STREET NORTH | 416 528 1368 | IS |
| HAMILTON | N MURRAY TV | 70 NEBO RO #3 | 416 575 3486 | IS |
| HUNTSVILLE | COKER ELECTRONICS SERVICING | 437 ASPEN ROAD | 705 789 5397 | IS |
| KANATA | NATIONAL VIDEO SPECIALTIES | 150 KATMARK ROAD | 613 592 9402 | IS |
| KAPUSXASING | MICHEL T.V. SERVICE | 110 BRUNELLE NORTH | 705 335 5223 | IS |
| KINGSTON | EASTERN ONTARIO DESCRAM INC. | 877 DIVISION STREET | 613 542 7242 | IS |
| KINGSTON | MONTGOMERY ELECTRONICS | 3079 PRIENCESS STREET PR #3 | 613 389 2846 | IS |
| KITCHENER | TOP TECH ELECTRONICS LTD. | 907 FREDRICK STREET | 519 578 7600 | IS |
PROVINCE: ONT
| LOCATION | SERVICER | ADDRESS | TELEPHONE | CODE |
| LAMBETH | WICKHAMS TV | 101 MEDOWBROOK PLAZA | 519 652 2125 | SD |
| LEAMINGTON | STAR RADIO | 33 TALBOT STREET EAST | 519 326 6321 | SD |
| LINDSAY | THOR ELECTRONICS | RR #5 | 705 324 0441 | IS |
| LISKEARD | CARLEA ELECTRONICS | HIGHWAY 118 BOX 1565 | 705 647 5666 | SD |
| LISTOWEL | MERWOOD C. SMITH LTD. | RR #2 | 519 291 3810 | IS |
| LONDON | DYN-ARC ELECTRONICS | 681 ADELAIDE STREET NORTH | 519 659 8258 | SD |
| LONDON | REX SERVICE INC. | 605 NEWBOLD STREET | 519 686 8123 | IS |
| MARKHAM | MULTI ELECTRONICS SERVICE | 190 DON PARK ROAD UNIT #5 | 416 475 5068 | IS |
| MIDLAND | THONG'S TV REPAIR | 539 BAY STREET | 705 526 8038 | SD |
| MISSISSAUGA | GOLDSTAR CANADA LTD. SERVICE | 7391 PACIFIC CIRCLE | 416 670 0650 | IS |
| MISSISSAUGA | KODAN ELECTRONICS | 980 DUNDAS STREET EAST | 416 625 5613 | IS |
| MISSISSAUGA | MALSBEC CAMFORD ELECTRONICS | 225 TRAOERS BLVD. EAST #2 | 416 890 0273 | IS |
| NEPEAN | TELE SERVICE ELECTRONICS LTD. | 1891 MERIVALE ROAD | 613 224 7748 | IS |
| NIAGRA FALLS | BECKERS TV & APPLIANCES | 455 QUEEN STREET | 416 354 2721 | IS |
| NIAGRA FALLS | SWALMS ELECTRONICS LTD. | 5859 FERRY STREET | 416 354 9275 | IS |
| NORTH BAY | J. E. F. ELECTRONICS LTD. | 431 MAIN STREET | 705 476 2644 | IS |
| NORTH BAY | R. J. E. ELECTRONICS | 34 MARSHALL AVE. | 705 474 0830 | IS |
| OSHAWA | HOLDCROFT ELECTRONICS CENTRE | 500 RALEIGH AVE. UNIT 12 | 416 579 4030 | IS |
| OTTAWA | B & K ELECTRONICS | 850 INDUSTRIAL AVE. #17 | 613 738 0048 | IS |
| OTTAWA | HOME ELECTRONICS CENTER LTD. | 20-5370 CANOTEK ROAD | 613 746 7700 | IS |
| OTTAWA | K. ELECTRONICS | 368 CHURCHILL AVE. | 613 725 2036 | IS |
| OTTAWA | NATIONAL ELECT. SERVICE ASC 3 | 2285 ST. LAURENT BLVD. | 613 526 3701 | IS |
| OWEN SOUND | HOME ELECTRONICS REPAIR | 1342 2ND AVE. EAST | 519 371 3808 | IS |
| OWEN SOUND | ROBERTS RADIO & ELECTRIC | 945-2ND AVE. EAST | 519 376 6870 | SD |
| PEMBROKE | JIMS TV & STEREO | 938 PEMBROKE STREET EAST | 613 732 4090 | IS |
| PETERBOROUGH | BILL HAYES RADIO & TV | 213 HUNTER STREET | 705 742 0056 | IS |
| PRESCOTT | LAMBS ELECTRONICS | RR #1 | 613 925 2232 | IS |
| PRESCOTT | W. L. PETERS APPLIANCE CO. LTD. | 152 KING STREET WEST | 613 925 2257 | SD |
| RICHMOND HILL | GERALYN ELECTRONICS | 10235 YONGE STREET | 416 883 0810 | IS |
| RIDGWAY | E & A ELECTRONICS | 3711 DOMINION RD. BOX 719 | 416 894 3013 | IS |
| SARNIA | DUAL ELECTRONICS | 493 N. CHRISTINA STREET | 519 344 2323 | IS |
| SARNIA | JERRYS TV | 116 EAST ST. N | 519 337 7086 | IS |
| SARNIA | KEELANS SERVICENTRE | 190 MAXWELL STREET | 519 337 7557 | SD |
| SAULT ST. MARIE | BRYMORE AUDIO VIDEO SERVICE | 490 QUEEN STREET EAST | 705 256 7437 | IS |
| SAULT ST MARIE | JOHN'S TV | 360 BRUCE STREET | 519 253 7291 | SD |
| SIMCOE | JOHNS ELECTRONICS | RR #1 | 519 4281066 | IS |
| SIMCOE | SIMCOE MAGNAVOX | 462 NORFOLK STREET SOUTH | 519 426 3583 | SSD |
| SMITH FALLS | S & S ELECTRONICS | 3 WINNIFRED STREET | 613 283 0441 | IS |
| ST. MARY | CLAUDE ELECTRIC LTD. | 127 QUEEN STREET | 519 284 1350 | SD |
| ST. CATHARINES | VIDEO WORLD | 224 GLENRIDGE AVE. | 416 685 7611 | SD |
| ST. THOMAS | DJ CONSUMER ELECTRONICS | 280 EDWARD STREET | 519 663 8874 | IS |
| STRATHROY | STATHROY AUDIO | 15 FRONT STREET WEST | 519 245 2534 | IS |
| SUDBURY | A.C. ELECTRONICS | 1879 PARIS STREET | 705 522 9190 | IS |
| SUDBURY | CUOMO ELECTRONICS INC. | 1060 LORNE STREET UNIT #2 | 705 674 3450 | SD |
| SUDBURY | KINGSWAY ELECTRONICS LTD. | 1106 KINGSWAY ROAO | 705 566 9290 | IS |
| THUNDER BAY | SOUND STEREO SERVICE | 189 SOUTH ALGOMA STREET | 807 344 6763 | IS |
| TIMMINS | CONRAD TV & AUDIO CENTRE LTD. | 219 WILSON AVE. | 705 267 6494 | SSD |
| TORONTO | ALL STAR ELECTRONICS INC. | 3801 DUNDAS ST. W. | 416 762 3211 | SD |
| TORONTO (CENTRAL) | ANDY MANGOS TELEVISION | 926 PAPE AVENUE | 416 421 2112 | SD |
| TORONTO (CENTRAL) | HOWARD TV STEREO & VID CENTRE | 3893 BATHURST STREET | 416 636 4822 | SD |
| TORONTO (CENTRAL) | RADIO SERVICE LABORATORY | 3377 YONGE STREET | 416 485 8066 | IS |
| TORONTO (CENTRAL) | RAYJAC ELECTRONICS | 980 ALNESS STREET. UNIT 8 | 416 661 5237 | IS |
| TORONTO (EAST) | DIGITAL VIDEO AUDIO | 50 SILVER STAR BLVO. #239 | 416 293 1614 | IS |
| TORONTO (EAST) | HITRONIX TECHNICAL SERVICES | 50 WEYBRIGHT CRESCENT | 416 299 6863 | IS |
| TORONTO (EAST) | NATIONAL ELECT. SERVICE ASC 5 | 24 PROGRESS ROAD | 416 292 3334 | IS |
| TORONTO (EAST) | TOWN & COUNTRY TELEVISION | 882 KINGSTON ROAD | 416 691 2000 | IS |
| TORONTO (EAST) | TRIPOLE ELECTRONICS LTD. | 744 MARKHAM ROAD | 416 431 5216 | SD |
| TORONTO (WEST) | CANADIAN HOME SERVICE | 74 ROYAL YORK ROAD | 416 251 3169 | IS |
| TORONTO (WEST) | VIDEO 2000 | 50 FASKEN DRIVE UNIT #1C | 416 6741396 | IS |
| TORONTO (WEST) | YOUNG'S ELECTRONICS | 723 OSSINGTON AVE. | 416 533 2355 | SD |
| TRENTON | WORTHING T. V. LTD. | RR #4 HWY 2 | 613 392 5000 | SSD |
| WATERLOO | DONALD CHOI CANADA LTD. | 627 COLBY ORIVE | 519 886 5010 | X |
| WHITBY | VIEWCOM ELECTRONICS INC. | 133-1/2 BROCK ST. NORTH | 416 430 0954 | IS |
| WINDSOR | BONDY TV & APPLIANCES LTD. | 7960 CLAIRVIEW AVE. | 519 974 6282 | IS |
| WINDSOR | CRESCENT TELEVISION LTD. | 3033 MARENTETTE AVENUE | 519 9691622 | SDPROVINCE: |
PROVINCE: PEI
| LOCATION | SERVICER | ADDRESS | TELEPHONE | CODE |
| CHARLETTETOWNWELLINGTON | GALLANT ELECTRONICSL. P. TV & STEREO | 96 MOUNT EDWARD ROADDAY'S CORNER | 902 892 3100902 854 2290 | ISIS |
PROVINCE: QUE
| LOCATION | SERVICER | ADDRESS | TELEPHONE | CODE |
| BL.ACK LAKE | BINETTE ET FRERES | 124 ST. DESIRE | 418 423 4893 | SSD |
| CAP DE LA MADELENE | GUY ELECTRONIQUE ENR | 112 GILLET | 819 371 8429 | IS |
| CAP DE LA MADELEN | CLAUDE TRUDEL TV | 295 THIBEAU | 819 375 5436 | SSD |
| CHARLESBOURG | CENTRE DE SERVICE SAUCIER | 840 BOUVIER | 418 622 2655 | IS |
| CHICOUTIMI | CLAUDE SIRARD TV | 786 ST. PAUL | 418 549 8767 | IS |
| CHOMEDY LAVAL | B K AUDIO SERVICE | 2025 BOUL FORTIN | 514 667 0491 | IS |
| DRUMMONDVILLE | CENTRE AUDIO VIDEO LANGLAIS | 1290 BOUL ST. JOSEPH | 819 472 1166 | SSD |
| DRUMMONDVILLE | ROSS ELECTRONIQUE INC. | 985 JEAN BREBEUR | 819 477 1522 | IS |
| GATINEAU | COSMO-TECH SERVICES INC. | 183 ACHEBAR STREET | 819 663 4496 | IS |
| GRANBY | LA CLINQUE DU SON INC. | 78 ASSOMPTION | 514 375 2323 | IS |
| ILE PERROT | NORVIC TV | 59-146 AVE. NOTRE DAME | 514 453 7050 | IS |
| JOLIETTE | B.G. ELECTRONIQUE | 150 ST. PIERRE SUD | 514 759 3091 | IS |
| LA SARRE | AMISON INC. | 77 2S RUE EST | 819 333 5419 | SD |
| LACHENAIE | B.H. ELECTRONIQUE INC. | 1306 DES ANGLAIS | 514 471 5525 | IS |
| LACHINE | MPE ELECTRONICS | 1445 NOTRE DAME | 514 634 8244 | IS |
| LES CEDRES | JACQUES DOL T.V. | 1343 CH. ST. DOMINIQUE | 514 452 4511 | IS |
| MONT LAURIER | CENTRE DU STEREO INC. | 344 BOULEVARD A PAQUETTE | 819 623 1330 | IS |
| MONTREAL | ACADIEN ELECTRONICS SERV. C. | 7711 BLVD. ST. LAURENT | 514 270 1105 | IS |
| MONTREAL | ATLANTIQUE SERVICE | 6245 METROPOLITAN EST | 514 328 1000 | SSD |
| MONTREAL | BC ELECTRONICS | 7321 HENRI BOURASSA EAST | 514 327 2382 | IS |
| MONTREAL | DUPONT ELECTRONICS CORP. | 305 BOULEVARD DECARIE | 514 748 7378 | IS |
| MONTREAL | ELECTRONIQUE R. ROY LTEE | 4567 JARRY EST | 514 725 6477 | IS |
| MONTREAL | MASSON RADIO TV ENRG. | 2641 MASSON STREET | 514 7281122 | IS |
| MT. ROYAL | SOLACMAR INC. | 5787 PARE STREET | 514 341 1431 | IS |
| MT. ST. HILLAIRE | LA GUADRA-SON INC. | 320 RUE HUGO | 514 464 4576 | IS |
| PLESSISVILLE | ELECTROCENTRE 2000 INC. | 1685 AVE. ST. LOUIS | 819 362 2456 | IS |
| QUEBEC CITY | ASTRO-SERVICE ELECTRONIQUE | 2665 BLVD. PERE LELIEVRE | 418 687 2787 | IS |
| QUEBEC CITY | LES ENTREPRISES ELECTRONICS | 193 RUE MADEN | 514 373 5466 | IS |
| RIMOUSKI | M.S.P ELECTRONIQUE INC | 389 HUPE | 418 722 8373 | IS |
| ROUYN-NORANDA | LES ENR. B. CHOUINARD INC. | 85 GAMBLE QUEST | 819 762 9668 | IS |
| SAINT-TIMOTHEE | PAQUETTE AUDIOTRONIQUE ENR. | 5670 BOULEVARD HEBERT | 514 371 5553 | IS |
| SHERBROOKE | PRIMO SERVICE | 2304 KINS STREET WEST | 819 564 1548 | SD |
| SHERBROCKE | VIDEO SON ENR. | 1020 BOUL QUEEN NORD | 819 564 0505 | IS |
| ST. GEORGES EST | DIMESION ELECTRONIQUE INC. | 17100 BOULEVARD LACROIX | 418 227 0988 | IS |
| ST. HYACINTHE | SALON DE LELECTRONIQUE INC. | 2783 NICHOLS | 514 774 7896 | SSD |
| ST. JEROME | POIRIER RADIO SERVICE | 506 RUE ST. GEORGES | 514 438 3375 | IS |
| ST. PIERRE DE SOREL | GAETAN BERGERON INC. | 1815 MARIE VICTROIN | 514 742 4511 | IS |
| ST. THOMAS D'AQUIN | DANIEL RADIO TV ENR | 400 PRINCIPALE | 514 796 3416 | SSD |
| ST. JACQUES | MIGUE TV SERVICE | 39 RUE ST-LACQUES | 418 839 2549 | IS |
| ST.-LAURENT | VICAM ELECTRONIC INC. | 4455 BOUL. PORIIER | 514 331 6513 | IS |
| ST. DAVIDS. LEVIS | SELECTROTEC | 563 TRANS CANADA | 418 835 3966 | IS |
| ST. HYACINTHE | JACQUES BOUSQUET TELEVISION | 2410 CARTIER | 514 773 1364 | SSD |
| ST. LEONARD | L'ATELIER DU VIDEO S.Y.K. INC. | 6020 METROPOLITAIN EAST | 514 253 1387 | IS |
| STE THERESE | CENTRE DE SERVICE AUDIO VIDEO | 238 TURGEON | 514 437 5495 | SD |
| STE-FOY | CLINIQUE ELECTRONIQUE (NESA) | 3187-A CHEMIN STE-FOY | 418 653 5220 | IS |
| THETFORD-MINES | CARON RADIO & TV | 1185 SIMONEAU | 418 338 8173 | IS |
| THETFORD-MINES | CENTRE ELECTRONIQUE ENR | 785 ST ALPHONESE | 819 623 1330 | IS |
| TROIS RIVIERES | VIDEO ELECTRONIQUE C.G. (922) | 1800 LAVERENDRYE | 819 376 1541 | IS |
| VALLEYFIELD | ANDRE BELLEMARD RADIO TV INC. | 30 AVE. GRANDE ILE | 514 373 6058 | SD |
| VERDUN | ROBICHAUD TV | 4349 WELLINGTON | 514 761 4713 | SD |
| VILLE ST-LAURENT | LES SERVICE CONYSTEL LTD. | 668 DESLLAURIERS | 514 331 5720 | IS |
PROVINCE: SASK
| LOCATION | SERVICER | ADDRESS | TELEPHONE | CODE |
| KINISTINO | TOM'S TV & RADIO SERVICE | BOX 472 | 306 864 2244 | IS |
| NORTH BATTLEFORD | TWIN CITY TV & RADIO LTD. | 1922-100TH STREET | 306 446 2322 | IS |
| REGINA | EL-MEC-TRONICS LTD. | 1809 McARA STREET | 306 352 4030 | SD |
| REGINA | PROFESSIONAL ELECTRONIC SVC | 1355 McIntYRE STREET | 306 359 3356 | SD |
| SASKATOON | TRICOM ELECTRONICS | 1926 ALBERTA AVENUE | 306 653 3913 | IS |
PROVINCE: YUKON
| LOCATION | SERVICER | ADDRESS | TELEPHONE | CODE |
| WHITEHORSE | AARO TECH LTD. | 406C OGILVIE ST. BOX 109 | 403 668 2035 | IS |
FOUR À MICRO-ONDES
MANUEL DE L'UTILISATEUR ET GUIDE DE CUISSON
LIRE COMPLÈTEMENT CE MANUEL DE L'UTILISATEUR AVANT D'UTILISER LE FOUR
LMS-1221SS


- OWNER'S MANUAL & COOKING GUIDE
- TABLE OF CONTENTS
- SAFETY 3-4
- UNDERSTANDING YOUR
- MICROWAVE OVEN 5-9
- Using your microwave oven ....10-21
- HEATING OR REHEATING GUIDE ......20
- FRESH VEGETABLE CHART 21
- TROUBLESHOOTING 22-24
- SERVICE CENTERS LISTING 25-28
- Important Notes:
- TABLE DES MATIÈRES
- SÉCURITÉ 3-4
- GROUNDING INSTRUCTIONS
- WARNING
- NOTES:
- SAFETY
- IMPORTANT SAFETY INSTRUCTIONS
- SAVE THESE INSTRUCTIONS
- INSTALLATION
- Circuits
- Voltage Warning
- Placement of the Oven
- Do not block the air vents
- Radio interference
- PARTS AND ACCESSORIES
- CONTROL PANEL
- COVERING
- SPACING
- STIRRING
- TURNING
- ARRANGEMENT
- TESTING FOR DONENESS
- STANDING TIME
- SHIELDING
- PIERCING
- CLEANING
- INTERIOR
- REMOVABLE PARTS
- DOOR
- Touch:
- Display Shows:
- 1.
- 2.
- 3.
- 4.
- CUSTOM SET
- CUSTOM SET FUNCTION TABLE
- CHILD LOCK
- 5.
- EZ ON
- TIMED COOKING
- 6.
- 7.
- For best results:
- AUTO COOK CHART
- Categories:
- POTATO (EXAMPLE)
- SENSOR REHEAT
- WARNING: Do not use aluminum foil during cooking cycle.
- COOKING TIPS
- Meat
- Poultry
- COOKING TIPS (continued)
- Fish
- HEATING OR REHEATING GUIDE
- TROUBLESHOOTING
- Questions and Answers
- Questions and Answers (continued)
- Before Calling for Service
- LG ELECTRONICS CANADA INC.
- AUTHORIZED SERVICE CENTERS LISTING
- FOUR À MICRO-ONDES
- MANUEL DE L'UTILISATEUR ET GUIDE DE CUISSON
Brand : LG
Model : LMS-1221SS
Category : Built-in oven