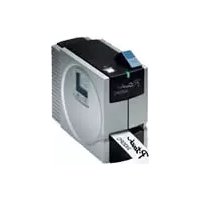
P-touch PT-1500PC - Printer BROTHER - Free user manual and instructions
Find the device manual for free P-touch PT-1500PC BROTHER in PDF.

User questions about P-touch PT-1500PC BROTHER
0 question about this device. Answer the ones you know or ask your own.
Ask a new question about this device
Download the instructions for your Printer in PDF format for free! Find your manual P-touch PT-1500PC - BROTHER and take your electronic device back in hand. On this page are published all the documents necessary for the use of your device. P-touch PT-1500PC by BROTHER.
USER MANUAL P-touch PT-1500PC BROTHER
text_image
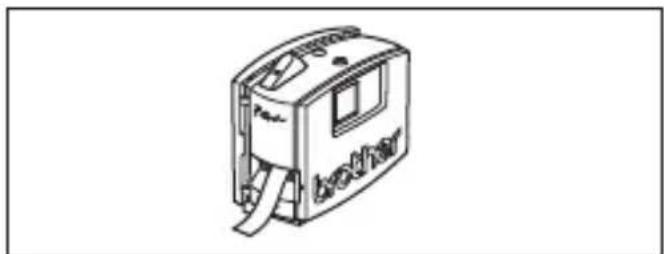
P-touch brotherbrother®
Quick Reference
Thank you for purchasing the P-touch 1500PC!
With your new Brother label printer, you can print personalized labels for any purpose. Simply insert a label cassette into the PT-1500PC, design your label with the enclosed P-touch label-designing software, and then print it out. Your customized label prints out in seconds. Label tape cassettes are available in various sizes and colors—ideal for color-coded labeling or any other special labeling needs.
Two label-designing applications are available on the enclosed CD-ROM. The easy-to-use P-touch Quick Editor software allows text to be entered and formatted quickly so that simple labels can be printed instantly. The more advanced P-touch Editor Ver. 3.1 application not only automates complex layout functions, but it also includes a variety of pre-formatted templates for immediate use.
Canadian Department of Communications Compliance Statement
This digital apparatus does not exceed the Class B limits for radio noise emissions from digital apparatus as set out in the interference-causing equipment standard entitled “Digital Apparatus”, ICES-003 of the Department of Communications.
Table of contents
Unpacking 2
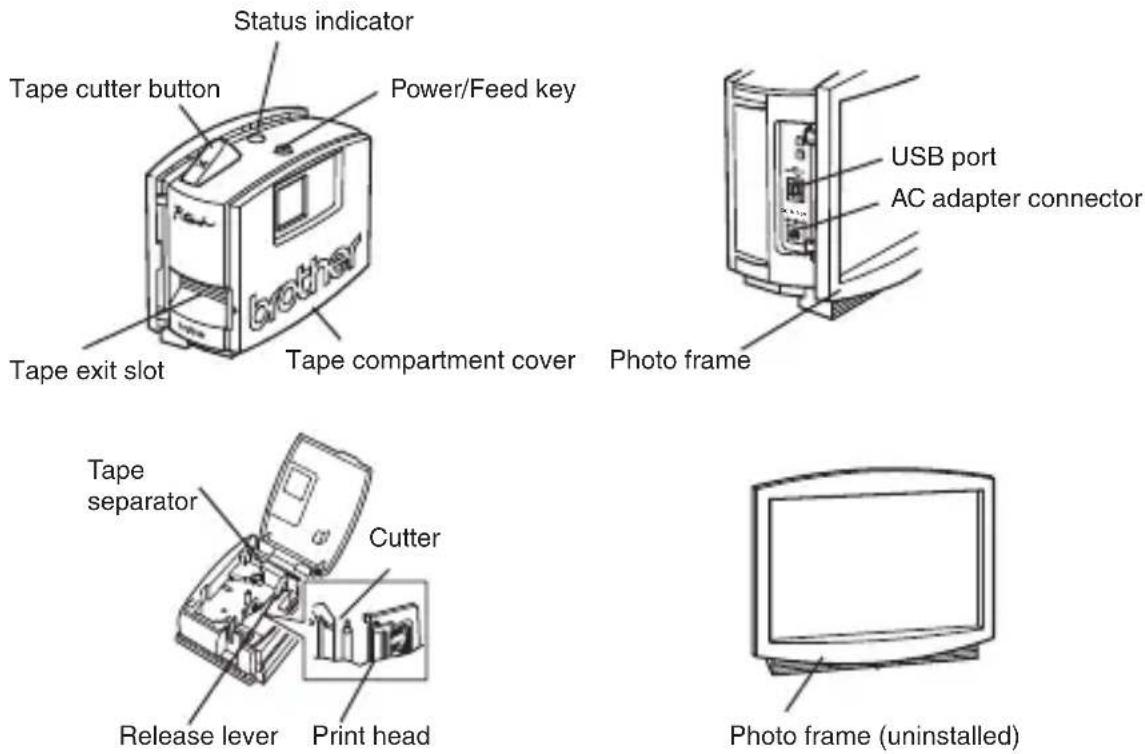
General description 2
General precautions 2
Inserting a photo into the photo frame 3
Tape cassettes 3
Changing the tape caessette 4
Connecting the AC adapter 4
Power/Feed key 5
Connecting the USB interface cable 5
Software and printer driver 5
For PC-compatible users (Windows® 98/98SE/Me/2000) ...... 6
Before installation 6
Installing P-touch Quick Editor 6
Installing P-touch Editor Ver. 3.1 8
Installing the printer driver 9
Reading the User's Guide 9
Uninstalling the software and printer driver 10
Replacing, deleting or adding another printer driver 10
For Macintosh users 12
Before installation 12
Installing P-touch Quick Editor 12
Installing P-touch Editor Ver. 3.1 13
Selecting the driver 14
Reading the User's Guide 14
Uninstalling the software and printer driver 14
Starting up the P-touch Editor Ver 3.1 software 15
Starting up P-touch Editor Ver. 3.1 15
Starting up the P-touch Quick Editor software ....16
Starting up P-touch Quick Editor 16
Using P-touch Quick Editor 16
Specifying a label size 16
Entering text 17
Importing text....17
Using the Text History list 17
Adding a symbol 17
Changing the background color 18
Viewing the text 18
Printing 18
Hiding/displaying P-touch Quick Editor (Windows only) 18
Quitting P-touch Quick Editor 18
Printing a label 19
Removing the label backing.... 19
Quitting P-touch Quick Editor 20
Maintenance 20
Cleaning the print head and roller 20
Cleaning the tape cutter 21
Troubleshooting 21
Monitoring the P-touch status 21
Problem-solving 22
Machine specifications 22
Accessories 23
Unpacking
• PT-1500PC (with photo frame attached)
- 1/2" (12 mm) wide TZ tape cassette (black characters on white tape; 26' 1/4" (8 meters))
- AC adapter (model AD-60; for plugging the PT-1500PC into the AC outlet)
• USB Interface cable (for connecting the PT-1500PC to either an IBM PC-compatible or Macintosh computer)
- Quick Reference
• CD-ROM containing the PC and Mac software and their manuals
General description
General precautions
- Use only Brother TZ tapes with this machine. Do not use tapes that do not have the
- Do not pull on the tape being fed from the P-touch. Otherwise, the tape cassette may be damaged.
- Avoid using the machine in extremely dusty places, and keep it out of both direct sunlight and rain.
- Do not expose the machine to high temperatures or high humidity.
- Do not leave any rubber or vinyl objects on the machine for an extended period of time. Doing so may cause staining.
- Do not clean the machine with alcohol or other organic solvents. Use a soft, dry cloth only.
- Do not put any foreign objects into or anything on the machine.
• T o avoid injures, do not touch the cutter's edge. - Do not touch the print head, which becomes very hot when the P-touch is used. Even after the machine is turned off, the print head remains hot for some time.
- Use only the enclosed AC adapter (model AD-60) designed exclusively for this machine. Use of any other adapter will void the warranty.
- Use only the enclosed USB interface cable. Use of any other cable will void the warranty.
- When the machine is not being used for a long period of time, disconnect the AC adapter.
- Do not try to disassemble the P-touch.
- IBM ^® is a trademark of International Business Machines, Inc.
- Microsoft® and Microsoft Windows® are registered trademarks of Microsoft Corp. in the US and other countries.
• Macintosh and Power Macintosh are registered trademarks of Apple Computer, Inc.
• All other software and product names mentioned are trademarks or registered trademarks of their respective companies.

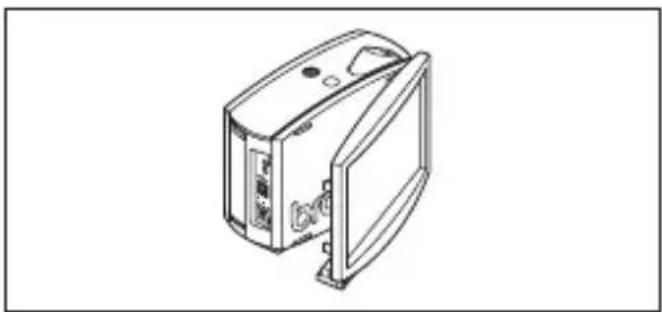
Inserting a photo into the photo frame
A photo can be inserted into the photo frame attached to the PT-1500PC, turning it into a decorative addition to your workspace.
Insert a photo into the photo frame in either of the following two ways:
- By removing the photo frame from the PT-1500PC
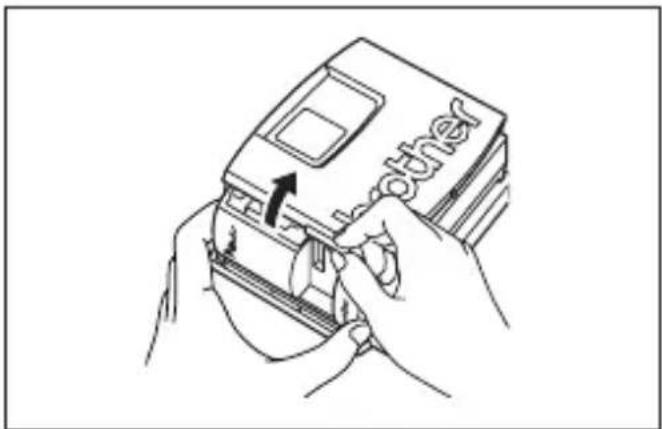
① Remove the photo frame from the PT-1500PC by carefully pulling off the frame, grabbing it from the back of the PT-1500PC as shown.
Be careful that the tape compartment cover is not opened when removing the photo frame.
② Remove the cardboard backing and the clear protective sheet from the photo frame.
③ Stack the clear protective sheet, the photo, and the cardboard backing in that order, facing down.
4 Insert one end of the stack under the two tabs on one side of the frame, and then insert the stack under the two tabs on the other side of the frame.
⑤ Attach the photo frame to the side of the PT-1500PC opposite to the tape compartment cover.
- Without removing the cardbord backing and the clear protective sheet from the photo frame
- Slide the photo between the cardbord backing and the clear protective sheet.
natural_image
Line drawing of a device with ports and connectors (no text or symbols)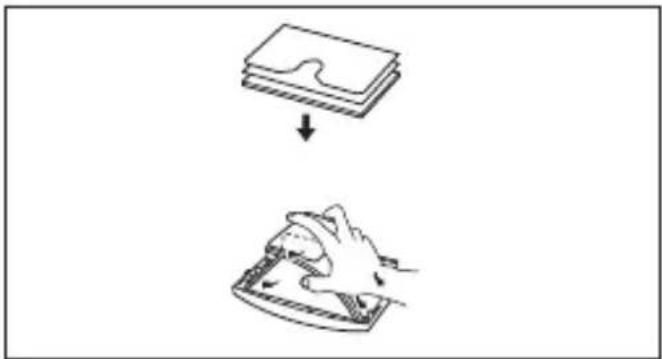
natural_image
Illustration showing a device being processed from a stack of documents (no text or symbols present)
natural_image
Diagram of a hand pressing down on a rectangular device with a downward arrow indicating force or movement (no text or symbols present)Tape cassettes
- Do not pull on the tape being fed from the machine, otherwise the tape cassette may be damaged.
- If the label is attached to a wet or dirty surface, it may easily peel off. Before affixing the label, clean the surface where it will be attached.
- Depending on the environmental conditions and the material, condition, roughness, and shape of the affixing surface, the label may move out of place or peel off. In order to test the label's adhesive strength or before using this label where safety is a particular concern, test the label by affixing a small piece of it to a hidden area of the intended surface.
- Sunlight, wind and rain may cause the color of the label to fade or the label to peel off.
- Markings made with oil-based or water-based ink may be visible through a label affixed over them. To hide the markings, use two labels layered on top of each other, or use tape with a dark background.
- This tape may not be adequate in cases where liabilities may result due to damage or injuries.
Changing the tape cassette
① Lift open the tape compartment cover. The installed cassette is also released.
Be careful that the photo frame does not fall off when the tape compartment cover is opened.
② If a tape cassette is already installed, remove it by pulling it straight up.
③ If the ink ribbon in the tape cassette to be installed is loose, use your finger to wind the toothed wheel in the direction of the arrow on the cassette until there is no slack in the ribbon. Also, make sure that the end of the tape feeds under the tape guide.
If you are inserting a new tape cassette provided with a stopper, be sure to remove the stopper.
4 Insert the tape cassette firmly into the tape compartment, making sure that the entire back of the cassette touches the bottom of the compartment.
When inserting the tape cassette, make sure that the ink ribbon does not catch on the corner of the metal guide.
⑤ Securely close the tape compartment cover by pressing down on the textured area of the cover near the tape exit slot.
text_image
Line drawing showing hands inserting a card into a card with the word 'other' visible on the cover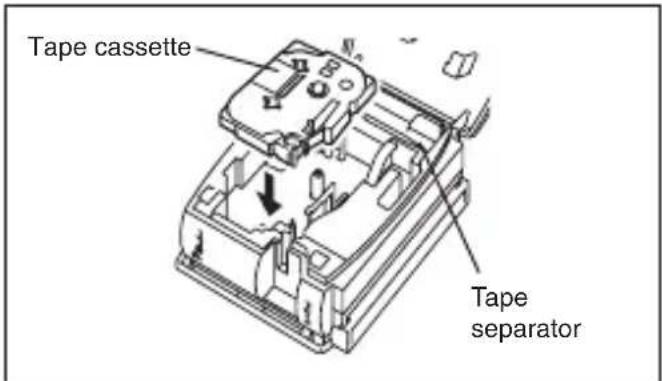
text_image
Tape cassette Tape separatorConnecting the AC adapter
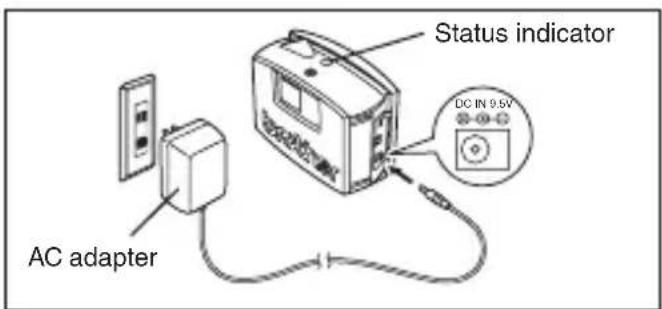
Connect the AC adapter to the PT-1500PC as described below.
① Insert the plug on the adapter cord into the connector marked DC IN 9.5V on the PT-1500PC.
② Insert the plug on the adapter into the nearest standard electrical outlet. The status indicator lights up in green to indicate that the machine is on.
To turn off the PT-1500PC, press the Power/Feed key so that the status indicator goes off.
text_image
Status indicator DC IN 9.5V AC adapterPower/Feed key
The power/feed key ( can be used both for turning on and off the PT-1500PC and for feeding out tape.
• T o turn the PT-1500PC on or off:
- Press once.
• T o feed out some tape:
●Hold down for at least two seconds.
Connecting the USB interface cable
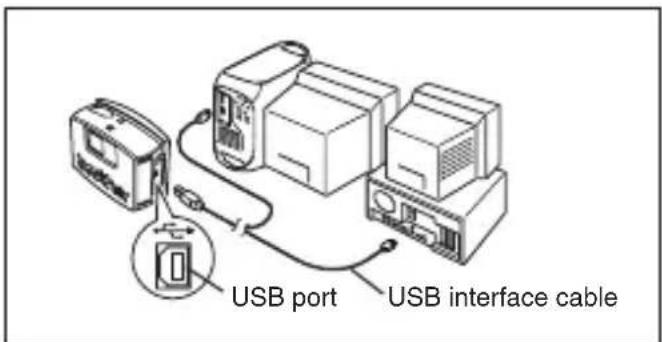
Connect the PT-1500PC to the computer as described below.
When connecting the PT-1500PC to an IBM PC-compatible computer, label-designing software and the printer driver must be installed before the PT-1500PC is connected to the computer and plugged in using the AC adapter. Follow the installation procedures on pages 6 through 10 to install the software and the printer driver, and then connect the PT-1500PC to the computer when you are instructed to do so.
① Insert the flat connector on the enclosed USB interface cable into the USB port on the computer.
② Insert the square connector on the enclosed USB interface cable into the USB port ( ) on the PT-1500PC.
When making a USB connection through a hub, a proper connection may not be possible due to the type of hub used. If printing is not possible with a hub connection, try connecting the PT-1500PC directly to the computer using the USB interface cable.
text_image
USB port USB interface cableSoftware and printer driver
Brother Co., Ltd. and its suppliers possess all rights and copyrights to this software (including, but not limited to, the programming, images, clip art, templates, and text incorporated into the software), the text in the enclosed manuals, and duplicates of the software. This software, either in part or in whole, may not be duplicated, modified, reverse-engineered, disassembled or decompiled without permission.
With the enclosed CD-ROM, the following can be installed:
• P-touch Quick Editor
• P-touch Editor Ver. 3.1
• PT-1500PC printer driver
For PC-compatible users (Windows® 98/98SE/Me/2000)
Before labels can be printed on the PT-1500PC, label-designing software and the PT-1500PC printer driver must be installed. In order to design labels that can be printed on the PT-1500PC, two applications are available on the enclosed CD-ROM: P-touch Quick Editor and P-touch Editor Ver. 3.1
Before installation
Check that your system configuration meets the following requirements.
Computer: IBM PC or compatible
Operating system: Microsoft® Windows® 2000 or pre-installed with Microsoft® Windows® 98/98SE/Me
Hard disk free space: At least 20 MB
Available memory: Minimum 32 MB
Monitor: VGA or higher graphics card
USB port
CD-ROM drive
Do not connect the PT-1500PC to the computer before installing the label-designing software, otherwise it may not be installed correctly. Be sure not to connect the PT-1500PC until you are instructed to do so.
For installation on Windows ^® 2000, administrator privileges are required. In addition, printing requires power user or administrator privileges. This software cannot be operated in Users groups.
Installing P-touch Quick Editor
The P-touch Quick Editor software provides quick access to the more simple label-designing features for easy text input and instant printing of labels. Install the P-touch Quick Editor software on a PC as described below.
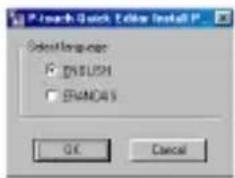
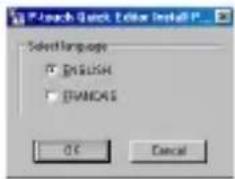
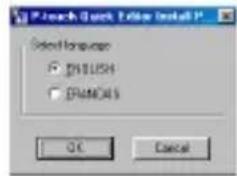
1 Insert the enclosed CD-ROM into the computer's CD-ROM drive. A dialog box automatically appears, allowing you to select the language.
text_image
Search Quick Edit Install Select language: ENGLISH EMANSYS OK CancelIf the dialog box does not automatically appear, double-click "My Computer" on the desktop, double-click the icon for the CD-ROM drive containing the CD-ROM, and then double-click "Setup.exe" to display the dialog box.
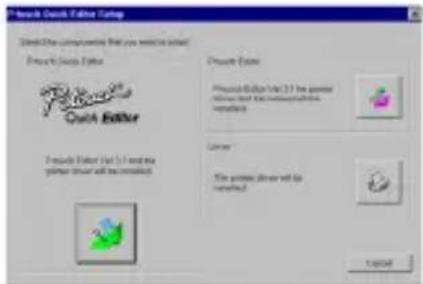
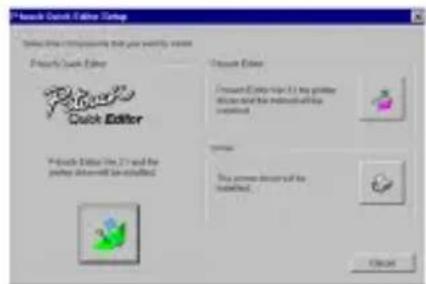
②Select the language for the Windows operating system that you are using, and then click the OK button. A dialog box appears, allowing you to select what to install.

text_image
Search Quick Answer Camp Describe the components that you want to read Create Quick Answer Quick Answer You're Existing - 11 for your doses that are not available in options Cancel You're Existing - 11 for your doses that are not available in options Cancel You're Existing - 11 for your doses that are not available in options CancelTo install just the printer driver, click the bottom button (Driver) on the right side. The first Driver Setup dialog box appears, informing you that the PT-1500PC printer driver will be installed.

text_image
Server Setup (Server PT 180PC) The following switch will set server: (Windows NT180PC) Starting Close installed action under Windows PT180PC and close are directed to: To confirm this setup! Setup settings. OK CancelContinue with the procedure in Installing the printer driver on page 9.
To install the P-touch Editor Ver. 3.1 software, click the top button (P-touch Editor) on the right side. Then, continue with the procedure in Installing P-touch Editor Ver. 3.1 on page 8.
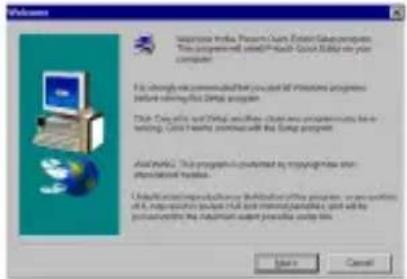
3 Click the left button (P-touch Quick Editor). The InstallShield® Wizard for installing the P-touch Quick Editor software starts up, and then the Welcome dialog box appears.
text_image
Welcome Microsoft Media Player Call Enter Subcomputer This appointment will be a successful 50% or more than your computer. It is strongly recommended for you to exit the following programs before referring this program: This Program will not use any other common services for writing. This service is available with the Program program. About this: This program is preferred by copying these key applications. Downloading an application or file sharing this program, or are suitable for a specific program that can be used to create new files, and will help you access to the Program's user website or files. Save Cancel④ Carefully read the contents of the dialog box, and then click the Next button to continue. The User Information dialog box appears.

text_image
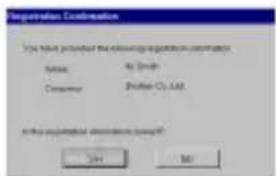
Name: 31.2nds Password: 90-896-05.126⑤Type the necessary information into the appropriate boxes (If the information has already been registered in Windows®, it will automatically appear.), and then click the Next button. A dialog box appears, asking for confirmation of the entered information.
text_image
Registration Confirmation You have requested the following registration confirmation: Name: No. 1634 Customer: Bhatier-CL-128 in this application otherwise required? OK Help⑥ Click the Yes button to register the entered information.
To change the information, click the No button, and then return to step 4.
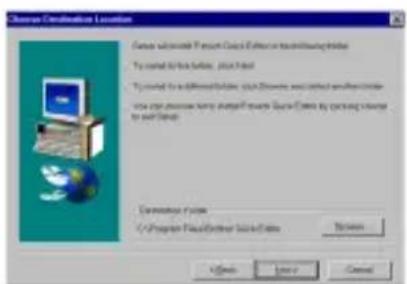
The Choose Destination Location dialog box appears.
text_image
Source Ordinators Location Source: Microsoft FrontPage Copy Editor in Microsoft Internet Explorer To be created by this version, then found To be created by Microsoft FrontPage, which is created by Microsoft Internet Explorer. This version contains the original website FrontPage Copy Editor by opening source to our Web Database System C:\Program Files\Other\LocalData Options Help Save Cancel⑦ Click the Next button to begin installation.
⑧ After P-touch Quick Editor is installed, a dialog box appears, allowing you to select where the shortcut to P-touch Quick Editor will be added (page 16).
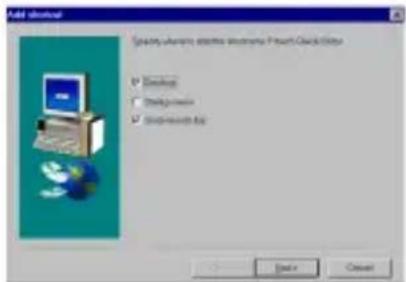
text_image
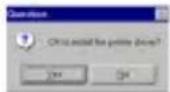
Add email Splice Atlanta email address: Pouch Call Date Download Help SendTo SendTo Back Next⑨ Select the desired location for the shortcut, and then click the Next button. A dialog box appears, allowing you to select whether or not to install the printer driver.
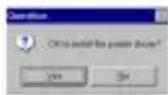
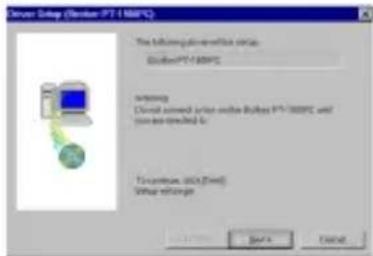
To install the printer driver, click the Yes button. The first Driver Setup dialog box appears, informing you that the PT-1500PC printer driver will be installed.
text_image
Order Setup (Order PT 100PC) File following: drive this setup OrderPT-300PC Routing: This tool contains server portes (Order PT-300PC) and you can be installed to Access: port (base) Data transfer... Go To CancelContinue with the procedure in Installing the printer driver on page 9.
If the printer driver is already installed, click the No button. A dialog box appears, showing that installation is finished.
text_image
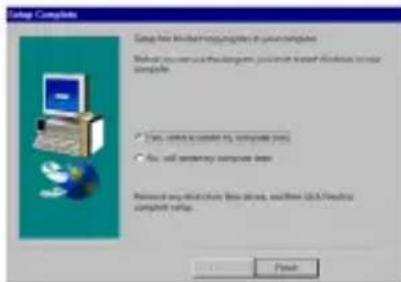
Setup Complete Setup has installed or running to your computer. Before you create the environment you must install Windows your computer. ✓ Yes, not allowed to switch this setup. ✓ No, not working on computer help. Remove any environment that uses, either clear or secure computer setup.Select "Yes, I want to restart may computer now.", click the Finish button to restart the computer, and then remove the CD-ROM from the CD-ROM drive.
Installing P-touch Editor Ver. 3.1
The P-touch Editor Ver. 3.1 software includes a variety of more complex functions for printing barcodes and images, enabling you to design just about any label that you can imagine. Install the P-touch Editor Ver. 3.1 software on a PC as described below.
1 Insert the enclosed CD-ROM into the computer's CD-ROM drive. A dialog box automatically appears, allowing you to select the language.
text_image
Search Quick Edition Install Select language ENGLISH CHANDS OK CancelIf the dialog box does not automatically appear, double-click "My Computer" on the desktop, double-click the icon for the CD-ROM drive containing the CD-ROM, and then double-click "Setup.exe" to display the dialog box.
② Select the language for the Windows operating system that you are using, and then click the OK button. A dialog box appears, allowing you to select what to install.
text_image
Touch Quick Editor Camp Create the Community Web you want to create Product Quick Editor Quick Editor Create Editor (set 1) with the writer server will be installed Product Type Product Editor must be 31 for users Allow to the following: Version Color The printer driver will be installed CancelTo install just the printer driver, click the bottom button (Driver) on the right side. The first Driver Setup dialog box appears, informing you that the PT-1500PC printer driver will be installed.
Continue with the procedure in Installing the printer driver on page 9.
To install the P-touch Quick Editor software, click the left button (P-touch Quick Editor). Then, continue with the procedure in Installing P-touch Quick Editor on page 6.
③ Click the top button (P-touch Editor) on the right side. The InstallShield® Wizard for installing the P-touch Editor Ver. 3.1 software starts up, and then the Welcome dialog box appears.
4 Follow the instructions that appear and continue with the installation. During installation, the following installation methods will be available.
Typical
All of the basic options (P-touch Editor Ver. 3.1, clip art, Auto Format templates, Help, and 13 fonts) are installed.
Compact
Only P-touch Editor Ver. 3.1 is installed.
Custom
Editor: P-touch Editor Ver. 3.1
Clip Art: Illustrations for the P-touch
Editor Ver. 3.1 Clip Art function
Fonts: 13 fonts
Auto Format Templates: Templates for the Auto Format function
User's Guide: User's Guide (HTML) for the P-touch Editor Ver. 3.1
The User's Guide can also be viewed from the CD-ROM without installing it onto the computer.
Help: Help files for P-touch Editor Ver. 3.1 If the Change button can be clicked while an option is selected, sub-components can be selected. Click the Change button to display the Select Sub-components dialog box, and then select the sub-components that you wish to install by putting a check mark beside them. If certain options or sub-components are not installed, some P-touch Editor Ver. 3.1 functions may not be available. After selecting the desired sub-components, click the Continue button.
⑤ After P-touch Editor Ver. 3.1 is installed, a dialog box appears, allowing you to select whether or not to install the printer driver.
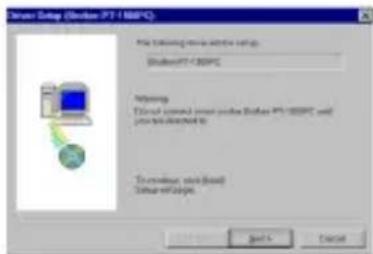
To install the printer driver, click the Yes button. The first Driver Setup dialog box appears, informing you that the PT-1500PC printer driver will be installed.
text_image
Driver Setup (Server PT 100PC) The following settings for this setup: Server PT 100PC Timeout Device ordered order online Server PT 100PC and user are checked to Timeout, 360 (End) Timeout extends OK CancelContinue with the procedure in Installing the printer driver below.
If the printer driver is already installed, click the No button. A dialog box appears, showing that installation is finished.
text_image
Setup Complete Setup free Windows networking in your computer Microsoft Word 2.0 (Windows) - Microsoft Windows to use computer. ✓ Use common settings to compute (ms) ✓ Use all connectivity compute server Removed any details: Web server, and then USB/Internet complete setup. FinishSelect "Yes, I want to restart may computer now.", click the Finish button to restart the computer, and then remove the CD-ROM from the CD-ROM drive.
Installing the printer driver
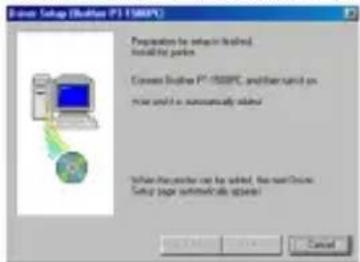
With Plug-and-Play, new devices connected to the system are detected, and their drivers are automatically installed. Since the PT-1500PC will be connected through the USB port, its driver will be installed with Plug-and-Play. Be sure to read the installation instructions described below before installing the printer driver supplied on the CD-ROM.
Be sure not to connect the PT-1500PC until you are instructed to do so.
① Click the Next button. A dialog box appears, instructing you to connect the PT-1500PC to the computer.
text_image
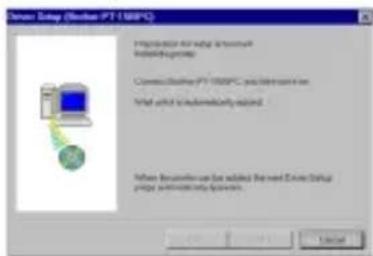
Network Setup (Network PT 100PC) Proportion to Web Server Installable group Connect the network PT 100PC, you will access this work Write your website or administer by us. When there are more web address the next instance. Default please install any updates.②Connect the PT-1500PC to the computer using the enclosed USB interface cable as described on page 5, and then turn on the PT-1500PC. A dialog box appears, showing that the printer driver has been installed.
text_image
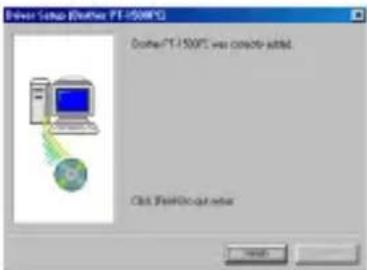
Driver Setup (Driver: PT-150KPG) Driver: PT-150PG was complete added. Click: Print/Print output③Click the Finish button. A dialog box appears, showing that installation is finished.

text_image
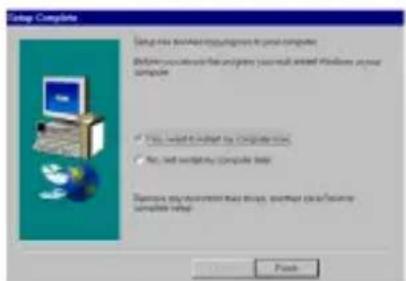
Setup Complete Setup has broken up the computer to your computer. Before you can use the program, you must not use Windows or your computer. Yes, I need to install any computer now. No, I will install my computer now. Remove any data from that device, and then adds finish to complete setup. Finish4 Select "Yes, I want to restart my computer now.", click the Finish button to restart the computer, and then remove the CD-ROM from the computer.
Reading the User's Guide
The P-touch Editor User's Guide can be viewed either by inserting the CD-ROM into the drive each time you wish to refer to it or by installing it onto your hard disk so that it is quickly available at any time. Since the User's Guide is an HTML document, a browser is needed to read it.
• From the CD-ROM:
① Start up Windows Explorer.
②Select the CD-ROM drive.
③ Double-click "Main.htm" in the Manual folder within the Ptouch folder on the CD-ROM.
• From the P-touch Editor 3.1 group window:
- Double-click The User's Guide P-touch Editor Ver3.1 icon.
- With the Start button:
① Click the Start button in the taskbar to display the Start menu.
②Select "Programs".
③Select "P-touch Editor 3.1".
④Click "The User's Guide P-touch Editor Ver3.1".
Uninstalling the software and printer driver
Uninstall the P-touch Editor Ver. 3.1/P-touch Quick Editor software from a PC as described below.
① Start up Windows ^® 98/98SE/Me/2000.
② Click the Start button in the taskbar, select "Settings", and then click "Control Panel".
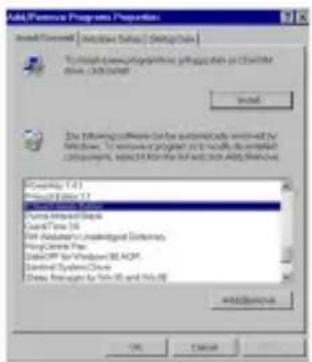
③In the Control Panel window, double-click "Add/Remove Programs".
text_image
Add Proteve Programs Properties Install/Control Options (Setup) Design/Box To include new Proteve Programs to install the drive. On Web Install The following: We can be automatically saved by Windows - To remove a program that is used to install C:\Program Files\Add Proteve Programs\AddProteve Programs\AddProteve Programs\AddProteve Programs\AddProteve Programs\AddProteve Programs\AddProteve Programs\AddProteve Programs\AddProteve Programs\AddProteve Programs\AddProteve Programs\AddProteve Programs\AddProteve Programs\AddProteve Programs\AddProteve Programs\AddProteve Programs\AddProteve Programs\AddProteve Programs C:\Users\1.0.1 Windows Server 1.1.1 Windows Server 1.1.2 Windows Server 1.1.3 Windows Server 1.1.4 Windows Server 1.1.5 Windows Server 1.1.6 Windows Server 1.1.7 Windows Server 1.1.8 Windows Server 1.1.9 Windows Server 1.2.0 Windows Server 1.2.1 Windows Server 1.2.2 Windows Server 1.2.3 Windows Server 1.2.4 Windows Server 1.2.5 Windows Server 1.2.6 Windows Server 1.2.7 Windows Server 1.2.8 Windows Server 1.2.9 Windows Server 1.3.0 Windows Server 1.3.1 Windows Server 1.3.2 Windows Server 1.3.3 Windows Server 1.3.4 Windows Server 1.3.5 Windows Server 1.3.6 Windows Server 1.3.7 Windows Server 1.3.8 Windows Server 1.3.9 Windows Server 1.4.0 Windows Server 1.4.1 Windows Server 1.4.2 Windows Server 1.4.3 Windows Server 1.4.4 Windows Server 1.4.5 Windows Server 1.4.6 Windows Server 1.4.7 Windows Server 1.4.8 Windows Server 1.4.9 Windows Server 1.5.0 Windows Server 1.5.1 Windows Server 1.5.2 Windows Server 1.5.3 Windows Server 1.5.4 Windows Server 1.5.5 Windows Server 1.5.6 Windows Server 1.5.7 Windows Server 1.5.8 Windows Server 1.5.9 Windows Server 1.6.0 Windows Server 1.6.1 Windows Server 1.6.2 Windows Server 1.6.3 Windows Server 1.6.4 Windows Server 1.6.5 Windows Server 1.6.6 Windows Server 1.6.7 Windows Server 1.6.8 Windows Server 1.6.9 Windows Server 1.7.0 Windows Server 1.7.1 Windows Server 1.7.2 Windows Server 1.7.3 Windows Server 1.7.4 Windows Server 1.7.5 Windows Server 1.7.6 Windows Server 1.7.7 Windows Server 1.7.8 Windows Server 1.7.9 Windows Server 1.8.04 In the Add/Remove Programs Properties dialog box, select "P-touch Quick Editor" (to delete the P-touch Quick Editor software) or "P-touch Editor 3.1" (to delete the P-touch Editor Ver. 3.1 software), and then click the Add/Remove button.
⑤ A message appears, asking if you wish to delete the selected application. Click the Yes button to delete the application.
If you do not wish to delete the application, click the No button.
⑥ In the dialog box that appears, indicating that the application is deleted, click the OK button.
Replacing, deleting or adding another printer driver
①Turn off the PT-1500PC, and then disconnect it from the computer.
② Insert the enclosed CD-ROM into the computer's CD-ROM drive. A dialog box automatically appears, allowing you to select the language.
text_image
File Quick Exit Install Select language ● CMOSA ○ CMOSA OK CancelIf the dialog box does not automatically appear, double-click "My Computer" on the desktop, double-click the icon for the CD-ROM drive containing the CD-ROM, and then double-click "Setup.exe" to display the dialog box.
③ Select the language for the Windows operating system that you are using, and then click the OK button. A dialog box appears, allowing you to select what to install.
text_image
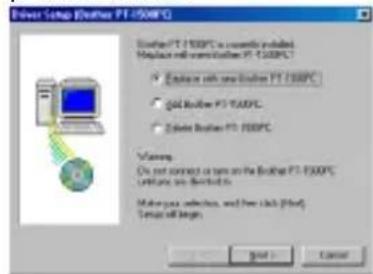
Quick Click Editor Setup Select the components that your website name. Quick Click Editor Quick Editor Create Copy size 11 by printer discs and the network of the created New The power description of the created. Cancel4 Click the bottom button (Driver) on the right side. The first Driver Setup dialog box appears, allowing you to select whether to replace, delete or add another PT-1500PC printer driver.
text_image
Driver Setup (Driver PT-1508PC) Driver PT-1508PC is currently included. Replace with reconnection PT-1508PC Exchange with new solution PT-1508PC Gold Solution PT-1508PC Delete Solution PT-1508PC Warning: Do not switch or turn on the Backlog PT-1508PC. Create any destinations. Make your selections, and how click (Find) Setup all uses. Print Cancel⑤Select the desired operation, and then click the Next button.
If "Replace with new Brother PT-1500PC" is selected, the previously installed printer driver is deleted, and replaced with a new one. Select this option when upgrading the printer driver, or when running Windows® 2000 and changing to a PT-1500PC with a different serial number.
If "Add Brother PT-1500PC" is selected, a new printer driver is added. With USB on Windows® 98/Me, only a port is added without adding the PT-1500PC as a new printer. Select this option when connecting and using multiple PT-1500PCs with the same computer.
⑥ If "Replace with new Brother PT-1500PC" or "Add Brother PT-1500PC" was selected: A dialog box appears, instructing you to connect the PT-1500PC to the computer.
text_image
Design Setup (Double P1 1500PC) Proposition to select in selected installing ports. Connect Double P1 1500PC, whether can add on prior touch as automatically deliver. When this is put out can be added, the next software Setup type is automatically open!Connect the PT-1500PC to the computer using the enclosed USB interface cable as described on page 5, and then turn on the PT-1500PC. A dialog box appears, showing that the printer driver has been installed.
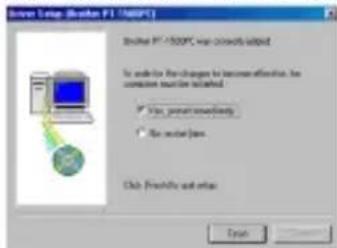
text_image
Create Setup (Revlon PT 100PC) Revlon PT 100PC was correctly added for use for the changes to become effective, be completed directly started. ✓ Use percent at least ✓ Use percent less. Click Previous and else. OKSelect "Yes, restart immediately.", and then click the Finish button to restart the computer.
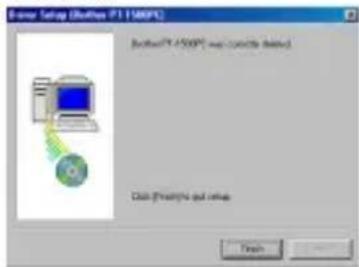
If "Delete Brother PT-1500PC" was selected: A dialog box appears, asking for confirmation to delete all PT-1500 printer drivers.

Click the Yes button. A dialog box appears, showing that the printer drivers have been deleted.
text_image
Driver Setup (Bluetooth P1.1500PC) Bluetooth P1-4500PC exp concepte deleted Class (F:\Users\opt.vcs\ns FinishClick the Finish button. If a dialog box appears, explaining that the computer should be restarted, select the option for restarting the computer, and then click the Finish button.
Before labels can be printed on the PT-1500PC, label-designing software and the PT-1500PC printer driver must be installed. In order to design labels that can be printed on the PT-1500PC, two applications are available on the enclosed CD-ROM: P-touch Quick Editor and P-touch Editor Ver. 3.1
Before installation
Check that your system configuration meets the following requirements.
Computer: Macintosh
Operating system: Mac OS 8.6 or later
* This software is only compatible with Mac OS X classic.
The Mac version of the software is for a Mac with an English operating system. If the software is installed on a Mac with an operating system in a different language, the software may not run properly.
Hard disk free space: At least 30 MB
A few hundred megabytes of additional free space may be needed when printing long labels or large amounts of data.
Available memory free space: Minimum 24 MB
USB port
CD-ROM drive
Installing P-touch Quick Editor
The P-touch Quick Editor software provides quick access to the more simple label-designing features for easy text input and instant printing of labels. Install the P-touch Quick Editor software on a Mac as described below.
① With the PT-1500PC and computer turned off, connect the PT-1500PC to the Macintosh using the enclosed USB interface cable. Be sure to leave the PT-1500PC off.
②Turn on the Macintosh.
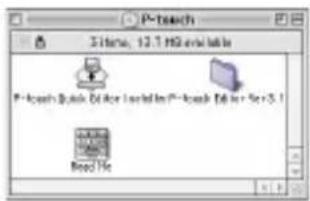
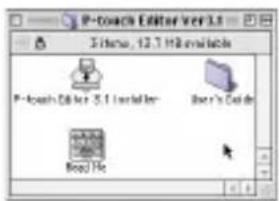
3 Insert the enclosed CD-ROM into the computer's CD-ROM drive. A folder opens, allowing you to view the contents of the CD-ROM.
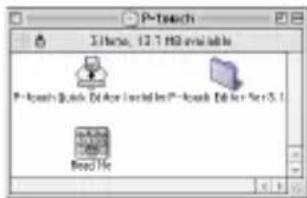
text_image
P-touch 3 items, 12.7 MB available table P-touch Quick, Del Aca Nexted for P-touch Del Aca For 5.1 Blood File4 Double-click the P-touch Quick Editor Installer icon in the folder that appears. The installer starts up.
text_image
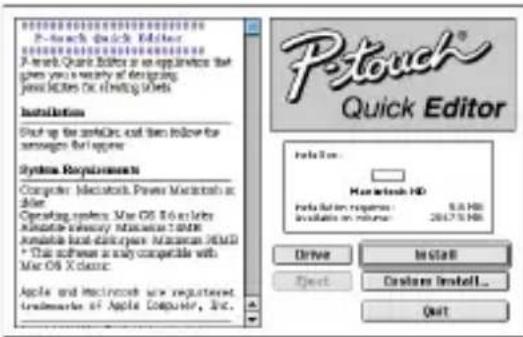
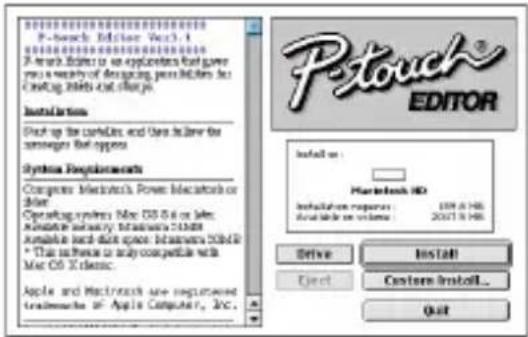
PStouch® Quick Editor Installation Start up the miniDisc and then follow for manager to the server Systems Requirements Computer Macintosh, Power Macintosh at Driver Operating System: Mac OS 8.6 or likely Available hardware resources tool Available local deliverer: Macintosh HD31 * This software is only compatible with Mac OS X classic. Apple and Macintosh are registered traderware of Apple Computer, Inc.⑤Select the installation method.
Clicking the Install button immediately starts installing the most basic options.
About 30 MB of available hard-disk space is needed to begin installation. In order to install all options, about 30 MB of available hard-disk space is needed. If enough hard-disk space is available, click the Install button.
Clicking the Custom Install button displays a dialog box that allows you to select which options to install.
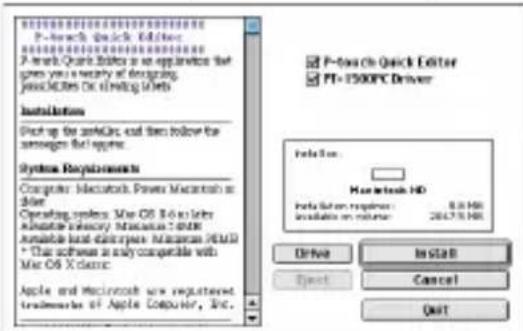
text_image
P-Search Quick Editor P-Search Quick Editor is an appliance that gives you a nearby of designing, plus DRX or listing items. Installation Start up the miniGet and then below the manager for require. System Requirements Computer Macintosh Power Macintosh in order Operating system: Mac OS 8.6 x 100x Macintosh 3.0x 100x Available local enterprise Macintosh HD/1 * This software is only compatible with Mac OS X clinic. Apple and Macintosh are registered tradeware of Apple Computer, Inc. P-Search Quick Editor PT+1500PC Driver Solution: Macintosh HD Solution button: https://2047.9.HK Available on volume: 2047.9.HK Drive Install Next Cancel QuitOnly the options with a check mark beside them are installed. Select the options that you wish to install, and then click the Install button to begin installation.
In order to print from the PT-1500PC, "PT-1500PC Driver" must be selected for installation.
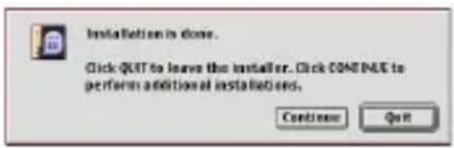
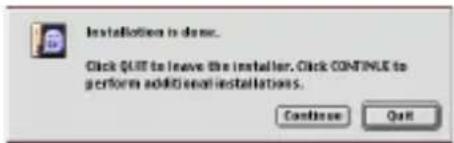
⑥ When the installation is finished and the following dialog box appears, click the Quit button.
text_image
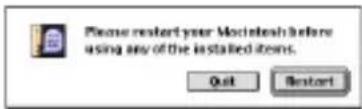
Installation is done. Click OUT to leave the installer. Click COME PRE to perform additional installations. Continue Quit⑦ When the dialog box appears asking if you wish to restart the computer, click the Restart button to restart the computer.
text_image
Please restart your Macintosh before using any of the installed items. Quit RestartInstalling P-touch Editor Ver. 3.1
The P-touch Editor Ver. 3.1 software includes a variety of more complex functions for printing barcodes and images, enabling you to design just about any label that you can imagine. Install the P-touch Editor Ver. 3.1 software on a PC as described below.
① With the PT-1500PC and computer turned off, connect the PT-1500PC to the Macintosh using the enclosed USB interface cable. Be sure to leave the PT-1500PC off.
②Turn on the Macintosh.
3 Insert the enclosed CD-ROM into the computer's CD-ROM drive. A folder opens, allowing you to view the contents of the CD-ROM.
text_image
P-tsearch 3 items, 12.1 HSG export table P-tsearch Quick Transfer Installable P-tsearch Editor for >5.1 Biospec File4 Double-click the P-touch Editor Ver3.1 folder to open it.
text_image
P-Coach Editor Ver 3.1 Items, 12.7 MB available P-Coach Editor Ver 3.1 (Installation) Bod's Guide Bood Files⑤Double-click the P-touch Editor 3.1 Installer icon in the folder. The installer starts up.
text_image
P-touch Editor P-touch Editor: Vcc3.1 P Touch Editor is an application that gives you a variety of designing, press, or files for creating, edit, and charge. Installation Start up the command and save follow-up the messages that apply Systems Requirements Computer Macintosh's Power Ecosystem or Solar Operating systems: Mac OS 6.6 or Solar Macintosh industry Macintosh 7.0/8 Available and sell space: Macintosh 2004.0 * This is known to any compatible with Mac OS 6.6.0& Apple and Macintosh are recommended trademarks of Apple Computer, Inc. Install on: Macintosh HD Installation response: 109.6.145 Available on system: 2007.9.145 Drive Install Next Custom Install... Quit⑥Select the installation method.
Clicking the Install button immediately starts installing the most basic options. (Some clip art illustrations are not installed.)
About 30 MB of available hard-disk space is needed to begin installation.
In order to install all options, about 120 MB of available hard-disk space is needed. If enough hard-disk space is available, click the Install button.
Clicking the Custom Install button displays a dialog box that allows you to select which options to install.

text_image
P-touch Editor Ver3.0 PT-150KPC Driver Fonts Auto Format Templates Clip Art Solution: Macintosh HD Installation response: 109.0 Hz Available on release: 261.7 Hz Drive Install B Direct Cancel OKTOnly the options with a check mark beside them are installed. Select the options that you wish to install, and then click the Install button to begin installation.
In order to print from the PT-1500PC, "PT-1500PC Driver" must be selected for installation.
⑦ When the installation is finished and the following dialog box appears, click the Quit button.
text_image
Installation is done. Click QUIT to leave the installer. Click CONTINUE to perform additional installations. Continue Quit⑧ When the dialog box appears asking if you wish to restart the computer, click the Restart button to restart the computer.

text_image
Please restart your Macintosh before using any of the installed items. Quit RestartSelecting the printer
① Pull down the Apple menu and select "Chooser" to display the Chooser window.
②In the list on the left, click the PT-1500PC icon.
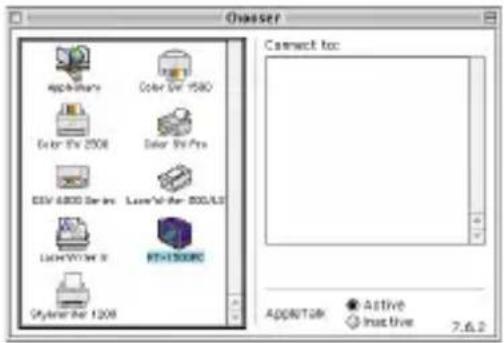
text_image
Ovaser AppWizard Color 5V 1500 Color Rx 2506 Color Rx Pro DSV 4800 Series Laser/Alt-Rev 800/Alt LightWGN 8 STK130000 Style 1208 Connect to: App&Tak Active Inactive 7.6.2③Close the Chooser window to confirm your settings.
Reading the User's Guide
The P-touch Editor User's Guide can be viewed either by inserting the CD-ROM into the drive each time you wish to refer to it or by installing it onto your hard disk so that it is quickly available at any time. Since the User's Guide is an HTML document, a browser is needed to read it.
• From the CD-ROM:
- Double-click "Main.htm" in the User's Guide folder within the P-touch Editor Ver3.1 folder on the CD-ROM.
• W ith the Start button:
- Double-click "Main.htm" in the User's Guide folder within the P-touch Editor Ver3.1 folder installed on the hard disk.
Uninstalling the software and printer driver
Uninstall P-touch Quick Editor, P-touch Editor Ver3.1 and the printer driver as described below.
When deleting the printer driver, be sure that the P-touch is turned off and unplugged.
①Drag the following folder to the Trash icon:
- P-touch Quick Editor folder (for the P-touch Quick Editor software)
- P-touch Editor Ver3.1 folder (for the P-touch Editor Ver. 3.1 software)
②In the System Folder, open the Extensions folder.
③Drag the following icons to the Trash icon:
- P T -1500PC and USB PT-1500PC Extension
④ In the System Folder, open the Preferences folder.
⑤Drag the following icons to the Trash icon:
- P-touch Quick Editor Prefs, P-touch Editor 3.1 Prefs, and PT-1500PC Prefs
The software and the printer driver are now deleted.
Starting up the P-touch Editor Ver. 3.1 software
Starting up P-touch Editor Ver. 3.1
The P-touch Editor Ver. 3.1 application makes it easy for anyone to design more complex labels and print them for almost any need imaginable.
On an IBM PC-compatible computer:
- By clicking the P-touch Editor icon:
●Double-click the P-touch Editor 3.1 icon in the P-touch Editor 3.1 group window.
text_image
File Edit View Insert Options Help Add Existing Format Tools Help Program Tools Help Create Edit Ctrl Print Copy Print Copy Print Copy Print Copy Print Copy Print Copy Print Copy Print Copy Print Copy Print Copy Print Copy Print Copy Print Copy Print Copy Print Copy Print Copy Print Copy Print Copy Print Copy Print Copy Print Copy Print Copy Print Copy Print Copy Print Copy Print Copy Print Copy Print Copy Print Copy Print Copy Print Copy Print Copy Print Copy Print Copy Print Copy Print Copy Print Copy Print Copy Print Copy Print Copy Print Copy Print Copy Print Copy Print Copy Print Copy Print Copy Print Copy Print Copy Print Copy Print Copy Print copy- With the Start button:
① Click the Start button in the taskbar to display the Start menu.
②Select "Programs".
③Select "P-touch Editor 3.1".
④Click "P-touch Editor 3.1".
After P-touch Editor Ver. 3.1 is started, the following window is displayed.
For more details on the functions of P-touch Editor Ver. 3.1, refer to its User's Guide, which can either be installed on the computer or viewed from the CD-ROM.
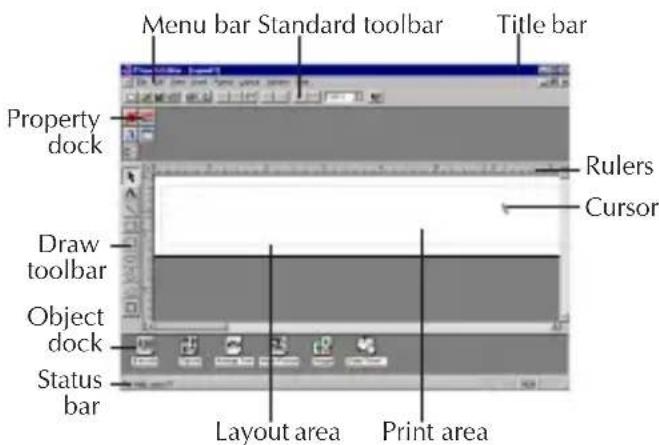
text_image
Menu bar Standard toolbar Title bar Property dock Draw toolbar Object dock Status bar Layout area Print area Rulers CursorOn a Macintosh computer:
- Double-click the P-touch Editor Ver3.1.6 icon in the P-touch Editor Ver3.1 folder installed on the computer.
After P-touch Editor Ver. 3.1 is started, the following window is displayed.
For more details on the functions of P-touch Editor Ver. 3.1, refer to its User's Guide, which can either be installed on the computer or viewed from the CD-ROM.
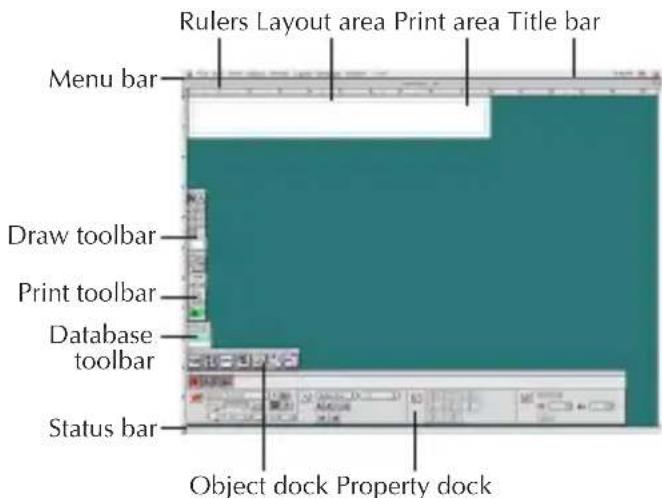
text_image
Rulers Layout area Print area Title bar Menu bar Draw toolbar Print toolbar Database toolbar Status bar Object dock Property dockStarting up the P-touch Quick Editor software
Starting up P-touch Quick Editor
When P-touch Quick Editor is installed on a PC, you can choose to add shortcuts to the desktop, the StartUp menu, and to the Quick Launch toolbar.
On an IBM PC-compatible computer:
- If a shortcut was added to the StartUp menu: - P-touch Quick Editor automatically starts up when the computer is started up.
- If a shortcut was added to the desktop:
●Double-click the P-touch Quick Editor icon on the desktop.
• If a shortcut was added to the Quick Launch toolbar:
●Double-click the P-touch Quick Editor icon in the Quick Launch toolbar.
• If no shortcuts were added:
① Click the Start button in the taskbar to display the Start menu.
②Select "Programs".
③Click "P-touch Quick Editor".
After P-touch Quick Editor is started, the following window is displayed.
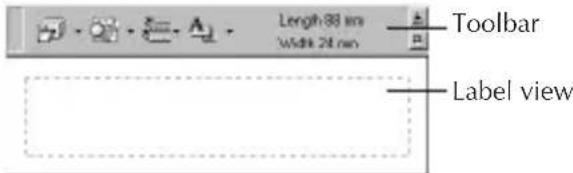
text_image
Length 88 mm Width 24 mm Toolbar Label viewP-touch Quick Editor can be hidden or displayed by clicking its icon in the system tray, at the right of the taskbar.
On a Macintosh computer:
- Double-click the P-touch Quick Editor icon in the P-touch Quick Editor folder installed on the computer.
After P-touch Quick Editor is started, the following window is displayed.
text_image
Toolbar Label viewUsing P-touch Quick Editor
The P-touch Quick Editor enables you to design a simple label layout quickly and easily. In addition to the various functions available through the buttons in the toolbar, right-clicking (Windows) or holding down the Control key and clicking (Macintosh) in the label view displays a pop-up menu containing more commands.
Specifying a label size
Before entering text, the label size must be set. A selection of preset layout sizes is available for a variety of needs.
① Click the arrow beside the Properties button (A) to display a drop-down menu.
②Click [Tape Settings] to display various label format settings.
text_image
Length: 175 mm Width: 100 mm Format: Normal Width: 77.000 Size: 25.000 Color Mode: Infrared ColorThe Tape Settings can also be displayed by selecting [View Properties], then clicking [Tape Settings] in the pop-up menu, displayed by right-clicking (Windows) or holding down the Control key and clicking (Macintosh) in the label view.
③In the Format list, click the desired label format.
The size of the label layout can also be set by specifying the Length and Width settings or by dragging the edges of the label view until the layout is the desired size.
Entering text
The entire text can quickly be formatted by specifying the font, size, style and alignment. In addition, a frame can be drawn around the text.
① Click the arrow beside the Properties button ( ) to display a drop-down menu.
②Click [Text Settings] to display various text format settings.
The Text Settings can also be displayed by selecting [View Properties], then clicking [Text Settings] in the pop-up menu, displayed by right-clicking (Windows) or holding down the Control key and clicking (Macintosh) in the label view.
③ In the Text Settings, select the desired text formats.
④ Click in the label view, and then type or import the text.
Typing in the label view shows the text as it will appear when it is printed. However, by clicking the Change View button ( ) the text is displayed in the text box, giving you a clearer view of the entered text.
Importing text
Text that has already been typed in another application can easily be imported into the label.
①Select the desired text in the other application.
② Import the text into the label layout either by pressing the designated shortcut keys (Windows only) or by dragging it from the other application.
(Windows only) To specify the shortcut keys used to import text, right-click in the label view (or text box), and then click [Options] in the menu that appears. In the Options dialog box that appears, select the desired shortcut keys for importing text.
Using the Text History list
The 10 most recently printed texts are automatically stored for future use.
① Click the Text History button (display the Text History list.

②Click the desired text.
Text selected from the Text History list replaces all text already entered in the layout.
Adding a symbol
A symbol from the various installed symbol fonts can be added at the left side of the label text.
①(Windows) Right-click in the label view (or text box), select [Symbols] in the menu that appears, and then click [Insert/Change]. The Input Symbol dialog box appears.
(Macintosh) Hold down the Control key and click in the label view (or text box), select [Symbol font] in the menu that appears, and then click [Import/Change]. A dialog box displaying symbols appears.
text_image
Super Screenset Image Scan: PPT Scanset 1 System List OK Cancel②In the Symbol Font list, select the desired symbol font.
③ In the Symbol List view, select the desired symbol.
④ Click the OK button. The selected symbol is added at the left of the text.
If a symbol has already been added to the text, it will be replaced by the newly selected symbol.
Changing the background color
The background color of the layout can be changed to suit your preference.
- (Windows) Right-click in the label view (or text box), select [Background Color] in the menu that appears, and then click the desired color from the list.
(Macintosh) Hold down the Control key and click in the label view (or text box), select [Background Color] in the menu that appears, and then click the desired color from the list.
To select a color other than those listed, select [User Settings] (Windows) or [User Setting] (Macintosh) from the Background Color submenu, create the desired color in the dialog box that appears, and then click the OK button.
Viewing the text
Layouts that are too long to fit in the screen can be scrolled by clicking the Arrange button (☐) to view the left, the center, then the right side of the layout with each click of the button.
If the label view (or text box) has been moved away from the tool bar, it will be docked before scrolling.
Printing
Before printing labels, certain print options can be selected.
① Click the arrow beside the Print button
( )to display a drop-down menu.
②(Windows) Click [Print Options]. The Print dialog box appears.
(Macintosh) Click [Print]. A dialog box containing the print options appears.
On the Macintosh, this dialog box can also be displayed by just clicking the Print button.
③Select the desired print settings.
Cut Marks: This option allows you to select whether or not to print cut marks (:), which indicate where to cut the label so that the left and right margins are equal.
Mirror Printing: This option allows you to print the text in reverse so it can be attached to a window.
Copies: This option allows enter the number of copies to be printed.
④(Windows) Click the OK button.
(Macintosh) Click [Print]. The layout is printed.
(Windows) To begin printing:
Either click the Print button ( ), or click the arrow beside the Print button, and click [Print] in the drop-down menu.
②Select the desired print settings.
③Click the OK button.
Hiding/displaying P-touch Quick Editor (Windows only)
P-touch Quick Editor can be hidden by clicking the Hide button ( 📁) Re-display P-touch Quick Editor by clicking its icon in the system tray, at the right of the taskbar.
Quitting P-touch Quick Editor
- (W indows) Do either of the following:
- Right-click the P-touch Quick Editor icon in the system tray, and then click [Exit] in the menu that appears.
● Right-click in the label view (or text box), and then click [Exit] in the menu that appears.
(Macintosh) Do either of the following:
- Click [Quit] in the [File] menu
- Hold down the Control key and click in the label view (or text box), and then click [Quit] in the menu that appears.
Printing a label
① Turn on the PT-1500PC and start up the computer.
② Start up either P-touch Quick Editor or P-touch Editor Ver. 3.1, and make sure that the PT-1500PC is selected as the printer.
③ Design your label.
④Click the [Print] command in the application, select the desired print settings, and then click the Print button. The status indicator of the PT-1500PC flashes while it is receiving the data. After the label is printed, press in on the tape cutter button to cut off the label.
While printing multiple copies, the PT-1500PC may stop printing for a short while in order for the print head to cool down. Printing will continue once the print head has sufficiently cooled down.
To feed out extra tape, hold down the Power/Feed key for a few seconds.
natural_image
Line drawing of a cassette tape device with label 'brother' on the cover (no additional text or symbols)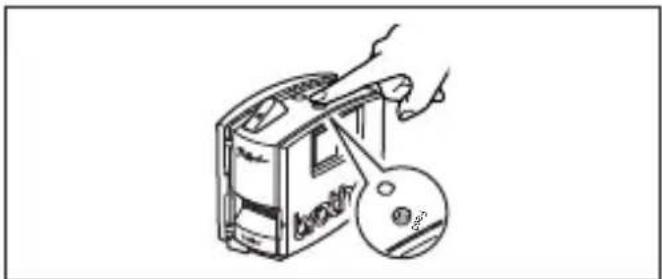
natural_image
Line drawing of a hand inserting a CD into a device (no text or symbols)Removing the label backing
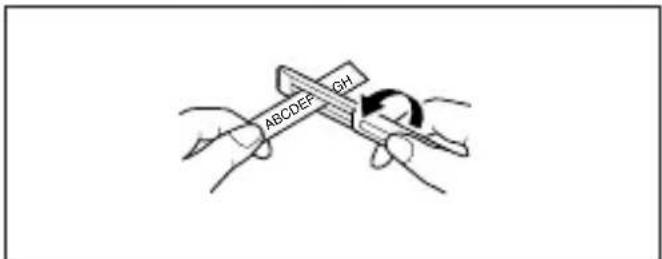
The enclosed tape separator enables you to easily remove the backing from labels printed on laminated tape.
① Hold the tape in your left hand, with the printed surface facing up, and hold the stick in your right hand.
② Pass the tape halfway through the long narrow hole in the stick.
③ Turn the stick three-quarters of a turn towards you, and then pull the stick away from you as shown in the illustration.
④ Peel off the label backing.
text_image
ABCDEF GH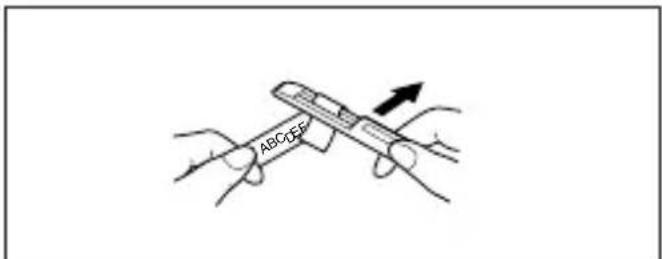
text_image
ABCOFFQuitting P-touch Quick Editor
On an IBM PC-compatible computer:
• From the application:
● Right-click in the label view (or text box), and then click [Exit] in the menu that appears.
• From the taskbar:
- Right-click on the P-touch Quick Editor icon in the system tray, at the right of the taskbar, and then click [Exit] in the menu that appears.
On a Macintosh computer:
• From the pop-up menu:
● While holding down the Control key, click in the label view (or text box), and then click [Quit] in the menu that appears.
• From the application menu:
- Click the [File] menu, and then click the [Quit] command.
Maintenance
Cleaning the print head and roller
A blank horizontal line appearing through the printed label indicates that the print head and roller are dirty. Clean the print head and roller according to the following procedure.
① Turn off the PT-1500PC.
② Open the tape compartment cover.
③Remove the tape cassette if one is installed.
④ Use a dry cotton swab to gently wipe up and down along the print head and roller.
Caution: Be careful not to touch the cutter near the print head and roller while cleaning them. In addition, do not try to clean the print head immediately after printing, otherwise you may be burned.
⑤ Insert the tape cassette, and then close the tape compartment cover.
* Cleaning can easily be done using the optional print head cleaning cassette (TZ-CL4).
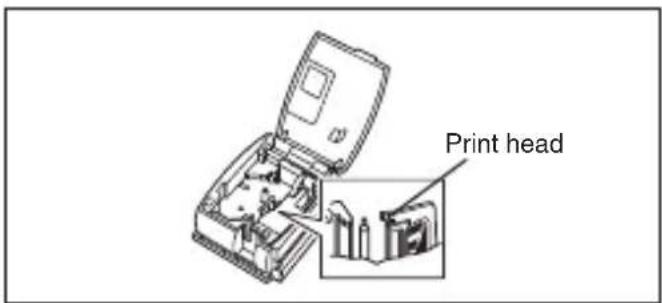
text_image
Print head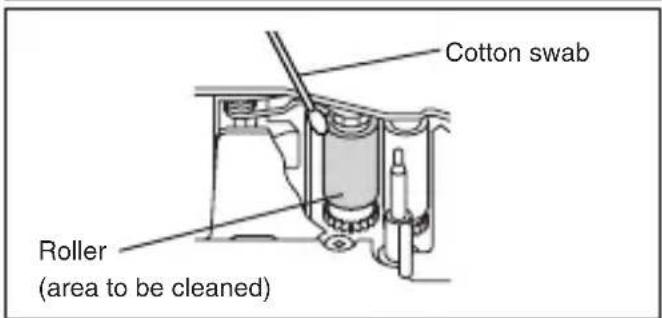
text_image
Cotton swab Roller (area to be cleaned)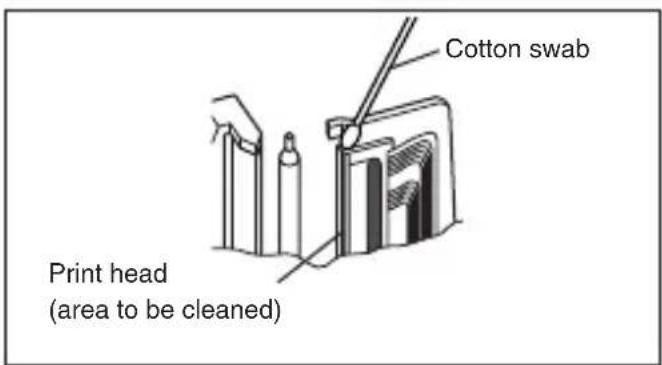
text_image
Cotton swab Print head (area to be cleaned)Cleaning the tape cutter
After a while, adhesive may accumulate on the cutter, preventing it from cutting or resulting in the tape being jammed. Once a year, use a cotton swab dipped in isopropyl (rubbing) alcohol to clean off the cutter.
Do not touch the cutter's edge, otherwise you may be injured.
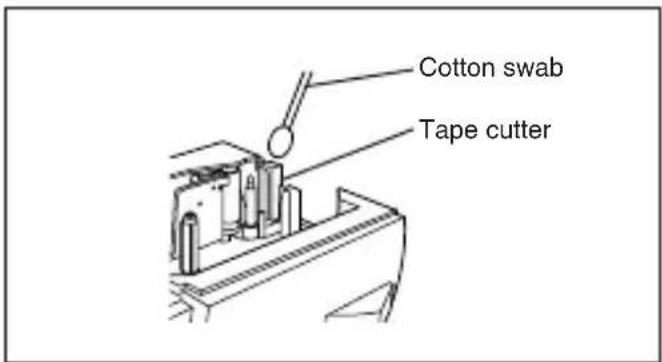
text_image
Cotton swab Tape cutterTroubleshooting
Monitoring the P-touch Status
You can determine the status of the PT-1500PC from the status indicator.
| Status Indicator | Cause→Remedy |
| Lights up | The P-touch is operating normally and is in stand-by. |
| Flashes a few times | The P-touch is receiving data from the computer correctly. |
| Flashes quickly | The cassette is not installed. → Install a cassette.A transmission error occurred. → Press the power/feed key to turn the PT-1500PC off, then on again.The tape cutter button was pressed while printing → Try printing again. |
| Flashes, staying off longer that it is on | An EEPROM error occurred. → Contact your service representative. |
| Flashes slowly | The print head is cooling down. → Wait until printing continues. |
Problem-solving
If you think the P-touch is not printing correctly, but you cannot determine the problem with the status indicator, refer to the following list of possible problems, and then perform the necessary operations.
| Problem | Cause | Solution |
| The P-touch does not print. A printing error is indicated. | · The interface cable is not correctly connected.· The tape cassette is not inserted correctly.· The tape compartment cover is open. | Check that the interface cable is correctly connected, the tape cassette is correctly installed, and that the tape compartment cover is closed. |
| While printing, striped tape appears. | There is no more tape in the tape cassette. | Insert a new tape cassette, and then either press the Power/Feed key or turn the P-touch off, then on again. |
| The status indicator does not light up or flash. | The AC adapter in not correctly connected. | Check that the AC adapter is correctly connected. If the power button still does not light up or flash, contact your service representative. |
| A blank horizontal line appears through the printed label. | The print head and roller are dirty. | Clean the print head and roller according to the procedure in Cleaning the print head and roller on page 20. |
| A data transmission error appears on the computer. | The wrong port is selected. | WindowsUnder “Print to the following port” in the printer Properties dialog box, select “PTUSB:” for the USB connection.*MacSelect in the Chooser the PT-1500PC where the P-touch is connected. |
* If two or more of the same P-touch models are connected through their USB ports, select "PTUSB (PT-1500PC-XXXXXXXX):" (where XXXXXXXXX is the serial number) instead of "PTUSB:". The serial number is written above the barcode on the silver label attached to the bottom of the P-touch.
Machine specifications
Power supply: AC 120 V, 60 Hz (AC adapter model AD-60)
Label tape: 5 widths available:
1/4" (6 mm)
3/8" (9 mm)
1/2" (12 mm)
3/4" (18 mm)
1" (24 mm)
Print head: 112 dots
180 dpi
Port: USB
Dimensions: 6 1/2" × 2 2/3" × 5 3/8" (166 × 66.5 × 137.4 mm)
Weight: 18 ozs (540 g)
Accessories
- Supplies
Obtain tape cassettes from your nearest authorized dealer. Brother cannot be held responsible for trouble caused by the use of unauthorized supplies.
Use only Brother TZ tapes with this machine. Do not use tapes that do not have the mark.
| Stock No. | Description QTY/PACKAGE PRICE | ||
| 1" (24 mm) | |||
| TZ151 Black Characters on Clear Adhesive 1 25.99 | |||
| TZ251 Black Characters on White Adhesive 128.99 | |||
| TZ451 Black Characters on Red Adhesive 1 28.99 | |||
| TZ651 Black Characters on Yellow Adhesive 128.99 | |||
| TZB51 Black Characters on Flu. Orange Adhesive 1 35.99 | |||
| TZ252 Red Characters on White Adhesive 128.99 | |||
| TZ253 Blue Characters on White Adhesive 1 28.99 | |||
| TZ354 Gold Characters on Black Adhesive 131.99 | |||
| TZ155 White Characters on Clear Adhesive 1 32.95 | |||
| TZ355 White Characters on Black Adhesive 131.99 | |||
| TZS251 Industrial (Strong Adhesive) Black Characters on White Adhesive 1 31.99 | |||
| 3/4" (18 mm) | |||
| TZ141 Black Characters on Clear Adhesive 122.99 | |||
| TZM41 | Black Characters on Clear (Mat) Adhesive | 1 24.99 | |
| TZ241 Black Characters on White Adhesive 124.99 | |||
| TZ641 Black Characters on Yellow Adhesive 1 24.99 | |||
| TZB41 Black Characters on Flu. Orange Adhesive 129.99 | |||
| TZ242 Red Characters on White Adhesive 1 24.99 | |||
| TZ243 Blue Characters on White Adhesive 124.99 | |||
| TZ344 Gold Characters on Black Adhesive 1 28.99 | |||
| TZ345 White Characters on Black Adhesive 128.99 | |||
| TZ545 White Characters on Blue Adhesive 1 28.99 | |||
| TZS241 Industrial (Strong Adhesive) Black Characters on White Adhesive 127.99 | |||
| 1/2" (12 mm) | |||
| TZ131 Black Characters on Clear Adhesive 1 19.99 | |||
| TZ231 Black Characters on White Adhesive 120.99 | |||
| TZM31 | Black Characters on Clear (Mat) Adhesive | 1 20.99 | |
| TZ431 Black Characters on Red Adhesive 120.99 | |||
| TZ531 Black Characters on Blue Adhesive | 1 20.99 | ||
| TZ631 Black Characters on Yellow Adhesive 120.99 | |||
| TZ731 Black Characters on Green Adhesive | 1 20.99 | ||
| TZ132 Red Characters on Clear Adhesive | 119.99 | ||
| TZ135 White Characters on Clear Adhesive 1 23.95 | |||
| TZ232 Red Characters on White Adhesive 120.99 | |||
| TZ133 Blue Characters on Clear Adhesive 1 19.99 | |||
| TZ233 Blue Characters on White Adhesive 120.99 | |||
| TZ334 Gold Characters on Black Adhesive 1 24.99 | |||
| TZ335 White Characters on Black Adhesive 124.99 | |||
| TZ435 White Characters on Red Adhesive 1 24.99 | |||
| TZS231 Industrial (Strong Adhesive) Black Characters on White Adhesive 123.99 | |||
| 3/8" (9 mm) | |||
| TZ121 Black Characters on Clear Adhesive 1 16.99 | |||
| TZ221 Black Characters on White Adhesive 119.99 | |||
| TZ222 Red Characters on White Adhesive 1 19.99 | |||
| TZ223 Blue Characters on White Adhesive 119.99 | |||
| TZ325 White Characters on Black Adhesive 1 22.99 | |||
| TZS221 Industrial (Strong Adhesive) Black Characters on White Adhesive 121.99 | |||
| 1/4" (6 mm) | |||
| TZ111 Black Characters on Clear Adhesive 1 14.99 | |||
| TZ211 Black Characters on White Adhesive | 116.99 | ||
| TZ315 White Characters on Black Adhesive | 1 20.99 | ||
| TZS211 | Industrial (Strong Adhesive) Black Characters on White Adhesive | 1 | 19.99 |
Non-laminated tapes
| Stock No. | Description QTY/PACKAGE PRICE | ||
| 3/4" (18 mm) | |||
| TZN641 | Black Characters on Yellow Adhesive | 1 21.99 | |
| TZN541 | Black Characters on Blue Adhesive | 121.99 | |
| TZNF41 | Black Characters on Purple Adhesive | 1 21.99 | |
| 1/2" (12 mm) | |||
| TZN631 | Black Characters on Yellow Adhesive | 117.99 | |
| TZN531 | Black Characters on Blue Adhesive | 1 17.99 | |
| TZNF31 | Black Characters on Purple Adhesive | 117.99 | |
Iron on transfer tape
| Stock No. | Description QTY/PACKAGE PRICE | ||
| 3/4" (18 mm) | |||
| TZIY41 | Black Characters | 1 $29.95 | |
Security tape
| Stock No. | Description QTY/PACKAGE PRICE | ||
| 3/4" (18 mm) | |||
| TZSE4 Black Characters on White Adhesive | 1 $49.95 | ||
Fabric tape
| Stock No. Description QTY/PACKAGE PRICE | ||
| 1/2" (12 mm) | ||
| TZFA3 Black Characters on White Adhesive | 1 $34.95 | |
Stamp kit/holder
| Stock No. Description QTY/PACKAGE PRICE | ||
| 1" (24 mm) Stamp Area 13.5 × 65 mm | ||
| SKLB LARGE Stamp Kit (Stamp holder + Tape cassette) 1 54.95 | ||
| SHLB LARGE Stamp Holder 127.45 | ||
| 3/4" (18 mm) Stamp Area 9 × 55 mm | ||
| SKMB MEDIUM Stamp Kit (Stamp holder + Tape cassette) 1 49.95 | ||
| SHMB MEDIUM Stamp Holder 124.95 | ||
Options
| Stock No. | Description QTY/PACKAGE PRICE | ||
| TZCL4 Print head cleaning cassette 1 $24.95 | |||
ACCESSORY ORDER FORM
This order form is provided for your convenience should your retailer not stock the item(s) needed or if you prefer to order by telephone. To order by phone, please call Brother International at 1-800-668-2768 and have your Visa or MasterCard available.
| Stock No. Description Price Quantity Total | |||
| TOTAL | |||
Prices subject to change without notice.
Before calling:
- Review the reverse side of this form and select the desired items.
- Complete the order form, indicating the quantity of each item (for your records).
- Enter the total on the "Supply/Accessory Total" line below (for your records).
- Add appropriate sales tax and shipping/handling costs (for your records).
- Have your Visa or MasterCard number and expiration date available.
Supply/Accessory Total \$
All Residents of Canada: Please add G.S.T \$
applicable sales taxes (G.S.T. & P.S.T.). P.S.T. \$
Shipping/Handling \$5.00
TOTAL DUE \$
G.S.T. # R100663764
P.S.T. # 100100117TQ0001
* Prices subject to change without notice.
natural_image
Line drawing of a device casing with internal components and mounting brackets (no text or symbols)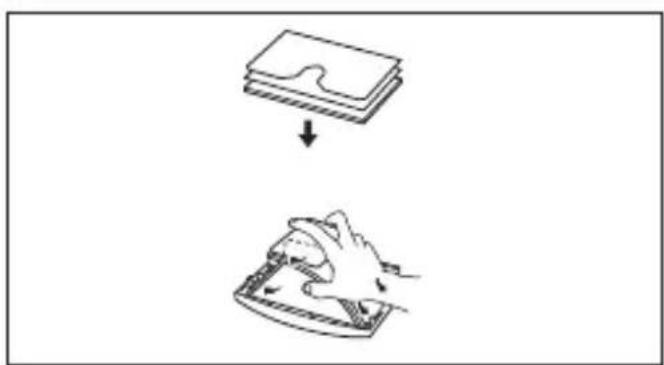
natural_image
Simple line drawing showing a stack of papers being dropped and then being placed on a tray (no text or symbols)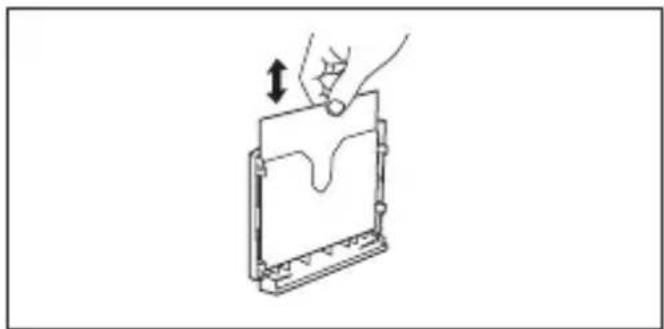
natural_image
Diagram of a hand pressing down on a rectangular device with a downward arrow indicating force or movement (no text or symbols present)text_image
Line drawing showing hands inserting a card into a card with the word 'other' visible on the cover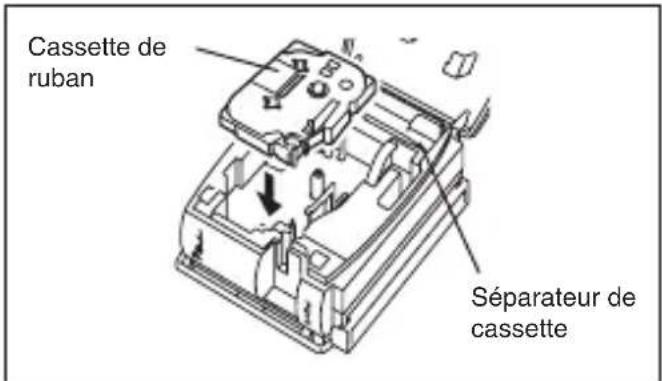
text_image
P-Reach Quick Edit Install P Select language ENGLISH STANDARD OK Canceltext_image
Pilot Quick Editor Setup Pilot Quick Editor Pilot Quick Editor: 10.5 in Simple Simulatistic with the new Simple insert icon Name None Simulatistic use Icontext_image
Ade minimar as programme de distribution ou Procure Qualif-0100. Ce programme notificier P search Qualif- Tilou la note options. Avail de descrite distribution. Ce uses important access to the link to applicable activities. Dashed use in the middle management of distribution to ensure what is available activities. Does not use any important product for distribution. ATTLE 200%: Ce programme has required for access to these mails internationally. Draft application can distribute details as appropriate as an programme effective, but it may be required. (If you want to access the system or if you want to access the system) or (If you want to access the system) or (If you want to access the system).text_image
Information Utilities Name: Request Info Category: Options Options Cancel Cancel Savetext_image
Load the new computer Transformed into a combination of systems in the new system on Windows desktop Edit Remove Save the new device Save the installed software Deluxe Sendaitext_image
Configuration du point (Estherer PT 1160PC) Let you want to switch this computer. Choose PT ASWPC Description: Microsoft your own website (or website): PT 1160PC user information and your own website and you are available. Pour continue to choose or install. Let configuration continue.text_image
Search Quick Exit Install Select Language ENGLISH EXERCISES OK Canceltext_image
Power Quick Editor Tom Instructions to create a new or existing content. Power Quick Editor Power Quick Editor Power Quick Editor No. 11 is the New Document(s) needs or the new document. Drive: Main Document(s) needs Windowtext_image
Configuration du point (Baseline PT-100PC) En papien version ou configue Baseline PT-100PC Description: Description you can access your website to the following: PT-100PC: www prescription.cptd.com/2009/2010 http://www.tpmc/ Prior software : classe our Front La configurazione commedia. OK Cancel Finishtext_image
Installation Wizard OK? ALL a network's setup is required. Please provide all the following instructions, then to install your network on the next page. ✓ Use the network to access existing networks ✓ Use the network to access existing data land Please continue installation, then to access the network or access your network.text_image
Configurations de printer (Enfinen P1-1000PC) La software exists to configuration card networks Enfinen P1-1000PC File path: Enfinen P1-1000PC (*.txt) New Version Alternative projects can be installed systematically installed. Si Technologies/Services available to a page in configuration. Available currently existing systematically installed. Analogtext_image
Configuration is pilot BT-150PC LTNTME PT-150PC will update complement. Closest set NT-150PC local clock to configurator.text_image
Installation to install RISCELL is tested for close-up files. Prior resume will be Exploration suitable, save server end-users Windows as more available. □ On your instructions, if necessary to switch! □ Not your instructions on end-users also set Prior installments installed, where to discontinue discontinue at computer or Termostat Cancel Canceltext_image
Search Quick Edition Install Select language ● ENGLISH ● EXAMOUNT OK Canceltext_image
Punch Quick Editor Setup Settlement for complete or very close (or similar) options: Punch Quick Editor Punch Quick Editor Punch Quick Editor No. 13 # Only Documents are ready Punch Quick Editor Direct File Edit when available OKtext_image
Configuration in print (Printer FT-750PC) Test printer FT-750PC will be installed. For this system, the print is installed at 24 hours. FT-750PC • Display your own website printer FT-750PC • Display available on FT-750PC • Display available on FT-750PC Analoggment Any other print is used to install your existing FT-750PC. This is also used to install your existing in all cases. Please select print, save output, or download as follows: Last configuration continuestext_image
Configuration de plante (Driver FT-SP6PL) File path with User to Configuration 500 files Public Properties Recommended to reduce FT-SP6PL configuration by Microsoft Identifier serves: To ensure will continue automatiquement. ST Configuration and file path is designed to Configuration do zone into the application automatiquement.text_image
Configuration du client (Brother FT-1306PC) Configuring FT-1306PC, plus available configuration. Pour note to switch statements. Use devices setting the configuration. ✓ Use software as requested ✓ Use software plus past Choose for E-mail/You file to be configuration. Browsetext_image
Configuration de plants (Inclust FT-100PC) Customs FT-100PC will switch to 100% completion. Clouc un l'Entire/You offre la configuration.text_image
P-Search S:\Users, 12.7 HKEY files P-Search Quick Get Active / Install Item P-Search Edit For: 5.1 Copy Filetext_image
P-touch Quick Editor P-touch Quick Editor is an application that grew you a reality of designing Jacquisition for Drilling Slabs Installation Pick up the installed and then follow the system for approve System Requirements Computer: Macintosh, Power Macintosh or Driver Operating system: Max OS X 6 x 1x 2x Associate: Inflow Macintosh 3x Available best data points Macintosh HD3 * This software is easy compatible with Max OS X class: Apple and Macintosh are registered terminals of Apple Computer, Inc. P-touch Quick Editor Solution: Macintosh HD Installation required: 8.0.1400 Installation on volume: 2017.5.1900 Drive Install Direct Customs Install... Quittext_image
P-Search Quick Editor P-Search Quick Editor in an application that gives you a variety of designing private letters on the following items Installation Start up the website and then follow for systemgns for your Systems Requirements Computer: Macintosh, Power Macintosh or Driver Operating system: Max OS 6.6 or later Macintosh hardware: Macintosh or earlier Macintosh HD50 * This software is easy compatible with Max OS X classic Apple and Macintosh are registered transactions of Apple Computer, Inc. P-Search Quick Editor PT=1500FC Driver File Set: Macintosh HD: File Set on request: 8.0 KB Available on volume: 267.75 KB Drive Install Next Cancel Quittext_image
Installation is close. Click QUIT to leave the installer. Click COME INIC to perform additional installations. Continue Quittext_image
P-treach S:\Users, 12.7 HD3 available P-treach Quick Get Active / installed in P-treach Dbl for 5.1 Box 16text_image
P-Coach Editor Ver 3.1 S Items, 12.7 MB available P-Coach DB list: 5.1 available Done in Cable Book Filetext_image
P-touch EDITOR Installation Start up the command and use follow the systems for options Systems Requirements Computer Macintosh's Power macOS or Driver Operating systems: Mac OS 8.6 or file: Macintosh's hardware: Macintosh 8.6 Available on disk space: Macintosh 8.6/8 + This instance is only compatible with Mac OS X classic. Apple and Macintosh are installed terminals of Apple Computer, Inc.text_image
P-touch Editor Ver 3.1 PT=1500PC Driver Fonts Auto Format Templates Clip Art Installation Pick up the author, and then follow the system for space Systems Requirements Computer: Macintosh Power Macintosh in Driver Operating system: Mac OS X6 or later Automotive Inventory: Macintosh 100% Available local disk types: Macintosh 1000 + This software is only compatible with Mac OS X classic. Apple and Macintosh are registered termbook of Apple Computer, Inc. Drive Install Cancel Quittext_image
Installation is done. Click QUIT to leave the installer. Click CONTINUE to perform add-on and installations. Continue Quittext_image
Please restart your macOS before using any of the installed items. Quit Restarttext_image
Oncaser AppWizard Color Bar 1500 Color Bar 2508 Color Bar Pro DSV 6800 Series Layered Bar 300/LS Layered Bar B PT-1300PC StyleBar 1308 Connect to: APP/TA#: Active Inactive 7.6.2text_image
P-touch Editor 3.1 P-touch Editor 3.1 File Edit View Help Tools Help Tools Help Tools Help Tools Help Tools Help Tools Help Tools Help Tools Help Tools Help Tools Help Tools Help Tools Help Tools Help Tools Help Tools Help Tools Help Tools Help Tools Help Tools Help Tools Help Tools Help Tools Help Tools Help Tools Help Tools Help Tools Help Tools Help Tools Help Tools Help Tools Help Tools Help Tools Help Tools Help Tools Help Tools Help Tools Help Tools Help Tools Help Tools Help Tools Help Tools Help Tools Help Tools Help Tools Help Tools Help Tools Help Tools Help Tools Help Tools Help Tools Help Taxis Help Tools Help Tools Help Tools Help Tools Help Tools Help Tools Help Tools Help Tools Help Tools Help Tools Help Tools Help Tools Help Tools Help Tools Help Tools Help Tools Help Tools Help Tools Help Tools Help Tools Help Tools Help Tools Help Tools Help Tools Help Tools Help Tools Help Tools Help Tools Help Tools Help Tools Help Tools Help Tools Help Tools Help Tools Help Tools Help Tools Help Tools Help Tools Help Tools Help Tools Help Tools Help Tools Help Tools Help Tools Help Tools Help Tools Help Tools Help Tools Help Tools Help Tasks Help Tasks Help Tasks Help Tasks Help Tasks Help Tasks Help Tasks Help Tasks Help Tasks Help Tasks Help Tasks Help Tasks Help Tasks Help Tasks Help Tasks Help Tasks Help Tasks Help Tasks Help Tasks Help Tasks Help Tasks Help Tasks Help Tasks Help Tasks Help Tasks Help Tasks Help Tasks Help Tasks Help Tasks Help Tasks Help Tasks Help Tasks Help Tasks Help Tasks Help Tasks Help Tasks Help Tasks Help Tasks Help Tasks Help Tasks Help Tasks Help Tasks Help Tasks Help Tasks Help Tasks Help Tasks Help Tasks Help Tasks Help Tasks Help Tasks Help Taxis help Taxis help Taxis help Taxis help Taxis help Taxis help Taxis help Taxis help Taxis help Taxis help Taxis help Taxis help Taxis help Taxis help Taxis help Taxis help Taxis help Taxis help Taxis help Taxis help Taxis help Taxis help Taxis help Taxis help Taxis help Taxis help Taxis help Taxis help Taxis help Taxis help Taxis help Taxis help Taxis help Taxis helpTaxis help Taxis help Taxis help Taxis help Taxis help Taxis help Taxis help Taxis help Taxis help Taxis help Taxis help Taxis help Taxis help Taxis help Taxis help Taxis help Taxis help Taxis help Taxis help Taxis help Taxis help Taxis help Taxis help Taxis help Taxis help Taxis help Taxis help Taxis help Taxis help Taxis help Taxis help Taxis help Taxis help T-axis help T-axis help T-axis help T-axis help T-axis help T-axis help T-axis help T-axis help T-axis help T-axis help T-axis help T-axis help T-axis help T-axis help T-axis help T-axis help T-axis help T-axis help T-axis help T-axis help T-axis help T-axis help T-axis help T-axis help T-axis help T-axis help T-axis help T-axis help T-axis help T-axis help T-axis help T-axis help T-axis help T-axis helps to support the new task.text_image
Language 100 mm Length 12 mm Format: format Language: 10 mm Layout: 12 mm Data correspondents as tabular formatstext_image
Input Symbol Input to Symbol - 100000 Line-of-Symptom OK CREATEnatural_image
Line drawing of a device with ports and cables (no text or symbols)
natural_image
Illustration of a hand inserting a CD into a device (no text or symbols visible)Total Fournitures/Accessoires, \$
Total Fournitures/Accessoires, \$