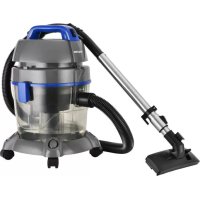
HUVI VCS 51019 BK - Vacuum Cleaner KALORIK - Free user manual and instructions
Find the device manual for free HUVI VCS 51019 BK KALORIK in PDF.

Questions des utilisateurs sur HUVI VCS 51019 BK KALORIK
0 question sur cet appareil. Repondez a celles que vous connaissez ou posez la votre.
Poser une nouvelle question sur cet appareil
Download the instructions for your Vacuum Cleaner in PDF format for free! Find your manual HUVI VCS 51019 BK - KALORIK and take your electronic device back in hand. On this page are published all the documents necessary for the use of your device. HUVI VCS 51019 BK by KALORIK.
USER MANUAL HUVI VCS 51019 BK KALORIK
THANK YOU Thank you for choosing HUVI! We hope you’re delighted with your HUVI. If you are, we’d love it if you’d shout it from the rooftops, tell your friends or leave us a review. We’d love to hear from you, so tag @kalorik on social media to share.
REGISTER YOUR PURCHASE
Learn more about your product by scanning the QR code below.
3. Signal communication
6. Power cord connector
7. Dust bag compartment
9. HUVI dust bin for self-
INDICATOR LIGHTS COLOR STATUS Blue Charging Green Standby/Cleaning Red Error IMPORTANT SAFEGUARDS When using electrical appliances, basic safety precautions should always be followed, including the following:
1. Read all instructions before use.
2. This device can be used by children aged 8 years and up, persons with
reduced physical, sensory, or mental capabilities, and persons with lack of experience and knowledge, if they have been given supervision or instruction concerning use of this device in a safe way and understand the hazards involved.
3. Cleaning and maintenance shall not be performed by children without
4. This device is only to be used with the power supply unit provided.
5. For the purposes of recharging the battery, use only the detachable
power supply unit that came with this device.
6. The battery must be removed from the device before the device is
disposed of. To remove the battery, unscrew the battery cover using a screwdriver. Remove the battery by disconnecting the quick connector.
7. The used battery should be placed in a sealed plastic bag and
disposed of safely according to local environmental regulations.
8. The external flexible cable or cord of the power supply unit cannot be
replaced. If the cord is damaged, the power supply unit shall be disposed of.
9. This device is for indoor use only.
10. This device is not a toy. Do not sit or stand on this device. Small children
and pets should be supervised when this device is operating.
11. Store and operate this device in room temperature environments only.
12. Clean with a cloth dampened with water only.
13. Do not use this device to pick up anything that is burning or smoking.6
14. Do not use this device to pick up bleach, paint, or chemicals spills, or
15. Before using this device, pick up objects like clothing and loose paper.
Lift up cords for blinds or curtains, and move power cords and fragile objects out of the way. If this device passes over a power cord and drags it, an object could be pulled off a table or shelf.
16. If the room to be cleaned has a balcony, a physical barrier should be
used to prevent access to the balcony and to ensure safe operation.
17. Do not place anything on top of this device.
18. Be aware that this device moves around on its own. Take care when
walking in the area where this device is operating to avoid stepping on it.
19. Do not operate this device in areas with exposed electrical outlets on
20. Do not attempt to alter the electronics of this device or the integrated
charging base. There are no user-serviceable parts inside.
21. Do not use this device on an unfinished, unsealed, waxed or rough
floor. It may result in damage to the floor and this device. Use only on hard floor surfaces or low-pile carpet.
22. This device has been designed to be used on floors without scratching
them. We still recommend that you test this device on a small area of the room to be cleaned to ensure no scratches are made before cleaning the whole room.
23. Check the dust bin regularly for signs of damage. Do not use HUVI with
a damaged or broken dustbin. If any signs of damage, look for immediate replacement. Some discoloration is normal with regular use.
SAVE THESE INSTRUCTIONS
The self-cleaning station is a charging base designed for your HUVI robot vacuum cleaners that automatically cleans the HUVI dustbin for you. By storing the contents inside of a dust bag located in the self-cleaning station, you can spend less time emptying your HUVI and let HUVI handle it for you.7 www.KALORIK.com
1. Remove the original dustbin from HUVI and install the new dustbin that is
included and compatible with the self-cleaning station.
2. Open the top of the self-cleaning station.
3. Install the dust bags by inserting the tag attached to the dust bag into
the slot inside the self-cleaning station and close the lid.
4. Plug in the self-cleaning station into a wall outlet. Make sure the original
HUVI charging base is unplugged to avoid confusion when HUVI is ready to return to the base.
5. Allow HUVI to run like normal. When it is ready to return to the charging
base or instructed to return, HUVI will make its way to the self-cleaning station to charge and deposit the contents in the dustbin. NOTE: The dust bags should be replaced when full, approximately after 2 months of regular use.
CLEANING AND MAINTENANCE
1. Press the button of the air outlet cover to take out the air outlet cover
2. Install the air outlet cover and the HEPA in the reverse direction
according to the removal method.
NOTE: The HEPA filter should be changed approximately every 6 months, depending on use. AVAILABLE ACCESSORIES Enhance your HUVI experience with the accessories outlined in this section. Visit kalorik.com/products/HUVI for more information. ITEM NUMBER KIT INCLUDES VCP 51009 Replacement Dust Bags
- 1x HEPA Filter TROUBLESHOOTING ISSUE POSSIBLE SOLUTION Collection failure Disconnect the power cord, then reconnect and restart. Dust bag failure Remove the dust bag and install a new dust bag. NOTE: If the above methods cannot solve the problem, please disconnect the power supply, reconnect the power supply after 5 minutes and try again. If additional assistance is needed, please contact our Customer Assistance at 1-888-525-6745.9 www.KALORIK.com
WARRANTY We suggest that you complete and return the enclosed Product Registration Card promptly to facilitate verification of the date of original purchase. However, return of the Product Registration Card is not a condition of these warranties. You can also fill out this warranty card online, at the following address: www.KALORIK.com This KALORIK product is warranted in the U.S.A. and in Canada for 1 year from the date of purchase against defects in material and workmanship. This warranty is not transferable. Keep the original sales receipt. Proof of purchase is required to obtain warranty performance. During this period, if the KALORIK product, upon inspection by KALORIK, is proven defective, it will be repaired or replaced, at Kalorik’s option, without charge to the customer. If a replacement product is sent, it will carry the remaining warranty of the original product. This warranty does not apply to any defect arising from a buyer's or user's misuse of the product, negligence, failure to follow KALORIK instructions noted in the user’s manual, use on current or voltage other than that stamped on the product, wear and tear, alteration or repair not authorized by KALORIK, or use for commercial purposes. There is no warranty for glass parts, glass containers, filter basket, blades and agitators, accessories outlined in this manual, and accessories in general. There is also no warranty for parts lost by the user. ANY WARRANTY OF MERCHANTABILITY OR FITNESS WITH RESPECT TO THIS PRODUCT IS ALSO LIMITED TO THE ONE YEAR LIMITED WARRANTY PERIOD. Some states do not allow limitation on how long an implied warranty lasts or do not allow the exclusion of incidental or consequential damages, so the above limitations may not apply to you. This warranty gives you specific legal rights, and you may also have other rights which vary from state to state. If the appliance should become defective within the warranty period and more than 30 days after date of purchase, do not return the appliance to the store: often, our Customer Service Representatives can help solve the problem without having the product serviced. If10 www.KALORIK.com
servicing is needed, a Representative can confirm whether the product is under warranty and direct you to the nearest service location. If this is the case, bring the product, or send it, postage prepaid by the user (all Kalorik customers are responsible for the initial shipment back to the warranty center), along with proof of purchase and a return authorization number indicated on the outer package, given by our Customer Service Representatives. Send to the authorized KALORIK Service Center (please visit our website at www.KALORIK.com or call our Customer Service Department for the address of our authorized KALORIK Service Center). When sending the product, please include a letter explaining the nature of the claimed defect. If you have additional questions, please call our Customer Service Department (please see below for complete contact information), Monday through Thursday from 9:00am - 5:00pm (EST) and Friday from 9:00am - 4:00pm (EST). Please note hours are subject to change. If you would like to write, please send your letter to: KALORIK Customer Service Department Team International Group of America Inc. 16175 NW 49th Avenue Miami Gardens, FL 33014 USA Or call: Toll Free: +1 888-521-TEAM / +1 888-KALORIK Only letters can be accepted at this address above. Shipments and packages that do not have a return authorization number will be refused.11 www.KALORIK.com