
180924 - Multi charger MANHATTAN - Free user manual and instructions
Find the device manual for free 180924 MANHATTAN in PDF.
| Product type | Secure charging station for multiple devices |
| Brand | Manhattan |
| Model | 180924 |
| Main use | Simultaneously charge and store multiple electronic devices (tablets, smartphones) securely |
| Power supply | AC mains with power cable |
| Locking type | Mechanical combination lock (4 dials) or key lock |
| Default combination | 0-0-0-0 |
| Wall mounting | Yes, on concrete or wood studs (screws included) |
| Stacking | Possible (stacking hardware not included) |
| Compliance | CE (2014/30/EU and 2014/35/EU) |
| Waste management | Do not dispose of with household waste, recycle according to WEEE directive 2012/19/EU |
| Maintenance and cleaning | Clean with a dry, soft cloth |
| Safety | Mechanical lock, combination or key locking, stable wall installation |
| Spare parts and repairability | Contact the manufacturer's after-sales service |
Frequently Asked Questions - 180924 MANHATTAN
User questions about 180924 MANHATTAN
0 question about this device. Answer the ones you know or ask your own.
Ask a new question about this device
Download the instructions for your Multi charger in PDF format for free! Find your manual 180924 - MANHATTAN and take your electronic device back in hand. On this page are published all the documents necessary for the use of your device. 180924 by MANHATTAN.
USER MANUAL 180924 MANHATTAN
Important: Read before use. • Importante: Leer antes de usar.
natural_image
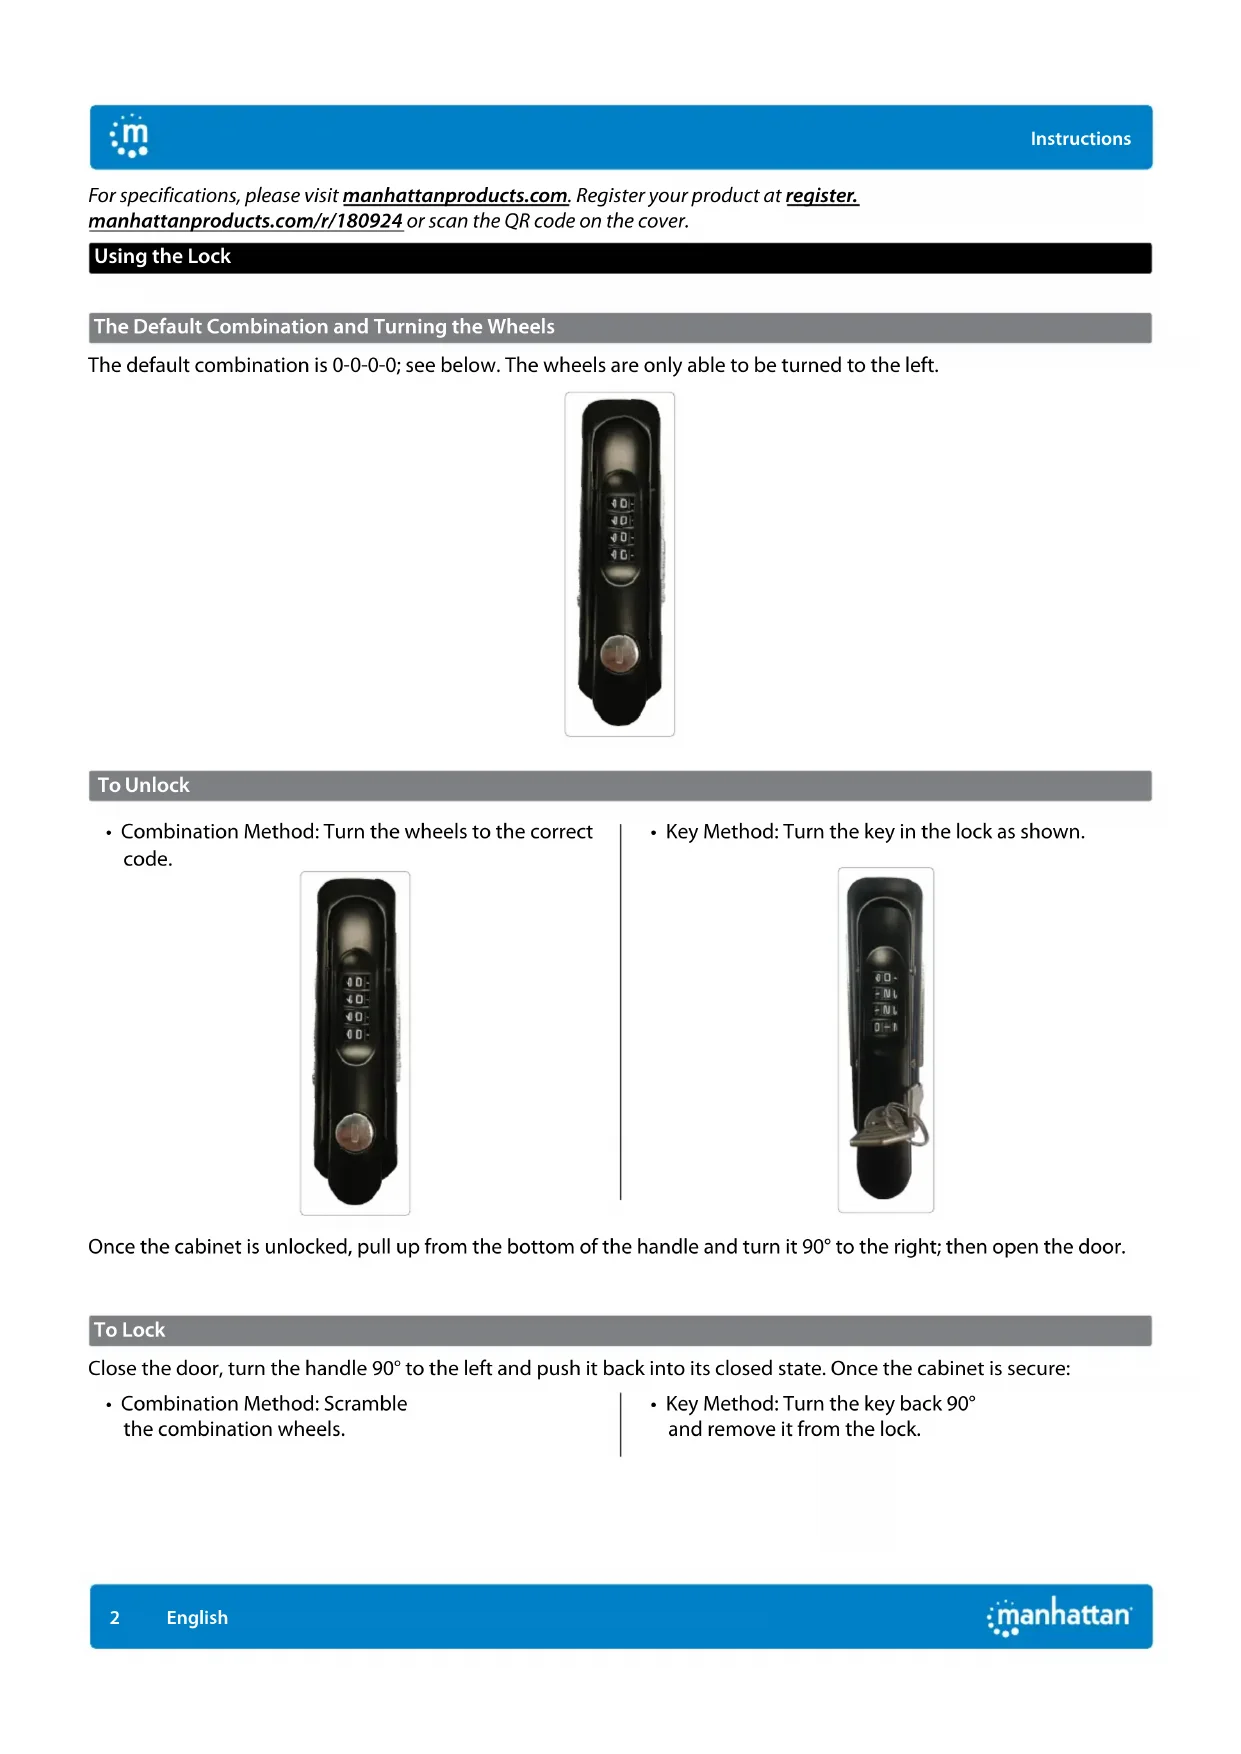
Exterior view of a black Manhattan air purifier unit with blue internal components and control panel (no visible text or symbols)For additional benefits
Scan to register your product warranty

or visit: register.manhattanproducts.com/r/180924
For specifications, please visit manhattanproducts.com. Register your product at register.manhattanproducts.com/r/180924 or scan the QR code on the cover.
Using the Lock
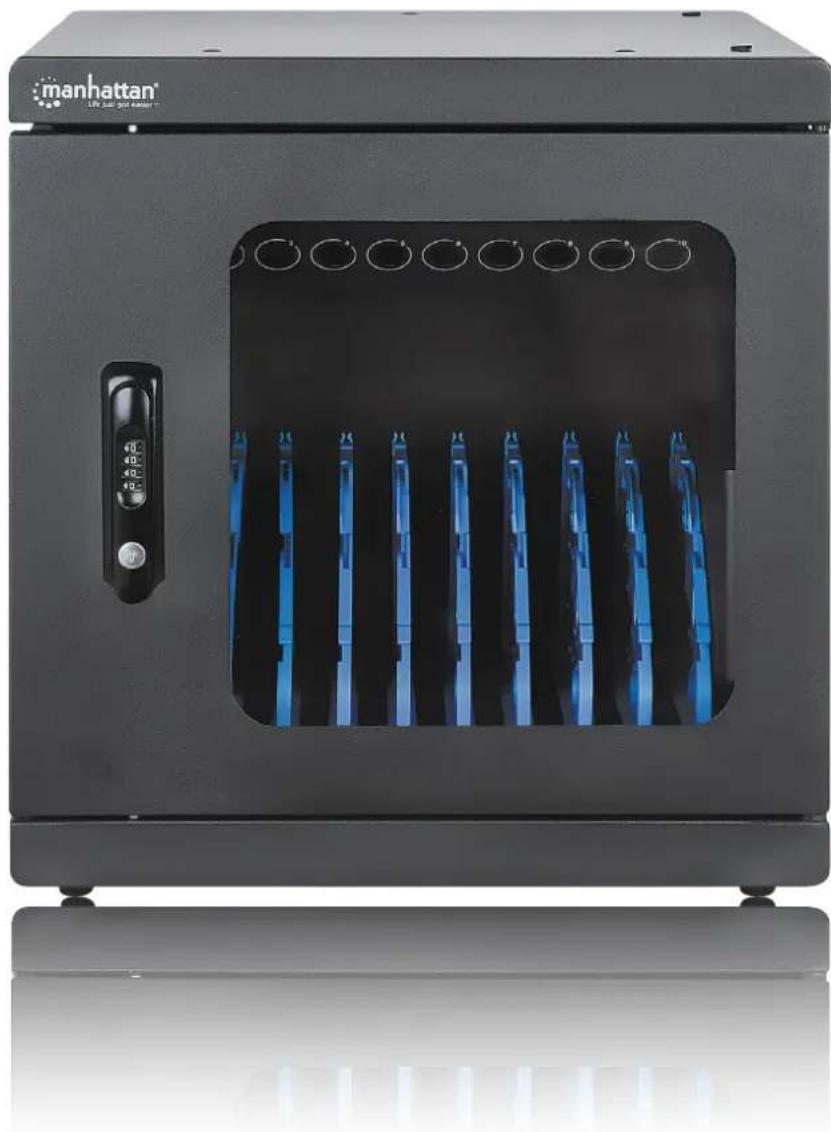
The Default Combination and Turning the Wheels
The default combination is 0-0-0-0; see below. The wheels are only able to be turned to the left.

natural_image
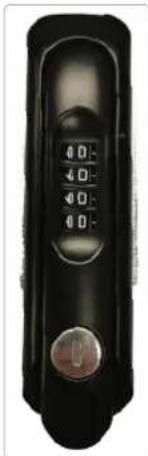
Close-up of a black handheld device with control buttons and a knob (no visible text or symbols)To Unlock
- Combination Method: Turn the wheels to the correct code.
natural_image
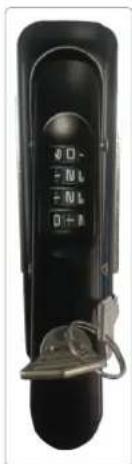
Close-up of a black handheld device with a circular button and control panel (no visible text or symbols)• Key Method: Turn the key in the lock as shown.
natural_image
Black remote control device with dual rotary buttons and a metallic key (no visible text or symbols)Once the cabinet is unlocked, pull up from the bottom of the handle and turn it 90^ to the right; then open the door.
To Lock
Close the door, turn the handle 90^ to the left and push it back into its closed state. Once the cabinet is secure:
- Combination Method: Scramble the combination wheels.
• Key Method: Turn the key back 90° and remove it from the lock.
To Set a New Combination
Remember to record and safely store the new combination after you set it. This is a mechanical lock, which cannot be reset directly if the code is forgotten.
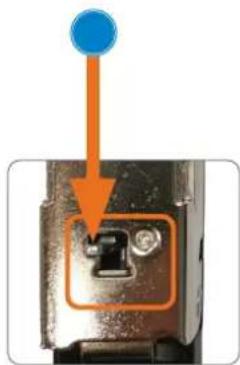
1 Make sure the Combination button on the back of the handle is in the Normal position.
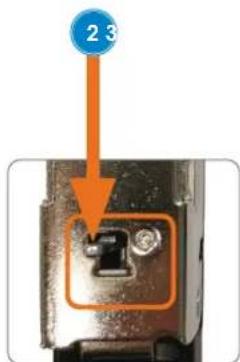
2 Push the Combination button to the Set position.
3 Turn the combination wheels to your desired code. NOTE: make sure to record and securely store the new combination.
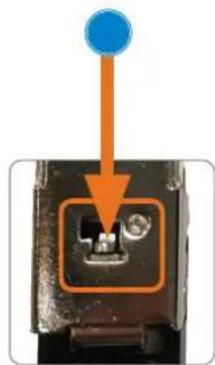
4 Once the new code is set, push the Combination button back to the Normal position.

natural_image
Mechanical clamp or lever device with metallic components and mounting holes (no visible text or symbols)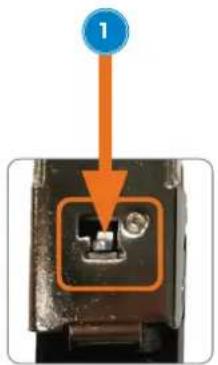


natural_image
Close-up of a mechanical component with an orange arrow pointing to a blue circular feature (no text or symbols visible)NOTE: Make sure you record and securely store the new combination.
To Find the Forgotten Combination
1 Remove the combination wheel box from the handle by unfastening the screws that secure it in place.

natural_image
Close-up of a hand using a power tool to adjust or install a device with a keypad and buttons (no visible text or symbols)2 Turn the combination wheels to the left to find the cutouts on the adjacent smaller wheels. The number next to the cutout is the correct number in the combination.

natural_image
Close-up of a mechanical component with multiple black buttons and orange arrows indicating directional movement (no text or symbols)3 Once the correct combination is noted and stored securely, re-fasten the combination wheel box to the handle using the screws.
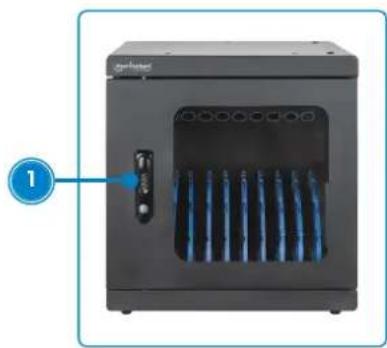
Setup
1 Unlock unit door and open it.
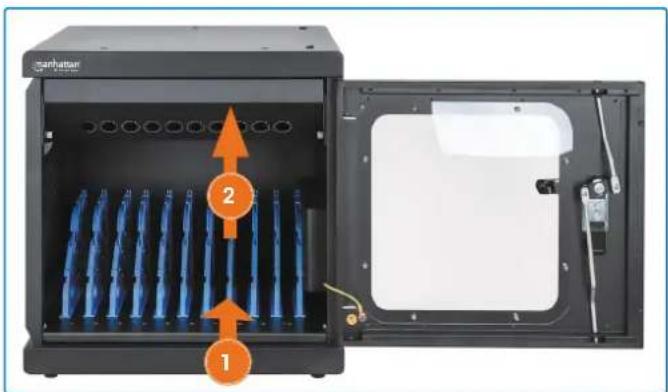
natural_image
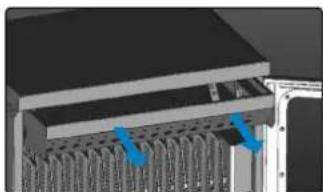
Exterior view of a black industrial machine with blue heat exchangers and a labeled component (no text or symbols on the device itself)2 Fitting a larger device — To remove an appropriate slot divider, push it to the back of the cabinet and lift it out. To replace a divider, position its tab(s) into the appropriate slot(s) and pull it toward you.
3 Connect devices to power outlets with appropriate cables. Secure cables with wire clips on dividers.
- Remove screws that hold the power box in place; slide the power box out.
- Connect power cables to power outlets, feeding cables through holes on power panel.
- Push the power box back in and replace the screws that hold it in place.
- Load devices in bays.
- Connect cables to devices.

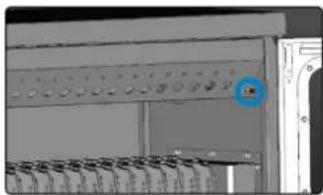
natural_image
Interior view of a black server rack unit with visible socket, ventilation pipes, and connectors (no text or symbols)Charging
4 Connect unit power cable to power outlet. Unit automatically begins to charge devices.
Installation Options
The following sections offer optional steps to complete installation.
Mounting to the Wall
1 At desired location on wall, use the spacing shown in the graphic below to mark four level drill positions for the cabinet holes.
Concrete wall: use a 15/64" (6 mm) bit to drill holes 2.4 in. (60 mm) deep at marks.
Wood-stud walls: use a 15/64" (6 mm) bit to make pilot holes 2.4 in. (60 mm) deep at marks.

2 Install included screws into holes so they protrude 0.4 in. (10 mm) from the wall.

3 Position cabinet holes over wall screws and hang cabinet on them. Installation is complete.

Stacking the Units — NOTE: Make sure all power is cut off from unit! Stacking material not included; refer to website.
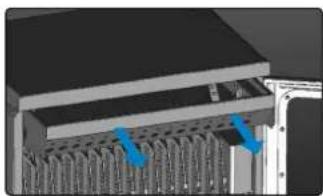
1 Unscrew the screws on the power box.
natural_image
Industrial control panel with multiple rows of equipment and a blue circular marker on the side (no visible text or symbols)2 Slide the power box out.
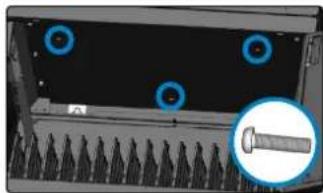
natural_image
Close-up of a server rack with multiple drive bays and blue arrows pointing to specific components (no text or symbols visible)3 Align the stacking holes on the top and bottom of the cabinets.

natural_image
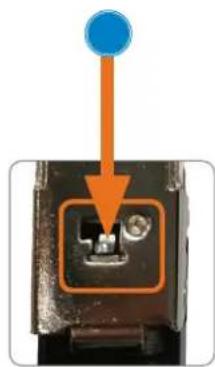
Two views of a computer chassis showing internal components and connected blue lines (no text or symbols)4 Tighten screws (not included) into both cabinets from the ceiling of the bottom cabinet.
natural_image
Close-up of a mechanical component with blue circular annotations and a magnified inset showing a threaded bolt (no text or symbols visible)
natural_image
Architectural elevation diagram showing a window with grid-like structure and blue lighting lines (no text or symbols)NOTE: a 13 mm
(0.51 in.) gap exists.
5 Reinstall the power box with its screws.

natural_image
3D rendering of an open computer tower case with two blue arrows indicating internal components (no text or symbols visible)
natural_image
Interior view of a laboratory or industrial equipment unit with multiple storage racks and a blue circular marker on the door (no visible text or symbols)natural_image
Close-up of a black handheld device with a control knob and four-digit display (no visible text or symbols)Entsperren
natural_image
Close-up of a black handheld device with a control knob and four rotary buttons (no visible text or symbols)natural_image
Black handheld device with a keypad and attached cable (no visible text or symbols)natural_image
Mechanical clamp or lever device with black base and metallic components (no visible text or symbols)

natural_image
Close-up of a mechanical component with an orange arrow pointing to a button (no text or symbols visible)
natural_image
Close-up of a mechanical component with an orange arrow pointing to a blue circular feature (no text or symbols visible)natural_image
Close-up of a hand using a power tool to adjust or install a device with a keypad and switch (no visible text or symbols)natural_image
Close-up of a mechanical component with multiple black and red buttons and orange arrows indicating directional movement (no text or symbols)natural_image
Exterior view of a black industrial appliance with blue ventilation slots and a labeled component (no text or symbols on the device itself)natural_image
Interior view of a black server rack unit with visible socket, ventilation slots, and power connections (no text or symbols)Aufladen
natural_image
Close-up of a hand holding a drill bit with a 50mm scale indicator (no other text or symbols)natural_image
Close-up of a control panel with buttons and dials (no visible text or symbols)natural_image
Close-up of a mechanical assembly with blue arrows pointing to internal components (no visible text or symbols)natural_image
Two views of a computer chassis showing internal components and connected blue lines (no text or symbols)natural_image
Close-up of a server rack with four blue circular markers and a magnified inset showing a screw (no text or symbols visible)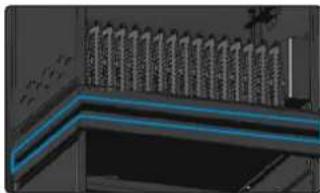
natural_image
Architectural elevation diagram showing a building facade with window grilles and ceiling lighting (no text or symbols)natural_image
Illustration of a computer interface with two ports and a closed door (no text or symbols visible)
natural_image
Close-up of a server rack with a blue circular icon highlighting a specific component (no visible text or symbols)natural_image
Close-up of a black handheld device with a circular button and control panel (no visible text or symbols)Para desbloquear
natural_image
Close-up of a black handheld device with a circular button and control knob (no visible text or symbols)natural_image
Black handheld device with keypad and tag (no visible text or symbols)natural_image
Mechanical clamp or lever component with metallic parts and mounting holes (no visible text or symbols)

natural_image
Close-up of a mechanical component with an orange arrow pointing to a button (no text or symbols visible)

natural_image
Close-up of a mechanical component with an orange arrow pointing to a highlighted section (no text or symbols visible)natural_image
Close-up of a hand using a power tool to adjust a device with a 125 timer and lock, no visible text or symbols.natural_image
Close-up of a mechanical component with multiple black and red indicator lights, featuring orange arrows pointing to specific ports (no text or symbols visible)natural_image
Exterior view of a black industrial machine with blue ventilation slots and a labeled component (no text or symbols on the device itself)natural_image
Interior view of a black server rack with visible ports and cables, labeled with number 3 (no text or symbols on the device itself)Carga
natural_image
Close-up of a hand holding a drill bit with a 50mm scale indicator (no text or symbols on the tool itself)natural_image
Close-up of a mechanical or electronic component with no visible text, numbers, or symbols.natural_image
3D mechanical assembly diagram showing a layered structure with blue arrows indicating specific components (no text or symbols present)natural_image
Two views of a computer chassis showing connected components (no text or symbols visible)natural_image
Close-up of a server rack with four blue circular markers and a magnified inset showing a screw (no text or symbols visible)
natural_image
Architectural elevation detail showing a window with vertical slats and a blue lighting stripe (no text or symbols visible)natural_image
Illustration of a computer tower with visible internal components and blue arrows indicating ports (no text or symbols)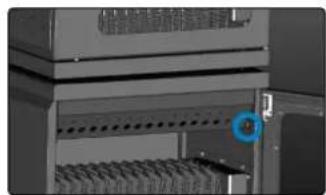
natural_image
Close-up of a mechanical or electronic component with a blue circular marker highlighting a specific part (no visible text or symbols)natural_image
Close-up of a black remote control device with a rotary dial and button (no visible text or symbols)Pour déverrouiller
natural_image
Close-up of a black remote control device with a rotary dial and button (no visible text or symbols)natural_image
Mechanical clamp or lever device with three bolts and a black handle (no visible text or symbols)
natural_image
Close-up of a mechanical component with an orange arrow pointing to a highlighted section (no text or symbols visible)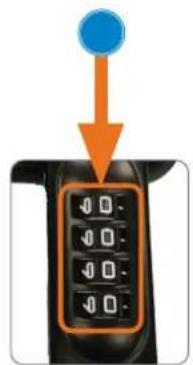
natural_image
Close-up of a mechanical component with an orange arrow pointing to a blue circular feature (no text or symbols visible)natural_image
Close-up of a hand using a power tool to adjust a black electronic device with a 1250 timer (no visible text or symbols)natural_image
Close-up of a mechanical component with multiple black and red buttons, featuring orange arrows pointing to specific slots (no text or symbols visible)natural_image
Exterior view of a black industrial machine with blue ventilation slots and a labeled component (no text or symbols on the device itself)natural_image
Interior view of a black electronic device chassis with visible ports and wiring (no text or symbols)Chargement
natural_image
Close-up of a hand holding a drill bit with a 50mm scale indicator (no other text or symbols)natural_image
Pure electrical circuit lines without any symbols2 Retirez le module de charge.
natural_image
3D mechanical assembly diagram showing internal components with blue arrows indicating movement or force (no text or symbols)natural_image
Two views of a computer chassis with blue connecting lines indicating connection points (no text or symbols present)natural_image
Close-up of a mechanical component with blue circular annotations and a magnified inset showing a threaded bolt (no text or symbols visible)
natural_image
Close-up of a mechanical or architectural component with blue lighting lines and grid-like structure (no visible text or symbols)natural_image
Interior view of an electronic device showing two ports with blue arrows indicating flow or movement (no text or symbols visible)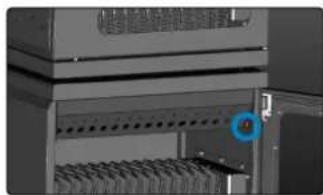
natural_image
Close-up of a server rack with a blue circular marker highlighting a specific component (no visible text or symbols)natural_image
Close-up of a black handheld device with a circular dial and a button (no visible text or symbols)Aby otworzyć
natural_image
Close-up of a black handheld device with a control knob and four-digit display (no visible text or symbols)
natural_image
Black handheld device with control panel and metal clasp (no visible text or symbols)natural_image
Mechanical device with three bolts and a lever mechanism (no visible text or symbols)


natural_image
Close-up of a mechanical component with an orange arrow pointing to a button (no text or symbols visible)natural_image
Close-up of a hand using a power tool to adjust a device with a 120-degree display (no visible text or symbols)natural_image
Close-up of a mechanical component with multiple black and red indicator lights, featuring orange arrows pointing to specific ports (no text or symbols visible)natural_image
Close-up of a hand holding a drill bit with a 50mm screw marker inside (no text or symbols on the tool itself)natural_image
Pure electrical circuit lines without any symbolsnatural_image
3D diagram of a server rack with blue arrows pointing to internal components (no text or symbols)natural_image
Two views of a computer interface showing connected components (no text or symbols visible)natural_image
Close-up of a computer monitor with screw and indicator lights, no visible text or symbols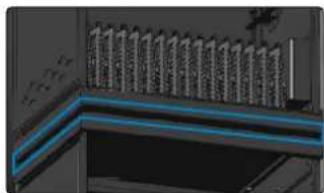
natural_image
Architectural elevation diagram showing a window with vertical supports and a blue highlighted line (no text or symbols)natural_image
Interior view of a computer rack with two blue arrows pointing to internal components (no visible text or labels)
natural_image
Close-up of a server rack with a blue circular icon highlighting a specific component (no visible text or symbols)natural_image
Black remote control device with digital display and rotary knob (no visible text or symbols)Per aprire
natural_image
Close-up of a black remote control device with a dial and button (no visible text or symbols)natural_image
Mechanical component with metallic parts and mounting bracket (no visible text or symbols)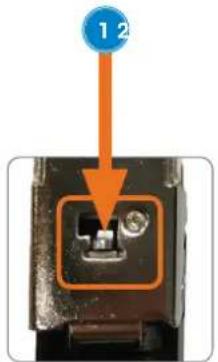

natural_image
Close-up of a mechanical component with an orange arrow pointing to a blue circular feature (no text or symbols visible)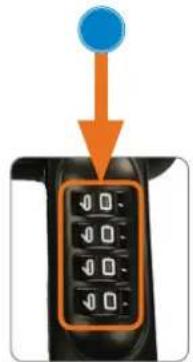

natural_image
Close-up of a mechanical component with an orange arrow pointing to a highlighted section (no text or symbols visible)natural_image
Close-up of a hand using a power tool to adjust or install a device with a rotary knob (no visible text or symbols)natural_image
Close-up of a mechanical component with multiple black buttons and orange arrows indicating directional movement (no text or symbols)natural_image
Front view of a black industrial machine with blue ventilation slots and a labeled component (no visible text or symbols)natural_image
Interior view of a black industrial machine with blue rack-mounted components and orange directional arrows indicating flow or movement (no text or symbols visible)natural_image
Interior view of a black electronic device chassis with visible internal components and wiring (no text or symbols)Ricarica
natural_image
Close-up of a hand holding a drill bit with a 50mm scale indicator (no other text or symbols)natural_image
Close-up of a control panel with multiple switches and a blue circular icon (no visible text or symbols)natural_image
3D mechanical assembly diagram showing internal components with blue arrows indicating motion or force (no text or symbols)natural_image
Two views of a computer interface showing connected components (no text or symbols visible)natural_image
Close-up of a server rack with four blue circular annotations highlighting specific components (no text or symbols present)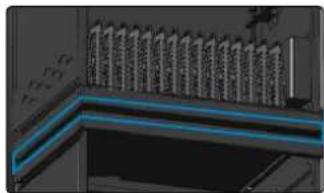
natural_image
Architectural elevation diagram showing a window with vertical supports and a blue highlighted line (no text or symbols)natural_image
3D rendering of an open industrial control unit with internal wiring and blue indicator lights (no text or symbols visible)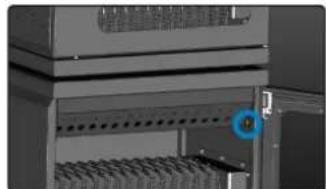
natural_image
Interior view of a server rack with a blue circular icon highlighting a component (no visible text or symbols)WASTE ELECTRICAL & ELECTRONIC EQUIPMENT
Disposal of Electric Equipment (applicable in the E.U. and other countries with separate collection systems)
ENGLISH: This symbol on the product or its packaging means that this product must not be treated as unsorted household waste. In accordance with EU Directive 2012/19/EU on Waste Electrical and Electronic Equipment (WEEE), this electrical product must be disposed of in accordance with the user's local regulations for electrical or electronic waste. Please dispose of this product by returning it to your local point of sale or recycling pickup point in your municipality.
manhattanproducts.com
ENGLISH : This device complies with the requirements of CE 2014/30/EU (UKCA Electromagnetic
Compatibility Regulations 2016) and / or 2014/35/EU (UKCA Electrical Equipment
[Safety] Regulations 2016). The Declaration of Conformity for is available at:
support.manhattanproducts.com/barcode/180924
POWER INFORMATION
| Input 120.0 VAC, 60 Hz, 15 A | |
| Power (max.) 1800 W | |
| No-load Power Consumption | 0.25w |
| Low-load Efficiency | 91% |
| Average Active Efficiency | 93.5% |


North & South America
IC Intracom Americas
550 Commerce Blvd.
Oldsmar, FL 34677, USA
Asia & Africa
IC Intracom Asia
4-F, No. 77, Sec. 1, Xintai 5th Rd.
Xizhi Dist., New Taipei City 221, Taiwan
Europe
IC Intracom Europe
Löhbacher Str. 7, D-58553
Halver, Germany
All trademarks and trade names are the property of their respective owners.
manhattanproducts.com
© IC Intracom. All rights reserved. Manhattan is a trademark of IC Intracom, registered in the U.S. and other countries.
- For additional benefits
- Using the Lock
- The Default Combination and Turning the Wheels
- To Unlock
- To Lock
- To Set a New Combination
- To Find the Forgotten Combination
- Setup
- Charging
- Installation Options
- Mounting to the Wall
- Stacking the Units — NOTE: Make sure all power is cut off from unit! Stacking material not included; refer to website.
- Entsperren
- Aufladen
- Para desbloquear
- Carga
- Pour déverrouiller
- Chargement
- Aby otworzyć
- Per aprire
- Ricarica
- WASTE ELECTRICAL & ELECTRONIC EQUIPMENT
- manhattanproducts.com
Brand : MANHATTAN
Model : 180924
Category : Multi charger