ORH-450-NF-W - Fridge Orima - Free user manual and instructions
Find the device manual for free ORH-450-NF-W Orima in PDF.


User questions about ORH-450-NF-W Orima
0 question about this device. Answer the ones you know or ask your own.
Ask a new question about this device
Download the instructions for your Fridge in PDF format for free! Find your manual ORH-450-NF-W - Orima and take your electronic device back in hand. On this page are published all the documents necessary for the use of your device. ORH-450-NF-W by Orima.
USER MANUAL ORH-450-NF-W Orima
natural_image
Abstract red spiral logo with gray inner arc (no text or symbols)orima
eletrodomésticos
MANUAL DE INSTRUÇÕES
INSTRUCTION MANUAL
LIVRE D'INSTRUCTIONS
facebook.com/orima.pt
natural_image
Exterior view of a modern refrigerator with two white units and a gray stainless steel cabinet (no visible text or symbols)
MMA
MÁRIO MIRANÇA DE ALMEIDA
FRIGORÍFICO
natural_image
Simple line drawing of a mechanical component or bracket with diagonal line (no text or symbols)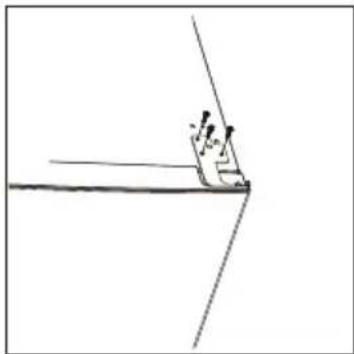
natural_image
Simple line drawing of a corner with a small object and motion lines, no text or symbols present.natural_image
Diagram showing two mechanical components with arrows indicating transformation (no text or symbols)natural_image
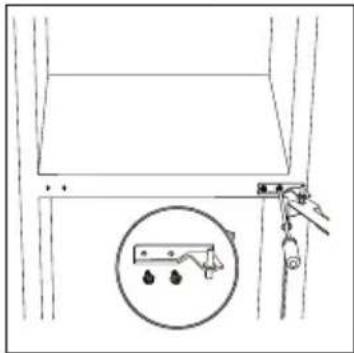
Pure mechanical diagram showing a lever and pivot point without any text, numbers, or symbols- Desaparafuse a dobradiça central.
natural_image
Simple line drawing of a cabinet or lift mechanism with a hand holding a tool, and an inset showing a hanging device (no text or symbols)natural_image
Simple line drawing of a geometric structure with a curved top and base, no text or symbols present.natural_image
Pure mechanical diagram showing two symmetrical components with circular features and connecting lines, no text or symbols present.natural_image
Technical line drawing of a mechanical assembly with no visible text or symbols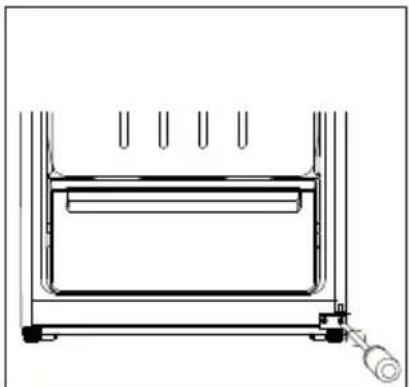
natural_image
Technical line drawing of a rectangular device with internal components and a hanging knob (no text or symbols)natural_image
Technical line drawing of a mechanical assembly with no visible text or symbols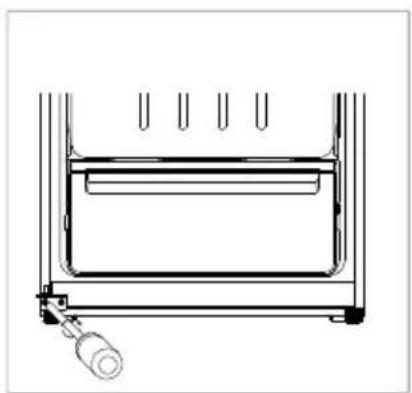
natural_image
Technical line drawing of a mechanical assembly with no visible text or symbolsnatural_image
Technical line drawing of a mechanical clamp or bracket assembly (no text or symbols)natural_image
Simple line drawing of a person sitting on a chair near a wall, no text or symbols present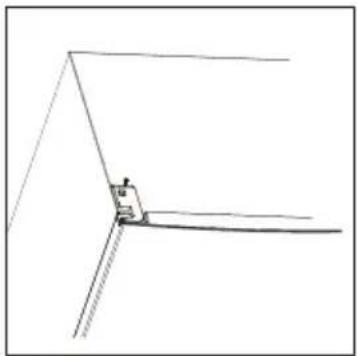
natural_image
Pure technical line drawing of a mechanical assembly without any text, numbers, or symbolsnatural_image
Simple line drawing of a corner joint or bracket (no text or symbols)UTILIZAÇÃO DIÁRIA
text_image
F H G 50° I F| A | 600 |
| B | 665 |
| C | 1700 |
| D | min=50 |
| E | min=50 |
| F | min=50 |
| G | 1200 |
| H | 1265 |
| I | 135^ |
text_image
Two labeled diagrams showing a checkmark and a cross symbol on a stand, likely indicating approval or rejection status.Posicionamento
natural_image
Line drawing of a hand installing or adjusting a metal shelf (no text or symbols)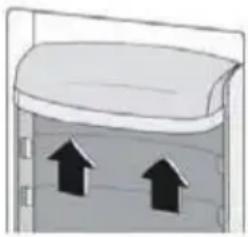
natural_image
Simple line drawing of a container with two upward arrows indicating flow or movement (no text or symbols)Dicas úteis
natural_image
Diagram showing a mechanical or fluid system with arrows indicating direction, no text or symbols present- All accessories, such as drawers, shelves balconies, should be kept there for lower energy consumption.


!
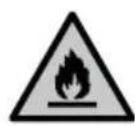
During using, service and disposal the appliance, please pay attention to symbol similar as left side, which is located on rear of appliance (rear panel or compressor) and with yellow or orange color.
It's risk of fire warning symbol. There are flammable materials in refrigerant pipes and compressor.
Please be far away fire source during using, service and disposal.
text_image
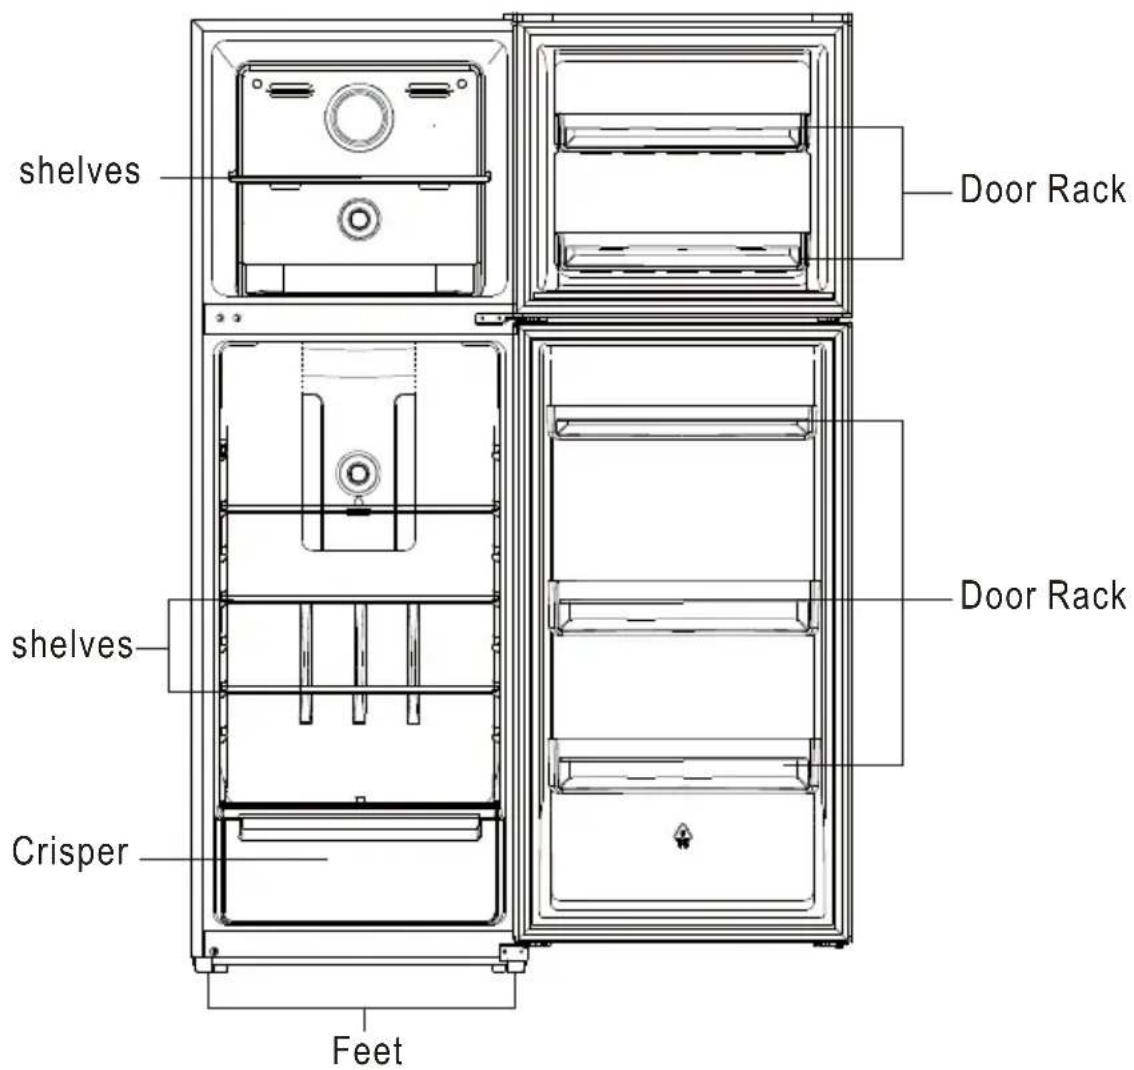
shelves Door Rack shelves Crisper Feet Door RackThis illustration is only for hinting, the detail please check your appliance.
natural_image
Simple line drawing of a mechanical component or bracket with no text or symbols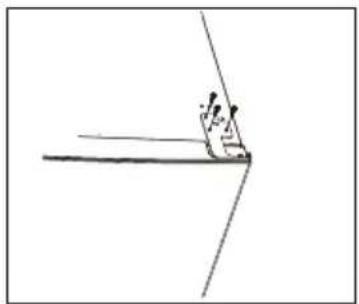
natural_image
Simple line drawing of a person standing on a platform with a diagonal line (no text or symbols)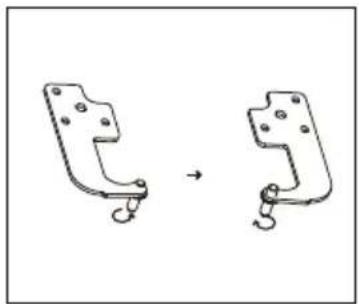
natural_image
Diagram showing two mechanical components with mounting holes and a curved arrow indicating transformation (no text or symbols)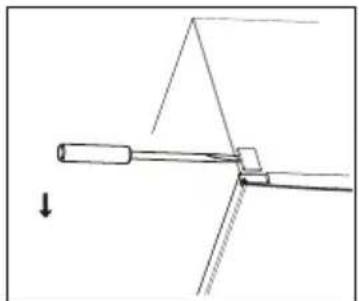
natural_image
Pure mechanical diagram showing a lever and pivot with no text or symbols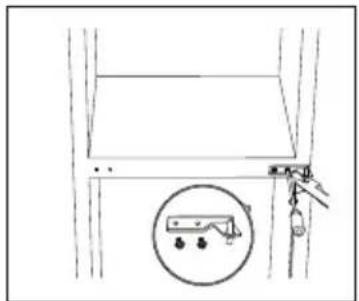
natural_image
Simple line drawing of a ladder with a hanging weight and a circular inset showing a device (no text or symbols)- Move shaft sleeve and pin hole plug from left side to right side.
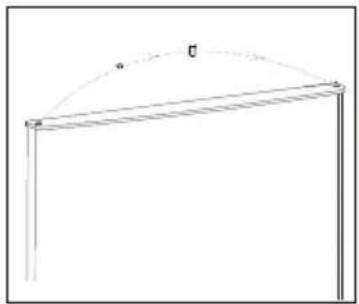
natural_image
Simple line drawing of a rectangular frame with a curved top edge and base, no text or symbols present.- Move the hinge hole covers from left side to right side.
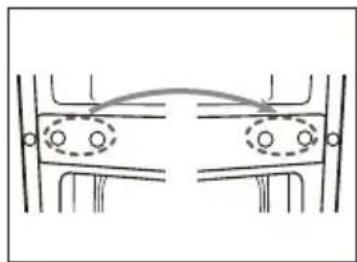
natural_image
Pure mechanical diagram showing two vertical supports with circular features and an arrow indicating direction (no text or symbols)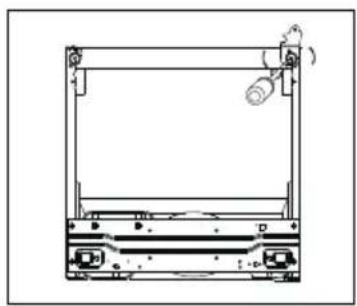
natural_image
Technical line drawing of a mechanical assembly with no visible text or symbols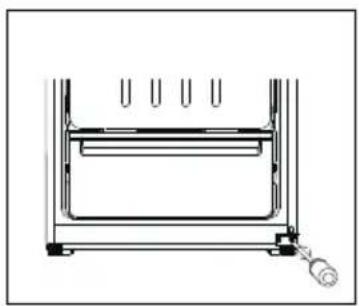
natural_image
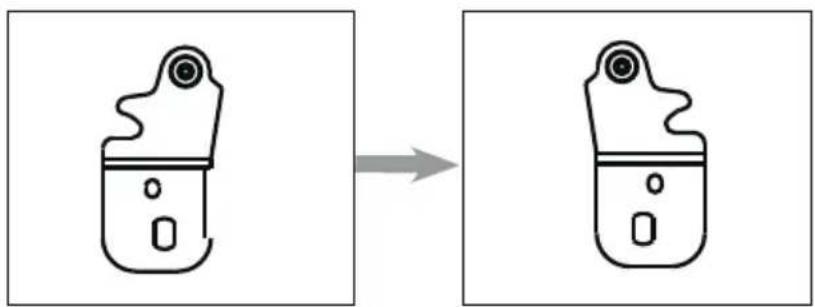
Technical line drawing of a mechanical device with no visible text or symbols- Disassemble right hinge, find out right bottom hinge from spare parts bags and fix it.
natural_image
Diagram showing a device being processed from a left-side to the right-side view (no text or symbols present)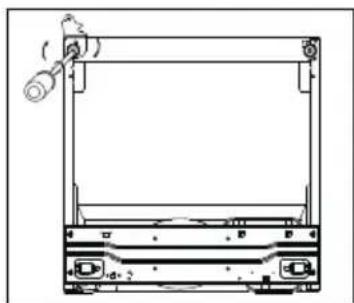
natural_image
Technical line drawing of a mechanical frame or enclosure with no visible text or symbols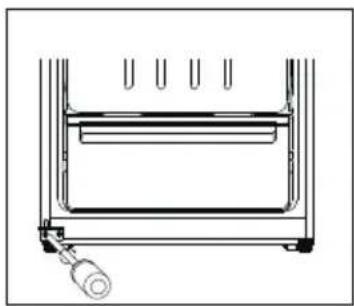
natural_image
Technical line drawing of a mechanical device with cooling fins and a hanging spring (no text or symbols)- Make the middle hinge reverse the direction180C, then transfer it to the left property position. Make the middle hinge pin in the upper hole of the lower door, then tight the bolts.
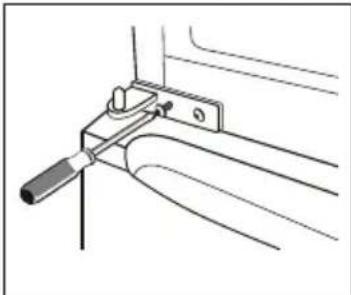
natural_image
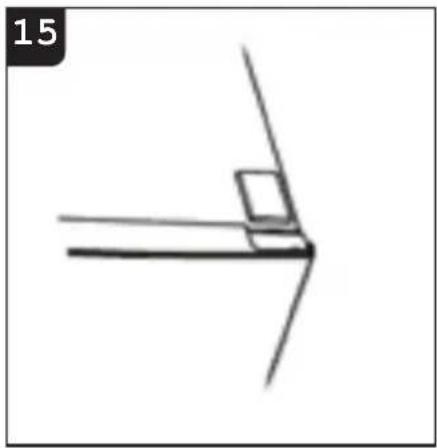
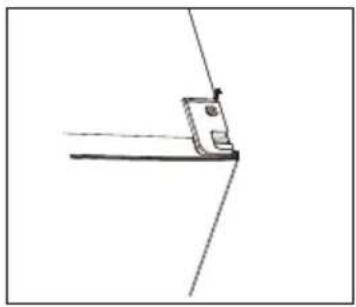
Technical line drawing of a mechanical clamp or bracket assembly (no text or symbols)- Place the upper door back on. Ensure the door is aligned horizontally and vertically so that the seal are closed on all sides before finally tightening the top hinge. Then inert the top hinge and screw it to the top of unit and then fix hinge cover (in accessory bag) by screw.
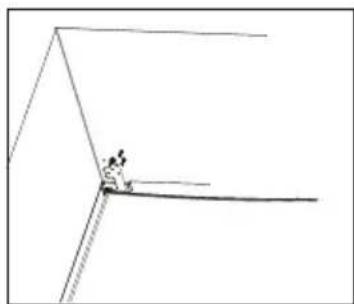
natural_image
Simple line drawing of a corner with a small figure and dashed lines indicating measurement or alignment (no text or symbols)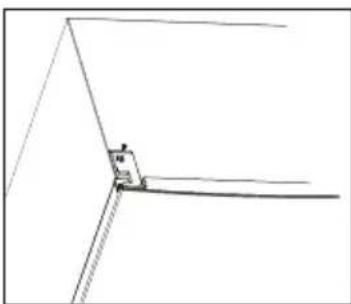
natural_image
Simple line drawing of a corner structure with a small object at the base (no text or symbols)- Fix the screw cover.
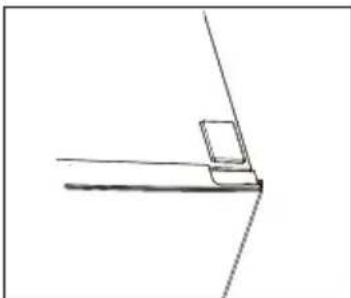
natural_image
Simple line drawing of a corner joint or bracket (no text or symbols)- Detach the Fridge and the Freezer door gaskets and then attach them after rotating.
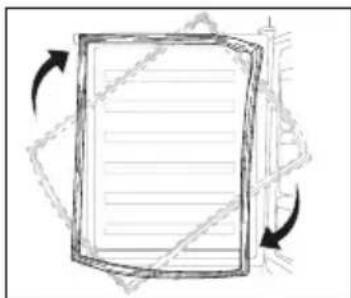
natural_image
Simple line drawing of a document with arrows indicating rotation or movement (no text or symbols)Space Requirement
Keep enough space of door open.
Keep at least 50mm gap at two sides and back.
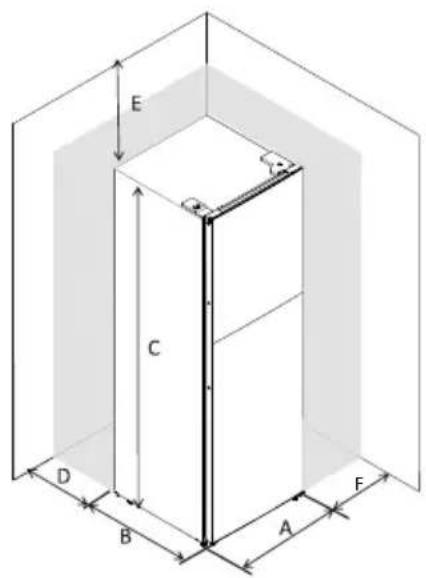
text_image
E C D B A F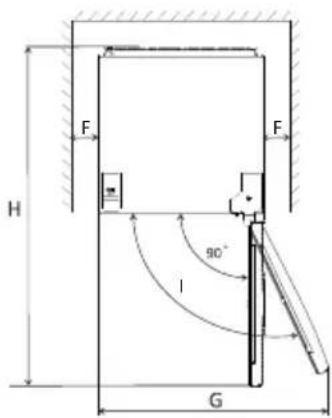
text_image
F H G 90° I F| A | 600 |
| B | 665 |
| C | 1700 |
| D | min=50 |
| E | min=50 |
| F | min=50 |
| G | 1200 |
| H | 1265 |
| I | 135" |
Levelling the unit
To do this adjust the two levelling feet at front of the unit.
If the unit is not level, the doors and magnetic seal alignments will not be covered properly.
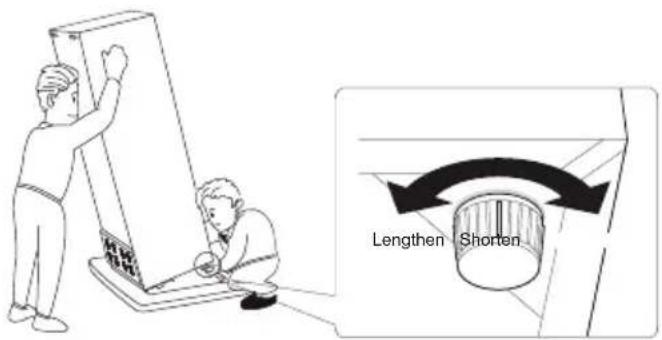
text_image
Lengthen Shorten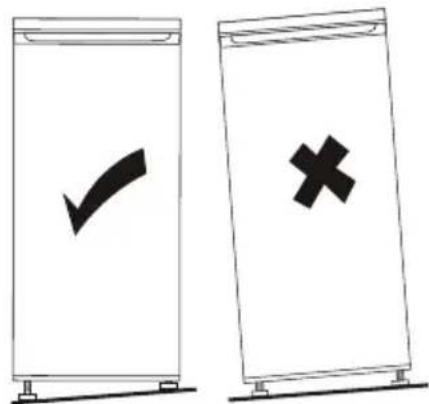
text_image
Two identical diagrams showing a checkmark and a cross symbol inside vertical containers, likely indicating cancellation or rejection.Positioning
Install this appliance at a location where the ambient temperature corresponds to the climate class indicated on the rating plate of the appliance:
for refrigerating appliances with climate class:
- extended temperate: this refrigerating appliance is intended to be used at ambient temperatures ranging from 10 °C to 32 °C; (SN)
- temperate: this refrigerating appliance is intended to be used at ambient temperatures ranging from 16 °C to 32 °C; (N)
- subtropical: this refrigerating appliance is intended to be used at ambient temperatures ranging from 16 °C to 38 °C; (ST)
- tropical: this refrigerating appliance is intended to be used at ambient temperatures ranging from 16 °C to 43 °C; (T)
Location
The appliance should be installed well away from sources of heat such as radiators, boilers, direct sunlight etc. Ensure that air can circulate freely around the back of the cabinet. To ensure best performance, if the appliance is positioned below an overhanging wall unit, the minimum distance between the top of the cabi-net and the wall unit must be at least 50 mm. Ideally, however, the appliance should not be positioned below overhanging wall units. Accurate leveling is ensured by one or more adjustable feet at the base of the cabinet.
This refrigerating appliance is not intended to be used as a built-in appliance;

Using the Control Panel
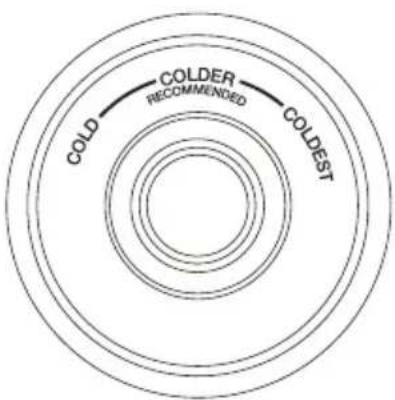
text_image
COLD COLDER RECOMMENDED COLDEST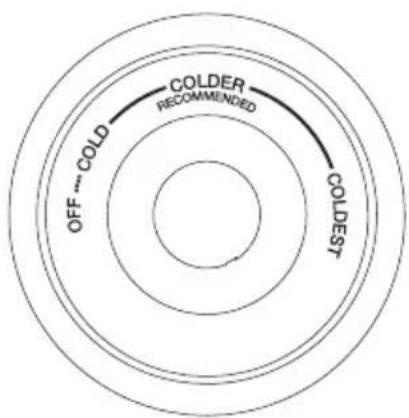
text_image
COLDER RECOMMENDED COLDER OFF ... COLD COLDERDaily use
Position different food in different compartments according to be below table
| Refrigerator compartments | Type of food |
| Door or balconies of fridge compartment | ·Foods with natural preservatives, such as jams, juices, drinks, condiments.·Do not store perishable foods. |
| Crisper drawer (salad drawer) | ·Fruits, herbs and vegetables should be placed separately in the crisper bin.·Do not store bananas, onions, potatoes, garlic in the refrigerator. |
| Fridge shelf – middle | ·Dairy products, eggs |
| Fridge shelf – top | ·Foods that do not need cooking, such as ready-to-eat foods, deli meats, leftovers. |
| Freezer drawer(s)/shelf | ·Foods for long-term storage.·Bottom drawer/shelf for raw meat, poultry, fish.·Middle drawer/shelf for frozen vegetables, chips.·Top drawer/shelf for ice cream, frozen fruit, frozen baked goods. |
Temperature setting recommendation
| Environment Temperature | Freezer compartment | Fridge compartment |
| Summer | 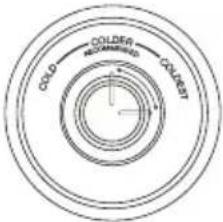 | 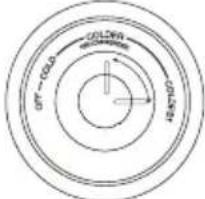 |
| Set on colder~coldest | Set on colder~coldest | |
| Normal | 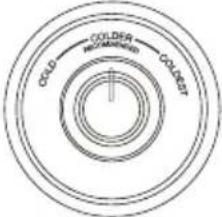 | 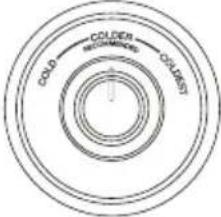 |
| Set on colder | Set on colder | |
| Winter | 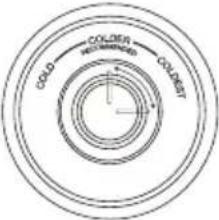 | 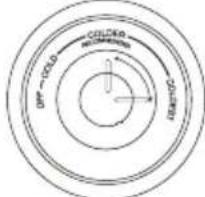 |
| Set on colder~coldest | Set on colder~coldest | |
setting.
coldest
coldest set only apply
or ice making), and need turn back after special need.
Impact on Food Storage
Under Recommended setting, the best storage time of freezer is no more than 1 month.
The best storage time may reduce under other settings.
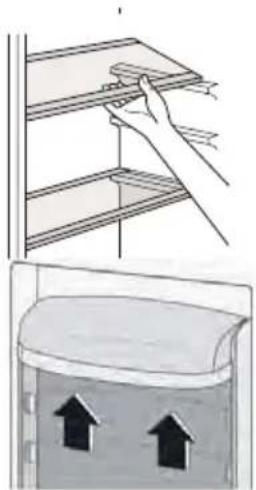
natural_image
Illustration showing a hand placing a tray onto a shelf above a container with two upward arrows (no text or symbols)
Troubleshooting

Caution! Before troubleshooting, disconnect the power supply. Only a qualified electrician or competent person must do the troubleshooting that is not in this manual.
Important! There will be some sound/noise during normal operation (compressor or refrigerant circulation).
| Problem | Possible cause | Solution |
| Appliance does not work | Mains plug is not plugged in or is loose | Insert mains plug. |
| Fuse has blown or is defective | Check fuse, replace if necessary. | |
| Socket is defective | Mains malfunctions are to be corrected by an electrician. | |
| Appliance freezes or cools too much | Temperature is set too cold | Turn the temperature regulator to a warmer setting temporarily. |
| The food is not frozen enough. | Temperature is not properly adjusted. | Please look in the initial Temperature Setting section. |
| Door was open for an extended period. | Open the door only as long as necessary. | |
| A large quantity of warm food was placed in the appliance within the last 24 hours. | Turn the temperature regulation to a colder setting temporarily. | |
| The appliance is near a heat source. | Please look in the installation location section. | |
| Heavy build up of frost on the door seal. | Door seal is not air tight. | Carefully warm the leaking sections of the door seal with a hair dryer (on a cool setting). At the same time shape the warmed door seal by hand such that it sits correctly. |
| Unusual noises | Appliance is not level. | Re-adjust the feet. |
| The appliance is touching the wall or other objects. | Move the appliance slightly. | |
| A component, e.g. a pipe, on the rear of the appliance is touching another part of the appliance or the wall. | If necessary, carefully bend the component out of the way. |
If the malfunction shows again, contact the Service Center.
This list provides all Eco-design requirements (following the (EU)2019/2019 Eco-design and (EU)2019/2016 Energy labelling), if the requirement is applicable to your product.
The refrigerating appliance is not intended to be used as a built-in appliance, unless specifically shown as such into its instruction manual.
The drawers, baskets and shelves should be kept in their current position unless otherwise specified in this document.
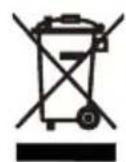
Doors and lids of the refrigeration appliance should be removed before disposal in the landfill, to avoid children or animals getting trapped inside.
Recommended setting:
Refrigerator compartment: +4°C
Freezer compartment: -18°C
FAST FREEZE
The use of this function is recommended when placing a very high quantity of food to be frozen in the freezer compartment. 24 hours before freezing fresh food, press the Fast Freeze button to activate the Fast Freeze function. When activated, the Fast Freeze indicator turns on. After 24 hours place the food to be frozen in the freezing zone of freezer compartment. The function is automatically disabled after 72 hours, or can be manually disabled by pressing Fast Freeze button.
FAST COOL
Using Fast Cool function it is possible to increase the cooling capacity in the refrigerator compartment. The use of this function is recommended when placing a very high quantity of food in the refrigerator compartment. Press the Fast Cool button to activate Fast Cool function. When activated, the Fast Cool indicator turns on. The function is automatically disabled after 6 hours, or can be manually disabled by pressing Fast Cool button again.
How to store foodstuffs:
To avoid food waste, please refer to the recommended setting and storage times:
Fridge compartment: Different food, especially vegetable and fruit, have different storage temperature. The storage time is 1 to 3 days (temp setting: middle)
Freezer compartment: 1 week (temp setting: Min) and 1 month (temp setting: Max)
To optimize freezing speed and get more storage space, the freezer compartment can be used without the freezer drawers.
The quantity of fresh food that can be frozen in a specific time period is indicated on the rating plate. Load limits are determined by baskets, flaps, drawers, shelves etc. Make sure that these components can still close easily after loading.
To avoid food waste, please refer to the recommended setting and storage times found in the user manual.
The model information can be retrieved using the QR-Code reported in the energy label.
The label also includes the model identifier that can be used to consult the portal of the registry at
https://eprel.ec.europa.eu
This product contains a light source of energy efficiency class G (if present).
| Model | ORH 450 NF W / X |
| Total Net Volume, L | 334 |
| Refrigerator Net Volume, L | 257 |
| Freezer net volume, L | 77 |
| Actual consumption depends on how the device is used and the location | |
| Energy Class based on EU 2019/2016 | F |
| Power Consumption: KWh/year | 281 |
| Climate class N,ST | |
| Dimensions (A x L x P), mm | 1700*600*670 |
| Noise level, db(A) re 1pw 41 | |
| Electrical Information See in the product rating label | |
| Note: The manufacturer reserves the right to make future changes to the Specifications and technical parameters. | |
IMPORTADO POR: MÁRIO MIRANDA DE ALMEIDA, SA
APARTADO 1, 3060-752 CORTICEIRO DE CIMA, PORTUGAL
orima
To ensure proper use of this appliance and your safety, please read the instruction manual completely before operating this appliance.
natural_image
Simple line drawing of a mechanical component or bracket with diagonal lines (no text or symbols)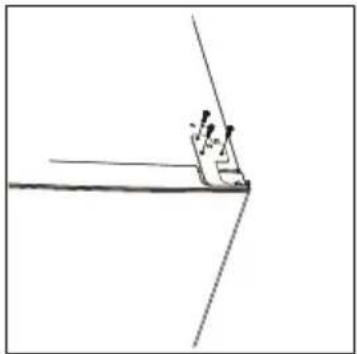
natural_image
Simple line drawing of a boat hull with a small boat and a small boat nearby, no text or symbols present.2 Quita pasadora dondestornilladagirasoportel thisagra. Lueguelv colocapernparsoportel thisagra.
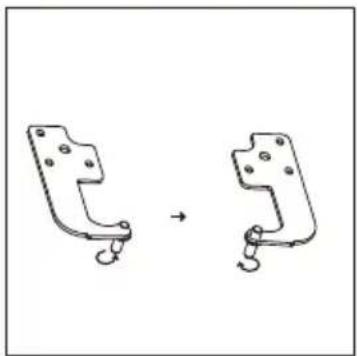
natural_image
Diagram showing two mechanical components with mounting holes and a curved arrow indicating transformation (no text or symbols)natural_image
Pure mechanical diagram showing a lever mechanism with no text or symbols- Desenrosque la bisagra central.
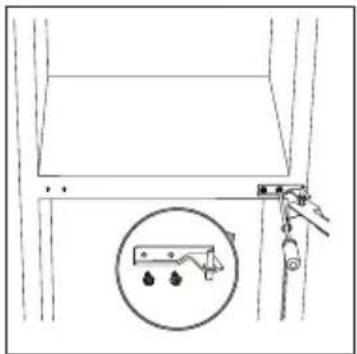
natural_image
Simple line drawing of a door with a hanging handle and a circular inset showing a lever mechanism (no text or symbols)natural_image
Simple line drawing of a rectangular frame with a curved top edge and labeled point 'O' (no text or symbols beyond basic geometry)natural_image
Pure mechanical diagram showing two symmetrical components with circular features, no text or symbols presentnatural_image
Technical line drawing of a mechanical device with no visible text or symbols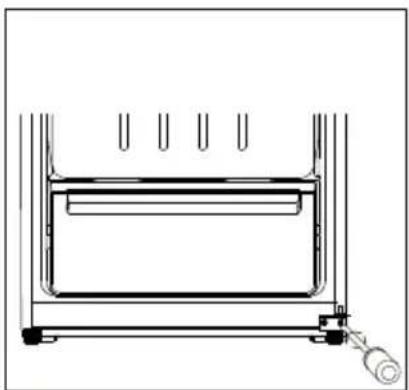
natural_image
Technical line drawing of a rectangular device with internal components and a hanging knob (no text or symbols)natural_image
Diagram showing a device being processed from a left-side to the right-side view (no text or symbols present)natural_image
Technical line drawing of a mechanical device with no visible text or symbols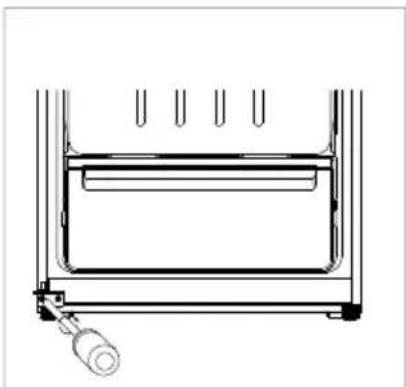
natural_image
Technical line drawing of a mechanical assembly with no visible text or symbolsnatural_image
Technical line drawing of a mechanical clamp or bracket assembly (no text or symbols)natural_image
Simple line drawing of a person sitting on a bench with a ladder, no text or symbols present
natural_image
Pure technical line drawing of a mechanical joint or bracket (no text or symbols)natural_image
Simple line drawing of a corner joint or bracket (no text or symbols)natural_image
3D diagram of a rectangular box with an upward arrow and 100mm dimension label, enclosed in a transparent cube (no text or symbols beyond measurement)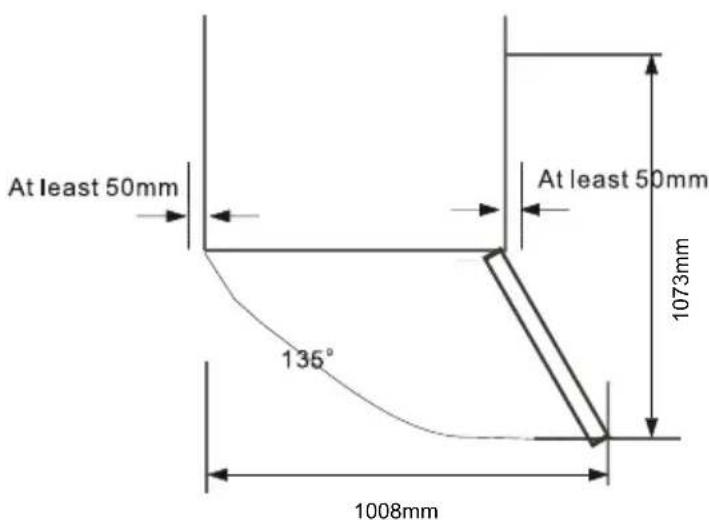
text_image
At least 50mm At least 50mm 135° 1008mm 1073mmtext_image
Diagram showing two labeled signs: a checkmark and an 'X' symbol, likely indicating approval or rejection status.Posicionamiento
text_image
Labeled diagram of a refrigerator interior showing numbered compartments and internal components
Etagères

Pieds

flowchart
graph TD
    A["Worker Icon"] --> B["LED"]
    B --> C["LED"]
    C --> A
natural_image
Illustration showing a hand cleaning a shelf and collecting trash from a bin (no text or symbols)text_image
1 100mm At least 50mm At least 50mm 136° 1075mm 1008mm
text_image
2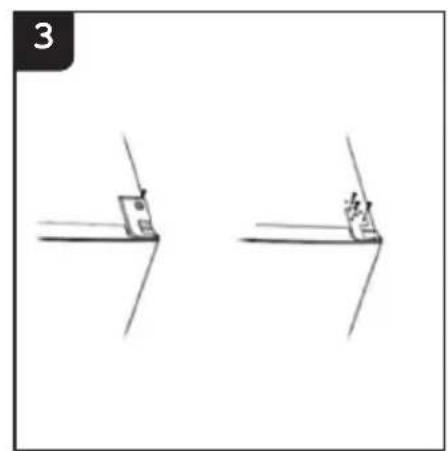
text_image
3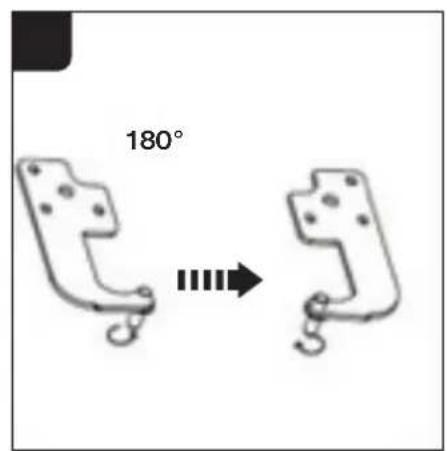
text_image
180°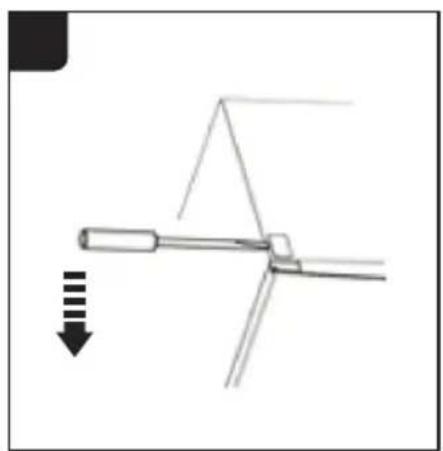
natural_image
Pure mechanical diagram showing a lever mechanism with no text or symbols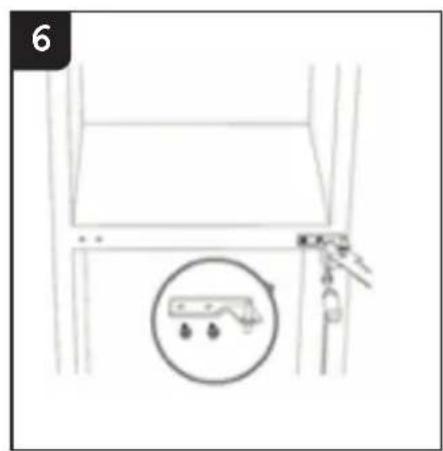
natural_image
Line drawing of a door with a circular inset showing a water level sensor (no text or symbols)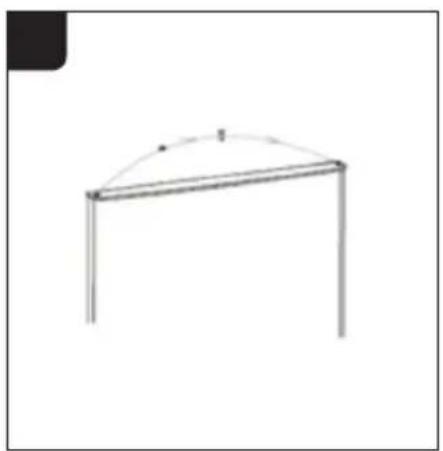
natural_image
Simple line drawing of a simple geometric structure resembling a tent or arch (no text or symbols)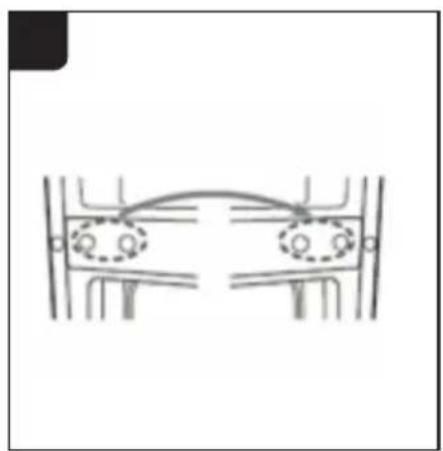
natural_image
Pure mechanical diagram showing two symmetrical components with no text or symbols
natural_image
Technical line drawings of two mechanical components, one with a frame and circular ports, the other with a handle and mounting base (no text or symbols)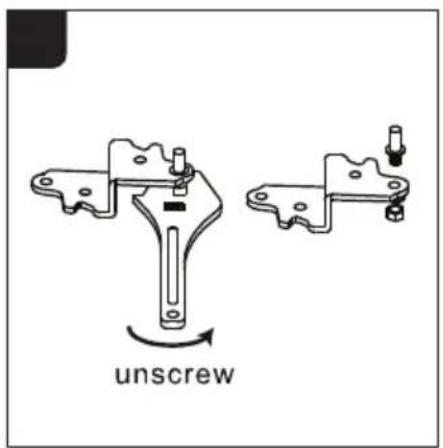
text_image
unscrew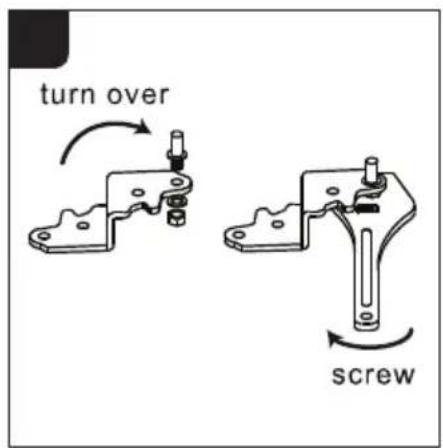
text_image
turn over screw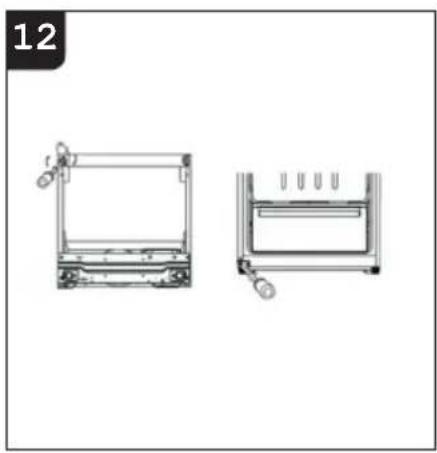
natural_image
Technical line drawing of two mechanical components with no visible text or symbols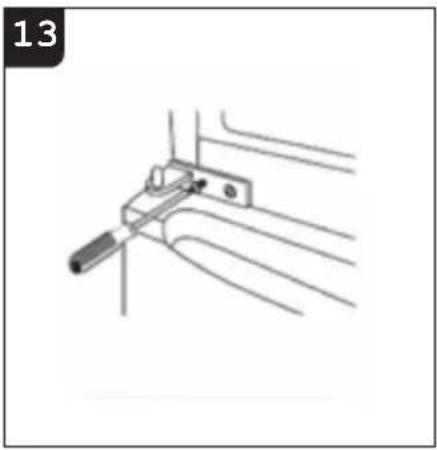
natural_image
Pure mechanical linkage diagram without any text, numbers, or symbols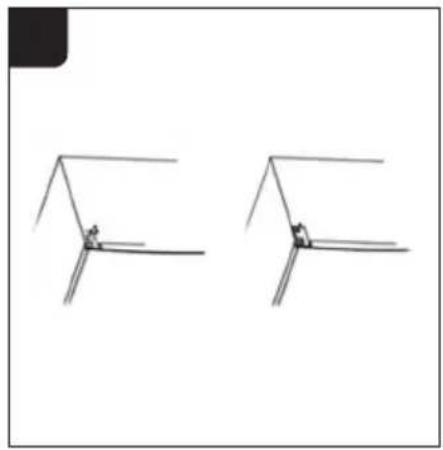
natural_image
Two identical line drawings of a V-groove with a small object on one end (no text or symbols)